1
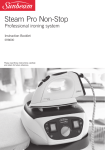
Steam Pro Compact
Professional Ironing System
Instruction Booklet
SR8200
Please read these instructions carefully
and retain for future reference.
Contents
Sunbeam’s Safety Precautions
Features of your Steam Pro Compact
Using your professional ironing system
Care and cleaning
Ironing guide
Ironing chart
1
2
4
6
7
8
Sunbeam’s Safety Precautions
SAFETY PRECAUTIONS FOR YOUR
PROFESSIONAL IRONING SYSTEM.
• Do not remove the boiler cap during use, as
the unit is under pressure and there is a
danger of scolding. Allow the unit to cool for 5
minutes before opening.
• Do not leave a hot iron within reach of
children. If they come into contact with a hot
iron it could lead to serious burns!
•
•
•
•
•
•
•
•
Sunbeam are very safety conscious when
designing and manufacturing consumer products,
but it is essential that the product user also
exercise care when using an electrical appliance.
Listed below are precautions which are essential
for the safe use of an electrical appliance:
Read carefully and save all the instructions
provided with an appliance.
Always turn the power off at the power outlet
before you insert or remove a plug. Remove
by grasping the plug - do not pull on the cord.
Turn the power off and remove the plug
when the appliance is not in use and
before cleaning.
Do not use your appliance with an extension
cord unless this cord has been checked
and tested by a qualified technician or
service person.
Always use your appliance from a power
outlet of the voltage (A.C. only) marked
on the appliance.
Close supervision is necessary when your
appliance is being used near children or
infirm persons.
Never leave an appliance unattended while
in use.
Young children should be supervised to ensure
that they do not play with the appliance.
• Iron only on an ironing board.
• An iron takes approximately 30 minutes
to cool down.
• Do not wind the cord around the soleplate
• Do not leave the iron unattended while it is
plugged into the power outlet.
• Always unplug the iron from the power outlet
before filling or emptying the water tank.
• Do not use an appliance for any purpose
other than its intended use.
• Do not place an appliance on or near a hot gas
flame, electric element or on a heated oven.
Do not place on top of any other appliance.
• Do not let the power cord of an appliance hang
over the edge of a table or bench top or touch
any hot surface.
• For safety reasons and to avoid maintenance
by unskilled persons, some appliances are
‘sealed’ using tamperproof screws. Such
appliances should always be returned to the
nearest Sunbeam Appointed Service Centre
for adjustment or repair if required.
• Do not operate any electrical appliance with a
damaged cord or after the appliance has been
dropped or damaged in any manner. If damage
is suspected, return the appliance to the
nearest Sunbeam Appointed Service Centre
for examination, repair or adjustment.
• For additional protection, Sunbeam
recommend the use of a residual current
device (RCD) with a tripping current not
exceeding 30mA in the electrical circuit
supplying power to your appliances.
• Do not immerse the appliance in water
or any other liquid unless recommended.
If you have any concerns regarding the performance and use of your appliance,
please visit www.sunbeam.com.au or contact the Sunbeam Consumer Service Line.
Ensure the above safety precautions are understood.
1
Features of your Steam Pro Compact
Iron thermostat light
The iron thermostat light illuminates to
indicate that the iron soleplate is heating,
and goes out when it has reached the
temperature selected on the temperature
dial. The thermostat light cycles on and off
during ironing as the iron soleplate maintains
the selected temperature.
Boiler cap
The easy-fill boiler holds 1 litre water.
Iron rest
Place the iron on the heat resistant iron rest
during ironing.
2
professional ironing system
Steam release button
Press and hold the steam release button to
produce a constant stream of high-powered
steam to reduce your ironing time and effort.
Steam will not be emitted from the iron when
the steam release button is not depressed.
Variable temperature dial
The variable temperature dial adjusts the
temperature of the iron soleplate, allowing
you to select the desired temperature for
each garment.
Boiler thermostat light
The boiler thermostat light illuminates to
indicate that the boiler is heating, and goes
out when the temperature is sufficient to
generate steam. When the light stays
illuminated, the boiler has run out of water.
Steam ready indicator
The steam ready indicator illuminates to
indicate that the steam function is ready to
use.
Iron and boiler on/off button
This switch controls the internal boiler and
the iron soleplate.
3
Using your professional ironing
system
Before first use
Remove any adhesive stickers, plastic covers
or cardboard sleeves from the soleplate.
Remove any remaining adhesive by rubbing
the soleplate with a cloth dampened with
methylated spirits.
Filling the boiler with water when cold
Before filing the boiler with water, ensure
that the power is turned off and the plug is
removed from the power outlet.
Unscrew the boiler cap. Using the funnel
provided, fill the boiler with 1 litre of water.
Replace the boiler cap and tighten.
Note: The non-corrosive stainless steel boiler
has been designed to allow you to use tap
water in your professional ironing system.
However, in very hard water areas, Sunbeam
recommends the use of distilled or
demineralised water. For best performance,
we recommend the use of Sunbeam Water
Demineraliser, available from Sunbeam
Service Centres and selected retailers. This
produces up to 30 litres of demineralised
water.
Caution: Do not fill the boiler with fabric
conditioners, starches, scented water, or any
other solution, as these will damage the
steam mechanism. Do not use contaminated
water.
4
Using your professional ironing system
1.Insert the plug into a 230/240V power
outlet and turn the power on.
2.Depress the iron and boiler on/off button to
turn the appliance on.
Note: when turned on for the first time your
new iron may give off vapours for up to 10
minutes. This is due to the initial heating
of the materials used. It is safe, not
detrimental to the performance of the iron
and will not reoccur.
3.Turn the temperature dial on the iron to
the desired setting. The thermostat light
will illuminate to indicate that the iron is
heating. It will go out once the iron has
reached the selected temperature.
Note: when changing the temperature dial
from a higher setting to a lower setting,
allow the iron to cool for at least 2 minutes
before continuing ironing.
4.The green steam ready indicator will turn
on and off several times during the first
minute. Once it comes on and stays
illuminated, you can commence ironing.
Before using steam on a garment, direct a
shot of steam into the air to release any
remaining condensation.
Using your professional ironing system continued
5.Press and hold the steam release button to
iron with steam. To dry iron, do not press
the steam release button. Both the steam
ready indicator and the boiler thermostat
light will cycle on and off during ironing as
the ironing system maintains the selected
steam pressure and temperature level.
Note: To prevent water dripping from the
soleplate, only use the steam function on
higher temperature settings (•• and above).
6. Once you have finished ironing, switch the
iron and boiler off by pressing the on/off
button. Switch the power off at the power
outlet and remove the plug. Wait for the
iron to cool completely before storing. Do
NOT empty the boiler.
Filling the boiler when hot
When pressing the steam release button fails to
emit steam and the boiler thermostat light stays
illuminated, the boiler has run out of water.
To refill the boiler:
1.Press the on/off button to switch the
appliance off.
2.Turn the power off and remove the plug
from the power outlet.
3.Wait a few minutes for the boiler to cool,
then loosen the cap slowly to release any
remaining steam in the boiler.
4.Unscrew and remove the cap completely.
5.Wait a few minutes before slowly refilling
the boiler using the funnel provided.
Caution: Use extreme caution when filling
the boiler, as adding cold water into the
hot boiler will immediately produce steam
which can scald skin.
6.Replace the boiler cap and tighten.
7.Follow steps 1 to 4 on page 4 to
recommence ironing.
Storage
If you do not intend to use your professional
ironing system for several weeks, wait until
the appliance has cooled completely, then
unscrew the boiler cap and empty the
remaining water from the boiler before
storing.
5
Care and cleaning
To clean the exterior of your appliance, wipe
over with a damp soft cloth and wipe dry.
Do NOT use harsh abrasives, chemical
cleaners or solvents to clean the exterior of
your appliance, as these will damage the
surface.
6
To clean the stainless steel soleplate, use a
stainless steel or metal cleaner and rub
gently with a damp cloth and wipe dry.
Do not use scouring pads, abrasives or harsh
cleaners to clean your stainless steel
soleplate as these will scratch and damage
the surface.
Ironing guide
Selecting the ironing temperature.
Always read garment labels and follow the
manufacturer’s ironing instructions. Refer
to the Ironing Chart for temperature
recommendations.
Hints for easier ironing
• Sort articles to be ironed according to the
type of fabric. This will reduce the need to
adjust the temperature to suit varying
garments.
• Start with garments requiring lower
temperatures and work your way through to
items requiring higher temperatures.
• If you are unsure of the fabric content of a
garment, test a small area such as a seam
or inside hem section before ironing a
visible area. Start with a low temperature
and gradually increase the heat to find the
best setting for ironing the garment.
• When reducing the temperature to iron
sensitive fabrics, allow approximately 2
minutes for the iron to cool to the new
setting.
• Pure woollen fabrics (100% wool) can be
steam ironed with the temperature dial set
to Wool. Use an ironing cloth to prevent
shine marks on the fabric.
• Fabrics such as velour, wool, linen and silk
are best ironed with an ironing cloth to
prevent shine marks.
• Never iron areas of a garment where
perspiration marks are visible, as the heat
of the iron will fix the stains, making them
permanent.
7
Ironing Chart
8
Fabric
Temperature Setting
Ironing Recommendation
Acrylic
•
Dry iron on wrong side.
Acetate
•
Dry iron on wrong side while still damp or use
spray to dampen.
Silk
••
Iron on wrong side. Use an ironing cloth to
prevent shine marks.
Nylon
••
Iron on wrong side while still damp or use spray
to dampen.
Polyester
••
Iron on wrong side while still damp or use spray
to dampen.
Rayon
••
Iron on wrong side of fabric.
Viscose
••
Mainly dry iron. Steam can be used under
manufacturer’s instructions.
Wool
••
Steam iron on wrong side or use an ironing cloth.
Wool Blends
••
Steam iron on wrong side or use an ironing cloth.
Cotton Blends
••
Check label and follow manufacturer’s
instructions. Use setting for the fibre requiring
the lowest setting.
Corduroy
•••
Steam iron on wrong side or use an ironing
cloth and brush to raise the pile.
Cotton
•••
Dry iron while still damp or use spray to dampen.
Linen
••• To MAX
Iron on wrong side or use an ironing cloth to
prevent shine marks, especially with dark colours.
Dry iron while still damp or use spray to dampen.
Denim
••• To MAX
Steam iron.
‘Sunbeam’ and ‘Steam Pro’ are registered trademarks of
Sunbeam Corporation.
Designed in Italy. Made in China. Due to minor changes in
design or otherwise, the product may differ from the one
shown in this leaflet. Backed by Sunbeam‘s 2 Year
Replacement Guarantee and National Service Network.
© Copyright. SUNBEAM CORPORATION LIMITED 2003.
(INCORPORATED IN N.S.W.) A.C.N. 000 006 771
Sunbeam Corporation is a division of GUD Holdings Ltd.
For more information or advice on this or any other
Sunbeam appliance, visit www.sunbeam.com.au or
contact the Sunbeam Consumer Service Line.
Australia 1800 025 059
New Zealand (09) 912 0747.
Consumer Hotline
Australia
1800 025 059
New Zealand
(09) 912 0747
www.sunbeam.com.au
is a registered Trademark of Sunbeam
Corporation Limited. ACN 000 006 771.
© Sunbeam Corporation Limited 2003.