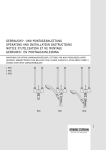
1
CNS50S,CNS75S,CNS100S,CNS125S, CNS150S,CNS175S,CNS200S,CNS250S,CNS300S CNS50U,CNS75U,CNS100U,CNS125U, CNS150U,CNS175U,CNS200U,CNS250U,CNS300U Deutsch Wand-Konvektor Gebrauchs-undMontageanweisung English Wallmountedconvectorheater Operationandinstallationinstructions Français Convecteurmural Noticed‘installationetd‘utilisation Nederlands Wand-convector Gebruiks-eninstallatieaanwijzing Español Convectormural Instruccionesdeusoymontaje Polska Konwektory Instrukcja użytkowania i montażu Česky Nástěnný konvektor Návod k použití a k montáži Pyccкий Конвектор Инструкция по монтажу и эксплуатации 한국어 6_07_31_003 벽걸이 컨벡터 라디에이터 작동 및 설치 설명서 Inhaltsverzeichnis Deutsch Seite 4 - 7 Inhoudsoverzicht Nederlandsbladzijde 14 - 16 Česky 1. Gebrauchsanweisung 1.1 Gerätebeschreibung 1.2 Bedienung 1.3 Sicherheitshinweise 1.4 Pflege und Wartung Was tun wenn . . .? 2.Montageanweisung 2.1 Geräteaufbau 2.2 Vorschriften und Bestimmungen 2.3 Montage 2.4 Elektrischer Anschluss 2.5 Übergabe Technische Daten Umwelt und Recycling Kundendienst und Garantie 1. Gebruiksaanwijzing 1.1 Toestelbeschrijving 1.2 Bediening 1.3 Veiligheidsaanwijzingen 1.4 Verzorging en onderhoud Wat te doen als . . .? 2.Montageaanwijzing 2.1 Opbouw van het toestel 2.2 Voorschriften en bepalingen 2.3 Montage 2.4 Elektrische aansluiting 2.5 Overdracht Technische gegevens Milieu en recycling Garantie 23 - 24 Oetovn Co dlat, kdy . . .? 24 Instrukce 24 - 25 P a ustanoven jka Technick data5 5 5 4-5 5 5-6 6 6 7 Table of contents English page 8 - 10 Índice Español 1. Operating instructions 1.1 Description 1.2 Operation 1.3 Safety notes 1.4 Care and maintenance What to do if . . .? 2.Installation instructions 2.1 Structure of unit 2.2 Provisions and specifications 2.3 Installation 2.4 Electrical connection 2.5 Handover Technical data Environment and recycling Guarantee 1. Instrucciones de uso 1.1 Descripción del aparato 1.2 Manejo 1.3 Indicaciones de seguridad 1.4 Cuidados y mantenimiento ¿Qué hacer cuando . . .? 2.Instrucciones de montaje 2.1 Componentes del aparato 2.2 Reglamentos e instrucciones 2.3 Montaje 2.4 Conexionado eléctrico 2.5 Entrega Datos técnicos Medio ambiente y reciclaje Garantía 8-9 9 9 - 10 10 10 10 14 - 15 15 15 - 16 16 16 16 Páginas 17 - 19 17 - 18 18 18 - 19 19 19 19 Table des matières Français page 11 - 13 20 22 1. Notice d‘utilisation 1.1 Description de l‘appareil 1.2 Fonctionnement 1.3 Consignes de sécurité 1.4 Entretien et maintenance Que faire quand . . .? 2.Instructions de montage 2.1 Composition de l‘appareil 2.2 Normes et spécifications 2.3 Montage 2.4 Raccordement électrique 2.5 Remise de l‘appareil Caractéristique techniques Environment et recyclage Garantie 20 - 21 C i k Co robi, gdy ? 21 21 - 22 Dane techniczne 22 2 2 11 - 12 12 12 13 13 13 23 25 Coдepжaние PyccкийСтраница 26 - 28 1. Инструкция по эксплуатации 26 1.1 Описание прибора 1.2 Обслуживание 1.3 Указания по безопасности 1.4 Уход и техническое обслуживание Что делать, если . . . ? 27 2. Инструкция по монтажу 27 2.1 Составляющие прибора 2.2 Указания по безопасности 2.3 Монтаж 2.4 Электрическое подключение 2.5 Сдача в эксплуатацию Технические характеристики 28 Окружающая среда и вторсырь 28 Гарантия 28 목차 한국어 페이지 29-31 1. 사용 설명서 1.1 상세설명서 1.2 사용 1.3 설치 시 주의사항 1.4 관리 및 유지 이럴 땐 어떻게 해야 하나요…? 2. 설치 설명서 2.1 제품 구조 2.2 설치 시 주의사항 2.3 설치 2.4 전기 연결 2.5 의무사항 기술정보 환경과 재활용 보증 29 - 30 30 30 - 31 30 30 30 3 ≥ 500 mm a d b a 6_07_31_0034 ≥ 150 mm C6_07_31_0033 450 4 c a b A C6_07_31_0035 B C6_07_31_0036 163 mm c 261 mm ≥ 100 mm B 100 78 1 7 5 8 A ≥ 100 mm ≥ 100 mm C d 6 5 b 5 b 1 Operation instructions for the user and the professional Important features in brief 3 2 1 overheating. After eliminating the cause (e.g. covered air outlet or inlet opening), after a cooling down period of a few minutes the unit resumes operation. 1 2 3 On/off switch Temperature selector button Locking pin Use of electrical equipment in principle re quires care to exclude any potential risks from fire, electrical shock or injury. Therefore the unit should only be used as described in these instructions, where any use outside the manufacturer‘s recommendations can lead to damage or injury. The correct match between the heat require ment of the room and the heating power of the unit must be observed. Before use of the unit, read the entire ins tructions and follow the information given on proper handling of the unit. These instructions should be kept carefully and handed to any subsequent user of the unit. Please show them to the engineer performing any repair work. 1.1 Description The CNS is an electric direct heater exclusive ly for wall installation. It is suitable e.g. for hea ting a bathroom or as transitional or additional heating for small rooms such as hobby rooms or guest rooms. Series CNS-S After wall mounting and electrical connection via a plug and socket, the unit is ready for use. Series CNS-U After wall mounting and electrical connection via a fixed connection through a junction box (note national regulations), the unit is ready for use. Function The air in the convector is heated by a heating element and emerges by natural convection at the top through the air outlet grille (4). The openings in the underside of the unit provide it with cool room air Safety device The convector has a protective thermostat (STR) which switches the appliance off on The convector is switched on and off via the switch (1) on the right-hand side. The desired room temperature is set via the temperature selector (2) anywhere between around +6°C and +30 °C. As soon as the set room tem perature has been reached, it is maintained constantly by intermittent heating (the heating power of the unit must correspond at least to the heat requirements of the room). If several heaters are fitted in a room, the temperature setting on each unit may vary. To avoid excessive energy consumption with the windows open, the unit should be swit ched off during ventilation at the switch (1). Frost protection If the unit is used as a frost guard, set the tem perature selector (2) to the far right stop (*). In this position the thermostat switches the heating on automatically if the room tempera ture falls to around +6°C. Limiting the thermostat Using the two pins on the back of the switch housing (3), the thermostat can be fixed in a particular setting. 2 b b 3 a 3 C26_07_31_0038 C26_07_31_0037 1.2 Operation To fix a desired temperature, push pin a into the hole opposite. To limit the temperature adjustment range, set the minimum and maximum values on the selector knob and mark these by inserting pin b into the opposite, slightly offset hole each time. 1.2.1 External room thermostat If necessary the unit can be operated with a commercial external room thermostat. The temperature selector (2) must be turned to the right stop (MAX). The room thermostat should be located as far as possible from the unit and at least 1.5 m high. 1.2.2 Shutting Down To shut down the unit, move the switch to the OFF position and remove the mains plug from the wall socket (do not pull out the plug using the lead). 1.3 Safety notes The unit should not be operated – in rooms at risk of explosion or fire from chemicals, dust, gas or vapour, – in the immediate vicinity of pipes or containers which transport or contain flammable or explosive substances, – if the minimum distances from adjacent object surfaces are not observed. Installation (electrical installation), first operation and maintenance of this unit may only be performed by an accredited expert according to these instructions. The unit must not be operated if in the same room work is performed such as floor laying, grinding, sealing, cleaning with petrol and care (spray, beeswax) and simi lar. The housing surfaces of the unit and the emerging air are hot during operation (over 80 °C). Risk of burns! Keep small children away from the unit. Do not place objects on the unit, lean ob jects against it or store anything between the heater and the wall (e.g. drying washing). Also do not place in the immediate vicini ty of the unit any flammable, combustible or heat-insulating objects or substances such as laundry, blankets, newspapers, con tainers of beeswax or petrol, spray cans or similar. Risk of explosion! To prevent overheating of the unit, it must not be covered. A For objects of all types e.g. furniture, curtains, hangings or textiles or other flammable or non-flammable materials, the following minimum distances from the unit must be observed: 500 mm To the air outlet grille ⇒ ⇒ 100 mm To the sides ⇒ 150 mm To the top ⇒ 100 mm To the underside ⇒26 mm To the back wall Hot air must be able to escape unobstructed. The unit may not be used as a freestan ding unit. Do not stand on the unit. No changes may be made to the unit. The unit should never be left in operation accidentally. 1.4 Care and maintenance If the unit housing shows a slight brown dis colouration it should be cleaned as soon as possible with a damp warm cloth: When the appliance is cold it can be cleaned with normal cleaning agents. Avoid scouring or aggressive cleaning agents. Moisture must not penetrate the unit. Do not spray cleaning spray into the air slots. For regular maintenance we recommend checking the control and adjustment elements. At the latest 10 years after first use, the safety, control and adjustment elements should be checked by an expert. English Special care is required if the unit is used in the presence of children, the infirm or animals. Risk of injury! If part of the unit is damaged, if the unit has fallen off or is malfunctioning, do not operate. In case the power mains supply is dama ged, it must be replaced by the manuf acturer, the customer service of the ma nufacturer or an authorized and qualified person. Mandatory for hazard prevention. What to do if . . . ? • the unit does not get hot? Check that . . . . . . the ON/OFF switch is turned on. . . . in your fuse box, the corresponding fuse is intact or whether the breaker has tripped. Eliminate cause! If the heater still does not warm up, call customer service! • the unit switches itself off? Check whether it is covered, so it could have overheated (e.g. covered air outlet or inlet opening). Eliminate cause! If it does not warm up again after a few minutes‘ cooling down period, call customer service! • customer service is called? Read the type (Typ) and number (Nr.) from the rating plate (8) on the unit and tell customer service! Typ: CNS . . . . Nr.: . . . . . . – . . . . – . . . . . . 2 Installation instructions for the professional This unit may only be erected and electrically connected by a specialist following the installa tion instructions. First remove the packaging and check acces sories and any enclosures, ensure that no ac cessories remain in the packaging material. 2.1 Structure of unit 4 5 6 7 8 Air outlet grid Wall bracket Closing bolt Mains connection cable Rating plate 2.2 Provisions and specification The unit should not be operated – in rooms at risk of explosion or fire from chemicals, dust, gas or vapour, – in the immediate vicinity of pipes or containers which transport or contain flammable or explosive substances, – if the minimum distances from adjacent object surfaces are not observed. In workshops or other rooms in which exhaust gases, oil or petrol vapours etc. occur or where solvents and chemicals are used, persistent odour problems and where applicable contamination can occur. The unit may only be fitted to a verti cal wall, temperature-resistant up to at least 80 °C. Minimum distances from adjacent object surfaces must be observed. All electrical connection and installation work must be performed to VDE regula tions (0100), the regulations of a compe tent utility company and the correspond ing national and regional regulations. The unit must not be mounted directly below a wall socket. If the unit is permanently connected to an AC network (junction box) an isolation distance of at least 3mm is required on all poles for isolation from the network. For this, circuit breakers, LS switches, fuses etc. can be used. Installation with permanent connection cables is not permitted. The rating plate must be observed. The rated voltage must correspond to the nominal voltage. On installation of the heater in rooms with a bath and/or shower, the protection area to VDE 0100 part 701 as specified on the unit rating plate must be observed. The unit must be mounted such that the switch and control units are out of reach of a person in the bath or shower. The mains connection cable may only be replaced with original Stiebel Eltron spare parts by experts. 2.3 Installation 2.3.1Installation of wall bracket B The wall bracket should be used as a template for fixing the appliance to the wall. It also helps to keep the necessary ground clearance. To attach the unit proceed as follows: I Place the wall bracket (5) holding the centre point horizontally on the ground and mark the holes a and d on the as sembly wall; II Raise the wall bracket so that the holes b in the wall bracket coincide with the marks just made on the assembly wall; Mark holes c and d on the wall bracket on the assembly wall; At all four markings drill holes and attach the wall bracket to the wall using suitable fixing materials (wall plugs and screws) dependig on the type of wall. The vertical slots allow adjustment for an offset in the fixing holes. 2.3.2 Unit installation C The convector is mounted by attaching the slots on the rear simultaneously to the four tabs of the wall bracket pressing down to lock. The closing bolt (6) of the wall bracket is then turned clockwise to the stop, locking the fixing. To remove the convector, unscrew the locking bolt and lift the unit slightly, pulling it forwards and out of the bracket. 2.4 Electrical connection 2.5 Handover The required electrical connection is AC 230V. Explain to the user how the unit functions. Draw his attention in particular to the safety instructions. Give the user these operating and usage ins tructions. For fixed connection, an earth socket or junc tion box should be installed at a distance of at least 100 mm to the side of the heater. Technical data Type CNS 50 S CNS 75 S CNS 100 S CNS 125 S CNS 150 S CNS 175 S CNS 200 S CNS 250 S CNS 300 S CNS 50 U CNS 75 U CNS 100 U CNS 125 U CNS 150 U CNS 175 U CNS 200 U CNS 250 U CNS 300 U Height mm Width mm 450 370 445 445 590 Depth mm with wall bracket Dimension A Weight 740 740 890 1040 78 100 mm 121 195 195 343 343 491 491 639 787 kg 3,0 4,2 4,2 5,6 5,6 7,0 7,0 8,4 9,8 kW 0,5 0,75 1,0 1,25 1,75 2,0 2,5 3,0 Connection Power 590 1/N ~ 230 V 1,5 Temperature adjustment range ºC approx. 6 to 30 Frost protection ºC approx. 6 Protection class II Protection mode IP 24, splash water protected Approval Environment and recycling Recycling of obselete appliances Appliances with this label must not be disposed off with the general waste. They must be collected separately and disposed off according to local regulations. Guarantee For guarantees please refer to the respective terms and conditions of supply for your country. The installation, electrical connection and first operation of this appliance should be carried out by a qualified installer. The company does not accept liability for failure of any goods supplied which accordance with the manufacturer‘s instructions. 10 see unit rating palte 32 33 Zentrale Holzminden Stiebel Eltron GmbH & Co. KG Dr.-Stiebel-Str. 37603 Holzminden Telefon 0 5531/702-0 Fax Zentrale 05531/702-480 E-Mail [email protected] Internet www.stiebel-eltron.com Stiebel Eltron International GmbH Dr.-Stiebel-Str. 37603 Holzminden Telefon 05531/702-0 Fax 05531/702-479 E-Mail [email protected] Internet www.stiebel-eltron.com Unseren zentralen Service erreichen Sie unter 0 180 3... ... in der Zeit von: Montag bis Donnerstag 715 bis 1800 Uhr Freitag 715 bis 1700 Uhr www.stiebel-eltron.com Stiebel Eltron Vertriebszentren Dortmund Oespel (Indupark) Brennaborstr. 19 44149 Dortmund Telefon 02 31/96 50 22-10 E-Mail: [email protected] Frankfurt Rudolf-Diesel-Str. 18 65760 Eschborn Telefon 0 61 73/6 02-10 E-Mail: [email protected] Hamburg Georg-Heyken-Straße 4a 21147 Hamburg Telefon 0 40/75 20 18-10 E-Mail: [email protected] Köln Ossendorf Mathias-Brüggen-Str. 132 50829 Köln Telefon 02 21/5 97 71-10 E-Mail: [email protected] Leipzig Airport Gewerbepark/Glesien Ikarusstr. 10 04435 Schkeuditz-Glesien Telefon 03 42 07/7 55-10 E-Mail: [email protected] München Hainbuchenring 4 82061 Neuried Telefon 0 89/89 91 56-10 E-Mail: [email protected] Verkauf Telefon 0 180 3 - 70 20 10 Telefax 0 180 3 / 70 20 15 E-Mail: [email protected] Stuttgart Weilimdorf Motorstr. 39 70499 Stuttgart Telefon 07 11/9 88 67-10 E-Mail: [email protected] Tochtergesellschaften und Vertriebszentren Europa und Übersee Kundendienst Telefon 0 180 3 - 70 20 20 Telefax 0 180 3 / 70 20 25 E-Mail: [email protected] Belgique Stiebel Eltron Sprl / Pvba Rue Mitoyenne 897 B-4840 Welkenraedt ✆ 0 87-88 14 65 Fax 0 87-88 15 97 E-Mail [email protected] Internet www.stiebel-eltron.be Ceská republika Stiebel Eltron spol. s r.o. K Hájum 946 ✆ 2-511 16111 E-Mail Internet C Z-15500 Praha 5-Stodulky Fax 2-355 12122 [email protected] www.stiebel-eltron.cz France Stiebel Eltron S.A.S. 7-9, rue des Selliers B.P. 85107 ✆ 03-87-74 3888 E-Mail Internet F-57073 Metz-Cédex Fax 03-87-74 6826 [email protected] www.stiebel-eltron.fr o Ersatzteil-Verkauf Telefon 0 180 3 - 70 20 30 Telefax 0 180 3 / 70 20 35 E-Mail: [email protected] 0,09 €/min (Stand: 01/06) Great Britain Exclusive Distributor: Applied Energy Products Ltd. Morley Way GB-Peterborough PE2 9JJ ✆ 087 09-00 04 20 Fax 017 33-31 96 10 E-Mail [email protected] Internet www.applied-energy.com Gedruckt auf 100% Recycling-Papier. Aktiv im Umweltschutz. 8127 Magyarország Stiebel Eltron Kft. Pacsirtamezo´�u.�41 ✆ 012 50-6055 E-Mail Internet H-1036 Budapest Fax 013 68-8097 [email protected] www.stiebel-eltron.hu Nederland Stiebel Eltron Nederland B.V. Daviottenweg 36 Postbus 2020 NL-5202 CA‘s-Hertogenbosch ✆ 073-6 23 00 00 Fax 073-6 23 11 41 E-Mail [email protected] Internet www.stiebel-eltron.nl Österreich Stiebel Eltron Ges.m.b.H. Eferdinger Str. 73 A-4600 Wels ✆ 072 42-47367-0 Fax 07242-47367-42 E-Mail [email protected] Internet www.stiebel-eltron.at Polska Stiebel Eltron sp.z. o.o ul. Instalatorów 9 ✆ 022-8 46 48 20 E-Mail Internet PL-02-237 Warszawa Fax 022-8 46 67 03 [email protected] www.stiebel-eltron.com.pl Sverige Stiebel Eltron AB Friggagatan 5 ✆ 0150-48 7900 E-Mail Internet SE-641 37 Katrineholm Fax 0150-48 7901 [email protected] www.stiebel-eltron.se Schweiz Stiebel Eltron AG Netzibodenstr. 23 c ✆ 061-8 16 93 33 E-Mail Internet CH-4133 Pratteln Fax 061-8 16 93 44 [email protected] www.stiebel-eltron.com Thailand Stiebel Eltron Ltd. 469 Building 77, Bond Street Tambon Bangpood Ampur Pakkred Nonthaburi 11120 ✆ 02-960 1602-4 Fax 02-960 1605 E-Mail [email protected] Internet www.stiebeleltronasia.com USA Stiebel Eltron Inc. 17 West Street ✆ 04 13-247-3380 E-Mail Internet West Hatfield MA 01088 Fax 0413-247-3369 [email protected] www.stiebel-eltron-usa.com CAP 000000/00000/1/0000 265848/34359/2/8167 · CN · XX · Irrtum und technische Änderungen vorbehalten · Subject to errors and technical changes! · Sous réserve d‘erreurs et de modifications techniques! · Onder voorbehoud van vergissingen en technische wijzigingen! · Salvo error o modificación técnica! · Rätt till misstag och tekniska ändringar förbehålls! Excepto erro ou alteração técnica · Zastrzeżone�zmiany�techniczne�i�ewentualne�błędy · Omyly a technické změny jsou vyhrazeny! · A�muszaki�változtatások�és�tévedések�jogát�fenntartjuk! · Âîçìîæíîñòü íåòî÷íîñòåé è òåõíè÷åñêèõ èçìåíåíèé íå èñêëþ÷àåòñÿ Adressen und Kontakte