1
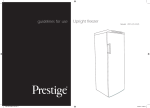
PRESTIGE
Instructions for use
Model PRT295FFCS
PRT325FFCS
guidelines for use
PRT 295/325 FFCS D6.indd 1
Fridge Freezer
Model PRT 295 FSCS
Model PRT 325 FSCS
1/12/06 16:32:46
2
GETTING TO KNOW YOUR FRIDGE FREEZER
Location
Before use
Please read these instructions carefully before using your new Prestige Fridge Freezer
The Fridge Freezer is for indoor and domestic use only.
CONTROL PANEL FRIDGE
INSTALLATION
CONTROL PANEL FREEZER
INTERNAL LIGHT
When selecting a position for your Fridge Freezer you should make sure the floor is flat and firm, and
the room is well ventilated with an average room temperature of between 16°C and 32°C.
Avoid locating your Fridge Freezer near a heat source, eg. cooker, boiler or radiator. Also avoid direct
sunlight. If you are placing your Fridge Freezer in an out-building such as a garage or annex ensure that
the Fridge Freezer is placed above the damp course, otherwise condensation will occur on the Fridge
Freezer cabinet. Never place the Fridge Freezer in a wall recess or into fitted cabinets or furniture. It
must be installed so that there is 10mm of free space at the sides, 30mm above and 50mm behind. The
Fridge Freezer door can either open to the right or the left, depending on the location which suits you.
See page 7 if you want to reverse the door swing. Do not drape the Fridge Freezer with any covering.
Levelling the Fridge Freezer
The Fridge Freezer has 2 adjustable feet at the front and 2 castors at the back to
assist with moving. Once the Fridge Freezer is put in it’s final location, make sure
it is level. Use the levelling feet at the front. If the Fridge Freezer is not level, the
doors and magnetic seal alignments will be affected.
ADJUSTABLE SHELVES
Cleaning before use
SALAD BIN
EGG TRAY
FREEZER BASKETS
Wipe the inside of the Fridge Freezer with a weak solution of bicarbonate soda. Then rinse with warm
water using a ‘wrung-out’ sponge or cloth. Wipe completely dry before replacing the shelves and
baskets. You could clean the Fridge Freezer externally with wax polish.
If you require more information refer to CLEANING on page 8.
Before plugging in YOU MUST
SPARE BRACKET
DOOR CHANGE
Check that you have a socket which is compatible with the plug supplied with the Fridge Freezer. If not,
see the section called ELECTRICAL CONNECTIONS on page 11.
Before switching on!
LEVELLING FEET
DO NOT SWITCH ON UNTIL FOUR HOURS AFTER MOVING THE FRIDGE FREEZER.
The coolant fluid needs time to settle.
BOTTLE STORAGE
DOOR HANDLE
Before using your Fridge Freezer
Before placing frozen foods in your freezer, turn the Fridge Freezer on and wait for 24 hours, to make
sure it is working properly and to allow the freezer to reach the correct temperature. If you are freezing
fresh foods, see Super freeze, in the section called ‘Indicator Lights’ on page 3/4. Always follow the
storage instructions on the food packaging. Your freezer baskets should not be over filled.
PRT 295/325 FFCS D6.indd 2
1/12/06 16:32:48
3
INSTALLATION
Attaching the handle to the door
The handle is shipped inside the baskets in your Fridge Freezer.
To fix it:
1. Remove blanking caps from door on the side which opens.
USING YOUR FRIDGE FREEZER
Switching on your Fridge Freezer
Is the freezer cold enough?
Freezer alarm
If you are concerned that your freezer is not being kept cold enough, and
wish to check the temperature, you will need a special fridge / freezer
thermometer available from most supermarkets and hardware shops.
Place the thermometer in the middle basket of the Freezer, where it can
be read easily. Leave overnight, the temperature in the Freezer should
be -18°C or lower.
When the unit is plugged in you will hear a beep and the display panel
will light up. After a few seconds the display will show the temperature
in both the refrigerator and freezer. The display temperature and alarm
indicator will flash.
When the appliance is turned on it will go through internal checks.
The Freezer alarm may flash until the temperature falls below -10ºC.
During this period the alarm can be cancelled by pressing and holding
the alarm/M button. If the constant internal temperature in the freezer
rises to -10ºC or above the alarm indicator light will glow.
Adjusting the temperature
2. Secure the handle in place using the screws provided.
3. Cover the screw heads using the blanking caps provided with
the handle.
To change the internal temperature of the Fridge Freezer use the up
down buttons on the control panel.
The recommended operating temperature for the Fridge section of your
Fridge Freezer is 2 and 5ºC. The recommended operating temperature for
the Freezer section is -18°C or lower.
Additional Feature
The Fridge Freezer may not operate at the correct temperature if it is in a
particularly hot or cold room or if you open the Fridge Freezer doors often.
Super cool/Super freeze light - green
REFRIGERATOR
Your freezer compartment can be used as either a freezer or extra
refrigeration space.
Indicator lights
This light shows when the Super cool/Super freeze button has been
pressed.
SUPER FREEZER
INDICATOR
Super cool
ON/OFF
Super cool
Temp
REFRIGERATOR
FREEZER
Super freeze
Super
Super cool
cool
ON/OFF Super cool
FREEZER
Temp
Super freeze ON/OFF Alarm/M
Super cool/Super freeze buttons
F Alarm
Temp
SUPER COOL
INDICATOR
Temp
Super freeze ON/OFF
Alarm/M
F ALARM
INDICATOR
If all the above are in order, the green lamp bulb may have blown.
Call your Customer Service Department if this is the case. See page 8
for details.
This allows you to drop the temperature to its lowest setting and return
automatically to the pre-set temperature
PRT 295/325 FFCS D6.indd 3
1/12/06 16:32:51
4
USING YOUR FRIDGE FREEZER
Noises inside the Fridge Freezer
Salad bin
If you have not owned a Refrigerator before, you may notice that it
makes some rather unusual noises. Most of these are perfectly normal.
Gurgling, whooshing
These noises are caused by the circulation of the refrigerant liquid in the
cooling system. It has become more pronounced since the introduction of
CFC free gases. This is not a fault and will not affect the performance of
your Fridge Freezer.
This is the compressor motor working, as it pumps the refrigerant around
the system.
Door alarm
If the Fridge Freezer door is left open, after a period of approximately 2
minutes the door alarm will sound to remind you to close the door. The
alarm will continue to sound 3 times every 30 seconds If the door is not
closed, after around 10 minutes the alarm will automatically stop.
When you store foods in the refrigerator
compartment
Cool area
•
•
•
•
•
By pressing the Super cool button the fridge will operate in Super cool
mode and the Super cool indicator light will be on. The compressor will
work continuously or until the internal temperature reaches +1°C, at
which point it will automatically stop. You can override this function by
pressing the Super cool button again during this cycle.
Shopping for chilled foods
Don’t buy in your lunch hour!
Unless you have a Fridge Freezer at work to keep the food cold in
the afternoon. Leaving food in your car or at room temperature for a
prolonged period of time could raise food temperature to the level at
which harmful bacteria grow.
Tips for keeping food perfect in the
Fridge Freezer
Take extra care with meat and fish
Cooked meats should always be stored on a shelf above raw meats to
avoid bacterial transfer. Keep raw meats on a plate which is large enough
to collect juices and cover it with cling film or foil.
Leave space around food
This will allow cold air to circulate around the Fridge Freezer.
Wrap up food
To prevent transfer of flavours and drying out, food should be separately
packed or covered.
Let pre-cooked food cool properly
Always let pre-cooked food cool down before you put it in the
Fridge Freezer. This will stop the internal temperature of the Fridge Freezer
from rising.
Shut the door
To prevent cold air escaping, limit the number of times you open the door.
When returning from shopping, sort foods to be kept in your
Fridge Freezer while the door is closed.
Keep chilled foods together
COOL
COLDEST
COOL
Raw and uncooked foods should
always be wrapped.
Pre-cooked chilled foods, eg. ready
meals, meat pies, soft cheeses.
Pre-cooked meats eg. ham.
Prepared salads (including
pre-washed chopped, pre-packed mixed green salads, rice, potato
salad etc).
Desserts, eg. fromage frais, home-prepared food and leftovers or
cream cakes.
PRT 295/325 FFCS D6.indd 4
NOTE: ALWAYS WRAP AND STORE RAW MEAT, POULTRY AND FISH ON THE
LOWEST SHELF AT THE BOTTOM OF THE FRIDGE. THIS WILL STOP THEM
DRIPPING ONTO, OR TOUCHING OTHER FOODS.
DO NOT STORE INFLAMMABLE GASES OR LIQUIDS IN THE FRIDGE.
Super cool button
Humming, purring or pulsating
The circulation fan (inside the top of
the cavity) is designed to assist a more
even temperature range across all the
shelves. However, we recommend that
you follow the guidelines below:
This is the most humid part of the Fridge. Store vegetables, fruit, fresh salad
items, eg. unwashed whole lettuce, whole tomatoes, radishes, etc here.
WE RECOMMEND THAT ALL PRODUCE KEPT IN THE SALAD BIN IS WRAPPED.
When you are going around the supermarket and when you are travelling
home. If you keep all the chilled foods together they will help to keep
each other cold.
Use a cool bag
Special insulated bags can be bought from most supermarkets and
hardware shops. These keep food cold for longer, but are only for getting
chilled foods home, not storing it.
Unpack as soon as you get home
Always unpack and place chilled foods in the Fridge Freezer before storing
dry food-stuffs.
1/12/06 16:32:52
5
USING YOUR FRIDGE FREEZER
Shopping for frozen foods
Your freezer is 4 star ★ ★ ★ ★
When you are buying frozen food, look at the Storage Guidelines on the
packaging. You will be able to store each item of frozen food for the
period shown against the 4 star rating. This is usually the period stated as
‘Best Before’, on the front of the packaging.
Store food straight away
Don’t buy frozen food unless you can freeze it straight away.
Special insulated bags can be bought from most supermarkets and
hardware shops. These keep frozen food cold for longer.
Thawing frozen food
Check the temperature of the frozen food cabinet in the shop where you
buy your frozen foods. It should show a temperature lower than -18°C.
For some foods, thawing before cooking is unnecessary. Vegetables and
pasta can be added directly to boiling water or steam cooked.
Frozen sauces and soups can be put into a saucepan and heated gently
until thawed.
Making ice cubes
Preparations for freezing
Check the freezer temperature
At the top of the freezer cabinet there is a section for making and storing
ice cubes.
Fill the ice cube tray with fresh drinking water and place in the section for
making and storing ice cubes.
After the ice cubes are made you can remove them from the tray by
twisting the tray slightly and or placing the tray under running water for
a short time.
•
•
•
•
•
Choose packs carefully
Take a quick look at the frozen food package and make sure it is in perfect
condition.
Purchase frozen food last
Always buy frozen products last on your shopping trip or visit to the
supermarket.
Keep frozen foods together
When you are going around the supermarket and when you are travelling
home, if you keep all the frozen foods together they will help to keep
each other cold.
PRT 295/325 FFCS D6.indd 5
•
•
•
Leave cooked food to cool completely.
Chill food in a fridge before freezing if possible.
Consider how you want to cook the food before freezing it.
Don’t freeze food in metal containers as you may want to microwave
it straight from the freezer.
Use special freezer bags available from supermarkets, freezer film,
polythene bags, plastic containers, aluminium foil (heavy grade only,
if in doubt, double wrap). Don’t use aluminium foil for acidic foods
(such as citrus fruits). Don’t use thin cling film or glass. Don’t use
used food containers (unless cleaned thoroughly first).
Exclude as much air from the container as possible. You could buy a
special vacuum pump which sucks excessive air out of the packaging.
Leave a small amount of ‘air space’ when freezing liquids, to allow
for expansion.
You can use the space in the
freezer most efficiently if
you freeze liquids (or solids
with liquids, such as stew) in
square blocks. This is known as
‘preforming’. Pour the liquid into
a polythene bag which is inside a
square sided container. Freeze it
like this, then remove it from the
container and seal the bag.
Freezing fresh foods
The golden rules
Use quality food and handle it as little as possible. Freeze food in small
quantities, it freezes faster, takes less time to thaw and enables you to eat
it in the quantity you need.
Using the Super freeze button
First, estimate the amount of food you will be freezing. Your freezer has a
Super freeze button (see Indicator lights on page 3/4) which makes your
freezer colder (approx -28° C), it will therefore freeze quicker and keep in
the goodness.
However you should use it sparingly to conserve energy.
To freeze
Super freeze
A loaf of bread
A small casserole
Not required
Up to 2lb/900gm
2 hrs before placing food in freezer and
4 hrs after placing food in freezer
Up to 6lb/2.7kg
6 hrs before placing food in freezer and
12 hrs after placing food in freezer
Maximum of 22lb/10kg
24 hrs before placing food in freezer and
24 hrs after placing food in freezer
What not to freeze
Bananas, pomegranates, pears, carbonated liquids as they can explode or
anything in a glass container, as these may crack.
NOTE Do not store inflammable gases or liquids in the freezer.
1/12/06 16:32:53
6
USING YOUR FRIDGE FREEZER
Freezing fresh foods
Useful tips
•
•
•
•
•
•
•
•
•
The freezer will fast freeze your produce successfully but cannot
improve it.
Carefully clean and prepare each item and wrap in polythene or place
in waxed cartons.
Keep the size of each package to a minimum. Do not forget that square
packages will utilise the storage space of your freezer more effectively.
Freeze each package as quickly as possible. Produce to be frozen should
be placed in as much contact as possible with the sides of the freezer.
Avoid placing unfrozen food in contact with food previously frozen.
Do not overload the freezer with fresh produce. The maximum
amount of fresh produce that can be frozen in 24 hours is
5 kilograms. Frozen food should be used in rotation and therefore
packages should be carefully labelled.
Lower the temperature in the freezer to maximum 24 hours before
the desired freezing is to be effected. After this period the appliance
will be ready to freeze the fresh produce.
24 hours after putting in the fresh produce the freezing operation
should be completed, you may then return the thermostat to the
normal position.
Commercially frozen pre-packed food should be stored in accordance
with the frozen food manufacturers’ instructions.
To thaw
1. Cover food loosely.
2. Thaw at room temperature. Don’t forget that thawing in a warm area
encourages the growth of bacteria.
3. Always make sure there are no ice crystals in the food before cooking,
particularly with meat. These crystals indicate that the food is not
fully thawed. They result in lower temperatures when cooking. Lower
cooking temperatures may not destroy dangerous bacteria.
4. Cook food as soon as possible after thawing.
5. Drain off and throw away any liquid lost during thawing.
Oven thawing
Many microwaves and ovens have thaw settings. To avoid bacterial build
up, only use these if you intend to cook the food immediately afterwards.
PRT 295/325 FFCS D6.indd 6
Safety tips
•
•
Never re-freeze anything that has thawed out unless you cook it
again, to kill off harmful bacteria.
Never re-freeze thawed shellfish.
Useful tip
Re-seal packs properly after removing items. This prevents drying or
‘freezer burn’ and a build up of frost on any remaining food.
Label everything
•
•
•
Many foods look the same when frozen, so careful labelling will help
avoid forgetting what an item is. Storage times being exceeded could
cause food poisoning.
You can buy special freezer tape for use in low temperatures.
This tape is available in white, so you can use it to write the items
contents on. You can buy special freezer labels and pens. Labels come
in different colours which can help you use your freezer effectively.
For instance you could colour code meat red and vegetables green.
Using a different colour label for each quarter of the year will help
you rotate your frozen food more efficiently.
Write the contents and date. If you are really organised add the
weight and notes on cooking such as ‘thaw first’, or ‘cook from frozen’
and keep a separate ‘log-book’ of what is in each drawer.
This will save opening the door and searching around unnecessarily.
Recommended Storage Periods
(when frozen from fresh)
Fruit Syrup or Sugar packed Fruit
up to 12 months
Open Frozen or Puréed Fruit
up to 18 months
Fruit juices
up to 6 months
Beef
up to 10 months
Lamb
up to 10 months
Veal
up to 6 months
Pork
up to 6 months
Minced meat
up to 3 months
Cured meats
up to 2 months
Sausages
up to 3 months
Packed bacon
up to 3 months
Smoked bacon/ chops/ gammon steaks
up to 2 months
Unsmoked bacon/ chops/ gammon steaks
up to 1 month
Chicken
up to 8 months
Duck
up to 5 months
Goose
up to 5 months
Turkey
up to 6 months
White fish
up to 5 months
Oily fish including salmon
up to 2 months
Smoked salmon
up to 3 months
Caviar
don’t freeze
Shellfish
up to 1 month
Butter
up to 6 months
Cheese
up to 6 months
Cream - double/ whipping
up to 3 months
Eggs - only freeze separated
up to 10 months
Suet
up to 6 months
Milk
up to 1 month
Yogurt
up to 6 weeks
1/12/06 16:32:54
7
REVERSING THE DOOR SWING
Both the door of the fridge and the freezer can be reversed.
• Ensure the Fridge Freezer is unplugged and empty.
• We recommend you have someone to assist you.
1
2
3
Tools required
• Phillips style screwdriver
• Flat bladed screwdriver
• An 8mm socket or spanner and 10mm socket
or spanner.
When laying the Fridge Freezer on its back in order to gain
access to the base, you should never tip it back by more
than 45º. Rest it on soft foam packaging or similar material
to avoid damaging the cooling pipes at the rear of the
Fridge Freezer.
4
Remove pin with a 10mm spanner/socket, replace
on the other side. Remove the door.
8
Remove the bottom bracket using an 8mm socket
or spanner. Remove the blanket plates from the
opposite side.
PRT 295/325 FFCS D6.indd 7
Remove the three screws at the rear of the Fridge
Freezer and the two screws on the top lid and
remove the lid.
5
Remove the middle hinge bracket using an 8mm
socket or spanner. Lift away the bottom door.
9
Secure the replacement botom bracket (shipped
in the salad drawer of the Fridge Freezer) on the
opposite side of the fridge. Replace the door and
secure the middle bracket on to the Fridge Freezer.
Use an 8mm spanner to remove the bolts from the
top bracket and lift the bracket out of the recess
in the door.
6
Remove the bolts on the other side of the Fridge
Freezer and replace where the bracket has been
removed.
7
Remove the hinge holder from the top of the
door and replace on the other side. Repeat for the
bottom door.
Remove the blanking plates and screw cover.
Remove screw and replace screw on the
opposite side.
10
11
Check both doors are
aligned horizontally
and vertically, and
that the seals are closed
on all sides before
finally tightening the
bottom hinge.
Insert top hinge into the recess on top of the door.
Bolt into place using the three bolts removed
earlier.
1/12/06 16:32:59
8
CLEANING
Cleaning inside the Fridge Freezer
Clean the Fridge Freezer internally with a weak solution of bicarbonate of
soda. Then rinse with warm water using a ‘wrung-out’ sponge or cloth.
Wipe the Fridge Freezer dry before replacing the baskets and shelves.
You can remove and clean the drainage which is located at the back of
the fridge compartment, above the salad drawers. This can get blocked
and affect the fridge’s automatic defrost function. Wash in warm soapy
water and rinse under a running tap to clear any blockages, wipe dry and
replace.
Wash the baskets and shelves in warm soapy water. Ensure they are
completely dry before replacing in the Fridge Freezer.
MAINTENANCE
Moving your Fridge Freezer
Changing the internal light
Do not locate your Fridge Freezer near a heat source, eg. cooker, boiler
or radiator. Also avoid direct sunlight.
1. Before carrying out the bulb replacement always switch off and
disconnect the electrical supply.
2. Slide the cover off the light.
3. Remove the old bulb by unscrewing in an anti-clockwise direction.
Location
Levelling the Fridge Freezer
Make sure the Fridge Freezer is level. Use the rotating levelling feet at
the front. If the Fridge Freezer is not level, the doors and magnetic seal
alignments will be affected.
Do not turn on the Fridge Freezer for 4 hours
After the Fridge Freezer is in place it needs to be left for 4 hours.
The coolant fluid needs time to settle.
Installation
Don’t cover or block the vents or grilles of your appliance.
Servicing
Repairs and maintenance of the appliance should only be performed by
an authorised, qualified technician.
4. Replace with a new bulb (10w) by screwing it in a clockwise direction
making sure that it is secure in the bulb holder.
5. Replace the light cover back into position and click back into place.
6. Re-connect your Fridge Freezer to the electrical supply and switch on.
After Sales Service
Cleaning the outside of the Fridge Freezer
Use standard furniture polish to clean the Fridge Freezer exterior. Make
sure that the doors are closed, to prevent polish getting on the magnetic
door seal or inside. The grille of the condenser at the back of the Fridge
Freezer and the adjacent components can be vacuumed using a soft
brush attachment.
PRT 295/325 FFCS D6.indd 8
If you experience a problem with your appliance and you require advice
please contact the technical help line on 0113 2793520
Please note: You can not book a Service call on this number.
If you require a Service enginneer to call the number is
0870 5425425
1/12/06 16:33:01
9
TROUBLESHOOTING
TECHNICAL SPECIFICATIONS
The Fridge Freezer is not working
Model
PRT 295 FSCS
Model
PRT 325 FSCS
Check it is plugged in and switched on. Check that the fuse in the plug
has not blown. Plug in another appliance, such as a lamp, to see if the
socket is working. The Fridge Freezer should be placed in a well ventilated
room with an ambient temperature of between 16°C and 32°C.
Rated Voltage
(V)
220-240
Rated Voltage
(V)
220-240
Rated Frequency
(Hz)
50
Rated Frequency
(Hz)
50
Energy Class
A
Energy Class
A
Fridge Gross Volume
(Litres)
(Cubic Feet)
263
9.3
Fridge Gross Volume
(Litres)
(Cubic Feet)
302
10.7
Freezer Gross Volume
(Litres)
(Cubic Feet)
121
4.3
Freezer Gross Volume
(Litres)
(Cubic Feet)
121
4.3
Red warning light glows continuously
If you have recently turned your Fridge Freezer on for the first time, it
may take up to 12 hours to cool to the correct operating temperature.
If it stays on longer, call your Customer Service Department.
Condensation on the outside of the Fridge Freezer
This may be due to a change in the room temperature. Wipe off any
residue of moisture. If the problem continues call your Customer
Service Department.
Noises
You may hear some unusual noises from time to time. See ‘Noises inside
the Fridge Freezer’ on page 4.
The mains power green light goes off
•
•
Check the power and that the Fridge Freezer is plugged in.
Check that the thermostat control isn’t at 0.
Tips
If the Fridge Freezer won’t be used for a long period of time switch it off,
unplug and clean it. Leave the door open to prevent the formation of
mildew and smell.
Power cut
If the internal temperature of the freezer compartment is -18°C or
less when the power returns, your food is safe. The food in your Fridge
Freezer will remain frozen for approx 16 hours with the door closed.
If you know the power is going to be cut, turn the Super freeze button
on, 24 hours before, this will make the Fridge Freezer colder than normal.
If there is no warning, use the Super freeze button after the power cut.
Don’t open either of the Fridge Freezer doors more than necessary.
PRT 295/325 FFCS D6.indd 9
Weight
(Kg)
82
Weight
(Kg)
86
Product Dimension h/w/d
(cm)
183.4 / 59.5 / 66.4
Product Dimension h/w/d
(cm)
196 / 59.5 / 66.4
Star Rating
4 Star
Star Rating
4 Star
Sound Decibel Rating
(dB[A])
42.5
Sound Decibel Rating
(dB[A])
42.5
Climate class
N
Climate class
N
Ambient temperature range
16-32ºC
Ambient temperature range
16-32ºC
Refrigerating blowing gas
Cyclopentane
Refrigerating blowing gas
Cyclopentane
Refregerant
R600a
Refregerant
R600a
Freezing capacity
(kgs)
5
Freezing capacity
(kgs)
5
1/12/06 16:33:01
10
TECHNICAL SPECIFICATIONS
The policy of Prestige is one of continuously seeking new ways of
improving its products. Therefore the Company reserves the right to
change the specification of items illustrated and described, at any time.
Fridge 1014mm
Freezer 1188mm
Fridge 1098mm
Freezer 645mm
Space required:
PRT 295/325 FFCS D6.indd 10
GENERAL GUIDELINES
Do - Clean your appliance regularly
Do - Defrost regularly (where applicable)
Do - Take off any unusable leaves on vegetables and wipe off any soil.
Do - Leave lettuce, cabbage, parsley and cauliflower on the stem.
Do - Wrap raw meat and poultry loosely in polythene
Do - Wrap fish and offal in polythene bags.
Do - Wrap food with a strong odour or which may dry out, in polythene
bags, or aluminium foil or place in airtight container.
Do - Check contents of the low temp compartment every so often
(where applicable).
Do - Keep food for as short a time as possible and adhere to “best before”
and “Use by” etc. dates.
Do - Store commercially prepared food in accordance with the
instructions given on the packets.
Do - Always choose high quality fresh food and be sure it is thoroughly
clean before freezing it.
Do - Wrap all food in food quality polythene bags and make sure any air
is excluded.
Do - Keep ventilation openings, in the appliance enclosure clear of
obstruction.
Do - Ensure that frozen food does not rise in temperature while
defrosting, a rise in temperature during defrosting may shorten the
storage life of your food.
Don’t - Cover the shelves with any protective materials which may
obstruct air circulation.
Don’t - Store poisonous or any dangerous substances in your freezer. It
has been designed for the storage of edible foodstuffs only.
Don’t - Store cooked and fresh food together in the same container.
They should be packaged and stored separately.
Don’t - Leave the door open for long periods, as this will make the
appliance more costly to run and cause excessive ice formation.
Don’t - Use sharp edged objects such as knives or forks to remove ice
(where applicable).
Don’t - Use hairdryers, or electrical appliances for defrosting only use
item recommended by the manufacturer (where applicable).
Don’t - Put hot food into the appliance. Let it cool down first.
Don’t - Put liquid-filled bottles or sealed cans containing carbonated
liquids into the freezer section, as they may burst.
Don’t - Give children ice-cream and water ices direct from the freezer
section. The low temperature may cause ‘freezer burns’ on
the lips.
Don’t - Try to keep frozen food which has thawed; it should be eaten
within 24 hours or cooked and refrozen.
Don’t - Damage the refrigerant circuit at any time
1/12/06 16:33:02
11
SAFETY
Disposal
Old appliances still have some residual value. An environmentally friendly
method of disposal will ensure that valuable raw materials can be
recovered and used again. The refrigerant used in your appliance and
insulation materials require special disposal procedures. Ensure that none
of the pipes on the back of the appliance are damaged prior to disposal.
Up to date information concerning options for disposing of your old
appliance and packaging from the new one can be obtained from your
retailer or local council office.
Locks
WARNING
IT IS HAZARDOUS FOR ANYONE
OTHER THAN AUTHORISED SERVICE
PERSONNEL TO CARRY OUT
SERVICING OR REPAIRS WHICH
INVOLVE THE REMOVAL OF COVERS.
TO AVOID THE RISK OF AN
ELECTRIC SHOCK DO NOT ATTEMPT
REPAIRS YOURSELF.
If your Fridge Freezer is fitted with a lock, to prevent children being
entrapped keep the key out of reach and not in the vicinity of the
appliance.
If disposing of an old freezer break off any old locks or latches as a
safeguard.
Electrical Connections
THIS APPLIANCE MUST BE EARTHED.
This appliance is fitted with a fused three pin plug to BS 1363 which
will be suitable for use in all houses fitted with sockets to current
specifications.
If the fitted plug is not suitable for your socket outlets, it should be cut
off and carefully disposed of. To avoid a possible shock hazard, do not
insert the discarded plug into a socket.
The wires in the mains lead fitted to this appliance are coloured in
accordance with the following code:
If the colours of the wires in the mains lead of this appliance do not
correspond with the coloured markings identifying the terminals in your
plug, proceed as follows:
The wire which is coloured Green and Yellow MUST be connected to
or
the terminal which is marked with the letter E (Earth) or symbol
coloured Green. The wire which is coloured Blue MUST be connected to
the terminal which is marked with the letter N or coloured Black. The wire
which is coloured Brown MUST be connected to the terminal which is
marked with the letter L or coloured Red.
Before refitting the plug cover, check that there are no cut or stray
strands of wire inside the plug.
Use a 13 Amp BS1362 fuse, only BSI or ASTA approved fuses should be
used. If you are in any way unsure which plug or fuse to use, always refer
to a qualified electrician.
Note: After replacing or changing a fuse on a moulded plug which has
a fuse cover, the cover must be refitted to the plug, the appliance must
not be used without a fuse cover. If lost, replacement fuse covers can be
obtained from an electrical shop.
This appliance complies with the following EEC Directives: 73 / 23 EEC
(Low Voltage Directive) 89 / 336 EEC (EMC Directive).
Fitting a new plug
If for any reason you need to fit a new plug, the flexible mains lead must
be connected as shown here.
CONNECT GREEN
AND YELLOW TO EARTH (E)
(Note: some appliances do
not have earth wires.)
13Amp Fuse
CONNECT BLUE TO
CONNECT BROWN
NEUTRAL (N)
TO LIVE (L)
MAKE SURE THE CABLE
IS HELD BY THE CLAMP
PRT 295/325 FFCS D6.indd 11
1/12/06 16:33:03
This symbol on the product or in the instructions means that your electrical and electronic
equipment should be disposed at the end of its life separately from your household waste.
There are separate collection systems for recycling in the EU.
For more information, please contact the local authority or your retailer where you purchased
the product.
Kesa UK HU1 3AU
Prestige ® is a registered trademark of Meyer Intellectual
Properties Limited and is sold pursuant to a license
PRT 295/325 FFCS D6.indd 12
1/12/06 16:33:04