Download UP! Quick Start Guide
Transcript
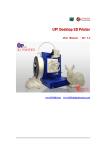
Personal Portable 3D Printer UP! Quick Start Guide www.PP3DP.com Quick Start Guide Quick Start Guide 1. Assemble Printer Open the box, take out the printer and accessories. Assemble the parts contained in the box as following procedure: 1. Unscrew the M4 screw from the extruder, then fix the extruder on the holder. Please make sure the extruder is parallel with Extruder axis. PP3DP.com | 1 Quick Start Guide 2. Install the ABS plastic spool holder. Unscrew the short M3 screw(M3X5) from printer, then fix the spool holder with a long M3 screw(M3X8). Please note that the spool holder should get stuck on the printer edge, so the ABS plastic spoon can be fixed on the printer tightly, and the filament supplier can work successfully. 3. Install the filament supplier. Unscrew the short M3 screw(M3X5) from printer, then fix the filament supplier with a long M3 screw(M3X8). PP3DP.com | 2 Quick Start Guide 4. Install extruder cable(14-pin). Open the extruder upper lid, the 14-pin socket will be found. Then connect the plug and socket, and put on the upper lid. 5. Connect all the power lines to the printer. Firstly, link the Power adapter (5 V) to the middle socket. Secondly, link the Power adapter (20 V) to the power line, then connect the 4-pin slug to the socket. Please note that the flat side of the 4-pin slug which is marked with an arrow should be upturned. PP3DP.com | 3 Quick Start Guide Thirdly, connect the power line to the filament supplier device. Please make sure the power line is got stuck on the side of filament. Lastly, connect the printer to a computer by USB cable. You could not connect the USB cable temporarily, until successfully install UP! software on computer (If connected, Windows system will find a new hardware and ask for installing dirver). PP3DP.com | 4 Quick Start Guide 6. Put the ABS plastic spool on the holder, then put the ABS filament into feeder and press the travel switch, the filament will automatically feed material. Please remember to thrust the ABS into a filament tube. 7. Install a platform. Raise the platform axis to a certain height where is proper to screw. Please note the screw under the platform heating bed, don’t screw it when take down the platform. PP3DP.com | 5 Quick Start Guide PP3DP.com | 6 Quick Start Guide 2. Installing the UP! software Start UP Setup.exe and install the software in the specified directory (Defaulted C:\Program files\UP), and create a desktop shortcut. The following are included: PP3DP.com | 7 Quick Start Guide 3. Installing drivers Connect the power cable to the back of UP printer, and then connect the computer and UP printer with USB cable. The system presents a new hardware is found and choose “No, not this time”. Choose “Install from a list or specific location (Advanced)”. After that, click on “Next”. Click on “Browse”, and choose “C:\Program Files\UP\Driver”. PP3DP.com | 8 Quick Start Guide Click on “Next” and the following dialogue box pops up. Choose “Continue Anyway” and the system is installed automatically. PP3DP.com | 9 Quick Start Guide 4. Loading 3D model Click the icon Click on on the desktop to start up the UP! software. , navigate to and select the STL file that you have created (this software support two kinds of file formats STL and UP3. UP3 is the compression format of STL). The model is presented on the screen. Unload the model: Choose the model you want to unload and click on Save the model: Choose the model you want to save and click on . . PP3DP.com | 10 Quick Start Guide 5. View the model Observe the model on the window and use the mouse to change the display status. Rotate: Press the middle mouse button and move, the model can be observed from different views. Move: Press CTRL and middle mouse button at the same time and move, translation is achieved. Scale: Rotate the mouse wheel, the model can be zoom in or out. View: The system has 8 preset standard views. Click on “Fit” to choose. PP3DP.com | 11 Quick Start Guide 6. Model Transformation Model Transformation can be realized through “Edit” menu and toolbar: Move: Click on the button “Move”, choose or input the distance and then choose the axis. Rotate: Click on “Rotate” on the toolbar, choose or input the angle, and then choose the axis. Scale:Click on “Scale”, choose or input the scaling, and then choose the axis(solitary scale ) or click “Scale” again(uniform scale). PP3DP.com | 12 Quick Start Guide Unit Conversion (from inch to mm): Magnify the whole model for 25.4 times. Procedures: Click on “Scale” on the toolbar. Choose25.4 (->mm), and then click on the “Scale” button again. PP3DP.com | 13 Quick Start Guide 7. Placing the model Auto Placement: Click on “Auto Place” button or “Edit-> Auto placement” menu to place the model automatically. When there is more than one model, “Auto Place” is recommended. Moving by Hand: Choose the target model by the left mouse button, then press CTRL, and at click left button again (not released). Move the mouse and drag the model to the position. Moving through : Click on the button, choose or input the distance, and finally choose the axis. Note: When more than one model is displayed, the gap between each other is about 12mm to prevent adhesion. PP3DP.com | 14 Quick Start Guide 8. Printer Initialization and Maintain Initialize Connect the power cable and USB cable to the back of the printer and connect the power cable to the dedicated power outlet. The printer must be initialized before printing. click menu “3D print->Initial” to initialize the printer. The printer buzzes three times at the beginning, and the platform is lowered to the bottom. Then the platform moves forth and back and the nozzle moves left and right. When all the movement stops, the printer buzzes once more again. Initialization is finished. Maintain Click on “3D Print->Maintain” and the following dialogue box pops up. Extrude: Squeezing out the ABS material. Click on this button, the temperature is getting higher. When the temperature is above 260℃, the printer buzzes, and the silk is squeezed out softly and continually. Withdraw: Pulling out the ABS material. When the temperature is above 260℃,the material is withdrawn from nozzle. After that the printer buzzes again. Status: Displaying the temperature of nozzle and platform, as well as if they are heated. Stop All: Stopping heating and all other movement of the printer. Nozzle & Platform: Five buttons(FL, FR, Center, NL, NR) on the left control the position of the PP3DP.com | 15 Quick Start Guide nozzle and the platform. To: it means lifting the platform to a certain height. It is mainly used to calibrate the nozzle height. After calibration, input the value to the nozzle box in “Setup” dialogue. Bottom: it means descending the platform to the lowest position. The best position of the platform is 0.2mm below the nozzle. Adjust the height of the nozzle by “To” until it is about 0.2 mm below the nozzle. Set to Nozzle Height: set current height value to nozzle height. PP3DP.com | 16 Quick Start Guide 9. Extude ABS Find a material lead-in tube on extruder, and put the ABS into it, Then press “Extrude” button in the maintain dialogue. When the printer beeps, push the filament into the hole with a little strength and the extruder will extrude material automatically. PP3DP.com | 17 Quick Start Guide 10. Set nozzle height The platform rise to Nozzle Height position before printing, and the first layer will be printed. The best position of the platform is where it is 0.2~0.3mm below the nozzle. If the nozzle is too close to the platform (if there is no space between the two) it is difficult to extrude the material. If the gap is too wide, the model can not be stick to the platform firmly, and can be deformed or moved easily. 1. Select menu”3D Printer->Maintain”, open maintain dialog 2. Click “Center” button, move the extruder and platform to center. 3. Input “125” in edit box, then click “To” button, rise the platform to 125mm height. 4. Observe the gap between the nozzle and the platform by eye, estimate the distance. 5. Input “127” in edit box, then click the “To” button, rise the platform to 127mm. 6. Input 129/131/133/…,click “To” button, until the gap is small than 2mm. 7. Increase the figure by 0.5 or 0.1 until the gap is near 0.2~0.3mm. Insert 2 or 3 sheets paper into the gap, it will help you to measure the gap. 8. Click “Set to Nozzle Height” to set the current value as Nozzle Height, then click “bottom” button to drop the platform. The nozzle height should be reset after install new extruder. Once the distance is set, the system saves the height data automatically. It needs not to be set again. PP3DP.com | 18 Quick Start Guide 11. Setup the parameters Click on “Setup” on “3D Print->Setup”, the following dialogue box pops up. Predef: the figure indicates the Layer thickness Base: the figure indicates the thickness of the raft. Nozzle: The figure indicates the height of the nozzle. Fill: There are four ways to adjust the inner infilling density, including Solid, Loose, Hollow, and Big Hole. Click on Ok and the parameters are set. PP3DP.com | 19 Quick Start Guide 12. Printing Click on “Print” on “3D Print->Print” and the dialog pops up. Make sure the printing parameters are right. Then click on “OK”, the system begins to print. When the printer finishes printing and beeps ready, remove model off the platform with shovel gently. Hold the platform to prevent the crossbar from suffering strong press. Please remember to wear a pair of gloves. If the platform is pushed moving unintentionally, please initial the printer. When the model is removed, put a thin layer of coat in its place. PP3DP.com | 20


