1
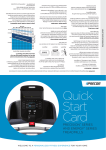
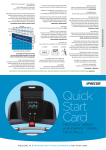
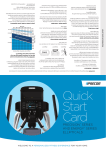
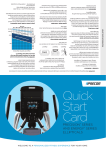
WELCOME TO A PERSONALIZED FITNESS EXPERIENCE FOR YOUR HOME ENERGY™ SERIES TRM 211 TREADMILL Quick Start Card CAUTION: Before beginning any fitness program, see your physician for a thorough examination. Ask your physician about the appropriate target heart rate for your fitness level. Choose a Program Choose ChooseaaProgram Program • Determine your level of fitness: beginner, • • Determine Determineyour yourlevel levelofofor fitness: fitness: beginner, beginner, intermediate, advanced. intermediate, intermediate,ororadvanced. advanced. • Determine your immediate goal: endurance • • Determine Determineyour yourimmediate immediate goal: goal:endurance endurance training, cardio-conditioning, or weight loss. training, training,cardio-conditioning, cardio-conditioning,ororweight weightloss. loss. 2. Adjust the strap and fasten it around your chest. aerobic heart rate. To improve your overall maintain yourYour heart rate in either zone for 30 minutes or CAUTION: CAUTION: Yourheart heart rate rateshould should never never exceed exceed more at least three times a week. 85% 85% of of your your maximum maximum aerobic aerobic heart heart rate rateor orgo go above aboveyour yourtarget targetzone zone(Diagram (DiagramD). D). 3.sure Make surethe that the chest strap isright right sideup, up,lies lies 3.3. Make Make surethat that thechest chest strap strap isisright side side up, lies horizontally across your chest, andisis centered in inin horizontally horizontally across across your your chest, chest, and and is centered centered the middle of your chest (Diagram C). the themiddle middle ofofyour yourchest chest(Diagram (DiagramC). C). For Forthe thegreatest greatest benefits,maintain maintain your your heart heartrate rateinin cardiovascular andbenefits, respiratory fitness level, maintain either either zone zone for for 30 30minutes minutes ormore more leastthree threetimes times your heart rate between 70% or and 85%at ofatleast your amaximum aweek. week. aerobic heart rate. For the greatest benefits, 2.2. Adjust AdjustThe the thestrap strap strap and andfasten fasten ititaround around your yourchest. chest. should feel snug, not restrictive The Thestrap strap should should feelsnug, snug,not notrestrictive restrictive (Diagram B).feel (Diagram (DiagramB). B). you are a beginner, start with a cardio-conditioning IfIfyou youare areaIfabeginner, beginner, start startaacardio-conditioning cardio-conditioning program gradually adjust your to the demands of program programtoto slowly slowlyto adjust adjust your your body body totoabody acomfortable comfortable exercise.Over Overaaarecommended recommended eight-week level levelofofexercise. exercise. Over recommended 8-week 8-week period, you will increase your endurance and strength. period, period,you you will willincrease increase your yourendurance endurance and andstrength strength while whileimproving improvingflexibility. flexibility. CAUTION: Your heart rate should never exceed 85% of your maximum aerobic heart rate or go Heart HeartRate RateTarget TargetZones Zones above your target zone (Diagram D). 200 200 For all fitness levels, plan to exercise at an appropriately IfIfyou youhave have been beenexercising exercising and feel thatyou you haveWear a chest challenging pace forand 20 tofeel 30 that minutes ahave day. Diagram Diagram AAA Diagram Diagram Diagram Diagram Diagram DiagramBBB Diagram CCC reached reachedan an intermediate intermediate oradvanced advanced fitness fitness level, level,you youplans strap to monitoror your heart rate. Supplement your probably probablyhave haveestablished established goals goals for yourself. When When these these steps steps are areare complete, complete, you areready readyto totoview view view with fitness workouts fromfor theyourself. Precor web site When these steps complete,you youare are ready your yourheart heart rate! rate! (www.precor.com). Precorat web site also provides your heart rate. For Forallallfitness fitness levels, levels,plan plantotoThe exercise exercise ataacomfortable comfortable expert advice to help you your fitnessstrap goals. pace pacefor for20 20 toto30 30 minutes minutes aaday. day.reach Wear Wear aachest chest strap Touch-Sensitive Touch-SensitiveHandrail HandrailGrips Grips Touch-Sensitive Handrail Grips totomonitor monitoryour yourheart heartrate. rate.Supplement Supplementyour yourplans plans Several Several Precor Precorproducts productsincorporate incorporatetouch-sensitive touch-sensitive Monitor Heart Rate Several Precor products incorporate touch-sensitive with withfitness fitness workouts workoutsYour from fromthe the Precor Precor web website site heartrate rategrips gripson onthe thehandrails. handrails.IfIfyou youprefer prefertotouse use The SmartRate and heart rate displays provide visual cuesheart heart rate grips on the handrails. If you prefer to use (www.precor.com). (www.precor.com). The The Precor Precor web web site site also also provides provides the thetouch-sensitive touch-sensitivehandrail handrailgrips, grips,use useboth bothhands. hands. that help you adjust your fitness routine to reach your the touch-sensitive handrail grips, use both hands. expert expertadvice advice to to help help you you reach reach your your fitness fitness goals. goals. Make sure sureboth bothhands handsare aremoist moist(not (notdry) dry)when whenyou you goals. Use these features to keep your heart rate within Make Make sure both hands are moist (not dry) and avoid grasp grasp the thetouch-sensitive touch-sensitivehandrail handrailgrips. grips. the target zones. grasping the sensors too tightly. HEART RATE INFORMATION Heart Rate Target Zones Diagram D: Heart Rate Target Zones 190 190 Your Heart Rate Your Heart Rate Monitor MonitorYour YourHeart HeartRate Rate Wear and aand Chest Strap Note: For the best heart rate monitoring results, wear a ®®Features SmartRate SmartRate Features The TheSmartRate SmartRate heart heart rate ratedisplays displaysprovide providevisual visual During a workout, the heart rate features appear on chest strap. cues cuesthat thathelp helpyou youadjust adjustyour yourfitness fitnessroutine routinetotoreach reach the display when you wear a chest strap. To receive an When Whenyou youbegin beginan anexercise exercisesession, session,aablinking blinking your yourgoals. goals.Use Usethese thesefeatures featurestotokeep keepyour yourheart heartrate rate accurate reading, the chest strap needs to be in direct SmartRate® Features segment segment ininthe theSmartRate SmartRate display displayappears appearsififyou you within withinthe thetarget targetzones. zones. contact with your skin. After you put on the chest strap, entered When you begin an exercise session, a blinking entered your your age age during during the thesetup setup phase. phase. The Theblinking blinking Wear WearaaChest Chest Strap Strap face the display console for a minimum of 15 seconds. This segment in the SmartRate display you rate. segment segment indicates indicates the thecurrent current zone zoneappears ofofyour yourifheart heart rate. allows thethe receiver inrate the features console toappear recognize the signal entered your age during the setup phase. The blinking During Duringaaworkout, workout, the heart heart rate features appearon on The Thecalculation calculation used usedfor forthe theheart heart rate rate target zone zone isis from theyou chest strap. segment indicates the current zone of target your heart rate. the thedisplay display when when youwear wear aachest cheststrap. strap.To Toreceive receive your yourmaximum maximumaerobic aerobicheart heartrate: rate: an anaccurate accuratereading, reading,the thechest cheststrap strapneeds needstotobe beinin (220 (220minus minusyour yourage) age)multiplied multipliedby byaapercent. percent. is 1. Carefully dampen the back of the strap with tap The calculation used for the heart rate target zone direct directcontact contact with with your your skin. skin. After After you you put put on on the the water A). your maximum aerobic heart rate: chest cheststrap, strap,face face the the(Diagram display displayconsole consolefor foraaminimum minimumofof For Forthe the ideal ideal weight weight loss lossrange, range, your yourheart heartrate rateshould should (220 minus your age), multiplied by a percentage. 15 15seconds. seconds.This Thisallows allowsthe thereceiver receiverininthe theconsole consoletoto remain remain between between 55% 55% and and 70% 70%ofofyour your maximum maximum Important: Do not use deionized water. It does recognize recognizethe thesignal signal from from the the chest chest strap. strap. aerobic aerobicheart heartrate. rate.To Toimprove improveyour youroverall overall not have the proper minerals and salts to conduct For the ideal weight loss range, your heart rate should cardiovascular cardiovascular and and respiratory respiratory fitness fitness level, level, maintain maintain remain between 55% and 69% of your maximum your yourheart heartrate ratebetween between70% 70%and and85% 85%ofofyour your maximum maximumaerobic aerobicheart heartrate. rate. 200 200 190 190 180 180 170 170 160 160 150 150 140 140 130 130 120 120 110 110 100 100 90 90 80 80 70 70 Your Heart Rate Your Heart Rate 180 180 170 170 High High 160 160 150 150 140 140 130 130 120 120 110 110 100 100 9090 ReRe cocmom meme ndnede d d C aCrdard ioviov asacsc ulaula r Zr Z onoene ReR Rce eoccmo mm om emnednd eneddeW dW e e d igehigt ht C ard LoLo iov sssZs Z asc onoene ula rZ o ne R ec om 8080 7070 me n d ed W eigh t Lo High High Peak Peak Cardio Cardio Peak Peak Fatburn Fatburn Cardio Cardio Warmup Warmup ss Z one Fatburn 20202525303035354040454550505555606065657070Fat 7575Burn Your YourAge Age Warmup Warmup 20 5055 5560 60D 65 70 75 75 20 25 25 3030353540404545 65 Diagram Diagram D 70 Your AgeAge Your Cool Down Your Workout Cool CoolDown DownAfter After AfterYour YourWorkout Workout Cooling down is an important aspect of your workout Cooling Coolingdown downisisan animportant importantaspect aspectofofyour yourworkout workout because it helps reduce muscle stiffness and because becauseitithelps helpsreduce reducemuscle musclestiffness stiffnessand and soreness by transporting excess lactic acid out of the soreness sorenessby bytransporting transportingexcess excesslactic lacticacid acidout outofofthe the working muscles. Cooling down for at least three working workingmuscles. muscles.Cooling Coolingdown downfor foratatleast leastthree three minutes helps provide a smooth transition that allows minutes minutes helps provide asmooth smooth transitionthat that allows allows your hearthelps rate toprovide return toaits normal,transition non-exercising state. your yourheart heartrate ratetotoreturn returntotoits itsnormal, normal,non-exercising non-exercising state. state. 20031 142nd Avenue NE | P.O. Box 7202 Woodinville, WA USA 98072-4002 www.precor.com P/N 303208-111 | ©2014 Precor Incorporated 1.1. Carefully Carefullydampen dampen the the back backofofthe thestrap strapwith withtap tap electrical impulses. water water(Diagram (DiagramA). A). Important: Important: Do Donot notuse usedeionized deionizedwater. water.ItItdoes does not nothave havethe theproper properminerals mineralsand andsalts saltstotoconduct conduct GETTING STARTED Energy Series 211 treadmill WARNING: Read through ALL of the safety information in the Owner’s Manual, and make sure that the treadmill is properly connected to the electrical supply in your house, before you use the treadmill. As you get to know your new Precor treadmill and your own fitness goals, you’ll use the advanced features of the treadmill more often. To begin with, though, here’s an easy way to start out. NOTE: These instructions assume that your treadmill has been completely installed and set up. To get started with your new Precor treadmill: STEP 2: Step onto the treadmill. STEP 1: Turn the treadmill on. STEP 3: Attach the safety clip securely to your clothing. Drawn for Hydra Manual / Quickstart Card 03.07.14 0 - Jen Drawn to crop 1.75” H QUICK START Line STOP Weights Approx .5 pt .25 pt STEP 4: Place one foot on each of the rails on either side of the treadmill belt. STEP 5: Touch the QUICKSTART key (manual operation). Drawn for Hydra Manual / Quickstart Card 03.07.14 0 - Jen STEP 6: After the console has displayed its countdown and the belt has started to move, step onto the belt. Drawn for Hydra Manual / Quickstart Card 03.07.14 0 - Jen QUICK START QUICK START STOP STOP STEP 7: Use the controls on the console to adjust the incline angle of the treadmill and the speed of the belt. STEP 8: If you need to end your workout early, press the STOP key on the console. Refer to your owner’s manual for complete operational instructions and troubleshooting. See reverse for important heart rate information. WELCOME TO A PERSONALIZED FITNESS EXPERIENCE FOR YOUR HOME ENERGY™ SERIES TRM 211 TREADMILL Quick Start Card CAUTION: Before beginning any fitness program, see your physician for a thorough examination. Ask your physician about the appropriate target heart rate for your fitness level. • Determine your immediate goal: endurance 3.sure Make surethe that the chest strap isright right sideup, up,lies lies 3.3. Make Make surethat that thechest chest strap strap isisright side side up, lies horizontally across your chest, and centered in inin horizontally horizontally across across your your chest, chest, and and isisis centered centered the middle of your chest (Diagram C). the themiddle middle ofofyour yourchest chest(Diagram (DiagramC). C). maintain yourYour heart rate in either zone for 30 minutes or CAUTION: CAUTION: Yourheart heart rate rateshould should never never exceed exceed more atof least three times a week. 85% 85%of your your maximum maximum aerobic aerobicheart heartrate rateor orgo go above aboveyour yourtarget targetzone zone(Diagram (DiagramD). D). you are a beginner, start with a cardio-conditioning IfIfyou youare areaIfabeginner, beginner, start startaacardio-conditioning cardio-conditioning program gradually adjust your to the demands of program programtoto slowly slowlyto adjust adjust your your body body totoabody acomfortable comfortable exercise.Over Overaaarecommended recommended eight-week level levelofofexercise. exercise. Over recommended 8-week 8-week period, you will increase your endurance and strength. period, period,you you will willincrease increase your yourendurance endurance and andstrength strength while whileimproving improvingflexibility. flexibility. HEART RATE INFORMATION For all fitness levels, plan to exercise at an appropriately IfIfyou youhave have been beenexercising exercising and feel thatyou you haveWear a chest challenging pace forand 20 tofeel 30 that minutes ahave day. Diagram Diagram AAA Diagram Diagram Diagram Diagram Diagram DiagramBBB Diagram CCC reached reachedan an intermediate intermediate oradvanced advanced fitness fitness level, level,you youplans strap to monitoror your heart rate. Supplement your probably probablyhave have established established goals goals for for yourself. yourself. When When these these steps steps are areare complete, complete, you areready readyto totoview view view with fitness workouts from the Precor web site When these steps complete,you youare are ready your yourheart heart rate! rate! (www.precor.com). Precorat web site also provides your heart rate. For Forallallfitness fitness levels, levels,plan plantotoThe exercise exercise ataacomfortable comfortable expert advice to help you your fitnessstrap goals. pace pacefor for20 20 toto30 30 minutes minutes aaday. day.reach Wear Wear aachest chest strap Touch-Sensitive Touch-SensitiveHandrail HandrailGrips Grips Touch-Sensitive Handrail Grips totomonitor monitoryour yourheart heartrate. rate.Supplement Supplementyour yourplans plans Several SeveralPrecor Precorproducts productsincorporate incorporatetouch-sensitive touch-sensitive Monitor Your Heart Rate Several Precor products incorporate touch-sensitive with withfitness fitnessworkouts workoutsfrom fromthe thePrecor Precorweb website site heart heartrate rategrips gripson onthe thehandrails. handrails.IfIfyou youprefer prefertotouse use The SmartRate and heart rate displays provide visual cues heart rate grips on the handrails. If you prefer to use (www.precor.com). (www.precor.com).The ThePrecor Precorweb website sitealso alsoprovides provides the thetouch-sensitive touch-sensitivehandrail handrailgrips, grips,use useboth bothhands. hands. thatto help youyou adjust youryour fitness routine to reach your the touch-sensitive handrail grips, use both hands. expert expertadvice advice tohelp help youreach reach yourfitness fitness goals. goals. MakeMake sure suresure both both hands handsare aremoist moist(not (notdry) dry)when whenyou you goals. Use these features to keep your heart rate within Make both hands are moist (not dry) and avoid grasp grasp the thetouch-sensitive touch-sensitivehandrail handrailgrips. grips. the target zones. grasping the sensors too tightly. Monitor MonitorYour YourHeart HeartRate Rate Wear and aand Chest Strap Note: For the best heart rate monitoring results, wear a ®®Features SmartRate SmartRate Features The TheSmartRate SmartRate heart heart rate ratedisplays displaysprovide providevisual visual During a workout, the heart rate features appear on chest strap. cues cuesthat thathelp helpyou youadjust adjustyour yourfitness fitnessroutine routinetotoreach reach the display when you wear a chest strap. To receive an When Whenyou youbegin beginan anexercise exercisesession, session,aablinking blinking your yourgoals. goals.Use Usethese thesefeatures featurestotokeep keepyour yourheart heartrate rate accurate reading, the chest strap needs to be in direct SmartRate® Features segment segment ininthe theSmartRate SmartRate display displayappears appearsififyou you within withinthe thetarget targetzones. zones. contact with your skin. After you put on the chest strap, entered When you begin an exercise session, a blinking entered your your age age during during the thesetup setup phase. phase. The Theblinking blinking Wear WearaaChest Chest Strap Strap face the display console for a minimum of 15 seconds. This segment in the SmartRate display you rate. segment segment indicates indicates the thecurrent current zone zoneappears ofofyour yourifheart heart rate. allows thethe receiver inrate the features console toappear recognize the signal entered your age during the setup phase. The blinking During Duringaaworkout, workout, the heart heart rate features appearon on The The calculation calculation used used for for the the heart heart rate rate target target zone zone isis from the chest strap. segment indicates the current zone of your heart rate. the thedisplay displaywhen whenyou youwear wearaachest cheststrap. strap.To Toreceive receive an anaccurate accuratereading, reading,the thechest cheststrap strapneeds needstotobe beinin 1. with Carefully dampen the back theon strap with tap direct directcontact contact withyour your skin. skin.After After you youof put put on the the water A). chest cheststrap, strap,face face the the(Diagram display displayconsole consolefor foraaminimum minimumofof 15 15seconds. seconds.This Thisallows allowsthe thereceiver receiverininthe theconsole consoletoto Important: Dochest not use deionized water. It does recognize recognizethe thesignal signalfrom fromthe the chest strap. strap. aerobic heart rate. To improve your overall For Forthe thegreatest greatest benefits,maintain maintain your your heart heartrate rateinin cardiovascular andbenefits, respiratory fitness level, maintain either either zone zone for for 30 30minutes minutes ormore more leastthree threetimes times your heart rate between 70% or and 85%at ofatleast your amaximum aweek. week. aerobic heart rate. For the greatest benefits, your yourmaximum maximumaerobic aerobicheart heartrate: rate: (220 (220The minus minus your yourage) age) multiplied multiplied by byrate aapercent. percent. calculation used for the heart target zone is your maximum aerobic heart rate: For Forthe the ideal ideal weight weight loss lossrange, range, your yourheart heartrate rateshould should (220 minus your age), multiplied by a percentage. remain remainbetween between55% 55%and and70% 70%ofofyour your maximum maximum aerobic aerobicheart heartrate. rate.To Toimprove improveyour youroverall overall not have the proper minerals and salts to conduct For the ideal weight loss range, your heart rate should cardiovascular cardiovascular and andrespiratory respiratoryfitness fitnesslevel, level,maintain maintain 1.1. Carefully Carefullydampen dampen the the back backofofthe thestrap strapwith withtap tap electrical impulses. remain between 55% and 69% of your maximum your yourheart heartrate ratebetween between70% 70%and and85% 85%ofofyour your water water(Diagram (DiagramA). A). maximum maximumaerobic aerobicheart heartrate. rate. Important: Important: Do Donot notuse usedeionized deionizedwater. water.ItItdoes does not nothave havethe theproper properminerals mineralsand andsalts saltstotoconduct conduct CAUTION: Your heart rate should never exceed 85% of your maximum aerobic heart rate or go Heart HeartRate RateTarget TargetZones Zones above your target zone (Diagram D). 200 200 Heart Rate Target Zones Diagram D: Heart Rate Target Zones 190 190 200 200 190 190 180 180 170 170 160 160 150 150 140 140 130 130 120 120 110 110 100 100 90 90 80 80 70 70 Your Heart Rate Your Heart Rate intermediate, intermediate,ororadvanced. advanced. • • Determine Determineyour yourimmediate immediate goal: goal:endurance endurance training, cardio-conditioning, or weight loss. training, training,cardio-conditioning, cardio-conditioning,ororweight weightloss. loss. 2. Adjust the strap and fasten it around your chest. 2.2. Adjust AdjustThe the thestrap strap strap and andfasten fasten ititaround around your yourchest. chest. should feel snug, not restrictive The Thestrap strap should should feelsnug, snug,not notrestrictive restrictive (Diagram B).feel (Diagram (DiagramB). B). Your Heart Rate • Determine your level of fitness: beginner, • • Determine Determineyour yourlevel levelofofor fitness: fitness: beginner, beginner, intermediate, advanced. Your Heart Rate Choose a Program Choose ChooseaaProgram Program 180 180 170 170 High High 160 160 150 150 140 140 130 130 120 120 110 110 100 100 9090 8080 7070 ReRe cocmom meme ndnede dC dC ardard ioviov asacsc ulaula r Zr Z onoene ReR Rce eoccmo mm om emnednd eneddeW d ed eWigeig Ca ht hLt L rdio ososss vas ZoZnon cula e e rZ o ne R ec om me n d ed We ight Los s Zo ne High High Peak Peak Cardio Cardio Peak Fatburn Fatburn Cardio Cardio Peak Warmup Warmup Fatburn 20202525303035354040454550505555606065657070Fat 7575Burn Your YourAge Age Warmup Warmup 20 5055 5560 60D 65 70 75 75 20 25 25 3030353540404545 65 Diagram Diagram D 70 Your AgeAge Your Cool Down Your Workout Cool CoolDown DownAfter After AfterYour YourWorkout Workout Cooling down is an important aspect of your workout Cooling Coolingdown downisisan animportant importantaspect aspectofofyour yourworkout workout because it helps reduce muscle stiffness and because becauseitithelps helpsreduce reducemuscle musclestiffness stiffnessand and soreness by transporting excess lactic acid out of the soreness sorenessby bytransporting transportingexcess excesslactic lacticacid acidout outofofthe the working muscles. Cooling down for at least three working workingmuscles. muscles.Cooling Coolingdown downfor foratatleast leastthree three minutes helps provide a smooth transition that allows minutes minutes helps provide asmooth smooth transitionthat that allows allows your hearthelps rate toprovide return toaits normal,transition non-exercising state. your yourheart heartrate ratetotoreturn returntotoits itsnormal, normal,non-exercising non-exercising state. state. 20031 142nd Avenue NE | P.O. Box 7202 Woodinville, WA USA 98072-4002 www.precor.com P/N 303208-111 | ©2014 Precor Incorporated OW N E R ’ S M A N UA L Energy Series ™ TRM 211 TREADMILL WELCOME TO A PERSONALIZED FITNESS EXPERIENCE FOR YOUR HOME Important Safety Instructions Read the following precautions thoroughly before using the treadmill, and save them afterward for future reference. These instructions are written for your safety and to protect the unit. DANGER To reduce the risk of electrical shock always unplug the treadmill from the electrical outlet immediately after using and before cleaning. Safety Precautions Read all instructions in this guide before installing and using the equipment and follow any labels on the equipment. Make sure all users see a physician for a complete physical examination before they begin any fitness program. Il est conseillé de subir un examen médical complet avant d’entreprendre tout programme d’exercise. Si vous avez des étourdissements ou des faiblesses, arrêtez les exercices immédiatement. Do not allow children, or people unfamiliar with the operation of this equipment, on or near it. Do not leave children unsupervised around the equipment. Never drop or insert objects into any opening. Keep hands away from moving parts. Always follow basic safety precautions when using the treadmill to reduce the chance of injury, fire, or damage. Other sections in this manual provide more details of safety features. Be sure to read these sections and observe all safety notices. These precautions include the following: Important Safety Instructions 303207-110 rev A TRM 211 Owner's Manual 031914 EN-US - body only with crops.pdf 1 1 3/25/2014 12:55:21 PM 2 TRM 211 Owner's Manual Use care when getting on or off the treadmill. Always grasp the handrail when stepping on the running belt and keep the initial speed at or below 1 mile per hour (mph) or 1 kilometer per hour (kph). Never step off the treadmill while the running belt is moving. Do not set anything on the stationary handrails, handlebars, control console, or covers. Place liquids, magazines, and books in the appropriate receptacles. Do not rock the unit. Do not lean or pull on the console at any time. Do not stand on the hood. Hold onto a stationary handrail or handlebar while assuming the starting position on the equipment. On treadmills, straddle the running belt and attach the safety clip to clothing at waist level before touching the control console. Important: For safety, make sure users step onto the running belt while it is moving at or below 1 mile per hour (1.6 kilometers per hour). Hold on to a stationary handrail or handlebar with one hand whenever you operate the console keys with the other hand. 303207-110 rev A TRM 211 Owner's Manual 031914 EN-US - body only with crops.pdf 2 Before the running belt begins moving (before your workout), and after it stops (at the end of your workout), straddle the belt by placing your feet firmly on the right and left staging platforms. Keep your body and head facing forward. Never attempt to turn around on the treadmill. The safety clip must be attached at waist level before your workout. A lanyard connects to the magnetic safety key. If you encounter difficulties, a strong tug on the lanyard disengages the magnetic safety key and stops the running belt. Do not overexert yourself or work to exhaustion. If you feel any pain or abnormal symptoms, stop your workout immediately and consult your physician. When the treadmill is not in use, disconnect the unit by turning the power switch to the Off position, and then remove the power plug from the power outlet. 3/25/2014 12:55:21 PM Make sure all users wear proper exercise clothing and shoes for their workouts and avoid loose or dangling clothing. Users should not wear shoes with heels or leather soles, and they should check the soles of their shoes to remove any dirt and embedded stones. They should also tie long hair back. Never leave the equipment unattended when it is plugged in. Unplug the equipment from its power source when it is not in use, before cleaning it, and before providing authorized service. Note: The optional power adapter is considered a power source for self-powered equipment. Use the power adapter provided with the equipment. Plug the power adapter into an appropriate, grounded power outlet as marked on the equipment. Care should be taken when mounting or dismounting the equipment. Read, understand, and test the emergency stop procedures before use. Keep the power cord or optional power adapter and plug away from heated surfaces. Important Safety Instructions 303207-110 rev A TRM 211 Owner's Manual 031914 EN-US - body only with crops.pdf 3 Route power cables so that they are not walked on, pinched, or damaged by items placed upon or against them, including the equipment itself. Ensure the equipment has adequate ventilation. Do not place anything on top of or over the equipment. Do not use on a cushioned surface that could block the ventilation opening. Assemble and operate the equipment on a solid, level surface. Proper Location for Equipment – For all equipment other than treadmills: Locate at least 40 inches (1 meter) away from walls or furniture on either side of the equipment, and 40 inches (1 meter) away from objects behind the equipment. – For treadmills: Locate at least 40 inches (1 meter) away from walls or furniture on either side of the treadmill, and at least 80 inches (2 meters) away from objects behind the treadmill. Keep equipment away from water and moisture. Avoid dropping anything on or spilling anything inside the equipment to prevent electric shock or damage to the electronics. 3 3/25/2014 12:55:21 PM 4 TRM 211 Owner's Manual Do not operate electrically powered equipment in damp or wet locations. Never operate this equipment if it has a damaged cord or plug, if it is not working properly, or if it has been dropped, damaged, or exposed to water. Call for service immediately if any of these conditions exist. Maintain the equipment to keep it in good working condition, as described in the Maintenance section of the assembly and maintenance guide. Inspect the equipment for incorrect, worn, or loose components, and then correct, replace or tighten prior to use. If you plan to move the equipment, obtain help and use proper lifting techniques. Refer to the "Moving the Equipment" section of the assembly and maintenance guide. Use the equipment only for its intended purpose as described in this manual. Do not use accessory attachments that are not recommended by Precor. Such attachments may cause injuries. Do not operate the equipment where aerosol (spray) products are being used or where oxygen is being administered. 303207-110 rev A TRM 211 Owner's Manual 031914 EN-US - body only with crops.pdf 4 Do not use outdoors. Do not attempt to service the equipment yourself, except to follow the maintenance instructions in this manual. CAUTION: DO NOT remove the cover, or you may risk injury due to electric shock. Read the assembly and maintenance guides before operating. There are no user-serviceable parts inside. Contact Customer Support if the equipment needs servicing. For use with single phase AC supply only. Safety Approval When identified with the ETL-c logo, the unit has been tested and conforms to the requirements of CAN/CSA-E-335-1/3-04, EN 60335-1: 2002 Safety of Household and Similar Electrical Appliances. 3/25/2014 12:55:21 PM Grounding Instructions The treadmill must be grounded. If the unit malfunctions or breaks down, grounding provides a path of least resistance for electric current, which reduces the risk of electrical shock. The unit is equipped with a power cord having an equipment-grounding conductor and a grounding plug. The plug must be inserted into an outlet that is properly installed and grounded in accordance with all local codes and ordinances. Failure to properly ground the treadmill could void the Precor Limited Warranty. DANGER Hazardous Materials and Proper Disposal The batteries within self-powered equipment contain materials that are considered hazardous to the environment. Federal law requires proper disposal of these batteries. If you plan to dispose of your equipment, contact Precor Commercial Products Customer Support for information regarding battery removal (refer to Obtaining Service). Improper connection of the equipment-grounding conductor can result in a risk of electric shock. Check with a qualified electrician or service person if you are in doubt as to whether the unit is properly grounded. Do not modify the plug provided with the treadmill. If it does not fit the outlet, get a proper outlet installed by a qualified electrician. Important Safety Instructions 303207-110 rev A TRM 211 Owner's Manual 031914 EN-US - body only with crops.pdf 5 5 3/25/2014 12:55:21 PM TRM 211 Owner's Manual Product Recycling and Disposal This equipment must be recycled or discarded according to applicable local and national regulations. Product labels, in accordance with European Directive 2002/96/EC concerning waste electrical and electronic equipment (WEEE), determine the framework for the return and recycling of used equipment as applicable throughout the European Union. The WEEE label indicates that the product is not to be thrown away, but rather reclaimed upon end of life per this Directive. 303207-110 rev A TRM 211 Owner's Manual 031914 EN-US - body only with crops.pdf 6 6 In accordance with the European WEEE Directive, electrical and electronic equipment (EEE) is to be collected separately and to be reused, recycled, or recovered at end of life. Users of EEE with the WEEE label per Annex IV of the WEEE Directive must not dispose of end of life EEE as unsorted municipal waste, but use the collection framework available to customers for the return, recycling, and recovery of WEEE. Customer participation is important to minimize any potential effects of EEE on the environment and human health due to the potential presence of hazardous substances in EEE (refer to Obtaining Service). 3/25/2014 12:55:21 PM Regulatory Notices for Cardiovascular Exercise Equipment Radio Frequency Interference (RFI) The regulatory information in this section applies to the exercise equipment and its control console. The treadmill has been tested and found to comply with the limits for a Class B digital device, pursuant to Part 15 of the FCC Rules. These limits are designed to provide reasonable protection against harmful interference in a residential installation. The treadmill generates, uses, and can radiate radio frequency energy and, if not installed and used in accordance with the owner’s manual instructions, may cause harmful interference to radio communications. Safety Approvals for Cardiovascular Equipment Precor equipment has been tested and found to comply with the following applicable safety standards. Cardiovascular Type Equipment: CAN/CSA, IEC 60335-1 (Household and similar electrical appliances - Safety) Important Safety Instructions 303207-110 rev A TRM 211 Owner's Manual 031914 EN-US - body only with crops.pdf 7 Federal Communications Commission, Part 15 WARNING Per FCC rules, changes or modifications not expressly approved by Precor could void the user’s authority to operate the equipment. 7 3/25/2014 12:55:21 PM TRM 211 Owner's Manual Canadian Department of Communications This digital apparatus does not exceed the Class B limits for radio noise emissions from digital apparatus set out in the Radio Interference Regulations of the Canadian Department of Communications. Le présent appareil numérique n’émet pas de bruits radioélectriques dépassant les limites applicables aux appareils numériques de la class B prescrites dans le Réglement sur le brouillage radioélectrique édicté par le ministére des Communications du Canada. ATTENTION: Haute Tension Débranchez avant de réparer Electrical Recommendations: 120 V Treadmills Note: This is a recommendation only. NEC (National Electric Code) guidelines or local region electric codes must be followed. 303207-110 rev A TRM 211 Owner's Manual 031914 EN-US - body only with crops.pdf 8 8 CAUTION: Use the supplied and appropriate power cord. Do not remove or otherwise bypass the 3-prong plug with an adapter in order to use a non-grounded outlet. Do not plug the treadmill into a power transformer in an attempt to adjust the voltage requirements. Failure to follow these instructions might damage the unit and will void the Precor Limited Warranty. If an appropriate cord for your location was not included with your treadmill, please contact your Precor dealer for the proper Precor power cord. For more information on authorized Precor dealers in your area, please contact Customer Support at www.precor.com. You should have received a power cable that meets your local electrical code requirements along with the equipment. Precor treadmills must be connected to a dedicated individual branch circuit with a capacity of at least 15 amps. If you need additional help with the power connections, contact your Precor authorized dealer. 3/25/2014 12:55:21 PM Obtaining Service You should not attempt to service the treadmill except for maintenance tasks as described in this manual. The treadmill does not contain any user-serviceable parts that require lubrication. For information about product operation or service, see the Precor web site at www.precor.com. For future reference, write the model, serial number, and date of purchase for your unit in the space provided. The serial number is printed on a label located on the front panel, near the power cord. Refer to the following figure. Model #: _______ Serial #: ______________________ Date purchased: _________________________________ Figure 1: Location of serial number Important Safety Instructions 303207-110 rev A TRM 211 Owner's Manual 031914 EN-US - body only with crops.pdf 9 9 3/25/2014 12:55:21 PM 10 TRM 211 Owner's Manual Table of Contents Important Safety Instructions ........................... 1 Safety Precautions ................................................... 1 Safety Approval ....................................................... 4 Grounding Instructions ......................................... 5 Hazardous Materials and Proper Disposal ...... 5 Product Recycling and Disposal ......................... 6 Regulatory Notices for Cardiovascular Exercise Equipment ........................................ 7 Electrical Recommendations: 120 V Treadmills ............................................. 8 Obtaining Service ................................................... 9 Treadmill Safety Features................................ 12 Using the Safety Clip ............................................ 12 Using the Handrails ............................................... 13 Turning the Unit On and Off .............................. 14 Using the Reset Switch ....................................... 14 Location ................................................................... 14 303207-110 rev A TRM 211 Owner's Manual 031914 EN-US - body only with crops.pdf 10 Heart Rate Features ......................................... 15 Important Use and Safety Information ............ 15 Using the Touch-Sensitive Heart Rate Grips .................................................................. 17 Using SmartRate ....................................................19 Heart Rate Analysis .............................................20 Display Console ............................................... 21 More Information about the Center Display ............................................................. 23 More Information about the Workout Statistics and the Lower Display ..............24 Workout Options .............................................26 Choosing QUICKSTART ..................................... 27 Selecting a Program ............................................. 28 Cooling Down After a Workout ........................ 29 Pausing During a Workout or the Cool-Down Period ........................................30 Ending a Workout .................................................30 3/25/2014 12:55:21 PM Programs ......................................................... 32 Choosing a Program............................................. 32 Program Tips .......................................................... 33 Manual Program ................................................... 34 Weight Loss Program .......................................... 35 Interval Program ................................................... 36 Hill Climb Program ............................................... 37 Walk Program ........................................................ 37 Fun Run Program .................................................. 38 Advanced Programming and Troubleshooting ....................................... 39 Advanced Programming Tips ............................ 39 Selecting a U.S. Standard or Metric Display ............................................................ 40 Informational Displays ........................................ 41 Red Reset Button ..................................................42 Troubleshooting Error Codes ............................ 43 Troubleshooting Heart Rate Issues ................ 44 Table of Contents 303207-110 rev A TRM 211 Owner's Manual 031914 EN-US - body only with crops.pdf 11 Maintenance ................................................... 45 Inspection ............................................................... 45 Cleaning the Equipment..................................... 46 Storing the Chest Strap ....................................... 47 Checking the Alignment of the Running Belt ................................................... 47 Adjusting the Running Belt ............................... 49 Long-Term Storage ..............................................50 Precor Residential Equipment Limited Warranty ................................................... 51 11 3/25/2014 12:55:21 PM 12 TRM 211 Owner's Manual Treadmill Safety Features The treadmill is equipped with certain items that, when used properly, help sustain an enjoyable workout. These items include: Safety clip and magnetic safety key Handrails Power switch Important: Before exercising, review the safety instructions at the beginning of this manual (refer to Important Safety Instructions). Note: If the safety power switch trips, the treadmill does not retain your workout statistics. To resume exercising, take the following steps: 1. If needed, reattach the safety clip to your clothing and the magnetic safety key onto the display console. 2. Straddle the running belt. 3. Press QUICKSTART or select a program. Using the Safety Clip Attach the safety clip to your clothing before each workout, as shown in the following figure. A tug on the lanyard disengages the magnetic safety key and trips the safety power switch inside the display console that stops the running belt and ends your exercise session. 303207-110 rev A TRM 211 Owner's Manual 031914 EN-US - body only with crops.pdf 12 3/25/2014 12:55:21 PM 4. Hold onto a handrail while you step on to the running belt with the speed at or below 1 mph (1.6 kph). Using the Handrails To maintain your balance, always grasp a handrail when you step on or off the treadmill, and when you use the keypad. The treadmill is also equipped with touch-sensitive heart rate grips that you can use to measure your heart rate during your workout (refer to Heart Rate Features). Figure 2: Attaching the safety clip to your clothing Important: To prevent unauthorized use, remove the magnetic safety key and safety clip after your workout and store it in a safe place. The treadmill cannot operate unless the magnetic safety key is attached to the display console. Treadmill Safety Features 303207-110 rev A TRM 211 Owner's Manual 031914 EN-US - body only with crops.pdf 13 13 3/25/2014 12:55:21 PM 14 TRM 211 Owner's Manual Turning the Unit On and Off Using the Reset Switch To turn the unit On and Off, use the power switch located at the front of the unit, near the power cord connection. The following figure shows the location of the power switch. The treadmill contains a circuit breaker that trips if it detects overload conditions. To protect the lower electronic boards from damage, a red button, near the power switch, must be pressed to reset the circuit breaker (refer to Advanced Programming and Troubleshooting). Important: Always turn the treadmill OFF and unplug the treadmill when it is not in use. Do not leave children unsupervised around the equipment. Figure 3: Power switch location 303207-110 rev A TRM 211 Owner's Manual 031914 EN-US - body only with crops.pdf 14 Location To prevent damage to the lower unit, locate your treadmill away from heating ducts. For safety and maintenance purposes, it is important to keep the area around the treadmill open and free from encumbrances such as other equipment. Locate at least 40 inches (1 meter) away from walls or furniture on either side of the treadmill, and at least 80 inches (2 meters) away from objects behind the treadmill. 3/25/2014 12:55:21 PM Heart Rate Features Important Use and Safety Information Read the following before using the heart rate or SmartRate features. CAUTION: Before beginning any fitness program, see your physician for a thorough physical examination. Seek advice from your physician to learn the target heart rate appropriate for your fitness level. Your heart rate should never exceed 85% of your maximum aerobic heart rate. If it does, immediately slow down and adjust the ramp incline or resistance to return to your physical recommended target zone. Heart rate and SmartRate® features are available when you grasp both touch-sensitive heart rate grips. As long as the treadmill can detect your heartbeat, the heart icon continues to blink. If the treadmill does not detect your heart rate, the outline around the heart icon remains lit and does not blink. During a workout, a number representing your heart rate appears on the console. Heart Rate Features 303207-110 rev A TRM 211 Owner's Manual 031914 EN-US - body only with crops.pdf 15 Consult your physician before engaging in any vigorous exercise. Do not use the heart rate programs until authorized by your physician. Know your heart rate and your physician-recommended heart rate target zone. Individual heart rates vary according to several physiological factors and may not correspond directly with standardized guidelines. 15 3/25/2014 12:55:21 PM 16 TRM 211 Owner's Manual The calculation used for the heart rate target zone is (220 minus your age) multiplied by a percent and is controlled by the user increasing or decreasing the incline. For example: – Fat Burn program: (220 minus your age) multiplied by 65% – Cardio program: (220 minus your age) multiplied by 80% Additional information about calculating your heart rate is available later in this chapter (refer to Using SmartRate). If you prefer to use the touch-sensitive heart rate grips, grasp both touch-sensitive heart rate grips and wait five to ten seconds. Make sure both hands are moist. Note: When a signal is detected, a number appears in the HEART RATE display and indicates your heart rate. Always face forward on the treadmill and use the handrail for balance. Keep upper body movement to a minimum. Figure 4: Heart rate target zones 303207-110 rev A TRM 211 Owner's Manual 031914 EN-US - body only with crops.pdf 16 3/25/2014 12:55:21 PM Using the Touch-Sensitive Heart Rate Grips The treadmill console incorporates a heart rate receiver so that you can monitor your heart rate while exercising. If you grasp both touch-sensitive heart rate grips, your heart rate (in beats per minute) appears on the display. You can monitor your heart rate at any time during your workout if you grasp the touch-sensitive heart rate grips. When you enter your age during the setup prompts, the SmartRate display provides a visual cue that helps you stay within your preferred heart rate target zone. Heart Rate Features 303207-110 rev A TRM 211 Owner's Manual 031914 EN-US - body only with crops.pdf 17 Important: Enter your age when the treadmill prompts you. If you do not, the information on the SmartRate display will not be accurate. The touch-sensitive grips are located on the treadmill’s handlebars, as shown in the following figure. To allow the treadmill to monitor your heartbeat, place the palms of your hands directly onto the metal heart rate sensors on the grips. 17 3/25/2014 12:55:21 PM 18 TRM 211 Owner's Manual To ensure a more accurate heart rate readout, follow these tips: Grip the sensors with both hands. Wait at least 10 seconds for your heart rate to register. When gripping the sensors, do not grip tightly. Keep a loose, cupping hold. Holding the grips too tightly can affect the reading. As you work out, your perspiration will help transmit your heart rate signal. If you have difficulty using the touch-sensitive grips to determine your heart rate, try the sensors again later in the workout to see if you can obtain a heart rate signal. Figure 5: Touch-sensitive heart rate grips 303207-110 rev A TRM 211 Owner's Manual 031914 EN-US - body only with crops.pdf 18 3/25/2014 12:55:22 PM Using SmartRate Table 1. Heart rate target zones and SmartRate LEDs The SmartRate feature helps you monitor and maintain your heart rate in the target zone best suited to your specific needs. Heart Rate Zone Percent SmartRate Blinking Target Bars Lit Zone After you begin a workout, a blinking bar appears on the SmartRate display. The blinking bar indicates the current zone of your heart rate. Below 50 none First WARMUP 50 to 54 First Second WARMUP 55 to 59 Second Third FATBURN 60 to 64 Third Fourth FATBURN 65 to 69 Fourth Fifth FATBURN 70 to 74 Fifth Sixth CARDIO 75 to 79 Sixth Seventh CARDIO 80 to 84 Seventh Eighth CARDIO 85 to 87 Eighth Ninth PEAK Above 87 Ninth Tenth HIGH Important: To use the SmartRate feature, you must choose a program and enter your age during the setup phase of your exercise session. The following table shows the percentages used in calculating the heart rate target zones. While your heart rate remains within these zones, the corresponding bar blinks and provides a visual cue. The calculation used to determine your maximum aerobic heart rate is (220 minus your age). When you multiply it by the percent indicated in the table, you can understand the relationship between the blinking SmartRate bar and your target heart rate. Heart Rate Features 303207-110 rev A TRM 211 Owner's Manual 031914 EN-US - body only with crops.pdf 19 19 3/25/2014 12:55:22 PM 20 TRM 211 Owner's Manual The SmartRate indicator lights do not appear when: You use the QUICKSTART button to start your workout. You do not enter your age before starting your workout. You do not maintain your grasp on both touch-sensitive heart rate grips for at least ten seconds. 303207-110 rev A TRM 211 Owner's Manual 031914 EN-US - body only with crops.pdf 20 Heart Rate Analysis Every time you complete a program using the touch-sensitive heart rate grips, your average heart rate appears along with your workout summary statistics. The heart rate analysis is based on all of the heart rate measurements the treadmill is able to complete while you are exercising. 3/25/2014 12:55:22 PM Display Console The following diagram and table describe the main components of the treadmill console. Use the console controls to enter your workout session selections, to affect what appears on the display, and to establish your incline and speed preferences. SMARTRATE DISPLAY: Blinking horizontal bars appear when the SmartRate feature is activated. Use the SmartRate display to monitor your heart rate and maintain it in your target zone (refer to Using SmartRate). PROGRAMS: Every time you press this key the display cycles through the following available workouts: • Manual (P1) • Weight Loss (P2) • Interval (P3) • Hill Climb (P4) • Walk (P5) • Fun Run (10K; P6) These programs are described in more detail later in this manual (refer to Programs). After you have selected a program, its profile appears in the center display and its program number appears just below the profile. Display Console 303207-110 rev A TRM 211 Owner's Manual 031914 EN-US - body only with crops.pdf 21 21 3/25/2014 12:55:22 PM 22 TRM 211 Owner's Manual QUICKSTART: Press QUICKSTART to start your workout immediately using the Manual Program (refer to Choosing QUICKSTART). ENTER: Use this key to confirm responses to specific prompts. INCLINE: Press and hold the INCLINE arrow keys to increase or decrease the incline from 0% to 15% in 0.5% increments. Changes to the incline are not immediate. It takes time for the lift to reach the target incline shown on the display. The incline setting affects the column height in the program profile (refer to More Information about the Center Display). The INCLINE display shows the new setting. SPEED: Press and hold the SPEED arrow keys to increase or decrease the running belt speed in 0.1 increments from 0.5 to 12 mph (0.8 to 20 kph). STOP: A firm tap on the red STOP key slows the running belt to a stop and the treadmill enters pause mode. To resume, press QUICKSTART or the SPEED up arrow key. To reset to the banner, hold the red STOP key for a few seconds or press it two more times (refer to Pausing During a Workout or the Cool-Down Period). CENTER DISPLAY: Initially shows the banner. It changes to the program profile when you select a program or press QUICKSTART. A blinking column in the profile indicates your position. WORKOUT STATISTICS: Your heart rate, calories burned, distance traveled, and workout time appear along the upper portion of the display. LOWER DISPLAY: While you exercise, three sets of numbers shown information about your session. When you complete a program, the average incline, average pace, and average speed appear as part of the workout summary. When you press the arrow keys, a target speed appears in the display. The running belt speed changes to meet the target, but the change occurs gradually so the transition is smooth. 303207-110 rev A TRM 211 Owner's Manual 031914 EN-US - body only with crops.pdf 22 3/25/2014 12:55:22 PM More Information about the Center Display The center display shows the program profile and other information pertinent to your workout. In most programs, the incline setting affects the column height as shown in the following figure. The profile raises or lowers according to which INCLINE arrow key is pressed. As you continue your exercise session, a blinking column indicates your position in the program. If the ) profile is only one row in height, then markers ( appear occasionally and provide a sense of movement through the program. Note: The center display provides a matrix consisting of 8 rows and 20 columns. You can determine the duration of each column in a program (if the workout time is less than 20 minutes) by dividing the program’s time limit by 20. If the workout time is greater than 20 minutes, each column represents 1 minute. Figure 6: Column height (1) and incline (2) settings Display Console 303207-110 rev A TRM 211 Owner's Manual 031914 EN-US - body only with crops.pdf 23 23 3/25/2014 12:55:22 PM TRM 211 Owner's Manual More Information about the Workout Statistics and the Lower Display The lower display presents the program name when you first select a program. During an exercise session, the lower display consists of three windows, which automatically provide specific information. The two outside windows display your incline and speed. The center window shows your pace. The numbers that appear relate to your workout statistics and are described below. On occasion, the lower display becomes a message bar and shows additional information depending on user selections and program interludes. 303207-110 rev A TRM 211 Owner's Manual 031914 EN-US - body only with crops.pdf 24 24 Upper Display Workout Statistics: HEART RATE, CALORIES, DISTANCE, and TIME HEART RATE—Your heart rate appears in the HEART RATE display if you are using the touch-sensitive heart rate grips (refer to Heart Rate Features). CALORIES—Tracks the cumulative number of calories being burned. DISTANCE—Tracks linear distance in either miles or kilometers. The distance is calculated based on your speed. TIME—Displays the workout time in minutes and seconds; however, when you exceed 60 minutes during a single workout, the TIME display converts to hours and minutes. For programs with a workout time limit, the TIME display shows the time remaining. When you use QuickStart or select a workout time of zero (no time limit), the TIME display shows the elapsed time. 3/25/2014 12:55:22 PM Lower Display Workout Statistics: INCLINE, PACE, and SPEED INCLINE—Displays the percentage of incline during your workout. The INCLINE arrow keys affect the lift and let you set an incline between 0% and 15%. The values displayed can change in 0.5% increments. SPEED—Displays the running belt speed in miles per hour (mph) or kilometers per hour (kph). The running belt speed ranges from 0.5 and 12 mph (0.8 to 20 kph) and can be changed in 0.1 increments using the SPEED arrow keys. PACE—Displays your target speed in minutes and seconds per mile (or kilometer). For example, the number 4:23 indicates that the pace (speed at which you are moving) is 4 minutes and 23 seconds per mile. When you press the SPEED arrow keys, the pace display changes accordingly (0.1 mile per key press). Note: If your pace is greater than 60 minutes per mile, the display indicates hours and minutes (hr:mm). Display Console 303207-110 rev A TRM 211 Owner's Manual 031914 EN-US - body only with crops.pdf 25 25 3/25/2014 12:55:22 PM 26 TRM 211 Owner's Manual Workout Options CAUTION: Before beginning any fitness program, see your physician for a complete physical examination. Know your physician-recommended heart rate target zone. If you want … Then press ... To start exercising immediately QUICKSTART (refer to Choosing QUICKSTART) To select your workout PROGRAMS (refer to from a list Programs) Important: Before exercising, review the safety instructions at the beginning of this manual (refer to Important Safety Instructions). 1. Insert the magnetic key into the display console. 2. Straddle the running belt. 3. The message CHOOSE QUICKSTART OR PROGRAM TO BEGIN scrolls across the lower display. 4. Hold on to a handrail while stepping on to the treadmill. 5. Face the display and straddle the running belt by placing your feet on the trim strips provided. 6. Attach the safety clip to your clothing. 7. Grip a handrail with one hand to steady yourself. 8. Select one of the following options. 303207-110 rev A TRM 211 Owner's Manual 031914 EN-US - body only with crops.pdf 26 3/25/2014 12:55:22 PM Choosing QUICKSTART QUICKSTART applies the following defaults: Prompts Default Value Program Manual 1. While the banner scrolls, press QUICKSTART to enter the Manual Program as a guest user. When you use the QUICKSTART key, you enter the MANUAL program as a guest user. There is no time limit and weight and age are set to default values. Each column in the program’s profile represents one minute. Workout Options 303207-110 rev A TRM 211 Owner's Manual 031914 EN-US - body only with crops.pdf 27 Time Unlimited Weight 150 lb (68 kg) Age 35 2. Hold onto a handrail and straddle the running belt. BELT STARTING scrolls across the display. A 3-second countdown appears in the upper display, and then the running belt starts moving. 3. Step on to the running belt with the speed at or below 1 mph (1.6 kph) and begin exercising. Use the SPEED arrow keys to increase or decrease the speed of the running belt. To use the SmartRate feature, you need to specify your age (refer to Selecting a Program). 27 3/25/2014 12:55:22 PM TRM 211 Owner's Manual Selecting a Program 1. While the banner prompt scrolls, continually press the PROGRAMS key to review the list of programs (refer to Programs). 2. ENTER TIME appears in the display and the Guest bar is highlighted which indicates that your preferences in workout time, weight, and age will not be saved to memory. Use the arrow keys to select a program time between 0 and 90 minutes. Accept the displayed entry by pressing ENTER. Each column in the program’s profile represents one minute. 303207-110 rev A TRM 211 Owner's Manual 031914 EN-US - body only with crops.pdf 28 28 3. Continue through the setup phase and enter your weight (23—350 lbs/10—159 kg) and then your age (10—99). Note: To change a value (program, weight, or age) that you have already entered press STOP/HOLD TO RESET or wait 30 seconds to return to the banner. Select a program and reenter the appropriate values. 4. Hold onto a handrail and straddle the running belt. BELT STARTING scrolls across the display. A 3-second countdown appears, and then the running belt starts moving. 5. Step on to the running belt with the speed at or below 1 mph or 1 kph and begin exercising. Use the SPEED arrow keys to increase or decrease the speed of the running belt. Important: As a GUEST user, you can press QUICKSTART at any of the setup prompts: ENTER TIME, ENTER WEIGHT, or ENTER AGE. Default settings are applied to any prompts you skipped and the running belt starts moving after a 3-second countdown. 3/25/2014 12:55:22 PM Cooling Down After a Workout Incorporate a cool-down period into your workout to help lower your heart rate and minimize muscle stiffness or soreness. When you complete a program with a time or distance limit, you automatically enter a 5-minute cool-down period. The running belt slows by about 20% and the incline returns to 0% grade and the Manual Program appears. To readjust the speed or incline, press the SPEED or INCLINE arrow keys. A workout summary appears at the end of the cool-down period (refer to Ending a Workout). To prematurely end the cool-down period, do the following: 1. Grasp a handrail with one hand. 2. Press the red Stop key with your other hand. The treadmill enters pause mode. 3. Press the red Stop key again to view the workout summary. 4. Press the red Stop key a third time to return to the banner. Important: Hold on to a handrail extension. Step off the treadmill when the lift has stopped moving. Important: If you exit a program before completing it, the cool-down period is bypassed. Workout Options 303207-110 rev A TRM 211 Owner's Manual 031914 EN-US - body only with crops.pdf 29 29 3/25/2014 12:55:22 PM 30 TRM 211 Owner's Manual Pausing During a Workout or the Cool-Down Period Press the red Stop key to pause anytime during a workout or during a cool-down period. The pause mode has a 10-minute time limit. The display posts the time and counts down the minutes that remain. If you do not resume exercising within the time limit, the display returns to the banner. 1. To pause, press the red STOP key. The display indicates the amount of time remaining in pause mode. 2. To resume exercising from pause mode, press QUICKSTART or the SPEED up arrow key. MPH or KPH appears briefly in the SPEED display and indicates whether the display is showing data in U.S. standard or metric measurements. 3. Adjust the running belt speed using the SPEED arrow keys. 303207-110 rev A TRM 211 Owner's Manual 031914 EN-US - body only with crops.pdf 30 Ending a Workout CAUTION: Hold on to a handrail when you near the end of your exercise session. The incline automatically recalibrates to a 0% grade. If the lift is moving, wait until it stops before stepping off the treadmill. The running belt stops when you complete the automatic cool-down period and you hear a series of audible beeps. After the running belt stops, time stops accruing. The workout summary shows your cumulative workout statistics including warm-up and cool-down periods. You can review your workout statistics for a few seconds before the display automatically resets to the banner. The cumulative statistics in calories, distance and time appear and blink in the upper display fields. Your average heart rate also appears. Along the lower display, the average incline, average pace, and average speed you maintain during your workout display. 3/25/2014 12:55:22 PM If you choose to exercise with no set time limit, you must manually end a program by pressing the red STOP key. You can also press the SPEED down arrow until the speed is reduced to zero and the running belt stops. To stop the running belt or end an exercise session at any time, do the following: 3. Press the red STOP key again to view the workout summary. 4. Press the red STOP key a third time to return to the banner. Important: Always turn Off and unplug the t