1
11015 47th Avenue W, Mukilteo, WA 98275
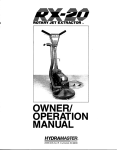
RX-20 / CMX-20
Table of Contents
Introduction . . . . . . . .
Machine Specifications
Assembly Instructions .
Operation . . . . . . . . . .
Cleaning Information . .
Machine Maintenance .
Machine Parts . . . . . .
Repair . . . . . . . . . . . .
Troubleshooting . . . . .
Limited Warranty Plan .
Page
.
.
.
.
.
.
.
.
.
.
.
.
.
.
.
.
.
.
.
.
.
.
.
.
.
.
.
.
.
.
.
.
.
.
.
.
.
.
.
.
.
.
.
.
.
.
.
.
.
.
.
.
.
.
.
.
.
.
.
.
.
.
.
.
.
.
.
.
.
.
.
.
.
.
.
.
.
.
.
.
.
.
.
.
.
.
.
.
.
.
.
.
.
.
.
.
.
.
.
.
.
.
.
.
.
.
.
.
.
.
.
.
.
.
.
.
.
.
.
.
.
.
.
.
.
.
.
.
.
.
.
.
.
.
.
.
.
.
.
.
.
.
.
.
.
.
.
.
.
.
.
.
.
.
.
.
.
.
.
.
.
.
.
.
.
.
.
.
.
.
.
.
.
.
.
.
.
.
.
.
.
.
.
.
.
.
.
.
.
.
1
2
3
4
6
8
11
21
22
24
Machine Serial Number _______________________
Copyright © 1998
HYDRAMASTER© Corporation
Mukilteo, Washington
182-006
No part of this manual may be reproduced or used in any form or by any means (i.e. graphic, electronic, photocopying or
electronic retrieval systems) without the express written permission of the HYDRAMASTER© Corporation. All rights reserved.
Revised September 10, 1998
RX-20 / CMX-20
Page 1
Congratulations!(
(!(
(
The RX-20's weight distribution and
rotary motion enable the technician to
maneuver the unit easily with less
fatigue and without back strain.
You now own a piece of equipment
that incorporates the latest in carpet
cleaning technology.
The RX-20's
features will almost certainly increase
the productivity of you and your
business, while decreasing the fatigue
factor that may have prevented you
from going after some of the large
cleaning jobs that are available to
carpet cleaners and maintenance
professionals today. With competition
as strong as it is in most communities,
you have invested in not only a
cleaning tool, but a marketing tool that
will enhance your professional image in
every
way.
The
RX-20
is
REVOLUTIONARY. Your foresight in
purchasing this ultimate "cleaning
machine" will be rewarded with the
knowledge that you care enough to
give your customer the maximum
cleaning process available.
The RX-20's electric motor drives its
precision transmission which, in turn,
rotates the star assembly. Cleaning
solution is injected through the center
of the gearbox shaft directly to the five
spray jets. Soiled solution is then
extracted from the carpet by five
cleaning heads and drawn through the
aluminum exhaust manifold to your
cleaning system's recovery tank.
NOTE: The operating temperature and
pressure of the cleaning solution as
well as the vacuum power depends
entirely on the type of cleaning system
you use.
Using the RX-20 in your business will
turn you into a professional carpet
cleaning operator, rather than a
professional laborer.
Once again, congratulations to another
cleaning professional who will not wait
for tomorrow, and will not have to
compete against the RX-20.
The
competition will have to try and
compete with you!
An Evolution
That Had To Happen
Your new RX-20 has been precision
engineered to bring you to the state-ofthe-art in carpet cleaning. In the past,
a wand technician had to supply all the
pressure and motion to do the cleaning.
HydraMaster Corporation
Construction
The base, exhaust manifolds, handle,
gearbox housing and cleaning heads
are all cast or molded aluminum. Other
parts are either metal or high impact
plastic.
9/10/98
RX-20 / CMX-20
Page 2
Machine Specifications
RX-20
CMX-20
HIGH SPEED RX-20
HIGH SPEED CMX-20
Length:
27"
23"
Base Width:
15"
15"
Height:
45"
43"
Weight:
75 lbs.
70 lbs.
Motor:
115 V, ¾ HP
115 V, ½ HP TEFC
1725 RPM Input
90 RPM Output
1725 RPM Input
130 RPM Output
Permanently Lubricated
Helical Gear Drive
14 oz.
14 oz.
Gearbox:
Oil Capacity:
HydraMaster Corporation
9/10/98
RX-20 / CMX-20
Page 3
Assembly Instructions
To prepare your machine for use,
follow these instructions:
a) Remove the machine from the
packaging. Inspect the machine
carefully for any damage that may
have occurred during shipping. If
any oil spillage is noted be sure to
check the gearbox lubricant level
(see instructions).
b) Now attach the star assembly to
the base. Lean the machine back
and rest it on the handle. Thread
the star assembly onto the exposed
shaft remembering to go in a
counter-clockwise direction.
c) Important:
Remove the solid
shipping plug from the top of the
gearbox and replace it with the
vented plug provided before
operating the machine.
If you purchased a High Speed RX-20,
it may require assembling if it was
shipped in two separate boxes.
To assemble:
a) With the three bolts provided,
attach the handle to the base using
a 9/16" wrench (see illustration to
right).
b) Next attach the stainless steel hose
to the rotary union using 7/16" and
1/2 " wrenches.
c) Next attach the 2" vacuum hose to
the base and handle using the hose
clamps provided.
d) Next plug the male and female
electrical connections together.
Your machine is now ready to
operate.
HydraMaster Corporation
9/10/98
RX-20 / CMX-20
Page 4
Operation
quick connect is required. The
vacuum inlet requires a two inch ID
vacuum hose for proper air flow
with a truck mounted system.
IMPORTANT: The vacuum hose
must be in good condition to
ensure maximum airflow. If you do
not have a 440 female quick
connect and can not find it locally,
it can be ordered from the
HydraMaster Parts Department.
Call (206)775-7276 and request
part # 052-051 (440 QC).
Preparation
1. Handle Adjustment: Loosen the
adjustment knob located below the
RX-20
label
(turn
counterclockwise to loosen, clockwise to
tighten). Adjust the handle to a
comfortable height.
Several
adjustments may be needed before
a desirable operating position is
found.
NOTE:
Most technicians have
found better control and less
fatigue when the handle is in a low
position just around the hip line.
There is an ideal position for each
person which will ensure the RX-20
will do the work instead of you.
2. Solution
and Vacuum Hose
Hookups: Your RX-20 is equipped
with 440 male quick connect for
the solution hose hookup and a
two inch OD vacuum hose inlet
(refer to the above illustration). A
solution hose with a 440 female
HydraMaster Corporation
3a. Electrical Cord Hook Up (Regular
RX-20): The 50 foot electrical cord
on your RX-20 is a detachable
three-prong grounded line requiring
a three-prong, 15 amp receptacle.
A three-prong to two-prong
adapter may be used, providing its
ground wire is properly attached to
a grounded terminal.
CAUTION: Do not, under any
circumstances, remove the ground
prong from your RX-20 power
cord. Serious injury or death may
result.
To connect the power cord to the
unit, insert the male twist-lock plug
(from the unit) into the female end
(on the power cord) and twist until
they are securely locked together.
3b.
Electrical Cord Hook Up
(High Speed RX-20): The
50 foot electrical cord on
your
RX-20
is
a
permanently
attached,
three-prong grounded line
requiring a three-prong,
15 amp receptacle. A
9/10/98
RX-20 / CMX-20
three-prong to two-prong
adapter may be used
providing its ground wire
is properly attached to a
grounded terminal.
CAUTION: Do not, under any
circumstances, remove the ground
prong from your RX-20 power
cord. Serious injury or death may
result.
Operating Instructions
There are
4. Control Functions:
control triggers located on each
side of the handle under the rubber
hand grips. As you operate the
RX-20, the trigger on your right
hand side controls the electric
motor that drives the cleaning
heads. On the left hand side, the
trigger controls the high pressure
solution spray.
The air flows
constantly while the RX-20 is in
operation.
Page 5
To move forward and backward,
position the handle so that the unit
remains stationary, then push
forward or pull back.
To familiarize yourself
with
your
RX-20,
practice on an open
carpeted area. Depress
both the solution trigger
and motor trigger and
move the RX-20 slowly
in a three to five foot
arc, as shown in the
cleaning patterns on the
following page.
CAUTION:
Do not
operate your RX-20 on
dry carpets.
The
friction generated by
the revolving cleaning heads may
damage fibers in the carpet.
Once you have become familiar with
the speed and movement of the
machine, practice making it hover in
one spot. (The hovering maneuver is
useful for removing stubborn stains, as
well
as
removing
furniture
indentations.)
Do not tilt machine sideways while
moving forward and backward. A loss
of control may result in damage to the
unit or location.
5. Maneuvering Your RX-20: Your
RX-20 maneuvers like a rotary floor
machine. To move the RX-20 to
the right, lift the handle slightly.
To move it to the left, push down
on the handle slightly. The more
you lift or lower the handle, the
faster the RX-20 will move.
HydraMaster Corporation
9/10/98
RX-20 / CMX-20
Page 6
Cleaning Information
Cleaning Patterns
For
regular
carpet
cleaning,
use
an
overlapping arc pattern
three times over the
same area (two passes
with solution and one
pass for drying). When
cleaning carpets, first
Arc
clean in a circular
pattern, then use the
overlapping arc pattern
to dry the area.
(NOTE: Dirtiest areas
may require two or
more cleaning passes.)
Using either pattern,
you should develop a
comfortable rhythm. To
Circular
obtain
maximum
performance from your
RX-20, move it slowly and deliberately
with a 50% overlap, giving it time to
clean and extract. (Unlike a manual
wand, the RX-20 is doing the work you
had to do in the past.) A steady pace
rather than a frenzied one will increase
efficiency and production and decrease
fatigue.
The Following Cautions Should
Be Observed While Cleaning:
1. DO NOT operate your RX-20 over
metal floor moldings. Damage to
both the molding and the cleaning
head will result.
hardwood floors.
3. DO NOT operate your RX-20 over
loose or unraveled carpet seams.
The cleaning head may catch and
cause further damage.
4. DO NOT operate
concrete floors.
sharp edges on
heads that will
fibers.
your RX-20 on
It will develop
the extraction
damage carpet
5. DO NOT clean over the edge of a
loose carpet. Instead, clean only
up to the edge. Damage may
occur should the extraction heads
catch the loose carpet.
Special Information
During the cleaning of some plush
carpets you may notice a "pilling"
effect. With an RX-20, loose yarns
form balls and are kicked aside as the
cleaning heads revolve. This is normal
when aggressive cleaning or even
normal vacuuming takes place, as
evidenced by a number of dead, loose
yarns in the vacuum cleaner bag.
These loose yarns, in most cases, are
short staple yarns or filler yarns used to
give the carpet a denser appearance.
Because
your
RX-20
weighs
approximately 90 pounds and rests on
five four-inch cleaning heads, the yarns
are not sucked up into the vacuum
heads as they are with a vacuum
cleaner or old-style cleaning wand.
2. DO NOT operate your RX-20 on
HydraMaster Corporation
9/10/98
RX-20 / CMX-20
CAUTION: On older, rubber backed,
glued down carpets that may be delaminating with age, the RX-20 may
cause further de-lamination. When in
doubt, DO NOT use your RX-20.
Cleaning Hints
Page 7
The RX-20 has been very successful in
restoring badly matted traffic lanes in
front of doorways and sofas. Even
pivot areas can be brought back to life
again, in most cases. "Cornrowing" in
hallways can also be eliminated with
minimal effort.
A. Most cleaners customarily clean
their way out of an area or room.
With the RX-20, it is possible to
clean into an area or room, as
shown in the illustrations below, so
that the hoses are dragged behind
you during the cleaning process
rather than kicked out of the way
as you back out of an area. The
"cleaning into" method works
especially well in hallways or
confined areas.
B.
The RX-20 is a very aggressive
carpet cleaning power head and
will leave the carpet with a freshlycleaned appearance. The carpet
should be brushed or groomed
after the cleaning process to
remove any swirl marks left
behind.
HydraMaster Corporation
9/10/98
RX-20 / CMX-20
Page 8
Machine Maintenance
Good care and regular maintenance of
your RX-20 will result in a long,
dependable life for the unit. Keep in
mind that your RX-20 will be in full
view of your customer. An RX-20 that
is dirty and unkempt in appearance can
cause your image to suffer. You are
offering your customer the latest in
cleaning technology. Therefore, it is
important that your company image
reflect your desire to give your
customer THE BEST.
necessary.
4. Remove the in-line solution filter
screen by unscrewing the 7/8 inch
hex nut protruding from the back
of the handle. Rinse under water
to remove debris. If necessary,
use a toothbrush to remove
stubborn particles.
The surface finish on your RX-20 is a
durable, baked on epoxy coating and is
easily cleaned with a damp cloth. To
further protect the finish, a light coat of
good silicon base polish should be
applied periodically.
Lubrication and maintenance play a key
role in the life of your RX-20. Hence,
the following daily and periodic
maintenance steps must be followed.
Train yourself to maintain your unit on
a regular schedule until it becomes
habitual.
Daily Maintenance
5. Check the jet spray for evenness.
1. Inspect the power cord for cuts,
breaks, etc. Repair as needed.
2. Inspect the vacuum hoses for
breaks or tears. Repair or replace
as necessary.
3. Visually inspect your RX-20 for
water leaks, damage to the
cleaning heads, etc. Repair as
HydraMaster Corporation
An uneven spray will cause
improper flow of the cleaning
solution.
9/10/98
RX-20 / CMX-20
6. Remove the
cleaning
head.
It
unscrews in
the
same
direction
it
turns during
operation (or
clockwise
when looking
at it from the underside). Once
you have loosened the assembly,
spin it off with your hands. If the
cleaning head is difficult to remove,
you may use a ¾ inch socket
wrench on the exposed center nut.
To prevent the gearbox from
turning, the output shaft will
accept a e inch wrench just below
the rotary union.
Wash the
cleaning
heads
and
shroud
assembly with a garden hose,
being careful not to wet the
electric motor assembly. Clean any
lint build-up from the cleaning
heads and vacuum hoses (lint
build-up will restrict proper airflow
and prolong drying time).
Ë CAUTION Ë
7. Clean off any debris that may have
accumulated on the gearbox shaft
or the inside threaded bore of the
hub. An accumulation of debris
here, if not removed, may damage
the gearbox oil seal. This will
result in loss of oil in the gearbox.
If the gearbox is operated without
oil, severe damage may occur.
HydraMaster Corporation
Page 9
8. Lubricate the felt vacuum seal on
top of the hub with a quality, 30
weight SAE motor oil. Also, put a
few drops into the hub threads.
9. Coat the shaft with Pennz-Guard or
a similar lubricant. Reinstall the
vacuum head assembly onto the
shaft by rotating it counterclockwise.
IMPORTANT: While rotating the
vacuum head assembly in the
counter-clockwise position, make
sure that it spins freely all the way
down. If it begins to require the
slightest finger tip pressure,
unscrew it and brush off the
threads. All it takes is the slightest
grain of dirt or sand to obstruct the
threads. If you turn too far onto a
grain of dirt, the hub may become
locked onto the shaft of the
gearbox.
9/10/98
Page 10
RX-20 / CMX-20
Periodic Maintenance
Transport And/Or Storage
Regular RX-20 only:
Check the oil in the gearbox. The
unit must be on a level surface to
get an accurate reading. Change
the oil in the gearbox every 100
hours. Use 80-90 weight gear oil
to reduce friction and allow the
gearbox to run at a cooler
temperature. With the unit level,
drain the oil. Next fill the gearbox
with new oil at the oil port on the
front until it dribbles out of the
inspection port.
NOTE: Normal wear and tear on
your new gearbox will cause small
amounts of metal splinters to rub
loose during the first 10 hours of
use. Therefore, we recommend
that you change the oil after 10
hours, and after that every 100
hours.
Whenever your RX-20 is transported or
stored, it is recommended that the
cleaning head be removed.
The
machine will then sit flat on the floor
and remain more stable, especially
during transport.
High speed RX-20:
Check the oil the gearbox. Check
the oil level in the gearbox on a
monthly basis.
This is a
permanently lubricated gearbox.
You do not need to change the oil.
However, maintaining the proper oil
level is important. To check the oil
level, remove the vent plug and
look into the gearbox. Turn the
star until you can see the
inspection hole in the gear. With
the RX-20 sitting flat on a table or
the floor, the oil level should be up
to, but not above, the middle of
the gear. If oil needs to be added,
use a quality 80-90 weight gear oil.
NOTE: When checking the oil level
in the gearbox, you can use a
toothpick as a dip stick. The oil
level should read dth of an inch.
HydraMaster Corporation
Freeze Warning And Protection
Your RX-20 can sustain damage from
freezing, as can any equipment that
functions with the use of water. Care
must be taken to protect this tool from
freezing just as you do your other
equipment. To protect it from freezing,
simply blow air from a gas station air
hose through the solution quick
connect with the valve open. This will
blow all water from the valve, solution
line, rotary union and jet assembly.
Open and close the valve several times
to ensure that all water is removed.
Parts And Assemblies
HydraMaster has every part in stock.
For parts ordering or servicing call:
Parts Department at (425) 775-7276 or
Service Department at (425) 775-7275
Check for a registered HydraMaster
Service Center in your area.
9/10/98
RX-20 / CMX-20
Page 11
Regular Base Assembly
HydraMaster Corporation
9/10/98
RX-20 / CMX-20
Page 12
Regular Handle Assembly
HydraMaster Corporation
9/10/98
RX-20 / CMX-20
Page 13
TWIST-LOCK PLUG
WIRING DIAGRAM
VALVE ASSEMBLY
Item No. 75
Item No. 85
Regular RX-20 Parts List
ITEM
1
2
3
4
5
6
7
8
9
10
11
12
13
14
15
19
20
21
PART NO
DESCRIPTION
000-143-132
000-081-001
000-041-026
000-081-001
000-052-002
000-052-276
000-068-175
000-052-296
000-106-014
000-107-091
000-106-001
604-052-007
000-143-166
000-052-288
000-174-049
000-143-118
000-015-066
000-141-001
Screw, 10-24 x ¾" HHC s/s
Label, RX-20 Machine (3 pc set)
Cover, RX-20 Motor
Label, RX-20 Machine (3 pc set)
2MA - 2UFS
Rotary Union, c" NPT
Hose, Solution Valve to Rotary Union
Nipple, Brass RX Gearbox Extention
Plug, RX-20 Gearbox Vent
RX-20 Gearbox
Plug, c" Brass
RX-20 Electric Motor Assembly
Screw, 10-24 x d" BTN HD Cap s/s
Coupler, c" Machined Rotary Union Fitting
Washer, 5/16" s/s Flat
Screw, #8 x ½" HXWSHD SM
Bracket, RX-20 Hood Wrinkle Black
Axle, 5½" Skid
HydraMaster Corporation
QTY
2
1
1
1
1
1
1
1
1
1
1
1
14
1
3
2
1
1
9/10/98
RX-20 / CMX-20
Page 14
ITEM
PART NO
DESCRIPTION
QTY
22
23
24
25
26
27
28
29
30
31
32
33
34
35
36
37
38
39
40
41
Optional:
000-020-005
000-177-002
000-107-096
000-143-018
000-097-009
000-154-013
000-068-034
000-041-017
000-143-164
000-006-008
000-141-010
000-143-142
000-078-108
000-143-114
000-107-0221
000-105-008
000-057-047
000-052-080
000-052-089
000-076-037
000-076-052
000-076-058
000-143-158
000-094-009
000-064-012
000-068-174
000-143-148
000-107-089
000-094-034
000-015-078
000-061-001
000-061-016
000-081-001
000-103-014
000-061-015
000-141-002
Collar, ½" Set
Wheel, 5" Rubber
Handle Arc
Screw, d-16 x 1" HHC
O-Ring, Cast Gearbox Shaft
Spacer, 1" RX-20 Gearbox Shaft
Hose, 2" Black Vacuum
Cover, Sight-Side Port
Screw, 5/16-18 x 2" BTN HD Cap s/s
Base, RX-20 Side Port
Axle, RX-20 Front Skid
Screw, 5/16-18 x ¾" BTN HD Cap s/s
Kit, Roto Shroud Bumper and Rivet
Screw, 10-24 x ½" FHM Phillips s/s
Hub with Ring, Single Lead Thread
Plate, Cast RX-20 Base - Seal
Gasket, RX-20 Felt Hub
Nipple, c" x 4" Brass
Elbow, c" Brass Female
Jet, H cVV 80015 SS - STD
Jet, 1) 2 Piece Set Twist Out
Jet, 1) 2 Piece Brass #8001
Screw, 5/16-18 x 1¼" HHC s/s
Nut, ¼-20 s/s Nylock
Head, New RX Skid Assembly
Hose, Vac Hub/Skid
Screw, 5/16-18 x ½" HHCS s/s
Heat Treated Star, s/s
Nut, 10-24 s/s Nylock
Bracket, RX-20 Hood Support Complete
Handle, Foam Grip
Handle, RX-20
Label, RX-20 Machine (3 pc set)
Pin, c x ¾ Roll
Knob, Adjusting
Rod Assembly, RX-20 Handle Adjusting
6
4
2
4
1
1
3 Ft
1
2
1
1
8
1
4
1
1
1
5
5
5
5
5
5
5
5
5
5
1
2
1
2
1
1
1
1
1
42
43
44
45
46
47
48
49
50
51
52
53
54
55
HydraMaster Corporation
9/10/98
RX-20 / CMX-20
ITEM
PART NO
60
000-020-004
62
000-103-015
63
000-103-012
64
000-107-101
65
000-094-030
66
000-107-097
67
000-139-006
68
000-103-013
70
000-162-001
71
000-167-010
72
000-107-103
73
000-157-032
74
000-143-048
76
000-178-004
77
000-108-012
78
000-094-021
79
000-052-050
80
000-052-071
81
000-049-033
82
000-052-301
83
000-094-008
84
000-167-009
85
000-169-058
86
000-052-001
87
000-143-005
88
000-143-002
89
000-041-013
90
000-105-018
91
000-140-001
92
000-143-167
93
000-141-009
94
604-051-003
95
000-052-059
Not Shown:
000-094-036
HydraMaster Corporation
DESCRIPTION
Page 15
QTY
d" Set Collar
Pin, 5/32 x 1" Roll
Pin, ¼ x f "Clevis
Plunger
Nut, Adjusting
Link
Ring, e" Snap
Pin, 3/32 x ½" s/s Cotter
Tie Wrap, 4" Nylon
Trigger, RX-20 Power
Trigger, Pivot
Switch, Micro
Screw, 6-32 x 1" Pan Head
Cord, 14/3 x 50' Gray - Power
Protector, Power Cord Relief Grip
Wire Nut, Yellow
Quick Connect, 440 Male with Viton
Nipple, ¼ Brass Hex
Filter, ¼" Inline Y
Elbow, ¼" Male x ¼" Male
Nut, ¼ - 20 Hex
Trigger, o/s RX-20 Brass Solution Valve
Valve, s/s HM Solution
2M - 2UFS
Screw, ¼-20 x 1¾" HHC
Screw, ¼-20 x 1" HHC s/s
Cover, Handle Access
Plate, RX-20 Serial ID
Rivet, AB4 - 3A Pop
Screw, 10-24 x 1¼" BTN HD s/s
Rod, RX-20 Handle Pivot
Internal Wire Harness
Bushing, ¼M x cF Brass
1
1
4
2
2
1
4
2
2
1
1
1
2
1
1
1
1
1
1
1
1
1
1
1
2
1
1
1
2
1
1
1
1
Nut, ½" NPT Pipe Plastic
Used with Item No. 77
1
9/10/98
Page 16
RX-20 / CMX-20
High Speed Handle Assembly
HydraMaster Corporation
9/10/98
RX-20 / CMX-20
Page 17
High Speed Base Assembly
HydraMaster Corporation
9/10/98
RX-20 / CMX-20
Page 18
RX-20 High Speed Parts List
ITEM
1
2
5
7
8
9
10
11
12
13
14
15
16
17
18
19
20
21
22
23
24
25
26
27
28
29
30
31
32
33
34
35
36
PART NO
DESCRIPTION
000-015-066
000-015-139
000-068-040
000-139-009
000-139-010
000-141-004
000-141-005
000-141-006
000-020-004
000-041-013
000-052-050
000-052-071
000-061-001
000-061-017
000-081-001
000-068-175
000-094-010
000-094-021
000-107-096
000-107-103
000-108-012
000-108-014
000-143-002
000-143-048
000-143-336
000-157-032
000-167-009
000-167-010
000-177-001
000-178-004
000-049-033
000-052-001
000-052-059
Bracket, RX-20 Hood Wrinkle Black
Bracket, Hi Speed RX Handle Brace
Hose, Base Out - Manifold
Ring, Snap Ring (E-Clip) x ½"
Ring, Snap Ring (E-Clip) x 5/16"
Axle, Hi Speed RX Wheel
Rod, Hi Speed RX-20 Handle Arc
Rod Assy, Hi Speed RX Handle Adjusting
Collar, d" Set
Cover, Handle Access
Quick Connect, 440 Male with Viton
Nipple, ¼ Brass Hex
Handle, Foam Grip
Handle, Hi Speed RX-20
Label, RX-20 Machine (3 pc set)
Hose, Solution Valve to Rotary Union
Nut ¼-20 s/s Hex
Nut, Wire - Yellow
Handle Arc
Trigger Pivot
Protector, Power Cord Relief Grip
Shield, RX-20 Micro Switch
Screw, ¼-20 x 1" HHC s/s
Screw, 6-32 x 1" Rnd HD Mach s/s
Screw, 10-32 x ¼" s/s Pan Head
Switch, Micro
Trigger, o/s RX-20 Brass Solution Valve
Trigger, RX-20 Power
Wheel, 8" Hi Speed RX-20
Cord, 14/3 x 50' Gray - Power
Filter, d" Inline Y
2M - 2UFS
Bushing, ¼ M x c F Brass
HydraMaster Corporation
QTY
1
1
1
2
4
1
1
1
1
1
1
1
2
1
1
1
1
1
2
1
1
1
3
2
1
1
1
1
2
1
1
1
1
9/10/98
RX-20 / CMX-20
ITEM
PART NO
DESCRIPTION
37
38
39
40
41
42
43
44
45
46
47
48
49
50
51
52
53
54
54A
54B
55
56
57
58
59
60
61
62
63
64
Optional:
000-052-301
000-169-058
000-094-030
000-103-012
000-103-013
000-107-097
000-107-101
000-139-006
000-037-016
000-178-039
000-006-009
000-061-027
000-052-276
000-078-108
000-105-008
000-106-014
000-143-166
604-052-005
604-052-006
000-059-001
000-041-123
000-143-096
000-052-080
000-052-089
000-057-047
000-064-012
000-068-174
000-064-011
000-107-095
000-076-037
000-076-052
000-076-058
000-094-009
000-107-0201
Elbow, ¼" Male x ¼" Male
Valve, s/s HM Solution
Nut, Adjusting
Pin, ¼ x f" Clevis
Pin, 3/32 x ½" s/s Cotter - RX
Link
Plunger
Ring, e" Snap
Terminal, #10 Ring - 16 AWG
Cord, 14/3 x 6' Gray
Base, Hi Speed RX-20
Handle, RX Express Base - Lift
Rotary Union, c" NPT
Kit, Roto Shroud Bumper and Rivet
Plate, Cast RX-20 Base - Seal
Plug, RX-20 Gearbox Vent
Screw, 10-24 x d" s/s BTN HD Cap
Hi Spd RX-20 Motor/Gearbox Assy
Hi Spd RX-20 Elect Motor Assy
Gearbox Complete, Spur
Cover, ½ HP TEFC Motor
Screw, d 16 x ¾" s/s BTN HD
Nipple, c" x 4" Brass
Elbow, c" Brass Female
Gasket, RX-20 Felt Hub
Head, New RX Skid Assembly Complete
Hose, Vac Hub/Skid
Head, New RX Cast Skid-Weldment
Skid Bottom, New Style RX Shoe
Jet, H 1/8VV 80015 SS-STD
Jet, 1) 2 Piece Set Twist Out
Jet, 1) 2 Piece Brass #8001
Nut, 5/16-18 s/s Nylock Half
Hub with Ring, Double Lead Thread
65
66
HydraMaster Corporation
Page 19
QTY
1
1
1
2
2
4
2
2
1
1
1
1
1
1
1
1
2
1
1
1
1
3
5
5
1
5
1
1
1
5
5
5
5
1
9/10/98
RX-20 / CMX-20
Page 20
ITEM
PART NO
67
000-107-089
68
000-143-012
69
000-143-162
70
000-143-166
71
000-143-065
72
000-174-049
73
000-015-009
Not Shown:
000-094-036
000-143-096
000-174-055
000-174-057
HydraMaster Corporation
DESCRIPTION
QTY
S/S Heat Treated Star
Screw, 5/16-18 x ¾" s/s HHC
Screw, 5/16 x 1" Stripper - ¼-20 s/s
Screw, 10-24 x d" s/s BTN HD Cap
Screw, 10-24 x 1¾" s/s BTN HD Cap
Washer, 5/16" s/s Flat
Bracket, Hi Speed RX Handle Brace
1
5
5
4
5
3
1
Nut, ½” NPT Pipe Plastic
Used with Item No. 24
Screw, d - 16 x 1" HHC s/s
Used with Item No. 54
Washer, Latch Pivot
Used with Item No. 54
Washer, d” s/s Lock
Used with Item No. 54
1
3
3
3
9/10/98
RX-20 / CMX-20
Page 21
Repair
REMOVAL OF COMPONENTS
performance of your RX-20.
Felt Vacuum Seal Replacement: A
worn or unlubricated seal will not form
a proper seal. Lack of a proper seal
will impair the vacuuming capabilities
of the unit and therefore leave behind
more water in the carpet than is
High Pressure Valve Assembly: The
valve assembly's moving parts will
eventually wear out it time. Its repair
or replacement is a relatively simple
operation.
desirable.
First, remove the vacuum head
assembly as previously described.
Using a pocket knife, carefully pry the
seal up and lift it out. If the seal
appears worn or glazed so that it will
not lubricate well, try turning it over. If
that does not work, or if it is damaged,
replace it with a new one.
We
recommend changing the felt seal after
10 hours of use. Replace it with a
spare, soaked seal. Press the seal in
place and saturate it with a quality 30
weight SAE motor oil. Always place
the flattened, used seal in an oil bath to
rejuvenate. (NOTE:
A tuna fish can is
the right size and
shape and does not
require
a
large
amount of oil.)
This seal and its
condition play an
important part in
the
optimum
HydraMaster Corporation
1. Remove the 440 male quick
connect (A) with a wrench.
2. Remove the five allen head screws
(B) in the back plate on the handle
and lift the back panel off.
3. Disconnect the stainless steel hose
(C) from the bottom of the valve
assembly.
4. Remove the bolt (D) holding the
trigger.
5. Remove the two bolts (E) holding
the valve assembly in the handle
and pull out.
6. The valve may now be rebuilt or
replaced. CAUTION: If the valve
has been frozen, inspect it for
leakage before reinstalling the back
plate.
9/10/98
Page 22
RX-20 / CMX-20
Troubleshooting
I.
Problem: Low Vacuum Flow at the
Cleaning Heads
Cause: Hub not sealing properly.
Solution: Replace felt seal with a
lubricated one.
Cause: Restricted air flow.
Solution: Check all vacuum hoses
for restrictions.
Cause: Low vacuum flow from power
source.
Solution: Refer to troubleshooting
section of equipment manual.
II. Problem: Low Water Flow at
Cleaning Heads
(Indicated by Irregular Water Temperature)
Solution: Remove cleaning hub
from shaft. Clean and re-thread
onto shaft.
III. Problem: Water Leak at Rotary
Union
Cause: Foreign matter in rotary union
seal.
Solution: Dismantle rotary union.
Clean. Reassemble and install.
IV. Problem: Water Leak at Valve
Cause: Ruptured plunger or valve oring.
Solution: Repair or replace
damaged plunger, o-ring, seal.
Check for freeze damage.
Cause: Restricted jets.
Solution: Remove jets and clear
them of debris.
Cause: Clogged water strainer.
Solution: Remove water strainer
and clean.
V. Problem: Loss of Oil From Gearbox
Cause: Loose or ruptured oil seal.
Solution: Replace damaged oil
seal. Refill gearbox with oil.
Cause: Kinked or clogged solution
hose.
Solution: Remove hose. Repair or
replace.
Cause: Cleaning hub not properly
threaded to shaft.
HydraMaster Corporation
9/10/98
RX-20 / CMX-20
VI. Problem: No Power
Cause: RX-20 wiring or power source.
Solution: Have an electrician
inspect unit for possible wiring or
motor problems.
Page 23
VII. Problem: Head Wobbles During
Operation
Cause: One leg of star bent.
Solution: Straighten star.
Cause: Overload power source.
Solution: Locate an unused power
source.
Cause: Gearbox.
Solution: Repair or replace
gearbox.
HydraMaster Corporation
9/10/98
RX-20 / CMX-20
Page 24
Limited Warranty Plan
HydraMaster warrants Rotary Extractor
machines of its manufacture to be free
from
defects
in
material
and
workmanship if properly installed,
maintained, and operated under normal
conditions with competent supervision.
No person, agent, representative or
dealer is authorized to give any
warranties on behalf of HydraMaster,
nor to assume for HydraMaster any
other liability in connection with any
HydraMaster products. This warranty
shall extend to the original purchaser of
said equipment for the periods listed
below from date of installation. If
repairs or replacements are made by
the Purchaser without HydraMaster’s
written
consent,
HydraMaster’s
warranty shall cease to be in effect.
Machinery, equipment and accessories
furnished
by
HydraMaster,
but
manufactured by others, are warranted
only to the extent of the original
manufacturer’s
warranty
to
HydraMaster unless otherwise specified
in the listing below.
HydraMaster agrees, at its option, to
repair at the point of shipment, or to
replace without charge, any parts or
parts of products of HydraMaster’s
manufacture,
which
within
the
specified warranty period shall be
proved to HydraMaster’s satisfaction to
have been defective when shipped,
provided the purchaser promptly
notifies HydraMaster, in writing, of
such alleged defect. HydraMaster will
pay all freight and transportation
charges, via normal ground shipping
means, for replacement of parts
HydraMaster Corporation
covered under this warranty.
This warranty covers parts, as
specified, and does not cover labor
which may be necessary in completing
repairs.
HydraMaster’s liability to
Purchaser, whether in contract or in
tort arising out of warranties,
representation, instructions, or defects
from any cause shall be limited to
repairing or replacing the defective part
or parts.
To qualify for warranty
coverage, defective parts must be
returned to HydraMaster within 30
days. No warranty liability whatsoever
shall attach to HydraMaster unless and
until
HydraMaster
has
received
payment in full for the warranted
machine or part.
Except as stated in this section and in
the proceeding section and except as
to title, there are no guarantees or
warranties of merchantability, fitness,
performance or otherwise, express,
implied or statutory, and HydraMaster
shall have no liability for consequential,
incidental or other damages howsoever
caused.
All components not specifically
referenced in the schedule below are
covered under this warranty for a
period of one (1) year, excepting those
parts which are considered, by
HydraMaster, to be expendable in
normal use.
(Continued on the following page...)
9/10/98
RX-20 / CMX-20
Page 25
(Limited Warranty Plan continued...)
Freezing of any water or chemical
related component will VOID all
warranties on water or chemical related
components, internal or external, of
this equipment.
Records of periodic maintenance must
be kept and copies may be required to
be furnished to HydraMaster before this
warranty is honored.
Deposits and build-up in the water or
chemical systems due to hardness in
the water used or chemicals which
results in deposits, will VOID all
warranties on affected components.
Coverage Schedule
All recommended maintenance must be
performed by competent service
personnel.
Frame, Handle, Body .
Gearbox . . . . . . . . .
................
................
Motor . . . . . . . . . . .
Valves, Filters, Hoses
. . . . . 3 years
Year 1 : 100%
Year 2 : 50%
Year 3 : 30%
. . . . . . 1 year
. . . . . . 1 year
For service, contact the distributor where the machine was purchased or
call our Customer Service Department:
Monday through Friday ! 8:00 am To 5:00 pm PST
Parts:
Service:
Parts and Service FAX:
(425) 775-7276
(425) 775-7275
(800) 426-4225
11015 47th Avenue W ! Mukilteo, WA 98275
HydraMaster Corporation
9/10/98