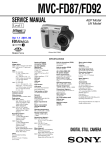
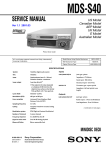
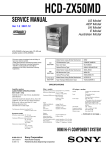
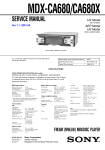
1
MDS-S9 SERVICE MANUAL AEP Model UK Model Ver 1.0 2001.06 US and foreign patents licensed from Dolby Laboratories. Model Name Using Similar Mechanism MDS-S50 MD Mechanism Type MDM-7A Optical Pick-up Name KMS-260B SPECIFICATIONS System MiniDisc digital audio system Disc MiniDisc Laser Semiconductor laser (λ = 780 nm) Emission duration: continuous Laser output MAX 44.6 µW1) 1) This output is the value measured at a distance of 200 mm from the objective lens surface on the Optical Pick-up Block with 7 mm aperture. Laser diode Material: GaAlAs Revolutions (CLV) 400 rpm to 900 rpm Error correction ACIRC (Advanced Cross Interleave Reed Solomon Code) Sampling frequency 44.1 kHz Coding ATRAC (Adaptive TRansform Acoustic Coding)/ATRAC 3 Modulation system EFM (Eight-to-Fourteen Modulation) Number of channels 2 stereo channels Frequency response 5 to 20,000 Hz ±0.3 dB Signal-to-noise ratio Over 96 dB during play Wow and flutter Below measurable limit Outputs ANALOG OUT Jack type: phono Rated output: 2 Vrms (at 50 kilohms) Load impedance: over 10 kilohms General Power requirements Power consumption Dimensions (approx.) Mass (approx.) 230 V AC, 50/60Hz 15 W 0.5 W (at the STANDBY mode) 280 × 83 × 290 mm (w/ h/d) incl. projecting parts and controls 2.4 kg Supplied accessories Audio connecting cords (2) Optical cable (1) Remote commander (remote) (1) R6 (size-AA) batteries (2) Design and specifications are subject to change without notice. Inputs ANALOG IN DIGITAL IN Jack type: phono Impedance: 47 kilohms Rated input: 500 mVrms Minimum input: 125 mVrms Connector type: square optical Impedance: 660 nm (optical wave length) MINIDISC DECK 9-873-914-11 Sony Corporation 2001F0500-1 C 2001.6 Home Audio Company Shinagawa Tec Service Manual Production Group MDS-S9 SELF-DIAGNOSIS FUNCTION The deck’s self-diagnosis function automatically checks the condition of the MD deck when an error occurs, then issues a threeor five-digit code and an error message on the display. If the code and message alternate, find them in the following table and perform the indicated countermeasure. Should the problem persist, consult your nearest Sony dealer. C11/Protected , Take out the MD and close the record-protect slot. C12/Cannot Copy • You tried to record a CD with a format that the external device connected to the deck does not support, such as CD-ROM or video CD. , Remove the disc and insert a music CD. C13/REC Error , Set the deck in a stable surface, and repeat the recording procedure. • The inserted MD is dirty (with smudges, fingerprints, etc.), scratched, or substandard in quality. , Replace the disc and repeat the recording procedure. C13/Read Error , Take out the MD and insert it again. C14/TOC Error , Insert another disc. , If possible, erase all the tracks on the MD. C41/Cannot Copy • The sound source is a copy of commercially available music software, or you tried to record a CD-R (Recordable CD). , The Serial Copy Management System prevents making a digital copy. You cannot record a CD-R. C71/Din Unlock • The sporadic appearance of this message is caused by the digital signal being recorded. This will not affect the recording. • While recording from a digital component connected through the DIGITAL IN connector, the digital connecting cable was unplugged or the digital component turned off. , Connect the cable or turn the digital component back on. PROCEDURE FOR USING THE SELF-DIAGNOSIS FUNCTION (ERROR HISTORY DISPLAY MODE) Note: Perform the self-diagnosis function in the “error history display mode” in the test mode. The following describes the least required procedure. Be careful not to enter other modes by mistake. If you set other modes accidentally, press the MENU/NO button to release the mode. 1. While pressing the [ . AMS > ] knob and x button simultaneously, connect the power plug to the outlet, and release the [ .AMS > ] knob and x button simultaneously to display “[Check]”. 2. Turn the [. AMS >] knob and when “[Service]” is displayed, press the [YES] button to display “AUTO CHECK” (C01). 3. Turn the [. AMS >] knob to display “Err Display” (C02). 4. Press the [YES] button to sets the error history mode and displays “op rec tm”. 5. Select the contents to be displayed or executed using the [. AMS >] knob. 6. Press the [. AMS >] knob to display or execute the contents selected. 7. Press the [. AMS >] knob another time returns to step 4. 8. Press the [MENU/NO] button to display “Err Display” (C02) and release the error history mode. 9. To release the test mode, press the I/1 button. The unit sets into the STANDBY state, and the test mode ends. 2 MDS-S9 ITEMS OF ERROR HISTORY MODE ITEMS AND CONTENTS Display Details of History op rec tm Cumulative recording time is displayed. When cumulative recording time is over 1 minute, the hour and minute are displayed as they are. When it is under 1 minute, “Under 1 min” is displayed. The displayed time is the total time the laser is set to the high power state. This is about 1/4 of the actual recording time. The time is displayed in decimal digits. op play tm Cumulative playing time is displayed. When cumulative playing time is over 1 minute, the hour and minute are displayed as they are. When it is under 1 minute, “Under 1 min” is displayed. The displayed time is the total of the actual play time. Pauses are not counted. The time is displayed in decimal digits. spdl rp tm Cumulative spindle motor running time is displayed. When cumulative spindle motor run time is over 1 minute, the hour and minute are displayed as they are. When it is under 1 minute, “Under 1 min” is displayed. The time is displayed in decimal digits. retry err Displays the total number of retries during recording and number of retry errors during playback. Displayed as “r ss p ss”. “r” indicates the retries during recording while “p” indicates the retry errors during playback. The number of retries and retry errors are displayed in hexadecimal digits from 00 to FF. total err Displays the total number of errors. Displayed as “total ss”. The number of errors is displayed in hexadecimal digits from 00 to FF. err history Displays the 10 latest errors. Displayed as “0s ErrCd @@”. s indicates the history number. The smaller the number, the more recent is the error. (00 is the latest) @@ indicates the error code. Refer to the following table for the details. The error history can be switched by turning the [ . AMS > ] knob. retry adrs Display the 5 latest retry address. Display as “ss ADRS@@@@”. ss indicates the history number. The smaller the number, the more recent is the error. (00 is the latest) @@@@ indicates the cluster of retry address. The number of retry address can be switched by turning the [ . AMS > ] knob. er refresh Mode to clear the error history and retry address history. Procedure: 1) Press the [. AMS > ] button. 2) The display will change to “er refresh?”, and then press the [YES] button. The operation is over if “Complete!” is displayed. After this mode was executed, check the following: • The data have been cleared. • Perform the recording and playing to check that the mechanism operates normally. op change Mode to clear cumulative time of “op rec tm” and “op play tm”. These historical data are used to determine the timing when the optical pick-up is to be replaced. When the optical pick-up was replaced, perform this operation to clear historical data. Procedure: 1) Press the [. AMS > ] button. 2) The display will change to “op chang?”, and then press the [YES] button. The operation is over if “Complete!” is displayed. spdl change Mode to clear cumulative time of “spdl rp tm”. This historical data is used to determine the timing when the spindle motor is to be replaced. When the spindle motor was replaced, perform this operation to clear historical data. Procedure: 1) Press the [. AMS > ] button. 2) The display will change to “spdl chang?”, and then press the [YES] button. The operation is over if “Complete!” is displayed. 3 MDS-S9 Table of Error Codes Error Code 4 Details of Error 10 Loading failed 12 Loading switch combination is illegal 20 Head of PTOC could not be read within the specified time 21 Head of PTOC could be read but its content is erroneous 22 Access to UTOC could not be made within the specified time 23 UTOC could be not read within the specified time 24 Content of UTOC is erroneous 30 Playing could not start 31 Content of sector is erroneous 40 Cause of retry occurred during normal recording 41 D-RAM overflowed and retry was executed 42 Retry was executed during the writing to TOC 43 S.F editing was interrupted by retry 50 Address could not be read except in access processing 51 Focusing failed and it is out of control 60 Unlock retry MDS-S9 TABLE OF CONTENTS SELF-DIAGNOSIS FUNCTION .................................... 2 1. SERVICING NOTES ............................................... 6 2. GENERAL ................................................................... 10 3. DISASSEMBLY 3-1. 3-2. 3-3. 3-4. 3-5. Disassembly Flow ........................................................... Case ................................................................................. MD Mechanism Deck (MDM-7A) ................................. MAIN Board ................................................................... BD Board ......................................................................... 4. TEST MODE .............................................................. 15 5. ELECTRICAL ADJUSTMENTS ......................... 20 6. DIAGRAMS 6-1. Block Diagram – SERVO Section – ............................... 6-2. Block Diagram – MAIN Section – ................................. 6-3. Note for Printed Wiring Boards and Schematic Diagrams ....................................................... 6-4. Printed Wiring Boards – BD Board – ............................. 6-5. Schematic Diagram – BD Board (1/2) – ........................ 6-6. Schematic Diagram – BD Board (2/2) – ........................ 6-7. Printed Wiring Board – MAIN Board (Component Side) – .............................. 6-8. Printed Wiring Board – MAIN Board (Conductor Side) – ................................ 6-9. Schematic Diagram – MAIN Board (1/3) – ................... 6-10. Schematic Diagram – MAIN Board (2/3) – ................... 6-11. Schematic Diagram – MAIN (3/3)/PT Boards – ............ 6-12. Printed Wiring Board – PT Board – ............................... 6-13. Printed Wiring Board – DISPLAY Board – ................... 6-14. Schematic Diagram – DISPLAY Board – ...................... 6-15. IC Pin Function Description ........................................... 12 13 13 14 14 31 32 33 35 36 37 CAUTION Danger of explosion if battery is incorrectly replaced. Replace only with the same or equivalent type recommended by the manufacturer. Discard used batteries according to the manufacturer’s instructions. ADVARSEL! Lithiumbatteri-Eksplosionsfare ved fejlagtig håndtering. Udskiftning må kun ske med batteri af samme fabrikat og type. Levér det brugte batteri tilbage til leverandøren. ADVARSEL Eksplosjonsfare ved feilaktig skifte av batteri. Benytt samme batteritype eller en tilsvarende type anbefalt av apparatfabrikanten. Brukte batterier kasseres i henhold til fabrikantens instruksjoner. VARNING Explosionsfara vid felaktigt batteribyte. Använd samma batterityp eller en likvärdig typ som rekommenderas av apparattillverkaren. Kassera använt batteri enligt gällande föreskrifter. 38 VAROITUS Paristo voi räjähtää, jos se on virheellisesti asennettu. Vaihda paristo ainoastaan laitevalmistajan suosittelemaan tyyppiin. Hävitä käytetty paristo valmistajan ohjeiden mukaisesti. 39 40 41 42 43 44 45 46 CAUTION Use of controls or adjustments or performance of procedures other than those specified herein may result in hazardous radiation exposure. 7. EXPLODED VIEWS 7-1. 7-2. 7-3. 7-4. Case Section .................................................................... Front Panel Section ......................................................... Mechanism Deck Section-1 (MDM-7A) ........................ Mechanism Deck Section-2 (MDM-7A) ........................ 8. ELECTRICAL PARTS LIST ............................... 56 52 53 54 55 This appliance is classified as a CLASS 1 LASER product. The CLASS 1 LASER PRODUCT MARKING is located on the rear exterior. The following caution label is located inside the unit. Notes on chip component replacement • Never reuse a disconnected chip component. • Notice that the minus side of a tantalum capacitor may be damaged by heat. SAFETY-RELATED COMPONENT WARNING!! Flexible Circuit Board Repairing • Keep the temperature of the soldering iron around 270 ˚C during repairing. • Do not touch the soldering iron on the same conductor of the circuit board (within 3 times). • Be careful not to apply force on the conductor when soldering or unsoldering. COMPONENTS IDENTIFIED BY MARK 0 OR DOTTED LINE WITH MARK 0 ON THE SCHEMATIC DIAGRAMS AND IN THE PARTS LIST ARE CRITICAL TO SAFE OPERATION. REPLACE THESE COMPONENTS WITH SONY PARTS WHOSE PART NUMBERS APPEAR AS SHOWN IN THIS MANUAL OR IN SUPPLEMENTS PUBLISHED BY SONY. 5 MDS-S9 SECTION 1 SERVICING NOTES NOTES ON HANDLING THE OPTICAL PICK-UP BLOCK OR BASE UNIT NOTES ON LASER DIODE EMISSION CHECK Never look into the laser diode emission from right above when checking it for adjustment. It is feared that you will lose your sight. The laser diode in the optical pick-up block may suffer electrostatic break-down because of the potential difference generated by the charged electrostatic load, etc. on clothing and the human body. During repair, pay attention to electrostatic break-down and also use the procedure in the printed matter which is included in the repair parts. The flexible board is easily damaged and should be handled with care. JIG FOR CHECKING BD BOARD WAVEFORM The special jig (J-2501-196-A) is useful for checking the waveform of the BD board. The names of terminals and the checking items to be performed are shown as follows. I+3V IOP GND TE FE VC RF : For measuring IOP (Check the deterioration of the optical pick-up laser) : For measuring IOP (Check the deterioration of the optical pick-up laser) : Ground : Tracking error signal (Traverse adjustment) : Focus error signal : Reference level for checking the signal : RF signal (Check jitter) CN105 IOP TE I+3V GND FE VC 1 RF I+3V IOP GND TE FE VC RF I+3V IOP GND TE FE VC RF 7 6 for MDM-7A MDS-S9 IOP DATA RECORDING AND DISPLAY WHEN OPTICAL PICK-UP AND NON-VOLATILE MEMORY (IC195 OF BD BOARD) ARE REPLACED The IOP value labeled on the optical pick-up can be recorded in the non-volatile memory. By recording the value, it will eliminate the need to look at the value on the label of the optical pick-up. When replacing the optical pick-up or non-volatile memory (IC195 of BD board), record the IOP value on the optical pick-up according to the following procedure. Record Precedure: 1. While pressing the [.AMS >] knob and x button simultaneously, connect the power plug to the outlet, and release the [.AMS >] knob and x button simultaneously to display “[Check]”. 2. Turn the [ . AMS > ] knob to display “[Service]”, and press the [YES] button to display “AUTO CHECK” (C01). 3. Turn the [ . AMS > ] knob to display “Iop Write” (C05), and press the [YES] button. 4. The display becomes “Ref=@@@.@” (@ is an arbitrary number) and the numbers which can be changed will blink. 5. Input the IOP value written on the optical pick-up. To select the number : Turn the [ .AMS > ] knob. To select the digit : Press the [ .AMS > ] knob. 6. When the [YES] button is pressed, the display becomes “Measu=@@@.@” (@ is an arbitrary number). 7. As the adjustment results are recorded for the 6 value. Leave it as it is and press the [YES] button. 8. “Complete!!” will be displayed momentarily. The value will be recorded in the non-volatile memory and the display will become “Iop Write” (C05). 9. Press the I/1 button to complete. Display Precedure: 1. While pressing the [. AMS >] knob and x button simultaneously, connect the power plug to the outlet, and release the [.AMS >] knob and x button simultaneously to display “[Check]”. 2. Turn the [. AMS > ] knob to display “[Service]”, and press the [YES] button to display “AUTO CHECK” (C01). 3. Turn the [. AMS > ] knob to display “Iop Read” (C26), and press the [YES] button. 4. “@@.@/##.#” is displayed and the recorded contents are displayed. @@.@ : indicates the IOP value labeled on the optical pick-up. ##.# : indicates the IOP value after adjustment 5. To end, press the [. AMS > ] knob or [MENU/NO] button to display “Iop Read” (C26). Then press the I/1 button. WHEN MEMORY NG IS DISPLAYED If the nonvolatile memory data is abnormal, “E001 MEMORY NG” will be displayed so that the MD deck does not continue operations. In this case, set the test mode promptly and perform the following procedure. Procedure: 1. Enter the test mode (refer to page 15). 2. Normally a message for selecting the test mode will be displayed. However if the nonvolatile memory is abnormal, the following will be displayed “INIT EEP?”. 3. Press the both x and Z buttons simultaneously. 4. Turn the [. AMS > ] knob to display “MDM-7A”. 5. Press the [. AMS >] button. If the nonvolatile memory is successfully overwritten, the normal test mode will be set and a message to select the test mode will be displayed. FORCE RESET You can reset the microprocessor of the system with following procedure. Use this method if the device cannot be operated normaly because the microprocessor is hung up or with some reasons. Procedure: Remove the short pin attached on CN420, then install it again. – MAIN BOARD (Component Side) – CN420 7 MDS-S9 RETRY CAUSE DISPLAY MODE IN MD • In this test mode, the causes for retry of the unit during recording and stop can be displayed on the liquid crystal display. During playback, the “track mode” for obtaining track information will be set. This is useful for locating the faulty part of the unit. • The following will be displayed : During recording and stop : Retry cause, number of retries, and number of retry errors. During playback : Information such as type of disc played, part played, copyright. These are displayed in hexadecimal. Precedure: 1. Keep the x button pressed for about 10 seconds, or press the [LEVER/DISPLAY/CHAR] button while pressing x and [MENU/NO] buttons. 2. “RTs00c00e000” is displayed after the mode is set. 3. Press the z button go into recording mode, then press the u button to start recording. 4. To check “track mode”, press the u button to playback. 5. To release the test mode, press the I/1 button and turn off the power. Remove the power plug from the outlet after “TOC” is turned off. If you cannot release the test mode, refer to “FORCE RESET” on page 7. Fig. 1 Reading the Test Mode Display (During recording and stop) Fig. 2 Reading the Test Mode Display (During playback) RTs@@c##e*** Liquid crystal display @@ ###** $$ Liquid crystal display @@ : Cause of retry ## : Number of retries *** : Number of retry errors @@ : ### : ** : $$ : Parts No. (Name of area named on TOC) Cluster Address (Physical address on the Sector disc) Track mode (Track information such as copyright information of each part) Reading the Retry Cause Display Higher Bits Lower Bits HexaCause of Retry Hexadecimal 8 4 2 1 8 4 2 1 decimal Bit b7 b6 b5 b4 b3 b2 b1 b0 Binary 01 0 0 0 0 0 0 0 1 shock Occurring conditions When track jump (shock) is detected When ADER was counted more than five times continuously 0 0 0 0 0 0 1 0 02 ader5 0 0 0 0 0 1 0 0 04 0 0 0 0 1 0 0 0 08 Discontinuous address When ADIP address is not continuous When DIN unlock is detected DIN unlock 0 0 0 1 0 0 0 0 10 FCS incorrect When not in focus 0 0 1 0 0 0 0 0 20 IVR rec error When ABCD signal level exceeds the specified range CLV unlock When CLV is unlocked Access fault When access operation is not performed normally 0 1 0 0 0 0 0 0 40 1 0 0 0 0 0 0 0 80 Reading the Display: Convert the hexadecimal display into binary display. If more than two causes, they will be added. Example When 42 is displayed: Higher bit: 4 = 0100 t b6 Lower bit : 2 = 0010 t b1 In this case, the retry cause is combined of “CLV unlock” and “ader5”. When A2 is displayed: Higher bit: A = 1010 t b7 + b5 Lower bit : 2 = 0010 t b1 The retry cause in this case is combined of “Access fault”, “IVR rec error”, and “ader5”. 8 MDS-S9 Reading the Retry Cause Display Higher Bits Lower Bits HexaHexadecimal 8 4 2 1 8 4 2 1 decimal Bit b7 b6 b5 b4 b3 b2 b1 b0 Binary Details When 1 When 0 0 0 0 0 0 0 0 1 01 Emphasis OFF Emphasis ON 0 0 0 0 0 0 1 0 02 Monaural Stereo 0 0 0 0 0 1 0 0 04 0 0 0 0 1 0 0 0 08 This is 2-bit display. Normally 01. 01: Normal audio. Others: Invalid 0 0 0 1 0 0 0 0 10 Audio (Normal) Invalid 0 0 1 0 0 0 0 0 20 Original Digital copy 0 1 0 0 0 0 0 0 40 Copyright No copyright 1 0 0 0 0 0 0 0 80 Write prohibited Write allowed Reading the Display: Convert the hexadecimal display into binary display. If more than two causes, they will be added. Example When 84 is displayed: Higher bit: 8 = 1000 t b7 Lower bit : 4 = 0100 t b2 In this case, as b2 and b7 are 1 and others are 0, it can be determined that the retry cause is combined of “Emphasis OFF”, “Monaural”, “Original”, “Copyright”, and “Write allowed”. Example When 07 is displayed: Higher bit: 0 = 0000 t All 0 Lower bit : 7 = 0111 t b0 + b1 + b2 In this case, as b0, b1, and b2 are 1 and others are 0, it can be determined that the retry cause is combined of “Emphasis ON”, “Stereo”, “Original”, “Copyright”, and “Write prohibited”. Hexadecimal t Binary Conversion Table Hexadecimal Binary Hexadecimal Binary 0 0000 8 1000 1 0001 9 1001 2 0010 A 1010 3 0011 B 1011 4 0100 C 1100 5 0101 D 1101 6 0110 E 1110 7 0111 F 1111 9 MDS-S9 SECTION 2 GENERAL This section is extracted from instruction manual. LOCATION OF CONTROLS – Front Panel – AMS qd (8) (10) (12) (13) (16) (24) CLEAR 8 (7) (16) (18) (24) Display qf (8) (17) INPUT qh (8) LEVEL/DISPLAY/CHAR 2 (8) (12) (24) MD insertion slot 4 (16) MD LP indicator qg (10) (17) MENU/NO 6 (10) (18) (20) PLAY MODE qk (16) REC MODE qj (9) Remote sensor 3 (7) YES 7 (10) (18) (20) BUTTON DESCRIPTIONS ?/1 (power)/STANDBY indicator 1 (8) (16) Z (eject) 5 (8) (17) m (go back)/M (go forward) 9 (16) (17) (18) (24) z (recording) 0 (8) (10) x (stop) qa (7) (8) (16) NX (play/pause) qs (8) (16) – Back Panel – PC LINK AC power cord to a wall outlet Amplifier, etc. 10 CD player, DBS tuner, etc.1) 1) Digital equipment with a DIGITAL OUT connector only MDS-S9 Remote control AyB qs (16) CD PLAYER . (go back)/> (go forward) ql (15) CD-SYNCHRO STANDBY/START/STOP 7 (14) (15) CLEAR 6 (16) (18) (24) DISPLAY ws (8) (12) FADER 3 (28) INPUT wf (8) Letter/number buttons 5 (17) (25) LEVEL +/– qa (12) MENU/NO w; (10) (18) (20) MUSIC SYNC 8 (14) NAME EDIT/SELECT wa (24) PLAY MODE 2 (16) REC MODE wg (9) REPEAT qd (16) SCROLL wd (17) T.REC qj (13) YES 4 (10) (18) (20) BUTTON DESCRIPTIONS ?/1 (power) 1 (8) (16) X (pause) 9 (8) (16) x (stop) 0 (8) (16) m (fast reverse)/M (fast forward) qf (16) (17) (18) (24) . (go back)/> (go forward) qg (8) (10) (16) (17) (25) (26) z (recording) qh (8) (10) H (play) qk (8) (16) A (eject) wh (8) (17) 11 MDS-S9 SECTION 3 DISASSEMBLY • This set can be disassembled in the order shown below. 3-1. DISASSEMBLY FLOW Set 3-2. CASE (Page 13) 3-3. MD MECHANISM DECK (MDM-7A) (Page 13) 3-4. MAIN BOARD (Page 14) 12 3-5. BD BOARD (Page 14) MDS-S9 Note: Follow the disassembly procedure in the numerical order given. 3-2. CASE 2 case 1 two screws (case 3 TP2) 1 two screws (case 3 TP2) 3-3. MD MECHANISM DECK (MDM-7A) 3 four screws (BVTTWH M3) 1 wire (flat type) (23 core) (CN400) 1 wire (flat type) (27 core) (CN1) 4 MD mechanism deck (MDM-7A) 2 harness 13 MDS-S9 3-4. MAIN BOARD 2 connector (CN902) 4 two screws (BVTP3 × 8) 1 wire (flat type) (15 core) (CN490) 5 MAIN board 3 three screws (BVTP3 × 8) 3-5. BD BOARD BD board – CONDUCTOR SIDE VIEW – 5 Remove four solders. 1 wire (flat type) (23 core) (CN103) 2 wire (flat type) (27 core) (CN102) 7 BD board 3 connector (CN104) 8 flexible board (CN101) 4 Remove five solders. 6 two screws (2 × 6) 14 MDS-S9 SECTION 4 TEST MODE 4-1. PRECAUTIONS FOR USE OF TEST MODE • As loading related operations will be performed regardless of the test mode operations being performed, be sure to check that the disc is stopped before setting and removing it. Even if the Z button is pressed while the disc is rotating during continuous playback, continuous recording, etc., the disc will not stop rotating. Therefore, it will be ejected while rotating. Be sure to press the Z button after pressing the [MENU/NO] button and the rotation of disc is stopped. 4-1-1. Recording laser emission mode and operating buttons • Continuous recording mode (CREC 1MODE) • Laser power check mode (LDPWR CHECK) • Laser power adjustment mode (LDPWR ADJUST) • Comparison with initial Iop value written in nonvolatile memory (Iop Compare) • Write current Iop value in read nonvolatile memory using microprocessor (Iop NV Save) • Traverse (MO) check (EF MO CHECK) • Traverse (MO) adjustment (EF MO ADJUST) • When pressing the z button. 4-2. SETTING THE TEST MODE The following are two methods of entering the test mode. Procedure 1: While pressing the [. AMS > ] knob and x button simultaneously, connect the power plug to the outlet, and release the [. AMS > ] knob and x button. When the test mode is set, “[Check]” will be displayed. Turning the [. AMS >] knob between the following three groups; ···Tt [Check] Tt [Service] Tt [Develop] Tt ···. Procedure 2: While pressing the [ . AMS > ] knob, connect the power plug to the outlet, and release the [ . AMS > ] knob. When the test mode is set, “TEMP CHECK” (C12) will be displayed. By setting the test mode using this method, only the “Check” group of procedure1 can be executed. Note: Do not use the test mode in the [Develop] group. If used, the unit may not operate normally. If the [Develop] group is set accidentally, press the [MENU/NO] button immediately to release the [Develop] group. 4-3. RELEASING THE TEST MODE Press the I/1 button. The unit sets into the STANDBY state, and the test mode ends. 4-4. BASIC OPERATIONS OF THE TEST MODE All operations are performed using the [ . AMS > ] knob, [YES] button, and [MENU/NO] button. The functions of knob and buttons are as follows. Function name Function [. AMS > ] knob Changes parameters and modes [YES] button Proceeds onto the next step. Finalizes input [MENU/NO] button Returns to previous step. Stops operations 15 MDS-S9 4-5. SELECTING THE TEST MODE There are 26 types of test modes as shown below. The groups can be switched by turning the [. AMS >] knob. After selecting the group to be used, press the [YES] button. After setting a certain group, turning the [ . AMS > ] knob switches modes shown below. Refer to “Group” in the table for details can be selected. All items used for servicing can be treated using group [Service]. So be carefully not to enter other groups by mistake. Note: Do not use the test mode in the [Develop] group. If used, the unit may not operate normally. If the [Develop] group is set accidentally, press the [MENU/NO] button immediately to exit the [Develop] group. Group Display No. Details AUTO CHECK C01 Automatic self-diagnosis Err Display C02 Error history display, clear TEMP ADJUST C03 Temperature compensation offset adjustment LDPWR ADJUST C04 Laser power adjustment Iop Write C05 Iop data writing Iop NV Save C06 Writes current Iop value in read nonvolatile memory using microprocessor EF MO ADJUST C07 Traverse (MO) adjustment EF CD ADJUST C08 Traverse (CD) adjustment FBIAS ADJUST C09 Focus bias adjustment AG Set (MO) C10 Auto gain output level adjustment (MO) AG Set (CD) C11 Auto gain output level adjustment (CD) TEMP CHECK C12 Temperature compensation offset check LDPWR CHECK C13 Laser power check EF MO CHECK C14 Traverse (MO) check EF CD CHECK C15 Traverse (CD) check FBIAS CHECK C16 Focus bias check ScurveCHECK C17 S-curve check VERIFYMODE C18 Nonvolatile memory check DETRK CHECK C19 Detrack check 0920 CHECK C25 Most circumference check Iop Read C26 Iop data display Iop Compare C27 Comparison with initial Iop value written in nonvolatile memory ADJ CLEAR C28 Initialization of nonvolatile memory for adjustment values INFORMATION C31 Display of microprocessor version, etc. CPLAY1MODE C34 Continuous playback mode CREC 1MODE C35 Continuous recording mode Mark Check Service • For details of each adjustment mode, refer to “5. Electrical Adjustments”. For details of “Err Display”, refer to “Self-Diagnosis Function” on page 2. • If a different mode has been selected by mistake, press the [MENU/NO] button to release that mode. • Modes with (×) in the Mark column are not used for servicing and therefore are not described in detail. If these modes are set accidentally, press the [MENU/NO] button to release the mode immediately. 16 MDS-S9 4-5-1. Operating the Continuous Playback Mode 1. Entering the continuous playback mode (1) Set the disc in the unit. (Whichever recordable discs or discs for playback only are available) (2) Turn the [. AMS > ] knob to display “CPLAY1MODE” (C34). (3) Press the [YES] button to change the display to “CPLAY1MID”. (4) When access completes, the display changes to “C = AD = )”. Note: The numbers “ ” displayed show you error rates and ADER. 2. Changing the parts to be played back (1) Press the [YES] button during continuous playback to change the display as below. “CPLAY1MID” t “CPLAY1OUT” t “CPLAY1IN” When pressed another time, the parts to be played back can be moved. When access completes, the display changes to “C = AD = )”. (2) Note: The numbers “ ” displayed show you error rates and ADER. 3. Ending the continuous playback mode (1) Press the [MENU/NO] button. The display will change to “CPLAY1MODE” (C34). (2) Press the Z button and take out the disc. Note: The playback start addresses for IN, MID, and OUT are as follows. IN : 40h cluster MID : 300h cluster OUT : 700h cluster 4-5-2. Operating the Continuous Recording Mode (Use only when performing self-recording/palyback check) 1. Entering the continuous recording mode (1) Set a recordable disc in the unit. (2) Turn the [. AMS > ] knob to display “CREC 1MODE” (C35). (3) Press the [YES] button to change the display to “CREC 1MID”. )” and “ REC ” lights up. (4) When access completes, the display changes to “CREC 1( Note: The numbers “ ” displayed shows you the recording position addresses. 2. Changing the parts to be recorded (1) When the [YES] button is pressed during continuous recording, the display changes as below. “CREC 1MID” t “CREC 1OUT” t “CREC 1IN” (2) When pressed another time, the parts to be recorded can be changed. “ REC ” goes off. )” and “ REC ” lights up. When access completes, the display changes to “CREC 1( Note: The numbers “ ” displayed shows you the recording position addresses. 3. Ending the continuous recording mode (1) Press the [MENU/NO] button. The display changes to “CREC 1MODE” (C35) and “ REC ” goes off. (2) Press the Z button and take out the disc. Note 1: The recording start addresses for IN, MID, and OUT are as follows. IN : 40h cluster MID : 300h cluster OUT : 700h cluster Note 2: The [MENU/NO] button can be used to stop recording anytime. Note 3: Do not perform continuous recording for long periods of time above 5 minutes. Note 4: During continuous recording, be careful not to apply vibration. 4-6. FUNCTIONS OF OTHER BUTTONS Function Contents u Sets continuous playback when pressed in the STOP state. When pressed during continuous playback, the tracking servo turns ON/OFF x Stops continuous playback and continuous recording M The sled moves to the outer circumference only when this is pressed m The sled moves to the inner circumference only when this is pressed REC MODE Switches between the pit and groove modes when pressed PLAY MODE Switches the spindle servo mode (CLV S y CLV A) LEVEL/DISPLAY/CHAR Switches the displayed contents each time the button is pressed Z Ejects the disc I/1 Releases the test mode 17 MDS-S9 4-7. TEST MODE DISPLAYS Each time the [LEVEL/DISPLAY/CHAR] button is pressed, the display changes in the following order. When CPLAY or CREC are started, the display will forcibly be switched to the error rate display as the initial mode. 1. Mode display Displays “TEMP ADJUST” (C03), “CPLAY1MODE” (C34), etc. Mode display 2. Error rate display Displays the error rate in the following way. C= AD = ) C = : Indicates the C1 error. AD = : Indicates ADER. Error rate display Address display Auto gain display (Not used in servicing) 3. Address display The address is displayed as follows. (MO: recordable disc, CD: playback only disc) h= s= (MO pit and CD) h= a= (MO groove) h = : Indicates the header address. s = : Indicates the SUBQ address. a = : Indicates the ADIP address. Detrack check display (Not used in servicing) IVR display (Not used in servicing) C1 error and jitter display (Not used in servicing) Note: “–” is displayed when the address cannot be read. AD error and jitter display (Not used in servicing) MEANINGS OF OTHER DISPLAYS Contents Display When Lit When Off N Servo ON Servo OFF X Tracking servo OFF Tracking servo ON REC Recording mode ON Recording mode OFF SYNC CLV low speed mode CLV normal mode L. SYNC ABCD adjustment completed OVER Tracking offset cancel ON B/1 Tracking auto gain OK A-/REP Focus auto gain OK TRACK/LP4 Pit Groove DISC/LP2 High reflection Low reflection SHUF/SLEEP CLV S CLV A MONO CLV LOCK CLV UNLOCK 18 Tracking offset cancel OFF MDS-S9 4-8. AUTOMATIC SELF-DIAGNOSIS FUNCTION This test mode performs CREC and CPLAY automatically for mainly checking the characteristics of the optical pick-up. To perform this test mode, the laser power must first be checked. Perform AUTO CHECK after the laser power check and Iop Compare. Procedure: 1. Turn the [. AMS > ] knob to display “AUTO CHECK” (C01). 2. Press the [YES] button. If “LDPWR ” is displayed, it means that the laser power check has not been performed. In this case, perform the laser power check and Iop Compare, and then repeat from enter the test mode. 3. If a disc is in the mechanical deck, it will be ejected forcibly. “DISC IN” will be displayed in this case. Load a test disc (MDW-74/GA-1) which can be recorded. 4. If a disc is loaded at step 3, the check will start automatically. 5. When “XX CHECK” is displayed, the item corresponding to XX will be performed. When “06 CHECK” completes, the disc loaded at step 3 will be ejected. “DISC IN” will be displayed. Load the check disc (TDYS-1). 6. When the disc is loaded in step 5, the check will automatically be resumed from “07 CHECK”. 7. After completing to test item 12, check OK or NG will be displayed. If all items are OK, “CHECK ALL OK” will be displayed. If any item is NG, it will be displayed as “NG:xxxx”. When “CHECK ALL OK” is displayed, it means that the optical pick-up is normal. Check the operations of other parts (spindle motor, sled motor, etc.). When displayed as “NG:xxxx”, it means that the optical pick-up is faulty. In this case, replace the optical pick-up. 4-9. INFORMATION Display the software version. Procedure: 1. Turn the [. AMS > ] knob to display “INFORMATION” (C31). 2. Press the [YES] button. 3. The software version will be displayed. 4. Press the [MENU/NO] button to end this mode. 19 MDS-S9 SECTION 5 ELECTRICAL ADJUSTMENTS 5-1. PARTS REPLACEMENT AND ADJUSTMENTS If malfunctions caused by optical pick-up such as sound skipping are suspected, follow the following check. Check before replacement Start 5-7-2. Laser Power Check (See page 23) NG OK 5-7-3. Iop Compare (See page 23) NG OK 5-7-4. Auto Check (See page 24) NG Replace optical pick-up or MDM-7A OK Other faults are suspected. Check the mechanism parts (spindle motor, sled motor, etc.) 20 MDS-S9 Adjustment flow • Abbreviation OP: optical pick-up Start Replace IC195 YES After turning off and then on the power, initialize the EEPROM For details, refer to “WHEN MEMORY NG IS DISPLAYED” in 1. SERVICING NOTES (See page 7) NO Replace OP or IC195 YES 5-8. INITIAL SETTING OF ADJUSTMENT VALUE (See page 26) YES 5-10. TEMPERATURE COMPENSATION OFFSET ADJUSTMENT (See page 26) YES 5-11. LASER POWER ADJUSTMENT (See page 26) NO Replace IC101, IC195, or D101 NO Replace OP, IC190, or IC195 NO Replace OP, IC102, IC190, or IC195 YES 5-12. Iop NV SAVE (See page 27) NO Replace OP, IC101, IC151, or IC195 YES 5-13. TRAVERSE ADJUSTMENT (See page 29) 5-14. FOCUS BIAS ADJUSTMENT (See page 30) 5-17. AUTO GAIN CONTROL OUTPUT LEVEL ADJUSTMENT (See page 29) NO Replace OP YES “op change” in SELF-DIAGNOSIS FUNCTION (ITEMS OF ERROR HISTORY MODE ITEMS AND CONTENTS) (See page 3) 5-9. RECORDING AND DISPLAYING THE IOP INFORMATION (See page 26) YES “spdl change” in SELF-DIAGNOSIS FUNCTION (ITEMS OF ERROR HISTORY MODE ITEMS AND CONTENTS) (See page 3) NO Replace the spindle motor NO 5-7-4. Auto Check (See page 24) End adjustments 21 MDS-S9 5-2. PRECAUTIONS FOR CHECKING LASER DIODE EMISSION To check the emission of the laser diode during adjustments, never view directly from the top as this may lose your eye-sight. 5-3. PRECAUTIONS FOR USE OF OPTICAL PICKUP (KMS-260B/260E) As the laser diode in the optical pick-up is easily damaged by static electricity, solder the laser tap of the flexible board when using it. Before disconnecting the connector, desolder first. Before connecting the connector, be careful not to remove the solder. Also take adequate measures to prevent damage by static electricity. Handle the flexible board with care as it breaks easily. optical pick-up 5-4. HOW TO DISTINGUISH BETWEEN OPTICAL PICK-UP KMS-260B AND KMS-260E Two types of optical pick-up, KMS-260B and KMS-260E, are used for this set at manufacturing , and each type has its own specified values for laser power check or laser power adjustment. Terefore, make sure to check which type of optical pick-up is used for the set before laser power check or laser power adjustment. To find the type of optical pick-up is described as follows. KMS-260B KMS-260E flexible board FPD Plate (L) FPD Plate (S) laser tap Optical pick-up flexible board 5-5. PRECAUTIONS FOR ADJUSTMENTS 1. When replacing the following parts, perform the adjustments and checks with in the order shown in the following table. 2. Set the test mode when performing adjustments. After completing the adjustments, release the test mode. Perform the adjustments and checks in “Group Service” of the test mode. 3. Perform the adjustments to be needed in the order shown. 4. Use the following tools and measuring devices. • Check Disc (TDYS-1) (Part No. : 4-963-646-01) • Test Disk (MDW-74/GA-1) (Part No. : 4-229-747-01) • Laser power meter LPM-8001 (Part No. : J-2501-046-A) or MD Laser power meter 8010S (Part No. : J-2501-145-A)*1 • Oscilloscope (Measure after performing CAL of prove.) • Digital voltmeter • Thermometer • Jig for checking BD board waveform (Part No. : J-2501-196-A) 5. When observing several signals on the oscilloscope, etc., make sure that VC and ground do not connect inside the oscilloscope. (VC and ground will become short-circuited) 6. Using the above jig enables the waveform to be checked without the need to solder. (Refer to Servicing Notes on page 6) 7. As the disc used will affect the adjustment results, make sure that no dusts nor fingerprints are attached to it. *1 Laser power meter When performing laser power checks and adjustment (electrical adjustment), use of the new MD laser power meter 8010S (Part No. J-2501-145-A) instead of the conventional laser power meter is convenient. It sharply reduces the time and trouble to set the laser power meter sensor onto the objective lens of optical pick-up. Parts to be replaced Adjustment 5-8. Initial setting of adjustment value 5-9. Recording and displaying of Iop information 5-10. Temperature compensation offset adjustment 5-11. Laser power adjustment 5-12. Iop NV Save 5-13. Traverse adjustment 5-14. Focus bias adjustment 5-17. Auto gain adjustment 5-7-4. Auto Check 22 Optical Pick-up IC101 IC102 IC151 IC190 IC195 D101 MDS-S9 5-6. USING THE CONTINUOUSLY RECORDED DISC • This disc is used in focus bias adjustment and error rate check. The following describes how to create a continuous recording disc. 1. Insert a disc (blank disc) commercially available. 2. Turn the [ . AMS > ] knob to display “CREC 1MODE” (C35). 3. Press the [YES] button to display “CREC 1MID”. Display “CREC 1(0300)” and start to recording. 4. Complete recording within 5 minutes. 5. Press the [MENU/NO] button and stop recording . 6. Press the Z button and remove the disc. The above has been how to create a continuous recorded disc for the focus bias adjustment and error rate check. Note: Be careful not to apply vibration during continuous recording. 5-7. CHECKS PRIOR TO REPAIRS These checks are performed before replacing parts according to “approximate specifications” to determine the faulty locations. For details, refer to “5-1. Parts Replacement and Adjustments” (see page 20). 5-7-1. Temperature Compensation Offset Check When performing adjustments, set the internal temperature and room temperature to 22 to 28ºC. Procedure: 1. Turn the [ . AMS > ] knob to display “TEMP CHECK” (C12). 2. Press the [YES] button. 3. “T=@@(##) [OK]” should be displayed. If “T=@@ (##) [NG]” is displayed, it means that the results are bad. (@@ indicates the current value set, and ## indicates the value written in the non-volatile memory.) 5-7-2. Laser Power Check Check the type and IOP value of the optical pick-up before checks. (Refer to 5-4. How to Distinguish between Optical pick-up KMS260B and KMS-260E (see page 22), 5-9. Recording and Displaying the IOP Information (see page 26)) Connection: laser power meter Optical pick-up objective lens digital voltmeter BD board CN105 pin 1 (I+3V) CN105 pin 2 (IOP) + – Procedure: 1. Set the laser power meter on the objective lens of the optical pick-up. (When it cannot be set properly, press the m button or M button to move the optical pick-up.) Connect the digital voltmeter to CN105 pin 1 (I+3V) and CN105 pin 2 (IOP). 2. Then, turn the [. AMS >] knob to display “LDPWR CHECK” (C13). 3. Press the [YES] button once to display “LD 0.9mW$ ”. Check that the reading of the laser power meter become 0.85 to 0.91 mW (KMS-260B) or 0.90 to 0.96 mW (KMS-260E). 4. Press the [YES] button once more to display “ LD 7.0mW$ ”. Check that the reading the laser power meter and digital voltmeter satisfy the specified value. Specified Value: Laser power meter reading : 7.0 ± 0.2 mW (KMS-260B) 7.25 ± 0.25 mW (KMS-260E) Digital voltmeter reading : Optical pick-up displayed value ± 10% (Optical pick-up label) KMS260B or E 20101 B0825 For details of the method for checking this value, refer to “5-9. Recording and Displaying the IOP Information” lOP=82.5 mA in this case lOP (mA) = Digital voltmeter reading (mV)/1 (Ω) 5. Press the [MENU/NO] button to display “LDPWR CHECK” (C13) and stop the laser emission. (The [MENU/NO] button is effective at all times to stop the laser emission.) Note: After step 4, each time the [YES] button is pressed, the display will be switched between “LD 0.7W$ ”, “LD 6.2mW$ ”, and “LD WP $ ”. Nothing needs to be performed here. Checking Location: BD board (see page 30) 5-7-3. Iop Compare The current Iop value at laser power 7.0 mW output and reference Iop value (set at shipment) written in the nonvolatile memory are compared, and the rate of increase/decrease will be displayed in percentage. Note: Perform this function with the optical pick-up set at room temperature. Procedure: 1. Turn the [. AMS > ] knob to display “Iop Compare” (C27). 2. Press the [YES] button and start measurements. 3. When measurements complete, the display changes to “± xx% yy”. xx is the percentage of increase/decrease, and OK or NG is displayed at yy to indicate whether the percentage of increase/ decrease is within the allowable range. 4. Press the [MENU/NO] button to end. 23 MDS-S9 5-7-4. Auto Check This test mode performs CREC and CPLAY automatically for mainly checking the characteristics of the optical pick-up. To perform this test mode, the laser power must first be checked. Perform Auto Check after the laser power check and Iop compare. Procedure: 1. Turn the [ . AMS > ] knob to display “AUTO CHECK” (C01). 2. Press the [YES] button. If “LDPWR ” is displayed, it means that the laser power check has not been performed. In this case, perform the laser power check and Iop Compare, and then repeat from enter the test mode. 3. If a disc is in the mechanical deck, it will be ejected forcibly. “DISC IN” will be displayed in this case. Load a test disc (MDW74/GA-1) which can be recorded. 4. If a disc is loaded at step 3, the check will start automatically. 5. When “XX CHECK” is displayed, the item corresponding to XX will be performed. When “06 CHECK” completes, the disc loaded at step 3 will be ejected. “DISC IN” will be displayed. Load the check disc (TDYS-1). 6. When the disc is loaded in the step 5, the check will automatically be resumed from “07 CHECK”. 7. After completing to test item 12, check OK or NG will be displayed. If all items are OK, “CHECK ALL OK” will be displayed. If any item is NG, it will be displayed as “NG: xxxx”. When “CHECK ALL OK” is displayed, it means that the optical pick-up is normal. Check the operations of other parts (spindle motor, sled motor, etc.). When displayed as “NG: xxxx”, it means that the optical pick-up is faulty. In this case, replace the optical pick-up. 5-7-5. Other Checks All the following checks are performed by the Auto Check mode. They therefore need not be performed in normal operation. 5-7-6. Traverse Check 5-7-7. Focus Bias Check 5-7-8. C PLAY Check 5-7-9. Self-Recording/Playback Check 5-7-6. Traverse Check Note 1:Data will be erased during MO reading if a recorded disc is used in this adjustment. Note 2:If the traverse waveform is not clear, connect the oscilloscope as shown in the following figure so that it can be seen more clearly. oscilloscope (DC range) BD board 330 k Ω CN105 pin 4 (TE) CN105 pin 6 (VC) + – 10 pF Connection: oscilloscope (DC range) BD board CN105 pin 4 (TE) CN105 pin 6 (VC) + – V: 0.1 V/div H: 10 ms/div Procedure: 1. Connect an oscilloscope to CN105 pin 4 (TE) and CN105 pin 6 (VC) on the BD board. 2. Load a disc (any available on the market). (Refer to Note 1) 3. Press the M button to move the optical pick-up outside the pit. 4. Turn the [. AMS >] knob to display “EF MO CHECK” (C14). 5. Press the [YES] button to display “EFB = MO-R”. (Laser power READ power/Focus servo ON/tracking servo OFF/spindle (S) servo ON) 6. Observe the waveform of the oscilloscope, and check that the specified value is satisfied. Do not turn the [ . AMS > ] knob. (Read power traverse checking) Traverse Waveform A VC B Specified value : Below 10% offset value Offset value (%) = IA – BI X 100 2 (A + B) 7. Press the [YES] button to display “EFB = MO-W”. 8. Observe the waveform of the oscilloscope, and check that the specified value is satisfied. Do not turn the [. AMS >] knob. (Write power traverse checking) Traverse Waveform A VC B Specified value : Below 10% offset value Offset value (%) = IA – BI X 100 2 (A + B) 24 MDS-S9 9. Press the [YES] button to display “EFB = MO-P”. Then, the optical pick-up moves to the pit area automatically and servo is imposed. 10. Observe the waveform of the oscilloscope, and check that the specified value is satisfied. Do not turn the [ . AMS > ] knob. Traverse Waveform A VC B Specified value : Below 10% offset value Offset value (%) = IA – BI X 100 2 (A + B) 11. Press the [YES] button to display “EF MO CHECK” (C14). The disc stops rotating automatically. 12. Press the Z button and take out the disc. 13. Load the check disc (TDYS-1). 14. Turn the [ . AMS > ] knob to display “EF CD CHECK” (C15). 15. Press the [YES] button to display “EFB = CD”. Servo is imposed automatically. 16. Observe the waveform of the oscilloscope, and check that the specified value is satisfied. Do not turn the [ . AMS > ] knob. Traverse Waveform A VC B 5-7-7. Focus Bias Check Change the focus bias and check the focus tolerance amount. Procedure: 1. Load the test disc (MDW-74/GA-1). 2. Turn the [. AMS > ] knob to display “CPLAY1MODE” (C34). 3. Press the [YES] button to display “CPLAY1MID”. 4. Press the [MENU/NO] button when “C = AD = )” is displayed. 5. Turn the [ . AMS > ] knob to display “FBIAS CHECK” (C16). 6. Press the [YES] button to display “ / c = ”. The first four digits indicate the C1 error rate, the two digits after [/] indicate ADER, and the 2 digits after [c =] indicate the focus bias value. Check that the C1 error is below 20 and ADER is below 2. 7. Press the [YES] button to display “ / b = ”. Check that the C1 error is about 100 and ADER is below 2. 8. Press the [YES] button to display “ / a = ”. Check that the C1 error is about 100 and ADER is below 2. 9. Press the [MENU/NO] button, then press the Z button and take out the test disc (MDW-74/GA-1). 5-7-8. C PLAY Check MO Error Rate Check Procedure: 1. Load the test disc (MDW-74/GA-1). 2. Turn the [. AMS > ] knob to display “CPLAY1MODE” (C34). 3. Press the [YES] button to display “CPLAY1MID”. 4. The display changes to “C = AD = )”. 5. If the C1 error rate is below 20, check that ADER is 00. 6. Press the [MENU/NO] button to stop playback, then press the Z button and take out the test disc (MDW-74/GA-1). Specified value : Below 10% offset value Offset value (%) = IA – BI X 100 2 (A + B) 17. Press the [YES] button to display “EF CD CHECK” (C15). 18. Press the Z button and take out the check disc (TDYS-1). Checking Location: BD board (see page 30) CD Error Rate Check Procedure: 1. Load the check disc (TDYS-1). 2. Turn the [. AMS > ] knob to display “CPLAY1MODE” (C34). 3. Press the [YES] button to display “CPLAY1MID”. 4. The display changes to “C = AD = )”. 5. Check that the C1 error rate is below 20. 6. Press the [MENU/NO] button to stop playback, then press the Z button and take out the check disc (TDYS-1). 5-7-9. Self-Recording/playback Check Prepare a continuous recording disc using the unit to be repaired and check the error rate. Procedure: 1. Load a recordable disc (blank disc). 2. Turn the [ . AMS > ] knob to display “CREC 1MODE” (C35). 3. Press the [YES] button to display “CREC 1MID”. 4. When recording starts, lights up “ REC ” and display “CREC 1 (@@@@)” (@@@@ is the address). 5. About 1 minute later, press the [MENU/NO] button to stop continuous recording. 6. Turn the [.AMS >] knob to display “CPLAY1MODE” (C34). 7. Press the [YES] button to display “CPLAY1MID”. 8. “C = AD = )” will be displayed. 9. Check that the C1 error becomes below 20 and the AD error below 2. 10. Press the [MENU/NO] button to stop playback, then press the Z button and take out the disc. 25 MDS-S9 5-8. INITIAL SETTING OF ADJUSTMENT VALUE 5-10. TEMPERATURE COMPENSATION OFFSET ADJUSTMENT Note: Mode which sets the adjustment results recorded in the non-volatile memory to the initial setting value. However the results of the temperature compensation offset adjustment will not change to the initial setting value. If initial setting is performed, perform all adjustments again excluding the temperature compensation offset adjustment. For details of the initial setting, refer to “5-5. Precautions for Adjustments” (See page 22) and execute the initial setting before the adjustment as required. Save the temperature data at that time in the non-volatile memory as 25 ˚C reference data. Procedure: 1. Turn the [. AMS >] knob to display “ADJ CLEAR” (C28). 2. Press the [YES] button. “Complete!” will be displayed momentarily and initial setting will be executed, after which “ADJ CLEAR” (C28) will be displayed. Procedure: 1. Turn the [ . AMS > ] knob to display “TEMP ADJUST” (C03). 2. Press the [YES] button to select the “TEMP ADJUST” mode. 3. “TEMP = [OK]” and the current temperature data will be displayed. 4. To save the data, press the [YES] button. When not saving the data, press the [MENU/NO] button. 5. When the [YES] button is pressed, “TEMP = SAVE” will be displayed and turned back to “TEMP ADJUST” (C03) display then. When the [MENU/NO] button is pressed, “TEMP ADJUST” (C03) will be displayed immediately. 5-9. RECORDING AND DISPLAYING THE IOP INFORMATION The IOP data can be recorded in the non-volatile memory. The IOP value on the optical pick-up label and the IOP value after the adjustment will be recorded. Recording these data eliminates the need to read the label on the optical pick-up. Recording Procedure: 1. Turn the [ . AMS > ] knob to display “Iop Write” (C05), and press the [YES] button. 2. The display becomes “Ref=@@@.@” (@ is an arbitrary number) and the numbers which can be changed will blink. 3. Input the IOP value on the optical pick-up label. To select the number : Turn the [ .AMS > ] knob. To select the digit : Press the [ . AMS > ] button. 4. When the [YES] button is pressed, the display becomes “Measu=@@@.@” (@ is an arbitrary number). 5. As the adjustment results are recorded for the step 4 value. Leave it as it is and press the [YES] button. 6. “Complete!!” will be displayed momentarily. The value will be recorded in the non-volatile memory and the display will become “Iop Write” (C05). Display Procedure: 1. Turn the [. AMS > ] knob to display “Iop Read”(C26). 2. “@@.@/##.#” is displayed and the recorded contents are displayed. @@.@ indicates the IOP value on the optical pick-up label. ##.# indicates the IOP value after adjustment 3. To end, press the [ . AMS > ] knob and [MENU/NO] button to display “Iop Read” (C26). Note: 1. Usually, do not perform this adjustment. 2. Perform this adjustment in an ambient temperature of 22 ˚C to 28 ˚C. Perform it immediately after the power is turned on when the internal temperature of the unit is the same as the ambient temperature of 22 ˚C to 28 ˚C. 3. When D101 has been replaced, perform this adjustment after the temperature of this part has become the ambient temperature. Specified Value: The “TEMP = ” should be within “E0 - EF”, “F0 - FF”, “00 0F”, “10 - 1F” and “20 - 2F”. 5-11. LASER POWER ADJUSTMENT Check the type and IOP value of the optical pick-up before adjustments. (Refer to 5-4. How to Distinguish between Optical pick-up KMS-260B and KMS-260E (see page 22), 5-9. Recording and Displaying the IOP Information) Connection: laser power meter Optical pick-up objective lens digital voltmeter BD board CN105 pin 1 (I+3V) CN105 pin 2 (IOP) + – Procedure: 1. Set the laser power meter on the objective lens of the optical pick-up. (When it cannot be set properly, press the m button and M button to move the optical pickup) Connect the digital voltmeter to CN105 pin 1 (I+3V) and CN105pin 2 (IOP) on the BD board. 2. Turn the [.AMS >] knob to display “LDPWR ADJUST” (C04). (Laser power : For adjustment) 3. Press the [YES] button once to display “LD 0.9 mW $ ”. 4. Turn the [ . AMS > ] knob so that the reading of the laser power meter becomes 0.85 to 0.91 mW. Press the [YES] button after setting the range knob of the laser power meter becomes 10 mW, and save the adjustment results. (“LD SAVE $ ” will be displayed for a moment) 5. Then “LD 7.0 mW $ ” will be displayed. 26 MDS-S9 6. Turn the [ .AMS >] knob so that the reading of the laser power meter becomes 6.9 to 7.1 mW, press the [YES] button to save it. (“LD SAVE $ ” will be displayed for a moment) Note: Do not perform the emission with 7.0 mW more than 15 seconds continuously. 7. Then, turn the [ .AMS > ] knob to display “LDPWR CHECK” (C13). 8. Press the [YES] button once to display “LD 0.9mW$ ”. Check that the reading of the laser power meter become 0.85 to 0.91 mW (KMS-260B) or 0.90 to 0.96 mW (KMS-260E). 9. Press the [YES] button once more to display “LD 7.0mW$ ”. Check that the reading the laser power meter and digital voltmeter satisfy the specified value. Note down the digital voltmeter reading value. Specified Value: Laser power meter reading : 7.0 ± 0.1 mW (KMS-260B) 7.25 ± 0.05 mW (KMS-260E) Digital voltmeter reading : Value on the optical pick-up label ±10% 4. After “Complete!” is displayed momentarily, the display changes to “Iop 7.0mW”. 5. After the display changes to “Iop=yysave?”, press the [YES] button. 6. When “Complete!” is displayed, it means that Iop NV saving has been completed. 5-13. TRAVERSE ADJUSTMENT Note 1: Data will be erased during MO reading if a recorded disc is used in this adjustment. Note 2: If the traverse waveform is not clear, connect the oscilloscope as shown in the following figure so that it can be seen more clearly. oscilloscope (DC range) BD board 330 k Ω CN105 pin 4 (TE) + – CN105 pin 6 (VC) 10 pF (Optical pick-up label) KMS260B or E 20101 B0825 For details of the method for checking this value, refer to “5-9. Recording and Displaying the IOP Information” lOP=82.5 mA in this case lOP (mA) = Digital voltmeter reading (mV)/1 (Ω) 10. Press the [MENU/NO] button to display “LDPWR CHECK” (C13) and stop the laser emission. (The [MENU/NO] button is effective at all times to stop the laser emission) 11. Turn the [ . AMS > ] knob to display “Iop Write” (C05). 12. Press the [YES] button. When the display becomes Ref=@@@.@ (@ is an arbitrary number), press the [YES] button to display “Measu=@@@.@” (@ is an arbitrary number). 13. The numbers which can be changed will blink. Input the IOP value noted down at step 9. To select the number : Turn the [ .AMS > ] knob. To select the digit : Press the [ .AMS > ] knob. 14. When the [YES] button is pressed, “Complete!!” will be displayed momentarily. The value will be recorded in the nonvolatile memory and the display will become “Iop Write” (C05). Note: After step 9, each time the [YES] button is pressed, the display will be switched “LD 0.7mW$ ”, “LD 6.2mW$ ”, and “LD WP $ ”. Nothing needs to be performed here. Connection: oscilloscope (DC range) BD board CN105 pin 4 (TE) CN105 pin 6 (VC) + – V: 0.1 V/div H: 10 ms/div Procedure: 1. Connect an oscilloscope to CN105 pin 4 (TE) and CN105 pin 6 (VC) on the BD board. 2. Load a disc (any available on the market). (Refer to Note 1) 3. Press the M button to move the optical pick-up outside the pit. 4. Turn the [. AMS > ] knob to display “EF MO ADJUST” (C07). 5. Press the [YES] button to display “EFB = MO-R”. (Laser power READ power/Focus servo ON/tracking servo OFF/spindle (S) servo ON) 6. Turn the [ .AMS > ] knob so that the waveform of the oscilloscope becomes the specified value. (When the [.AMS>] knob is turned, the of “EFB= ” changes and the waveform changes) In this adjustment, waveform varies at intervals of approx. 2%. Adjust the waveform so that the specified value is satisfied as much as possible. (Read power traverse adjustment) Traverse Waveform Adjustment Location: BD board (see page 30) A 5-12. Iop NV SAVE Write the reference values in the nonvolatile memory to perform “Iop compare”. As this involves rewriting the reference values, do not perform this procedure except when adjusting the laser power during replacement of the optical pick-up and when replacing the IC102. Otherwise the optical pick-up check may deteriorate. Note: Perform this function with the optical pick-up set at room temperature. VC B Specification A = B 7. Press the [YES] button and save the result of adjustment to the non-volatile memory (“EFB = SAVE” will be displayed for a moment. Then “EFB = MO-W” will be displayed). Procedure: 1. Turn the [.AMS >] knob to display “Iop NV Save” (C06). 2. Press the [YES] button and display “Iop [stop]”. 3. After the display changes to “Iop =xxsave?”, press the [YES] button. 27 MDS-S9 8. Turn the [.AMS >] knob so that the waveform of the oscilloscope becomes the specified value. (When the [.AMS>] knob is turned, the of “EFB= ” changes and the waveform changes) In this adjustment, waveform varies at intervals of approx. 2%. Adjust the waveform so that the specified value is satisfied as much as possible. (Write power traverse adjustment) Traverse Waveform VC B Specification A = B 9. Press the [YES] button, and save the adjustment results in the non-volatile memory. (“EFB = SAVE” will be displayed for a moment) 10. “EFB = MO-P” will be displayed. The optical pick-up moves to the pit area automatically and servo is imposed. 11. Turn the [ .AMS > ] knob until the waveform of the oscilloscope moves closer to the specified value. In this adjustment, waveform varies at intervals of approx. 2%. Adjust the waveform so that the specified value is satisfied as much as possible. Traverse Waveform A VC B Specification A = B 12. Press the [YES] button, and save the adjustment results in the non-volatile memory. (“EFB = SAVE” will be displayed for a moment) Next “EF MO ADJUST” (C07) is displayed. The disc stops rotating automatically. 13. Press the Z button and take out the disc. 14. Load the check disc (TDYS-1). 15. Turn the [ . AMS > ] knob to display “EF CD ADJUST” (C08). 16. Press the [YES] button to display “EFB = CD”. Servo is imposed automatically. 17. Turn the [ . AMS > ] knob so that the waveform of the oscilloscope moves closer to the specified value. In this adjustment, waveform varies at intervals of approx. 2%. Adjust the waveform so that the specified value is satisfied as much as possible. Traverse Waveform A VC B 28 Adjustment Location: BD board (see page 30) 5-14. FOCUS BIAS ADJUSTMENT A Specification A = B 18. Press the [YES] button, display “EFB = SAVE” for a moment and save the adjustment results in the non-volatile memory. Next “EF CD ADJUST” (C08) will be displayed. 19. Press the Z button and take out the check disc (TDYS-1). Procedure: 1. Load the continuously-recorded disc. (Refer to “5-6. USING THE CONTINUOUSLY RECORDED DISC” (See page 23)) 2. Turn the [ . AMS > ] knob to display “CPLAY1MODE” (C34). 3. Press the [YES] button to display “CPLAY1MID”. 4. Press the [MENU/NO] button when “C = AD = )” is displayed. 5. Turn the [ . AMS > ] knob to display “FBIAS ADJUST” (C09). 6. Press the [YES] button to display “ / a= T”. The first four digits indicate the C1 error rate, the two digits after “/ ” indicate ADER, and the 2 digits after “a =” indicate the focus bias value. 7. Turn the [ . AMS > ] knob in the clockwise and find the focus bias value at which the C1 error rate becomes about 220 (refer to Note 2). 8. Press the [YES] button to display “ / b= T”. 9. Turn the [.AMS>] knob in the counterclockwise and find the focus bias value at which the C1 error rate becomes about 220. 10. Press the [YES] button to display “ / c= T”. 11. Check that the C1 error rate is below 20 and ADER is 00. Then press the [YES] button. 12. If the “( )” in “ - - ( )” is above 20, press the [YES] button. If below 20, press the [MENU/NO] button and repeat the adjustment from step 2. 13. Press the Z button and take out the disc. Note 1: The relation between the C1 error and focus bias is as shown in the following figure. Find points A and B in the following figure using the above adjustment. The focal point position C is automatically calculated from points A and B. Note 2: As the C1 error rate changes, perform the adjustment using the average vale. C1 error about 220 Focus bias value B C A MDS-S9 5-15. ERROR RATE CHECK 5-17. AUTO GAIN CONTROL OUTPUT LEVEL ADJUSTMENT 5-15-1. CD Error Rate Check Procedure: 1. Load the check disc (TDYS-1). 2. Turn the [ . AMS > ] knob to display “CPLAY1MODE” (C34). 3. Press the [YES] button twice and display “CPLAY1MID”. 4. The display changes to “C = AD = )”. 5. Check that the C1 error rate is below 20. 6. Press the [MENU/NO] button to stop playback, then press the Z button and take out the check disc (TDYS-1). Be sure to perform this adjustment when the optical pick-up is replaced. If the adjustment results becomes “Adjust NG!”, the optical pickup may be faulty or the servo system circuits may be abnormal. 5-15-2. MO Error Rate Check Procedure: 1. Load the continuously-recorded disc. (Refer to “5-6. USING THE CONTINUOUSLY RECORDED DISC” (See page 23)) 2. Turn the [ . AMS > ] knob to display “CPLAY1MODE” (C34). 3. Press the [YES] button to display “CPLAY1MID”. 4. The display changes to “C = AD = )”. 5. If the C1 error rate is below 20, check that ADER is 00. 6. Press the [MENU/NO] button to stop playback, then press the Z button and take out the disc. 5-16. FOCUS BIAS CHECK Change the focus bias and check the focus tolerance amount. Procedure: 1. Load the continuously-recorded disc. (Refer to “5-6. USING THE CONTINUOUSLY RECORDED DISC” (See page 23)) 2. Turn the [ .AMS > ] knob to display “CPLAY1MODE” (C34). 3. Press the [YES] button twice to display “CPLAY1MID”. 4. Press the [MENU/NO] button when “C = AD = )” is displayed. 5. Turn the [ . AMS > ] knob to display “FBIAS CHECK” (C16). / c= T”. 6. Press the [YES] button to display “ The first four digits indicate the C1 error rate, the two digits after “/ ” indicate ADER, and the 2 digits after “c =” indicate the focus bias value. Check that the C1 error is below 20 and ADER is below 2. 7. Press the [YES] button and display “ / b= T”. Check that the C1 error is below 100 and ADER is below 2. 8. Press the [YES] button and display “ / a= T”. Check that the C1 error is below 100 and ADER is below 2 9. Press the [MENU/NO] button, then press the Z button and take out the disc. Note: 5-17-1. CD Auto Gain Control Output Level Adjustment Procedure: 1. Load the check disc (TDYS-1). 2. Turn the [.AMS>] knob to display “AG Set (CD)” (C11). 3. When the [YES] button is pressed, the adjustment will be performed automatically. “Complete!!” will then be displayed momentarily when the value is recorded in the non-volatile memory, after which the display changes to “AG Set (CD)” (C11). 4. Press the Z button and take out the check disc (TDYS-1). 5-17-2. MO Auto Gain Control Output Level Adjustment Procedure: 1. Load the test disc (MDW-74/GA-1). 2. Turn the [.AMS>] knob to display “AG Set (MO)” (C10). 3. When the [YES] button is pressed, the adjustment will be performed automatically. “Complete!!” will then be displayed momentarily when the value is recorded in the non-volatile memory, after which the display changes to “AG Set (MO)” (C10). 4. Press the Z button and take out the test disc (MDW-74/GA-1). If the C1 error and ADER are above other than the specified value at points a (step 8. in the above) or b (step 7. in the above), the focus bias adjustment may not have been carried out properly. Adjust perform the beginning again. 29 MDS-S9 Adjustment and checking Loacation: – BD BOARD (Component Side) – D101 CN101 – BD BOARD (Conductor Side) – IC101 IC151 CN105 1. I+3V 1 2. IOP 7 3. GND 4. TE 5. FE 6. VC 7. RF IC190 Note: It is useful to use the jig for checking BD board waveform. (Refer to Servicing Notes on page 6) 30 MDS-S9 SECTION 6 DIAGRAMS 100 60 FILTER SCTX 59 62 61 AGCI RF AGC & EQ ASYI PEAK 3T PEAK & BOTTOM BOTM 9 TE E I-V AMP F TRACKING ERROR AMP COMMAND AUTOMATIC POWER CONTROL Q121, 122 ILCC PD 11 FE FOCUS ERROR AMP APC LD/PD AMP SERIAL/PARALLEL CONVERTER, DECODER LD SE 78 SUBCODE PROCESSOR ADIP DEMODULATOR/ DECODER CPU INTERFACE 35 79 34 F0CNT MONITOR CONTROL SPINDLE SERVO 26 28 94 93 12 11 14 9 8 5 6 7 V-I CONVERTER F0CNT SWDT 20 SCLK 1024FS DIVIDER IC171 16 17 (Page 32) C (Page 32) D-RAM IC153 XOE 43 XWE 47 XRAS 46 XCAS 44 22 3 4 23 OE WE RAS CAS 1 2 3 4 SHOCK XBUSY 8 F ABCD ABCD AMP I-V AMP 32 SWDT SCLK XLAT C D E ADFG SRDT DETECTOR ADIN SENS E A B C D 30 XINT 4 5 6 7 29 SQSY A ADFM B.P.F. DQSY AT AMP SPRD J INTERNAL BUS SPFD A OSCO 36 ADFG B DADT, BCK, LRCK OSCI CLOCK GENERATOR 37 EQ 3T WBL C D DIGITAL IN 21 33 WBL I 20 DOUT DADT 26 XBCK 28 LRCK 27 FS256 29 COMPARATOR RFI DIN1 OPTICAL RECEIVER IC611 WAVE SHAPER IC600 19 B AUX B 57 DIN0 DIGITAL AUDIO INTERFACE 1, 2, 24, 25 B.P.F. TEMP 38 ASYO 23 EQ WBL F RF PLL FILO BCK LRCK DQ1 – DQ4 40 24 LRCKI A0 – A9 46 CLTV 22 XBCKI 9 – 12, 14 – 18, 5 RFO RF AMP J PCO A DATA D0 – D3 2 54 I FILI DATAI 49, 48, 50, 51 1 J 53 SAMPLING RATE CONVERTER ADDT 25 A00 – A09 I RF AMP, FOCUS/TRACKING ERROR AMP IC101 ADDT MNT0 (FOK) MNT1 (SHOCK) MNT2 (XBUSY) MNT3 (SLOCK) MORFO OPTICAL PICK-UP BLOCK (KMS-260B) 47 MORFI 48 (Page 32) EFMO 34 – 31, 36 – 40, 45 HR901 OVER WRITE HEAD 15 TX IC151 (1/2) SHOCK PROOF MEMORY CONTROLLER OVER WRITE HEAD DRIVE IC181, Q181, 182 ATRAC ENCODER/DECODER DIGITAL SIGNAL PROCESSOR, EFM/ACIRC ENCODER/DECODER, SHOCK PROOF MEMORY CONTROLLER, ATRAC ENCODER/DECODER IC151 (1/2) BLOCK DIAGRAM – SERVO Section – EFM/ACIRC ENCODER/DECODER 6-1. SWDT, SCLK 32 48 40 38 42 50 58 56 SCLK XLATCH MNT1 (SHOCK) MNT2 (XBUSY) 133 IOP 29 LDON 47 DIG-RST 35 WRPWR LDIN 16 FCS+ (FOCUS) (TRACKING) 2-AXIS DEVICE HF MODULE FCS– TRK+ TRK– OUT4R IN4F 4 27 OUT2F 25 OUT2R 21 OUT1F 23 OUT1R IN2F 29 IN2R 30 IN1F 19 IN1R 18 83 SPRD 92 91 10 XRST 13 RECP AUTOMATIC POWER CONTROL SFDR FFDR 88 FRDR 89 IN3F 14 IN3R 15 TFDR 86 TRDR 85 5 LOADING MOTOR DRIVE IC440 ANALOG MUX SRDR A/D CONVERTER DIGITAL SERVO SIGNAL PROCESS FROM CPU INTERFACE DIGITAL SERVO SIGNAL PROCESSOR IC151 (2/2) 6 CLAMP 2 AUTO SEQUENCER 12 OUT3F 10 OUT3R LRCKI 34 BCK LRCK • SIGNAL PATH : PLAY (ANALOG OUT) : REC (ANALOG IN) : REC (DIGITAL IN) 67 65 66 75 74 63 64 S101 (LIMIT IN) 4 REFERENCE VOLTAGE SWITCH Q440, 444 REC-SW 43 S105 (REC POSITION) 11 LD-LOW OUT-SW 51 S103 (PACK OUT) 10 M XLRF XLAT 80 CKRF SCLK 81 DTRF SWDT 82 LIMIT-IN 30 +5V REVIN 8 CLK (CLIP) 46 DATA 12 13 SPFD FWDIN 3 AUX1 ABCD FE TE SE PEAK BOTM IN4R MOTOR DRIVE MOTOR DRIVE M OUT4F PWM GENERATOR M102 (SLED) M 6 APCREF M101 (SPINDLE) TX0 (CLIP) 44 SYSTEM CONTROLLER IC1 (1/2) 14 MOD PSB RXO (CLIP) 44 45 LDOUT FOCUS/TRACKING COIL DRIVE, SPINDLE/SLED MOTOR DRIVE IC141 SWDT 25 27 DQSY COMPARATOR IC102 SRDT 16 17 18 SENS 12 D (Page 32) XINT PD SQSY 10 SWDT SCLK XLAT LASER ON SWITCH Q101 PD APCREF LASER DIODE M103 (LOADING) REFLECT SW 67 PROTECT SW 68 HF MODULE SWITCH Q131 – 134 –1 –2 S102 MOD 31 S104 (PLAY POSITION) PLAY-SW 49 31 S102-1 (REFELECT RATE DETECT) S102-2 (PROTECT DETECT) MDS-S9 6-2. BLOCK DIAGRAM – MAIN Section – A/D, D/A CONVERTER IC500 A ADDT 13 J150 HIGH-PASS FILTER, DIGITAL ATTENUATOR SDTO (Page 31) AINL A/D CONVERTER BLOCK SUBTRACKTION AINR AOUTL+ AUDIO INTERFACE CONTROLLER DADT, BCK, LRCK DADT B 14 BCK (Page 31) 12 LRCK D SWDT, SCLK 11 SWDT SCLK D/A CONVERTER BLOCK DIGITAL ATTENUATOR, SOFT MUTE SDTI BICK AOUTR+ AOUTR– LRCK CDTI 15 CCLK 16 CS 17 (Page 31) AOUTL– CONTROL REGISTER INTERFACE CLOCK GENERATOR, CLOCK DIVIDER TXI 3 2 26 MIX AMP IC160 (2/2) 25 LOW-PASS FILTER IC260 (2/2) : PLAY (ANALOG OUT) ANALOG IN R : REC (ANALOG IN) L ANALOG OUT 28 MIX AMP IC160 (1/2) 27 9 LOW-PASS FILTER IC260 (1/2) R OSC IC550 PD 19 C • SIGNAL PATH L LINE AMP IC350 X550 45.1584MHz 1024FS MUTING Q180, 281 (Page 31) SDA SCL WP EEPROM IC195 5 6 7 REMOTE CONTROL RECEIVER IC781 MUTING CONTROL SWITCH Q380 X22 10MHz 9 61 66 60 4 RESET SDA SCL EEP-WP RMC 8 MUTE 10 LATCH D412 22 XIN 20 XOUT J800 PC LINK 5 36 I2CCLK 6 129 I2CPOWER 2 115 I2CBUSY XBUSY 123 124 1 A KEY0 – KEY2 141, 139, 138 3 RESET +5V PDOWN 4 FL-DATA FL-CLK FL-CS +5V 1 2 128 26 19 C769, R769 ROTARY ENCODER 59 OSCI OSC 4 GND TR900 SUB POWER TRANSFORMER 63 62 61 B SW 58 OSCO POWER ON/OFF RELAY DRIVE Q910 STB 131 DAT CLK CS EXTON SYSTEM CONTROLLER IC1 (2/2) 37 I2CDAT JOG 1 I2CCLK 1 JOG 0 I2CDATA RST 60 FLUORESCENT INDICATOR TUBE/LED DRIVER IC761 MD MECHANISM DECK SECTION 5 P1, P2 1, 2 S1 – S35 5 – 39 G1 – G12 40 – 51 +3.3V BACK UP +3.3V G13 52 5 +5V AC (TO FL771) PH5 AC F-1 –32V FL/LED DRIVER (IC761) B– +3.3V REGULATOR IC190 –32V REGULATOR IC480 11 V.BACK LINE FILTER LF900 D481 AC IN RECT D461, 462 VCC1 6 D422 RY910 AC F-2 LOADING MOTOR DRIVER (IC440) B+ S713 . AMS > PUSH ENTER LED DRIVE Q751, 755 GRID DRIVE Q767 BT420 LITHUM BATTERY S701 – 705, 711, 712, S714, 715, 721 – 724, 726 SYSTEM +3.3V D751 STANDBY D755 MDLP FLUORESCENT INDICATOR TUBE FL771 A/D, D/A CONVERTER (IC500) B+ +3.3V REGULATOR IC400 D421 +3.3V REGULATOR Q356 8 SYS3.5 4 ANA5 UNREG +12V UNREG –12V RECT D471, 472 D476, 477 TR950 MAIN POWER TRANSFORMER VCC2 7 RECT D401 – 404 AC 2 RECT D431, 432 +5V 10 S.RESET 13 P.DOWN 32 ANALOG LINE OUT CIRCUIT 32 MDS-S9 C E These are omitted. COMPO AGCI RF AGC RF PEAK OPN COMPP RFO ADDC MORFI OPO MORFO 39 38 37 RF AGC + – EQ USRC EQ DET BPF3T Note: The components identified by mark 0 or dotted line with mark 0 are critical for safety. Replace only with part number specified. RFA2 I J • A : B+ Line. • B : B– Line. • Voltages and waveforms are dc with respect to ground under no-signal conditions. no mark : STOP ( ) : PLAY < > : REC : Impossible to measure ∗ • Voltages are taken with a VOM (Input impedance 10 MΩ). Voltage variations may be noted due to normal production tolerances. • Waveforms are taken with a oscilloscope. Voltage variations may be noted due to normal production tolerances. • Circled numbers refer to waveforms. • Signal path. E : PLAY (ANALOG OUT) j : REC (ANALOG IN) l : REC (DIGITAL IN) 1 –1 – –2 – 2 RFA3 HLPT –1 VC A 3 IVR 3T PTGR WBL TEMP PEAK – 1 – –2 –2 BOTTOM GRVA PBSW WBL 35 ABCD 34 FE – – – – AA 36 BOTM PBH –1 GRV + – 4 P-P –2 OFST CVB AUX SW PEAK3T 3T 33 AUX BPFC ABCDA 32 ADFG B + – 5 IVR C 31 ADAGC BB + – 6 IVR + + – – 30 ADIN FEA CC DET BPF22 D – – + + + – 7 IVR ADIP AGC WBL ATA DD WBL E + – 8 IVR 29 ADFM + – EE EE' –1 PTGR – + – + –2 –1 TESW EBAL –2 ESW + – 9 IVR FF IV + – 3T AUXSW 25 WBLADJ VI CONV BGR COMMAND – + – VREF SCRI - PARA DECODE APC 11 APCREF 12 33 33 26 TE TEA EQ PD 10 + TG WBL FF' FBAL GSW 28 SE 27 CSLED EFB F TG SEA 13 14 15 16 17 18 19 20 21 22 23 24 VCC Q 40 3TADJ These are omitted. 41 EQADJ E 43 42 VREF B C RFA1 44 USROP F0CNT Q – + XSTBY B E 45 XLAT These are omitted. 46 SCLK Q 47 SWDT C 48 TEMPR • Indication of transistor CXA2523AR TEMPI Parts on the pattern face side seen from the pattern face are indicated. Parts on the parts face side seen from the parts face are indicated. IC101 + – Caution: Pattern face side: (Conductor Side) Parts face side: (Component Side) Note on Schematic Diagram: • All capacitors are in µF unless otherwise noted. pF: µµF 50 WV or less are not indicated except for electrolytics and tantalums. • All resistors are in Ω and 1/4 W or less unless otherwise specified. f • : internal component. • 5 : fusible resistor. • C : panel designation. GND Note on Printed Wiring Board: • X : parts extracted from the component side. • Y : parts extracted from the conductor side. : Pattern from the side which enables seeing. • (The other layers' patterns are not indicated.) B • IC Block Diagrams – BD Board – NOTE FOR PRINTED WIRING BOARDS AND SCHEMATIC DIAGRAMS – + 6-3. BH6519FS-E2 – MAIN Board – CAPA– CAPA+ IN2R IN2F VM2 OUT2F PGND2 OUT2R VM12 OUT1R PGND1 OUT1F VM1 IN1F IN1R VDD MDS-S9 IC400 32 31 30 29 28 27 26 25 24 23 22 21 20 19 18 17 CHARGE PUMP. OSC AMP AMP INTERFACE AMP AMP PREDRIVE PH5 1 STBY 2 IC440 T.S.D VCC 3 ANA5 4 MOTOR DRIVE + 3 4 5 6 7 8 9 10 11 12 13 14 15 16 VG IN4R IN4F VM4 OUT4F PGND4 OUT4R VM34 OUT3R PGND3 OUT3F VM3 IN3F IN3R PSB CD1 8 P. DOWN 9 IC480 DELAY CIRCUIT CD2 11 DELAY CIRCUIT EACH BLOCK MONITOR CONTROL ON/OFF 73 AVSS IN 71 ADRT 70 AVDD SWDT 5 IC500 69 ADIO SCLK 6 EACH BLOCK SRDT 8 SERVO DSP A/D CONVERTER 67 AUX1 ANALOG MUX XRST 10 66 FE 1 AINR 2 63 PEAK SUBCODE PROCESSOR DQSY 12 VCOM 65 ABCD 64 BOTM SQSY 11 AK4524 68 VC SENS 9 PLL EFM/ACIRC ENCODER/ DECODER SHOCK RESISTANT MEMORY CONTROLLER XINT 14 61 FILO 60 FILI AINL 3 VREF AGND 4 5 6 7 24 DGND 23 VD 22 VT VA TEST 58 AVSS OSCI 16 CLOCK GENERATOR XTSL 18 EACH BLOCK DIGITAL AUDIO I/F DIN0 19 DIN1 20 COMP SAMPLING RATE CONVERTER D/A CONVERTER BLOCK 59 PCO TX 15 OSCO 17 AOUTR+ AOUTR– AOUTL+ AOUTL– 28 27 26 25 A/D CONVERTER BLOCK 62 CLTV RECP 13 XTAO 8 XTAI 9 XTALE 10 57 RFI 56 BIAS CLOCK GENERATOR & DIVIDER 21 CLKO 20 M/S 19 PD 55 AVDD 54 ASYI DOUT 21 LRCK BICK SDTO SDTI 53 ASYO DATAI 22 ATRAC ENCODER/DECODER LRCKI 23 XBCKI 24 52 MVCI ADDT 25 ADDRESS/DATA BUS A00 - A11, D0 - D3 51 D3 D2 D0 D1 XWE XRAS A09 XCAS XOE DVSS A11 A08 A07 A06 A05 A04 A10 A01 A00 A02 31 32 33 34 35 36 37 38 39 40 41 42 43 44 45 46 47 48 49 50 A03 DVDD XBCK FS256 LRCK DADT 26 27 28 29 30 REFERENCE VOLTAGE – OVERHEAT PROTECTION 72 ADRB CPU I/F 4 74 SE ADIP DECODER 34 34 11 12 13 14 AUDIO INTERFACE CONTROLLER H.P.F. D-ATT D-ATT, S-MUTE 5 REFERENCE VOLTAGE 3 OUT 27k + 75 TE MNT3 4 10 2 – + VREF AUTO SEQUENCER PWM GENERATOR 9 M5293L DCHG ADFG F0CNT XLRF CKRF 92 91 90 89 88 87 86 85 84 83 82 81 80 79 78 77 76 SPINDLE SERVO 8 5k S. RESET 12 MNT0 1 7 GND 10 DTRF APCREF LDDR TRDR TFDR DVDD FFDR FRDR FS4 SRDR SFDR SPRD SPFD FGIN TEST1 TEST2 TEST3 DVSS EFMO GND 94 93 6 – + CXD2662R 100 99 98 97 96 95 5 MOTOR DRIVE 7 4 NOISE FILTER AC 3.3V 3 VCC 2 6 2 VCC 1 B.BAK – REV.IN 1 + FWD.IN PSB CLAMP INTERFACE NOISE FILTER AMP GND AMP FWD/REV/STOP CONTROL LOGIC – + GND AMP AMP 5 SYS3.3 2 XLAT 7 MOTOR DRIVE MOTOR DRIVE PREDRIVE 1 MNT2 3 O.C.P + – INTERFACE MNT1 2 LB1641 – PREDRIVE PREDRIVE IC151 LA5643 VDD INTERFACE APC IC141 CONTROL REGISTER INTERFACE 18 17 16 15 CIF CS CCLK CDTI 1 OVERCURRENT LIMITTER MDS-S9 6-4. PRINTED WIRING BOARDS – BD Board – BD BOARD FLEXIBLE BOARD BD BOARD (CONDUCTOR SIDE) (COMPONENT SIDE) S102-2 PROTECT DETECT (LOADING) –2 –1 S102-1 REFLECT RATE DETECT (PACK OUT) 2B 1B TEST PIN 2C 1C PLAY POSITION REC POSITION G D G D 23 1 22 22 (SLED) (22) (22) A-1 Q101 Q131 Q132 Q133 Q134 B-1 C-1 B-1 B-1 C-1 MAIN BOARD CN400 MAIN BOARD CN1 (Page 38) (Page 38) Ref. No. Location D101 A • Semiconductor Location • Semiconductor Location Ref. No. B 35 35 Location D181 D183 D-3 D-3 IC101 IC102 IC141 IC151 IC153 IC171 A-3 B-3 C-1 C-2 C-3 D-2 Ref. No. Location IC181 IC190 IC195 D-3 D-1 D-2 Q121 Q122 Q181 Q182 B-3 B-3 D-3 D-3 MDS-S9 6-5. SCHEMATIC DIAGRAM – BD Board (1/2) – • See page 43 for Waveforms. • See page 33 for IC Block Diagrams. (Page 37) (Page 37) (Page 37) The components identified by mark 0 or dotted line with mark 0 are critical for safety. Replace only with part number specified. 36 36 MDS-S9 6-6. SCHEMATIC DIAGRAM – BD Board (2/2) – • See page 43 for Waveforms. • See page 33 for IC Block Diagram. (Page 36) (Page 40) (Page 36) (Page 41) (Page 36) 37 37 MDS-S9 6-7. PRINTED WIRING BOARD – MAIN Board (Component Side) – • Semiconductor Location 2 3 4 5 Location A FB803 C804 L804 R806 R623 C613 IC600 R815 R614 C406 1 IC260 7 R176 C171 R28 D421 A A C L490 K 14 C925 2 R129 R137 R3 R138 C955 D C482 R484 R483 R485 C481 C39 D401 D402 D431 R481 R141 D412 R139 A C26 D432 E R263 C261 C265 L524 108 C522 R16 R30 E R24 Q444 R482 C36 R45 1 27 C48 CN1 C484 CN400 23 R356 R44 R442 R443 2 36 37 C37 R38 22 R255 C515 C503 C502 R511 R508 C501 C505 L506 C554 R552 L551 C553 8 7 14 R553 R551 1 72 R357 R42 R1001 R155 IC500 L523 R49 26 1 D155 R514 C524 73 R43 2 L349 R90 IC1 8 R262 IC160 109 4 R261 R162 C19 Q440 E R265 R515 R432 1 R165 C519 C443 R431 R163 1 R266 R264 C165 1 R433 D482 C161 5 C266 4 R161 144 R144 R10 R912 IC350 C272 C516 R441 D403 R1035 C172 R166 5 R164 8 R4 K K D404 1 R272 R271 C166 C926 C956 8 R253 C271 R276 1 CN490 R911 4 R171 15 R36 R37 D422 5 R172 R116 R421 R153 D156 R410 C411 C410 R801 R811 R252 R513 R512 R805 C407 E E R181 R280 8 R251 R152 C517 C800 14 Q380 C251 R278 R151 Q281 R516 C413 R613 E Q180 R517 B R626 FB801 R808 R807 R413 C601 R380 R178 R381 R177 D255 C177 R855 C151 C277 C611 D256 L611 R851 R277 R802 C814 R114 B-7 B-7 B-6 E-3 E-3 DISPLAY BOARD CN701 R33 Q180 Q281 Q380 Q440 Q444 8 MAIN BOARD (COMPONENT SIDE) R123 D-5 C-7 B-7 C-8 D-8 E-7 B-5 C R115 IC1 IC160 IC260 IC350 IC500 IC550 IC600 7 (Page 44) R124 D-8 D-8 D-8 D-8 D-2 D-1 D-2 D-1 D-3 C-3 C-3 D-1 D-1 D-1 6 R134 R135 D155 D156 D255 D256 D401 D402 D403 D404 D412 D421 D422 D431 D432 D482 R136 Ref. No. 1 R50 R51 L522 L550 C551 R67 R68 IC550 C552 R1002 25 1-677-830- B BD BOARD CN103 (Page 35) A BD BOARD CN102 (Page 35) 38 38 (25) MDS-S9 6-8. PRINTED WIRING BOARD – MAIN Board (Conductor Side) – 1 2 3 4 5 6 7 • Semiconductor Location 8 Ref. No. IN A R MAIN BOARD ANALOG L SHORT SOCKET OUT R L IC611 J800 OPTICAL IN PC LINK (CONDUCTOR SIDE) IC611 4 2 1 3 6 C403 B C276 C412 C408 C404 13 IC400 BT420 LITHIUM BATTERY CN420 C490 C366 5 1 R306 R301 C356 3 C612 C176 C152 C252 1 2 C361 1 C351 D472 D462 C C471 C461 D477 1 C153 D461 C253 D471 C476 (Page 43) CN902 D D476 PT BOARD CN901 D C520 C312 10 10 C400 C447 Q910 E C1 C523 D481 IC440 C485 X22 C500 C483 C431 C504 1 Q356 C405 E E X550 5 C550 1 IC480 LP3 25 1-677-830- 39 39 (25) Location D461 D462 D471 D472 D476 D477 D481 C-8 C-8 D-8 C-8 D-8 C-8 D-8 IC400 IC440 IC480 IC611 B-8 E-7 E-8 A-4 Q356 Q910 E-3 D-8 MDS-S9 6-9. SCHEMATIC DIAGRAM – MAIN Board (1/3) – • See page 43 for Waveform. (Page 41) (Page 37) (Page 42) (Page 42) (Page 45) 40 40 MDS-S9 6-10. SCHEMATIC DIAGRAM – MAIN Board (2/3) – • See page 43 for Waveforms. • See page 33 for IC Block Diagram. (Page 37) (Page 40) (Page 42) 41 41 MDS-S9 6-11. SCHEMATIC DIAGRAM – MAIN (3/3)/PT Boards – • See page 33 for IC Block Diagrams. (Page 41) (Page 40) (Page 40) The components identified by mark 0 or dotted line with mark 0 are critical for safety. Replace only with part number specified. 42 42 MDS-S9 6-12. PRINTED WIRING BOARD – PT Board – • Waveforms – BD Board – PT BOARD AC IN 1 IC101 1 (I), 2 (J) (MD Play mode) 1 6 IC151 wk (XBCK) 3 IC500 9 (XTI) 1 CN900 2 2 C900 3 1.4 Vp-p 4.4 Vp-p 0.5 Vp-p 4 LF900 LINE FILTER 1 354 ns 2 2 IC101 4 (A) (MD Play mode) 22.2 ns 7 IC171 3 4 IC500 qa (LRCK) C901 JW901 4 1.4 Vp-p 0.1 Vp-p 3.6 Vp-p 6 3 TR950 MAIN POWER TRANSFORMER 2 8 22.2 µs 22.7 µs 5 IC500 qs (BICK) 3 IC101 8 (E), 9 (F) (MD Play mode) 1 RY910 0.6 Vp-p 3.3 Vp-p C910 – MAIN Board – D910 354 ns JW904 4 IC151 qh (OSCI) 2 1 3 4 1 IC1 w; (XOUT) 5 5.2 Vp-p 2.9 Vp-p TR900 SUB POWER TRANSFORMER LP901 22.2 ns 5 IC151 wj (LRCK) C920 13 12 11 9 8 7 2 IC550 2 1 IC761 tk (OSC0) 6 C921 C922 C924 10 – DISPLAY Board – 100 ns 1 4.2 Vp-p CN901 3.6 Vp-p 1.6 Vp-p 10 C923 LP900 C952 C951 C950 11 1-681-806- (CHASSIS) (11) 22.7 µs D MAIN BOARD CN902 (Page 39) 43 43 22.2 ns 540 ns MDS-S9 6-13. PRINTED WIRING BOARD – DISPLAY Board – 1 2 3 4 5 6 7 8 9 10 11 DISPLAY BOARD A S701 – 705, S711, 712, S714, 715, S721 – 724, 726 C700 S712 R712 R715 YES (CHASSIS) S711 S714 CLEAR LP700 D751 STANDBY S715 MENU/NO JW721 Z S703 S704 M m R703 JW702 JW706 1 JW708 3 JW712 JW710 u R763 R767 R724 CN701 JW711 R723 R722 R726 JW725 IC781 C766 3 C781 1 S722 C782 JW713 S713 ROTARY ENCODER S705 C MDLP JW718 JW701 R702 R781 JW717 R760 x IC761 I/1 S724 LEVEL/DISPLAY/CHAR JW707 R761 S702 z JW723 JW719 R769 S713 R705 R751 JW724 S726 E JW716 Q751 E Q775 C764 JW715 D775 R762 S701 C769 C773 C760 4 C762 B Q767 R775 E JW714 C765 5 C761 R704 C763 R713 JW704 R714 JW703 JW722 PLAY MODE R782 JW720 S721 S723 INPUT REC MODE C770 . AMS > PUSH ENTER 11 1-681-805- C MAIN BOARD CN490 (Page 38) • Semiconductor Location Ref. No. Location D751 D775 A-11 B-9 IC761 IC781 B-6 B-9 Q751 Q767 Q775 B-10 B-9 B-9 44 44 (11) MDS-S9 6-14. SCHEMATIC DIAGRAM – DISPLAY Board – • See page 43 for Waveform. FL771 FLUORESCENT INDICATOR TUBE R775 68 R751 1.5k D775 SEL5821A-TP15 D751 SEL5220S-TP15 MDLP STANDBY R726 47k R724 4.7k R723 3.3k R722 2.2k S726 Q775 UN4211-TA Q751 UN4211-TA LED DRIVE S724 S723 S722 S721 LED DRIVE LEVEL/DISPLAY/CHAR REC MODE PLAY MODE INPUT C700 0.1 LP700 G13 G12 G10 G11 G9 G8 G7 G6 G5 S2 S3 S1 S4 S5 S6 S7 S10 S8 S9 S11 S12 S13 S14 S15 S16 S18 S17 S19 S20 S21 S22 S23 S24 S25 S26 G4 S27 G3 S28 G2 G1 S705 S704 R704 4.7k S703 R703 3.3k R702 2.2k S702 S701 C773 10 50V S1 S2 S3 S4 S5 S6 S7 S8 S9 S10 S11 S12 S13 S14 S15 S16 S17 S18 S19 S20 S21 S22 S23 S24 S25 S26 S27 S28 C770 10 50V S713 ROTARY ENCODER AMS PUSH ENTER R715 10k A SW R714 4.7k R713 3.3k R712 2.2k GND GND B S715 CN701 15P S714 S712 CLEAR YES S711 MENU/NO P.DOWN KEY0 RMC FLUORESCENT KEY2 INDICATOR TUBE/LED KEY1 DRIVER JOG0 IC761 MSM9202-07GS-K JOG1 SYS+3.3V FLCS FLDT FCLK DISPLAY.GND -32V AC R760 100 AC R761 100 R769 3.3k G13 G12 G11 G10 G9 G8 G7 G6 G5 G4 G3 G2 G1 S35 S34 S33 S32 S31 S30 C762 0.001 C763 0.001 C760 0.1 C761 0.001 C769 47p R767 100k C766 0.1 R762 100 S29 S33 S35 S32 S34 S31 S30 S29 (CHASSIS) R705 10k R763 100 C764 0.1 C765 22 6.3V Q767 UN4216-TA REMOTE CONTROL RECEIVER IC781 NJL74H400A R781 47 R782 100 45 45 C782 0.01 C781 100 6.3V (Page 40) MDS-S9 6-15. • BD BOARD IC151 CXD2662R (DIGITAL SIGNAL PROCESSOR, DIGITAL SERVO SIGNAL PROCESSOR, EFM/ACIRC ENCODER/DECODER, SHOCK PROOF MEMORY CONTROLLER, ATRAC ENCODER/DECODER) IC PIN FUNCTION DESCRIPTION • BD BOARD IC101 CXA2523AR (RF AMP, FOCUS/TRACKING ERROR AMP) Pin No. Pin Name I/O 1 I I I-V converted RF signal I input from the optical pick-up block detector 2 J I I-V converted RF signal J input from the optical pick-up block detector 3 VC O 4 to 9 A to F 10 PD 11 APC Description Pin No. Pin Name I/O 1 MNT0 (FOK) O Focus OK signal output terminal “H” is output when focus is on (“L”: NG) Not used (open) Middle point voltage (+1.65V) generation output terminal 2 MNT1 (SHOCK) O Track jump detection signal output to the system controller (IC1) I Signal input from the optical pick-up detector 3 MNT2 (XBUSY) O Busy monitor signal output to the system controller (IC1) I Light amount monitor input from the optical pick-up block laser diode 4 MNT3 (SLOCK) O Spindle servo lock status monitor signal output terminal Laser amplifier output to the automatic power control circuit 5 SWDT I Writing serial data signal input from the system controller (IC1) Reference voltage input for setting laser power from the CXD2662R (IC151) 6 SCLK I (S) Serial data transfer clock signal input from the system controller (IC1) Ground terminal 7 XLAT I (S) Serial data latch pulse signal input from the system controller (IC1) Connected to the temperature sensor 8 SRDT O (3) Reading serial data signal output to the system controller (IC1) SENS O (3) Internal status (SENSE) output to the system controller (IC1) O 12 APCREF I 13 GND — 14 TEMPI I Description Not used (open) 15 TEMPR O Output terminal for a temperature sensor reference voltage 9 16 SWDT I Writing serial data input from the CXD2662R (IC151) 10 XRST I (S) Reset signal input from the system controller (IC1) “L”: reset 17 SCLK I Serial data transfer clock signal input from the CXD2662R (IC151) 11 SQSY O 18 XLAT I Serial data latch pulse signal input from the CXD2662R (IC151) Subcode Q sync (SCOR) output to the system controller (IC1) “L” is output every 13.3 msec Almost all, “H” is output 19 XSTBY I Standby control signal input terminal “L”: standby (fixed at “H” in this set) 12 DQSY O Digital In U-bit CD format subcode Q sync (SCOR) output to the system controller (IC1) “L” is output every 13.3 msec Almost all, “H” is output 20 F0CNT I Center frequency control voltage input terminal of internal circuit (BPF22, BPF3T, EQ) input from the CXD2662R (IC151) 13 RECP I Laser power selection signal input from the system controller (IC1) “L”: playback mode, “H”: recording mode 14 XINT O Interrupt status output to the system controller (IC1) 15 TX O Magnetic head on/off signal output to the over write head drive (IC181) 16 OSCI I System clock signal (512Fs=22.5792 MHz) input from the oscillator circuit 17 OSCO O System clock signal (512Fs=22.5792 MHz) output terminal 18 XTSL I Input terminal for the system clock frequency setting “L”: 22.5792 MHz, “H”: 45.1584 MHz (fixed at “L” in this set) 19 DIN0 I Digital audio signal input terminal when recording mode (for digital optical input) 20 DIN1 I Digital audio signal input terminal when recording mode (for digital optical input) 21 DOUT O Digital audio signal output terminal when playback mode (for digital optical output) 22 DADTAI I Serial data input from the system controller (IC1) 23 LRCKI I L/R sampling clock signal (44.1 kHz) input from the system controller (IC1) 24 XBCKI I Bit clock signal (2.8224 MHz) input from the system controller (IC1) 25 ADDT I Recording data input from the A/D, D/A converter (IC500) 26 DADT O Playback data output to the A/D, D/A converter (IC500) 27 LRCK O L/R sampling clock signal (44.1 kHz) output to the A/D, D/A converter (IC500) 28 XBCK O Bit clock signal (2.8224 MHz) output to the A/D, D/A converter (IC500) 29 FS256 O Clock signal (11.2896 MHz) output terminal 30 DVDD — Power supply terminal (+3.3V) (digital system) 31 to 34 A03 to A00 O Address signal output to the D-RAM (IC153) 21 VREF O Reference voltage output terminal Not used (open) 22 EQADJ I Center frequency setting terminal for the internal circuit (EQ) 23 3TADJ I 24 VCC — 25 WBLADJ I Center frequency setting terminal for the internal circuit (BPF22) 26 TE O Tracking error signal output to the CXD2662R (IC151) 27 CSLED I Connected to the external capacitor for low-pass filter of the sled error signal 28 SE O Sled error signal output to the CXD2662R (IC151) 29 ADFM O FM signal output of the ADIP 30 ADIN I Receives a ADIP FM signal in AC coupling 31 ADAGC I Connected to the external capacitor for ADIP AGC 32 ADFG O ADIP duplex signal (22.05 kHz ± 1 kHz) output to the CXD2662R (IC151) 33 AUX O Auxiliary signal (I3 signal/temperature signal) output to the CXD2662R (IC151) 34 FE O Focus error signal output to the CXD2662R (IC151) 35 ABCD O Light amount signal (ABCD) output to the CXD2662R (IC151) 36 BOTM O Light amount signal (RF/ABCD) bottom hold output to the CXD2662R (IC151) 37 PEAK O Light amount signal (RF/ABCD) peak hold output to the CXD2662R (IC151) 38 RF O Playback EFM RF signal output to the CXD2662R (IC151) 39 RFAGC I Connected to the external capacitor for RF auto gain control circuit 40 AGCI I Receives a RF signal in AC coupling 41 COMPO O User comparator output terminal Not used (open) 42 COMPP I User comparator input terminal Not used (fixed at “L”) 43 ADDC I Connected to the external capacitor for cutting the low band of the ADIP amplifier 44 OPO O User operational amplifier output terminal Not used (open) 45 OPN I User operational amplifier inversion input terminal Not used (fixed at “L”) 46 RFO O RF signal output 47 MORFI I Receives a MO RF signal in AC coupling 48 MORFO O MO RF signal output Center frequency setting terminal for the internal circuit (BPF3T) Power supply terminal (+3.3V) Not used (open) Not used Not used Not used (open) 35 A10 O Address signal output to the external D-RAM 36 to 40 A04 to A08 O Address signal output to the D-RAM (IC153) 41 A11 O Address signal output to the external D-RAM 42 DVSS — Ground terminal (digital system) 43 XOE O Output enable signal output to the D-RAM (IC153) “L” active 44 XCAS O Column address strobe signal output to the D-RAM (IC153) “L” active 45 A09 O Address signal output to the D-RAM (IC153) 46 XRAS O Row address strobe signal output to the D-RAM (IC153) “L” active 47 XWE O Write enable signal output to the D-RAM (IC153) “L” active Not used (open) Not used (open) * I (S) stands for schmitt input, I (A) for analog input, O (3) for 3-state output, and O (A) for analog output in the column I/O. 46 46 MDS-S9 Pin No. Pin Name I/O 48 D1 I/O 49 D0 I/O 50 D2 I/O Description Two-way data bus with the D-RAM (IC153) 51 D3 I/O 52 MVCI I (S) 53 ASYO O 54 ASYI I (A) 55 AVDD — 56 BIAS I (A) Playback EFM asymmetry circuit constant current input terminal 57 RFI I (A) Playback EFM RF signal input from the CXA2523AR (IC101) 58 AVSS — 59 PCO O (3) Phase comparison output for master clock of the recording/playback EFM master PLL 60 FILI I (A) Filter input for master clock of the recording/playback master PLL 61 FILO O (A) Filter output for master clock of the recording/playback master PLL 62 CLTV I (A) Internal VCO control voltage input of the recording/playback master PLL 63 PEAK I (A) Light amount signal (RF/ABCD) peak hold input from the CXA2523AR (IC101) 64 BOTM I (A) Light amount signal (RF/ABCD) bottom hold input from the CXA2523AR (IC101) 65 ABCD I (A) Light amount signal (ABCD) input from the CXA2523AR (IC101) 66 FE I (A) Focus error signal input from the CXA2523AR (IC101) 67 AUX1 I (A) Auxiliary signal (I3 signal/temperature signal) input from the CXA2523AR (IC101) 68 VC I (A) Middle point voltage (+1.65V) input from the CXA2523AR (IC101) Digital in PLL oscillation input from the external VCO Not used (fixed at “L”) Playback EFM full-swing output terminal Playback EFM asymmetry comparator voltage input terminal Power supply terminal (+3.3V) (analog system) Ground terminal (analog system) 69 ADIO 70 AVDD O (A) Monitor output of the A/D converter input signal Not used (open) — 71 ADRT I (A) A/D converter operational range upper limit voltage input terminal (fixed at “H” in this set) 72 ADRB I (A) A/D converter operational range lower limit voltage input terminal (fixed at “L” in this set) 73 AVSS — 74 SE I (A) Sled error signal input from the CXA2523AR (IC101) 75 TE I (A) Tracking error signal input from the CXA2523AR (IC101) 76 DCHG I (A) 77 TEST4 I 78 ADFG I (S) 79 F0CNT O Power supply terminal (+3.3V) (analog system) Ground terminal (analog system) Connected to the +3.3V power supply Input terminal for the test Not used (fixed at “H”) ADIP duplex FM signal (22.05 kHz ± 1 kHz) input from the CXA2523AR (IC101) Filter f0 control signal output to the CXA2523AR (IC101) 80 XLRF O Serial data latch pulse signal output to the CXA2523AR (IC101) 81 CKRF O Serial data transfer clock signal output to the CXA2523AR (IC101) 82 DTRF O Writing serial data output to the CXA2523AR (IC101) 83 APCREF O Control signal output to the reference voltage generator circuit for the laser automatic power control 84 TEST0 O Input terminal for the test Not used (open) 85 TRDR O Tracking servo drive PWM signal (–) output to the BH6519FS (IC141) 86 TFDR O Tracking servo drive PWM signal (+) output to the BH6519FS (IC141) 87 DVDD — Power supply terminal (+3.3V) (digital system) 88 FFDR O Focus servo drive PWM signal (+) output to the BH6519FS (IC141) 89 FRDR O Focus servo drive PWM signal (–) output to the BH6519FS (IC141) 90 FS4 O Clock signal (176.4 kHz) output terminal (X’tal system) Not used (open) 91 SRDR O Sled servo drive PWM signal (–) output to the BH6519FS (IC141) 92 SFDR O Sled servo drive PWM signal (+) output to the BH6519FS (IC141) 93 SPRD O Spindle servo drive PWM signal (–) output to the BH6519FS (IC141) * I (S) stands for schmitt input, I (A) for analog input, O (3) for 3-state output, and O (A) for analog output in the column I/O. 47 MDS-S9 Pin No. Pin Name I/O Description 94 SPFD O 95 FGIN I (S) 96 TEST1 I 97 TEST2 I 98 TEST3 I 99 DVSS — Ground terminal (digital system) 100 EFMO O EFM signal output terminal when recording mode Spindle servo drive PWM signal (+) output to the BH6519FS (IC141) Input terminal for the test (fixed at “L”) * I (S) stands for schmitt input, I (A) for analog input, O (3) for 3-state output, and O (A) for analog output in the column I/O. 48 MDS-S9 • MAIN BOARD IC1 M30805MG-216GP (SYSTEM CONTROLLER) Pin No. Pin Name I/O Description 1 FL-DATA O Serial data output to the fluorescent indicator tube/LED driver (IC761) 2 FL-CLK O Serial data transfer clock signal output to the fluorescent indicator tube/LED driver (IC761) 3 A1 IN I Sircs remote control signal input terminal of the CONTROL A1II 4 RMC I Remote control signal input from the remote control receiver (IC781) 5 to 7 NC O Not used (open) 8 MUTE O Audio line muting on/off control signal output “L”: line muting on, “H”: line muting off 9 RESET O Reset signal output to the A/D, D/A converter (IC500) “L”: reset 10 LATCH O Serial data latch pulse signal output to the A/D, D/A converter (IC500) 11 LD-LOW O Loading motor drive voltage control signal output for the loading motor driver (IC440) “H” active 12 LDIN O Motor control signal output to the loading motor driver (IC440) “L” active *1 13 LDOUT O Motor control signal output to the loading motor driver (IC440) “L” active *1 Not used (fixed at “H”) Laser modulation selection signal output to the HF module switch circuit Stop: “L”, Playback power: “H”, Recording power: 0.5 sec 14 MOD O 2 sec 15 BYTE I 16 CNVSS — 17 XCIN I Sub system clock input terminal (32.768 kHz) 18 XCOUT O Sub system clock output terminal (32.768 kHz) 19 RESET I System reset signal input from the regulator (IC400) “L”: reset For several hundreds msec. after the power supply rises, “L” is input, then it changes to “H” 20 XOUT O Main system clock output terminal (10 MHz) 21 VSS — 22 XIN I 23 VCC — 24 NMI I Non-maskable interrupt input terminal “L” active (fixed at “H” in this set) 25 DQSY I Digital In U-bit CD format subcode Q sync (SCOR) input from the CXD2662R (IC151) “L” is input every 13.3 msec Almost all, “H” is input 26 PDOWN I Power down detection signal input from the regulator (IC400) “L”: power down, normally: “H” 27 SQSY I Subcode Q sync (SCOR) input from the CXD2662R (IC151) “L” is input every 13.3 msec Almost all, “H” is input 28 KEYBD-CLK I Serial data transfer clock signal input from the key board 29 LDON O Laser diode on/off control signal output to the automatic power control circuit “H”: laser on 30 LIMIT-IN I Detection signal input from the sled limit-in detect switch (S101) The optical pick-up is inner position when “L” 31 A1 OUT O Sircs remote control signal output terminal of the CONTROL A1II External data bus line byte selection signal input “L”: 16 bit, “H”: 8 bit (fixed at “L”) Ground terminal Not used (open) Not used (open) Ground terminal Main system clock input terminal (10 MHz) Power supply terminal (+3.3V) Not used (fixed at “H”) Not used (open) *1 Loading motor (M103) control Mode LOADING EJECT BRAKE STOP LDIN (pin qs) “L” “H” “L” “H” LDOUT (pin qd) “H” “L” “L” “H” Terminal 49 MDS-S9 Pin No. Pin Name I/O 32 XINT I Interrupt status input from the CXD2662R (IC151) 33 BEEP O Beep sound drive signal and headphone muting on/off control signal output terminal Not used (open) 34 LRCKI O L/R sampling clock signal (44.1 kHz) output to the CXD2662R (IC151) 35 WRPWR O Laser power selection signal output to the CXD2662R (IC151) and HF module switch circuit “L”: playback mode, “H”: recording mode 36 I2CCLK I/O Serial data transfer clock signal input/output terminal for the IIC bus 37 I2CDAT I/O Serial data input/output terminal for the IIC bus 38 SWDT O Writing serial data signal output to the CXD2662R (IC151) 39 VCC — Power supply terminal (+3.3V) 40 SRDT I 41 VSS — Ground terminal 42 SCLK O Serial data transfer clock signal output to the CXD2662R (IC151) 43 REC-SW I Detection signal input from the recording position of over write head (HR901) detect switch (S105) “L” recording mode 44 TX0 (CLIP) O Serial data output to the CXD2662R (IC151) 45 RX0 (CLIP) I Serial data input 46 CLK (CLIP) O Bit clock signal (2.8224 MHz) output to the CXD2662R (IC151) 47 DIG-RST O Reset signal output to the CXD2662R (IC151) and BH6519FS (IC141) “L”: reset 48 SENS I Internal status (SENSE) input from the CXD2662R (IC151) 49 PLAY-SW I Detection signal input from the playback position of over write head (HR901) detect switch (S104) “L” playback mode 50 XLATCH O Serial data latch pulse signal output to the CXD2662R (IC151) 51 OUT-SW I Detection signal input from the loading-out detect switch (S103) “L” at a load-out position, others: “H” 52 RDY O Not used (open) 53 ALE O Not used (open) 54 HOLD O Not used (open) 55 HLDA O Not used (open) 56 MNT2 (XBUSY) I Busy monitor signal input from the CXD2662R (IC151) 57 VSS — 58 MNT1 (SHOCK) I 59 VCC — Power supply terminal (+3.3V) 60 EEP-WP O Writing protect signal output to the EEPROM (IC195) 61 SDA I/O Two-way data bus with the EEPROM (IC195) 62 BCLK O Not used (open) 63 OE O Data reading strobe signal output to the flash memory “L” active Not used (open) 64 BHE O Not used (open) 65 WE O Writing enable signal output to the flash memory “L” active Not used (open) 66 SCL O Clock signal output to the EEPROM (IC195) 67 REFLECT SW I Detection signal input from the disc reflection rate detect switch (S102-1) “L”: high reflection rate disc, “H”: low reflection rate disc 68 PROTECT SW I REC-proof claw detection signal input from the protect detect switch (S102-2) “H”: write protect 69 to 71 CS0 to CS2 O Chip select signal output to the flash memory “L” active Not used (open) 72, 73 A20, A19 O Address signal output to the flash memory Not used (open) 74 VCC — Power supply terminal (+3.3V) 75 A18 O Address signal output to the flash memory Not used (open) 50 Description Reading serial data signal input from the CXD2662R (IC151) Ground terminal Track jump detection signal input from the CXD2662R (IC151) MDS-S9 Pin No. Pin Name I/O Description 76 VSS — Ground terminal 77 to 85 A17 to A9 O Address signal output to the flash memory Not used (open) 86 to 89 SEL1 to SEL4 I Not used (open) 90 WP O Writing protect signal output to the flash memory “L” active Not used (fixed at “L”) 91 VCC — Power supply terminal (+3.3V) 92 A8 O Address signal output to the flash memory Not used (open) 93 VSS — Ground terminal 94 to 101 A7 to A0 O Address signal output to the flash memory Not used (open) 102 to 113 D15 to D4 I/O Two-way data bus with the flash memory Not used (open) 114 KEYBD-CLKCTL O Clock control signal output to the key board Not used (pull down) 115 I2CBUSY I Busy monitor signal input from the IIC bus 116 KEYBD-DAT I Serial data input from the key board Not used (fixed at “H”) 117 REC VOL A O Not used (open) 118 REC VOL B O Not used (open) 119 to 122 D3 to D0 I/O Two-way data bus with the flash memory Not used (open) 123 JOG0 I JOG dial pulse input from the rotary encoder (S713 . AMS >) (A phase input) 124 JOG1 I JOG dial pulse input from the rotary encoder (S713 . AMS >) (B phase input) 125 LATCH O Not used (open) 126 REC O Power on/off control signal output terminal for the beep sound drive Not used (open) 127 COAX/OPT O Optical in or coaxial in selection signal output terminal “L”: optical in, “H”: coaxial in Not used (open) 128 FL-CS O Chip select signal output to the fluorescent indicator tube/LED driver (IC761) 129 I2CPOWER I Power supply detection signal input from the IIC bus 130 VSS — Ground terminal 131 STB O Relay drive signal output for the power on/off “L”: standby, “H”: power on 132 VCC — Power supply terminal (+3.3V) 133 IOP I Optical pick-up voltage detection signal input from the automatic power control circuit 134 DESTINATION I Destination setting input terminal Fixed at “L” in this set 135 MODEL I Model setting input terminal Fixed at “M” in this set 136 BEEP SW I Beep switch input terminal Not used (fixed at “L”) 137 KEY3 I Key input terminal (A/D input) Not used (fixed at “H”) 138 KEY2 I Key input terminal (A/D input) S721 to S724 and S726 (INPUT, PLAY MODE, REC MODE, LEVEL/DISPLAY/CHAR, I/1) keys input 139 KEY1 I Key input terminal (A/D input) S711 to S715 (MENU/NO, YES, PUSH ENTER, CLEAR, Z) keys input 140 AVSS — 141 KEY0 I Key input terminal (A/D input) S701 to S705 (z, x, M, m, u) keys input 142 VREF I Reference voltage (+3.3V) input terminal (for A/D converter) 143 AVCC — Power supply terminal (+3.3V) (for analog system ) 144 NC O Not used (pull down) Ground terminal (for analog system ) 51 MDS-S9 SECTION 7 EXPLODED VIEWS NOTE: • -XX and -X mean standardized parts, so they may have some difference from the original one. • Color Indication of Appearance Parts Example: KNOB, BALANCE (WHITE) . . . (RED) ↑ ↑ Parts Color Cabinet's Color • Items marked “*” are not stocked since they are seldom required for routine service. Some delay should be anticipated when ordering these items. • The mechanical parts with no reference number in the exploded views are not supplied. • Hardware (# mark) list and accessories and packing materials are given in the last of the electrical parts list. The components identified by mark 0 or dotted line with mark 0 are critical for safety. Replace only with part number specified. 7-1. CASE SECTION 13 TR900 3 4 2 A 1 14 3 14 14 B MDM-7A not supplied 14 7 not supplied #3 8 A B #3 6 #3 15 11 5 #3 #3 9 10 Front panel section Ref. No. 1 2 3 4 5 6 07 * 8 52 Part No. Description 1-681-806-11 4-228-643-11 3-363-099-21 4-229-363-51 1-792-811-11 PT BOARD SCREW (+BVTTWH M3), STEP SCREW (CASE 3 TP2) CASE WIRE (FLAT TYPE) (23 CORE) 1-792-812-11 WIRE (FLAT TYPE) (27 CORE) 1-777-071-61 CORD, POWER 3-703-244-00 BUSHING (2104), CORD Remark Ref. No. 9 10 11 13 14 * 15 0 TR900 Part No. Description 4-235-438-01 A-4726-240-A 4-965-822-01 4-221-887-11 4-228-689-01 PANEL, BACK MAIN BOARD, COMPLETE FOOT SCREW, +PTTWH (M3) (S) TITE INSULATOR 1-569-972-21 SOCKET, SHORT 2P 1-435-544-11 TRANSFORMER, POWER Remark MDS-S9 7-2. FRONT PANEL SECTION 57 56 56 #4 #5 53 58 not supplied not supplied 54 55 51 Ref. No. 51 53 54 Part No. Description 4-235-123-01 KNOB (AMS) X-4953-948-1 PANEL ASSY, FRONT 4-228-630-01 SPRING (LID), TENSION COIL Remark Ref. No. 55 57 58 Part No. Description Remark 4-228-629-62 LID (MD) A-4726-238-A DISPLAY BOARD, COMPLETE 1-792-813-11 WIRE (FLAT TYPE) (15 CORE) 53 MDS-S9 7-3. MECHANISM DECK SECTION-1 (MDM-7A) 321 312 311 313 314 310 319 315 309 not supplied 316 304 305 #2 308 317 305 303 318 306 302 307 320 302 301 Mechanism deck section-2 Ref. No. Part No. Description * 301 302 303 304 305 4-996-267-01 4-231-319-01 4-227-007-01 4-227-025-01 3-372-761-01 BASE (BU-D) SCREW (2X6) CZN, +B (P) TRI GEAR (SB) BELT (LOADING) SCREW (M1.7), TAPPING 306 307 308 309 310 4-227-002-01 4-226-999-01 X-4952-665-1 A-4680-638-A 4-229-533-02 GEAR, PULLEY LEVER (HEAD) SPRING (SHT) ASSY, LEAF LOCK (HOLDER) SPRING (STOPPER), TORSION 311 4-227-012-01 SPRING (HOLDER), TENSION 54 Remark Ref. No. Part No. Description 312 313 314 315 316 4-227-019-03 4-227-013-01 4-226-995-01 4-226-996-03 4-226-997-04 PLATE (HOLDER) ASSY, RETAINER SPRING (EJ), TENSION SLIDER (EJ) LIMITTER (EJ) SLIDER 317 318 319 320 321 4-226-998-01 4-227-006-01 A-4735-075-A 4-226-994-01 A-4680-638-B LEVER (CHG) GEAR (SA) HOLDER ASSY GUIDE (L) RETAINER COMPLETE ASSY Remark MDS-S9 7-4. MECHANISM DECK SECTION-2 (MDM-7A) 359 HR901 358 360 356 364 367 357 #1 362 #1 355 359 362 354 353 368 352 353 S102 352 363 M101 366 365 361 353 M102 353 M103 351 352 The components identified by mark 0 or dotted line with mark 0 are critical for safety. Replace only with part number specified. Ref. No. Part No. Description 351 352 353 354 355 A-4725-471-A 4-231-319-01 3-372-761-01 4-226-993-01 4-227-014-01 BD BOARD, COMPLETE SCREW (2X6) CZN, +B (P) TRI SCREW (M1.7), TAPPING RACK SPRING (RACK), COMPRESSION 356 357 0 358 359 360 4-226-992-01 1-678-514-11 A-4672-541-A 4-988-560-01 4-996-265-01 BASE, SL FLEXIBLE, BOARD OPTICS ASSY (KMS-260B) SCREW (+P 1.7X6) SHAFT, MAIN 361 362 4-226-989-01 CHASSIS 4-232-270-01 SCREW (1.7X3.5), +PWH Remark Ref. No. Part No. Description Remark 363 364 365 366 367 4-226-990-01 4-227-023-01 4-227-004-01 4-227-005-01 4-227-008-01 BASE (BU-A) SPRING (SPINDLE), TORSION GEAR (LC) GEAR (LD) GEAR (SC) 368 HR901 M101 M102 M103 4-227-009-01 1-500-670-11 A-4672-898-A A-4735-076-A A-4735-074-A GEAR (SD) HEAD, OVER WRITE MOTOR ASSY, SPINDLE MOTOR ASSY, SLED MOTOR ASSY, LOADING S102 1-771-957-11 SWITCH, PUSH (2 KEY) (REFLECT RATE DETECT, PROTECT DETECT) 55 MDS-S9 SECTION 8 ELECTRICAL PARTS LIST BD NOTE: • Due to standardization, replacements in the parts list may be different from the parts specified in the diagrams or the components used on the set. • -XX and -X mean standardized parts, so they may have some difference from the original one. • RESISTORS All resistors are in ohms. METAL: Metal-film resistor. METAL OXIDE: Metal oxide-film resistor. F: nonflammable Ref. No. Part No. • Items marked “*” are not stocked since they are seldom required for routine service. Some delay should be anticipated when ordering these items. • SEMICONDUCTORS In each case, u: µ, for example: uA. . : µA. . uPA. . : µPA. . uPB. . : µPB. . uPC. . : µPC. . uPD. . : µPD. . • CAPACITORS uF: µF • COILS uH: µH Description Remark A-4725-471-A BD BOARD, COMPLETE ******************* < CAPACITOR > C101 C102 C103 C104 C105 1-135-259-11 1-135-259-11 1-162-970-11 1-164-227-11 1-115-416-11 TANTALUM CHIP TANTALUM CHIP CERAMIC CHIP CERAMIC CHIP CERAMIC CHIP 10uF 10uF 0.01uF 0.022uF 0.001uF 20% 20% 10% 10% 5% 6.3V 6.3V 25V 25V 25V C106 C107 C108 C109 C110 1-162-970-11 1-162-970-11 1-162-969-11 1-164-677-11 1-163-038-00 CERAMIC CHIP CERAMIC CHIP CERAMIC CHIP CERAMIC CHIP CERAMIC CHIP 0.01uF 0.01uF 0.0068uF 0.033uF 0.1uF 10% 10% 10% 10% 25V 25V 25V 16V 25V C111 C112 C113 C114 C115 1-117-720-11 1-110-563-11 1-162-968-11 1-125-837-11 1-162-966-11 CERAMIC CHIP CERAMIC CHIP CERAMIC CHIP CERAMIC CHIP CERAMIC CHIP 4.7uF 0.068uF 0.0047uF 1uF 0.0022uF C116 C117 C118 C119 C120 1-164-227-11 1-162-970-11 1-165-176-11 1-165-176-11 1-164-156-11 CERAMIC CHIP CERAMIC CHIP CERAMIC CHIP CERAMIC CHIP CERAMIC CHIP 0.022uF 0.01uF 0.047uF 0.047uF 0.1uF C121 C125 C128 C131 C132 1-164-156-11 1-117-720-11 1-164-156-11 1-117-720-11 1-164-156-11 CERAMIC CHIP CERAMIC CHIP CERAMIC CHIP CERAMIC CHIP CERAMIC CHIP 0.1uF 4.7uF 0.1uF 4.7uF 0.1uF C133 C141 C142 C143 C144 1-164-156-11 1-126-206-11 1-164-156-11 1-164-156-11 1-162-970-11 CERAMIC CHIP ELECT CHIP CERAMIC CHIP CERAMIC CHIP CERAMIC CHIP 0.1uF 100uF 0.1uF 0.1uF 0.01uF C145 C151 C152 C153 C154 1-164-156-11 1-117-370-11 1-164-156-11 1-164-156-11 1-126-206-11 CERAMIC CHIP CERAMIC CHIP CERAMIC CHIP CERAMIC CHIP ELECT CHIP 0.1uF 10uF 0.1uF 0.1uF 100uF C155 C156 C157 C158 C159 1-164-156-11 1-164-156-11 1-164-156-11 1-162-927-11 1-162-927-11 CERAMIC CHIP CERAMIC CHIP CERAMIC CHIP CERAMIC CHIP CERAMIC CHIP 0.1uF 0.1uF 0.1uF 100PF 100PF 56 10% 10% 10% 10% 10% 10% 10% 10% 10V 16V 50V 6.3V 50V 25V 25V 16V 16V 25V 25V 10V 25V 10V 25V 10% 25V 6.3V 25V 25V 25V 20% 25V 10V 25V 25V 6.3V 5% 5% 25V 25V 25V 50V 50V 20% Ref. No. The components identified by mark 0 or dotted line with mark 0 are critical for safety. Replace only with part number specified. When indicating parts by reference number, please include the board. Part No. Description Remark C160 C161 C162 C163 C164 1-162-927-11 1-162-970-11 1-162-970-11 1-125-891-11 1-162-927-11 CERAMIC CHIP CERAMIC CHIP CERAMIC CHIP CERAMIC CHIP CERAMIC CHIP 100PF 0.01uF 0.01uF 0.47uF 100PF 5% 10% 10% 10% 5% 50V 25V 25V 10V 50V C165 C166 C167 C169 C171 1-162-968-11 1-125-891-11 1-164-245-11 1-164-156-11 1-164-156-11 CERAMIC CHIP CERAMIC CHIP CERAMIC CHIP CERAMIC CHIP CERAMIC CHIP 0.0047uF 10% 0.47uF 10% 0.015uF 10% 0.1uF 0.1uF 50V 10V 25V 25V 25V C172 C180 C181 C182 C183 1-164-156-11 1-117-370-11 1-126-206-11 1-163-038-00 1-164-156-11 CERAMIC CHIP CERAMIC CHIP ELECT CHIP CERAMIC CHIP CERAMIC CHIP 0.1uF 10uF 100uF 0.1uF 0.1uF 25V 10V 6.3V 25V 25V C184 C185 C191 C192 C193 1-117-970-11 1-131-872-11 1-126-206-11 1-164-156-11 1-126-206-11 ELECT CHIP CERAMIC CHIP ELECT CHIP CERAMIC CHIP ELECT CHIP 22uF 1000PF 100uF 0.1uF 100uF C194 C195 C196 C1401 1-164-156-11 1-164-156-11 1-164-156-11 1-117-720-11 CERAMIC CHIP CERAMIC CHIP CERAMIC CHIP CERAMIC CHIP 0.1uF 0.1uF 0.1uF 4.7uF 20% 20% 10% 20% 20% 10V 630V 6.3V 25V 6.3V 25V 25V 25V 10V < CONNECTOR > CN101 CN102 CN103 * CN104 CN105 1-766-833-21 1-784-835-21 1-784-834-21 1-580-055-21 1-784-859-21 CONNECTOR, FFC/FPC (ZIF) 21P CONNECTOR, FFC (LIF (NON-ZIF)) 27P CONNECTOR, FFC (LIF (NON-ZIF)) 23P PIN, CONNECTOR (SMD) 2P CONNECTOR, FFC (LIF (NON-ZIF)) 7P < DIODE > D101 D181 D183 8-719-988-61 DIODE 1SS355TE-17 8-719-080-81 DIODE FS1J6 8-719-080-81 DIODE FS1J6 < IC > IC101 IC102 IC141 IC151 IC153 8-752-080-95 8-759-473-51 8-759-836-79 8-752-404-64 8-759-671-27 IC IC IC IC IC CXA2523AR TLV2361CDBV BH6519FS-E2 CXD2662R MSM51V4400E-70TS-K MDS-S9 BD Ref. No. IC171 IC181 IC190 IC195 Part No. Description 8-759-096-87 8-759-481-17 8-759-460-72 8-759-640-41 IC IC IC IC Remark TC7WU04FU (TE12R) MC74ACT08DTR2 BA033FP-E2 BR24C08F-E2 Ref. No. Part No. Description R111 R112 R113 R114 R115 1-216-833-11 1-216-829-11 1-216-833-11 1-216-827-11 1-216-833-11 METAL CHIP METAL CHIP METAL CHIP METAL CHIP METAL CHIP 10K 4.7K 10K 3.3K 10K 5% 5% 5% 5% 5% 1/16W 1/16W 1/16W 1/16W 1/16W Remark R116 R117 R118 R119 R120 1-216-839-11 1-216-837-11 1-218-855-11 1-218-863-11 1-218-889-11 METAL CHIP METAL CHIP METAL CHIP METAL CHIP METAL CHIP 33K 22K 2.2K 4.7K 56K 5% 5% 0.5% 0.5% 0.5% 1/16W 1/16W 1/16W 1/16W 1/16W R121 R122 R123 R124 R125 1-218-863-11 1-218-855-11 1-216-819-11 1-216-809-11 1-216-815-11 METAL CHIP METAL CHIP METAL CHIP METAL CHIP METAL CHIP 4.7K 2.2K 680 100 330 0.5% 0.5% 5% 5% 5% 1/16W 1/16W 1/16W 1/16W 1/16W R126 R127 R128 R129 R130 1-216-819-11 1-216-845-11 1-219-724-11 1-216-298-00 1-216-829-11 METAL CHIP METAL CHIP METAL CHIP METAL CHIP METAL CHIP 680 100K 1 2.2 4.7K 5% 5% 1% 5% 5% 1/16W 1/16W 1/4W 1/10W 1/16W R131 R132 R133 R134 R135 1-216-833-11 1-216-841-11 1-216-821-11 1-216-821-11 1-216-821-11 METAL CHIP METAL CHIP METAL CHIP METAL CHIP METAL CHIP 10K 47K 1K 1K 1K 5% 5% 5% 5% 5% 1/16W 1/16W 1/16W 1/16W 1/16W R136 R138 R150 R151 R154 1-216-295-11 1-216-833-11 1-216-833-11 1-216-833-11 1-216-833-11 SHORT METAL CHIP METAL CHIP METAL CHIP METAL CHIP 0 10K 10K 10K 10K 5% 5% 5% 5% 1/16W 1/16W 1/16W 1/16W R155 R156 R157 R158 R159 1-216-864-11 1-216-864-11 1-216-809-11 1-216-809-11 1-216-833-11 METAL CHIP METAL CHIP METAL CHIP METAL CHIP METAL CHIP 0 0 100 100 10K 5% 5% 5% 5% 5% 1/16W 1/16W 1/16W 1/16W 1/16W R160 R161 R163 R164 R165 1-216-833-11 1-216-833-11 1-216-809-11 1-216-809-11 1-216-809-11 METAL CHIP METAL CHIP METAL CHIP METAL CHIP METAL CHIP 10K 10K 100 100 100 5% 5% 5% 5% 5% 1/16W 1/16W 1/16W 1/16W 1/16W R167 R168 R169 R170 R171 1-216-833-11 1-216-845-11 1-216-855-11 1-216-827-11 1-216-821-11 METAL CHIP METAL CHIP METAL CHIP METAL CHIP METAL CHIP 10K 100K 680K 3.3K 1K 5% 5% 5% 5% 5% 1/16W 1/16W 1/16W 1/16W 1/16W R173 R174 R175 R176 R179 1-216-821-11 1-216-811-11 1-216-857-11 1-216-809-11 1-216-295-11 METAL CHIP METAL CHIP METAL CHIP METAL CHIP SHORT 1K 150 1M 100 0 5% 5% 5% 5% 1/16W 1/16W 1/16W 1/16W R181 R182 R183 R184 R185 1-216-841-11 1-216-841-11 1-216-841-11 1-220-942-11 1-220-942-11 METAL CHIP METAL CHIP METAL CHIP METAL CHIP METAL CHIP 47K 47K 47K 3.3 3.3 5% 5% 5% 1% 1% 1/16W 1/16W 1/16W 1/4W 1/4W R195 R196 R197 1-216-833-11 METAL CHIP 1-216-833-11 METAL CHIP 1-216-833-11 METAL CHIP 10K 10K 10K 5% 5% 5% 1/16W 1/16W 1/16W < SHORT > JW201 JW202 JW203 JW903 JW904 1-216-295-11 1-216-295-11 1-216-295-11 1-216-295-11 1-216-295-11 SHORT SHORT SHORT SHORT SHORT 0 0 0 0 0 < FERRITE BEAD/SHORT > L101 L102 L103 L105 L106 1-500-245-11 1-500-245-11 1-500-245-11 1-414-235-22 1-500-245-11 FERRITE FERRITE FERRITE FERRITE FERRITE 0uH 0uH 0uH 0uH 0uH L121 L122 L131 L141 L142 1-500-245-11 1-500-245-11 1-500-245-11 1-216-296-11 1-216-296-11 FERRITE FERRITE FERRITE SHORT SHORT 0uH 0uH 0uH 0 0 L143 L144 L145 L146 L147 1-216-296-11 1-216-296-11 1-216-296-11 1-469-855-21 1-469-855-21 SHORT SHORT SHORT FERRITE FERRITE 0 0 0 0uH 0uH L161 L171 L180 L181 L182 1-500-245-11 1-500-245-11 1-469-855-21 1-469-855-21 1-500-245-11 FERRITE FERRITE FERRITE FERRITE FERRITE 0uH 0uH 0uH 0uH 0uH L183 L184 1-216-296-11 SHORT 1-216-296-11 SHORT 0 0 < TRANSISTOR > Q101 Q121 Q122 Q131 Q132 8-729-403-35 8-729-403-35 8-729-101-07 8-729-026-53 8-729-903-10 TRANSISTOR TRANSISTOR TRANSISTOR TRANSISTOR TRANSISTOR UN5113 UN5113 2SB798-DL 2SA1576A-T106-QR FMW1 Q133 Q134 Q181 Q182 8-729-402-93 8-729-402-93 8-729-018-75 8-729-017-65 TRANSISTOR TRANSISTOR FET FET UN5214 UN5214 2SJ278MY 2SK1764KY < RESISTOR > R101 R102 R103 R104 R105 1-216-829-11 1-216-853-11 1-216-863-11 1-216-853-11 1-216-825-11 METAL CHIP METAL CHIP RES-CHIP METAL CHIP METAL CHIP 4.7K 470K 3.3M 470K 2.2K 5% 5% 5% 5% 5% 1/16W 1/16W 1/16W 1/16W 1/16W R106 R107 R108 R109 R110 1-216-825-11 1-216-825-11 1-216-833-11 1-216-845-11 1-216-845-11 METAL CHIP METAL CHIP METAL CHIP METAL CHIP METAL CHIP 2.2K 2.2K 10K 100K 100K 5% 5% 5% 5% 5% 1/16W 1/16W 1/16W 1/16W 1/16W 57 MDS-S9 BD Ref. No. R218 DISPLAY Part No. MAIN Description 1-216-864-11 METAL CHIP Remark 0 5% 1/16W < SWITCH > S101 1-762-596-21 SWITCH, PUSH (1 KEY) (LIMIT IN) S103 1-771-956-21 SWITCH, PUSH (1 KEY) (PACK OUT) S104 1-771-955-21 SWITCH, PUSH (1 KEY) (PLAY POSITION) S105 1-771-955-21 SWITCH, PUSH (1 KEY) (REC POSITION) ************************************************************** A-4726-238-A DISPLAY BOARD, COMPLETE ************************ 4-212-590-22 HOLDER (FL) 4-949-935-31 CUSHION (FL) * < CAPACITOR > C700 C760 C761 C762 C763 1-164-159-11 1-164-159-11 1-162-294-31 1-162-294-31 1-162-294-31 CERAMIC CERAMIC CERAMIC CERAMIC CERAMIC 0.1uF 0.1uF 0.001uF 0.001uF 0.001uF C764 C765 C766 C769 C770 1-164-159-11 1-126-153-11 1-164-159-11 1-162-215-31 1-124-261-00 CERAMIC ELECT CERAMIC CERAMIC ELECT 0.1uF 22uF 0.1uF 47PF 10uF 5% 20% 50V 6.3V 50V 50V 50V C773 C781 C782 1-124-261-00 ELECT 1-124-584-00 ELECT 1-162-306-11 CERAMIC 10uF 100uF 0.01uF 20% 20% 20% 50V 10V 16V 10% 10% 10% 20% 50V 50V 50V 50V 50V < CONNECTOR > CN701 1-779-552-21 CONNECTOR, FFC (LIF (NON-ZIF)) 15P < LED > D751 D775 Ref. No. Part No. Description Remark R715 R722 R723 1-249-429-11 CARBON 1-249-421-11 CARBON 1-247-843-11 CARBON 10K 2.2K 3.3K 5% 5% 5% 1/4W 1/4W 1/4W R724 R726 R751 R760 R761 1-249-425-11 1-249-437-11 1-249-409-11 1-247-807-31 1-247-807-31 CARBON CARBON CARBON CARBON CARBON 4.7K 47K 220 100 100 5% 5% 5% 5% 5% 1/4W 1/4W 1/4W 1/4W 1/4W R762 R763 R767 R769 R775 1-247-807-31 1-247-807-31 1-249-441-11 1-247-843-11 1-249-409-11 CARBON CARBON CARBON CARBON CARBON 100 100 100K 3.3K 220 5% 5% 5% 5% 5% 1/4W 1/4W 1/4W 1/4W 1/4W R781 R782 1-249-401-11 CARBON 1-247-807-31 CARBON 47 100 5% 5% 1/4W 1/4W < SWITCH/ROTARY ENCODER > S701 S702 S703 S704 S705 1-762-875-21 1-762-875-21 1-762-875-21 1-762-875-21 1-762-875-21 S711 S712 S713 1-762-875-21 SWITCH, KEYBOARD (MENU/NO) 1-762-875-21 SWITCH, KEYBOARD (YES) 1-475-543-11 ENCODER, ROTARY (. AMS >, PUSH ENTER) 1-762-875-21 SWITCH, KEYBOARD (CLEAR) 1-762-875-21 SWITCH, KEYBOARD (Z) S714 S715 SWITCH, KEYBOARD (z) SWITCH, KEYBOARD (x) SWITCH, KEYBOARD (M) SWITCH, KEYBOARD (m) SWITCH, KEYBOARD (u) S721 1-762-875-21 SWITCH, KEYBOARD (INPUT) S722 1-762-875-21 SWITCH, KEYBOARD (PLAY MODE) S723 1-762-875-21 SWITCH, KEYBOARD (REC MODE) S724 1-762-875-21 SWITCH, KEYBOARD (LEVEL/DISPLAY/CHAR) S726 1-762-875-21 SWITCH, KEYBOARD (I/1) ************************************************************** 8-719-812-44 LED TL0124 (STANDBY) 8-719-046-39 LED SEL5821A-TP15 (MDLP) A-4726-240-A MAIN BOARD, COMPLETE ********************* < FLUORESCENT INDICATOR TUBE > 7-685-546-19 SCREW +BTP 3X8 TYPE2 N-S FL771 1-517-986-11 INDICATOR TUBE, FLUORESCENT < CAPACITOR > < IC > IC761 IC781 8-759-659-03 IC MSM9202-07GS-K 8-759-826-34 IC NJL74H400A (REMOTE CONTROL RECEIVER) C1 C19 C26 C36 C37 1-126-964-11 1-164-156-11 1-162-964-11 1-162-960-11 1-162-960-11 ELECT CERAMIC CHIP CERAMIC CHIP CERAMIC CHIP CERAMIC CHIP 10uF 0.1uF 0.001uF 220PF 220PF 20% 10% 10% 10% 50V 25V 50V 50V 50V C39 C48 C151 C152 C153 1-164-156-11 1-162-927-11 1-164-315-11 1-128-551-11 1-128-551-11 CERAMIC CHIP CERAMIC CHIP CERAMIC CHIP ELECT ELECT 0.1uF 100PF 470PF 22uF 22uF 5% 5% 20% 20% 25V 50V 50V 25V 25V C161 C165 C166 C171 C172 1-164-816-11 1-162-927-11 1-162-927-11 1-137-368-11 1-130-471-00 CERAMIC CHIP CERAMIC CHIP CERAMIC CHIP MYLAR MYLAR 220PF 100PF 100PF 0.0047uF 0.001uF 2% 5% 5% 5% 5% 50V 50V 50V 50V 50V C176 C177 C251 1-128-551-11 ELECT 1-164-315-11 CERAMIC CHIP 1-164-315-11 CERAMIC CHIP 22uF 470PF 470PF 20% 5% 5% 25V 50V 50V < TRANSISTOR > Q751 Q767 Q775 8-729-900-80 TRANSISTOR 8-729-900-74 TRANSISTOR 8-729-900-80 TRANSISTOR DTC114ES DTC143TS DTC114ES < RESISTOR > R702 R703 R704 R705 R712 1-249-421-11 1-247-843-11 1-249-425-11 1-249-429-11 1-249-421-11 CARBON CARBON CARBON CARBON CARBON 2.2K 3.3K 4.7K 10K 2.2K 5% 5% 5% 5% 5% 1/4W 1/4W 1/4W 1/4W 1/4W R713 R714 1-247-843-11 CARBON 1-249-425-11 CARBON 3.3K 4.7K 5% 5% 1/4W 1/4W 58 MDS-S9 MAIN Ref. No. Part No. Description Remark Ref. No. Part No. Description C611 C612 C613 C804 C814 1-164-156-11 1-126-963-11 1-162-970-11 1-164-156-11 1-164-156-11 CERAMIC CHIP ELECT CERAMIC CHIP CERAMIC CHIP CERAMIC CHIP 0.1uF 4.7uF 0.01uF 0.1uF 0.1uF Remark C925 C926 C955 C956 1-164-156-11 1-164-156-11 1-164-156-11 1-164-156-11 CERAMIC CHIP CERAMIC CHIP CERAMIC CHIP CERAMIC CHIP 0.1uF 0.1uF 0.1uF 0.1uF C252 C253 1-128-551-11 ELECT 1-128-551-11 ELECT 22uF 22uF 20% 20% 25V 25V C261 C265 C266 C271 C272 1-164-816-11 1-162-927-11 1-162-927-11 1-137-368-11 1-130-471-00 CERAMIC CHIP CERAMIC CHIP CERAMIC CHIP MYLAR MYLAR 220PF 100PF 100PF 0.0047uF 0.001uF 2% 5% 5% 5% 5% 50V 50V 50V 50V 50V C276 C277 C312 C351 C356 1-128-551-11 1-164-315-11 1-126-916-11 1-104-665-11 1-104-665-11 ELECT CERAMIC CHIP ELECT ELECT ELECT 22uF 470PF 1000uF 100uF 100uF 20% 5% 20% 20% 20% 25V 50V 6.3V 25V 25V C361 C366 C400 C403 C404 1-104-665-11 1-104-665-11 1-126-939-11 1-126-963-11 1-126-934-11 ELECT ELECT ELECT ELECT ELECT 100uF 100uF 10000uF 4.7uF 220uF 20% 20% 20% 20% 20% 25V 25V 16V 50V 10V C405 C406 C407 C408 C410 1-126-916-11 1-164-156-11 1-164-156-11 1-104-665-11 1-162-964-11 ELECT CERAMIC CHIP CERAMIC CHIP ELECT CERAMIC CHIP 1000uF 0.1uF 0.1uF 100uF 0.001uF 20% 20% 10% 6.3V 25V 25V 10V 50V D155 D156 D255 D256 D401 8-719-988-61 8-719-988-61 8-719-988-61 8-719-988-61 8-719-081-08 DIODE DIODE DIODE DIODE DIODE 1SS355TE-17 1SS355TE-17 1SS355TE-17 1SS355TE-17 EP05Q04-TE8L3 C411 C412 C413 C431 C443 1-164-156-11 1-126-963-11 1-162-964-11 1-104-663-11 1-162-970-11 CERAMIC CHIP ELECT CERAMIC CHIP ELECT CERAMIC CHIP 0.1uF 4.7uF 0.001uF 33uF 0.01uF 20% 10% 20% 10% 25V 50V 50V 25V 25V D402 D403 D404 D412 D421 8-719-081-08 8-719-081-08 8-719-081-08 8-719-820-05 8-719-988-61 DIODE DIODE DIODE DIODE DIODE EP05Q04-TE8L3 EP05Q04-TE8L3 EP05Q04-TE8L3 1SS181 1SS355TE-17 C447 C461 C471 C476 C481 1-104-665-11 1-126-939-11 1-126-935-11 1-126-935-11 1-165-319-11 ELECT ELECT ELECT ELECT CERAMIC CHIP 100uF 10000uF 470uF 470uF 0.1uF 25V 16V 16V 16V 50V D422 D431 D432 D461 D462 8-719-074-34 8-719-988-61 8-719-988-61 8-719-200-82 8-719-200-82 DIODE DIODE DIODE DIODE DIODE RB495D-T146 1SS355TE-17 1SS355TE-17 11ES2 11ES2 C482 C483 C484 C485 C490 1-165-319-11 1-128-576-11 1-165-319-11 1-126-967-11 1-126-965-11 CERAMIC CHIP ELECT CERAMIC CHIP ELECT ELECT 0.1uF 100uF 0.1uF 47uF 22uF 50V 63V 50V 50V 50V D471 D472 D476 D477 D481 8-719-200-82 8-719-200-82 8-719-200-82 8-719-200-82 8-719-200-82 DIODE DIODE DIODE DIODE DIODE 11ES2 11ES2 11ES2 11ES2 11ES2 C500 C501 C502 C503 C504 1-126-934-11 1-164-156-11 1-162-966-11 1-162-966-11 1-104-665-11 ELECT CERAMIC CHIP CERAMIC CHIP CERAMIC CHIP ELECT 220uF 0.1uF 0.0022uF 0.0022uF 100uF D482 8-719-422-23 DIODE MA8047 10% 10% 20% 10V 25V 50V 50V 10V C505 C515 C516 C517 C519 1-164-156-11 1-162-927-11 1-162-927-11 1-162-927-11 1-162-964-11 CERAMIC CHIP CERAMIC CHIP CERAMIC CHIP CERAMIC CHIP CERAMIC CHIP 0.1uF 100PF 100PF 100PF 0.001uF 5% 5% 5% 10% 25V 50V 50V 50V 50V C520 C522 C523 C524 C550 1-126-934-11 1-164-156-11 1-104-665-11 1-164-156-11 1-104-665-11 ELECT CERAMIC CHIP ELECT CERAMIC CHIP ELECT 220uF 0.1uF 100uF 0.1uF 100uF C551 C552 C553 C554 C601 1-164-156-11 1-162-912-11 1-162-912-11 1-164-156-11 1-164-156-11 CERAMIC CHIP CERAMIC CHIP CERAMIC CHIP CERAMIC CHIP CERAMIC CHIP 0.1uF 7PF 7PF 0.1uF 0.1uF 20% 20% 20% 20% 20% 20% 20% 20% 20% 20% 20% 0.5PF 0.5PF 10V 25V 10V 25V 10V 25V 50V 50V 25V 25V 20% 10% 25V 50V 25V 25V 25V 25V 25V 25V 25V < CONNECTOR > CN1 CN400 CN420 CN490 * CN902 1-784-384-11 1-793-991-11 1-568-683-11 1-784-374-21 1-764-333-11 CONNECTOR, FFC/FPC 27P CONNECTOR, FFC/FPC 23P PIN, CONNECTOR (PC BAORD) 2P CONNECTOR, FFC/FPC 15P PLUG, CONNECTOR 10P < DIODE > < SHORT/CAPACITOR > FB801 FB803 1-216-295-11 SHORT 1-165-319-11 CERAMIC CHIP 0 0.1uF 50V < IC > IC1 IC160 IC260 IC350 IC400 6-800-334-01 8-759-100-96 8-759-100-96 8-759-100-96 8-759-678-77 IC IC IC IC IC M30805MG-216GP uPC4558G2 uPC4558G2 uPC4558G2 LA5643 IC440 IC480 IC500 IC550 IC600 8-759-822-09 8-759-633-42 8-759-579-68 8-759-548-87 8-759-548-87 IC IC IC IC IC LB1641 M5293L AK4524 SN74LVU04ANSR SN74LVU04ANSR IC611 8-749-012-70 IC GP1F38R (DIGITAL IN) 59 MDS-S9 MAIN Ref. No. Part No. Description Remark < JACK/CONNECTOR > J150 J800 1-784-429-11 JACK, PIN 4P (ANALOG IN/OUT) 1-580-394-11 CONNECTOR, DIN 6P (PC LINK) < SHORT/COIL > L349 L490 L506 L522 L523 1-216-296-11 1-216-295-11 1-216-295-11 1-216-295-11 1-216-295-11 SHORT SHORT SHORT SHORT SHORT 0 0 0 0 0 L524 L550 L551 L611 L804 1-216-296-11 1-216-295-11 1-216-296-11 1-414-267-21 1-414-265-21 SHORT SHORT SHORT INDUCTOR INDUCTOR 0 0 0 10uH 4.7uH < TRANSISTOR > Q180 Q281 Q356 Q380 Q440 8-729-046-97 8-729-046-97 8-729-194-57 8-729-424-08 8-729-421-22 TRANSISTOR TRANSISTOR TRANSISTOR TRANSISTOR TRANSISTOR Q444 Q910 8-729-026-53 TRANSISTOR 8-729-922-37 TRANSISTOR 2SD1938 (F) -T (TX).SO 2SD1938 (F) -T (TX).SO 2SC945-P UN2111 UN2211 2SA1576A-T106-QR 2SD2144S-UVW < RESISTOR > R3 R4 R10 R16 R24 1-216-809-11 1-216-864-11 1-216-864-11 1-216-845-11 1-216-833-11 METAL CHIP METAL CHIP METAL CHIP METAL CHIP METAL CHIP 100 0 0 100K 10K 5% 5% 5% 5% 5% 1/16W 1/16W 1/16W 1/16W 1/16W R28 R30 R33 R36 R37 1-216-833-11 1-216-833-11 1-216-864-11 1-216-864-11 1-216-864-11 METAL CHIP METAL CHIP METAL CHIP METAL CHIP METAL CHIP 10K 10K 0 0 0 5% 5% 5% 5% 5% 1/16W 1/16W 1/16W 1/16W 1/16W R38 R42 R43 R44 R45 1-216-864-11 1-216-864-11 1-216-833-11 1-216-864-11 1-216-833-11 METAL CHIP METAL CHIP METAL CHIP METAL CHIP METAL CHIP 0 0 10K 0 10K 5% 5% 5% 5% 5% 1/16W 1/16W 1/16W 1/16W 1/16W R49 R50 R51 R67 R68 1-216-833-11 1-216-864-11 1-216-833-11 1-216-833-11 1-216-833-11 METAL CHIP METAL CHIP METAL CHIP METAL CHIP METAL CHIP 10K 0 10K 10K 10K 5% 5% 5% 5% 5% 1/16W 1/16W 1/16W 1/16W 1/16W R90 R114 R115 R116 R123 1-216-845-11 1-216-845-11 1-216-833-11 1-216-833-11 1-216-833-11 METAL CHIP METAL CHIP METAL CHIP METAL CHIP METAL CHIP 100K 100K 10K 10K 10K 5% 5% 5% 5% 5% 1/16W 1/16W 1/16W 1/16W 1/16W R124 R129 R134 R135 R136 1-216-833-11 1-216-833-11 1-216-833-11 1-216-833-11 1-216-845-11 METAL CHIP METAL CHIP METAL CHIP METAL CHIP METAL CHIP 10K 10K 10K 10K 100K 5% 5% 5% 5% 5% 1/16W 1/16W 1/16W 1/16W 1/16W R137 1-216-833-11 METAL CHIP 10K 5% 1/16W 60 Ref. No. Part No. Description R138 R139 R141 R144 1-216-833-11 1-216-833-11 1-216-833-11 1-216-833-11 METAL CHIP METAL CHIP METAL CHIP METAL CHIP 10K 10K 10K 10K 5% 5% 5% 5% 1/16W 1/16W 1/16W 1/16W Remark R151 R152 R153 R155 R161 1-216-839-11 1-216-835-11 1-216-849-11 1-216-805-11 1-216-833-11 METAL CHIP METAL CHIP METAL CHIP METAL CHIP METAL CHIP 33K 15K 220K 47 10K 5% 5% 5% 5% 5% 1/16W 1/16W 1/16W 1/16W 1/16W R162 R163 R164 R165 R166 1-216-833-11 1-216-833-11 1-216-833-11 1-218-724-11 1-218-724-11 METAL CHIP METAL CHIP METAL CHIP METAL CHIP METAL CHIP 10K 10K 10K 22K 22K 5% 5% 5% 0.5% 0.5% 1/16W 1/16W 1/16W 1/16W 1/16W R171 R172 R176 R177 R178 1-216-823-11 1-216-823-11 1-216-819-11 1-216-845-11 1-216-815-11 METAL CHIP METAL CHIP METAL CHIP METAL CHIP METAL CHIP 1.5K 1.5K 680 100K 330 5% 5% 5% 5% 5% 1/16W 1/16W 1/16W 1/16W 1/16W R181 R251 R252 R253 R255 1-216-833-11 1-216-839-11 1-216-835-11 1-216-849-11 1-216-805-11 METAL CHIP METAL CHIP METAL CHIP METAL CHIP METAL CHIP 10K 33K 15K 220K 47 5% 5% 5% 5% 5% 1/16W 1/16W 1/16W 1/16W 1/16W R261 R262 R263 R264 R265 1-216-833-11 1-216-833-11 1-216-833-11 1-216-833-11 1-218-724-11 METAL CHIP METAL CHIP METAL CHIP METAL CHIP METAL CHIP 10K 10K 10K 10K 22K 5% 5% 5% 5% 0.5% 1/16W 1/16W 1/16W 1/16W 1/16W R266 R271 R272 R276 R277 1-218-724-11 1-216-823-11 1-216-823-11 1-216-819-11 1-216-845-11 METAL CHIP METAL CHIP METAL CHIP METAL CHIP METAL CHIP 22K 1.5K 1.5K 680 100K 0.5% 5% 5% 5% 5% 1/16W 1/16W 1/16W 1/16W 1/16W R278 R280 0 R301 0 R306 R356 1-216-815-11 1-216-833-11 1-219-786-11 1-219-786-11 1-216-815-11 METAL CHIP METAL CHIP FUSIBLE FUSIBLE METAL CHIP 330 10K 22 22 330 5% 5% 5% 5% 5% 1/16W 1/16W 1/4W F 1/4W F 1/16W R357 R380 R381 R410 R413 1-216-822-11 1-216-845-11 1-216-847-11 1-216-845-11 1-216-833-11 METAL CHIP METAL CHIP METAL CHIP METAL CHIP METAL CHIP 1.2K 100K 150K 100K 10K 5% 5% 5% 5% 5% 1/16W 1/16W 1/16W 1/16W 1/16W R421 R431 R432 R433 R441 1-216-813-11 1-216-809-11 1-216-819-11 1-216-816-11 1-216-837-11 METAL CHIP METAL CHIP METAL CHIP METAL CHIP METAL CHIP 220 100 680 390 22K 5% 5% 5% 5% 5% 1/16W 1/16W 1/16W 1/16W 1/16W R442 R443 R481 R482 R483 1-216-835-11 1-216-837-11 1-216-864-11 1-216-846-11 1-216-813-11 METAL CHIP METAL CHIP METAL CHIP METAL CHIP METAL CHIP 15K 22K 0 120K 220 5% 5% 5% 5% 5% 1/16W 1/16W 1/16W 1/16W 1/16W R484 R485 R508 R511 1-216-813-11 1-216-845-11 1-216-845-11 1-216-805-11 METAL CHIP METAL CHIP METAL CHIP METAL CHIP 220 100K 100K 47 5% 5% 5% 5% 1/16W 1/16W 1/16W 1/16W The components identified by mark 0 or dotted line with mark 0 are critical for safety. Replace only with part number specified. MDS-S9 MAIN Ref. No. Part No. Description Remark R512 1-216-805-11 METAL CHIP 47 5% 1/16W R513 R514 R515 R516 R517 1-216-805-11 1-216-805-11 1-216-809-11 1-216-809-11 1-216-809-11 METAL CHIP METAL CHIP METAL CHIP METAL CHIP METAL CHIP 47 47 100 100 100 5% 5% 5% 5% 5% 1/16W 1/16W 1/16W 1/16W 1/16W R551 R552 R553 R613 R614 1-216-828-11 1-216-817-11 1-216-815-11 1-216-853-11 1-216-841-11 METAL CHIP METAL CHIP METAL CHIP METAL CHIP METAL CHIP 3.9K 470 330 470K 47K 5% 5% 5% 5% 5% 1/16W 1/16W 1/16W 1/16W 1/16W R623 R626 R801 R802 R805 1-216-864-11 1-216-864-11 1-216-829-11 1-216-809-11 1-216-829-11 METAL CHIP METAL CHIP METAL CHIP METAL CHIP METAL CHIP 0 0 4.7K 100 4.7K 5% 5% 5% 5% 5% 1/16W 1/16W 1/16W 1/16W 1/16W R806 R807 R808 R851 R855 1-216-809-11 1-216-809-11 1-216-809-11 1-216-833-11 1-216-864-11 METAL CHIP METAL CHIP METAL CHIP METAL CHIP METAL CHIP 100 100 100 10K 0 5% 5% 5% 5% 5% 1/16W 1/16W 1/16W 1/16W 1/16W R911 R912 R1001 R1002 R1035 1-216-825-11 1-216-841-11 1-216-864-11 1-216-864-11 1-216-833-11 METAL CHIP METAL CHIP METAL CHIP METAL CHIP METAL CHIP 2.2K 47K 0 0 10K 5% 5% 5% 5% 5% 1/16W 1/16W 1/16W 1/16W 1/16W < VIBRATOR > Ref. No. < CAPACITOR > 0 C900 0 C901 0 C910 C920 C921 1-113-920-11 1-113-920-11 1-113-920-11 1-164-159-11 1-164-159-11 CERAMIC CERAMIC CERAMIC CERAMIC CERAMIC 0.0022uF 20% 0.0022uF 20% 0.0022uF 20% 0.1uF 0.1uF 250V 250V 250V 50V 50V C922 C923 C924 C950 C951 1-164-159-11 1-164-159-11 1-164-159-11 1-164-159-11 1-164-159-11 CERAMIC CERAMIC CERAMIC CERAMIC CERAMIC 0.1uF 0.1uF 0.1uF 0.1uF 0.1uF 50V 50V 50V 50V 50V C952 1-164-159-11 CERAMIC 0.1uF 50V < CONNECTOR > * CN900 1-580-230-11 PIN, CONNECTOR (PC BOARD) 2P < DIODE > D910 Description Remark < LEAD > * LP900 1-690-880-31 LEAD (WITH CONNECTOR) < RELAY > 0 RY910 1-755-356-11 RELAY < TRANSFORMER > 0 TR950 1-435-548-11 TRANSFORMER, POWER ************************************************************** MISCELLANEOUS ************** 5 6 07 * 15 58 1-792-811-11 1-792-812-11 1-777-071-61 1-569-972-21 1-792-813-11 WIRE (FLAT TYPE) (23 CORE) WIRE (FLAT TYPE) (27 CORE) CORD, POWER SOCKET, SHORT 2P WIRE (FLAT TYPE) (15 CORE) 357 0 358 HR901 M101 M102 1-678-514-11 A-4672-541-A 1-500-670-11 A-4672-898-A A-4735-076-A FLEXIBLE, BOARD OPTICS ASSY (KMS-260B) HEAD, OVER WRITE MOTOR ASSY, SPINDLE MOTOR ASSY, SLED M103 S102 A-4735-074-A MOTOR ASSY, LOADING 1-771-957-11 SWITCH, PUSH (2 KEY) (REFLECT RATE DETECT, PROTECT DETECT) 0 TR900 1-435-544-11 TRANSFORMER, POWER ************************************************************ X22 1-795-004-21 VIBRATOR, CERAMIC (10MHz) X550 1-781-998-11 VIBRATOR, CRYSTAL (45.1584MHz) ************************************************************** 1-681-806-11 PT BOARD ********* Part No. PT ************** HARDWARE LIST ************** #1 7-685-204-19 SCREW +KTP 2X6 TYPE2 NON-SLIT #2 7-685-850-04 SCREW +BVTT 2X3 (S) #3 7-685-646-79 SCREW +BVTP 3X8 TYPE2 N-S #4 7-685-533-19 SCREW +BTP 2.6X6 TYPE S N-S #5 7-685-532-14 SCREW +BTP 2.6X5 TYPE S N-S ************************************************************ ACCESSORIES & PACKING MATERIALS ******************************* 0 1-476-057-11 REMOTE COMMANDER (RM-D47M) 1-558-271-11 CORD, CONNECTION (AUDIO CONNECTING CORD) 1-574-264-11 CORD, LIGHT PLUG (OPTICAL CABLE) 1-770-019-11 ADAPTOR, CONVERSION PLUG 3P (UK) 4-235-443-11 MANUAL, INSTRUCTION (ENGLISH) 4-235-443-21 MANUAL, INSTRUCTION (FRENCH, SPANISH) (AEP) 4-235-443-31 MANUAL, INSTRUCTION (GERMAN, DUTCH, ITALIAN) (AEP) 4-235-443-41 MANUAL, INSTRUCTION (SWEDISH, PORTUGUESE) (AEP) 4-981-643-11 COVER, BATTERY (for RM-D47M) 8-719-911-19 DIODE 1SS119-25 < LINE FILTER > 0 LF900 1-419-625-11 COIL, LINE FILTER The components identified by mark 0 or dotted line with mark 0 are critical for safety. Replace only with part number specified. 61 MDS-S9 REVISION HISTORY Clicking the version allows you to jump to the revised page. Also, clicking the version at the upper right on the revised page allows you to jump to the next revised page. Ver. 1.0 Date 2001.06 Description of Revision New