1
185mm (7-1/4”)
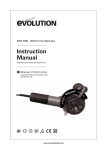
Multipurpose Circular Saw
Instruction
Manual
Read instructions before operating this tool.
www.evolutionbuild.com
TABLE OF CONTENTS
EC - DECLARATION OF CONFORMITY
EC - Declaration of Conformity
02
We, manufacturer and importer
Important Information
03
12 Month Limited Warranty
03
Evolution Power Tools Ltd.
Venture One
Sheffield
S20 3FR
General Safety Rules
03
Safety Precautions for All Saws
05
Labels & Symbols
06
Additional Specific Safety Rules
06
Specification07
Machine Overview
08
Assembly09
Operation11
Maintenance20
Environmental Protection
Service Parts Diagram
Declare that the product
Part numbers:
RAGEB-110 / RAGEB-230 / RAGEB-2302EU
Evolution: RageB
Multipurpose Circular Saw 185mm
Complies with the essential requirements
of the following European Directives:
2006/42/EC – Machine Directive
2006/95/EC – Low Voltage Directive
2004/108/EC – EMC Directive
2002/95/EC – Restriction of the use of
Certain Hazardous Substances in Electrical
and Electric Equipment
The following standards
have been applied:
21
22
EN55014-1 : 2006
EN55014-2 / AA1:2001
EN61000-3-2 : 2006
EN61000-3-11 : 2000
EN60745-1 : 2009
EN60745-2-5 : 2007
Authorised by
Mr Matthew J Gavins
Managing Director
1 May 2011
All documentation is held on file at the
above address and is available, on request
for review.
2
www.evolutionbuild.com
IMPORTANT
Please read these operating and safety
instructions carefully and completely. For
your own safety, before using this equipment
check that the voltage is correct and that all
handles and parts are firmly secured. If you
are uncertain about any aspect of using this
equipment, please contact our Technical Help
Resource.
UK 0870 609 2297
TCT STEEL CUTTING CIRCULAR SAW
Congratulations on your purchase of an
Evolution Power Tools machine. Please
complete your product registration on line
to validate your machine’s warranty period
and ensure prompt service if needed. We
sincerely thank you for selecting a product
from Evolution Power Tools.
12 MONTH LIMITED WARRANTY. Evolution
power tools reserves the right to make
improvements and modifications to design
without prior notice.
Evolution Power Tools will, within twelve (12)
months from the original date of purchase,
repair or replace any goods found to be
defective in materials or workmanship. This
warranty is void if the tool being returned
has been used to cut materials beyond
the recommendations in the Instruction
Manual or if the saw has been damaged by
accident, neglect, or improper service. This
warranty does not apply to machines and/
or components which have been altered,
changed, or modified in any way, or subjected
to use beyond recommended capacities
and specifications. Electrical components
are subject to respective manufacturers’
warranties. All goods returned defective
shall be returned prepaid freight to Evolution
Power Tools. Evolution Power Tools reserves
the right to optionally repair or replace it with
the same or equivalent item. There is no
warranty – written or verbal – for saw blades.
In no event shall Evolution Power Tools be
liable for loss or damage resulting directly or
indirectly from the use of our merchandise or
from any other cause. Evolution Power Tools
is not liable for any costs incurred on such
goods or consequential damages. No officer,
employee or agent of Evolution Power Tools
is authorised to make oral representations of
fitness or to waive any of the foregoing terms
of sale and none shall be binding on Evolution
Power Tools. Questions relating to this limited
warranty should be directed to the company’s
head office, or call the appropriate Helpline
number.
IMPORTANT SAFETY INSTRUCTIONS
To reduce the risk of electric shock, this
equipment is fitted with an approved cord and
plug for its intended country of use. Do not
change the cord or plug in any way.
GENERAL SAFETY RULES
Read and understand all instructions before
operating this product. Failure to follow
all instructions listed below, may result in
electric shock, fire and / or serious personal
injury. SAVE THESE INSTRUCTIONS FOR
FUTURE REFERENCE.
Read all these instructions before attempting
to operate this product and save these
instructions.
The term “power tool” in the warnings refers
to your mains-operated (corded) power tool or
battery-operated (cordless) power tool.
www.evolutionbuild.com
3
SAFETY INSTRUCTIONS
FOR CIRCULAR SAWS
WARNING: Read all instructions. Failure
to follow all instructions listed below may
result in electric shock, fire and/or serious
injury.
SAVE THESE INSTRUCTIONS
1) Work Area Safety
a) Keep work area clean and well lit.
Cluttered or dark areas invite accidents.
b) Do not operate power tools in
explosive atmospheres, such as in the
presence of flammable liquids, gases or
dust. Power tools create sparks which may
ignite the dust or fumes.
c) Keep children and bystanders away
while operating a power tool. Distractions
can cause you to lose control.
2) Electrical Safety
a) Power tool plugs must match the outlet.
Never modify the plug in any way. Do not use
any adapter plugs with earthed (grounded)
power tools. Unmodified plugs and matching
outlets will reduce risk of electric shock.
b) Avoid body contact with earthed
or grounded surfaces, such as pipes,
radiators, ranges and refrigerators. There
is an increased risk of electric shock if your
body is earthed or grounded.
c) Do not expose power tools to rain or
wet conditions. Water entering a power tool
will increase the risk of electric shock.
d) Do not abuse the cord. Never use the
cord for carrying, pulling or unplugging
the power tool. Keep cord away from
heat, oil, sharp edges or moving parts.
Damaged or entangled cords increase the
risk of electric shock.
e) When operating a power tool outdoors,
use an extension cord suitable for outdoor
use. Use of a cord suitable for outdoor use
4
reduces the risk of electric shock.
f) If operating a power tool in a damp
location is unavoidable, use a residual
current device (RCD) protected supply.
Use of an RCD reduces the risk of electric
shock.
3) Personal Safety
a) Stay alert, watch what you are doing
and use common sense when operating
a power tool. Do not use a power tool
while you are tired or under the influence of
drugs, alcohol or medication. A moment of
inattention while operating power tools may
result in serious personal injury.
b) Use personal protective equipment.
Always wear eye protection. Protective
equipment such as dust mask, non-skid
safety shoes, hard hat, or hearing protection
used for appropriate conditions will reduce
personal injuries.
c) Prevent unintentional starting. Ensure
the switch is in the off-position before
connecting to power source and/or
battery pack, picking up or carrying the
tool. Carrying power tools with your finger
on the switch or energising power tools that
have the switch on invites accidents.
d) Remove any adjusting key or wrench
before turning the power tool on. A wrench
or a key left attached to a rotating part of the
power tool may result in personal injury.
e) Do not overreach. Keep proper footing
and balance at all times. This enables better
control of the power tool in unexpected
situations.
f) Dress properly. Do not wear loose
clothing or jewellery. Keep your hair,
clothing and gloves away from moving parts.
Loose clothes, jewellery or long hair can be
caught in moving parts.
g) If devices are provided for the connection of
dust extraction and collection facilities, ensure
these are connected and properly used. Use
of dust collection can reduce dust-related hazards.
www.evolutionbuild.com
4) Power Tool Use & Care
a) Do not force the power tool. Use the
correct power tool for your application. The
correct power tool will do the job better and
safer at the rate for which it was designed.
b) Do not use the power tool if the switch
does not turn it on and off. Any power tool
that cannot be controlled with the switch is
dangerous and must be repaired.
c) Disconnect the plug from the power
source and/or the battery pack from
the power tool before making any
adjustments, changing accessories, or
storing power tools. Such preventive safety
measures reduce the risk of starting the
power tool accidentally.
d) Store idle power tools out of the reach
of children and do not allow persons
unfamiliar with the power tool or these
instructions to operate the power tool.
Power tools are dangerous in the hands of
untrained users.
e) Maintain power tools. Check for
misalignment or binding of moving parts,
breakage of parts and any other condition
that may affect the power tool’s operation.
If damaged, have the power tool repaired
before use. Many accidents are caused by
poorly maintained power tools.
f) Keep cutting tools sharp and clean.
Properly maintained cutting tools with
sharp cutting edges are less likely to bind
and are easier to control.
g) Use the power tool, accessories and
tool bits etc. in accordance with these
instructions, taking into account the
working conditions and the work to
be performed. Use of the power tool for
operations different from those intended
could result in a hazardous situation.
5) Service
Have your power tool serviced by a
qualified repair person using only genuine
replacement parts.
This will ensure that the safety of the power
tool is properly maintained.
SAFETY INSTRUCTIONS FOR ALL SAWS
a) DANGER: Keep hands away from
cutting area and the blade. Keep your
second hand on auxiliary handle, or motor
housing. If both hands are holding the saw,
they cannot be cut by the blade.
b) Do not reach underneath the workpiece.
The guard cannot protect you from the blade
below the workpiece.
c) Adjust the cutting depth to the thickness
of the workpiece. Less than a full tooth of
the blade teeth should be visible below the
workpiece.
d) Never hold piece being cut in your hands
or across your leg. Secure the workpiece to
a stable platform. It is important to support
the work properly to minimize body exposure,
blade binding, or loss of control.
e) Hold power tool by insulated gripping
surfaces when performing an operation
where the cutting tool may contact hidden
wiring or its own cord. Contact with a “live”
wire will also make exposed metal parts of
the power tool “live” and shock the operator.
f) When ripping always use a rip fence
or straight edge guide. This improves the
accuracy of cut and reduces the chance of
blade binding.
g) Always use blades with correct size and
shape (diamond versus round) of arbor
holes. Blades that do not match the mounting
hardware of the saw will run eccentrically,
causing loss of control.
h) Never use damaged or incorrect blade
washers or bolt. The blade washers and
bolt were specially designed for your saw, for
optimum performance and safety of operation.
www.evolutionbuild.com
5
FURTHER SAFETY INSTRUCTIONS
Causes and operator prevention of kickback:
Kickback is a sudden reaction to a pinched,
bound or misaligned saw blade, causing an
uncontrolled saw to lift up and out of the
workpiece toward the operator:
1. When the blade is pinched or bound tightly
by the kerf closing down, the blade stalls and
the motor reaction drives the unit rapidly back
toward the operator;
2. If the blade becomes twisted or misaligned
in the cut, the teeth at the back edge of the
blade can dig into the top surface of the
workpiece causing the blade to climb out of
the kerf and jump back towards the operator.
Kickback is the result of saw misuse and/or
incorrect operating procedures or conditions
and can be avoided by taking proper
precautions as given below.
a) Maintain a firm grip with both hands
on the saw and position your arms to
resist kickback forces. Position your body
to either side of the blade, but not in line
with the blade. Kickback could cause the
saw to jump backwards, but kickback forces
can be controlled by the operator, if proper
precautions are taken.
b) If the blades are binding, or when
interrupting a cut for any reason, release
the trigger and hold the saw motionless
in the material until the blades come to
a complete stop. Never attempt to remove
the saw from the work or pull the saw
backward while the blades are in motion or
kickback may occur. Investigate and take
corrective actions to eliminate the cause of
blade binding.
c) When restarting a saw in the workpiece,
centre the saw blade in the kerf and check
that saw teeth are not engaged into the
material. If saw blade is binding, it may walk
up or kickback from the workpiece as the saw
is restarted.
6
d) Support large panels to minimise the
risk of blade pinching and kickback. Large
panels tend to sag under their own weight.
Supports must be placed under the panel on
both sides, near the line of cut and near the
edge of the panel.
e) Blade depth and bevel adjusting locking
levers must be tight and secure before
making a cut. If the blade adjustment
shifts while cutting it may cause binding and
kickback.
f) Do not use dull or damaged blades.
Unsharpened or improperly set blades
produce a narrow kerf causing excessive
friction, blade binding and kickback.
g) Use extra caution when making a
“plunge cut” into existing walls or other
blind areas. The protruding blade may cut
objects that can cause kickback.
d) Always observe that the lower guard
is covering the blade before placing
saw down on a bench or the floor. An
unprotected, coasting blade will cause the
saw to walk backwards, cutting whatever is
in its path. Be aware of the time it takes for
the blade to stop after switch is released.
Safety instructions for saws
a) Check lower guard for proper closing
before each use. Do not operate the saw if
lower guard does not move freely and close
instantly. Never clamp or tie the lower guard
into the open position. If saw is accidentally
dropped, lower guard may be bent. Raise the
lower guard with the retracting handle and
make sure it moves freely and does not touch
the blade or any other part, in all angles and
depths of cut.
b) Check the operation of the lower guard
spring. If the guard and the spring are not
operating properly, they must be serviced
before use. Lower guard may operate
sluggishly due to damaged parts, gummy
deposits, or a build-up of debris.
c) Lower guard may be retracted manually
only for special cuts such as “plunge cuts”
and “compound cuts.” Raise lower guard
by retracting handle and as soon as blade
enters the material, the lower guard must
be released. For all other sawing, the lower
guard should operate automatically.
You should:
www.evolutionbuild.com
Only use genuine Evolution replacement
parts. Unauthorized parts may be dangerous!
To obtain an additional copy of your manual,
please contact Evolution Power Tools at:
UK 0870 609 2297
WEBwww.evolutionpowertools.com
HEALTH ADVICE
ADDITIONAL SPECIFIC SAFETY RULES
WARNING: When drilling, sanding, sawing or
grinding, dust particles will be produced. In
some instances, depending on the materials
you are working with, this dust can be
particularly harmful to you (e.g. lead from
old gloss paint).You are advised to consider
the risks associated with the materials you
are working with and to reduce the risk of
exposure.
•Work in a well-ventilated area.
•Work with approved safety equipment, such
as dust masks that are specially designed to
filter microscopic particles.
LABELS & SYMBOLS
WARNING: Do not operate machine if
warning and/or instruction labels are missing
or damaged. Contact Evolution Power Tools
for replacement labels.
SymbolDescription
V
Volts
A
Amperes
HzHertz
MinMinutes
~
Alternating Current
No Load Speed
no
Double Insulated
Wear Safety Goggles
Wear Ear Protection
a) DANGER: Keep hands away from
cutting area and the blade. Keep your
second hand on the auxiliary handle, or motor
housing. If both hands are holding the saw,
they cannot come into contact with the blade.
b) Do not reach underneath the workpiece.
The guard cannot protect you from the blade
below the workpiece.
c) Adjust the cutting depth to the thickness
of the workpiece. Less than a full tooth of
the blade teeth should be visible below the
workpiece.
d) Never hold the piece being cut in your
hands or across your legs. Secure the
workpiece to a stable platform. It is important
to support the work properly to minimize body
exposure, blade binding, or loss of control.
e) Hold the power tool by the insulated
gripping surfaces when performing an
operation where the cutting tool may
contact hidden wiring or its own cord.
Contact with a “live” wire will also make
exposed metal parts of the power tool “live”
and shock the operator.
f) When ripping always use a rip fence
or straight edge guide. This improves the
accuracy of the cut and reduces the chance
of the blade binding.
g) Always use blades with correct size and
shape (diamond versus round) of arbor
holes. Blades that do not match the mounting
hardware of the saw will run eccentrically,
causing loss of control.
www.evolutionbuild.com
7
99
h) Never use damaged
or incorrect blade washers or bolt.
The blade washers, flanges and bolt were
specially designed for your saw, for optimum
performance and safety of operation. Replace
with genuine spare parts if damaged or worn.
i) Do not use High
Speed Steel (HSS) saw blades
k) Inspect the machine and the blade
before each use. Do not use deformed,
cracked, worn or otherwise damaged blades.
l) Never use the saw without the original
guard protection system. Do not lock the
moving guard in the open position. Ensure
that the guard operates freely without
jamming.
m) Only use blades that comply with the
characteristics specified in this manual.
Before using accessories, always compare
the maximum allowed RPM of the accessory
with the RPM of the machine.
ASSEMBLY
Your Evolution Power Tools saw is shipped
complete. Remove all contents from the
box and inspect to ensure no damage was
incurred during shipping, and that the items
listed below are included.
ITEMS SUPPLIED
DescriptionQty
Instruction Manual
Allen Key
185mm Multi Blade (fitted)
Parallel Edge Guide
1
1
1
1
SPECIFICATION; Rage B
Designed to cut: Mild Steel Plate: Max Thickness - 6mm
Mild Steel Box Section:
Max Wall Thickness - 3mm
Wood: Max Thickness at 900 Motor (230v 50/60 Hz) (Watts) Maximum Box Cutting Capacity 900
(3mm wall)
Maximum Box Cutting Capacity 450
(3mm wall)
Optimum Cutting Thickness
(Mild Steel Plate)
RPM No Load (min-1)
Recommended Maximum Duty Cycle
Blade Diameter:
Bore Diameter
Thickness
MACHINE OVERVIEW
1
60mm
40mm
6mm
3700
30mins
185mm
20mm
1.7mm
3
5
Noise and Vibration Data
Sound pressure level:
96.8. dB(A) K 3 dB(A)
Sound power level:
107.8. dB(A) K 3 dB(A)
Vibration level:
2.048m/s2 K 1.5m/s2
The declared vibration total value has been
measured in accordance with a standard
test method and may be used for comparing
one tool with another. The declared vibration
total value may also be used in a preliminary
assessment of exposure.
WARNING: The vibration emission during
actual use of the power tool can differ from the
declared total value depending on the ways in
which the tool is used. The need to identify
safety measures and to protect the operator
are based on an estimation of exposure in the
actual conditions of use (taking account of all
parts of the operating cycle, such as the times
the tool is switched off, when it is running
idle, in addition to trigger time).
8
www.evolutionbuild.com
2
6
60mm
1200
4
Know your parts
1. Rear Handle
2. Front Handle
3. Upper Blade Guard
4. Lower Blade Guard
5. Sole Plate
6. Chip Exhaust Port
www.evolutionbuild.com
OPERATION
GETTING STARTED
7. Reinstall the outer drive flange and the
arbor socket headed screw.
8. Engage the arbor lock and tighten the arbor
socket headed screw securely using the
Allen key.
WARNING: ALWAYS DISCONNECT THE
SAW FROM THE POWER SOURCE BEFORE
MAKING ADJUSTMENTS.
Refer to the “Service Parts Diagram”. Install
a blade as detailed in the “Installing or
Removing a Blade” section.
FIG 1
Note: The socket headed arbor screw has a
RH thread.
9. Check that the arbor lock is fully released
by manually rotating the blade.
10. Check the operation of the safety guard.
WARNING: Never start the saw with the
cutting edge of the saw blade in contact with
the workpiece surface. Do not retract blade
guard manually. Guard retracts automatically.
This saw is equipped with an approved cord
and plug for its intended Country of use. Do
not alter or modify the power cord.
Parallel Edge Guide
A parallel guide (for help when rip cutting)
can be fitted to the sole plate of the machine
The guides arm should be inserted into the
rectangular slots found at the front of the sole
plate, and slid under the locking thumb screw.
(Fig. 4)
Installing or Removing a Blade
WARNING: Only use genuine Evolution
blades which are designed for this machine.
Ensure that the maximum speed of the blade
is compatible with the machine. Only perform
this operation with the machine disconnected
from the power supply.
FIG 2
FIG 3
10
Note: It is recommended that the operator
considers wearing protective gloves when
handling the blade during installation or when
changing the machines blade.
1. Place saw on a level, secure surface.
2. Lock the machine arbor by engaging the
arbor lock. (Fig. 1)
3. Using the supplied Allen Key loosen and
remove the arbor socket headed screw
and outer blade drive flange. (Fig. 2)
4. Remove the saw blade.
5. Thoroughly clean inner and outer blade
drive flanges and blade mounting surface
before installing a new blade.
6. Ensure that the direction of rotation
arrows printed on the blade, match the
direction of rotation arrow found on the
machines upper and lower guard. (Fig. 3)
www.evolutionbuild.com
Note: The edge guide can be fitted to either
side of the sole plate and should only be fitted
and adjusted with the machine disconnected
from the power supply.
FIG 4
Adjust the edge guide so that it is at the
required distance from the blade and tighten
the two thumb screws. Check that the edge
guide is parallel to the saw blade.
Adjustment of the Cutting Depth
FIG 5
Loosen the Depth Adjustment Locking
Screw to adjust the sole plate to give the
required cutting depth. A scale can be found
on the depth bracket and an index mark is
incorporated into the machines upper guard
to aid setting. In most cases depth should be
set at maximum unless there are obstructions
below the work surface. Tighten the Depth
Adjustment Locking Screw securely to lock in
the required position. (Fig. 5)
www.evolutionbuild.com
11
Adjustment of the Cutting Angle
1. Loosen the Bevel Locking Screw found at
the front of the saw. (Fig. 6)
2. Tilt the blade to the required angle. (Fig. 7)
3. Tighten the Bevel Locking Screw securely
Note: An angle scale (00- 450) is incorporated
into the Bevel Locking quadrant to aid setting.
Operating Advice
FIG 6
0-45o
Carry out routine safety checks each time you
use the machine. Check that all safety guards
are operating correctly, and that all adjustment
handles/screws are tightened securely.
Check that the blade is secure and installed
correctly. Also check that it is the correct
blade for the material being cut.
Check the integrity of the power cord.
Always clamp the workpiece to a rigid support
such as a bench or saw horse whenever
possible.
ON/OFF Trigger Switch
FIG 7
This machine is equipped with a safety start
trigger switch.
To start the tool:
•Pushinthesafetylockbuttononthesideof
the handle with your thumb.
•Depressthemaintriggerswitchtostartthe
motor. (Fig. 8)
Cutting Advice
The operator should wear all relevant PPE
(Personal Protection Equipment) necessary
for the job at hand. This could include safety
glasses, dust masks, safety shoes etc.
The operator should always be aware of the
position and routing of the power cable.
FIG 8
12
www.evolutionbuild.com
•Donotforcethemachine.
• Allow the speed of the saw blade do
the work. Cutting performance will not be
improved by applying excessive pressure to
the machine, and blade life will be reduced.
•Whenusingtheparalleledgeguide,ensure
that it is parallel with the blade. The blade
and/or motor could become damaged if the
machine is used with an incorrectly adjusted
parallel edge guide.
•Tosettheguide,loosenthelockingscrew,
and adjust the guide to the required position.
Tighten the locking screw.
•Placefrontedgeofsoleplatesquarelyon
the workpiece before starting the motor.
•Whenstartingacut,sightthecuttingline
with the line of cut guide, taking care to
introduce the blade to the material slowly,
so as not to damage its teeth.
•Usebothhandstomovethesawforwards
through the work piece.
•Applysmooth,constantpressuretomove
the saw forwards through the workpiece.
All motor bearings in this machine are
lubricated for life. No further lubrication is
required.
When a cut has been completed release the
ON/OFF trigger switch and allow the blade to
come to a complete halt. Do not apply lateral
pressure to the blade disc in an attempt to
slow it down more quickly.
ENVIRONMENTAL PROTECTION
Use a clean, slightly damp cloth to clean
the plastic parts of the machine. Do not use
solvents or similar products which could
damage the plastic parts.
WARNING: Do not attempt to clean by
inserting pointed objects through openings in
the machines casings etc. The machines air
vents should be cleaned using compressed
dry air.
Excessive sparking may indicate the
presence of dirt in the motor or worn out
carbon brushes. If this is suspected have the
machine serviced and the brushes replaced at
an authorised service centre.
Waste electrical products should not be
disposed of with household waste. Please
recycle where facilities exist. Check with your
Local Authority or retailer for recycling advice.
WARNING: If the motor should stop or stall
whilst a cut is being attempted release the
trigger switch immediately and disconnect
the machine from the power supply. Remove
the machine from the workpiece before
investigating the cause and attempting to
restart the motor.
MAINTENANCE
Note: Any maintenance must be carried
out with the machine switched off and
disconnected from the power supply.
Check that all safety features and guards are
operating correctly on a regular basis. Only
use this machine if all guards/safety features
are fully operational.
www.evolutionbuild.com
13
NOTES
SERVICE PARTS DIAGRAM
14
www.evolutionbuild.com
www.evolutionbuild.com
15
w w w. e v o l u t i o n b u i l d . c o m
D11100