1
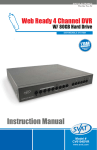
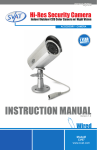
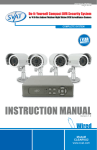
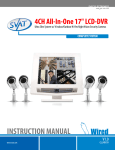
SVAT ELECTRONICS Now You Can See WEB READY DVR SYSTEM W/ 4 OUTDOOR COLOR CCD NIGHT VISION SECURITY CAMERAS COMPLETE SYSTEM Instruction Manual Model # CV0204DVR www.svat.com SVAT ELECTRONICS Now You Can See CV0204DVR www.svat.com SVAT ELECTRONICS Now You Can See PRODUCT WARRANTY & REGISTRATION Please visit our website at www.svat.com to apply for your products warranty registration. The warranty registration for is located under the support tab on the SVAT website. We take quality very seriously. This is why all of our products come with a one year warranty from the original purchase date against defects in workmanship and materials. If you have warranty or support issues please contact us using any of the following methods: SVAT Electronics USA 2315 Whirlpool St., Unit 333 NIagara Falls, New York USA 14305 SVAT Electronics Canada 4080 Montrose Road Niagara Falls, ON Canada L2H 1J9 Phone: 866.946.7828 Fax: 888.771.1701 Email: [email protected] Website: www.svat.com Warranty Terms 1. SVAT products are guaranteed for a period of one year from the date of purchase against defects in workmanship and materials. This warranty is limited to the repair, replacement or refund of the purchase price at SVAT’s option. 2. When service is required, the warranty is validated by the submission of a fully completed warranty card. 3. This warranty becomes void if the product shows evidence of having been misused, mishandled or tampered with contrary to the applicable instruction manual. 4. Routine cleaning, normal cosmetic and mechanical wear and tear are not covered under the terms of this warranty. 5. The warranty expressly provided for herein is the sole warranty provided in connection with the product itself and no other warranty, expressed or implied is provided. SVAT assumes no responsibilities for any other claims not specifically mentioned in this warranty. 6. This warranty does not cover the shipping cost, insurance or any other incidental charges. 7. You MUST call SVAT before sending any product back for repair. You will be given a Return Authorization number. When returning the product for warranty service, please pack it carefully in the original box with all supplied accessories, and enclose your original receipt or copy, and a brief explanation of the problem (include RA #). 8. This warranty is valid only in Canada and the U.S.A. 9. This warranty card cannot be re-issued. CAUTION RISK OF ELECTRIC SHOCK, DO NOT OPEN TO REDUCE THE RISK OF ELECTRIC SHOCK, DO NOT REMOVE THE COVER (BACK). NO USER SERVICEABLE PARTS INSIDE. REFER SERVICING TO QUALIFIED SERVICE PERSONNEL. Graphic Symbol Explanation: The lightning flash with arrowhead symbol, within an equilateral triangle, is intended to alert the user to the presence of uninsulated dangerous voltage within the products enclosure that may be of sufficient magnitude to constitute a risk of electric shock to persons. The exclamation point within an equilateral triangle is intended to alert the user to the presence of important operating maintenance (servicing) instructions in the literature accompanying the appliance. WARNING: TO PREVENT FIRE OR SHOCK HAZARDS, DO NOT EXPOSE THIS UNIT TO RAIN OR MOISTURE CV0204DVR www.svat.com SVAT ELECTRONICS Now You Can See TABLE OF CONTENTS WHAT IS INCLUDED........................................................................................1 WHAT IS COMPATIBLE...................................................................................1 SAFETY PRECAUTIONS..................................................................................2 INTRODUCTION / FEATURES......................................................................3 CAMERA SETUP................................................................................................4 INSTALLATION..................................................................................................5 NAME & FUNCTION OF EACH PART.........................................................6 OPERATING PROCEDURE........................................................................ 7-8 SYSTEM SETUP..........................................................................................9-25 DVR NETWORKING GUIDE................................................................. 26-36 NETWORK REMOTE CONTROL (OPTIONAL)............................... 37-46 TROUBLESHOOTING............................................................................ 47-48 GLOSSARY.......................................................................................................49 SPECIFICATIONS..................................................................................... 50-52 WHAT IS INCLUDED 1x 4CH DVR 4x CV67 Cameras 4x 60ft Extension Wires 5x BNC Connectors 4x Camera Power Adapters RCA to RCA wire (male) Software Installation CD RJ-45 Ethernet Cable - Mounting Hardware - 1 Year Warranty 1x DVR Power Adapter - Instruction Manual - Online/Toll Free Tech Support WHAT IS COMPATIBLE The CV0204DVR is compatible with TVs, VCRs, computers and other SVAT systems including: CV67 CV0204DVR CVP400C CVP403C CVP500C CVP3017M 1 SVAT ELECTRONICS Now You Can See SAFETY PRECAUTIONS Disposal of Old Electrical & Electronic Equipment (Applicable in the European Union and other European countries with separate collection systems). This symbol on the product or on its packaging indicates that this product shall not be treated as household waste. Instead it shall be handed over to the applicable collection point for the recycling of electrical and electronic equipment. By ensuring this product is disposed of correctly, you will help prevent potential negative consequences for the environment and human health, which could otherwise be caused by inappropriate waste handling of this product. The recycling of materials will help to conserve natural resources. For more detailed information about recycling of this product, please contact your local city office , your household waste disposal service or the shop where you purchased the product. The power cord is the main power connection. Therefore, constantly plug and unplug of the power cord might result in malfunction of the product. Do not install the product in an environment where the humidity is high. Unless the product is waterproof or weatherproof, otherwise it can cause the image quality to be poor.. Do not drop the product or subject them to physical shocks. Except for vandal-proof or shockproof product. Otherwise it will result malfunctions to occur. Never keep the product to direct strong light. It can damage the product. Do not spill liquid of any kind on the product. If it gets wet, wipe it dry immediately. Alcohol or beverage can contain minerals that corrode the electronic components. Do not expose to extreme temperatures. CV0204DVR 2 SVAT ELECTRONICS Now You Can See INTRODUCTION This complete system comes with four outdoor cameras and can display all four at the same time. Customize the recording and set a 24 hour recording schedule based on your preferences. You can choose to have the DVR record continuously during the day, then record only when motion is detected at night. And since each camera is equipped with night vision, you can view and record in pitch blackness! This DVR can record four different camera views (quad view) simultaneously and play it back at a smooth 30 frames per second. During playback you can even display each camera in full screen or view all four without losing quality. Finding your recorded footage is a breeze. Just search for the time and date it was recorded and the file will be displayed. Everything is stored on the DVR’s internal hard drive allowing you weeks of recording. The DVR can be set to overwrite old footage when the drive does run out of space, allowing you continuous recording, year after year. The CV0204DVR also has a built-in internet server for remote viewing. Just plug the DVR into your internet connection and set it up with the included software. Then simply type in your IP address to monitor your home or business remotely, from any internet-enabled computer in the world! You can even play back recorded footage, save picture or movie files to your computer, and more, all through a web browser. FEATURES • Easy setup and installation • Live monitoring through the internet from anywhere in the world • Includes 160GB hard drive • Includes 4 CCD color indoor/outdoor night vision cameras • Password protected recording and menus • 15 infrared LEDs let you see in the dark • Has built-in motion detection • Find your recorded footage fast and easy • Has built-in time and date stamp • M-JPEG compression technology • Easily connects to any TV or Monitor CV0204DVR 3 SVAT ELECTRONICS Now You Can See 1. STEP BY STEP CAMERA SETUP Follow these instructions for the installation of each camera. The 60ft video/power wire has two connections: one for video out, and one for power. 1. Plug the 4 pin DIN female connection 2. Match the two arrows on top of both on the camera into the 4 PIN DIN male connection on the 60ft video/power wire. 1 connectoring cables. 2 3. Plug the camera’s power supply into 4. Plug the camera’s power adapter into the power jack located on the 60ft video/power wire. 3 an AC outlet. 4 5. Connect the 60ft video/power wire’s 6. If your VIDEO IN port is a BNC male RCA plug to the VIDEO IN port of your TV/monitor/VCR/DVR. 5 CV0204DVR connection (common with DVR units), you will need to attach the BNC to RCA adapter before connecting the camera. 6 4 SVAT ELECTRONICS Now You Can See 2. INSTALLATION CONNECTORS ON THE REAR PANEL Please setup the connection by following the illustration shown below (detailed instructions on using the network function can be found in Section 6): 1) Plug the power cord into your DVR and plug it into an outlet. SVAT recommends plugging it into a surge protected power bar for your device’s protection. 2) Plug the BNC Connectors into each video input you plan on using. For example, if you are using 3 cameras with this system, then plug BNC convertors into inputs 1-3. Plug BNC convertor into the video output as well. 3) Plug your camera(s) into the video input jacks using the 60ft extension wires. 4) Use an RCA wire to connect your television to the video output of the DVR. Make sure the RCA wire is plugged into the video input of your television. Note: This system does not support audio, so if you are using an audio/video RCA wire, there is no need to plug in the red or white inputs. On your television switch to the video/audio input channel 5) Your system is now installed and ready for use. CV0204DVR 5 SVAT ELECTRONICS Now You Can See 3. NAME AND FUNCTION OF EACH PART 3.1 FRONT PANEL 1. Quad screen display. 2. CH 1 screen display. 3. CH 2 screen display. 4. CH 3 screen display. 5. CH 4 screen display. 6. MENU: Menu button. 7. Up direction button. 8. Down direction button. 9. ENTER: Enter button. 10. REV: Reverse button. 11. STOP: Press this button during playback and recording to return to monitoring mode. 12. PAUSE: Press this button during playback mode to pause. 13. FF: Fast forward button. 14. PLAY: Play button. 15. REC: Record button. 16. PWR: Power indicator. 3.2 REAR PANEL 1. 2. 3. 4. Video Input [VIDEO IN]: Connect to cameras. DC 12V/ 2.5A [Power Input terminal]: power socket. Video Output [VIDEO OUT]: Connect to the monitor. RJ45: Internet connection terminal. CV0204DVR 6 SVAT ELECTRONICS Now You Can See 4. OPERATING PROCEDURE 4.1 POWERING ON This DVR is built to be on at all times, and therefore should be connected to a surge protected power bar (UPC power backup). Use the power bar’s switch to turn the unit off and on. This is especially important as loss of power while recording could possibly damage the hard drive. Every time the DVR is powered on, it will auto-detect its peripherals (self-testing, warm-up, auto detects the hard drive, etc). It will also detect all video input signals. If it does not detect an input, (eg: no camera present) it will sound an alarm. Press any button on the DVR to stop the alarm. There are 4 camera inputs and channels. Disable the unused channels in the Camera Setup Menu to prevent the alarm from activating every time the unit is powered on. 4.2 MONITORING MODE Monitoring mode is the default mode after the DVR is powered on. It will display all 4 camera views. To display a specific camera, press the corresponding number. This will place that camera’s view on your entire screen. To display all cameras again, press the Quad Display button. To start recording, press REC. To stop recording, press STOP. To reset all DVR settings to their factory default settings (under quad or single display), press the PAUSE button 5 times. The message ALL SETTING DATA IS INITIALIZED will be displayed, and after the reset the default password will be set as 111111. When the reset is completed, the message DVR RESET COMPLETED. TURN OFF AND ON THE DVR will be displayed. Restart the DVR to continue. 4.3 RECORD MODE CV0204DVR 7 SVAT ELECTRONICS Now You Can See *Note ~ CH1: No block figure next to CH1 indicates that it is not recording. EACH: Record Type QUAD: Record Type (M): MASTER HDD (T): TIMER RECORD (A): MOTION RECORD (M): MIX RECORD (c): Currently under recording. VIDEO LOSS: Video input unable to be detected. CAMERA1: Title for CH 1. OFF: Channel is set to “OFF”. 4.4 PLAYBACK MODE To play your recordings, press PLAY. A list of your recordings will appear after a slight delay. Use the up and down arrows to find the date and time of your recording. The date format is YY/MM/DD (Year, Month, Day). Press PLAY again to begin playback. In playback mode you can also choose to view all 4 of your cameras or an individual camera, if you have recorded in EACH mode. When the recording is done, press STOP to return to live mode. During playback, press FF to change the playback speed (FF1, FF2, FF3), or press the REV button to reverse playback. CV0204DVR 8 SVAT ELECTRONICS Now You Can See 5. SYSTEM SETUP 5.1 MENU 1. Main Menu 2. Menu Layer Indication: The device consists of four menu layers. < : First Menu Layer (Main Menu) << : Second Menu Layer <<< : Third Menu Layer <<<< : Fourth Menu Layer 3. Menu Operation and Setup Press the up or down button to move the cursor ( > ). Press the ENTER button to enter the sub menu. Press MENU button: LOAD DEFAULT Under the second or third menu layer, the system will return to the previous menu layer (second layer to first layer or third layer 5to second layer) and will auto update the modified data. Under main menu (first menu layer), the system will enter live mode. Press ENTER to increase or decrease the highlighted setting values. 4. Menu Layer Operation Guide CV0204DVR 9 SVAT ELECTRONICS Now You Can See 5.2 SYSTEM SETUP LOAD DEFAULT 5 1. Cursor (>) position indicates the current function selected. 2. Press the up and down buttons to move the cursor. 3. Press ENTER button to proceed. 4. Press MENU button to exit “System Setup”. 5. “System Setup” is situated on the second menu layer. Under this menu layer user may setup the system time, password, return system to default value, and language preference, etc (VERSION displayed represents the FIRMWARE version). CV0204DVR 10 SVAT ELECTRONICS Now You Can See 5.2.1 TIME SETUP Time Set - Sets the time and date on your DVR. Use the up and down arrows to select a value to change, and press ENTER to change the value. When you are finished, press MENU to return to the previous menu screen. Time is in YEAR/MONTH/DAY format CV0204DVR 11 SVAT ELECTRONICS Now You Can See 5.2.2 PASSWORD SETUP 1. Cursor (>) position indicates the current function selected. 2. Press the up and down buttons to move the cursor. 3. Press ENTER button to proceed. 4. Press MENU button to exit “Password Setup”. 5. Select MENU PASSWORD to password-protect your DVR menu from unwanted changes. The password must be entered any time someone tries to access the main menu. Select MENU PASSWORD again to turn this feature off. 6. Select STOP REC PASSWORD to password protect your DVR while it is recording. The password must be entered to stop recording. Select STOP REC again to turn this feature off. 7. When an incorrect password has been entered, “PASSWORD INCORRECT” will be shown on the display. To disable the message, press button: QUAD, CH1, CH2, CH3, or CH4. CV0204DVR 12 SVAT ELECTRONICS Now You Can See 5.2.2.1 CHANGE PASSWORD 1. Press ENTER to show the display above. 2. Enter the current password (CURRENT PASSWORD). 3. Enter new password (NEW PASSWORD). 4. Confirm the new password (CONFIRM PASSWORD). 5. When password change is successful, the system will display “PASSWORD CHANGED”. Default Value: 111111 If password entered is incorrect, you will receive a message “NO PASSWORD CHANGED” to inform you (message flashes three times) and the system returns to “Password setup” selection. CV0204DVR 13 SVAT ELECTRONICS Now You Can See 5.2.3 LOAD DEFAULT Press enter on this option to return the DVR to its factory default settings. Press enter again to confirm, or menu to cancel. When the message “DVR RESET COMPLETED TURN OFF AND ON THE VCR” is displayed, restart the DVR. CV0204DVR 14 SVAT ELECTRONICS Now You Can See 5.2.4 LANGUAGE SETUP 5 To setup “LANGUAGE SET” function, press ENTER, to select the desired language (languages supported are Chinese and English). CV0204DVR 15 SVAT ELECTRONICS Now You Can See 5.3 CAMERA SETUP 1. Camera Enable - Select this option to change the camera view combination. For example, if you select (- - - -), all camera channels will be disabled, and a black screen will be displayed. If you select (1 2 3 4), all cameras channels will be enabled and displayed. If you select (- - - 4), only the camera 4 channel will be enabled and displayed. Use the ENTER button to change these combinations. Note: Disable the camera channels that you won’t be using, or the VIDEO LOSS alarm will sound during startup and recording. 2. Camera Title - Select this option to change whether you want a custom title displayed for each camera, for no cameras, or for some cameras. Use the enter button to select the combination to your preference. 3. Camera Setting - Allows you to change specific settings for each camera. Please refer to the next section for more details. 4. CH(1-4) Title - Select a camera and use the up/down and ENTER buttons to change the title (maximum 8 characters). When you are finished, press MENU to confirm. Example: When highlighting “CH1 TITLE”, press ENTER to show the display below: CH1 TITLE V CAMERA1 “V” indicates the position of the cursor. Press the up and down buttons to move the cursor, and press ENTER to change the title (maximum 8 characters). 5. All channel titles are setup in the same way. CV0204DVR 16 SVAT ELECTRONICS Now You Can See 5.3.1 CAMERA SETUP 1. Camera Select - Select the camera channel to which you would like to make changes (CH 1-4). 2. Record Enable - Press ENTER to switch the channel recording on/off. 3. Motion Detection - Press ENTER to switch the motion detection function on/off. 4. Motion Sensitivity - Press ENTER to set up the motion sensitivity level (1-5, 1 being the most sensitive). 5. Hue - Press ENTER to adjust the color of the camera. 6. Contrast - Press ENTER to adjust the camera contrast. 7. Brightness - Press ENTER to adjust the camera brightness CV0204DVR 17 SVAT ELECTRONICS Now You Can See 5.4 RECORD SETUP 1. Record Type - Press ENTER to select between QUAD and EACH mode. QUAD mode will record all four cameras, but will not let you view each camera individually during playback. EACH mode will record all four cameras and allow you to view each camera individually during playback. 2. Video Quality - Press ENTER to change between LOW, MEDIUM or HIGH video quality. Higher quality settings will result in better image clarity but larger file sizes. Lower quality settings will result in reduced image clarity but smaller file sizes. 3. Frame Rate Options: Frame Rate is the number of frames recorded per second. 30 frames per second is the maximum, and provides smooth video playback. Fewer frames per second result in the video being less smooth, but smaller in size. There are 2 frame rate options in this menu: -Timer Rec Frame Rate - Press enter to set the recording frame rate when the “T” (timer) mode is set up under schedule record. -Motion Rec Frame Rate - Press enter to set the recording frame rate when “M” (motion) or “A” (alarm) modes are set up under schedule record. Recording frame rates available: NTSC: 30, 15, 10, 7, 5, 4, 3, 2, 1 PAL: 25, 12, 8, 6, 4, 3, 2, 1 CV0204DVR 18 SVAT ELECTRONICS Now You Can See 5.4.1 RECORD MODE 1. This menu allows you to set up the preferred type of scheduled recording (time, motion/time&motion, off ) throughout a 24 hour day. For example, you may want to record continuously from 9:00 AM to 5:00 PM, but only record when motion is detected the rest of the time. IMPORTANT: after you make changes and return to monitoring mode, you must press RECORD. When you press STOP, the DVR will not adhere to your Record Mode settings until you press RECORD again. Use the up and down and ENTER buttons to change the type of recording for the specified hour of the day. 2. T: Time, indicates continuous record. 3. M: TIME+MOTION (1) When motion has been detected, it will be recorded by “Motion Record Frame Rate”. (2) Otherwise, it is recorded by “Time Record Rate”. 4. _ : OFF. The DVR will not record during the specified time. CV0204DVR 19 SVAT ELECTRONICS Now You Can See 5.5 BUZZER SETUP 1. ALARM ALERT: Press ENTER to setup “ON” or “OFF”, whether to trigger the alarm when motion event has been detected (this setup is only active when the system is under record status and schedule record is setup to “M” (Mix). 2. VIDEO LOSS ALERT: Press ENTER to setup “ON” or “OFF”, whether to trigger the alarm when video loss has been detected (this setup is only active when the system is under record or live status). 3. HDD FULL ALERT: Press ENTER to setup “ON” or “OFF”, whether to trigger the alarm when hard disk is full (this setup is only active when the system is under record status). 4. BUZZER TIME: Press ENTER to setup the buzzer time to continuous (CONT), and press any button to release this setup. CV0204DVR 20 SVAT ELECTRONICS Now You Can See 5.6 EVENT LIST 1. Cursor (>) position indicates the current function selected. 2. Press 3. Press ENTER to proceed. 4. Press MENU to exit “EVENT LIST” selection. 5. “EVENT LIST” is situated on the second menu layer. Under this menu layer user may setup “TIME SEARCH” or “EVENT SEARCH”. CV0204DVR and button to move the cursor to the desired item 21 SVAT ELECTRONICS Now You Can See 5.6.1 TIME SEARCH (< >)MOVE (ENTER) CHANGE (MENU)EXIT (PLAY) PLAY 1. TIME SEARCH: Displays system recording time (begin and end). 2. Press 3. Press ENTER to setup playback starting time and date. 4. Press MENU to exit “TIME SEARCH” selection. 5. Press PLAY button to play. and button to select the desired time and date. (< >)MOVE (ENTER) CHANGE (MENU)EXIT (PLAY) PLAY CV0204DVR 22 SVAT ELECTRONICS Now You Can See 5.6.2 EVENT SEARCH 1. EVENT SEARCH: Displays all recording events, every page consists of 7 events, and maximum 63 stored events. 2. Press PLAY button to play the selected event. BEGIN: END: 05/01/15 15:00:01 05/01/15 15:00:06 Displays the beginning and end time of each event. CV0204DVR 23 SVAT ELECTRONICS Now You Can See 5.7 HARD DRIVE SETUP 1. When item “OVERWRITE” has been selected, press ENTER to enable overwrite when both MASTER or SLAVE HDD is full (2 options: OVERWRITE or STOP). 2. MASTER HDD: displays the capacity of the MASTER HDD. 3. MASTER HDD USED: displays the capacity of the MASTER HDD already used. c N/A indicates HDD not installed or unable to be detected. CV0204DVR 24 SVAT ELECTRONICS Now You Can See 5.7.1 FORMAT 1. When proceeding “HDD” function, the above display will be shown. 2. When password entered is correct, the screen will display the message “PASSWORD CORRECT”, “HDD FORMATTED” (flashes 3 times), indicating hard disk format is successful. 3. When password entered is incorrect, the screen will display “PASSWORD INCORRECT” (flashes 3 times), and return to “HARD DRIVE” selection. Once the user formats the hard disk drive (MASTER), the camera title returns to its default setting (CAMERA1/ CAMERA2/ CAMERA3/ CAMERA4), because this setup is stored in the hard disk drive (MASTER). CV0204DVR 25 SVAT ELECTRONICS Now You Can See 6.DVR NETWORKING GUIDE 6.1 INTRODUCTION Congratulations on taking a step forward in protecting your valued possessions. Now that you have your video security system in place, connecting it to the internet will allow you to view what’s important to you with ease. You will learn about your product and will see that you can do this on your own. The following is a step by step instruction manual on how to connect your system to the internet. You will be able to view your DVR and even watch previously recorded footage with the touch of a button. NOTE: This guide was created using a cable modem and some procedures will be slightly different depending on your hardware. If you are using a DSL modem, you may need to enter your PPPoE settings into the DVR (User name and password provided by your ISP.) Before you start lets make sure that you have everything you need to do this properly. You should have these ready and connected before beginning: • • • • • DVR connected to a router Router connected to the internet. In order for this DVR system to connect to the internet, it must be connected to a router. If you are using a DSL internet connection the setup process is much easier if you use modem with a router integrated in it as this will help avoid any problems connecting your DVR. Please write down the model # of your router in the important information section. A PC laptop or computer that is connected to the router so you can make the necessary changes. This system is not Mac compatible. Your computer should have the following specifications: Internet Explorer Version 5 or higher. If you do not have this program, please go to www.download.com and get an updated version. You can check your version of Internet Explorer by opening the program. Go to the top menu selection and in the Help menu options, choose About Internet Explorer. The version will be displayed. A valid and fully updated version of Windows XP (minimum). Important Information Please fill in the information you receive during this installation in the areas below: Model Numbers Your router manufacturer: Example: D-Link Your router model #: Example: DI-524 Router IP: Example: 192.168.1.1 DVR IP: Example: 192.168.1.101 Port #: ______ Example: 80 External IP: Example: 14.14.243.113 DynDNS User name: Example: myname1234 DynDNS Password: Example: 123ABC DynDNS Domain Chosen: Example: dyndns.org Sign-In URL: CV0204DVR Example:myname1234. dyndns.org 26 SVAT ELECTRONICS Now You Can See 6.2 PREPARE YOUR COMPUTER Following these steps will allow your computer to view the video. Before starting to set-up your network connection, you have to be sure that your computer is able to view the footage from the DVR. If you are running Windows XP, you will most likely have this pre-installed. NOTE: You will need to do this to any computer that you want to view the footage from. 1. Open Internet Explorer. Go to the drop down menu in the TOOLS area and select INTERNET OPTIONS. A screen will open. 2. Select the SECURITY tab, then click on the CUSTOM LEVEL button in this tab. 3. Change the ActiveX settings to the ones seen in the images. • Download signed ActiveX controls: PROMPT • Download unsigned ActiveX controls: PROMPT • Initialize and script ActiveX controls not marked as safe: PROMPT • Run ActiveX controls and plug-ins: ENABLE • Script ActiveX controls marked safe for scripting:ENABLE NOTE: If you do not have ActiveX installed and the previous step did not download it, go to www.download.com and search for ActiveX. Download the ActiveX Download Control. Your computer is now able to view the feed from the DVR. CV0204DVR 27 SVAT ELECTRONICS Now You Can See 6.3 PREPARE YOUR DVR Next we will set up the DVR to connect to the internet and allow you to view online. 1. Place the CD-ROM that was included with the DVR system into your computer’s CDROM drive. If your computer does not automatically open the CD folder, go to Start/My Computer and double-click on the CD-ROM icon. 2. Drag and drop the IPEDIT.EXE program onto your desktop. This program will give you the information needed to find your DVR’s IP address (unique location on your network). 3. Open IPEDIT.EXE from your desktop. Depending on your firewall settings, a warning message may appear asking if you want to block or unblock this program. Click Unblock. 4. Click on the UPDATE button. In the top left area of the program window you should see a set of numbers. This is the IP address of your DVR. Write it down in the information area of this manual listed as ROUTER IP. 5. Open up Internet Explorer. In the Address bar, enter your DVR’s IP address found in Step 4 followed by a space, a colon and the port number. This DVR’s default port number is 80. Your IP address should look something like this: 192.168.0.1 :80 Some versions of Internet Explorer will not work with a space in the address bar. If this is the case, try it without the space. eg: 192.168.0.100:80 CV0204DVR 28 SVAT ELECTRONICS Now You Can See 6. If entered successfully a window will open up with a login screen. The default USER NAME is admin. The default PASSWORD will be 1234. 7. The first time you logon to the DVR, an ActiveX Installation window will appear. Install the ActiveX control. You can now view and control your DVR from inside your local network. 6.4 CONNECT TO THE INTERNET Port forwarding is a necessary step that opens a path on your home/business network to allow you to view your DVR video feed from outside your network (over the internet). There are hundreds of makes and brands of routers on the market and these instructions have been made using a D-Link router (Model DI-524). If you have a router that is different than shown, please visit www.portforward.com and go to the link marked GUIDES. Once on this page, go to the link marked Port Forwarding Guides by Router. Find your router make and model in the list of links and click on it. You will see a list of various applications. Find a link for any DVR or IP camera and click on it. Follow the instructions but make sure you forward the correct port number (the port number assigned to your DVR. The default port number is 80. ) The steps for your router will be similar to the following. These instructions have also been created without a firewall in place. If you have a firewall, please consult a computer technician. NOTE: Your router may require a user name and password. If you do not know it, ask the person who configured your network. Portforward.com will provide you with each router’s default user name and password. D-LINK ROUTER You will need to enable the ports by locating the port range forwarding screen. With some D-LINK routers the port forwarding screen is located within the Applications & Games or Filters tab; in others it is located in the Advanced Tools tab. 1. Open your web browser. Enter the ROUTER IP address in the address bar as shown below and press ENTER. 2. Enter the user name admin. Leave the password blank followed by pressing the OK button (unless you have set up a user name and password for your router) 3. Select the Advanced tab. CV0204DVR 29 SVAT ELECTRONICS Now You Can See 4. Select the Virtual Server tab. • Enable the Virtual server • • • • In the Name field type in “DVR” In the Private IP field enter the DVR’s IP address. In the Protocol field, select Both (This will enable both TCP and UDP). In the Private port enter the port number you need to forward. By default this DVR is set to port 80. Use port 80 unless you have a reason to change the DVR to another port (not recommended). In the Public port re-enter the port number you entered in the private port field (e.g. 80). Select the Schedule to Always. Ensure that the Virtual Server (or forwarding that is being set-up) is set to ENABLED. • • • When complete, select the Apply button located at the bottom of the page to save your changes. Port forwarding is now complete! CV0204DVR 30 SVAT ELECTRONICS Now You Can See 6.5 FIND YOUR EXTERNAL IP Now you will need to find your external IP address. This will be the address you will be entering in order to access the DVR from outside your network (over the internet). There are many ways to find your external IP address. The simplest way is to go to http://www. whatsmyip.org. This site will display your external IP address in the top portion of the screen.If you go to http://www.portforward.com, it will also display this IP address. Write it down on the second page marked EXTERNAL IP. Test Your External IP Now that you know your external IP address, you can perform a test to ensure your DVR is accessible from outside your network (over the internet). 1. Open Internet Explorer, and in the address bar type in the EXTERNAL IP address you wrote down on page 2, followed by a colon and your port number (default is port 80). It should similar to the following 2 examples:14.14.243.113 :80 OR 14.14.243.113:80 2. Press ENTER, and your DVR’s login window should pop up. If it does not pop up, your router is not properly forwarding the necessary port. This could be due to a number of problems including incorrect settings, presence of a firewall, or a DSL modem that has its own IP address. If your DSL modem has its own internal IP address, it will not properly forward the necessary port. You may have to configure PPPoE settings in the DVR to match the settings provided to you by your Internet Service Provider (ISP). Consult your ISP for more information. DEFENDER technical support cannot troubleshoot modems, since changing these settings can potentially render your modem inoperable. You should also check all your network connections and go through the above steps again to make sure a configuration error was not made. CV0204DVR 31 SVAT ELECTRONICS Now You Can See 6.6 FORWARDING OUTSIDE YOUR NETWORK. Port Dynamic DNS This section will explain how to associate your IP address with an easy-to-remember URL (domain name) 1. Open Internet Explorer and type in www.dyndns.com 2. The instructions on creating a dynamic DNS may have changed since the writing of this guide. Create a new account by clicking the link “Create Account” 3. Enter your preferred user name, email address, and password. Enter these on page 2. 4. Do not worry about the optional information. Agree to the Terms of Service by checking the boxes. Click Create Account. 5. Now check your email for the confirmation message. You will need to click the link in the body of this message to activate your account. The message may take up to 24 hours to arrive in your inbox. If you cannot find the message in your inbox, please check your junk/spam mail folder. 6. When you click the link, a window will appear that displays “Account Confirmed.” Click on the login link and enter the user name and password you created. CV0204DVR 32 SVAT ELECTRONICS Now You Can See 7. Click on the Services button located on the top menu 8. Click on the Dynamic DNS link 9. 10. 11. Click on the Get Started link located on the right menu Type in a host name (subdomain name). We recommend you use your first name or company name. Choose a domain name from the dropdown menu. We recommend using the dvrdns.org suffix. CV0204DVR 33 SVAT ELECTRONICS Now You Can See 12. In the IP address field, type in your external IP address (it may also be shown below the field). 13. Leave all the rest of the options as-is, and click Create New Host. 14. Your dynamic DNS settings have been created. CV0204DVR 34 SVAT ELECTRONICS Now You Can See 6.7 FINALIZING THE SET-UP Now you must associate your DVR with the DynDNS account you just created. This will ensure that when your external IP address changes, your domain name (address in the Internet Explorer Bar) will remain associated with your new IP address. This will ensure that you will only need to type in your domain name in order to access your DVR, whether you are inside or outside of your network: 1. Log-on to your DVR through your computer by using either the internal or external IP address. 2. Click the CONFIGURATION button. 3. Under the “Network DVR Setup” window, scroll down to “DDNS Account Setting.” 4. Make sure the ENABLE button is selected. 5. Enter the user name, password, and full domain name you configured at www.dyndns.com. Example: UserName: myname Password: mypassword DomainName: myname.dvrdns.org 6. Click the OK button located in this section to save your configuration. Reboot the DVR CV0204DVR 35 SVAT ELECTRONICS Now You Can See by powering it off and then on again to confirm the changes. You must reboot the DVR any time a change is made in the configuration menu. 7. You should now be able to access your DVR simply by typing in your domain name (i.e. myname.dvrdns.org) Note: If your router is set to automatically assign an IP address to your DVR (Dynamic/DHCP), your DVR’s internal IP address may change if your DVR or router is rebooted. To resolve this problem, you need to configure your router to forward to this new address (simply replace the old private IP address with the new one). To avoid this problem all together, you can set your router to Static LAN IP, which will assign the same IP address to the DVR every time, even when the DVR or router is rebooted. 6.8 ADDITIONAL TROUBLESHOOTING I press play and nothing happens You need to press STOP on the DVR first. This DVR can either record or view video footage. It will not do both at the same time. Please make sure that you press STOP before proceeding. My browser keeps freezing First make sure you have an up to date browser and that the proper ActiveX options are selected. If they are, you may need to re-install your browser. I can’t remember my DVR’s password Call technical support to obtain the DVR’s master password I can’t see at night with my IR night vision camera These cameras are spec’d at 10-15ft in the dark. If you placed these cameras outdoors in the open, the night vision will be reduced as there is nothing to reflect the IR emitted from the camera. To help increase the viewing capabilities add additional lighting to the area. The color is off on the camera These cameras have been designed with a high resolution lens which allows you to see crisp clean images. The best lighting for this system is by using incandescent lighting. Other lighting effects will alter the color. You can adjust the color of the cameras in your menu settings. NOTE: When entering an external or internal IP address, the port number is required and should be in the following format: 192.168.0.100 :80 OR 192.168.0.100:80 (some browser versions require a space, some do not) CV0204DVR 36 SVAT ELECTRONICS Now You Can See 7. NETWORK REMOTE CONTROL (OPTIONAL) 7.1 MAIN DISPLAY Remote control DVR - Main Menu 1. Live display. 2. DVR control button. 3. Video setup. 4. Configuration: Enter detail setup Recording: Displays recording setup menu (for video recording). Snapshot: Pop-up window displays live images, right mouse click to save. Note: To view complete interface, PC resolution must be adjusted to 1024*768. 7.1.1 LIVE DISPLAY • View/ Make changes on image display. • Rotate/ Make changes on image direction. • Image Recording/ Record function setup. • Save Current Picture/ Save the current image. • Welcome! Administrator/ Display current user name. • About/ Version description. Move the cursor inside the image range, right mouse click to display 9 function selections: CV0204DVR 37 SVAT ELECTRONICS Now You Can See 7.1.2 VIEW Two types of display method: 1. Re-sizable: Adjustable image size. 2. Actual size: The actual image size. 7.1.3 ROTATE Four types of rotate settings: 1. Rotate 0: Default state 2. Rotate 180: Rotate the image by 180 degrees. 3. Flip horizontal: Image flips horizontally. 4. Flip vertical: Image flips vertically. 7.1.4 IMAGE RECORDING Image Recording Setup Display: Save as JPEG: Save as picture file Save as AVI: Save as AVI animation file Save as JPEG: No Limit: Unrestricted image storage (continuous). Number: Image storage according to “number”. Save interval: Image storage according to ì1/10 second” (e.g.: Enter ì10î, then 1 frame is stored per second. Enter “50”, then 1 frame is stored in 5 seconds). Size: Image storage according to “size”. Time: Image storage according to “time”. Save Path: Image storage according to “Save Path”. Pre Name: Image storage according to “Prefix Name”. Save as AVI: No Limit: Unrestricted image storage (continuous). Number: Image storage according to “number”. Save interval: Image storage according to ì1/10 second” (e.g.: Enter ì10î, then 1 avi file is stored per second. Enter “50”, then 5 avi files are stored in 5 seconds). Size: Image storage according to “size”. Frame Rate: Image storage according to “frame rate”. Time: Image storage according to “time”. Maximum Number of Frame in Each File: Image storage according to “maximum frame”. Save Path: Image storage according to “Save Path”. Pre Name: Image storage according to “Prefix Name”. CV0204DVR 38 SVAT ELECTRONICS Now You Can See 7.1.5 SAVE CURRENT PICTURE Select to save live images. 7.1.6 DVR CONTROL SETUP Supports DVR remote control function (Please refer to 3.1 Front Panel Buttons and Controls). 7.1.7 QUALITY SETTING Network DVR provides 5 image quality settings. The user can select the quality setting from the “Quality” list box. • Highest • High • Medium • Low • Lowest CV0204DVR 39 SVAT ELECTRONICS Now You Can See 7.1.8 RESOLUTION SETTING The network DVR provides six resolution settings. The user can select the quality setting from the “Resolution” list box. • 176 x 144 • 160 x 120 • 320 x 240 • 352 x 288 • 640 x 480 • 704 x 576 Note: The device supports auto video system detection (NTSC/ PAL). 7.1.9 ADVANCED SETTINGS Network DVR provides the advanced settings for the following: • Brightness • Contrast • Saturation • Hue 7.2 CONFIGURATION (FOR ADVANCED USERS) Only the administrator can select the “Configuration”; the ordinary user account does not have this privilege to access this function. 7.2.1 SYSTEM SETTING The number on Port 1 and Port 2 may be changed, press “OK” button to save the setting. System Setting Display CV0204DVR 40 SVAT ELECTRONICS Now You Can See • Reboot DVR: The system needs 30 seconds to reboot the DVR’s network (Rebooting does not affect hard drive recording). • Firmware update (Please refer to 7.2.4). • Restore Factory Default 7.2.2 USER SETTING • User Authorization Setting • Add User or Change Password • Delete User Account • Current Users User Setting Display 7.2.2.1 USER AUTHORIZATION SETTING Select item “Needed” to enable user authorization function, then each time before login to Network DVR the Login window will request for “User name” and “Password”. To disable user authorization function, select item “No Need”. CV0204DVR 41 SVAT ELECTRONICS Now You Can See 7.2.2.2 NEW USER / CHANGE PASSWORD Enter a new user name and password information to create a new user account, or enter an existing user account, then set a new password to replace the old password, and select “OK” to create the account or change password. After selecting “OK” button, the “Current User List” would display the newly created user account (Maximum 20 users, user name and password setup are limited to 10 characters). 7.2.2.3 DELETE USER Enter the user account that you wish to delete, click “OK” to delete the account. After selecting “OK” button, the selected user account will be deleted from the “Current User List”. 7.2.3 NETWORK SETTING 7.2.3.1 FIXED IP To setup follow the steps below: 1. Select item “Manually”. 2. Enter “IP Address”, “Subnet mask”, and “DNS”. 3. Click “OK” button to save the setting. User Setting Display CV0204DVR 42 SVAT ELECTRONICS Now You Can See 7.2.3.2 DHCP The “DHCP” is automatically set as the default network setting of the Network DVR. When a Network DVR is connected into the LAN, it will issue DHCP packets to request an IP address that is dynamically assigned by the DHCP server. If it is unable to get a DHCP address, the Network DVR will assign a default IP address such as “169.254.1.13”. 7.2.3.3 CONNECT TO ADSL BY PPPOE MODE To setup follow the steps below: 1. After setup, rebooting enables automatic connection to ADSL. 2. Enter the “User name” and “Password” fields with the account and password provided by the ISP. 3. If item “Send mail after connected” is selected, the mail will be automatically sent when connected to the ISP. 4. Click “OK” button to save the settings. Note: In order to activate the PPPoE, it is necessary to reboot the device after the setup. ADSL Setting Display If the Network DVR and ADSL modem are connected by a hub, the user can select “Dial On Power Up” to perform the connect operation. However, if the Network DVR and ADSL modem are connected directly, then please note the following steps below. 1. Power off Network DVR. 2. Connect Network DVR directly to the ADSL modem (using RJ-45 Ethernet port). 3. Power-up Network DVR. 4. Network DVR will start dialing. 5. Once connected, mail the IP address information to the preset e-mail address. 6. After 10 times of connection failure, it aborts the operation and the user can reconnect it by LAN to find the cause. CV0204DVR 43 SVAT ELECTRONICS Now You Can See Note: If item “Send mail after connected” is selected, then the Network DVR will send a mail that contains the message “Dial Up IP Address/ Netmask/ Gateway/ DNS Server” will be mailed to the preset e-mail address. Connection Message Send to User CV0204DVR 44 SVAT ELECTRONICS Now You Can See 7.2.4 FIRMWARE UPDATE SVAT may occasionally release newer versions of firmware for your DVR. Please check your product at www.svat.com to ensure you have the latest version. When new firmware is supplied, you may update to the new version (bin file) through your PC by following the procedures below: 1. In the configuration menu of your network DVR, click on Firmware Update. 2. Select browse and select the .bin firmware file. 3. Press Open. 3. Press Upload and follow the onscreen instructions. Select the Firmware to be Updated CV0204DVR Uploading the Selected Firmware 45 SVAT ELECTRONICS Now You Can See Firmware Update. Press “here” button (1) to update Firmware. Press “here” button (2) to delete the file. The message below displays the writing progress of the firmware update. When Firmware update is completed, it will show 100%, and a message “Click here to reboot DVR browser” will be displayed, requesting to restart the Network DVR. Firmware Update Display. Firmware Update Completed, prompt to restart the device. CV0204DVR 46 SVAT ELECTRONICS Now You Can See 8. TROUBLESHOOTING Problem Solution No display on television 1. 2. DVR not recording 1. Make sure recording is enabled in each camera’s setting. Go to Menu>Camera Setup>Camera Setting and enable recording for each camera if it has been disabled. 2. Make sure recording is enabled and set to the correct recording setting in scheduled recording. Go to Menu>Record Setup>Record Mode. If a line (-) is over any hour of the day, that means recording is disabled for that time period. Press enter to enable recording for that hour. Also make sure you press REC when you return to Monitoring Mode, or your scheduled recording will not take effect. 3. Your disk may be full. By default the DVR should start rewriting over your earliest recorded files, but this option may be disabled. Go to Menu>Hard Drive Setup>Disk Full. Set it to OVERWRITE. 4. Make sure your DVR is in Monitoring Mode, and not at a menu screen or in Playback Mode. No playback 1. 2. 3. During playback, I can’t switch to different camera views. To switch between cameras during playback, you must have recorded your file in EACH mode. Change this setting using Menu>Record Setup>Record Type. CV0204DVR Make sure all RCA and power cables are plugged in securely and in their proper places. Make sure your television is on the correct channel (input mode). There is a delay while the DVR searches for your recorded files. Wait a few moments and your files should appear. Make sure you are not in Recording Mode. Pressing PLAY during recording will have no effect. Press STOP first. If you have just formatted your drive or your drive is otherwise empty, there will be no files to play back. 47 SVAT ELECTRONICS Now You Can See Problem Solution Unexpected Alarms (beeps) go off. 1. 2. 3. Video Loss - One of your cameras are disconnected. There are a few options: connect a camera, disable that camera’s channel if you don’t want a camera installed in that channel, or disable the VIDEO LOSS alert alarm by going to MENU>Buzzer Setup>Video Loss Alert. Press enter to disable it. HDD Full - A buzzer activates when your HDD is full. Set the HDD to overwrite to avoid this problem. It will record new footage over your oldest footage. Go to Menu>Hard Drive Setup>Disk Full. Press enter to set it to OVERWRITE. Alarm Alert may be set to ON, which sounds a short alarm whenever motion is detected. Go to Menu>Buzzer Setup>Alarm Alert and press ENTER to disable it. No picture from camera(s) 1. 2. Make sure all the camerasí RCA and power cables are plugged in securely and in their proper places. Make sure the camera channels enabled on your DVR. Go to Menu>Camera Setup>Camera Enable to enable your camera’s channel. CV0204DVR 48 SVAT ELECTRONICS Now You Can See 9. GLOSSARY DDNS - Dynamic Domain Name Service. Use dyndns.org to track your IP on the Internet and assign it an easy to remember domain name instead of an IP number. Dynamic IP (DHCP) - A DHCP server assigns an IP address automatically when a device connects to the network. A dynamic IP can change when a device is restarted. Firmware - The built-in software that controls the DVR’s functions. Higher firmware version may be released to provide additional features. Please check this product at www.svat.com to ensure you have the latest firmware version installed. Go to Menu > System Setup to view the firmware version running on your DVR. Frame Rate - The number of frames that are recorded per second. Setting recording to 30 frames/second will provide smooth playback but will increase the file size. Setting recording to lower frame rates will make playback less smooth, but will decrease the file size and you will be able to record more video on your DVR’s hard drive. IP (Internet Protocol) - A network and transport protocol used for exchanging data over the Internet. The address is a string of four numbers separated by periods (such as 111.22.3.444) used to represent a computer or other device on the Internet. Monitoring Mode - The default mode when the DVR starts up. It will display a quad view of your cameras. Playback Mode - After you press PLAY and select a recorded file, the DVR will enter this mode. You cannot enter recording mode or access the menu system directly from this mode. Record Mode - The DVR enters this mode after you press record, or when there is a scheduled time or motion recording. You cannot enter playback mode or enter the menu system directly from this mode. Static IP - An IP assigned to a device that does not change. CV0204DVR 49 SVAT ELECTRONICS Now You Can See 10. DVR SPECIFICATIONS Functionality...................................................................... Simplex Video Compression......................................................... Modified MJPEG Resolution........................................................................... 720 x 480 Recording Frame Rate.................................................... 30FPS per camera channel Recording Time................................................................. Max. 77 days Recording Resolution..................................................... Max. 640 x 224 Recording Qualities......................................................... Low, Medium, High Recording Modes............................................................. Manual, Schedule, Motion Detection Recording Method........................................................... Quad, Each Recording Media.............................................................. 3.5” 160GB IDE HDD Storage Capacity.............................................................. Max. 750GB Hard Drive Video Format..................................................................... NTSC Video Loss........................................................................... Auto Detection Video Inputs....................................................................... 4CH BNC Video Display Output..................................................... 1CH BNC Live Viewing....................................................................... Quad View, Single Screen Live Resolution.................................................................. 720 x 480 Live Frame Rate................................................................. 30FPS per camera channel Play Search Mode............................................................. By Time, Date, Event Play Speed.......................................................................... Normal, Fast Forward Play Mode........................................................................... Quad, Each OSD and System Menu Display ................................. Yes OSD Language Display ................................................. English/Traditional Chinese Time and Date Stamp Display . .................................. Yes Password Protection....................................................... Menu Password, Stop Recording Password Network Protocol............................................................. TCP/IP, PPPoE, DDNS, SMPT Network LAN IP................................................................. Static, Dynamic Network Connection....................................................... 10/100 BaseT Ethernet (RJ-45) Operating System............................................................ Written Using Linux Processor............................................................................. Proprietary Disk Full Warning.............................................................. Yes Automatic Overwrite Option....................................... Yes LED Indicators.................................................................... Power, Record, Play, Live Housing Material.............................................................. Aluminum CV0204DVR 50 SVAT ELECTRONICS Now You Can See Housing Color.................................................................... Graphite Grey Power Input........................................................................ DC 12V 2.5A Power Adapter Input....................................................... AC 100-250V 50/60Hz Operating Temperature................................................. 41°F ~ 104°F Operating Humidity........................................................ 30% ~ 80% Dimensions......................................................................... 12.6” x 1.8” x 10.6” Weight.................................................................................. 6.6lbs (without HDD) 11. CAMERA SPECIFICATIONS (CV67) Camera Type...................................................................... Bullet Image Sensor..................................................................... 1/4” Color CCD Resolution........................................................................... 420 TV lines Outdoor Use....................................................................... Yes IP Rating............................................................................... IP65 Focal Length....................................................................... 3.6mm Focus Type.......................................................................... Fixed Night Vision........................................................................ Yes Number of IR LEDs and Range.................................... 12 LEDs, 15ft IR LED Control.................................................................... Automatic (CDS sensor) Min. Illumination.............................................................. 0 lux IR Wavelength.................................................................... 850nm Video Output..................................................................... 60ft 4 PIN DIN to RCA (male) Video/Power Wire TV System............................................................................ NTSC Microphone........................................................................ No Motion Detection............................................................. No Viewing Angle................................................................... 60 Degrees Electronic Shutter............................................................. 1/60 ~ 1/100000 sec BLC......................................................................................... No AGC........................................................................................ Automatic ELC......................................................................................... Automatic Line Lock.............................................................................. No Iris Control........................................................................... No White Balance.................................................................... Automatic CV0204DVR 51 SVAT ELECTRONICS Now You Can See Sun Shield........................................................................... Yes IR Cut Filter......................................................................... No Housing Material.............................................................. Anodized aluminum Housing Color.................................................................... Platinum Silver Signal/Noise Ratio............................................................ >48dB Camera Bracket................................................................. Yes Operating Temperature................................................. -14°F ~ 122°F Operating Humidity........................................................ 98% Camera Power Input....................................................... DC 12V 300mA Power Adapter Input....................................................... 120V 60Hz LED Power Indicator........................................................ No Dimensions......................................................................... 4” x 2.25” x 2.25” Weight.................................................................................. 0.6lbs CV0204DVR 52 SVAT ELECTRONICS Now You Can See SVAT SUPPORTS CRIME STOPPERS Crime Stoppers programs are operated as non-profit charities and are managed by a volunteer board of directors who raise funds and pay rewards to individuals who anonymously call with information that helps solve crime. Rewards are paid for tips that lead to the arrest and indictment of people charged with felony offences, and to date Crime Stoppers statistics show a conviction rate of approximately 95%. CRIME STOPPERS INTERNATIONAL P.O. Box 614 Arlington, Texas U.S.A 76004-0614 PLACE POSTAGE HERE To receive more information about Crime Stoppers or to make a charitable donation please fill in the fields on the back of this page, cut on the dotted line and mail in. CV0204DVR www.svat.com Now You Can See SVAT ELECTRONICS SVAT SUPPORTS CRIME STOPPERS To receive more information about Crime Stoppers or to make a charitable donation please fill in the fields below, cut on the dotted line and mail in. CRIME STOPPERS INTERNATIONAL Crime Stoppers International is an organization of community based civilian Crime Stoppers programs, which assist police in solving crime. You can find more information about Crime Stoppers at www.c-s-i.org Local Crime Stoppers programs are partnerships between the public, media and local policing organizations. Each program is run by a citizen board, whose purpose is to advertise a local telephone number, which anonymous persons can call with information regarding a crime. Callers (tipsters) may be eligible for a cash reward for their information. If your community does not have a Crime Stoppers program and would like information about starting one, return this card with the following information. NAME:_____________________________________________ PHONE:_____________________________________ ADDRESS:_________________________________________ CITY:________________________________________ PROV/STATE:__________________ COUNTRY:_____________________ POSTAL/ZIP CODE:__________________ E-MAIL ADDRESS:_________________________________________________________________________________ Charitable donations can be made to “CSI” by returning this card in an envelope with your check or money order to the address on the other side. Amount $__________________ THANK YOU www.svat.com CV0204DVR SVAT ELECTRONICS Now You Can See NOTES CV0204DVR 55 SVAT ELECTRONICS Now You Can See NOTESNOTES CV0204DVR 56 SVAT ELECTRONICS Now You Can See w w w.svat.co m Disclaimer SVAT d o e s n o t e n d o r s e a ny o f S VAT p ro d uc ts for any illegal ac t i v i t i e s. S VAT is n o t re s p o n s i b l e o r l i a b l e in any way shape or for m fo r a ny d a m a g e, va n d a l i s m , t h e f t o r a ny other ac tion that may o cc u r w h i l e a S VAT p ro d u c t i s i n u s e by the purchaser. Model # CV0204DVR www.svat.com