1
Crestron QM-FTMCSC
FlipTop Media Center with Storage Compartment
Installation
NOTE: To prevent overheating, do not operate this product in an area that exceeds
the environmental temperature range listed in the table of specifications.
Consideration must be given if installed in a closed or multi-unit rack assembly,
inside a closed desk or in a closed podium since the operating ambient temperature
of these environments may be greater than the room ambient temperature. Contact
with thermal insulating materials should be avoided on all sides of the unit.
NOTE: The following section does not apply to NB models. If you have an NB
model, please skip to “Cable Management Plate” on page 18
Button Installation
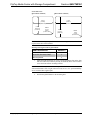
The QM-FTMCSC is shipped with ten large blank buttons. You can order a variety
of button kits (sold separately) for a total of 20 engraved or blank buttons.
Button Kits
KIT NUMBER
DESCRIPTION
FT-BTNB-L
One large button engraved as desired
FT-BTNB-L-BLANK
One large button not engraved
FT-BTNB-S
Two small buttons with divider engraved as desired
FT-BTNB-S-BLANK
Two small buttons with divider, not engraved
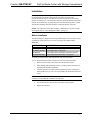
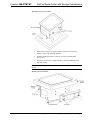
To replace the large buttons with small buttons, follow this procedure.
A 1/16" Allen (hexhead) wrench is required to remove the button faceplate.
1.
Remove the four Allen screws that secure the button faceplate.
2.
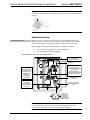
While holding adjacent buttons in place, carefully pull the button(s) to be
replaced from the rubber membrane.
3.
Carefully press the two small replacement buttons in place, making sure
LED window faces up. Use care not to dislodge the membrane and circuit
board.
NOTE: The removable buttons fit snugly on the rubber membrane. Remove
carefully to avoid pulling the membrane from the unit.
4.
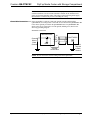
The divider bar slips into the slots on the back of the faceplate.
5.
Replace the faceplate.
Operations & Installation Guide – DOC. 6307B
FlipTop Media Center with Storage Compartment: QM-FTMCSC • 17