Download User Manual - Conceptronic
Transcript
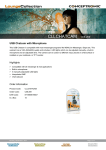
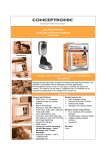
User Manual Chatcam with Microphone CLLCHATCAM C08-209 V5.0 CONTENTS Chapter 1: Introduction .............................................. 1 Product Overview Main Features Package Contents Chapter 2: Installation ................................................ 3 Hardware installation Basic webcam usage Driver installation Chapter 3: Using the webcam ...................................... 5 Resolution configuration Extra features Video Proc Amp i Chapter 1: Introduction Product Overview Thank you for choosing CLLCHATCAM Chatcam with Microphone. This USB Chatcam is compatible with most messenger-programs like MSN/Live Messenger, Skype etc. This webcam has a VGA (640x480) quality and includes 6 LED lights which controlled by LDR, a built-in microphone and an adjustable lens. The camera can be used in 2 different ways: placed on a flat surface or installed on your notebook- or TFT monitor. Front Panel 1 Main Features • Compatible with all messenger & chat applications • Built-in microphone • 6 LED lights controlled by LDR • Interpolated 30MP • VGA webcam Package Contents • Chatcam with Microphone • Product CD-ROM • Multi Language Quick Installation Guide 2 Chapter 2: Installation Hardware installation The Conceptronic Chatcam is an UVC (Universal Video Class) webcam, meaning that you can plug the Chatcam in a free USB port of a computer with UVC support (like Windows XP SP2, Windows Vista, Windows 7 and Linux 9.04), without the need to install any drivers. Turn on your computer. Connect the USB connector of the Chatcam to a free USB port of your computer. The computer will recognize and install the Chatcam automatically with the default drivers of your operating system. After the installation, you can use your Chatcam. LEDs: You can use the 6 LED lights which controlled by LDR on the Chatcam to improve the image quality when using the Chatcam in dark places. Basic webcam usage When you have connected the webcam to your computer and the webcam is recognized, you can use the webcam in webcam enabled applications, like Microsoft Live Messenger & Skype. To configure the webcam in Live Messenger, use the „Tools‟, „Audio and Video setup‟ in the Live Messenger main window. To configure the webcam in Skype, use the „Tools‟, „Options‟ menu and select „Video Settings‟. Note: When using the Driverless Installation of the webcam, you can only use the basic webcam functions. To obtain the extra features, you need to install the drivers. 3 Driver installation If you want to use the extra features of the webcam, you need to install the drivers from the included product CD-ROM. Before you can install the drivers, you need to connect the webcam to your computer, as described in Hardware installation. A. Insert the CD into the CD-ROM drive on your PC. The autorun program should start automatically. If it does not, please run autorun.exe under your CD-ROM drive. In the autorun screen, click “Drivers” to begin the software installation. Note: You might get a “User Account Control” warning message, which you will need to accept by clicking on “Yes”. B. The Setup Wizard will appear on your screen. Select which language you want and Click “Next”, and then Click “Install” to proceed with the installation of the drivers and software. C. When the installation is finished, click on “Finish” to close the installation wizard. 4 Chapter 3: Using the webcam When the drivers and software are installed, you can use the installed webcam software to access the extra functions of the webcam. Start the webcam software by double clicking on the “Camera Capture” shortcut on your desktop, or use the shortcut in the start menu: “Start” --> “All Programs” --> “USB2.0 PC CAMERA” --> “Camera Capture”. When the Amcap software is started, you will see a live stream of the webcam on your screen: When no image of the webcam is visible, use the menu “Devices” to select the ” USB2.0 PC CAMERA”. 5 Resolution configuration Through the menu“Options”-->“Setting”, you are able to change the default resolution settings for the webcam: Note: If you select a higher resolution, the frame rate will drop. To have a smooth webcam stream, lower the resolution. Extra features The webcam has extra features, like “General Effects”, " Special Effects " and “Face Page”. These features can be set through the properties of the webcam, which can be accessed in different ways. In the “General Effects” and " Special Effects " page, you can select an image effect, or a photo frame, to adjust your webcam image. 6 7 In the “Face Page” page, you can also select an image effect, or a photo frame, to adjust your webcam image. This “Face Page” just combine “General Effects” and " Special Effects ". 8 Video Proc Amp In the “Video Proc Amp” page, you can change the image settings for the webcam. 1. Slide the “Brightness”,“Contrast”, “Hue”, “Saturation”,“Sharpness”, or“Gamma” sliders to adjust the image settings. 2. Select“Default”to load the webcam default settings. When you have changed your settings, click “Apply”. Enjoy the use of your Conceptronic Chatcam! 9


