1
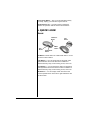
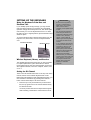
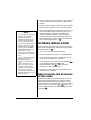
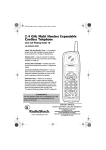
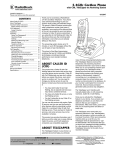
27MHz Wireless
Keyboard and Mouse
OWNER’S MANUAL —
Please read before using this equipment.
26-750
Thank you for purchasing the Compaq 27 MHz Wireless
Keyboard and Mouse. The wireless keyboard lets you move
it freely from your computer within 2 meters range and the
keyboard’s 19 hot keys are convenient for one touch access
to your favorite Internet, e-mail, and programs such as
Word, Excel, and Power Point. The wireless mouse’s
buttons can be programmed to control movements
frequently used in Windows, for example, double clicks,
zoom in and out, shift key, scroll, copy, paste, enter, page
up and down, and so on.
Your wireless mouse and keyboard system is fully
compatible with IBM/AT and PS/2, Windows 95 (PS/2 only)
Windows, 98, 2000, ME, XP.
Wireless Keyboard
Wireless Mouse
! IMPORTANT !
If an icon appears at the end of a paragraph, go to the box on that page
with the corresponding icon for pertinent information.
! — Important Ô — Note
Receiver
© 2003 RadioShack Corporation.
All Rights Reserved.
RadioShack and RadioShack.com
are trademarks used by
RadioShack Corporation.
Compaq is registered by the U.S.
Patent and Trademark Office.
CONTENTS
System Requirements .................................................................................................................................. 3
A Quick Look ................................................................................................................................................ 4
Mouse ....................................................................................................................................................... 4
Keyboard Hotkeys ..................................................................................................................................... 4
Media Keys ........................................................................................................................................... 4
Internet Keys: ........................................................................................................................................ 5
Others ................................................................................................................................................... 5
LED Indicators on the Receiver ............................................................................................................ 6
Hardware Installation ................................................................................................................................... 7
Connecting the Receiver to Your Computer .............................................................................................. 7
Installing Batteries ..................................................................................................................................... 7
In the Keyboard .................................................................................................................................... 8
In the Mouse ......................................................................................................................................... 8
Setting Up The Keyboard .......................................................................................................................... 9
Using the Keyboard’s Palm Rest and Elevation Tabs .......................................................................... 9
Wireless Keyboard, Mouse, and Receiver ............................................................................................ 9
Setting the ID Channel .......................................................................................................................... 9
Software Installation ................................................................................................................................... 10
Wireless Mouse And Keyboard Setting Menu ......................................................................................... 10
Customizing the Mouse Settings ........................................................................................................ 11
Mouse Button Assignments ................................................................................................................ 11
Application Switch/Document Switch .................................................................................................. 13
EasyJump for Windows ..................................................................................................................... 14
Zoom function for Office and IE Applications ...................................................................................... 15
Setting Wireless Mouse Options for Internet .......................................................................................... 15
Setting The Keyboard’s Hotkeys ............................................................................................................. 15
Setting the Media Key ......................................................................................................................... 16
Setting the Play/Pause Key ................................................................................................................ 16
Setting the Search Key ....................................................................................................................... 17
Setting the Web/Home WWW Key ..................................................................................................... 17
Setting the Mail Key ............................................................................................................................ 18
Setting the “My Computer” Key ........................................................................................................... 18
Setting the Calculator Key .................................................................................................................. 19
Setting the Sleep Key ......................................................................................................................... 19
Setting Options for Displaying
the HotKey Icon .................................................................................................................................. 20
Setting the Wireless Function ............................................................................................................. 20
Troubleshooting .......................................................................................................................................... 21
FCC Declaration of Conformity .................................................................................................................. 22
The FCC Wants You to Know ..................................................................................................................... 22
Care ............................................................................................................................................................ 23
Cleaning the Wireless Mouse ................................................................................................................ 23
Service and Repair ..................................................................................................................................... 23
Environment Requirements ........................................................................................................................ 24
2
SYSTEM REQUIREMENTS
TM
• IBM -Compatible PC, with 80486 processor or above
• 8 MB RAM minimum (16 MB recommended)
• 10 MB hard-disk space
• CD-ROM drive
• PS/2 keyboard port. (If your system has an AT
computer (IBM compatible) keyboard port, you will
need one more AT socket to PS/2 socket adapter,
available at your local RadioShack store.)
• PS/2 mouse port.
• Windows 95 (PS/2 only) Microsoft Windows 98/Me, or
Windows NT 4.0 (with Service Pack 3 or later version),
or Windows 2000/XP installed.
• Microsoft Windows Media Player 6.4 and CD Player
installed or Windows Media Player 7.0 installed.
Your wireless keyboard and mouse system’s features
include:
256 Channel ID Number Selections — lets you select a
different channel ID number to prevent any possible radio
frequency interruption.
One-Touch Popular Multimedia Function Keys — allow
one touch operation of Mute, Volume up, Volume down,
Previous-track, Next-track, Stop, Play and Pause functions.
One-Touch Applications Keys — allow one touch access
to Internet functions such as My Favorite, Search, E-mail,
WWW, Windows My Computer desktop, Windows’
calculator.
Four LED Mode Indicators — indicate mouse operating
status, battery power status, Number Lock, Caps Lock, and
Scroll Lock function status.
Foldable Keyboard Palm Rest — lets you rest your palms
comfortably for extended use of the keyboard.
Ergonomic Mouse Design — lets you hold the mouse
comfortably.
Optical Sensing Technology — senses mouse movement
precisely and smoothly, with no moving parts to replace.
USB to PS/2 Adapter — lets you use your mouse with
computer either with PS/2 or USB connector.
3
Mouse Scroll Wheel — lets you scroll and select quickly
and easily, helping you work with long documents.
Supplied Driver CD — provides various customized
functions for operation with the Internet and Windows.
A QUICK LOOK
MOUSE
Left Mouse
Button
Side
Button
Side
Button
Scroll
Button
Right Mouse
Button
Left Button: The left button is a default click button. You do
not need to set this button.
Right Button — You can assign this for frequently used
keyboard buttons and mouse functions in addition to
features like Easy-Jump, Auto-Panning, Zoom, and so on.
Scroll Button — You can assign this button for frequently
used keyboard buttons and mouse functions in addition to
features like Easy-Jump, Auto-Panning, Zoom, and so on.
Side Button — You can assign certain functions in the
Mouse Properties menu to the left or right side button with
the roller button.
4
KEYBOARD HOTKEYS
Media Keys
— starts the media player that you select.
F — moves audio or video CD to previous track.
J — moves an audio or video CD to the next track.
9 — Play and pause an audio or video CD.
D — stops playing an audio or video CD.
Volume + or – ] — increases or decreases volume.
Mute
— mutes the sound of an audio or video CD
being played.
Internet Keys
My Favorites
— displays your Favorites or Bookmarks
list for the Internet.
Search
— goes to your Internet search service.
E-mail
— access an E-mail application such as
Outlook Express.
WWW
Back
— access the internet browser application.
— returns to the previous web page.
Forward
Stop
— moves to the next web page.
— stops loading or refreshing a new web page.
Refresh
— updates the content on a web page.
Others
My Computer
Calculator
Sleep
— displays <My Computer>.
— access the Windows’ Calculator.
— turn system into sleep mode.
LED Indicators on the Receiver
There are four LED indicators in the receiver.
1. The top LED lights either red or green as follows:
• lights red when the mouse battery power weakens
and turns off when fresh batteries are installed.
5
• lights red when the keyboard battery power is low.
The LED only flashes when a key is pressed on the
keyboard while the batteries are low.
• flashes green slowly when the receiver is preparing
to operate.
• flashes green rapidly when the mouse moves and
goes off when the mouse stops.
• flashes green slowly when you hit a key on the
keyboard and goes off when you stop.
2. The second green LED lights when Scroll Lock is set to
on and turns off when Scroll Lock is released.
3. The third green LED lights when Caps Lock is set to on
and turns off when Caps Lock is released.
4. The last green LED lights when Num Lock is set to on
and turns off when Num Lock is released.
6
HARDWARE INSTALLATION
CONNECTING THE RECEIVER TO YOUR
COMPUTER
The connectors of the RF (Radio Frequency) receiver meet
the PC 99 Spec. If you have a computer with PC 99
specification, simply plug the purple connector marked with
to the same color PS/2 port, or connect the supplied
USB to PS/2 adapter to the USB connector and connect it to
the mouse’s USB port. Refer to your computer’s manual for
the location of PS/2 ports. ! Ô
If your computer is AT type (IBM compatible), please
contact your local RadioShack for the optional adapter.
PS/2
! IMPORTANT !
Keep your previous mouse
installed as a back-up until you
finish installation
Ô NOTE Ô
Before installing or removing the
keyboard or mouse (either the
original or the new one) to or from
your computer, always turn off your
computer first. Installing or
removing the keyboard or mouse
while the computer is running can
cause permanent damage to them
or your computer.
USB
INSTALLING BATTERIES
The wireless keyboard and mouse require two AA batteries
each (not supplied) for power. We recommend RadioShack
alkaline batteries.
7
In the Keyboard
Tabs
Battery
Compartment
Cover
1. Push up on the tabs to lift and remove the battery
compartment cover on the bottom of the keyboard.
2. Insert two AA batteries into the battery compartment
according to the polarity marked inside the battery
compartment.
3. Replace the battery compartment cover.
In the Mouse
1. Press the latch on the top of the battery compartment
cover. Then lift off the cover.
2. Insert two AA batteries into the battery compartment
according to the battery polarity marked inside the
compartment.
3. Replace the cover.
8
SETTING UP THE KEYBOARD
Using the Keyboard’s Palm Rest and
Elevation Tabs
If your desktop space is large enough, you may use the
palm rest which supports your forearms for comfortable
operation. Simply turn the keyboard over, then lift the palm
rest towards you. Turn the keyboard back over. To return
the palm rest to it’s original position, flip it backwards until it
clicks into place.
! IMPORTANT !
•
Do not use the keyboard or
mouse on a desk made of
glass, mirror, iron, or black
velvet. A flat surface is
necessary for the optical sensor
to work.
•
For normal transmit distance,
avoid using this device on a
metal surface because a large
surface of iron, aluminum,
copper, or other metal will
shield or ground the keyboard’s
or mouse’s RF antenna and
receiver.
•
If your notebook computer has
a metal (contains aluminum or
magnesium) case, the LCD
panel’s metal housing will
isolate partial power of the RF
signal from the keyboard and
mouse. This will result in
reducing the transmitting
distance when you connect the
receiver on the back of the LCD
panel; however, your mouse
and keyboard should work
properly while using them
beside your notebook
computer.
To use the elevation tabs to elevate the keyboard, turn the
keyboard over, lift the tabs, and turn the keyboard back
over.
Elevation Tab Down
Elevation Tab Up
Wireless Keyboard, Mouse, and Receiver
The wireless keyboard and mouse give you free movement.
For optimal performance, place the receiver at least 8
inches (about 20cm) away from the keyboard, mouse and
other electrical devices, such as a computer, monitor, and
so on. !
Setting the ID Channel
There is one ID channel button each on the top cover of the
receiver, bottom of the wireless keyboard and mouse.
Before using this wireless mouse and keyboard system, you
must set the ID channel first by pressing each channel
button. Follow these steps to set the ID channel.
1. Press the top cover (channel button) on the receiver
first, the top green LED on the receiver flashes slowly
for about 8 seconds.
You must proceed with the next steps while the green
LED is flashing, otherwise the channel will not be set.
9
2. Press the channel button on the bottom of the wireless
mouse. The top green LED indicator on the receiver
flashes.
3. Press the channel button on the bottom of the wireless
keyboard. The top green LED on the receiver flashes.
Ô NOTE Ô
•
You must reset the ID channel
each time you change the
batteries. Your wireless
keyboard and optical mouse
channel automatically select
one of the 256 ID codes after
you press both channel buttons.
•
When you open the keyboard
HotKey setting menu,
appears on the task bar and
disappears when the HotKey
setting menu is closed.
•
The left button is a default click
button and you do not need to
set it.
•
If you are using Windows XP or
Windows 2000, you must
reinstall the software if:
The eyes on the mouse icon
(
) in the task bar do not
move or the eyes are closed.
The receiver was originally
installed on the PS/2 and you
later switch to a USB port.
You install the receiver on one
USB port and later move it to a
different USB port.
4. Wait until the green LED on the receiver goes off. Then
move the wireless mouse and press any key on the
wireless keyboard. If the green LED flashes, the
channel connection among the receiver, wireless
mouse and keyboard is successfully set. If the green
LED indicator does not flash, channel connection fails
and you must repeat Steps 1–4. Ô
SOFTWARE INSTALLATION
To perform the various customized functions for operation
with the Internet and Windows, follow these steps to install
the supplied driver CD. Ô
1. Turn on your computer and start Windows.
2. Insert the supplied driver CD into your CD-ROM drive.
3. If your computer is AutoRun compatible, wait for the
setup screen to display, then go to step 4.
If your computer is not AutoRun compatible, click Start
on the Windows task bar, then Run. Type
d:\SETUP.EXE and click OK, if <d:> is the drive
designation of your CD-ROM drive.
4. Follow the on screen instructions to install the driver
then restart your computer.
WIRELESS MOUSE AND KEYBOARD
SETTING MENU
The wireless mouse’s and keyboard’s setting menu in the
supplied driver software enables you to set the wireless
mouse or keyboard buttons to your preference. You can
change the pointer type, mouse speed, cursor size, pointing
direction, and so on. Double-click
or
at the lower
right of the Windows task bar to open the respective button
control panel.Ô
10
Customizing the Mouse Settings
To open the Mouse Properties dialog box for customizing
the mouse setting, double-click
in the task bar or click
Windows /Start /Programs /Scroll Mouse Control Panel
(“Mouse Properties” setting menu).
Mouse Button Assignments
The Button
Assignments’ function
in the Mouse Properties
Settings tab lets you set
the mouse button
function in a more
efficient way. You can
assign the most
frequently used
commands in Windows
to the mouse buttons.
To open the Mouse
Properties Settings
menu for button
assignments, double-click
in the Windows task bar and
click the Mouse Properties tab. Magic, Pointer, Cursor,
Action, Hardware, Settings, About, and Wireless appear..
Left Button — The left button is a default click button. You
do not need to set this button.
Right Button — You can assign this for frequently used
keyboard button and mouse functions, in addition to
features like Easy-Jump, Auto-Panning, Zoom, and so on.
Middle (Roller) Button — You can assign this button for
frequently used keyboard button and mouse functions in
addition to features like Easy-Jump, Auto-Panning, Zoom,
and so on.
Side Button — You can assign certain functions in the
Mouse Properties menu for the left or right side button or
operate it with the roller button.
11
Browsing Speed —
Adjust your browsing
speed to the desired
setting.
Browsing Direction —
Adjust your browsing
direction to scroll either
forward or backward
when you move the scroll
wheel.
Button Find —
Automatically positions
the cursor on the default
button (usually OK or
Enter) when the dialog
box appears on your
screen.
Trails — This option
makes it easier to find the
cursor when using an
LCD monitor. This option
cannot be used if your
monitor does not support
it.
Loop — You can enable
the cursor to automatically
move to the top (or
bottom) of the screen. The
Button Assignment
feature lets you assign the
most frequently used
commands in Windows to
the mouse buttons.
Mouse Speed — This
function lets you adjust
the speed at which the
pointer moves across the
screen.
Double Click Speed — Use this function to set the doubleclick speed of the mouse.
Button Swap — select this option if you want to operate the
right mouse button as the primary button.
12
Pointers — Customize
cursor appearance or
select to use the default
settings.
Office Mode — Only
supports Microsoft Office
along with some new
applications. Features
include zoom, scrolling and
Auto-scrolling. It is similar
to Microsoft’s IntelliMouse.
Scroll Mouse Mode —
supports all applications that use scroll bars, including
Office, with zoom, Auto-panning, and scrolling functions.
This is the default setting.
Application Switch/Document Switch
When the left or rightbutton is set to
Application Switch or
Document Switch, you
can quickly switch from
one open application or
document to another
without moving the
mouse. To switch to a
specific application or
document, press the left
or right button and roller
button to select the
application or
document.
Horizontal Scroll — When the side-button is set to
“Horizontal Scroll”, you can press the side-button and roll
the roller button to scroll the document horizontally.
Last<Back>/Next<Forward> — Browses page remark
function when you browse an Internet document. When the
left or right -button is set to Last<Back>/Next<Forward>,
you can quickly switch from one page to another by
pressing the left or right- button and roller button to move
pages without moving the mouse.
Zoom In/Out — When the left or right -button is set to
“Zoom In/Out”, you can press the left or right button and roll
the roller button to zoom in/out of document windows.
13
About — This tab lists the product, version, and copyright
information.
EasyJump for Windows
Click EasyJump Options on the Settings tab. The Easy
Jump Options dialog box appears.Ô
Ô NOTE Ô
Some panels inside the EasyJump
circle might appear gray (disabled).
This is because your application
software does not support those
functions. The horizontal and
vertical scroll bars only operate on
documents that support the driver
such as Microsoft Word, Excel,
Notepad, and Wordpad.
Close Ap — Close the application you are using.
Horizontal — Moves the cursor to the horizontal scroll bar.
14
Vertical — Moves the cursor to the vertical scroll bar.
Start — Activates the Windows Start menu.
Internet Access — This function opens the Browser to
access the Internet.
Help — This opens the computer’s Help & Support menu.
Control Panel — Opens the mouse’s control panel (Mouse
Properties dialog box).
Auto-Panning — You can set this function in the Button
Assignments menu. Move the mouse, and the document
moves in the direction you just moved.
Zoom function for Office and IE Applications
Press Ctrl and move the scroll wheel forward or backward to
zoom in or out. You can also use just one hand to zoom in
or out by setting the right button to be the Ctrl function. Then
press the right button and move the scroll wheel forward or
backward to zoom in or out of the document.
SETTING WIRELESS MOUSE OPTION’S
FOR INTERNET
Open the Mouse Properties menu and click on the Settings
tab. Then click EasyJump Options to display the functions
such as Open Browser, Add to Favorites (IE), Organize
Favorites (IE), Add Bookmark (Netscape), Edit Bookmark
(Netscape), Go next (Forward) and Go Previous (Back).
SETTING THE KEYBOARD’S
HOTKEYS
Before you can use the convenient one touch hotkeys, you
must set the hotkeys.
15
Setting the Media Key
1. Double-click
on the Windows
task bar to
display the
HotKey menu.
2. Click the Media
tab and select
List Supported
Media Player or
Eject/Insert CDROM, then click
Apply then OK.
3. To perform the
selected function, press
on the keyboard. Then
follow the on screen instructions.
Setting the Play/Pause Key
1. Double-click
on the Windows
task bar to
display the
HotKey menu.
2. Click the Play/
Pause tab to
select Microsoft
Deluxe CD
Player, or
Windows Media
Player, then
click Apply then
OK.
3. To perform the selected function, press 9 on the
keyboard then follow the on screen instructions.
16
Setting the
Search Key
1. Double-click
on the Windows
task bar to
display the
HotKey menu.
2. Click the Search
tab to select the
web site or
function you
want for the
Search key.
Then click Apply then OK.
3. To perform the selected function, press
keyboard.
on the
Setting the Web/Home WWW Key
1. Double-click
on Windows task
bar to display
HotKey menu.
2. Click the Web/
Home tab to
select the
Microsoft Internet
Explorer,
Program, Web
Site, Menu
functions you
want for the Web/
Home key
. Click Apply then OK.
3. To perform the selected function, press
keyboard.
on the
17
Setting the Mail Key
1. Double-click
on the Windows
task bar to display
the HotKey menu.
2. Click the Mail tab
to select Microsoft
Outlook Express,
Microsoft Outlook,
Program, Web
Site, and Menu
functions you
want for the Mail
key
. Click
Apply then OK.
3. To perform the selected function, press
keyboard.
on the
Setting the “My Computer” Key
1. Double-click
on
Windows task
bar to display
the HotKey
menu.
2. Click on the My
Computer tab
to select My
Computer,
Windows
Explorer,
Program, Web
Site, Menu
functions you want for the My Computer key
Apply then OK.
3. To perform the selected function, press
keyboard.
18
. Click
on the
Setting the
Calculator Key
1. Double-click
on the
Windows task
bar to display
the HotKey
menu.
2. Click on the
Calculator tab
and select
Windows
Calculator,
Program, Web Site, Menu functions you want for the
Calculator key
. Click Apply then OK.
3. To perform the selected function, press
keyboard.
on the
Setting the Sleep Key
For computers
running Windows
95 (PS/2 only) or
Windows NT
version 4.x without
a power
management
program, the Sleep
Hot Key can be
assigned one of the
following functions
from the Hot Key
user interface. Start
a screen saver, Log
off Windows, Shut
down Windows.
For computers with power-management such as Sleep,
Suspend, or Hibernation, the Sleep feature automatically
assigns power-management to the Sleep HotKey.
1. Double-click
HotKey menu.
on the Windows task bar to display the
2. Click on Sleep tab to select turning on or turning off
Windows power management
. Click Apply then
OK.
19
3. To perform the selected function, press
keyboard.
on the
Setting Options for Displaying
the HotKey Icon
1. Double-click
HotKey menu.
on the Windows task bar to display the
2. Click the
Options tab to
select “Show
on-screen key
effects” and/or
“Show icon in
the task bar”. If
you select
“Show onscreen key
effects” only,
the keyboard
icon
will not
appear.
3. To access HotKey menu, double click
To directly access the HotKey setting for Search, WebHome/Mail/My computer/Calculator, click
.
To access the HotKey Configuration user’s interface for
HotKey Configuration, Hide Icon, About (HotKey
version), Close HotKey, right click
.
Setting the Wireless Function
The wireless function lets you see the mouse’s and
keyboard’s battery level and shows Caps Lock, Num Lock,
and Scroll Lock icons in the task bar.
1. Click
on the Windows task bar to display the
HotKey menu.
20
2. Click the Wireless
tab to select
showing Caps
Lock, Num Lock,
and Scroll Lock
icons in the task
bar, then click
Apply.
21
TROUBLESHOOTING
Problem
Possible Reason
Solution
No batteries are installed in the
wireless keyboard and mouse or the
batteries are installed incorrectly.
Install fresh batteries or reinstall
the batteries facing the correct
directions.
The receiver for the wireless
keyboard and mouse are incorrectly
connected to your computer.
Make sure the green connector
goes to the mouse port and the
purple connector goes to the
keyboard port. (see
“Connecting the Receiver to
Your Computer” on Page 7)
The ID channel for the receiver,
keyboard and mouse are not
identical.
Set the ID channel for the
receiver, keyboard, and mouse
(see “Setting the ID Channel”
on Page 9).
The cursor does not move or
the keyboard does not work.
The receiver, wireless keyboard, and
mouse are placed at an improper
distance.
Place the wireless receiver at
least 8 inches (20cm) from the
mouse, keyboard, monitor,
computer, and other electrical
devices (see “Wireless
Keyboard, Mouse, and
Receiver” on Page 9). Do not
use your wireless keyboard or
mouse on a metal surface. Use
a pad to prevent interference.
The ACPI Power Management
Keys do not work properly.
The ACPI (Advanced Configuration
and Power Interface) needs correct
OS and BIOS to support it. Now, only
Windows98 (or later) supports ACPI
Power Management Keys. If you use
any other systems, ACPI Power
Management Keys would not work
properly. If you already have
Windows98 (or later), make sure
your system meets ACPI specs
completely. If so, you can only get the
sleep function.
To find which BIOS supports
ACPI, connect to: http://
www.microsoft.com/hwdev/
onnow/ACPI_lists.htm
The wireless keyboard and
mouse do not work.
22
FCC DECLARATION OF
CONFORMITY
This device complies with Part 15 of the FCC Rules.
Operation is subject to the following two conditions: (1) this
device may not cause harmful interference, and (2) this
device must accept any interference received, including
interference that may cause undesired operation.
Product:
Model:
Responsible Party:
Phone:
27MHz Wireless Keyboard and mouse
26-750
RadioShack
100 Throckmorton
Fort Worth, TX 76102
817-415-3200
THE FCC WANTS YOU TO
KNOW
This equipment has been tested and found to comply with
the limits for a Class B digital device, pursuant to Part 15 of
the FCC Rules. These limits are designed to provide
reasonable protection against harmful interference in a
residential installation. This equipment generates, uses and
can radiate radio frequency energy and, if not installed and
used in accordance with the instructions, may cause
harmful interference to radio communications.
However, there is no guarantee that interference will not
occur in a particular installation. If this equipment does
cause harmful interference to radio or television reception,
which can be determined by turning the equipment off and
on, the user is encouraged to try to correct the interference
by one or more of the following measures:
• Reorient or relocate the receiving antenna.
23
Environment
Requirements
In order to keep your wireless
keyboard and mouse in the perfect
performance and avoid the
unnecessary damages, please read
the following cautions:
•
Do not use the device in a damp
environment, such as a bathroom,
a damp basement, a swimming
pool, etc.
•
Do not try to repair the device by
yourself.
•
Under the following
circumstances, have the device
repaired by qualified personnel.
The cable or plug is damaged or
worn.
Liquid has entered the device.
The device has fallen and the
casing has been damaged.
The performance of the device
is clearly becoming worse.
•
Position the device so that the
cable cannot be damaged.
•
If the device must be cleaned, use
a damp cloth. Do not use a liquid
cleaner or a spray.
• Increase the separation between the equipment and
receiver.
• Connect the equipment into an outlet on a circuit
different from that to which the receiver is connected.
• Consult your local RadioShack store or an experienced
radio/TV technician for help.
• If you cannot eliminate the interference, the FCC
requires that you stop using your keyboard and mouse.
Changes or modifications not expressly approved by
RadioShack may cause interference and void the user’s
authority to operate the equipment.
CARE
Keep the keyboard and mouse dry; if they get wet, wipe
them dry immediately. Use and store the keyboard and
mouse only in normal temperature environments. Handle
the keyboard and mouse carefully; do not drop it. Keep the
keyboard and mouse away from dust and dirt, and wipe it
with a damp cloth occasionally to keep it looking new.
CLEANING THE WIRELESS MOUSE
1. Remove the batteries inside the mouse.
2. Dampen a cotton swab with mild soap and water.
3. Gently wipe the optical sensor clean, being careful not
to scratch the surface of the sensor.
4. Replace the batteries in the mouse.
Limited Ninety-Day Warranty
This product is warranted by RadioShack against manufacturing defects in material and workmanship under normal use for ninety (90) days from the date of purchase
from RadioShack company-owned stores and authorized RadioShack franchisees and dealers. EXCEPT AS PROVIDED HEREIN, RadioShack MAKES NO EXPRESS
WARRANTIES AND ANY IMPLIED WARRANTIES, INCLUDING THOSE OF MERCHANTABILITY AND FITNESS FOR A PARTICULAR PURPOSE, ARE LIMITED IN
DURATION TO THE DURATION OF THE WRITTEN LIMITED WARRANTIES CONTAINED HEREIN. EXCEPT AS PROVIDED HEREIN, RadioShack SHALL HAVE
NO LIABILITY OR RESPONSIBILITY TO CUSTOMER OR ANY OTHER PERSON OR ENTITY WITH RESPECT TO ANY LIABILITY, LOSS OR DAMAGE CAUSED
DIRECTLY OR INDIRECTLY BY USE OR PERFORMANCE OF THE PRODUCT OR ARISING OUT OF ANY BREACH OF THIS WARRANTY, INCLUDING, BUT NOT
LIMITED TO, ANY DAMAGES RESULTING FROM INCONVENIENCE, LOSS OF TIME, DATA, PROPERTY, REVENUE, OR PROFIT OR ANY INDIRECT, SPECIAL,
INCIDENTAL, OR CONSEQUENTIAL DAMAGES, EVEN IF RadioShack HAS BEEN ADVISED OF THE POSSIBILITY OF SUCH DAMAGES.
Some states do not allow limitations on how long an implied warranty lasts or the exclusion or limitation of incidental or consequential damages, so the above limitations
or exclusions may not apply to you.
In the event of a product defect during the warranty period, take the product and the RadioShack sales receipt as proof of purchase date to any RadioShack store. RadioShack will, at its option, unless otherwise provided by law: (a) correct the defect by product repair without charge for parts and labor; (b) replace the product with one
of the same or similar design; or (c) refund the purchase price. All replaced parts and products, and products on which a refund is made, become the property of RadioShack. New or reconditioned parts and products may be used in the performance of warranty service. Repaired or replaced parts and products are warranted for the
remainder of the original warranty period. You will be charged for repair or replacement of the product made after the expiration of the warranty period.
This warranty does not cover: (a) damage or failure caused by or attributable to acts of God, abuse, accident, misuse, improper or abnormal usage, failure to follow instructions, improper installation or maintenance, alteration, lightning or other incidence of excess voltage or current; (b) any repairs other than those provided by a RadioShack Authorized Service Facility; (c) consumables such as fuses or batteries; (d) cosmetic damage; (e) transportation, shipping or insurance costs; or (f) costs of
product removal, installation, set-up service adjustment or reinstallation.
This warranty gives you specific legal rights, and you may also have other rights which vary from state to state.
RadioShack Customer Relations, 200 Taylor Street, 6th Floor, Fort Worth, TX 76102
26-750
04A03
Printed in China