1
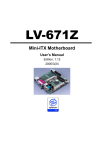
LV-671
Mini-ITX Motherboard
User’s Manual
Edition: 1.41
2005/03/24
LV-671 User’s Manual
2
LV-671 User’s Manual
3
LV-671 User’s Manual
Copyright
Copyright© 2003 - 2004. All rights reserved. This document is copyrighted and all rights are
reserved. The information in this document is subject to change without prior notice to
make improvements to the products.
This document contains proprietary information and protected by copyright. No part of this
document may be reproduced, copied, or translated in any form or any means without prior
written permission of the manufacturer.
All trademarks and/or registered trademarks contains in this document are property of their
respective owners.
Disclaimer
The company shall not be liable for any incidental or consequential damages resulting from
the performance or use of this product.
The company does not issue a warranty of any kind, express or implied, including without
limitation implied warranties of merchantability or fitness for a particular purpose.
The company has the right to revise the manual or include changes in the specifications of
the product described within it at any time without notice and without obligation to notify any
person of such revision or changes.
Trademark
All trademarks are the property of their respective holders.
Any questions please visit our website at http://www.commell.com.tw.
4
LV-671 User’s Manual
Packing List
Please check the package before you use this product
Hardware:
LV-671 Mini-ITX motherboard x 1
Cable Kit:
40-pin ATA100 IDE Cable x 1
26-pin Slim Type Floppy Cable x 1
4-pin to 4-pin Power Cable x 1
CPU Cooler x 1
Other Accessories
Driver CD x 1
User’s Manual x 1
5
LV-671 User’s Manual
Index
Index
Chapter 1 <Introduction> ..................................................................................... 9
1.1
<Product Overview>.......................................................................... 9
1.2 <Product Specification> ......................................................................... 10
1.3 <Component Placement> ...................................................................... 13
1.4 <Block Diagram>.................................................................................... 14
Chapter 2 <Hardware Setup>............................................................................. 15
2.1 <Connector Location>............................................................................ 15
2.2 <Jumper Reference> ............................................................................. 16
2.3 <Connector Reference>......................................................................... 17
2.3.1 <Internal Connector>.................................................................. 17
2.3.2 <External I/O connector> ........................................................... 17
2.4 <System Setup>..................................................................................... 18
2.4.1 <CPU Installation>...................................................................... 18
2.4.2 <Memory Installation> ................................................................ 19
2.4.3 <CPU Cooler Installation> .......................................................... 20
2.5 <CMOS Setup> ...................................................................................... 21
2.6 <IDE Interface> ...................................................................................... 22
2.7 Compact Flash Interface ........................................................................ 23
2.8 <Display Interface> ................................................................................ 24
2.8.1 <Analog display interface> ......................................................... 24
2.8.2 <Digital display interface> .......................................................... 24
2.9 <Audio Interface>................................................................................... 28
2.10 <Ethernet Interface> ............................................................................ 30
2.11 <Power and Fan connector> ................................................................ 31
2.12 <GPIO Interface> ................................................................................. 33
2.13 <Expansive Interface> ......................................................................... 34
2.14 <Switch and Indicator>......................................................................... 35
6
LV-671 User’s Manual
Index
Chapter 3 <System Setup> ................................................................................ 37
3.1 <Watchdog Timer Setting>..................................................................... 37
3.2 <Audio Setting>...................................................................................... 38
3.3 <Display Device Setup>......................................................................... 39
Chapter 4 <BIOS Setup> .................................................................................... 43
Appendix A <I/O Port Pin Assignment>............................................................ 45
A.1 <IDE Port> ............................................................................................. 45
A.2 <Floppy Port> ........................................................................................ 47
A.3 < USB Interface > .................................................................................. 47
A.4 <IrDA Port> ............................................................................................ 48
A.5 < VGA Port >.......................................................................................... 48
A.6 < LAN Port > .......................................................................................... 48
A.7 < Serial Port > ........................................................................................ 49
Appendix B <Flash BIOS>.................................................................................. 51
B.1 <Flash Tool> .......................................................................................... 51
B.2 <Flash BIOS Procedure>....................................................................... 51
Appendix C <System Resource> ...................................................................... 53
C.1 <I/O Address Map>................................................................................ 53
C.2 <Memory Address Map> ....................................................................... 55
C.3 <System IRQ and DMA Resource>....................................................... 56
Contact Information ............................................................................................ 58
7
LV-671 User’s Manual
(This Page is Left for Blank)
8
LV-671 User’s Manual
Introduction
Chapter 1 <Introduction>
1.1 <Product Overview>
LV-671 is an all-in-one industrial compact Pentium-M level motherboard based on Mini-ITX
form factor at 170 x 170 mm of dimension. Based on Intel 855GME and ICH4 chipset,
LV-671 offers the compact, embedded, value and high performance solution with Intel
Pentium-M CPU, 400MHz of FSB, 1GBytes DDR200/266/333 SDRAM with ECC, Intel
855GME GMCH built-in Intel Extreme Graphics 2, Intel PRO/1000+ LAN, Hi-Speed USB
2.0, 5.1 channel and S/P DIF 3D audio, 18/24-bit dual channel LVDS, GPIO and
embedded flash disk interfaces.
Low Power Consumption Solution
Based on Intel 855GME chipset and Intel Pentium M/Celeron M processor, the board
requires lower power consumption than Pentium 4 –M processors. The Intel Pentium M
integrates 512KB/1MB/2MB of L2 cache, so it provides better performance than before.
Dual Display Architecture
Intel 855GME supports two DAC for display interface; users can apply two display
devices for dual display clone or extended desktop display. With this feature, system
integrator can use this board for Kiosk, ATM, or industrial control machines.
5.1 Channel AC97 Audio
LV-671 integrates a REALTEK 5.1 channel AC97 codec; users can enjoy the live
surround sound through 5.1 channel speakers. LV-671 also has an S/PDIF jack for digital
sound outputting.
Hi-Speed USB 2.0 Interface
Intel ICH4 built-in Hi-Speed USB 2.0 controller let LV-671 offer up to 480Mbps of
transferring rate.
Card Bus and Embedded Flash Disk
The LV-671 support PCMCIA Type I/II enable you can simply use the wireless LAN
module or other extended devices, the Compact Flash interface and IDE1 with DOM
support can let you port any embedded system onboard.
Mini-PCI and Mini-AGP interface
With Mini-PCI interface, users can add a wireless LAN module or video capture
module for powerful communication solutions. With Mini-AGP interface, users can apply
the AGP graphic card or additional video output module such as HDTV or DVI.
Product Overview
9
LV-671 User’s Manual
1.2 <Product Specification>
General Specification
Form Factor
CPU
Memory
Chipset
BIOS
Green Function
Watchdog Timer
Real Time Clock
Enhanced IDE
Mini-ITX motherboard at 170 x 170 mm (L x W)
Package: 478 pin PGA/ 479 pin BGA
L2 Cache: 512KB/1MB/2MB
FSB: 400MHz
( The Intel® Celeron® M Processor 4xx series have been
designed to work with the Mobile Intel® 945 Express Chipset
Family only .)
1GBytes DDR200/266/333 SDRAM on one 184-pin DIMM socket
ECC memory is supported
Intel 82855GME GMCH and 82801DB ICH4
Phoenix-Award v6.00PG 4Mb PnP flash BIOS
Power saving mode includes doze, standby and suspend modes.
ACPI version 1.0 and APM version 1.2 compliant
System reset programmable watchdog timer with 1 ~ 255
sec./min. of timeout value
Intel ICH4 built-in RTC with lithium battery
PCI enhanced IDE interface supports dual channels and up to 4
ATAPI devices at UltraATA/100
One 40-pin and one 44-pin IDE port
DiskOnModule (DOM) embedded flash disk up to 1GBytes
Multi-I/O Port
Chipset
Serial Port
USB Port
Parallel Port
Floppy Port
IrDA Port
K/B & Mouse
GPIO
Card Bus
PCMCIA
Intel 82801DB ICH4 (USB) and Winbond W83627HF-AW LPC
Super I/O controller
Two external RS-232 serial port with 16C550 compatible UART
and 16 bytes FIFO
Six Hi-Speed USB 2.0 ports with 480 Mbps of transfer rate
Two external and four internal USB ports
One external bi-direction parallel port with SPP/ECP/EPP mode
One slim-type FDD port supports up to two FDD
One IrDA compliant Infrared interface supports SIR
External PS/2 keyboard and mouse ports on rear I/O panel
One 20-pin Digital I/O connector with 15-bit programmable I/O
interface
One PCMCIA Type I/II slot
VGA Display Interface
Chipset
10
Intel 855GME GMCH built-in Intel Extreme Graphics 2
With 266 MHz VGA core and 256-bit 3D engine
LV-671 User’s Manual
Frame Buffer
Introduction
Intel DVMT (Dynamic Video Memory Technology) 2.0 up to
64Mbytes shared with system*
CRT and LCD monitors for analog display
24-bit single/dual channel LCD panel for digital display
External DB15 female connector on rear I/O panel
Internal 40-pin LVDS connector
Display Type
Connector
*Under Windows 98/ME/2000/XP/Server2003 or Linux kernel 2.4 later
Ethernet Interface
Chipset
Type
Connector
Intel PRO/1000+ LAN interface with Intel 82540EM
10Base-T / 100Base-TX/1000Base-T,
auto-switching Fast Ethernet
Full duplex, IEEE802.3U compliant
External RJ45 connector with LED on rear I/O panel
Audio Interface
Chipset
Interface
Connector
Intel ICH4 with REALTEK ALC655 AC97 3D audio codec
5.1 channel 3D audio with front (R/L), rear (R/L), center and bass
Optical Fiber digital audio encoding signal output
Optional external three phone jack for 5.1 channel audio onboard
External Amplified Speaker output jack on rear panel
External SPDIF connector on rear panel
Internal 10-pin header for line-in/-out, MIC-out, 4-pin header for
CD-in
Solid State Disk Interface
Flash Type
Capacity
Compact Flash Type-I for Compact Flash Card or IBM Micro Drive
Up to 1GB flash memory
Expansion Interface
Slim PCI Slot
Mini-PCI
Mini-AGP
One slim type PCI slot supports up to 2 bus master PCI
32-bit, 33MHz
One Mini-PCI type B socket with 32-bit, 33MHz for LV-671MP
series
One Mini-AGP socket with 4x AGP bus for LV-671MA series
Product Specification
11
LV-671 User’s Manual
Power and Environment
Power
Requirement
Input Voltage
Range
Input Current
Dimension
Temperature
One external 19V/12V (auto switching) DC Adapter connector on
rear panel
4-pin onboard 12V P4 4-pin power connector
(Two power resources selectable for each)
11V ~ 13V for 12V power supply
16V ~ 20V for 19V power supply
12V/60W (with one 5.25” CDROM and 3.5” HDD)
19V/60W (with one 5.25” CDROM and 3.5” HDD)
170 (L) x 170 (H) mm, Mini-ITX form factor
Operating within 0 ~ 60oC (32 ~ 140oF)
Storage within -20 ~ 85oC (-4 ~ 185oF)
Ordering Code
LV-671-MA
LV-671-MP
LV-671-MAPM11
LV-671-MPPM11
LV-671-MACM6
LV-671-MPCM6
Mini-ITX Socket 479 Pentium-M processor Motherboard
with Intel Extreme VGA, LAN, 5.1-CH/SPDIF Audio,
Hi-Speed USB 2.0, mini-AGP socket and LVDS interface.
Mini-ITX Socket 479 Pentium-M processor Motherboard
with Intel Extreme VGA, LAN, 5.1-CH/SPDIF Audio,
Hi-Speed USB 2.0, mini-PCI socket and LVDS interface.
Same as LV-671-MA and with onboard Intel Pentium M 1.1GHz
processor for ULV/LV version.
Same as LV-671-MP and with onboard Intel Pentium M 1.1GHz
processor for ULV/LV version.
Same as LV-671-MA and with onboard Intel Celeron M 600MHz
processor for ULV/LV version.
Same as LV-671-MP and with onboard Intel Celeron M 600MHz
processor for ULV/LV version.
For further product information please visit the website at http://www.commell.com.tw
12
Product Specification
LV-671 User’s Manual
Introduction
1.3 <Component Placement>
1 x 184-pin DDR266/333 DIMM up to 1GB
Intel ICH4
(Southbridge)
Intel 855GME
(Northbridge)
Socket479
For 478-pin PGA
Pentium M/Celeron M
Onboard DC
to DC inverter
Intel 82540EM
Gigabit LAN
REALTEK
ALC655 5.1CH
Audio Codec
Onboard
479-pin BGA
Pentium M/Celeron M
For embedded
CPU version
Component Placement
13
LV-671 User’s Manual
1.4 <Block Diagram>
Intel Pentium M processor with FC-PGA2/FC-BGA2
400MHz FSB
CRT
DDR266/333
LVDS
LCD
DIMM
Up to 1GB
AGP 4x
Mini-AGP
1 x 184-pin
DVO B/C
855GME
PCI Bus
ATAPI Devices
UltraATA100
USB Devices
33MHz
USB2.0
480Mb/s
ICH4
Audio
AC97 Codec
Gigabit Ethernet
Controller
Slim PCI
LPC
Mini-PCI
PCMCIA
Compact Flash
IrDA
PS/2
COM Port
Parallel
Port
Floppy
14
Block Diagram
LV-671 User’s Manual
Hardware Setup
Chapter 2 <Hardware Setup>
This chapter contains the information for installation of hardware. The install procedure
includes jumper settings, CPU and memory installation, fan, I/O and panel connections.
2.1 <Connector Location>
CN_BPWR
CN_INV
DIMM
IDE1
CN_LVDS
IDE2
CN_USB1
CN_USB2
CN_SPWR
JFRNT
SYSFAN
CN_DIO
MINI_AGP
MINIPCI
PCI
CPU
CN_IR
FDD
CPUFAN
CN_WOL
CN_AUDIO
CDIN
CN 12V
CN_2ND_IO
DC_IN
PS/2
VGA
Connector Location
Printer
SPEAKER
CN_LAN2
LAN
SP/DIF
COM2/1
Dual_USB
PCMCIA
15
LV-671 User’s Manual
Hardware Setup
2.2 <Jumper Reference>
Jumper
JRTC
JLAN
JVLCD
JCFSEL
JDOM
Function
COMS Operate / Clear Setting
LAN1 Enable/Disable
LCD Panel Voltage Setting
Compact Flash Address Setting
IDE1 5V Voltage Enable/Disable
JDOM
JCFSEL
JVLCD
JRTC
JLAN
16
Jumper Reference
LV-671 User’s Manual
Hardware Setup
2.3 <Connector Reference>
2.3.1 <Internal Connector>
Connector
CPU
DIMM
IDE1
IDE2
FDD
CN_USB1
CN_USB2
CN_IR
CN_12V
CN_BPWR
CN_SPWR
JFRNT
CPUFAN
SYSFAN
CN_AUDIO
CDIN
CN_WOL
CN_LVDS
CN_INV
CN_DIO
CN_LAN2
CN_2ND_IO
CF
PCMCIA
Function
MicroPGA479 CPU Socket
184-pin DIMM Socket
40-pin Primary IDE Port
44-pin Secondary IDE Port
26-pin slim type FDD Port
10-pin 3rd / 4th Hi-Speed USB 2.0 Port
10-pin 5th / 6th Hi-Speed USB 2.0 Port
5-pin SIR IrDA Port
4-pin AT Power Connector
4-pin 5V&12V output connector
4-pin 5V&12V output connector
14-pin Switch and Indicator Connector
3-pin +12V CPU Fan Connector
3-pin +12V System Fan Connector
10-pin Audio Port
4-pin CD-in Interface
3-pin Wake-On-LAN Interface
40-pin LVDS connector
5-pin LCD Inverter Power Connector
20-pin programmable I/O connector
Additional Ethernet Controller Interface
Additional I/O module interface
Compact Flash Card Interface
PCMCIA Card bus interface
Remark
Standard
Standard
Standard
Standard
Standard
Standard
Standard
Standard
Standard
Standard
Standard
Standard
Standard
Standard
Standard
Standard
Standard
Standard
Standard
Standard
Standard
Standard
Standard
Standard
2.3.2 <External I/O connector>
Connector
DC_IN
PS2
Printer
VGA
SPEAKER
SPDIF
LAN
DUAL_USB
COM1/2
PCMCIA
Connector Reference
Function
4-pin 12V/19V auto-switching input
PS/2 type keyboard and mouse port
DB26 parallel port
DB15 VGA port
Amplified speaker out
Digital audio output
RJ45 LAN port
USB connectors
RS232 DB9 serial port
Car bus slot
Remark
Standard
Standard
Standard
Standard
Standard
Standard
Standard
Standard
Standard
Standard
17
LV-671 User’s Manual
Hardware Setup
2.4 <System Setup>
2.4.1 <CPU Installation>
The board supports Intel Pentium M/ Celeron M processor with 400MHz of front side bus,
512KB/1MB/2MB of L2 cache, there are two package type of the processor, 478-pin PGA
for socket479 onboard version; 479-pin BGA for embedded processor version. Please
check installation steps below for onboard socket479 version.
Socket479 for Intel Pentium M/Celeron M
With 478-pin PGA
Embedded Intel Pentium M/Celeron M
With 479-pin LV/ULV
Unlock way
1. Use the flat-type
screw drive to unlock
the CPU socket
Check point
2. Follow the pin direction to install
the processor on the socket
3. Lock the socket
18
CPU Installation
LV-671 User’s Manual
Hardware Setup
2.4.2 <Memory Installation>
The board supports one 184-pin DDR266/333 (PC2100/PC2700) SDRAM up to 1GB of
capacity, and supports ECC (Error Correcting Code), unbufferred memory modules.
DIMM
104-pin
80-pin
Please check the pin number to match the socket side well
before installing memory module.
Memory Installation
19
LV-671 User’s Manual
Hardware Setup
2.4.3 <CPU Cooler Installation>
The board accessories come with one CPU cooler, the cooler’s specification is listed below,
please check the installation steps before you start.
Notice: Installing the cooler improperly may cause the system unstable, if you face system rebooting or
other issue, please check this point.
Cooler Specification:
Rated Voltage
12V
Consumption
Max 0.12Amp
Sound Level
Max 27dB
Rated Speed
5000rpm
Air Flow
Max 4.73CFM
The Cooler can compete with up to 2.0GHz of Intel Pentium M processor, if user needs to
use more upper frequency, please replace other coolers.
Cooler Installation Guide:
1. Remove the sticker on the base
2. Put the base through the
3. Put the cooler through
fixing holes
the four pills on the base
4. Press the plate and move
4. Connect the fan connector on CPUFAN
forward
20
CPU Cooler Installation
LV-671 User’s Manual
Hardware Setup
2.5 <CMOS Setup>
The board’s data of CMOS can be setting in BIOS. If the board refuses to boot due to
inappropriate CMOS settings, here is how to proceed to clear (reset) the CMOS to its
default values.
Jumper: JRTC
Type: Onboard 3-pin Header
JRTC
Mode
1-2
Clear CMOS
2-3
Normal Operation
Default setting
1
3
JRTC
CMOS Setup
21
LV-671 User’s Manual
Hardware Setup
2.6 <IDE Interface>
The board supports two IDE interface up to 4 ATAPI devices, base on Intel ICH4, the IDE
interface supports ATA66/100 ATAPI drives. The IDE1 supports +5V on pin-20 for DOM
(Disk on Module), the jumper JDOM can let you select enable/disable this support.
Jumper: JDOM
Type: onboard 3-pin header
JDOM
Mode
ON
IDE1 pin-20 5V power supply enable
OFF
No 5V power supply on IDE1 pin-20
Default setting
39
1
JDOM
IDE1 (40-pin pitch=2.54)
2
40
43
1
44
2
IDE2 (44-pin pitch=2.00)
22
IDE Interface
LV-671 User’s Manual
Hardware Setup
2.7 Compact Flash Interface
The board supports Compact Flash Type I socket for storage flash disk only, the jumper
JCFSEL can let you to setup the flash card operate on secondary master or slave mode.
Jumper: JCFSEL
Type: onboard 3-pin header
JCFSEL
Mode
1-2
Master
2-3
Slave
Default setting
Tested Compact Flash Disk
Manufacture
LEXAR
DigitFab
RiDATA
HAGIWARA SYS-COM
Sandisk
Capacity
16MB
32MB
256MB
512MB
2GB
CF
Compact Flash Interface
23
LV-671 User’s Manual
Hardware Setup
2.8 <Display Interface>
2.8.1 <Analog display interface>
The board is integrated with Intel 855GM GMCH chipset built-in Intel Extreme
Graphics 2 with 266 MHz VGA core, 256-bit 3D engine and Intel Dynamic Video Memory
up to 64MBytes shared with system memory. The CRT / analog VGA interface includes
one external DB15 female connector on bracket on board.
VGA
2.8.2 <Digital display interface>
The board’s digital video interface provides LVDS flat panel support. The built-in 18/24-bit
dual channel LVDS interface offers the economical solution for LVDS-based LCD display.
JVLCD
3 1
5
1
CN_INV
1
CN_LVDS
40
24
Display Interface
LV-671 User’s Manual
Hardware Setup
Connector: CN_INV
Type: 5-pin LVDS Power Header
Pin
1
2
3
4
5
Description
+12V
GND
GND
GND
ENABKL
Connector: JVLCD
Type: 3-pin Power select Header
Pin
1
2
3
Description
VCC
LCDVCC
VCC3
Connector: CN_LVDS
Type: onboard 40-pin connector for LVDS connector
Connector model: HIROSE DF13-40DP-1.25V
Pin
2
4
6
8
10
12
14
16
18
20
22
24
26
28
30
32
34
36
38
40
Signal
LCDVCC
GND
ATX0ATX0+
GND
ATX1ATX1+
GND
ATX2ATX2+
GND
ATXCKATXCK+
GND
ATX3ATX3+
GND
PANELCLK
PANELDATA
N/C
Pin
1
3
5
7
9
11
13
15
17
19
21
23
25
27
29
31
33
35
37
39
Signal
LCDVCC
GND
BTX0BTX0+
GND
BTX1BTX1+
GND
BTX2BTX2+
GND
BTX3BTX3+
GND
BTXCKBTXCK+
GND
N/C
N/C
N/C
To setup the LCD, you need the components below:
1. A panel (support up to 24-bit dual channel) with LVDS interfaces.
2. An inverter for panel’s backlight power.
3. A LCD cable and an inverter cable.
For the cables, please follow the pin assignment of the connector to make a cable,
because every panel has its own pin assignment, so we do not provide a standard cable;
please find a local cable manufacture to make cables.
Display Interface
25
LV-671 User’s Manual
Hardware Setup
LCD installing guide:
1. Prepare a panel, inverter and LV-671.
2.
3.
Please check the datasheet of the panel to see the voltage of the panel, and set the
jumper JVLCD to +5V or +3.3V.
Prepare a LVDS type LCD cable
Board side
Panel side
For sample illustrator only
4.
Connect all the devices well.
Inverter
LVDS Cable
26
Display Interface
LV-671 User’s Manual
Hardware Setup
After setup the devices well, you need to select the LCD panel type in the BIOS.
The panel type mapping is list below:
BIOS panel type selection form
For 18-bit color
For 24-bit color
NO.
Output format
NO.
Output format
1
640 x 480
8
1024 x 768
2
800 x 600
9
1280 x 1024 Dual Channel
3
1024 x 768
10
1400 x 1050 Dual Channel
4
1280 x 1024
11
1600 x 1200 Dual Channel
5
1400 x 1050 Dual Channel @ 108Mhz
13
1024 x 768 Dual Channel
6
1400 x 1050 Dual Channel @ 122Mhz
14
7
1600 x 1200 Dual Channel
15
12
1024 x 768 Dual Channel
Display Interface
1280 x 768Dual Channel
27
LV-671 User’s Manual
Hardware Setup
2.9 <Audio Interface>
The board integrates Intel ICH4 with REALTEK ALC655 codec for AC97 Rev 2.3; it comes
with the features below:
● Microsoft WHQL/WLP 2.0 audio compliance
● Software selectable for 2-channel/5.1-channel sound
● 16-bit Stereo full-duplex CODEC with 48KHz sampling rate
● Two software selectable MIC inputs
● Supports 20-bit 48KHz S/PDIF output, complying with AC'97 Rev 2.3 specifications
● EAX™ 1.0 & 2.0, Direct Sound 3D™, A3D™ compatible
1
CDIN
4
CN_AUDIO
1
10
SPEAKER
28
SP/DIF
Audio Interface
LV-671 User’s Manual
Hardware Setup
Connector: CN_AUDIO
Type: 10-pin (2 x 5) 2.54-pitch header
Pin
Description
1
Line – Right
3
Line – Left
5
MIC
7
N/C
9
Line Out – Right
Pin
2
4
6
8
10
Description
Ground
MIC
Ground
Line Out – Left
Ground
Connector: CDIN
Type: 4-pin header
Pin
Description
1
CD – Left
2
Ground
3
Ground
4
CD – Right
Optional Audio Cable
Line-in/Rear MIC-IN/Center Line-out/Front
Audio Interface
29
LV-671 User’s Manual
Hardware Setup
2.10 <Ethernet Interface>
The
board
integrates
with
Intel
82540EM
Gigabit
controller
at
the
type
of
10Base-T/100Base-TX/1000Base-T auto-switching Ethernet with full duplex and IEEE
802.3U compliant. The LAN function comes with a RJ45 jack on the rear I/O panel. The
CN_WOL is for the Wake-Up-On-LAN function link with PCI LAN Card.
Connector: CN_WOL
Type: onboard 3-pin (1 x 3) wafer connector
Pin
1
2
Description
WOL-Ctrl
Ground
Jumper: JLAN
Type: onboard 3-pin header
JRTC
Mode
1-2
Enable Onboard LAN controller
2-3
Disable Onboard LAN controller
Default setting
3
+5V Standby
RJ45
CN_WOL
1
3
1
3
JLAN
30
Ethernet Interface
LV-671 User’s Manual
Hardware Setup
2.11 <Power and Fan connector>
The board comes with a 4-pin Mini-DIN power connector for DC 12V/19V auto-switching
input, it also has one 4-pin P4 additional use power connector for internal power supply,
you can choose one pf them to meet your application.
The board has two power connectors for 5V/12V output to powering your ATAPI drives
directly, and it has two fan connectors for CPU and system cooling.
How to power the board
Type 1: Use DC 12V/19V adapter with 4-pin MINI-DIN connector for DC_IN
DC 12V/19V Adapter
Type 2: Use standard internal P4 power supply for CN_12V
We strongly recommend users to use type 1 for powering the board.
CN_BPWR
1
CN_SPWR
1
4
4
CPUFAN
3
SYSFAN
3
1
1
CN_12V
3
1
4
2
DC_IN
3
4
Power and Fan Connector
1
2
31
LV-671 User’s Manual
Hardware Setup
Connector: CN_12V
Type: 4-pin standard Pentium 4 +12V power connector
Pin
Description
Pin
Description
1
+12V
2
+12V
3
Ground
4
Ground
Connector: DC_IN
Type: 4-pin DC power connector
Pin
Description
1
+12V
3
+12V
Connector: CPUFAN, SYSFAN
Type: 3-pin fan wafer connector
Pin Description
Pin
1
Ground
2
Pin
2
4
Description
Ground
Ground
Description
+12V
Pin
3
Description
Fan Control
Connector: CN_BPWR
Type: 4-pin P-type connector for +5V/+12V output
Pin Description Pin Description Pin Description
1
+5V
2
Ground
3
Ground
Note: Maximum output voltage: 12V/5A & 5V/3A
Connector: CN_SPWR
Type: 4-pin connector for +5V/+12V output
Pin
1
Description
+12V
Pin
2
Description
Ground
Pin
3
Description
Ground
Floppy
Pin
4
Description
+12V
Pin
4
Description
+5V
ATAPI Drives
Relative Accessory
32
Power and Fan Connector
LV-671 User’s Manual
Hardware Setup
2.12 <GPIO Interface>
The board offers 16-bit digital I/O to customize its configuration to your control needs.
For example, you may configure the digital I/O to control the opening and closing of the
cash drawer or to sense the warning signal from a tripped UPS.
Connector: CN_DIO
Type: 20-pin (10 x 2) header
Pin
Description
1
GP10
3
GP11
5
GP12
7
GP13
9
Ground
11
GP14
13
GP15
15
GP16
17
GP17
19
12VDU
Pin
2
4
6
8
10
12
14
16
18
20
Description
GP20
GP21
GP22
GP23
Ground
GP24
GP25
GP26
N/C
5VDU
1
20
CN_DIO
GPIO Interface
33
LV-671 User’s Manual
Hardware Setup
2.13 <Expansive Interface>
The board comes with one slim type PCI slot and one optional Mini-AGP or Mini-PCI
interface. The slim PCI slot supports up to 2 PCI devices through an optional riser card. For
Mini-PCI interface, you can obtain a wireless LAN card for potable system. For Mini-AGP
interface, you can obtain an extended graphic card to improve the onboard graphics
performance.
Mini-AGP
Optional PCI Riser Card
Slim-PCI
Mini-PCI
Optional Mini-PCI Wireless LAN Card
Optional MA-ATI Mini-AGP Card
34
Expansive Interface
LV-671 User’s Manual
Hardware Setup
2.14 <Switch and Indicator>
Connector: JFRNT
Type: onboard 14-pin (2 x 7) 2.54-pitch header
Function
Signal
PIN
Signal
Vcc (+)
1
2
(+) Vcc
Active
3
4
N/C
Reset
5
6
GND
GND
7
8
Vcc
N/C
9
10
N/C
Power
PWRBT
11
12
N/C
Button
5VSB
13
14
SPKIN
IDE LED
Function
Power
LED
Reset
Speaker
JFRNT
1
14
Switch and Indicator
35
LV-671 User’s Manual
(This Page is Left for Blank)
36
LV-671 User’s Manual
System Setup
Chapter 3 <System Setup>
3.1 <Watchdog Timer Setting>
The watchdog timer makes the system auto-reset while it stops to work for a period. The
integrated watchdog timer can be setup as system reset mode by program.
Timeout Value Range
- 1 to 255
- Second or Minute
Program Sample
Watchdog timer setup as system reset with 5 second of timeout
2E, 87
2E, 87
2E, 07
2F, 08
Logical Device 8
2E, 30
Activate
2F, 01
2E, F5
Set as Second*
2F, 00
2E, F6
Set as 5
2F, 05
* Minute: bit 3 = 0; Second: bit 3 = 1
You can select Timer setting in the BIOS, after setting the time options, the system will
reset according to the period of your selection.
Watchdog Timer Setting
37
LV-671 User’s Manual
System Setup
3.2 <Audio Setting>
The board integrates Intel® ICH4 with REALTEK® ALC655 codec. It can support
2-channel or 5.1 channel sound under system configuration. Please follow the steps below
to setup your sound system.
1.
Install REALTEK AC97 Audio driver.
2.
Lunch the control panel and Sound Effect Manager.
3.
Select Speaker Configuration
4. Select the sound mode to meet your speaker system.
38
Audio Setup
LV-671 User’s Manual
System Setup
3.3 <Display Device Setup>
This chapter shows you how to setup the display device under Windows OS.
Before you using your display device:
1. Check your software
Before you can use the display device properly, please install the VGA driver.
2. Check your hardware
Please setup the display device properly before you boot up the system.
For configure your Display device, please follow the instructions below:
1. Please lunch Display Properties.
You would see two Graphics Controllers. If you connect two display devices, you would be
able to setup each device for color bit and resolution.
This item can let you configure which device would be the primary if you connect two
display devices.
This item can let you extend your Windows Desktop to second display device.
If you click the identify button, the screen will pop up the number sequence of your device.
Display Device Setup
39
LV-671 User’s Manual
System Setup
For advanced display settings, please click Advanced… button and choose Intel(R)
Extreme Graphics.
Please click Graphics Properties button to enter the advanced setup.
40
Display Device Setup
LV-671 User’s Manual
System Setup
While you entering the Graphics Properties, you will see the options below:
This option can let you configure
the CRT monitors for Colors,
Screen Area (Resolution) and
Refresh Rate.
This option can let you configure
the LCD panel for Colors, Screen
Area (Resolution) and Full Screen
option.
Display Device Setup
41
LV-671 User’s Manual
System Setup
This option can let you configure
the Dual Display for clone mode
(same display on two devices)
This option can let you configure
the Dual Display for Extended
Desktop mode
42
Display Device Setup
LV-671 User’s Manual
BIOS Setup
Chapter 4 <BIOS Setup>
The single board computer uses the Award BIOS for the system configuration. The
Award BIOS in the single board computer is a customized version of the industrial standard
BIOS for IBM PC AT-compatible computers. It supports Intel x86 and compatible CPU
architecture based processors and computers. The BIOS provides critical low-level support
for the system central processing, memory and I/O sub-systems.
The BIOS setup program of the single board computer let the customers modify the basic
configuration setting. The settings are stored in a dedicated battery-backed memory,
NVRAM, retains the information when the power is turned off. If the battery runs out of the
power, then the settings of BIOS will come back to the default setting.
The BIOS section of the manual is subject to change without notice and is provided here for
reference purpose only. The settings and configurations of the BIOS are current at the time
of print, and therefore they may not be exactly the same as that displayed on your screen.
To activate CMOS Setup program, press <DEL> key immediately after you turn on the
system. The following message “Press DEL to enter SETUP” should appear in the lower left
hand corner of your screen. When you enter the CMOS Setup Utility, the Main Menu will be
displayed as Figure 5-1. You can use arrow keys to select your function, press <Enter>
key to accept the selection and enter the sub-menu.
Figure 5-1 CMOS Setup Utility Main Screen
For more BIOS information please visit Phoenix-Award:
http://www.phoenix.com/en/customer+services/bios/awardbios/default1.htm
BIOS Setup
43
LV-671 User’s Manual
(This Page is Left for Blank)
44
LV-671 User’s Manual
I/O Port Pin Assignment
Appendix A <I/O Port Pin Assignment>
A.1 <IDE Port>
Connector: IDE1
Type: 40-pin (20 x 2) box header
Pin
1
3
5
7
9
11
13
15
17
19
21
23
25
27
29
31
33
35
37
39
IDE Port
Description
Reset
D7
D6
D5
D4
D3
D2
D1
D0
Ground
REQ
IOW-/STOP
IOR-/HDMARDY
IORDY/DDMARDY
DACKIRQ
A1
A0
CS1 (MASTER CS)
LED ACT-
Pin
2
4
6
8
10
12
14
16
18
20
22
24
26
28
30
32
34
36
38
40
39
1
40
2
Description
Ground
D8
D9
D10
D11
D12
D13
D14
D15
VCC (JDOM)
Ground
Ground
Ground
IDESEL
Ground
N/C
CBLID
A2
CS3 (SLAVE CS)
Ground
45
LV-671 User’s Manual
I/O Port Pin Assignment
Connector: IDE2
2
44
1
43
Type: 44-pin (22 x 2) box header
Pin
1
3
5
7
9
11
13
15
17
19
21
23
25
27
29
31
33
35
37
39
41
43
46
Description
Reset
D7
D6
D5
D4
D3
D2
D1
D0
Ground
REQ
IOW-/STOP
IOR-/HDMARDY
IORDY/DDMARDY
DACKIRQ
A1
A0
CS1
IDEACTVCC
Ground
Pin
2
4
6
8
10
12
14
16
18
20
22
24
26
28
30
32
34
36
38
40
42
44
Description
Ground
D8
D9
D10
D11
D12
D13
D14
D15
N/C
Ground
Ground
Ground
IDESEL
Ground
N/C
CBLID
A2
CS3
Ground
VCC
Ground
IDE Port
LV-671 User’s Manual
I/O Port Pin Assignment
A.2 <Floppy Port>
Connector: FDD
Type: 26-pin connector
Pin
Description
1
VCC
3
VCC
5
VCC
7
DRV1
9
MTR1
11
RPM
13
N/C
15
Ground
17
Ground
19
N/C
21
N/C
23
Ground
25
Ground
Pin
2
4
6
8
10
12
14
16
18
20
22
24
26
Description
INDEX
DRV0
DSKCHG
N/C
MTR0
DIR
STEP
WRITE DATA
WRITE GATE
TRACK 0
WRPTR
RDATASEL
A.3 < USB Interface >
Connector: CN_USB1, CN_USB2
Type: 10-pin (5 x 2) header for dual USB Ports
Pin
Description
Pin
9
1
10
2
Description
1
VCC
2
VCC
3
Data04
Data15
Data0+
6
Data1+
7
Ground
8
Ground
9
N/C
10
N/C
PS. You can obtain an optional USB cable on bracket for to 2 USB ports.
Optional USB Cable
Floppy Port
47
LV-671 User’s Manual
I/O Port Pin Assignment
A.4 <IrDA Port>
5
Connector: CN_IR
Type: 5-pin header for SIR Ports
Pin
Description
1
VCC
2
N/C
3
IRRX
4
Ground
5
IRTX
1
6
A.5 < VGA Port >
11
1
2
3
4
5
Connector: VGA
Type: 15-pin D-sub female connector on bracket
Pin
Description
Pin
Description
1
RED
6
Ground
2
GREEN
7
Ground
3
BLUE
8
Ground
4
N/C
9
LVGA5V
5
Ground
10
Ground
12
13
14
15
10
Pin
11
12
13
14
15
Description
N/C
5VCDA
HSYNC
VSYNC
5VCLK
A.6 < LAN Port >
Connector: RJ45
Type: RJ45 connector with LED on bracket
Pin
Description
48
1
2
3
4
MI0+
MI0-
MI1+
MI2+
5
6
MI2- MI1-
7
8
MI3+
MI3-
IrDA Port
LV-671 User’s Manual
I/O Port Pin Assignment
A.7 < Serial Port >
5
Connector: COM1
Type: 9-pin D-sub male connector on bracket
Pin
1
2
3
4
5
Description
MDCD1MSIN1MSO1MDTR1Ground
Pin
6
7
8
9
1
9
Description
MDSR1MRTS1MCTS1MRI1-
5
Connector: COM2
Type: 9-pin D-sub male connector on bracket
Pin
1
2
3
4
5
Description
MDCD2MSIN2MSO2MDTR2Ground
Pin
6
7
8
9
6
9
1
6
Description
MDSR2MRTS2MCTS2MRI2-
Output Voltage: +/- 9V.
Serial Port
49
LV-671 User’s Manual
(This Page is Left for Blank)
50
LV-671 User’s Manual
Flash BIOS
Appendix B <Flash BIOS>
B.1 <Flash Tool>
The board is based on Award BIOS and can be updated easily by the BIOS auto flash
tool. You can download the tool online at the address below:
http://www.phoenix.com/en/home/
http://www.commell.com.tw/Support/Support_SBC.htm
File name of the tool is “awdflash.exe”, it’s the utility that can write the data into the
BIOS flash ship and update the BIOS.
B.2 <Flash BIOS Procedure>
1. Please make a bootable floppy disk.
2. Get the last .bin files you want to update and copy it into the disk.
3. Copy awardflash.exe to the disk.
4. Power on the system and flash the BIOS. (Example: C:/ awardflash XXX.bin)
5. Restart the system.
Any question about the BIOS re-flash please contact your distributors or visit the
web-site at below:
http://www.commell.com.tw/support/support.htm
TU
Flash BIOS
UT
51
LV-671 User’s Manual
(This Page is Left for Blank)
52
LV-671 User’s Manual
System Resource
Appendix C <System Resource>
C.1 <I/O Address Map>
Address Range
Device
x0000 - x000F
Direct Memory Access Controller
x0010 - x001F
Motherboard Resource
x0020 - x0021
Programmable Interrupt Controller
x0022 - x003F
Motherboard Resource
x0040 - x0043
System Clock
x0044 - x005F
Motherboard Resource
x0060 - x0060
Standard 101/102-Key or Microsoft Natural Keyboard
x0061 - x0061
System Speaker
x0062 - x0063
Motherboard Resource
x0064 - x0064
Standard 101/102-Key or Microsoft Natural Keyboard
x0065 - x006F
Motherboard Resource
x0070 - x0073
System CMOS/ Real Time Clock
x0074 - x007F
Motherboard Resource
x0080 - x0090
Direct Memory Access Controller
x0091 - x0093
Motherboard Resource
x0094 - x009F
Direct Memory Access Controller
x00A0 - x00A1
Programmable Interrupt Controller
x00A2 - x00BF
Motherboard Resource
x00C0 - x00DF
Direct Memory Access Controller
x00E0 - x00EF
Motherboard Resource
x00F0 - x00FF
Numeric Data Processor
x0170 - x0177
Intel(R) 82801DB Ultra ATA Storage Controller - 24CB
x0170 - x0177
Secondary IDE controller (dual fifo)
x01F0 - x01F7
Intel(R) 82801DB Ultra ATA Storage Controller - 24CB
x01F0 - x01F7
Primary IDE controller (dual fifo)
x0294 - x0297
Motherboard Resource
x02F8 - x02FF
Communication Port (COM2)
x0376 - x0376
Intel(R) 82801DB Ultra ATA Storage Controller - 24CB
x0376 - x0376
Secondary IDE controller (dual fifo)
x0378 - x037F
Printer Port (LPT1)
x03B0 - x03BB
Intel(R) 82852/82855 GM/GME Graphics Controller
x03C0 - x03DF
Intel(R) 82852/82855 GM/GME Graphics Controller
x03F0 - x03F5
Standard Floppy Controller
x03F6 - x03F6
Intel(R) 82801DB Ultra ATA Storage Controller - 24CB
x03F6 - x03F6
Primary IDE controller (dual fifo)
x03F7 - x03F7
Standard Floppy Controller
I/O Address Map
53
LV-671 User’s Manual
54
System Resource
x03F8 - x03FF
Communication Port (COM1)
x0400 - x04BF
Motherboard Resource
x04D0 - x04D1
Motherboard Resource
x0500 - x051F
Intel(R) 82801DB/DBM SMBus Controller - 24C3
x0778 - x077B
Printer Port (LPT1)
x0A78 - x0A7B
Motherboard Resource
x0B78 - x0B7B
Motherboard Resource
x0BBC - x0BBF
Motherboard Resource
x0CF8 - x0CFF
PCI Bus
x0E78 - x0E7B
Motherboard Resource
x0F78 - x0F7B
Motherboard Resource
x0FBC - x0FBF
Motherboard Resource
xA000 - xBFFF
Intel(R) 82801DB PCI Bridge - 244E
xB000 - xB03F
Intel(R) PRO/1000 MT Network Connection
xC000 - xC01F
Intel(R) 82801DB/DBM USB Universal Host Controller
xC400 - xC41F
Intel(R) 82801DB/DBM USB Universal Host Controller
xC800 - xC81F
Intel(R) 82801DB/DBM USB Universal Host Controller
xCC00 - xCC07
Intel(R) 82852/82855 GM/GME Graphics Controller
xD400 - xD4FF
Realtek AC'97 Audio
xD800 - xD83F
Realtek AC'97 Audio
xF000 - xF007
Primary IDE controller (dual fifo)
xF000 - xF00F
Intel(R) 82801DB Ultra ATA Storage Controller - 24CB
xF008 - xF00F
Secondary IDE controller (dual fifo)
I/O Address Map
LV-671 User’s Manual
System Resource
C.2 <Memory Address Map>
Range
Device
x00000000 - x0009FFFF
System board extension for ACPI BIOS
x000A0000 - x000AFFFF
Intel(R) 82852/82855 GM/GME Graphics Controller
x000B0000 - x000BFFFF
Intel(R) 82852/82855 GM/GME Graphics Controller
x000C0000 - x000CC7FF
Intel(R) 82852/82855 GM/GME Graphics Controller
x000CC800 - x000CFFFF
System board extension for ACPI BIOS
x000E0000 - x000EFFFF
System board extension for ACPI BIOS
x000F0000 - x000F7FFF
System board extension for ACPI BIOS
x000F8000 - x000FBFFF
System board extension for ACPI BIOS
x000FC000 - x000FFFFF
System board extension for ACPI BIOS
x00100000 - x1DFEFFFF
System board extension for ACPI BIOS
x1DFF0000 - x1DFFFFFF
System board extension for ACPI BIOS
xD0000000 - xD7FFFFFF
Intel(R) 82852/82855 GM/GME Graphics Controller
xD8000000 - xDFFFFFFF
Intel(R) 82852/82855 GM/GME Graphics Controller
xE0000000 - xE0000FFF
Ricoh RL5C475 CardBus Controller
xE0000000 - xE1FFFFFF
Intel(R) 82801DB PCI Bridge - 244E
xE1000000 - xE101FFFF
Intel(R) PRO/1000 MT Network Connection
xE1020000 - xE102FFFF
Intel(R) PRO/1000 MT Network Connection
xE2000000 - xE207FFFF
Intel(R) 82852/82855 GM/GME Graphics Controller
xE2080000 - xE20FFFFF
Intel(R) 82852/82855 GM/GME Graphics Controller
xE2100000 - xE21003FF
Intel USB 2.0 Enhanced Host Controller
xE2101000 - xE21011FF
Realtek AC'97 Audio
xE2102000 - xE21020FF
Realtek AC'97 Audio
xFEC00000 - xFECFFFFF
System board extension for ACPI BIOS
xFEE00000 - xFEEFFFFF
System board extension for ACPI BIOS
xFFB00000 - xFFB7FFFF
System board extension for ACPI BIOS
xFFB80000 - xFFBFFFFF
Intel(r) 82802 Firmware Hub Device
xFFF00000 - xFFFFFFFF
System board extension for ACPI BIOS
Memory Address Map
55
LV-671 User’s Manual
System Resource
C.3 <System IRQ and DMA Resource>
C3.1 IRQ
IRQ Number
0
56
Device
System Clock
1
Standard 101/102-Key or Microsoft Natural Keyboard
2
Programmable Interrupt Controller
3
Communication Port (COM2)
4
Communication Port (COM1)
5
Realtek AC'97 Audio
5
Intel(R) 82801DB/DBM SMBus Controller - 24C3
5
ACPI IRQ Holder for PCI IRQ Steering
6
Standard Floppy Controller
7
Printer Port (LPT1)
8
System CMOS/ Real Time Clock
9
Ricoh RL5C475 CardBus Controller
9
ACPI IRQ Holder for PCI IRQ Steering
9
SCI IRQ used by ACPI bus
10
Intel(R) 82801DB/DBM USB Universal Host Controller - 24C7
10
Intel(R) 82801DB/DBM USB Universal Host Controller - 24C2
10
Intel(R) 82852/82855 GM/GME Graphics Controller
10
ACPI IRQ Holder for PCI IRQ Steering
10
ACPI IRQ Holder for PCI IRQ Steering
11
Intel(R) PRO/1000 MT Network Connection
11
Intel USB 2.0 Enhanced Host Controller
11
Intel(R) 82801DB/DBM USB Universal Host Controller - 24C4
11
ACPI IRQ Holder for PCI IRQ Steering
11
ACPI IRQ Holder for PCI IRQ Steering
12
PS/2 Compatible Mouse Port
13
Numeric Data Processor
14
Primary IDE controller (dual fifo)
14
Intel(R) 82801DB Ultra ATA Storage Controller - 24CB
15
Secondary IDE controller (dual fifo)
15
Intel(R) 82801DB Ultra ATA Storage Controller - 24CB
System IRQ and DMA Resource
LV-671 User’s Manual
System Resource
C3.2 DMA
Channel
0
1
2
3
4
5
6
7
Device
(free)
(free)
Standard Floppy Disk Controller
(free)
Direct Memory Access Controller
(free)
(free)
(free)
System IRQ and DMA Resource
57
LV-671 User’s Manual
Contact Information
Any advice or comment about our products and service, or anything
we can help you please don’t hesitate to contact with us. We will do
our best to support you for your products, projects and business
Taiwan Commate Computer Inc.
Address
8F, No. 94, Sec. 1, Shin Tai Wu Rd., Shi Chih
Taipei Hsien, Taiwan
TEL
+886-2-26963909
FAX
+886-2-26963911
http://www.commell.com.tw
Website
TU
UT
[email protected] (General Information)
E-Mail
TU
UT
[email protected] (Technical Support)
TU
UT
Commell is our trademark of industrial PC division
58