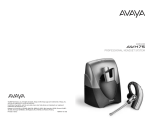
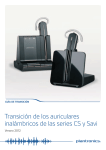
1
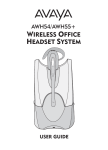
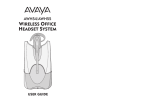
USER GUIDE
AWH75
PROFESSIONAL HEADSET SYSTEM
© 2006 Plantronics, Inc. All rights reserved. Avaya and the Avaya Logo are trademarks of Avaya, Inc.
and may be registered in certain jurisdictions.
IntelliStand, SupraElite, and the voice tube clear color trade dress are trademarks or registered
trademarks of Plantronics, Inc.
Patents U.S. 5,210,791; 6,735,453; D469,756; D505,413; D512, 984; Australia 147229; France 651,857651,865; Germany 40108524.4; GB Regd.Des.No. 2104923 and Patents Pending
73870-01 (05.06)
Printed in China
Table of Contents
Components
Components
3
Setup 1–5
6
IntelliStand
10
Charging
11
Positioning
11
Adjusting Fit
12
Multi-shift Pairing
12
Making/Answering/Ending Calls
13
Checking Compatibility
15
Volume
16
Headset Controls
18
Base Indicator Lights
19
Troubleshooting
20
Subscription
22
System Reset
22
Maintenance
22
Voice Tube Replacement
22
Battery Replacement
23
Accessing UCC
24
Technical Assistance
25
Regulatory Notices
25
Headset
Eartips
Spare Voice Tube
Base
AC Charger
25
Base
Telephone Cord
27
29
2
Ring Detector
D + M Filter Cord
30
28
24/46 Hookswitch
Control Cord
8400 Hookswitch
Control Cord
31
9600 Hookswitch
Control Cord
3
Components
Components
Base - Underside View
Base - Top View
Speak Volume
Major Adjust
Front:
Indicator Lights
Handset Jack
Talking (Green)
Power (Red)
AC Power
Adapter Jack
Charging (Amber)
Accessory Jack
Ring Detector Jack
Charging Cradle
Telephone Base Jack
EU24/ADJ
Telephone
Configuration Dial
Headset
Rear:
Speaking Volume
Minor Adjust
IntelliStand™
On/Off Switch
(to automate
call control button)
Listening Volume/Mute
Call Control Button
Talk Indicator Light
Voice Tube
Listening Volume
Major Adjust
Telephone Cord
NOTE: Please refer to the separate Safety Instructions booklet for
important product safety information prior to installation or use of
the product.
4
5
Setup 1
Setup 2
with AVAYA 2420, 4610SW, 4620, 4620SW,
4621SW, 4622SW, 4625SW 4630SW, 5420,
5610 and 5620 telephones*
with AVAYA 2410, 4630, 5410, 6416 D+M
and 6424 D+M telephones
1
1
26
5
7
7
24
24
4
Configuration
dial set to 3
28
28
25
24
25
4
25
27
29
24
27
Configuration
dial set to 1
29
See pages 3, 4,
and 5 for callout
of components
*24xx and 54xx phones require 4.0 firmware or greater.
46xx and 56xx phones require 1.8 firmware or greater.
6
7
Setup 3
Setup 4
with AVAYA 7403D, 7405D, 7407D, 7406,
8403, 8405, 8410D, 8411D, 8434, 8510ISDN
and 7506ISDN telephones
with AVAYA 9600 series telephones
1
7
1
24
7
24
25
27
31
24
4
27
30
4
Configuration
dial set to 3
8
27
24
Configuration
dial set to 1
31
27
9
Setup 5
Charging
with other AVAYA telephones
Caution: It is important for correct and safe operation that the base cord
is installed into the proper jack of your telephone. Follow these instructions
carefully, especially if your telephone has two jacks where the handset was
attached. Be sure to note or mark which jack was used for the handset.
1
1
6
7
1. Slide the headset into the charging
cradle. The earpiece with the microphone goes into the cradle.
2. Gently press down on the the headset to ensure that the headset is in
the correct position. The amber
charge indicator light on the base
will flash while charging and will
change to solid amber when fully
charged.
24
Configuration
Dial
{see page 15}
2
24
4
Optional
Lifter
25
Optional
Lifter
Be sure to connect
this plug into the
jack where the
handset was
connected.
S
ONIC
NT R
PLA
• 20 minutes = minimum charge
to continue setup
• 3 hours = full charge
Positioning
NICS
PLANTRO
12
Optional
Lifter
”
6“
IntelliStand™
IntelliStand™
off
IntelliStand
on
10
Set the IntelliStand
switch to IntelliStand off
( –) if you want to control
the handset lifter with
the call control button
on your headset.
Set the IntelliStand
switch to IntelliStand on
( = ) if you want the
handset to automatically
pick up when you take
the headset off the
charging cradle.
The minimum recommended separation distance is shown above.
IMPORTANT: Incorrect positioning can cause noise and interference problems.
11
Adjusting Fit
1
Making/Answering/Ending Calls
2
3
Setup 1, 2, 3 & 4
1
2
NOTE: Depending on your preference, you can
replace the pre-installed leatherette ear cushions
with the included alternative foam cushions.
1. Adjust headband to fit.
2. Rotate noise-canceling microphone until it is pointed towards your chin.
Multi-shift Pairing
To make a call, press call control button. Dial tone should sound through handset
(If not, check compatibility—see Setup 1, 2, 3 & 4). Dial using the telephone keypad.
2
1
To answer a call, press the call control button on the headset.
To end a call, press the call control button on the headset. If either you or the recipient
have trouble hearing, please check compatibility (Setup 1, 2, 3 & 4).
Enable
Disable
OR
OR
To make a call:
1. Take your handset off-hook. Dial tone should sound through handset (if not, check
compatibility—see page 15).
2. Press the call control button on the headset. The talk indicator lights on both the base
and the headset should go on, indicating a successful link. Dial tone should sound
through headset. Dial using the telephone keypad.
To answer a call:
1. Take the handset off-hook.
2. Press the call control button on the headset to answer a call.
To end a call, press the call control button on the headset, then hang up the handset.
NOTE: If either you or the recipient have trouble hearing, please check compatibility (page 15).
12
13
Making/Answering/Ending Calls
Checking Compatibility
NOTE: The compatibility setting of “1” is set at the factory to work with most phones.
However, if you do not hear a dial tone, if either you or the recipient is having trouble hearing,
or if you experience buzzing/hissing, please follow the directions below.
Setup 5
with Optional Handset Lifter
2
2
3
4
1
2
4
1
3
1
First, test proper set up of the handset lifter.
1. Press the call control button on headset to activate handset lifter and lift handset
from phone. Dial tone should sound if the handset is raised high enough.
2. If no dial tone, adjust handset lifter height switch or reposition the lifter under the
handset.
Use mounting tape to secure the handset lifter in position.
Adjust your telephone configuration dial on the base to position 3 for the following telephones: 2420, 4610SW, 4620, 4620SW, 4621SW, 4622SW, 4625SW, 4630SW, 5420, 5610,
5620, 7403D, 7405D, 7407D, 7406, 8403, 8405, 8410D, 8411D, 8434, 8510ISDN, and
7506ISDN.
Adjust the configuration dial to position 1 for the following telephones:
2410, 4630, 5410, 6416D+M, 6424D+M, and 9600 series.
2
1
If you cannot hear a dial tone through your headset, use a coin or small screwdriver to
turn the telephone configuration dial until you can. Make sure that a number is aligned
with the position indicator.
1. Place a call to someone you know.
2. While speaking, turn the configuration dial through the four positions.
3. Select the position that provides the best sound quality for both you and the recipient.
To make/answer a call:
1. Press the call control button to raise the handset lifter.
2. Use the telephone keypad to dial the number.
To end a call, press the call control button to lower the handset lifter. The handset will
return to the base.
If either you or the recipient have trouble hearing, please check compatibility (page 15).
14
15
Listening Volume
Speaking Volume
NOTE: Be sure to set your telephone’s volume at the mid range before adjusting
the AWH75 volume.
Minor Adjust
Major Adjust
Push on the “+” and “–” buttons to adjust
listening volume in minor incremental
adjustments.
NOTE: You must be in talk mode (i.e. on a
call) to adjust.
Use listening volume major adjust
control on the back of the base for
large incremental adjustments.
NOTE: 1 is the loudest setting.
4 is the lowest setting.
Minor Adjust
Major Adjust
Use the speaking volume minor adjust
control on the back of the base for
minor incremental adjustments.
Use the speaking volume major adjust
control on the bottom of the base for
large incremental adjustments.
NOTE: You must be in talk mode (i.e. on a
call) to adjust.
NOTE: A is the lowest setting.
B is the most common setting.
D is the loudest setting.
Headset Mute
To mute headset, long press the volume
down button (3 seconds). Press again to
unmute.
Talk indicator light on base will flash
while muted.
You will hear 3 rapid beeps every 30
seconds to indicate that mute is on.
16
17
Headset Controls
Base Indicator Lights
Indicator Lights
Talking/Muted (Green)
Power (Red)
Charging (Amber)
N/A
N/A
Feature
Action
Tone
Listening volume
minor adjust
Press + to increase
or – to decrease
Ascending/descending
tones, 2 tones at limit
Mute
Long press – key
(3 seconds)
3 mid tones = Mute
3 low tones = Unmute
NOTE: Tones repeat every
30 seconds when muted.
Answering/
ending calls
Short press call
control button
Mid tone
Low battery
warning
Replace headset in
charging cradle
1 tone every 10
seconds
Out of range
warning — when
on active call
Move closer to base
2 tones
Incoming call
notification*
Press call control
button to answer call
3 repetitive tones
Action
Light
Charging
Flashes amber
Fully Charged
Solid amber
Power
Solid red
Talking
Solid green
Muted
Flashes green
* Only works when using optional Handset Lifter.
18
19
Troubleshooting
Problem
Solution
I plugged everything in but
the lights won’t come on.
• Check that the AC charger jack is connected to the base unit.
• Check that the AC charger is securely connected to a
working wall outlet.
• Check that the AC charger is the model supplied by Avaya.
My headset does not work
with the base unit.
• Check that the phone is connected to the base unit’s phone
cord jack and it is pushed in firmly.
• Check that the phone handset is connected to the base’s
phone handset jack and it is pushed in firmly.
• Headset may be out of range of the base. Move closer to
base unit until headset is within range. Range varies with
office environment.
• Headset battery is dead. Recharge the battery by placing
the headset in the headset charging cradle. See page 11.
• Listening volume too low. Press the volume up button on the
headset. If the volume is still too low, select another
listening volume major adjust switch setting. See page 16.
• Incorrect configuration dial setting for your phone. Try other
phone configuration dial settings on the base unit. Ensure
the selected number is in line with the position indicator.
See page 15.
• You may have to resubscribe your headset with the base.
See page 22.
Callers cannot hear me.
I can hear a dial tone in
more than one
configuration position.
• Headset is muted. Press the mute button on headset to
unmute the microphone. See page 16.
• Speak volume is too low. Increase the speaking volume by
adjusting the speaking volume minor adjust buttons on the
base unit as described on page 17. If the volume is still too
low, select another speaking volume major adjust setting
as described on page 17.
• Incorrect configuration dial setting for your phone. Try
other phone configuration dial settings on the base unit.
Ensure the selected number is in line with the position
indicator. See page 15.
Phone will work in more than one configuration dial
position. Use the position that sounds best to you and the
person you call.
I cannot hear a dial tone in
any configuration position.
• Check that the phone is connected to the base’s phone
cord jack. See pages 6–10.
• Check that the phone handset is connected to the base’s
phone handset jack. See pages 6–10.
I cannot hear caller/dial tone.
• Check that all cords and jacks are connected correctly.
• Check that the base has power (red indicator light) and
the headset battery is fully charged.
• Try other phone configuration dial settings on the base
unit. Ensure the selected number is in line with the
position indicator. See page 15.
• Ensure you are in headset mode. Press the talk button to
select correct mode. The talk indicator light on the base
is green.
20
Troubleshooting
Problem
Sound in handset is
distorted/hear echo in
handset.
Solution
• Reduce speaking volume by changing the speaking volume
major adjust switch setting. See page 17.
• Point microphone towards your chin.
• Listening volume too high on phone. If your phone has a
handset volume control, lower this until the distortion
disappears.
• If the distortion is still present, lower the listening volume
adjust button on the headset. If the distortion persists,
select another listening volume major adjust switch
setting. See page 16.
• Base is too close to computer or phone. See page 11 for
proper positioning.
• System needs to be reset. Perform system reset as
described on page 22.
I can hear too much
background conversation,
noise or sidetone.
Speaking volume is too high. Lower the speaking volume by
adjusting the speaking volume minor adjust buttons on the
base. If the volume is still too high, select another speaking
volume major adjust setting. See page 17.
People I talk to can hear a
buzz in the background.
• AC charger is plugged into a power strip. Plug the AC
charger into the wall directly.
• Picking up another radio frequency. Call the Avaya Headset
Helpdesk for an RF filter.
Battery talk time performance
is significantly degraded even
after a full recharge.
Battery is going bad. Replace the battery with a new
battery pack. See page 23.
The call is dropped. (Talk
indicator on the headset and
base will not be illuminated.)
Headset lost subscription. Try to reset the system. See
page 22. If this does not work, try the resubscription
procedure on page 22.
I hear static that does not
allow me to communicate.
• Link to headset is lost. Try to reestablish a link by pressing
the headset talk button.
• Unplug the AC charger from the base for 7 seconds, then
plug back in.
• Reset the whole system as described on page 22.
I hear beeps in the headset.
• One beep every 10 seconds is caused by a low battery
warning. Recharge battery by returning it to the base
charge cradle for one to three hours until charge light stays
lit or quits blinking.
• Two beeps is an out of range warning. Move closer to the base.
• Three rapid beeps every 30 seconds indicates your mute is
on. Press the mute control dial once to turn mute off.
• When an optional lifter is connected, three repetitive beeps
indicate a call is coming into the headset. Press the talk
button on the headset to answer the call.
Handset lifter is installed
but does not lift handset.
Be sure the handset lifter power cord is firmly pushed into
the handset lifter jack on the base.
My handset lifter operates
every time I remove or
replace my headset in the
base unit.
IntelliStand is enabled. To disable the handset lifter, move
the IntelliStand switch to position .
21
Subscription
Battery Replacement
The headset and base unit are supplied subscribed to each other. However, if you wish
to use a replacement headset with the base unit, then the units must be re-subscribed.
To do so, please follow the instructions on page 12 for Multi-Shift Pairing.
The custom battery supplied should last 2– 3 years. When talk time decreases
significantly, you should replace the battery. Call Plantronics at (800) 544-4660
ext. 5538 for information on sending back to factory to install new battery.
System Reset
1
1
To recover from some fault conditions (refer to the Troubleshooting Section), you may need
to perform a system reset. To perform the system reset, follow this procedure:
2
1
3
4
4
1. Simultaneously press the call control button and both the "+" and "–" volume buttons
for 5 seconds. When the talk indicator light on the headset blinks, release all buttons.
2. Press the call control button again. The talk indicator light will again blink briefly to
indicate the headset is back to normal operation mode.
3. Disconnect the AC charger from the AC charging jack for 5 seconds.
4. Reconnect.
The system reset operation is complete.
Maintenance
1. Replace voice tube every 6–9 months (voice tube models only).
2. Unplug the unit from the telephone and the AC charger from the power source before cleaning.
3. Clean the equipment with a damp (not wet) cloth.
4. Do not use solvents or other cleaning agents.
22
23
Accessing the Avaya Unified
Communication Center (UCC)
from the AWH75
1. Connect the AWH75 to the Avaya telephone. Follow the instructions in
this user guide.
2. Ask your switch administrator to configure your telephone for ringdown to the UCC
in your telephone first call appearance.*
* Notes for switch administrators on configuring ringdown for your AVAYA telephones:
• Some phones allow for direct ringdown configuration, i.e. 2500.
• Other phones do not allow for direct ringdown configurations, i.e. 64XX. In order
to configure the ringdown in these phones, the administrator needs to:
• Create a phantom extension setup as a 2500 type.
(No real port has to be assigned.)
• Create a ringdown to the UCC for the phantom extension.
• Bridge the phantom extension to the telephone call appearance 1
(configure it as an “abrdg-appr” and setup the “Auto Select Any Idle Appearance”
to Yes).
Technical Assistance
The Avaya Headset Helpdesk is ready to assist you! Dial (800) 544-4779, or
visit the support section of our website at www.avayaheadsets.com.
Regulatory Notices
FCC Requirements – Part 15
This device complies with Part 15 of the FCC Rules. Operation is subject to the following two conditions:
1. This device may not cause harmful interference, and
2. This device must accept any interference received, including interference that may cause
undesired operation.
This equipment has been tested and found to comply with the limits for a Class B digital device, pursuant to Part 15 of the FCC Rules. These limits are designed to provide reasonable protection against
harmful interference in a residential installation. This equipment generates, uses, and can radiate
radio frequency energy and, if not installed and used in accordance with the instructions, may cause
harmful interference to radio communications. However, there is no guarantee that interference will
not occur in a particular installation. If this equipment does cause harmful interference to radio or
television reception which can be determined by turning the radio or television off and on, the user is
encouraged to try to correct interference by one or more of the following measures:
1. Reorient or relocate the receiving antenna.
2. Increase the separation between the equipment and receiver.
3. Connect the equipment into an outlet on another circuit.
4. Consult the dealer or an experienced radio/TV technician for help.
FCC Requirements – Part 68
This equipment complies with Part 68 of the FCC rules and the requirements adopted by ACTA. On
the exterior of this equipment is a label that contains a product identifier in the format
US:AAAEQ##TXXXX. If requested, this information must be provided to your telephone company.
A plug and jack used to connect this equipment to the premises wiring and telephone network must
comply with the applicable FCC Part 68 rules and requirements adopted by ACTA. A compliant telephone cord and modular plug is provided with this product. It is designed to be connected to a compatible jack that is also compliant. See installation instructions for details.
The REN is useful to determine the quantity of devices you may connect to your telephone line.
Excessive RENs on a telephone line may result in the devices not ringing in response to an incoming
call. In most, but not all areas, the sum of the RENs should not exceed five (5.0). To be certain of the
number of devices you may connect to your line, as determined by the REN, contact your local telephone company. For product approved after July 23, 2001, the REN for this product is part of the
product identifier that has the format US:AAAEQ##TXXXX. The digits represented by ### are the
REN without the decimal point. (For example, 03 represents a REN of 0.3.) For earlier producers, the
REN is separately shown on the label.
If this telephone equipment causes harm to the telephone network, the telephone company will notify you in advance that temporary discontinuance of service may be required. But if advance notice
isn’t practical, the telephone company will notify the customer as soon as possible. Also, you will be
advised of your right to file a complaint with the FCC if you believe it is necessary.
The telephone company may make changes in its facilities, equipment, operations, or procedures
that could affect the proper functioning of your equipment. If they do, you will be notified in advance
in order for you to make necessary modifications to maintain uninterrupted service.
If trouble is experienced with this unit, for repair or warranty information, please contact customer
service at (800) 544-4779. If the equipment is causing harm to the network, the telephone company
may request that you disconnect the equipment until the problem is resolved.
DO NOT DISASSEMBLE THIS EQUIPMENT: it does not contain any user serviceable components.
We recommend the installation of an AC surge arrester in the AC outlet to which this equipment is
connected. Telephone companies report that electrical surges, typically lighting transients, are very
destructive to customer terminal equipment connected to AC power sources.
Exposure to RF Radiation
24
The internal wireless radio operates within the guidelines found in radio frequency safety standards and
recommendations, which reflect the consensus of the scientific community. Independent studies have
shown that the internal wireless radio is safe for use by consumers. Visit www.avayaheadsets.com for
more information.
NOTE: Modifications not expressly approved by Avaya could void the user's authority to operate the
equipment.
25