1
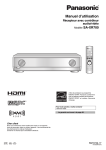
AV Control Receiver
Model No.
Table of contents
Before use
IMPORTANT SAFETY INSTRUCTIONS. . . . . . . . . . . . . . . . . . . . . . . 2
How to set up the Home Theater . . . . . . . . . . . . . . 3
Listening caution . . . . . . . . . . . . . . . . . . . . . . . . . . . . . . . . . . . . . . . . 3
Supplied accessories . . . . . . . . . . . . . . . . . . . . . . . . . . . . . . . . . . . . 3
Home Theater connections
As an ENERGY STAR® Partner∗,
Panasonic has determined that this
product meets the ENERGY STAR®
guidelines for energy efficiency.
∗For
Canada only: The word “Participant” is
used in place of the word “Partner”
Connections
Thank you for purchasing this product.
Before connecting, operating or adjusting this product, please
read the instructions completely.
Please keep this manual for future reference.
1. TV and DVD player . . . . . . . . . . . . . . . 4
• Basic connection. . . . . . . . . . . . . . . . . . . . . . . . 4
• High picture quality connection . . . . . . . . . . . . 5
• DVD ANALOG 6CH connection . . . . . . . . . . . . 5
2. Speakers . . . . . . . . . . . . . . . . . . . . . . . 6
Connections
• Bi-wiring connection . . . . . . . . . . . . . . . . . . . . 8
• Using speaker terminal B . . . . . . . . . . . . . . . . . 8
Settings
Dear customer
SA-XR55
Before use
Operating Instructions
3. AC power supply cord . . . . . . . . . . . . 8
•
•
•
•
In the U.S.A.: 1-800-211-PANA(7262)
In Canada: 905-624-5505
For U.S.A. only
The warranty can be found on page 26.
DVD recorder . . . . . 9 • VCR . . . . . . . . . . . . 9
Cable box or satellite receiver etc. . . . . . . . . . 10
CD player . . . . . . . 10 • Tape deck . . . . . . 10
Game player etc. . 10 • Antennas . . . . . . . 11
The remote control . . . . . . . . . . . 11
For Canada only
The warranty can be found on page 27.
Receiver settings - Basic . . . . . . 12
Settings - Test . . . . . . . . . . . . . . . 13
Basic Operations
Other connections
If you have any questions contact
Basic operations
Basic
Operations
Playback . . . . . . . . . . . . . . . . . . . . . . . . 14
Using Surround effects . . . . . . . . . . . . 15
Operations
Settings
Reference
Specifications . . . . . . . . . . . . . . . . . . . . . . . . . . . . . . . . . . . . . . . . . 25
Product Service . . . . . . . . . . . . . . . . . . . . . . . . . . . . . . . . . . . . . . . 25
Warranty (U.S.A.) . . . . . . . . . . . . . . . . . . . . . . . . . . . . . . . . . . . . . . 26
Warranty (Canada) . . . . . . . . . . . . . . . . . . . . . . . . . . . . . . . . . . . . . 27
Maintenance . . . . . . . . . . . . . . . . . . . . . . . . . . . . . . . . . . . . . . . . . . 27
Troubleshooting guide . . . . . . . . . . . . . . . . . . . . . . . . . . .Back cover
P
PC
RQT7994-2P
Reference
Operations
Control guide . . . . . . . . . . . . . . . . . . . . . . . . . . . . . . . . . . . . . . . . . 16
Sound quality/Sound field/Convenient functions . . . . . . . . . . . . 18
Making a recording . . . . . . . . . . . . . . . . . . . . . . . . . . . . . . . . . . . . . 20
Receiver settings - Advanced . . . . . . . . . . . . . . . . . . . . . . . . . . . 21
The radio . . . . . . . . . . . . . . . . . . . . . . . . . . . . . . . . . . . . . . . . . . . . . 22
Remote control mode . . . . . . . . . . . . . . . . . . . . . . . . . . . . . . . . . . . 24
Multi control menus and factory settings . . . . . . . . . . . . . . . . . . 24
IMPORTANT SAFETY INSTRUCTIONS
Reference
Operations
Basic Operations
Settings
Connections
Before use
Read these operating instructions carefully before using the unit. Follow the safety instructions on the unit and the applicable safety
instructions listed below. Keep these operating instructions handy for future reference.
1)
Read these instructions.
2)
Keep these instructions.
3)
Heed all warnings.
4)
Follow all instructions.
5)
Do not use this apparatus near water.
6)
Clean only with dry cloth.
7)
Do not block any ventilation openings. Install in accordance
with the manufacturer’s instructions.
8)
Do not install near any heat sources such as radiators, heat
registers, stoves, or other apparatus (including amplifiers)
that produce heat.
9)
Do not defeat the safety purpose of the polarized or
grounding-type plug. A polarized plug has two blades with
one wider than the other. A grounding-type plug has two
blades and a third grounding prong. The wide blade or the
third prong are provided for your safety. If the provided plug
does not fit into your outlet, consult an electrician for
replacement of the obsolete outlet.
CAUTION
RISK OF ELECTRIC SHOCK
DO NOT OPEN
CAUTION: TO REDUCE THE RISK OF ELECTRIC
SHOCK, DO NOT REMOVE SCREWS.
NO USER-SERVICEABLE PARTS
INSIDE.
REFER SERVICING TO QUALIFIED
SERVICE PERSONNEL.
The lightning flash with arrowhead symbol,
within an equilateral triangle, is intended to
alert the user to the presence of uninsulated
“dangerous voltage” within the product’s
enclosure that may be of sufficient magnitude
to constitute a risk of electric shock to
persons.
The exclamation point within an equilateral
triangle is intended to alert the user to the
presence of important operating and
maintenance (servicing) instructions in the
literature accompanying the appliance.
RQT7994
WARNING:
2
TO REDUCE THE RISK OF FIRE, ELECTRIC
SHOCK OR PRODUCT DAMAGE, DO NOT
EXPOSE THIS APPARATUS TO RAIN,
MOISTURE, DRIPPING OR SPLASHING AND
THAT NO OBJECTS FILLED WITH LIQUIDS,
SUCH AS VASES, SHALL BE PLACED ON
THE APPARATUS.
10) Protect the power cord from being walked on or pinched
particularly at plugs, convenience receptacles, and the
point where they exit from the apparatus.
11) Only use attachments/accessories
manufacturer.
specified
by
the
12) Use only with the cart, stand, tripod,
bracket, or table specified by the
manufacturer, or sold with the apparatus.
When a cart is used, use caution when
moving the cart/apparatus combination to
avoid injury from tip-over.
13) Unplug this apparatus during lightning storms or when
unused for long periods of time.
14) Refer all servicing to qualified service personnel. Servicing
is required when the apparatus has been damaged in any
way, such as power-supply cord or plug is damaged, liquid
has been spilled or objects have fallen into the apparatus,
the apparatus has been exposed to rain or moisture, does
not operate normally, or has been dropped.
THE FOLLOWING APPLIES ONLY IN THE U.S.A.
CAUTION:
This equipment has been tested and found to comply with the
limits for a Class B digital device, pursuant to Part 15 of the
FCC Rules.
These limits are designed to provide reasonable protection
against harmful interference in a residential installation. This
equipment generates, uses and can radiate radio frequency
energy and, if not installed and used in accordance with the
instructions, may cause harmful interference to radio
communications. However, there is no guarantee that
interference will not occur in a particular installation. If this
equipment does cause harmful interference to radio or
television reception, which can be determined by turning the
equipment off and on, the user is encouraged to try to correct
the interference by one or more of the following measures:
• Reorient or relocate the receiving antenna.
• Increase the separation between the equipment and
receiver.
• Connect the equipment into an outlet on a circuit different
from that to which the receiver is connected.
• Consult the dealer or an experienced radio/TV technician
for help.
Any unauthorized changes or modifications to this equipment
would void the user’s authority to operate this device.
This device complies with Part 15 of the FCC Rules.
Operation is subject to the following two conditions: (1) This
device may not cause harmful interference, and (2) this
device must accept any interference received, including
interference that may cause undesired operation.
The socket outlet shall be installed near the equipment and
easily accessible or the mains plug or an appliance coupler
shall remain readily operable.
How to set up the Home Theater
• Stereo playback
• Output a stereo source in
5.1-channel
Speakers combination
settings
Dolby Pro Logic
DTS NEO:6
SFC
• Stereo playback
You can create your desired environment by connecting other peripheral equipment.
Listen to your television or CDs in surround sound
Turn on.
or
or
Listening caution
• Select Dolby Pro Logic , DTS NEO:6 or SFC to listen to
stereo sound from your television or CDs in surround. (Sound is
output from all the speakers.)
• Depending on the speaker settings and input signal (audio
signal from the disc being played), this may not be possible.
(ápage 17)
Supplied accessories
Please check and identify the supplied accessories.
EST. 1924
Selecting fine audio equipment such as the unit you’ve just
purchased is only the start of your musical enjoyment. Now it’s
time to consider how you can maximize the fun and excitement
your equipment offers. This manufacturer and the Electronic
Industries Association’s Consumer Electronics Group want you
to get the most out of your equipment by playing it at a safe level.
One that lets the sound come through loud and clear without
annoying blaring or distortion-and, most importantly, without
affecting your sensitive hearing.
Before use
Dolby Pro Logic
DTS NEO:6
SFC
1 AC power supply cord
(K2CB2CB00018)
1 FM indoor antenna
(RSA0006-L)
1 AM loop antenna
(RSA0037)
2 Batteries
Connections
TV, DVD player, etc.
+
Speakers
• 2 Front speakers
• 1 Center speaker
• 2 Surround speakers
• 1 Subwoofer
• Output 5.1-channel sound
in 7.1/6.1-channel
• Output a stereo source in
7.1/6.1-channel
Settings
5.1-channel
surround
Speakers combination
settings
+
Surround back speaker
settings
Operations
Basic Operations
7.1/6.1-channel
surround
TV, DVD player, etc.
+
Speakers
• 2 Front speakers
• 1 Center speaker
• 2 Surround speakers
• 2 Surround back speakers
(1 Surround back speaker)
• 1 Subwoofer
Settings
These settings are necessary to
output the audio correctly.
Operations
Connections
Once you have established a comfortable sound level:
• Set the dial and leave it there.
Taking a minute to do this now will help to prevent hearing
damage or loss in the future. After all, we want you listening for a
lifetime.
1 Remote control
(EUR7722KM0)
Refer to the separate booklet,
“Remote
Control
Operation
Guide”, for remote control
operation details.
Use the numbers indicated in parentheses when asking for replacement
parts. (As of March 2005)
In the U.S.A. to order accessories, refer to “Accessory Purchases”
on page 26.
In Canada to order accessories, call the dealer from whom you have
made your purchase.
RQT7994
Sound can be deceiving. Over time your hearing “comfort level”
adapts to higher volumes of sound. So what sounds “normal”
can actually be loud and harmful to your hearing.
Guard against this by setting your equipment at a safe level
BEFORE your hearing adapts.
To establish a safe level:
• Start your volume control at a low setting.
• Slowly increase the sound until you can hear it comfortably and
clearly, and without distortion.
Reference
We recommend that you avoid prolonged exposure to excessive
noise.
3
Home Theater connections - 1. TV and DVD player
Basic connection
Preparation: Turn off all components before making any connections.
Connection cable (All cables are sold separately)
Audio cable
Video cable
Before use
Stereo connection cable
White (L)
Red (R)
You can enjoy analog sound.
Coaxial cable
Video connection cable
Use to connect to the TV MONITOR
terminals for a standard picture.
You can enjoy digital sound such
as Dolby Digital, DTS and PCM.
• Do not sharply bend the optical
fiber cable.
Optical fiber cable
TV or monitor
AUDIO OUT
R
L
This unit
LOOP
GND
Changing the digital
input settings
Basic Operations
VIDEO IN
DIGITAL AUDIO OUT
Settings
Connections
• Use an analog connection to enjoy sources that cannot be decoded on this unit and to record analog sources.
You can change the input
settings for the digital
terminals if necessary. Note
the equipment you have
connected to the terminals,
then change the settings.
(ápage 13)
FM ANT
EXT
AM ANT
(TV/STB) (DVD RECORDER)
LOOP ANT
OPTICAL1 OPTICAL2
GND
Y
PB
PR
Y
OUT
TV MONITOR
DIGITAL IN
PB
PR
Y
IN
DVD
COMPONENT VIDEO
OUT
(DVD)
(CD)
COAXIAL1 COAXIAL2 TV MONITOR
IN
DVD
OUT
IN
DVD RECORDER
VIDEO
PB
IN
DVD RECORDER
IN
VCR1
IN
TV/STB
OUT
TV MONITOR
Y
PB
PR
IN
TV/STB
IN
IN
DVD
DVD RECORDER
S VIDEO
IN
TV/STB
CENTER
L
L
R
OUT
SUBWOOFER
Operations
PR
R
IN
CD
REC(OUT) PLAY(IN) SUBWOOFER SURROUND FRONT
DVD/DVD 6CH
TAPE
AUDIO
OUT
IN
DVD RECORDER
IN
VCR1
IN
TV/STB
: Signal flow
DVD player
RQT7994
Reference
R
4
DIGITAL
AUDIO OUT
VIDEO
OUT
L
AUDIO OUT
CAUTION!
CAUTION!
DO NOT INSTALL OR PLACE THIS UNIT IN A
BOOKCASE, BUILT-IN CABINET OR IN ANOTHER
CONFINED SPACE. ENSURE THE UNIT IS WELL
VENTILATED. TO PREVENT RISK OF ELECTRIC SHOCK
OR FIRE HAZARD DUE TO OVERHEATING, ENSURE
THAT CURTAINS AND ANY OTHER MATERIALS DO NOT
OBSTRUCT THE VENTILATION VENTS.
Do not place anything on top of this unit or block the heat
radiation vents in any way. In particular, do not place tape
decks or CD/DVD players on this unit as heat radiated from it
can damage your software.
Peripheral equipment sold separately unless otherwise indicated.
To connect equipment, refer to the appropriate operating instructions.
High picture quality connection
Use this connection instead of the VIDEO IN/VIDEO OUT connections on page 4. A COMPONENT VIDEO connection provides a purer picture than a
S-VIDEO connection. Select a S-VIDEO or COMPONENT VIDEO connection to match the peripheral equipment.
Video input can only be output again through the same type of terminal.
Preparation: Turn off all components before making any connections.
Connection cable (All cables are sold separately)
Coaxial cable
Video connection cable
You can enjoy digital sound such
as Dolby Digital, DTS and PCM.
S-VIDEO connection cable
• Do not sharply bend the optical
fiber cable.
Optical fiber cable
DIGITAL
AUDIO
OUT
You can change the
input settings for the
digital terminals if
necessary. Note the
equipment you have
connected
to
the
terminals, thenGND
change
the settings.
(ápage 13)
FM ANT
LOOP
EXT
COMPONENT
VIDEO IN
Y
PB
Y
AM ANT
(TV/STB) (DVD RECORDER)
LOOP ANT
OPTICAL1 OPTICAL2
GND
S-VIDEO
IN
AUDIO OUT
R
PR
PB
PR
Y
OUT
TV MONITOR
DIGITAL IN
You can enjoy a higher quality picture than
with a video connection cable.
PB
PR
Y
IN
DVD
COMPONENT VIDEO
(DVD)
(CD)
OUT
COAXIAL1 COAXIAL2 TV MONITOR
IN
DVD
OUT
IN
DVD RECORDER
VIDEO
PB
PR
Y
PB
IN
DVD RECORDER
IN
TV/STB
IN
VCR1
L
PR
IN
TV/STB
OUT
TV MONITOR
IN
IN
DVD RECORDER
DVD
S VIDEO
IN
TV/STB
CENTER
L
L
R
R
IN
CD
REC(OUT) PLAY(IN) SUBWOOFER SURROUND FRONT
DVD/DVD 6CH
TAPE
AUDIO
OUT
IN
DVD RECORDER
IN
TV/STB
IN
VCR1
Operations
OUT
SUBWOOFER
This unit
: Signal flow
DVD player
Y
PB
PR
COMPONENT
VIDEO OUT
S-VIDEO
OUT
Reference
R
L
DIGITAL
AUDIO OUT
AUDIO OUT
DVD ANALOG 6CH connection
COMPONENT VIDEO
You can play high fidelity
sound such as DVD-Audio.
You need to make additional
connections for this.
áRefer to page 14 for
“Playing DVD-Audio”.
VIDEO OUT
(TV/STB) (DVD RECORDER)
LOOP ANT
OPTICAL1 OPTICAL2
GND
DIGITAL IN
(DVD)
(CD)
OUT
COAXIAL1 COAXIAL2 TV MONITOR
IN
DVD
OUT
IN
DVD RECORDER
VIDEO
IN
VCR1
T
CENTER
OUT
SUBWOOFER
L
L
R
R
IN
CD
REC(OUT) PLAY(IN) SUBWOOFER SURROUND FRONT
DVD/DVD 6CH
TAPE
AUDIO
OUT
IN
DVD RECORDER
IN
VCR1
FRONT
T
L
R
DVD player
SURROUND
CENTER
SUBWOOFER
RQT7994
TV or monitor
Use to connect to the TV MONITOR
terminals for a standard picture. Can also
be used to make a COMPONENT VIDEO
connection for a higher quality picture than
an S-VIDEO connection.
Connections
You can enjoy analog sound.
Basic Operations
White (L)
Red (R)
Before use
Video cable
Settings
Audio cable
Stereo connection cable
5
Home Theater connections - 2. Speakers
Front speakers (L: left/R: right)
Place on the left and right of the TV at seated ear height so that there is good coherency between
the picture and sound.
Center speaker
Place underneath or above the center of the TV. Aim the speaker at the seating area.
Surround speakers (LS: left/RS: right)
Before use
Place on the side of or slightly behind the seating area, about one meter (3 feet) higher than ear
level.
(
) Surround back speakers (SBL: left/SBR: right)
Place behind the seating area, about one meter (3 feet) higher than ear level.
SBL/SBR: Two surround back speakers.
SB:
One surround back speaker.
Subwoofer
RQT7994
Reference
Operations
Basic Operations
Settings
Connections
The subwoofer can be placed in any position as long as it is at a reasonable distance from the TV.
6
• The front, center, surround, and surround back speakers should be placed at approximately the
same distance from the seating position.
• The angles in the diagram are approximate.
• Set the distance of the speakers from the seating position if you cannot place them at the same
distances. (ápage 21)
• Speaker settings and placement should suit the number of speakers. (ápage 12)
nPlacement of speakers
The number of speakers
Speakers
7
2 Front speakers (Left/Right), 1 Center speaker,
2 Surround speakers (Left/Right), 2 Surround back speakers (Left/Right)
2 Front speakers (Left/Right), 1 Center speaker,
2 Surround speakers (Left/Right), 1 Surround back speaker
6
2 Front speakers (Left/Right), 2 Surround speakers (Left/Right),
2 Surround back speakers (Left/Right)
2 Front speakers (Left/Right), 2 Surround speakers (Left/Right),
1 Surround back speaker
5
2 Front speakers (Left/Right), 1 Center speaker,
2 Surround speakers (Left/Right)
4
2 Front speakers (Left/Right), 2 Surround speakers (Left/Right)
3
2 Front speakers (Left/Right), 1 Center speaker
2
2 Front speakers (Left/Right)
Placement
Peripheral equipment sold separately unless otherwise indicated.
To connect equipment, refer to the appropriate operating instructions.
Preparation: Turn off all components before making any connections.
Speaker cable (All cables are sold separately)
If using 4-mm plugs
Speaker terminals
Do not short-circuit
(+)
Monaural connection cable
(-)
Fully tighten the terminal, then
insert.
Connect the cables so “L”, “R”, “+” and “-” are correct.
Before use
Twist the wire
Speaker cable
Front A:
Center:
Surround:
Surround back:
6-8 Ω
6-8 Ω
6-8 Ω
6-8 Ω
Connections
Speaker impedance:
Front speakers
R
L
FM ANT
EXT
AM ANT
PB
FRONT A
PR
DIGITAL IN
CENTER
SURROUND
SURROUND BACK
HF
IN
V/STB
R
(TV/STB) (DVD RECORDER)
LOOP ANT
OPTICAL1 OPTICAL2
GND
FRONT B
BI-WIRE
LF
IN
RECORDER
O
L
R
L
R
L
R
L
IN
TV/STB
L
R
AC IN
Operations
CD
REC(OUT
TA
R
L
Surround
speakers
Active subwoofer
R
L
Surround back
speakers
Connect here if there is only one
surround back speaker.
Reference
IN
RQT7994
OUT
SUBWOOFER
Basic Operations
LOOP
GND
Settings
Center speaker
7
Home Theater connections - 2. Speakers
Preparation: Turn off all components before making any connections.
Bi-wiring connection
You can enjoy high quality sound by connecting to speakers designed for bi-wiring.
BI-WIRE compatible speakers have separate terminals for the high frequency and low frequency signals.
• When using a bi-wiring connection, select “BI-WIRE ” for “Bi-wiring settings”. (ápage 12)
áRefer to page 15 for “Enjoying BI-AMP sound”.
Before use
HF: High frequency
LF: Low frequency
Front speaker (R)
Front speaker (L)
Y
FRONT A
PR
FRONT B
BI-WIRE
LF
CENTER
SURROUN
HF
HF
HF
Connections
PB
IN
TV/STB
LF
R
OR
IN
IN
DVD
DVD RECORDER
S VIDEO
L
R
L
LF
R
IN
TV/STB
Speaker impedance:
6-8 Ω
Using speaker terminal B
For connection to a second pair of speakers. Use the A terminals to enjoy multi-channel sound.
If you select SPEAKERS B only, playback is 2-channel. When a multi-channel source is played, the sounds intended for all the speakers are played
through the front left and front right speakers (2CH MIX).
áRefer to page 14 for “Using SPEAKERS B”.
Basic Operations
Settings
BI-WIRE:
Y
Front speaker (R)
PB
FRONT A
PR
FRONT B
BI-WIRE
LF
CENTER
SURROUND
SURROUND BAC
HF
Front speaker (L)
IN
TV/STB
R
IN
IN
DVD
DVD RECORDER
S VIDEO
L
R
L
R
L
Speaker impedance:
Operations
Reference
AC
Front A and B: 6-8 Ω
Front B:
6-8 Ω
Home Theater connections - 3. AC power supply cord
FRONT B
CENTER
SURROUND
SURROUND BACK
Household AC outlet
(AC 120 V/60 Hz)
HF
R
L
R
L
R
L
AC power supply cord
(included)
RQT7994
AC IN
8
R
IN
TV/STB
Connect this cord after all other
cables and cords are connected.
Note
• The included AC power supply
cord is for use with this unit only.
Do not use it with other
equipment.
• Do not use an AC power supply
cord from any other type of
equipment with this unit.
• If the unit is left unplugged for
longer than two weeks, all
settings will revert to the factory
settings. Perform the settings
again if this occurs.
Other connections
Peripheral equipment sold separately unless otherwise indicated.
To connect equipment, refer to the appropriate operating instructions.
DVD recorder
DIGITAL
AUDIO OUT
AUDIO IN
R
L
AUDIO OUT VIDEO
IN
R
L
VIDEO
OUT
FM ANT
Y
AM ANT
PB
PR
Y
PB
OUT
TV MONITOR
PR
Y
IN
DVD
COMPONENT VIDEO
PB
PR
Y
IN
DVD RECORDER
PB
FRONT A
PR
LF
IN
TV/STB
R
(TV/STB) (DVD RECORDER)
LOOP ANT
OPTICAL1 OPTICAL2
GND
DIGITAL IN
(DVD)
(CD)
OUT
COAXIAL1 COAXIAL2 TV MONITOR
IN
DVD
OUT
IN
DVD RECORDER
VIDEO
IN
VCR1
IN
TV/STB
OUT
TV MONITOR
IN
IN
DVD
DVD RECORDER
S VIDEO
L
IN
TV/STB
L
L
R
OUT
SUBWOOFER
Connections
CENTER
R
IN
CD
REC(OUT) PLAY(IN) SUBWOOFER SURROUND FRONT
TAPE
DVD/DVD 6CH
AUDIO
OUT
IN
DVD RECORDER
IN
VCR1
IN
TV/STB
nHigh picture quality connection
Use this connection instead of the VIDEO IN/VIDEO OUT
connections (áabove). A COMPONENT VIDEO connection
provides a purer picture than a S-VIDEO connection.
Select a S-VIDEO or COMPONENT VIDEO connection to
match the peripheral equipment.
Video input can only be output again through the same type of
terminal.
PB
PR
Y
PB
PR
Y
PB
Y
PR
PB
IN
DVD
COMPONENT VIDEO
IN
DVD RECORDER
IN
TV/STB
PR
COMPONENT
VIDEO OUT
S-VIDEO OUT
OUT
IN
DVD RECORDER
VIDEO
IN
VCR1
IN
TV/STB
OUT
TV MONITOR
IN
IN
DVD
DVD RECORDER
S VIDEO
IN
TV/STB
DVD
recorder
Settings
You can change the input
settings for the digital
terminals if necessary.
Note the equipment you
have connected to the
terminals, then change
the settings. (ápage 13)
EXT
LOOP
GND
Before use
DVD recorder
This unit
DVD OUT terminals
DIGITAL AUDIO OUT
VIDEO OUT
OPTICAL 2 (DVD RECORDER)
DVD RECORDER VIDEO IN
DVD/VHS COMMON OUT terminals
AUDIO OUT
VIDEO OUT
VCR1 AUDIO IN
VCR1 VIDEO IN
áRefer to page 14 for “Using a DVD recorder with built-in VCR”.
Operations
nConnection to equipment with DVD analog 5.1CH OUT terminals
Connect as shown in “DVD ANALOG 6CH connection” (ápage 5), replacing the DVD player with a DVD recorder.
áRefer to page 14 for “Playing DVD-Audio”.
VCR (Playback only)
VCR
EXT
LOOP
GND
FM ANT
AM ANT
Y
PB
PR
Y
OUT
TV MONITOR
PB
PR
Y
IN
DVD
COMPONENT VIDEO
PB
PR
IN
DVD RECORDER
Y
PB
PR
IN
TV/STB
Reference
DVD recorder with built-in VCR
Basic Operations
nConnection to a DVD recorder with built-in VCR
VIDEO OUT
(TV/STB) (DVD RECORDER)
LOOP ANT
OPTICAL1 OPTICAL2
GND
DIGITAL IN
(DVD)
(CD)
OUT
COAXIAL1 COAXIAL2 TV MONITOR
IN
DVD
OUT
IN
DVD RECORDER
VIDEO
IN
VCR1
IN
TV/STB
OUT
TV MONITOR
IN
IN
DVD
DVD RECORDER
S VIDEO
IN
TV/ST
CENTER
L
L
R
R
R
IN
CD
REC(OUT) PLAY(IN) SUBWOOFER SURROUND FRONT
TAPE
DVD/DVD 6CH
AUDIO
OUT
IN
DVD RECORDER
IN
VCR1
IN
TV/STB
AUDIO OUT
RQT7994
OUT
SUBWOOFER
L
9
Peripheral equipment sold separately unless otherwise indicated.
To connect equipment, refer to the appropriate operating instructions.
Other connections
Cable box or satellite receiver etc.
When connecting to the video terminals, connect to the VIDEO, S VIDEO or COMPONENT VIDEO terminals to match the TV’s connection (ápages 4, 5) .
Video input can only be output again through the same type of terminal.
Before use
Y
You can change the input settings for the digital
terminals if necessary. Note the equipment you
have connected to the terminals, then change the
LOOP
settings.GND
(ápage
13)EXT
Y
P
P
Y
P
B
FM ANT
AM ANT
R
B
OUT
TV MONITOR
PB
PR
PR
Y
IN
DVD
COMPONENT VIDEO
PB
PR
Y
IN
DVD RECORDER
PB
COMPONENT
VIDEO OUT
Cable box
or satellite
receiver
etc.
PR
VIDEO OUT
IN
TV/STB
S-VIDEO OUT
Connections
(TV/STB) (DVD RECORDER)
LOOP ANT
OPTICAL1 OPTICAL2
GND
DIGITAL IN
(DVD)
(CD)
OUT
COAXIAL1 COAXIAL2 TV MONITOR
IN
DVD
OUT
IN
DVD RECORDER
VIDEO
IN
VCR1
IN
TV/STB
OUT
TV MONITOR
IN
IN
DVD
DVD RECORDER
S VIDEO
IN
TV/STB
CENTER
L
L
L
R
R
R
OUT
SUBWOOFER
REC(OUT) PLAY(IN) SUBWOOFER SURROUND FRONT
TAPE
DVD/DVD 6CH
AUDIO
IN
CD
OUT
IN
DVD RECORDER
IN
VCR1
IN
TV/STB
Y
PB
AUDIO OUT
DIGITAL
AUDIO OUT
Settings
CD player
You can change the input settings for the digital
terminals if necessary. Note the equipment you
have connected
to the
LOOP
EXT terminals, then change the
GND
Y
P
P
Y
P
settings. (ápage 13)
B
Basic Operations
FM ANT
AM ANT
(TV/STB) (DVD RECORDER)
LOOP ANT
OPTICAL1 OPTICAL2
GND
B
OUT
TV MONITOR
DIGITAL IN
PR
IN
DVD
COMPONENT VIDEO
(CD)
OUT
(DVD)
COAXIAL1 COAXIAL2 TV MONITOR
IN
DVD
OUT
IN
DVD RECORDER
VIDEO
PR
Y
IN
DVD RECORDER
IN
VCR1
IN
TV/STB
PB
CD player
PR
IN
TV/STB
OUT
TV MONITOR
IN
IN
DVD
DVD RECORDER
S VIDEO
DIGITAL
AUDIO OUT
IN
TV/S
CENTER
L
L
L
R
R
R
OUT
SUBWOOFER
REC(OUT) PLAY(IN) SUBWOOFER SURROUND FRONT
DVD/DVD 6CH
TAPE
AUDIO
IN
CD
OUT
IN
DVD RECORDER
IN
VCR1
IN
TV/STB
EXT
LOOP
FM ANT
Y
AM ANT
PB
PR
Y
OUT
TV MONITOR
PB
PR
Y
IN
DVD
COMPONENT VIDEO
PB
PR
IN
DVD RECORDER
Y
PB
Tape deck
P
IN
TV/STB
L
(TV/STB) (DVD RECORDER)
LOOP ANT
OPTICAL1 OPTICAL2
GND
DIGITAL IN
(DVD)
(CD)
OUT
COAXIAL1 COAXIAL2 TV MONITOR
IN
DVD
OUT
IN
DVD RECORDER
VIDEO
IN
VCR1
IN
TV/STB
OUT
TV MONITOR
IN
IN
DVD
DVD RECORDER
S VIDEO
IN
TV/S
R
CENTER
Reference
LINE OUT
Tape deck
GND
Operations
R
OUT
SUBWOOFER
L
L
L
R
R
R
IN
CD
REC(OUT) PLAY(IN) SUBWOOFER SURROUND FRONT
TAPE
DVD/DVD 6CH
AUDIO
OUT
IN
DVD RECORDER
IN
VCR1
REC (IN)
PLAY (OUT)
IN
TV/STB
Game player etc.
These terminals are convenient for equipment you want to connect only temporarily. Select “VCR 2 ” for input.
VIDEO OUT
SPEAKERS
A
B
DUAL AMP BI-AMP
RQT7994
POWER
10
BAND
PRESET
TUNE
L
R
VCR 2
VIDEO IN
L
AUDIO IN R
AUDIO OUT
Game player
etc.
Antennas
AM loop antenna (included)
Keep the antenna cord away
from tape decks, DVD players,
and other cords.
2
FM indoor antenna (included)
Fix the other end of the antenna
where reception is best.
1
LOOP
GND
FM ANT
EXT
AM ANT
Y
PB
PR
Y
OUT
TV MONITOR
P
IN
DV
Before use
Adhesive tape
Red
IN
DVD
OU
DV
CENTER
3
Black
L
LOOP ANT
GND
R
OUT
SUBWOOFER
IN
CD
REC(OUT) PLAY(IN) SUBWOOFER SURROUND FRONT
DVD/DVD 6CH
TAPE
AUDIO
FM outdoor antenna (not included)
• Disconnect the FM indoor antenna.
• The antenna should be installed by a competent
technician.
• Twist the coaxial cable’s shield braid firmly and
connect it to the GND terminal.
FM outdoor
antenna
Shield braid Core wire
20 mm (25/32")
75Ω GND
10 mm (3/8")
2
1
OU
DV
75Ω coaxial
cable
FM ANT
The remote control
Batteries
Use
Aim at the sensor, avoiding obstacles, at a maximum range of 7m (23
feet) directly in front of the unit.
1
3
Remote control signal sensor
2
7 meters (23 feet)
(R6/LR6, AA)
• Insert so the poles (+ and –) match those in the remote control.
• Do not use rechargeable type batteries.
Transmission window
Settings
(CD)
OUT
(DVD)
COAXIAL1 COAXIAL2 TV MONITOR
Basic Operations
DIGITAL IN
Operations
(TV/STB) (DVD RECORDER)
LOOP ANT
OPTICAL1 OPTICAL2
GND
Reference
2
• Keep the transmission window and the unit’s sensor free from dust.
• Operation can be affected by strong light sources, such as direct
sunlight, and the glass doors on cabinets.
RQT7994
1
Connections
White
11
Receiver settings - Basic
Change the settings to tailor your equipment to
the environment in which you are using it.
• Before making any changes, read the following descriptions of the
settings and refer to the instructions for the speakers and equipment.
Use the MULTI CONTROL menus to change the settings.
(áleft “Basic operations with the MULTI CONTROL”)
1
Enter the MULTI CONTROL.
MULTI
CONTROL
CANCEL
Basic operations with the MULTI CONTROL
INPUT SELECTOR
Before use
Turn to change.
ENTER
SETUP 1
and press [ENTER].
Press to enter.
Select the settings to change. (ábelow, page 13)
MULTI
CONTROL
CANCEL
n To return to the previous setting/To cancel
Press.
Turn on.
Speakers combination settings
Set the speaker combination connected to this unit.
The speaker combination has to be set in order for the sound to be output
properly.
2
Select “SPKR SET ” (SPEAKER SET) and press
[ENTER].
3
Select if you have connected a subwoofer or not
and press [ENTER].
SUBW NO: You have not connected one.
SUBW YES: You have connected one.
4
Select the speaker combination connected to
this unit and press [ENTER].
L CR
L_R
L CR
L_R
L CR
L_R
Settings
Connections
Select “SETUP 1 ”
(“BASIC SETUP ” scrolls once)
INPUT SELECTOR
Basic Operations
5
S
S
S
S
_
_
SB:
SB:
_ _:
_ _:
_ _:
_ _:
All speakers connected
No center speaker
No surround back speakers
No center and surround back speakers
No surround and surround back speakers
Only front speakers
Select another setting
Finish setting
Press [MULTI CONTROL, CANCEL] 2 times to select “EXIT ”
and press [ENTER].
Bi-wiring settings
Operations
Select this when you connect bi-wire compatible front speakers. (ápage 8)
2
Select “FRNT L/R ” (FRONT L/R) and press
[ENTER].
3
Select “BI-WIRE ” and press [ENTER].
4
NORMAL: Normal speakers
BI-WIRE: Bi-wire compatible speakers
Select another setting
Finish setting
Press [MULTI CONTROL, CANCEL] 2 times to select “EXIT ”
and press [ENTER].
Surround back speaker settings
Reference
This is displayed when you connected surround back speakers in
“Speakers combination settings” (áabove).
Select this to set the number of surround back speakers.
RQT7994
• Any changes to settings remain as set even if the power is turned off.
áFor more detailed information on settings refer to “Receiver settings Advanced” on page 21.
áPage 24 “Multi control menus and factory settings”.
12
2
Select “SB SPKR ” (SURROUND BACK SPEAKER)
and press [ENTER].
3
Select the number of speakers and press
[ENTER].
1 SPKR: If you connect one surround back speaker.
2 SPKRS: If you connect two surround back speakers.
4
Select another setting
Finish setting
Press [MULTI CONTROL, CANCEL] 2 times to select “EXIT ”
and press [ENTER].
Settings - Test
Check that sound is output from the connected
speakers.
L: Front left
C: Center
R: Front right
RS: Surround right
LS: Surround left
SBL: Surround back left
SBR: Surround back right
SB: Surround back (If you connect one surround back speaker)
SW: Subwoofer
1
SPEAKERS
A
B
Change these settings to suit the connections you have made to the
optical (OPT) and coaxial (COAX) digital input terminals. (ápages 4, 5, 9
and 10)
You can only allocate one piece of equipment per terminal.
4
Change the setting and press
[ENTER].
OPT 1,
OPT 2,
COAX 1,
COAX 2
Repeat steps 3 and 4 to set other input
positions.
5
2
Select another setting
If there is no output from a connected speaker,
Stop the test signal (step 6) and check the
connections (ápages 6 to 8) and settings (ápage 12,
left) again.
Finish setting
Input signal settings
A test signal is output from one speaker at a time for two seconds
in the following order.
• Speakers set as “_” (not connected) in “Speakers combination
settings” (ápage 12) are skipped.
Press [MULTI CONTROL, CANCEL] several times to return to
step 2 in the operations across and select another setting.
Press [MULTI CONTROL, CANCEL] several times to select
“EXIT ” and press [ENTER].
Check the test signal output.
3
Adjust the main volume.
VOL- 50dB
This unit automatically detects whether input is digital or analog, but you
can fix the input mode. Select “AUTO ” when it is not necessary to fix the
signal.
2
Select “IN MODE ” (INPUT MODE) and press [ENTER].
3
Select the input position and press
[ENTER].
4
Change the setting and press [ENTER].
(MIN)
4
Select the speaker channel.
5
Adjust the level.
TV/STB,
DVR, DVD,
CD
AUTO:
Automatically detects the input signal and plays.
(In “AUTO”, the unit distinguishes the digital
signals then the analog signals.)
ANALOG: Fixes the input signal to analog and plays.
DIGITAL: Fixes the input signal to digital and plays.
PCM FIX: Fixes the input signal to PCM and plays.
• Adjust center, surround and surround back output to the same
apparent level as the front speakers.
C
+4dB
Repeat steps 3 and 4 to set other input positions.
5
(MAX)
SW
Select another setting
Finish setting
Press [MULTI CONTROL, CANCEL] several times to select
“EXIT ” and press [ENTER].
Note regarding PCM FIX mode
In rare cases, the unit may have trouble recognizing the digital signals on discs.
With the PCM signals on CDs, this may cause the beginning of a track to
be cut off. Engage the PCM FIX mode if this occurs.
When PCM FIX mode is on, the unit cannot process other signals. This
may cause noise to be output. Select another mode in this case.
• This setting is not necessary when playback is normal.
• When an input position is set to PCM FIX, and the input signals are not
from a PCM source, “PCM FIX ” flashes on the display.
(MIN)
(MAX)
Factory settings: 0 dB
10
Factory setting: 10
• Approximately two seconds after adjusting the level, a test
signal is again output from each speaker in order.
Press [MULTI CONTROL, CANCEL] several times to return to
step 2 in the operations across and select another setting.
Repeat steps 4 and 5 to adjust the level of each
speaker.
6
Connections
TV/STB,
DVR, DVD,
CD
Settings
Select the input position and press
[ENTER].
Basic Operations
3
• If you select SPEAKERS B only, the test signal will not be output.
Operations
Select “D-INPUT ” (DIGITAL INPUT) and press
[ENTER].
-When using a BI-WIRE connection-
Reference
2
Turn SPEAKERS A on.
Stop the test signal.
RQT7994
Changing the digital input terminals
Before use
• Adjust so output level from each speaker is balanced with the
output level from the front speakers.
13
Basic operations
Playback
1
Turn on.
POWER
2
Turn SPEAKERS A on.
SPEAKERS
A
B
Before use
-When using a BI-WIRE connection• If you use a BI-WIRE connection for the front speakers, select
“BI-WIRE ” in “Bi-wiring settings”. (ápage 12)
Connections
3
Select input.
INPUT SELECTOR
• If “DVR ” is selected, “DVD RECORDER ” scrolls once on the
display.
• If you watch a DVD etc., change to video input on the television.
n Using a DVD recorder with built-in VCR
Settings
To play a DVD: Select “DVR ”
To play a video cassette: Select “VCR 1 ”
4
Start play of the source.
5
Adjust the volume.
• The unit sets the sound mode (stereo or multichannel) to suit the input signal.
• Select the desired surround effects. (ápage 15)
VOLUME
Basic Operations
VOL- 50dB
DOWN
UP
(MIN)
(MAX)
• When you finish listening
Be sure to reduce the volume and press [8, POWER] to turn the
unit to standby.
Reference
Operations
Various kinds of playback
n Playing DVD-Audio
n Using SPEAKERS B
Playing DVD ANALOG 6CH
áRefer to page 8 for connecting SPEAKERS B.
Sound is output from the speaker connected to
the FRONT B terminals on this unit.
You can enjoy high quality sound with DVD-Audio.
áRefer to page 5 for “DVD ANALOG 6CH connection”.
Preparation:
• Turn SPEAKERS on.
DVD ANALOG 6CH only works when either SPEAKERS A or BI-WIRE
is on.
• Set the selector to “DVD ”. (áabove)
• When you connect to a DVD recorder, playback is not possible if “DVR ”
is selected for input. Select “DVD ”.
Press and hold until “DVD 6CH ” is displayed.
To cancel, press and hold until “DVD ” is displayed.
• Speaker settings (ápages 12, 21) are ineffective. Change
the settings on the DVD player if necessary.
Enjoying high quality 2-channel sound
You can enjoy high quality stereo sound with 192 kHz 2-channel DVD-Audio.
1. Cancel the “DVD 6CH ” setting. (áabove)
RQT7994
2. Set the input signal to “ANALOG ” in “Input signal
settings”. (ápage 13)
14
To turn off the sound from the speaker connected to the A terminals,
press [SPEAKERS A] and cancel A .
If you select SPEAKERS B only:
• Playback is in stereo (2-channel).
• When a multi-channel source is played with digital connections,
“2CH MIX” is displayed and the sounds intended for all the speakers are
played through the front speakers.
When DVD ANALOG 6CH is selected, the sound from the front 2 channels is output.
If you select SPEAKERS B only, the following are set automatically
irrespective of settings selected in speaker settings (ápages 12, 21).
• Speaker size: LARGE
• Subwoofer: NO
(Bass is output from the front speakers.)
n Using headphones
Press to turn all the speakers off.
Reduce the volume and connect the
-When using a BI-WIRE connection- headphones. The sound from the
headphones automatically becomes
2CH MIX.
When DVD ANALOG 6CH is selected, the sound from the front 2
channels is output.
Select.
DOLBY EX: Use this mode when playing movies.
MUSIC:
n To cancel
Use this mode when playing music.
n You can make further adjustments to the
effect of “MUSIC ” mode. (ápage 18)
Enjoy a dance hall like audio effect.
DRAMA:
Best suited for dialogues in drama
movies.
ACTION:
Best suited for action movies with
impact.
SPORTS:
Enjoy a feeling like being at a live
sporting event.
MUSICAL: Enjoy a feeling like being at a live
musical performance.
Use DTS NEO:6 to play 2-channel sources through multi-channels. (If all
speakers are set to “LARGE ” in “Speaker settings” (ápage 21), there is
no output from the subwoofer.) You can also enjoy Dolby Digital 5.1channel and DTS 5.1-channel sources in 6.1-channel.
CINEMA: Use this mode when playing movies.
MUSIC:
n To cancel
Recreates natural sound ambience
and direction.
DANCE:
Select.
Using DTS NEO:6
Select.
Best suited to enhance vocals.
Use this mode when playing music.
n You can make further adjustments to the
effect of “MUSIC ” mode. (ápage 18)
GAME:
Enjoy games with greater audio impact.
n After pressing [MUSIC] or [AV/MOVIE], the mode changes even if
you press
.
n To cancel
n You can make further adjustments to
these effects. (ápage 18)
For your reference
Depending on the combination of input source and SFC mode, sound
may be distorted. In this case, decrease the SFC speaker level or effect
(ápage 18). Try another SFC mode (áabove).
When the digital input S indicator lights with Dolby Digital 2-channel and
DTS 2-channel sources, you can only use “CINEMA ” mode. When it does not
light, you can only use “MUSIC ” mode. (ápage 16 “Display indicators”)
Other playback functions
n DUAL AMP function
Enjoy a higher quality sound during stereo (2-channel) playback
by playing the sound through the amplifiers used for multichannel sound sources.
DUAL AMP does not work in the following cases.
• When all the speakers are turned off
• During multi-channel playback
• When you are using Dolby Pro Logic
, DTS NEO:6 or SFC (áabove)
When the DUAL AMP function does not work, the DUAL AMP lamp
goes out.
n Enjoying BI-AMP sound
(When the front speakers are BI-WIRE compatible)
The BI-AMP function uses separate amplifiers for the high
frequency and low frequency sounds to the BI-WIRE speakers
during playback. This produces a higher quality sound.
This function works when using a BI-WIRE connection and
input is analog (excluding DVD 6CH) or a 2-channel PCM signal.
áRefer to page 8 for connecting BI-WIRE speakers.
• Select “BI-WIRE ” for “Bi-wiring settings”. (ápage 12)
For your reference
When playing video sources connected to DVD RECORDER.
The picture remains on the screen even if you select “TUNER ”, “CD ” or “TAPE ”.
Connections
pop and rock music.
VOCAL:
JAZZ:
Settings
POP/ROCK: Best suited for dynamic sound such as
• You can only use “GAME ” mode when the input signal is 2-channel stereo.
-When “1 SPKR ” is selected in “Surround back speaker settings”
(ápage 12) and there is a Dolby Digital 5.1-channel, DTS 5.1-channel,
or Dolby Digital Surround EX sources-
Imparts the reflection and spread of a
large concert hall.
Digital signals that can be played on this unit
n Dolby Digital, including Dolby Digital Surround EX
DVD etc.
This is digital surround format developed by Dolby Laboratories. Dolby
Digital Surround EX adds a surround back channel to the traditional 5.1channel format of Dolby Digital. This creates a sound with greater
presence.
n DTS including DTS-ES or DTS 96/24
DVD etc.
This digital surround system was developed by DTS (Digital Theater
Systems, Inc.). DTS-ES adds a surround back channel to the traditional
5.1-channel format of DTS. This creates a sound with greater presence.
DTS 96/24 provides 96 kHz sound at up to 24 bits. The 96 kHz/24 bit
high frequency sounds are played through multiple channels.
Basic Operations
MOVIE: Use this mode when playing movies.
MUSIC: Use this mode when playing music.
GAME: Enjoy games with greater audio impact.
LIVE:
Operations
Select.
Reference
Select.
Using the Sound Field Control (SFC)
Enjoy an enhanced sound experience with greater presence and spread
by using these SFC modes with Dolby Digital, DTS, PCM or analog stereo
sources. Choose from the following modes.
n PCM signal
CD, DVD-Audio etc.
This unit’s DIGITAL IN COAXIAL1 terminal can play up to 192 kHz and
the other DIGITAL IN terminals can play up to 96 kHz.
n It cannot decode
• Other digital signals, such as MPEG
• Dolby Digital RF signals from a laser disc player
RQT7994
Using Dolby Pro Logic
Enjoy stereo (2-channel) sources through multiple channels. (If you have
not connected surround back speakers, play is in Dolby Pro Logic
(ápage 12 “Speakers combination settings”).)
You can also enjoy Dolby Digital 5.1-channel and DTS 5.1-channel
sources in 7.1(6.1)-channel.
Before use
Using Surround effects
Adding surround effects.
• This unit does not automatically recognize the Dolby Digital Surround EX signal. The surround back channel is added by using Dolby Pro Logic .
• Dolby Pro Logic
, DTS NEO:6 and SFC modes remain in effect until you change them.
• You cannot select Dolby Pro Logic
, DTS NEO:6 and SFC at the same time.
• If you make any settings in “Speakers combination settings”, “Surround back speaker settings” or “Speaker settings” (ápages 12, 21) when using
surround effects, the surround effects are canceled.
áRefer to page 17 for information about limitations on using surround effects.
15
Control guide
Main unit
[8, POWER]
[SPEAKERS, A, B]
[MULTI CONTROL, CANCEL]
[VOLUME]
Press to switch the unit from on to standby mode
or vice versa. In standby mode, the unit is still
consuming a small amount of power.
For selecting speakers A or B.
Turning
the
speakers
off
automatically
engages
the
STEREO/2CH MIX mode (when
listening through headphones, for
example).
Press to enter Multi control or cancel.
Volume
control.
Standby indicator [^]
Before use
When the unit is connected to the AC mains
supply, this indicator lights up in standby mode
and goes out when the unit is turned on.
[ENTER]
Enters setting in Multi control.
[INPUT SELECTOR]
For selecting input.
Selects each setting in Multi control.
INPUT SELECTOR
SPEAKERS
A
B
POWER
DUAL AMP BI-AMP
BAND
PRESET
VOLUME
MULTI
CONTROL ENTER
TUNE
CANCEL
Connections
VIDEO IN
Remote
control signal
sensor
[VCR 2]
Settings
For a game player,
etc.
L
AUDIO IN R
[DUAL AMP]
[BAND]
[PHONES]
Lights
when
the
DUAL AMP function
is activated.
For switching between FM and AM.
[BI-AMP]
[2 TUNE 1]
Headphone jack.
Plug type: 6.3 mm (1/4") stereo
Avoid listening for prolonged
periods of time to prevent hearing
damage.
Turn the speakers off when using
the headphones.
Lights when the BIAMP
function
is
activated.
[PRESET]
Press to allow preset station selection with [2 TUNE 1].
For tuning the radio and selecting preset stations.
Press and hold until the frequency starts scrolling to start
automatic tuning. Tuning stops when a station is found.
Basic Operations
Display indicators
[RE-MASTER]
[TUNED]
[DIGITAL INPUT]
Lights when the multi-source
re-master function is on.
A station is tuned.
[MULTI CONTROL]
A stereo FM broadcast is tuned.
When you press the [MULTI
CONTROL, CANCEL] button
and enter the settings the
indicator lights.
[MONO]
Lights when using the monaural
mode.
[SLEEP]
Flashes
during
presetting.
• The channels contained in the digital input signal light.
• No sound is output from a channel if the speaker is set to “_” (not connected) in
“Speakers combination settings” (ápage 12) even if the channel indicator lights.
L: Front left channel
C: Center channel
R: Front right channel
LS: Surround left channel
SB: Surround back channel
RS: Surround right channel
S: If the surround channel is monaural
LFE (Low Frequency Effects): Deep-bass effect
Sleep timer indicator.
[ST]
[ M ]
RE-MASTER
automatic
[PCM]
Lights when the PCM FIX mode is set.
TUNED ST MONO M
DIGITAL INPUT
MULTI CONTROL
Operations
SLEEP
SPEAKERS
A B BI-WIRE
[– SPEAKERS – A , B , BI-WIRE ]
Reference
Speaker indicators.
A:
Sound is output from speakers connected to the
front A, surround, and center terminals.
B:
Sound is output only from speakers connected to
the front B terminals.
A, B:
Sound is output from speakers connected to the
front A, B, surround, and center terminals.
A, B, BI-WIRE: Sound is output from speakers connected by Bi-wiring.
RQT7994
L
C
2CH
MIX LS SB
kHz PCM
S
MHz
General
display
Shows the input
mode,
radio
frequency, and
other general
information.
R
RS
LFE
SOUND MODE
DIGITAL EX
DTS - ES DTS 96/24
EX NEO:6 SFC
PL x STEREO
[2CH MIX]
[SOUND MODE]
Lights when playing a
multi-channel source in
2CH MIX mode.
The following light to
indicate the source’s
input signal (multichannel digital signal)
and the decoding
format used. (ábelow)
[kHz, MHz]
Frequency unit indicators.
kHz: AM, or PCM sampling
frequency
MHz: FM
SOUND MODE
DIGITAL:
DIGITAL EX:
16
UP PHONES
DOWN
VCR 2
EX:
DTS-ES:
DTS:
DTS 96/24:
STEREO:
•
•
Dolby Digital decoder is being used.
PL
:
Dolby Digital Surround EX decoder (Dolby Pro Logic
decoder) is being used when
the input signal is Dolby Digital 5.1-channel or Dolby Digital Surround EX.
PL :
Dolby Digital Surround EX decoder (Dolby Pro Logic
decoder) is being used when the input signal is DTS.
DTS-ES discrete or matrix decoder is being used.
NEO:6:
DTS decoder is being used.
DTS 96/24 decoder is being used.
SFC:
2-channel stereo decoder is being used.
Dolby
Pro
Logic
decoder is being used.
Dolby
Pro
Logic
decoder is being used.
DTS
NEO:6
matrix
decoder is being used.
SFC matrix function is
being used.
DIGITAL EX and
EX are displayed only when “1 SPKR ” is selected in “Surround back speaker settings”. (ápage 12)
PL is displayed when using Dolby Pro Logic
with stereo (2-channel) sources and “SB ” is set to “_” in “Speakers combination settings”. (ápage 12)
Remote control
Buttons not explained on this page are used only to operate other equipment.
áRefer to the separate booklet, “Remote Control Operation Guide”, for remote control operation details.
[^, RECEIVER]
Standby/on button.
Input mode and remote control mode
buttons.
[1, 2, 3, 4, 5, 6, 7, 8, 9, 0]
[1, CH, 2]
To enter radio frequencies and channels.
For selecting preset radio channels.
Before use
[CD, VCR, TUNER –BAND, TV,
DVD RECORDER,
DVD PLAYER –ANALOG 6CH]
To adjust the volume.
To enter two digit channels.
[MULTI-SOURCE RE-MASTER]
[SUBWOOFER]
For selecting a re-master mode.
For selecting subwoofer level.
[DIMMER]
[MUTING]
For dimming the unit’s display.
To mute the volume.
[
[TEST]
PL
]
To start the speaker test signal.
Select MOVIE (DOLBY EX), MUSIC or
GAME when Dolby Pro Logic
mode or
Dolby Pro Logic mode is on.
[LEVEL]
To adjust speaker level.
[DTS NEO:6]
[EFFECT]
For selecting a DTS NEO:6 mode:
CINEMA or MUSIC.
To adjust Dolby Pro Logic
or SFC effects.
, DTS NEO:6
[w, 3, q, 4]
[SFC, MUSIC]
First select EFFECT, LEVEL or SFC, and
then press [w, 3] or [q, 4] to complete
the setting.
For selecting a SFC mode:
LIVE, POP/ROCK, VOCAL, JAZZ or DANCE.
[SFC, AV/MOVIE]
Operations
For selecting a SFC mode:
DRAMA, ACTION, SPORTS, MUSICAL or
GAME.
Settings
[4, 3, VOLUME]
[ ≧ 10, ENTER]
Basic Operations
To enable selection of radio stations by
frequency.
Connections
[DISC, DIRECT TUNING]
[OFF]
To cancel surround effects.
Limitations on using surround effects (ápage 15)
Input signal
Surround effects that cannot be used
Only front L/R
+ All
• Dolby Pro Logic
• SFC
Front L/R + Center
+ Multi-channel
• Dolby Pro Logic
• SFC
Front L/R + Center
+ 2-channel
• GAME mode (Dolby Pro Logic
No surround back
+ Multi-channel
• Dolby Pro Logic
Input signal ( (
) are display indicators ápage 16)
• 1-channel ( C )
• Surround sound is monaural (
Excluding 2-channel sources
• DTS-ES
S
)
• DTS NEO:6
• DTS NEO:6
)
• DTS NEO:6
Surround effects that cannot be used
• 3-channel ( L
C
R )
• PCM with a sampling frequency
exceeding 96 kHz
• Dolby Pro Logic
• SFC
• DTS NEO:6
• DTS 96/24-ES
• Dolby Pro Logic
• DTS NEO:6
RQT7994
Speaker settings
Reference
Depending on the speaker settings and input signal (audio signal recorded on the disc etc.), some surround effects cannot be used.
17
Sound quality/Sound field/Convenient functions
Adjusting the level of each surround effect
INPUT SELECTOR
áRefer to page 15 for information about surround effects.
MULTI
CONTROL ENTER
Using Dolby Pro Logic
CANCEL
INPUT SELECTOR
POWER
SPEAKERS
A
B
DUAL AMP BI-AMP
BAND
PRESET
TUNE
VOLUME
MULTI
CONTROL ENTER
CANCEL
DOWN
UP PHONES
VCR 2
VIDEO IN
L
AUDIO IN R
DIMEN (Dimension Control)
You can make up for differences in the output level of the front and
surround speakers. You can choose a level between –3 and +3 Increase the level to move sound to the front speakers, decrease to move it
to the surround speakers.
Select.
Adjust.
Factory setting: 0
DIMEN 0
Connections
Before use
You can adjust the effect of “MUSIC ” with “DIMEN ”
(Dimension Control), “C-WDTH ” (Center Width Control) and
“PANORAMA ”. (Only when the input signal is 2-channel.)
C-WDTH (Center Width Control)
This adjustment helps you realize a more natural sound image when
listening to music. Move sound out into the front speakers to improve
the overall front image, or add sound to the center speaker to fix the
center image. You can choose a level between 0 (the center speaker is
dominant) and 7 (center sound is spread out).
Select.
Settings
PANORAMA
Sound is spread out more so you feel like you are surrounded by music.
Select.
Select.
: Factory setting
PANORAMA
Basic Operations
Operations
Factory setting: 3
C-WDTH 3
Using DTS NEO:6
You can adjust the effect of “MUSIC ” with the center image
control.
C-IMG (Center Image Control)
This adjustment helps you realize a more natural sound image when
listening to music. Move sound out into the front speakers to improve
the overall front image, or add sound to the center speaker to fix the
center image. You can choose a level between 0 (the center speaker is
dominant) and 5 (center sound is spread out).
Select.
Adjust.
Factory setting: 2
C-IMG 2
Basic operations with the MULTI CONTROL
Using the Sound Field Control (SFC)
INPUT SELECTOR
Turn to change.
Reference
Adjust.
ENTER
Press to enter.
n To return to the previous setting/To cancel
Press.
MULTI
CONTROL
CANCEL
n To select another settings
You can adjust the sound field by adjusting the level of
the speakers and effect. These adjustments can be
made for each SFC mode.
To adjust the speaker level
Select.
Adjust.
Press several times to return to step 2 in the
operations across and select another setting.
Factory settings: 0 dB
n To finish settings
Press several times to select “EXIT ” and
press [ENTER].
RQT7994
áPage 24 “Multi control menus and factory settings”.
18
Factory setting: 10
• Speakers set as “_” (not connected) in “Speakers combination
settings” are skipped. (ápage 12)
To adjust SFC effect
Select.
Adjust.
Factory setting: 5
Use the MULTI CONTROL menus to change the settings.
(ápage 18 “Basic operations with the MULTI CONTROL”)
Changing the audio output (Dual program)
4
Select the audio and press [ENTER].
2
Select “TONE ” and press [ENTER].
3
Select “BASS ” or “TREBLE ” and
press [ENTER].
4
Adjust the level and press [ENTER].
5
5
BASS,
TREBLE
Select another setting
Finish setting
You can adjust the balance of the front speakers.
2
Select “BALANCE ” and press [ENTER].
3
Adjust the balance and press
[ENTER].
L
Change this setting to listen to software recorded with Dolby Digital at
low volume (such as late at night) maintaining audio clarity. It reduces
the peak level in loud scenes without affecting the sound field.
2
Select “OPTION ” and press [ENTER].
3
Select “DR COMP ” (DYNAMIC RANGE
COMPRESSION) and press [ENTER].
4
Select the level and press [ENTER].
OFF:
R
• The bar shows the
standard balance.
Dim the display for better viewing in a darkened room.
Choose a level between 1 (bright) and 3 (dim).
2
Select “DIMMER ” and press [ENTER].
3
Select “ON ” and press [ENTER].
4
Select the level and press [ENTER].
STANDARD:
MAX:
Select another setting
Finish setting
Adjusting the brightness of the display
5
• The setting remains in effect even if the power is turned off.
Listening comfortably at low volume
(MIN) (MAX)
Adjusting the volume balance
4
Select another setting
Finish setting
5
The software is played with the original
dynamic range.
The level recommended by the producer of
the software for household viewing.
The maximum allowable compression
(recommended for night viewing).
Select another setting
Finish setting
A/D attenuator
Turn the A/D attenuator on if “OVERFLOW ” lights frequently when
using 2-channel analog input or DVD ANALOG 6CH input.
OFF, ON
• Select “OFF ” to cancel.
LEVEL 1,
LEVEL 2,
LEVEL 3
Select another setting
Finish setting
• When you operate the main unit or remote control, this is temporarily
canceled.
2
Select “OPTION ” and press [ENTER].
3
Select “A/D ATT ” (A/D ATTENUATOR) and press
[ENTER].
4
Select “ON ” and press [ENTER].
5
• To cancel, select “OFF ”.
OFF,
ON
Select another setting
Finish setting
Sleep timer
The RESET function
The sleep timer can turn the unit off after a set time.
It does not control any other components.
The operation settings for the unit will be initialized to the settings made
at the time of shipment.
However, any preset radio stations will not be erased.
2
Select “SLEEP ” and press [ENTER].
3
Select the time and press [ENTER].
4
When this is set, “SLEEP” appears on the display.
• To cancel, select “OFF ”.
OFF, 30, 60,
90, 120
(in minutes)
Select another setting
Finish setting
• To check the setting:
After setting the time, you can check the remaining time using step 2.
• To change a setting:
Repeat the procedure from the beginning.
Connections
You can adjust the level of the bass and treble.
MAIN:
Main audio output
SAP:
Sub channel audio output
MAIN+SAP: Main and sub channel audio output
Settings
Adjusting the tone
Select “DUAL PRG ” (DUAL PROGRAM) and
press [ENTER].
Basic Operations
Select the settings to change. (ábelow, right)
3
Operations
CANCEL
Enter the MULTI CONTROL.
2
Select “OPTION ” and press [ENTER].
3
Select “RESET ” and press [ENTER].
4
Select “YES ” and press [ENTER].
NO,
YES
• To cancel, select “NO ”.
• When you select “YES ”, the input source becomes
“TUNER ” (Preset Channel 1).
Reference
MULTI
CONTROL
Select “OPTION ” and press [ENTER].
RQT7994
1
2
Before use
When the input signal is Dolby Digital, DTS and “DUAL ” appears in the
display, the audio to be output is set.
19
Before use
Sound quality/Sound field/Convenient functions
Connections
Adjusting the subwoofer level
Select.
Muting
• “MUTING IS ON ” scrolls on the display while the volume is
muted.
• Muting is canceled when the power is turned off.
n To cancel: Press again
To mute the volume.
RQT7994
Reference
Operations
Basic Operations
Settings
Multi-source re-master
20
• You can make fine settings by pressing [TEST] then adjusting
the output level. (ápage 13)
• You cannot adjust the subwoofer level if “DVD ANALOG 6CH”
is selected.
• Select “SW --- ” to stop output.
Factory setting: SW 10
You can adjust the volume of the subwoofer while
listening to a source.
Sound can be distorted if you raise the volume while
the subwoofer level is high. Reduce the subwoofer
level if this occurs.
Select.
EFFECT 1:
EFFECT 2:
EFFECT 3:
EFFECT 4:
OFF:
This original feature boosts the frequencies of the
higher harmonics that are lost during recording due
to compression.
You can enjoy a full, more natural sound with this.
For fast tracks (pop and rock)
For tracks with a variety of tempos (jazz)
For slow tracks (classical)
For compressed audio signals
The re-master processing is off (factory setting)
• Dolby Pro Logic
, DTS NEO:6 and SFC are canceled when using multi-source re-master.
• If you make any settings in “Speakers combination settings”, “Surround back speaker
settings” or “Speaker settings” (ápages 12, 21) when using multi-source re-master, multisource re-master is canceled.
Multi-source re-master cannot be used in the following cases.
• When input signal is DTS 96/24, PCM with sampling frequencies of 192, 176.4, 96 or 88.2 kHz.
Dimmer
n To cancel: Press again
áRefer to page 19 for adjusting the brightness of the display.
Dim the display for better viewing in a darkened
room.
Making a recording
You can record to a tape deck connected to TAPE REC (OUT) or a DVD recorder connected to DVD RECORDER OUT.
See the recording unit’s operating instructions for details on how to prepare it for recording.
INPUT SELECTOR
INPUT SELECTOR
POWER
SPEAKERS
A
B
DUAL AMP BI-AMP
BAND
PRESET
TUNE
VOLUME
DOWN
VIDEO IN
L
AUDIO IN R
Select the source to be recorded.
2
Begin recording.
3
Start the source to be recorded.
MULTI
CONTROL ENTER
CANCEL
VCR 2
1
UP PHONES
INPUT SELECTOR
Follow your recording unit’s operating instructions.
Follow your equipment’s operating instructions.
Note
• You cannot record a source connected through a digital terminal.
• When recording from a TV/STB, DVR, CD or DVD ensure the source is connected through the corresponding analog terminals and “ANALOG ” input
is selected. (ápages 4, 5, 9, 10 and 13)
• With a tape deck, you can record any analog source except TAPE.
• With a DVD recorder, you can record any analog source except DVR.
• When you select DVD ANALOG 6CH mode, only sound from the front left and right channels is recorded.
Receiver settings - Advanced
Distance setting
INPUT SELECTOR
MULTI
CONTROL ENTER
VOLUME
MULTI
CONTROL ENTER
CANCEL
DOWN
UP PHONES
2
Select “DISTANCE ” and press [ENTER].
3
Select the speaker and press
[ENTER].
4
Set the distance and press
[ENTER].
VCR 2
VIDEO IN
L
AUDIO IN R
Basic operations with the MULTI CONTROL
INPUT SELECTOR
Turn to change.
ENTER
Press to enter.
n To return to the previous setting/To cancel
CANCEL
n To select another settings
Press several times to return to step 2 in the
operations across and select another setting.
n To finish settings
Press several times to select “EXIT ” and
press [ENTER].
• Any changes to settings remain as set even if the power is turned off.
áPage 24 “Multi control menus and factory settings”.
Use the MULTI CONTROL menus to change the settings.
(MIN)
You can select differences at one foot intervals.
5
Press.
MULTI
CONTROL
FRONT,
CENTER,
SURROUND,
SUR BACK
(MAX)
Select another setting
Finish setting
Filter setting
If the Front speakers are set to “SMALL ”, make this setting.
Change the cut-off if the bass from the front speakers is unsatisfactory so
that this bass is output through the subwoofer.
2
Select “FILTER ” and press [ENTER].
3
Select the bass filter frequency
and press [ENTER].
80, 100, 150,
200 (Hz)
• This setting is effective for all speakers set to
“SMALL ” in “Speaker settings”.
1
MULTI
CONTROL
Enter the MULTI CONTROL.
CANCEL
INPUT SELECTOR
Select “SETUP 2 ” (“ADVANCE SETUP ”
scrolls once) and press [ENTER].
Select the settings to change. (ábelow, right)
Speaker settings
Set the size so that the speakers can adequately reproduce the bass range.
4
Select another setting
Finish setting
Bi-amp setting
This is displayed when you set “BI-WIRE ” in “Bi-wiring settings”. Select
this when you connect bi-wire compatible front speakers.
You can adjust HF (high frequency) and LF (low frequency) output
balance from the bi-wired speakers. You can also adjust the sound delay
time to offset the difference in HF and LF output directions.
2
Select “SPEAKERS ” and press [ENTER].
2
3
Select the speaker and press [ENTER].
Adjusting the balance
Correcting the HF and LF
difference
4
Change the setting and press [ENTER].
3
Select “BALANCE ”
and press [ENTER].
3
Select “HF PHASE ”
and press [ENTER].
4
Adjust the balance
and press [ENTER].
4
Set the difference and
press [ENTER].
SUB-WFR, FRONT, CENTER, SURROUND, SUR BACK
SUB-WFR: NO, YES
FRONT: SMALL, LARGE
CENTER/SURROUND: NONE, SMALL, LARGE
SUR BACK: NONE, 1 SPKR, 2 SPKRS
NONE:
For speakers you haven’t connected (center,
surround or surround back).
SMALL: For speakers that cannot adequately reproduce the
bass range. This setting is sufficient for most
speakers if you are using a subwoofer.
LARGE: For speakers that can reproduce a full sound range,
particularly the bass range below 80 Hz.
1 SPKR: If you connect one surround back speaker.
2 SPKRS: If you connect two surround back speakers.
For the subwoofer (SUB-WFR), select “YES ” if you have
connected one, or “NO ” if you have not.
Repeat steps 3 and 4 for each speaker channel.
5
Select another setting
Finish setting
The following are set automatically.
• When you set “FRONT ” to “SMALL ”, “SUB-WFR ” is set to “YES ”.
• When you set “SUB-WFR ” to “NO ”, “FRONT ” is set to “LARGE ”.
Select “BI-AMP ” and press [ENTER].
L
Connections
TUNE
Settings
PRESET
Basic Operations
BAND
Operations
DUAL AMP BI-AMP
Difference
H
HF
• The bar shows the
standard balance.
(Side view of a
speaker in
cross section)
LF
0.00 FEET
(MIN)
Reference
INPUT SELECTOR
SPEAKERS
A
B
POWER
(MAX)
You can select differences at
0.03 feet intervals.
5
Select another setting
Finish setting
RQT7994
CANCEL
Before use
By setting the distance between the speaker’s position (except the
subwoofer) and the listener’s seating position, the sound delay time is
automatically adjusted so that sound reaches the listener at the same
time.
21
The radio
Manual Tuning
INPUT SELECTOR
BAND
PRESET
TUNE
MULTI
CONTROL ENTER
n On the remote control (Direct tuning)
1 Select “TUNER ”.
INPUT SELECTOR
POWER
SPEAKERS
A
B
DUAL AMP BI-AMP
BAND
PRESET
TUNE
VOLUME
MULTI
CONTROL ENTER
CANCEL
DOWN
UP PHONES
2
VIDEO IN
L
AUDIO IN R
Press and hold for 2 seconds.
Press [DISC, DIRECT TUNING].
4
Enter the station frequency.
Settings
3
Operations
Basic Operations
e.g. 107.9 MHz, Press [1] → [0] → [7] → [9]
Tuning intervals: FM - 0.1 MHz,
AM - 10 kHz
• If you do not press a button while the cursor is flashing, the
display returns to the frequency being received.
• If the frequency has not been input correctly, “ERROR ” will be
displayed.
n On the main unit
1 Select “TUNER ”.
Basic operations with the MULTI CONTROL
Reference
Turn to change.
MULTI
CONTROL
CANCEL
ENTER
Press to enter.
n To return to the previous setting/To cancel
Press.
áPage 24 “Multi control menus and factory settings”.
For your reference
Improving reception
RQT7994
INPUT SELECTOR
2
Select “FM ” or “AM ”.
3
Tune to the station.
BAND
TUNE
INPUT SELECTOR
22
Select “FM ” or “AM ”.
VCR 2
Connections
Before use
CANCEL
DVD players can interfere with radio reception. Turn the DVD player off or
move it further away from the AM loop antenna if this occurs.
Tuning intervals: FM - 0.2 MHz,
AM - 10 kHz
• Automatic tuning
Hold down [TUNE 2 or 1] until the frequency begins to scroll.
Tuning stops when a station is found. (Tuning may stop if there is
interference.)
Preset tuning
Presetting stations
MULTI
CONTROL
Enter the MULTI CONTROL.
(ápage 22 “Basic operations with the MULTI CONTROL”)
CANCEL
3
Select “TUNER ” and press [ENTER].
4
Select “AUTO MEM ” (AUTO MEMORY) and
press [ENTER].
5
Select “START ” and press [ENTER].
• Select “CANCEL ” to cancel.
START,
CANCEL
• During automatic presetting, the memory indicator ( M ) flashes
and the frequency scrolls. The memory indicator and channel
numbers are displayed for a second when a station is preset.
• The last station to be preset is displayed when presetting finishes.
• Frequencies may not preset correctly when broadcast waves are too
strong or too weak. In such cases, carry out presetting manually.
2
MULTI
CONTROL
Enter the MULTI CONTROL.
(ápage 22 “Basic operations with the MULTI CONTROL”)
CANCEL
3
Select “TUNER ” and press [ENTER].
4
Select “MEMORY ” and press [ENTER].
5
Select a channel number and press [ENTER].
6
Press [MULTI CONTROL, CANCEL] 2 times to
select “EXIT ” and press [ENTER].
“STORED ” is displayed.
• To continue presetting, press [TUNE 2 or 1] to tune another
station from step 1.
• Even if the AC power supply cord is disconnected from the household AC
outlet, the stations remain in the memory for approximately two weeks.
• FM stations can also be preset in the MONO mode. (ábelow)
Listening to preset stations
n On the remote control
• Select the channel
Before use
2
Tune to the station you want to preset. (ápage 22)
Connections
Preset channels that are automatically assigned by this unit are:
FM: 1 to 30
AM: 21 to 30
Preset the FM stations first. If the AM stations are preset before the
FM stations, they will be erased when the FM stations are preset.
1
n On the main unit
1
Press.
2
Select the channel.
• Press the numbered buttons to select the channel
Operations
After 5 seconds, the display will change from the channel number
to the frequency.
• Hold down the button to change channels faster.
Basic Operations
1
n Manual presetting
Set the channel reception to FM 87.9 MHz or AM
530 kHz.
Settings
n Auto presetting
To select a two digit number
e.g. 21: [ ≧ 10, ENTER] → [2] → [1]
Preparation: Enter the MULTI CONTROL. (ápage 22 “Basic operations with the MULTI CONTROL”)
n During FM stereo reception
n During AM reception
You can improve FM reception by switching reception to monaural.
When there is a lot of noise interference with an AM broadcast, try
switching to this mode.
1
Select “TUNER ” and press [ENTER].
1
Select “OPTION ” and press [ENTER].
2
Select “FM MODE ” and press [ENTER].
2
Select “B PROOF ” (BEAT PROOF) and press [ENTER].
3
Select “MONO ” and press [ENTER].
3
Select “MODE A ” or “MODE B ” and press [ENTER].
4
Press [MULTI CONTROL, CANCEL] 2 times to select
“EXIT ” and press [ENTER].
4
Press [MULTI CONTROL, CANCEL] 2 times to select
“EXIT ” and press [ENTER].
• Select “AUTO ” to cancel.
AUTO,
MONO
RQT7994
Select if noise is excessive during radio reception.
Reference
Reducing excessive noise
23
Remote control mode
Other products may respond to this unit’s remote control. If this happens,
change the remote control mode.
Change the remote control mode on the main unit and the remote control.
Basic operations with the MULTI CONTROL
INPUT SELECTOR
Turn to change.
ENTER
Press to enter.
INPUT SELECTOR
MULTI
CONTROL ENTER
MULTI
CONTROL
Before use
CANCEL
CANCEL
INPUT SELECTOR
SPEAKERS
A
B
POWER
DUAL AMP BI-AMP
BAND
PRESET
VOLUME
MULTI
CONTROL ENTER
TUNE
CANCEL
DOWN
L
2
Select “SETUP 2 ” (“ADVANCE SETUP ” scrolls once )
and press [ENTER].
3
Select “REMOTE ” and press [ENTER].
4
Select “REM2 ” and press [ENTER].
5
Press [MULTI CONTROL, CANCEL] 2 times to
select “EXIT ” and press [ENTER].
7
Press and hold both at the same
time for 2 seconds.
n To return to REM1
1. Select “REM1 ” in step 4.
2. Press and hold both [ENTER] and [1] at the same time for 2
seconds in step 7.
Multi control menus and factory settings
Main menu
TUNER ※ 1
TONE
BALANCE
DIMMER
SLEEP
OPTION
Sub menu (factory settings)
FM MODE ※ 2
MEMORY
AUTO MEM
BASS
TREBLE
L
R
OFF
ON
OFF
DUAL PRG
DR COMP
A/D ATT
B PROOF ※ 3
RESET
AUTO
CH 1
START
Pages
23
0 dB
LEVEL 2
MAIN
OFF
OFF
MODE A
YES
Main menu
19
SETUP 1
(BASIC
SETUP)
23
19
RQT7994
SETUP 2
(ADVANCE
SETUP)
24
REM1,
REM2
-On the remote control6 Press [TUNER -BAND].
Settings
Basic Operations
Operations
CANCEL
UP PHONES
AUDIO IN R
Connections
VIDEO IN
Press.
-On the main unitMULTI
Enter the MULTI CONTROL.
1 CONTROL
VCR 2
Reference
n To return to the previous setting/To cancel
※ 1 During FM/AM reception only ※ 2 During FM reception only
※ 3 During AM reception only
※ 4 When BI-WIRE is selected only
EXIT
Sub menu (factory settings)
SUBW NO
SPKR SET
SUBW YES
FRNT L/R
NORMAL
SB SPKR
2 SPKRS
TV/STB
DVR
D-INPUT
DVD
CD
TV/STB
DVR
IN MODE
DVD
CD
SUB-WFR
FRONT
SPEAKERS
CENTER
SURROUND
SUR BACK
FRONT
CENTER
DISTANCE
SURROUND
SUR BACK
FILTER
100
BALANCE
BI-AMP ※ 4
HF PHASE
REMOTE
REM1
áExit the Multi control
Pages
LCR S SB
12
OPT 1
OPT 2
COAX 1
COAX 2
13
AUTO
YES
SMALL
2 SPKRS
10 FEET
21
5 FEET
L
H
0.00 FEET
above
–
Specifications (IHF’78)
n FM TUNER SECTION
Frequency range
Sensitivity
50 dB quieting sensitivity
MONO
STEREO
Total harmonic distortion
MONO
STEREO
2
2
87.9-107.9 MHz
11.2 dBf (2 µV, IHF ’58)
n VIDEO SECTION
Output voltage at 1 V input (unbalanced)
1±0.1 Vp-p
Maximum input voltage
1.5 Vp-p
Input/output impedance
75 Ω
S-Video
Input
TV, DVD, DVD RECORDER
Output
TV MONITOR
Component Video
Input
TV, DVD, DVD RECORDER
Output
TV MONITOR
n GENERAL
Power supply
Power consumption
Dimensions (W x H x D)
Mass
AC 120 V, 60 Hz
135 W
430 mm x 107.5 mm x 394 mm
(16-15/16'' x 4-7/32'' x 15-1/2'')
4.6 kg (10.1 lb.)
n DIN POWER
2 x 100 W (6 Ω)
1 kHz, T. H. D 1 %
Power consumption in standby mode:
0.2 W
Notes:
1. Specifications are subject to change without notice. Mass and
dimensions are approximate.
2. Total harmonic distortion is measured by the digital spectrum analyzer.
18.3 dBf (4.5 µV, IHF ’58)
38.3 dBf (45 µV, IHF ’58)
0.2 %
0.3 %
Product Service
Product information
For product information or assistance with product operation:
In the U.S.A., refer to “Customer Services Directory” on page 26.
In Canada, contact the Panasonic Canada Inc. Customer Care Centre at
905-624-5505, or visit the website (www.panasonic.ca), or an authorized
Servicentre closest to you
.
Manufactured under license from Dolby Laboratories.
“Dolby”, “Pro Logic” and the double-D symbol are trademarks of Dolby
Laboratories.
“DTS”, “DTS-ES”, “Neo:6” and “DTS 96/24” are trademarks of Digital
Theater Systems, Inc.
User memo:
DATE OF PURCHASE
DEALER NAME
DEALER ADDRESS
Reference
1. Damage requiring service — The unit should be serviced by qualified
service personnel if:
(a) The AC power supply cord or the plug has been damaged; or
(b) Objects or liquids have gotten into the unit; or
(c) The unit has been exposed to rain; or
(d) The unit does not operate normally or exhibits a marked change in
performance; or
(e) The unit has been dropped or the cabinet damaged.
2. Servicing — Do not attempt to service the unit beyond that described
in these operating instructions. Refer all other servicing to authorized
servicing personnel.
3. Replacement parts — When parts need replacing ensure the servicer
uses parts specified by the manufacturer or parts that have the same
characteristics as the original parts. Unauthorized substitutes may
result in fire, electric shock, or other hazards.
4. Safety check — After repairs or service, ask the servicer to perform
safety checks to confirm that the unit is in proper working condition.
Before use
530-1710 kHz
20 µV, 330 µV/m
55 dB
50 dB
Connections
Frequency range
Sensitivity
Selectivity
IF rejection at 1000 kHz
40 dB
30 dB
75 Ω (unbalanced)
Settings
(OPTICAL)
(COAXIAL)
n AM TUNER SECTION
73 dB
67 dB
20 Hz-15 kHz, +1 dB, –2 dB
65 dB
1.5 dB
40 dB
75 dB
50 dB
Basic Operations
Digital input
S/N
MONO
STEREO
Frequency response
Alternate channel selectivity
Capture ratio
Image rejection at 98 MHz
Spurious response rejection at 98 MHz
AM suppression
Stereo separation
1 kHz
10 kHz
Antenna terminal
Operations
Rated minimum sine wave RMS power output
20 Hz-20 kHz both channels driven
0.09 % total harmonic distortion
100 W per channel (6 Ω)
1 kHz continuous power output both channels driven
0.09 % total harmonic distortion
105 W per channel (6 Ω)
Total harmonic distortion
rated power at 20 Hz-20 kHz
0.09 % (6 Ω)
Power bandwidth
both channels driven, –3 dB
4 Hz-88 kHz (6 Ω, 0.9 %)
Power output each channel driven
0.9 % total harmonic distortion at 1kHz
Front (L/R)
100 W (6 Ω)
Center
100 W (6 Ω)
Surround (L/R)
100 W (6 Ω)
Surround back (L/R)
100 W (6 Ω)
Load impedance
Front (L/R)
A or B
6-8 Ω
A and B
6-8 Ω
BI-WIRE
6-8 Ω
Center
6-8 Ω
Surround (L/R)
6-8 Ω
Surround back (L/R)
6-8 Ω
Frequency response
CD, TAPE, TV, DVD, DVD RECORDER, VCR1, VCR2 4 Hz-88 kHz, ±3 dB
DVD 6CH
4 Hz-44 kHz, ±3 dB
Input sensitivity
CD, TAPE, TV, DVD, DVD RECORDER, VCR1, VCR2
27 mV (200 mV, IHF ’66)
Input impedance
CD, TAPE, TV, DVD, DVD RECORDER, VCR1, VCR2
22 kΩ
S/N (IHF A)
CD, TV, DVD, DVD RECORDER (Digital Input) 85 dB (103 dB, IHF ’66)
Tone controls
BASS
50 Hz, +10 to –10 dB
TREBLE
20 kHz, +10 to –10 dB
Subwoofer frequency response (–6 dB)
7 Hz–200 Hz
TELEPHONE NUMBER
The model number and serial number of this product can be found on
either the back or the bottom of the unit. Please note them in the
space provided below and keep for future reference.
MODEL NUMBER
SERIAL NUMBER
SA-XR55
RQT7994
n AMPLIFIER SECTION
25
RQT7994
Reference
Operations
Basic Operations
Settings
Connections
Before use
Warranty (U.S.A.)
26
Warranty (Canada)
Panasonic Canada Inc.
5770 Ambler Drive, Mississauga, Ontario L4W 2T3
For product repairs, please contact one of the following:
≥Your Dealer who will inform you of an authorized Servicentre nearest you.
≥Our Customer Care Centre at (905) 624-5505 or www.panasonic.ca
≥A Panasonic Factory Servicentre listed below:
Richmond,
British Columbia
Panasonic Canada Inc.
12111 Riverside Way
Richmond, BC
V6W 1K8
Tel: (604) 278-4211
Fax: (604) 278-5627
Calgary, Alberta
Mississauga, Ontario
Lachine, Québec
Panasonic Canada Inc.
6835-8th St. N. E.
Calgary, AB
T2E 7H7
Tel: (403) 295-3955
Fax: (403) 274-5493
Panasonic Canada Inc.
5770 Ambler Dr.
Mississauga, ON
L4W 2T3
Tel: (905) 624-8447
Fax: (905) 238-2418
Panasonic Canada Inc.
3075, rue Louis A. Amos
Lachine, QC
H8T 1C4
Tel: (514) 633-8684
Fax: (514) 633-8020
Connections
Settings
Reference
IF YOU SHIP THE PRODUCT TO A SERVICENTRE
Carefully pack and send prepaid, adequately insured and preferably in the original carton.
Include details of the defect claimed, and proof of date of original purchase.
Basic Operations
WARRANTY SERVICE
For product operation and information assistance, please contact your Dealer or our Customer
Care Centre at: Telephone #: (905) 624-5505 Fax #: (905) 238-2360 Web: www.panasonic.ca
Operations
LIMITATIONS AND EXCLUSIONS
This warranty does not apply to products purchased outside Canada or to any product which has
been improperly installed, subjected to usage for which the product was not designed, misused or
abused, damaged during shipping, or which has been altered or repaired in any way that affects the
reliability or detracts from the performance, nor does it cover any product which is used commercially. Dry cell batteries are also excluded from coverage under this warranty.
This warranty is extended to the original end user purchaser only. A purchase receipt or other proof
of date of original purchase is required before warranty service is performed.
THIS EXPRESS, LIMITED WARRANTY IS IN LIEU OF ALL OTHER WARRANTIES, EXPRESS
OR IMPLIED, INCLUDING ANY IMPLIED WARRANTIES OF MERCHANTABILITY AND FITNESS FOR A PARTICULAR PURPOSE.
IN NO EVENT WILL PANASONIC CANADA INC. BE LIABLE FOR ANY SPECIAL, INDIRECT
OR CONSEQUENTIAL DAMAGES.
In certain instances, some jurisdictions do not allow the exclusion or limitation of incidental or consequential damages, or the exclusion of implied warranties, so the above limitations and exclusions
may not be applicable.
Before use
PANASONIC/TECHNICS PRODUCT—LIMITED WARRANTY
Panasonic Canada Inc. warrants this product to be free from defects in material and workmanship
and agrees to remedy any such defect, or at its option, replace the product for a period as stated
below from the date of original purchase.
Technics Audio Product
One (1) year, parts and labour
Panasonic Audio & DVD Product
One (1) year, parts and labour
Accessories including rechargeable batteries
Ninety (90) days
Maintenance
RQT7994
To clean this unit, wipe with a soft, dry cloth.
• Never use alcohol, paint thinner or benzine to clean this unit.
• Before using chemically treated cloth, carefully read the instructions that came with it.
27
Troubleshooting guide
Before requesting service, make the following checks. If you are in doubt about some of the check points, or if the remedies indicated in the chart do not
solve the problem, refer to the “Customer Services Directory” on page 26 if you reside in the U.S.A., or refer to the “Product information” on page 25 if
you reside in Canada.
n Common problems
No power.
Pages
•
•
•
•
•
•
•
•
•
•
•
No sound.
Sound is distorted.
Sound stops. “OVERLOAD ”
appears on the display for
about a second, and the unit
turns off.
“F76 ” appears on the display
and the unit turns off.
“F70 ” appears on the display.
“U12 ” appears on the display.
Display is dim.
Clicking sound heard during
play.
8
14
4 to 11
14
14
13
15
20
13
–
Ensure the AC power supply cord is connected.
Turn the volume up.
Check connections to speakers and other equipment.
Turn on the speakers.
Select the correct source.
Change D-INPUT setting to suit the type of connection you have made.
Check that the digital signals can be decoded by this unit.
Turn the muting off.
Turn PCM FIX off.
Recording of some DVD-Audio may not be possible due to copyright protection.
Determine and correct the cause, then turn the unit on.
Causes include:
- Shorting (bare wires touching) of positive and negative speaker wires.
- Using speakers with an impedance lower than that rated for this unit.
- Straining of the speakers through excessive volume or power.
- Using the unit in a hot environment without proper ventilation.
Consult your dealer if the problem occurs again after switching the unit on.
7
7, 8, 25
–
–
–
• Turn the unit off, disconnect the AC power supply cord, and consult your dealer.
•
•
•
•
Turn the unit off, disconnect the AC power supply cord, and consult your dealer.
Match the “Remote control mode” on the main unit and the remote control.
Cancel “DIMMER ”.
Depending on the input signal when playing DVD etc., the DUAL AMP function changes
automatically. A clicking sound is heard when it changes. This does not mean a problem
with the unit.
n Surround effects
Pages
Sound is not heard from the
center, surround or subwoofer
speakers.
Sound is not heard from the
surround back speaker.
Cannot use Dolby Pro Logic
DTS NEO:6 or SFC.
–
24
19, 20
15
,
There is no DTS audio output.
There is audio output, but the
DTS decoder indicator is not lit.
Sound is distorted when using
the Sound Field Control (SFC).
• Ensure the speaker settings for your speakers are correct.
• The source may be stereo. Turn Dolby Pro Logic , DTS NEO:6 or SFC on.
• If the FRONT speakers are set to LARGE:
- When you play an analog or PCM source in stereo, sound is output from the subwoofer.
However when you play a Dolby Digital or DTS 2-channel source in stereo, only the LFE
(low frequency effects channel) signal from the source is output from the subwoofer.
• Ensure the speaker settings for your speakers are correct.
• Turn Dolby Pro Logic
, DTS NEO:6 or SFC on.
• Turn DVD ANALOG 6CH off.
• You cannot use Dolby Pro Logic , DTS NEO:6 or SFC when input is PCM with sampling
frequencies of 192 or 176.4 (COAXIAL1).
12, 21
15
21
12, 21
15
14
–
• Set the DTS Digital Audio Output setting on the DVD player or DVD recorder to
“Bitstream”.
–
• Depending on the input source, sound may be distorted if you increase the SFC speaker
level or effect. If this happens, decrease the SFC speaker level or effect.
18
n Radio
Pages
11
The radio cannot be tuned in
or there is a lot of noise and
interference.
• Connect the appropriate antenna. (You may need an outdoor antenna or one with more
elements.)
• Adjust the position of the FM or AM antenna.
• Reduce the treble.
• Turn off nearby televisions, video decks, DVD players, and satellite receivers.
• Separate the antenna from other cables, cords, and appliances.
There is a lot of noise when
listening to AM.
• Try changing the BEAT PROOF mode.
23
n Remote control
The remote control doesn’t
work.
Other products respond to the
remote control.
11
19
–
–
Pages
• Replace the batteries if they are worn.
11
• Change this unit’s remote control mode to “REM2 ”.
24
Panasonic Consumer Electronics
Company, Division of Panasonic
Corporation of North America
One Panasonic Way Secaucus,
New Jersey 07094
Panasonic Puerto Rico, Inc.
Ave. 65 de Infantería, Km. 9.5
San Gabriel Industrial Park, Carolina,
Puerto Rico 00985
Panasonic Canada Inc.
5770 Ambler Drive
Mississauga, Ontario
L4W 2T3
En
www.panasonic.ca
http://www.panasonic.com
2005 Matsushita Electric Industrial Co., Ltd.
Printed in Malaysia
RQT7994-2P
H0405WM2055