1
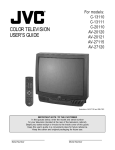
For models:
C-13010
C-13011
C-20010
AV-20020
AV-20021
AV-27015
AV-27020
COLOR TELEVISION
USER’S GUIDE
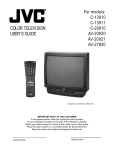
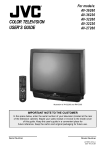
(Illustration of AV-27020 and RM-C345)
IMPORTANT NOTE TO THE CUSTOMER:
In the spaces below, enter the model and serial number
for your television (located on the rear of the television cabinet).
Staple your sales receipt or invoice to the inside cover of this guide.
Keep this user’s guide in a convenient place for future reference.
Keep the carton and original packaging for future use.
Model Number
Serial Number
IMPORTANT SAFETY PRECAUTIONS
CAUTION
RISK OF ELECTRIC SHOCK
DO NOT OPEN
CAUTION:To reduce the risk of electric shock.
Do not remove cover (or back).
No user serviceable parts inside.
Refer servicing to qualified service personnel.
The lightning flash with arrowhead symbol,
within an equilateral triangle is intended to alert
the user to the presence of uninsulated
“dangerous voltage” within the product’s
enclosure that may be of sufficient magnitude
to constitute a risk of electric shock to persons.
IMPORTANT SAFEGUARDS
CAUTION:
Please read and retain for your safety.
Electrical energy can perform many useful functions. This TV
set has been engineered and manufactured to assure your
personal safety. But improper use can result in potential
electrical shock or fire hazards. In order not to defeat the
safeguards incorporated in this TV set, observe the following
basic rules for its installation, use and servicing.
And also follow all warnings and instructions marked on your
TV set.
INSTALLATION
The exclamation point within an equilateral
triangle is intended to alert the user to the
presence of important operating and maintenance (servicing) instructions in the literature
accompanying the appliance.
WARNING: TO PREVENT FIRE OR SHOCK
HAZARDS, DO NOT EXPOSE THIS
TV SET TO RAIN OR MOISTURE.
CAUTION:
TO INSURE PERSONAL SAFETY,
OBSERVE THE FOLLOWING
RULES REGARDING THE USE OF
THIS UNIT.
1. Operate only from the power source specified
on the unit.
2. Avoid damaging the AC plug and power cord.
3. Avoid Improper installation and never position
the unit where good ventilation is unattainable.
4. Do not allow objects or liquid into the cabinet
openings.
5. In the event of trouble, unplug the unit and
call a service technician. Do not attempt to
repair it yourself or remove the rear cover.
Changes or modifications not approved by JVC
could void the warranty.
* When you don’t use this TV set for a long
period of time, be sure to disconnect both the
power plug from the AC outlet and antenna for
your safety.
* To prevent electric shock do not use this
polarized plug with an extension cord, receptacle or other outlet unless the blades can be fully
inserted to prevent blade exposure.
1 Your TV set is equipped with a polarized AC line plug (one
blade of the plug is wider than the other).
(POLARIZED-TYPE)
This safety feature allows the plug to fit into the power
outlet only one way. Should you be unable to insert the
plug fully into the outlet, try reversing the plug.
Should it still fail to fit, contact your electrician.
2 Operate the TV set only from a power source as indicated
on the TV set or refer to the operating instructions for this
information. If you are not sure of the type of power supply
to your home, consult your TV set dealer or local power
company. For battery operation, refer to the operating
instructions.
3 Overloaded AC outlets and extension cords are dangerous, and so are frayed power cords and broken plugs.
They may result in a shock or fire hazard. Call your service
technician for replacement.
4 Do not allow anything to rest on or roll over the power
cord, and do not place the TV set where power cord is
subject to traffic or abuse. This may result in a shock or
fire hazard.
5 Do not use this TV set near water — for example, near a
bathtub, washbowl, kitchen sink, or laundry tub, in a wet
basement, or near swimming pool, etc.
6 If an outside antenna is connected to the TV set, be sure the
antenna system is grounded so as to provide some protection
against voltage surges and built-up static charges. Section 810
of the National Electrical Code provides information with respect
to proper grounding of the mast and supporting structure,
grounding of the lead-in wire to an antenna discharge unit, size
of grounding conductors, location of antenna discharge unit,
connection requirements for the grounding electrode.
13 For added protection of the TV set during a lightning storm or
when the TV set is to be left unattended for an extended period
of time, unplug it from the wall outlet and disconnect the
antenna. This will prevent damage to product due to lightning
storms or power line surges.
14 A TV set and cart combination should be moved with care.
Quick stops, excessive force, and uneven surfaces may cause
the TV set and cart combination to overturn.
7 An outside antenna system should not be located in the
vicinity of overhead power lines or other electric light or
power circuits, or where it can fall into such power lines or
circuits. When installing an outside antenna system, extreme
care should be taken to keep from touching such power
lines or circuits as contact with them might be fatal.
EXAMPLE OF ANTENNA GROUNDING
AS PER NATIONAL ELECTRICAL CODE
8 TV sets are provided with ventilation openings in the cabinet
to allow heat generated during operation to be released.
Therefore:
— Never block the bottom ventilation slots of a portable TV
set by placing it on a bed, sofa, rug, etc.
— Never place a TV set in a “built-in” enclosure unless
proper ventilation is provided.
— Never cover the openings with a cloth or other material.
— Never place the TV set near or over a radiator or heat register.
9 To avoid personal injury:
— Do not place a TV set on a sloping shelf unless properly secured.
— Use only a cart or stand recommended by the TV set
manufacturer.
— Do not try to roll a cart with small casters across thresholds or deep pile carpets.
— Wall or shelf mounting should follow the manufacturer’s
instructions, and should use a mounting kit approved by
the manufacturer.
SERVICE
15 Unplug this TV set from the wall outlet and refer servicing to
qualified service personnel under the following conditions:
A. When the power cord or plug is damaged or frayed.
B. If liquid has been spilled into the TV set.
C. If the TV set has been exposed to rain or water.
D. If the TV set does not operate normally by following the
operating instructions. Adjust only those controls that are
covered in the operating instructions as improper adjustment of other controls may result in damage and will often
require extensive work by a qualified technician to restore
the TV set to normal operation.
E. If the TV set has been dropped or damaged in any way.
F. When the TV set exhibits a distinct change in performance — this indicates a need for service.
16 Do not attempt to service this TV set yourself as opening or
removing covers may expose you to dangerous voltage or
other hazards. Refer all servicing to qualified service personnel.
17 When replacement parts are required, have the service
technician verify in writing that the replacement parts he uses
have the same safety characteristics as the original parts.
Use of manufacturer’s specified replacement parts can
prevent fire, shock, or other hazards.
18 Upon completion of any service or repairs to this TV set,
please ask the service technician to perform the safety check
described in the manufacturer’s service literature.
19 When a TV set reaches the end of its useful life, improper
disposal could result in a picture tube implosion. Ask a
qualified service technician to dispose of the TV set.
USE
10 Caution children about dropping or pushing objects into the TV set
through cabinet openings. Some internal parts carry hazardous
voltages and contact can result in a fire or electrical shock.
11 Unplug the TV set from the wall outlet before cleaning. Do
not use liquid or an aerosol cleaner.
12 Never add accessories to a TV set that has not been designed for
this purpose. Such additions may result in a hazard.
20 Note to CATV system installer.
This reminder is provided to call the CATV system installer’s
attention to Article 820-40 of the NEC that provides
guidelines for proper grounding and, in particular, specifies
that the cable ground shall be connected to the grounding
system of the building, as close to the point of cable entry
as practical.
WELCOME!
Congratulations on your new television purchase! We thank you for choosing JVC.
We know you are anxious to start watching your new television, but before you operate it,
please read this guide and then keep it handy for future reference. After all, you just bought a
great TV with a lot of terrific features, you should know what each feature is and how to use it
properly!
Please note as you read through this guide, that there are illustrations of select models for
your reference. There are several models in this guide and therefore each illustration will not be of
the model you own. Just be sure to look for the similar feature on your TV.
Again, congratulations and thank you for choosing JVC! Enjoy!
TABLE OF CONTENTS
CONNECTIONS
Menu Functions Cont...
Connections Checklist . . . . . . . . .
Front Panel Diagrams . . . . . . . . . .
Rear Panel Diagrams . . . . . . . . . .
Cable Box Connection . . . . . . . . .
Connecting to a Camcorder . . . . . .
Connecting to External Amplifier . . . .
Connecting to Headphones/Earphones
Sound Settings
Bass . . . . . . . . . . . . . . .
Treble . . . . . . . . . . . . . . .
Balance . . . . . . . . . . . . . .
MTS (Multi-channel TV Sound) .
Some Sound Advice . . . . . . .
General Items
TV Speaker . . . . . . . . . . . .
Set Clock . . . . . . . . . . . . .
On/Off Timer . . . . . . . . . . .
Language . . . . . . . . . . . .
Closed Caption . . . . . . . . .
Background . . . . . . . . . . .
.
.
.
.
.
.
.
.
.
.
.
.
.
.
.
.
.
.
.
.
.
.
.
.
.
.
.
.
5
5
6
6
7
7
7
GETTING STARTED
Remote Controls . . . . . . . . . . . . . . . . . 8
Power . . . . . . . . . . . . . . . . . . . . . . 9
Adjusting Volume . . . . . . . . . . . . . . . . 9
Changing Channels . . . . . . . . . . . . . . . 9
Remote Programming . . . . . . . . . . . . . 10
CATV & Satellite Codes . . . . . . . . . . . . 10
VCR Codes . . . . . . . . . . . . . . . . . . . 11
MENU FUNCTIONS
Using the Menu . . . . . .
Initial Setup
Auto Tuner Setup. .
Channel Summary.
Set Lock Code . . .
Picture Settings
Tint . . . . . . . . .
Color . . . . . . . .
Picture . . . . . . .
Bright . . . . . . . .
Detail . . . . . . . .
Noise Muting . . . .
Set Video Status . .
. . . . . . . . . . 12
. . . . . . . . . . 13
. . . . . . . . . . 13
. . . . . . . . . . 14
.
.
.
.
.
.
.
.
.
.
.
.
.
.
.
.
.
.
.
.
.
.
.
.
.
.
.
.
.
.
.
.
.
.
.
.
.
.
.
.
.
.
.
.
.
.
.
.
.
.
.
.
.
.
.
.
.
.
.
.
.
.
.
.
.
.
.
.
.
.
15
15
15
15
15
15
15
.
.
.
.
.
.
.
.
.
.
.
.
.
.
.
16
16
16
16
16
.
.
.
.
.
.
.
.
.
.
.
.
.
.
.
.
.
.
17
17
18
18
18
18
.
.
.
.
.
.
.
.
.
.
.
.
.
.
.
.
.
.
.
.
.
.
.
.
.
.
.
.
.
.
.
.
.
19
19
19
19
20
20
20
20
20
20
20
.
.
.
.
.
.
.
.
.
.
.
.
21
22
23
24
BUTTON FUNCTIONS
Display . . . . . . . . . . . . . . . . . .
Video Status . . . . . . . . . . . . . . .
Sleep Timer . . . . . . . . . . . . . . . .
Hyper Surround . . . . . . . . . . . . .
Number Buttons (10 Key Pad) . . . . .
100+ . . . . . . . . . . . . . . . . . . .
Muting . . . . . . . . . . . . . . . . . .
Menu Button . . . . . . . . . . . . . . .
TV/Video . . . . . . . . . . . . . . . . .
R e t u rn +. . . . . . . . . . . . . . . . .
VCR Buttons . . . . . . . . . . . . . . .
APPENDICES
Troubleshooting . . . . . . .
Limited Warranty . . . . . . .
Authorized Service Centers .
Specifications . . . . . . . .
.
.
.
.
.
.
.
.
.
.
.
.
.
.
.
.
.
.
.
.
.
.
.
.
C O N N E C T I O N S
5
CONNECTIONS CHECKLIST — READ ME FIRST!
The Connections Checklist — Read Me First! section of this guide is a list of ideas to keep in mind
when you set out to perform your connections. It is designed to help us not-so-technicallyadvanced individuals. If you read this section, and can’t identify the plugs, connectors, and
components you have, do not be afraid to seek help.
1) Always refer to the connection instructions in the user’s
guide for your components first! The manufacturer will
provide the most detailed information about their products.
A/V input plug
2) Know your jacks and plugs — most are color coded:
• Yellow plugs are Video connections
• Red plugs are Right Audio connections
• White or black plugs are Left Audio (Mono) connections (if your VCR is mono, it will have a white or black
plug, no red)
RF Connectors
3) Perform one hookup at a time. If you have many
accessories to connect, make sure each connection is
correct by checking to see that it works properly before
attempting the next connection.
4) Unplug the power cord between each connection.
S-Video Plug
5) In and Out Concept. Remember In and Out. The Output jack from one
piece will go to the Input jack of the other — read the jack panels, they
are all labeled.
FRONT PANEL DIAGRAMS
AV-27020 • AV-27015 Front Panel
AV-20020 • AV-20021 • C-20010 Front Panel
C-13010 • C-13011 Front Panel
6
C O N N E C T I O N S
REAR PANEL DIAGRAMS
C-13010 • C-13011
C-20010
AV-20020 • AV-20021
AV-27015
AV-27020
CABLE BOX CONNECTION
If you do not require a cable box to access any or all channels, refer to the Quick Setup Guide.
If you use a cable box to access any or all channels, use the diagram below.
Illustration of AV-27020
CABLE or
ANTENNA OUT
CABLE
BOX
VCR
1) Connect the cable wire out from
the wall in to the cable box RF
input.
2) Connect an RF cable out from
the cable box, in to VCR RF
input.
3) Connect an RF cable out from
VCR RF output, in to TV VHF/UHF
input.
4) Plug the power cord into a nearby
AC outlet
❒ Refer to the VCR and/or cable
box instructions.
C O N N E C T I O N S
7
CONNECTING TO A CAMCORDER
You can connect a camcorder right to your TV. For other video/VCR connections see the Quick Setup Guide.
Illustration of AV-27020
1) Connect a white audio cable from the
camcorder output into the TV’s Left Audio input
jack.
2) Connect a yellow video cable from the camcorder output into the TV’s Video input jack.
3) If you have both a stereo model TV and
camcorder, connect the red audio cable from
the camcorder output into the TV Right audio
input jack.
❒ Refer to the camcorder’s instructions.
CONNECTING TO AN EXTERNAL AMPLIFIER
AV-20020, AV-20021 & AV-27020 only. If you set the TV Speaker to off (see page 17 for special setup), you
can adjust the amplifier’s sound with the TV remote’s VOLUME -/+ button!
1) Connect a white audio cable
from the TV Left Audio output
jack into the Amplifier ’s Left
Audio input.
2) Connect a red audio cable
from the TV Right Audio output
jack into the Amplifier’s Right
Audio input.
❒ Refer to the amplifier’s
instructions.
Illustration of AV-27020
CONNECTING TO HEADPHONES/EARPHONES
You can connect headphones to the TV’s front panel headphone jack on the AV-20020 and AV-20021. You can
connect earphones to the C-13010, C-13011, and the C-20010.
1) Connect the headphones plug
to the TV’s headphones input jack
on the front panel.
❒ Refer to the headphones or
earphones instructions.
Headphones/
Earphones
Illustration of C-13010
8
G E T T I N G
S T A R T E D
REMOTE CONTROLS
RM-C345
RM-C340
RM-C241
AV-27020
AV-20020 • AV-20021
C-13010 • C-13011
C-20010 • AV-27015
CHANGING THE BATTERIES
Be sure to use only size AA batteries.
1
Push down or raise the latch on the remote's back
cover to remove it.
2
Insert the two supplied AA batteries, carefully noting
the “+” and “–” markings on the batteries and remote
control. To avoid a short circuit, insert “–” end first.
3
RM-C241
Snap the cover back into place.
❒ If the remote control acts erratically, replace the batteries.
Typical battery life is usually about six months to one year.
❒ We recommend alkaline batteries for a longer battery life.
RM-C340/RM-C345 USERS NOTE:
When you change the batteries, try to complete the task
within three minutes. If it takes longer than 3 minutes, the
remote control codes for your VCR and/or Cable box will
have to be reset (page 10).
RM-C340 • RM-C345
G E T T I N G
S T A R T E D
9
POWER
❒ Press the POWER button on the remote control or the TV front panel. The power lamp will glow red.
(On the AV-27020 and AV-27015 the On Timer lamp will glow red.)
❒ Make sure that the TV/CATV switch is set to TV (RM-C340 and RM-C345 only). Switch to CATV
only if you plan to operate a cable box. If you switch to CATV you will not be able to operate the
TV functions with the remote, only the cable box functions!
❒ To turn the power off, press the POWER button again. The power lamp will go out.
❒ The On Timer lamp will glow red when the On/Off Timer is set, even when the TV power is off.
ADJUSTING VOLUME
1
Use the VOLUME –/+ buttons (
) on the front panel or remote control. Use the VOLUME – (
button to lower the volume. Press the VOLUME + button (
) raise the volume.
)
VOLUME 13
||||||| -------------------
2
Press the MUTING button to instantly turn the volume off to zero. To restore the volume to the
previous volume level, simply press the MUTING button again.
CHANGING CHANNELS
1
10 key direct access.
Press the numbers on the remote’s 10 key pad. For single-digit channel numbers press 0 then the
number. For channels above 100, press the 100+ button plus the 2-digit number.
2
CHANNEL –/+ button (
).
Press the CHANNEL –/+ button, it will scan the channels in order.
❒ NOTE: After you operate the Auto Tuner Setup (page 13), all of the blank, or empty, channels will be
removed from scanning so that there is no noise or channel snow when you scan, only active channels.
3
Regular Return.
Press and release the RETURN+ button to return to the previous channel. First, select a channel
(game #1). Then, select another channel (game #2) with the 10 key pad and push the RETURN+
button to flip directly back and forth.
4
Return+ .
Press and hold down the RETURN+ button for three seconds. The message, “RETURN CHANNEL
PROGRAMMED !” will appear and you can scan as you wish with the CHANNEL -/+ button. Press
RETURN+ again and you will go back to the Return+ channel you programmed.
To cancel the Return+ channel, press and hold down the RETURN+ button for another three seconds
and the message, “RETURN CHANNEL CANCELLED !” appears.
❒ Pressing any number key or turning the TV off will also cancel a Return+ channel.
10
R E M O T E
P R O G R A M M I N G
SETTING THE CATV & VCR CODES
Many CATV & VCR brands have more than one code. If the first code in the list does not work, try the other
codes listed. If your CATV box or your VCR do not respond to any of the codes listed for the manufacturer and
search code function, use the remote control for that accessory to operate it.
CABLE BOX OR SATELLITE SETUP FOR RM-C340 AND RM-C345
The remote is programmed with the CATV and Satellite codes for power on and off, 10 key, and channel up
and down.
1) Determine the cor rect code from the “CATV & Satellite Codes” chart below.
2) Slide the 2-Way Mode Selector Switch to CATV.
3) Press and hold down the DISPLAY button.
4) Enter the 3-digit code with the 10 key pad while continuing to hold down the DISPLAY button.
5) Release the DISPLAY button.
6) Confirm the operation of the cable box.
Note : If your cable box or satellite box does not respond to any code on the chart, use the Search
Codes Function below.
CATV & Satellite Codes
CABLE BOXES
ABC
Archer
Cableview
Citizen
Curtis
Diamond
Eagle
Eastern
GCBrand
Gemini
General Instrument
Hamlin
Hitachi
Jerrold
Macom
Magnavox
Memorex
Movietime
Oak
Panasonic
Paragon
Philips
Pioneer
Pulsar
CODES
024
032, 025
051, 032
022, 051
058, 059
024, 032, 025
029
034
032, 051
022, 043
065,024, 025, 026, 027, 020,
021, 022, 057, 023
040, 041, 042, 045
049, 024
065, 024, 025, 026, 027, 020,
021, 022, 057, 023
049, 050, 051, 054
033
030
032, 051
039, 037, 048
055, 056, 060
063
028, 029, 030, 052, 053, 031,
069
047, 062
051, 032
CABLE BOXES
Puser
RCA
Realistic
Regal
CODES
032
061
032
058, 064, 040, 041, 042, 045,
068
Regency
034
Rembrandt
037, 032, 051, 038
Samsung
051
Scientific Atlanta 057, 058, 059
SLMark
051, 047
Sprucer
051, 056
Stargate
032, 051
Telecaption
067
Teleview
047, 051
Texscan
044
Tocom
035, 036, 066
Toshiba
050
Unika
032, 025
Universal
022, 032
Videoway
052
Viewstar
029, 030
Zenith
063, 046
Zenith/Drake
046
Satellite
DIGITAL
SATELLITE
SYSTEMS
Echostar
G.E.
Gradiente
Hitachi
HNS(Hughes)
Panasonic
Philips
Primestar
RCA
Sony
Toshiba
Uniden
CODES
100
106
112
104, 111
104
105
102, 103
108
106, 109, 110
107
101
102, 103
Search Codes Function :
1) Slide the 2-Way Mode Selector Switch to CATV.
2) Press the TV POWER and RETURN+ buttons simultaneously for more than three seconds, then release.
3) Press TV POWER and check if the accessory responds.
4) If there was a response, press RETURN+. If there was no response, repeat Step 3 until there is a response. If
you repeat Step 3 more than 70 times and there is still no response, use the accessory remote.
R E M O T E
P R O G R A M M I N G
11
VCR SETUP FOR RM-C340 AND RM-C345
The remote is pre-programmed with the VCR codes for power on and power off, play, stop, fast-forward,
rewind, and channel up and down.
1) Determine the correct code from the “VCR Codes” chart (below).
2) Slide the 2-Way Mode Selector Switch to TV.
3) Press and hold down the DISPLAY button.
4) Enter the 3-digit code with the 10 key pad while continuing to hold down the DISPLAY button.
5) Release the DISPLAY button.
6) Confirm the operation of the VCR.
❒ When you record a channel, press the PLAY button while continuing to hold down the REC button.
Note : If your VCR does not respond to any code on the chart, use the Search Codes Function below.
VCR Codes
VCRs
Admiral
Aiwa
Akai
Audio Dynamic
Bell &Howell
Broksonic
Canon
CCE
Citizen
Craig
Curtis Mathes
Daewoo
DBX
Dimensia
Emerson
Fisher
Funai
GE
Go Video
Goldstar
Gradiente
Hitachi
Instant Replay
Jensen
JVC
Kenwood
LXI
CODES
035
027, 032
029, 072, 073, 074
003, 005
063, 071
020, 026
023, 025
043
064
063, 029, 064
045, 024, 027
043, 059, 024
003, 004, 005
045
043, 026, 077, 061, 025, 042,
020, 076
063, 066, 067, 065, 071
027, 026, 020, 000
033, 045, 024
037, 051, 049, 050, 089
064
083, 084, 081, 000, 001
023, 045, 058, 027, 081
024, 023
003
000, 001, 002, 003, 004, 005
003, 004, 064, 005
027, 064, 058, 065, 066, 063,
067
VCRs
Magnavox
Marantz
Marta
Memorex
MGA
Minolta
Mitsubishi
Multitech
NEC
Olympic
Optimus
Orion
Panasonic
Penney
Pentax
Philco
Philips
Pioneer
Proscan
Quasar
Radio Shack
RCA
Realistic
CODES
031, 023, 024, 086
003, 004, 005
064,
024, 067
038, 040, 047, 048, 041, 042
058, 045
038, 040, 047, 048, 041, 042,
078, 090
047, 027, 062
003, 004, 005, 000
024, 023
028, 021, 035, 064
026, 020
023, 024, 021, 022
024, 058, 045, 063, 003, 004,
005
058, 005, 045
031, 024, 027, 023, 026, 020,
043
031, 023, 024, 086
023
045, 058, 023,024, 031, 046,
059, 060, 033, 087
021, 022, 023, 024
033, 024, 063, 036, 067, 040,
027
033, 045, 058, 023, 024, 031,
046, 059, 060, 083, 085, 087
024, 063, 036, 067, 040, 027
VCRs
Samsung
Sansui
Sanyo
Scott
Sears
Shintom
Sharp
Signature 2000
Singer
Sony
SV2000
Sylvania
Symphonic
Tashiro
Tatung
Teac
Technics
Teknika
Toshiba
Vector Research
Wards
Yamaha
Zenith
CODES
037, 060, 062, 033, 089
003, 026, 020, 052
063, 067, 091, 071
059, 060, 062, 067, 038, 040,
047, 048, 026, 020
063, 064, 065, 066, 058
075
035, 036, 080, 088
027, 035
075
028, 029, 030, 053, 054, 055
027
031, 023, 024, 027
027, 081
064
003, 004, 005
003, 004, 027, 005
021, 022, 023, 024
024, 027, 070
059, 046, 079
005
035, 036, 067, 044, 064
063, 003, 004, 005
044, 082, 064
Search Codes Function :
1) Slide the 2-Way Mode Selector Switch to TV.
2) Press the VCR POWER and RETURN+ buttons simultaneously for more than three seconds, then release.
3) Press VCR POWER and check if the accessory responds.
4) If there was a response, press RETURN+. If there was no response, repeat Step 3 until there is a response. If
you repeat Step 3 more than 80 times and there is still no response, use the accessory remote.
12
U S I N G
T H E
USING THIS GUIDE:
PICTURE SETTINGS
Throughout this guide there are certain symbols we use
as shorthand to show you what to do. When you see
them, keep these factors in mind:
Up and down arrows mean press the MENU UP or
MENU DOWN buttons. Pressing the up or down
buttons allows you to:
• Move vertically in the main menu screen
• Move through a submenu, or
• Move to the next letter, number, or other
choice in a submenu, or
• Back up to correct an error
• Channel Up and Down
Left and right arrows mean press the MENU LEFT or
MENU RIGHT button to:
• Select the highlighted item, or
• Select the options in a submenu
• Volume Up and Down
The “Press Button” means you should press
that button on the remote control
❒
M E N U
Important information, or a note, about a feature
follows a cube like this one.
SMALL CAPITAL LETTERS are used when we refer
to buttons … this is important because some
menu functions have the same name.
TINT
COLOR
PICTURE
BRIGHT
DETAIL
-------------||-------------------------||-------------------------||-------------------------||-------------------------||-------------
SELECT
OPERATE
BY
BY
EXIT BY
EXIT
PICTURE SETTINGS SCREEN 2
NOISE MUTING
SET VIDEO STATUS
SELECT
OPERATE
ON OFF
EXIT BY
EXIT
BY
BY
SOUND SETTINGS (Stereo Models Only*)
BASS
TREBLE
BALANCE
MTS
-------------||-------------------------||-------------------------||------------STEREO SAP MONO
ON AIR
THE ONSCREEN MENUS:
TV SPEAKER
To bring up the onscreen menu, press the MENU
button on the remote, and the menu will appear on the
screen. The item that appears yellow is the selected
item.
SELECT
OPERATE
When you first turn on the TV, the “Picture Settings”
menu will appear. However, “Initial Setup” is so
important, that this guide begins here.
INITIAL SETUP ITEMS
AUTO TUNER SETUP
CHANNEL SUMMARY
SELECT
OPERATE
BY
BY
EXIT BY
EXIT
OFF
EXIT BY
EXIT
BY
BY
GENERAL ITEMS
SET CLOCK
ON/OFF TIMER
LANGUAGE
CLOSED CAPTION
BACKGROUND
SELECT
OPERATE
SET LOCK CODE
ON
BY
BY
ENG
FRE
SPA
BLACK CLEAR
EXIT BY
EXIT
❒ If you use the MENU button on the TV’s
front panel, an additional menu
indicating the current channel and the
TV/Video status will appear between
the last initial setup menu and the
picture settings menu.
*AV-27015 does not have TV Speaker.
I N I T I A L
S E T U P
AUTO TUNER SETUP
CHANNEL SUMMARY
During Auto Tuner Setup, the TV will
automatically scan through all available
channels and memorize the active ones
so that when you scan, you do not pick
up weak or noisy channels.
You can add or delete channels from the
channel scanning. You can also lock out
any “unauthorized” viewers from one or
up to all 181 channels.
Press the MENU button
Press the MENU button
To CHANNEL SUMMARY
To AUTO TUNER SETUP
To operate
To operate
ADD
TUNER MODE
:
CABLE
AIR
START
To choose CABLE or AIR
To move to START
To start Auto Tuner Setup
NOW
PROGRAMMING!
48
The Programming takes approximately
1 to 2 minutes
PROGRAMMING OVER!
Note: Noise Muting will not work while
Auto Tuner Setup is working.
You can manually set channels to scan
that were too weak to be picked up
during Auto Tuner Setup. (If you have not
performed the Auto Tuner Setup, in
previous column, do so now.) Conversely,
if a channel was too weak to receive a
good picture but was picked up anyway,
delete it by removing the X.
CH
01
02
03
04
05
ADD
–
X
X
X
X
–
–
–
–
–
:
:
:
:
:
:
CH
06
07
08
09
10
ADD
X
–
–
X
X
–
–
–
–
–
To the ADD column
To include or delete from scan
EXIT when finished
Note: Channels set to scan will be
marked with an X.
Note: Some cable systems experience
interference from radio frequencies on
Cable Channel 95. You can delete this
channel from scanning by removing the X.
Continued next page ...
13
NOTES:
During Initial Setup,
the TV will be
programmed to
only receive active
channels. Once the
channels are
activated by the
Auto Tuner Setup
they will be included in Scan.
Some weak
channels may be
included or omitted
during this
procedure. You can
add or delete any
channels for
scanning in the
Channel Summary.
Noise Muting will
not work while you
operate the
Channel Summary.
14
I N I T I A L
S E T U P
Continued …
SET LOCK CODE
CHANNEL GUARD - LOCK
To CHANNEL SUMMARY
To operate
To the Lock column
The access code zero (0) to lock
or unlock that channel
CH
01
02
03
04
05
ADD
X
X
X
X
X
–
–
–
–
–
:
:
:
:
:
:
CH
06
07
08
09
10
ADD
X
–
–
X
X
The Lock Code locks and unlocks
Channel Guard settings. Write this four
digit number down and keep it safe
from potential viewers!
Press the MENU button
To SET LOCK CODE
To operate
–
The padlock icon appears
–
–
EXIT when finished
ZERO (the access code is zero)
LOCK CODE
0000
FINISH
CHANNEL GUARD MESSAGE:
This message appears when a viewer
attempts to watch a guarded channel:
To choose the number
To move to the next place
PLEASE ENTER LOCK CODE BY
10 KEY PAD TO UNLOCK IT.
Continue to follow these directions for
all four numbers
To FINISH
NO. – – – –
To save settings and exit
To watch a channel you have locked, enter
the lock code using the 10 key pad.
If the wrong lock code is entered, this
message will flash on the screen:
INVALID LOCK CODE !
THANK YOU!!
Note: If you forget the Lock Code you
can set another one this same way.
Note: After a power interruption you
must reset the lock code.
P I C T U R E
S E T T I N G S
TINT
DETAIL
Tint allows you to adjust the levels of
red and green in the picture.
Detail allows you to adjust the level of
detail within the picture.
Press the MENU button
Press the MENU button
To TINT
To DETAIL
To accentuate green
To make the picture sharper
To accentuate red
To move to the next or previous
To make the picture smoother
To move to the next or previous
COLOR
NOISE MUTING
Color allows you to adjust both the
vividness and subtlety of the color.
Eliminates noise from channels that are
not broadcasting or are too weak.
Press the MENU button
Press the MENU button
To COLOR
To NOISE MUTING
To make colors more vivid
To turn ON/OFF
To subdue colors
To move to the next or previous
Note: Noise Muting will not work when
you operate Auto Tuner Setup or Channel
Summary.
PICTURE
Picture allows you to adjust the range
between black and white in the
picture.
SET VIDEO STATUS
Save Picture Settings as “Choice”.
Press the MENU button
Press the MENU button
To PICTURE
To SET VIDEO STATUS
To operate
To increase contrast
To decrease contrast
To move to the next or previous
BRIGHT
Adjust the degree of light and dark in
the picture.
TINT
COLOR
PICTURE
BRIGHT
DETAIL
-------------||-------------------------||-------------------------||-------------------------||-------------------------||------------SAVE AS CHOICE
To operate the TINT option
To move to the next option
Press the MENU button
To BRIGHT
Repeat the above steps for each setting
To lighten the picture
To SAVE AS CHOICE
To darken the picture
To save settings and exit
To move to the next or previous
Note: Access your “Choice” settings by
pressing the VIDEO STATUS button on the
remote control.
15
NOTES:
If you do not move
to the next setting
with the up and
down arrows, in
approximately three
seconds the screen
will disappear and
your preferences
will be stored.
You can exit the
Picture Settings
menu at any time
by pressing the
EXIT button on the
remote control.
16
NOTES:
STEREO SETS
ONLY!!
Bass, Treble,
Balance, and MTS
are available on:
• AV-20020
• AV-20021
• AV-27015
• AV-27020
MTS has no effect
on normal sound
broadcasts.
You can exit the
Sound Settings
menu at any time
by pressing the
EXIT button.
S O U N D
S E T T I N G S
BASS
The Bass level adjustment feature allows
you to raise or lower the level of lower
frequencies in the TV’s sound.
Press the MENU button
MTS (Multi-Channel
Television Sound)
MTS technology gives you a choice
among stereo, mono, and Second
Audio Programs (SAP).
To BASS
Press the MENU button
To emphasize bass
To MTS
To reduce bass
To move to next
MTS
STEREO
SAP
MONO
ON AIR
TREBLE
The Treble level adjustment feature
allows you to raise or lower the level of
higher frequencies in the TV’s sound.
Press the MENU button
To TREBLE
To increase treble
To decrease treble
To move to next
BALANCE
The Balance adjustment feature
allows you to center the TV’s sound to
your needs.
Select the mode
(The ON AIR arrow tells you if
the current signal contains
Stereo or SAP)
Note: Keep the TV in STEREO mode
to get the fullest sound quality.
Note: SAP will allow you to hear an
alternative soundtrack, if available.
Note: Choose MONO to reduce
excess noise in a program or channel.
Press the MENU button
To BALANCE
To shift the speaker balance to
the right
To shift the speaker balance to
the left
To move to next
Some Sound Advice
You can tell if a program is broadcast in stereo by the position of the ON AIR arrow in the MTS
menu. Unfortunately, it is common for some cable companies to squash the transmission of
stereo programs to mono because they only have mono equipment. If connected to a cable
system, the sound is at the mercy of that cable company — if they broadcast in mono, you
receive mono sound regardless of the original stereo programming.
Fortunately, most programs that are broadcast in stereo are aired on the major television
networks. If you connect your TV to an antenna instead of cable, and set the tuner mode in the
Auto Tuner Setup to “Air” instead of “Cable,” you will be able to pick up stereo broadcasts in
stereo.
G E N E R A L
I T E M S 17
TV SPEAKER
SET CLOCK
You can listen to the TV speakers, or if
your set is connected to a stereo, turn
them off to listen to the stereo
speakers.
The Clock is the heart of all timer
functions. You must set the clock
before any timer functions will work.
Press the MENU button
Press the MENU button
TV SPEAKER
TV Speaker is only
available on:
• AV-20020
• AV-20021
• AV-27020
To SET CLOCK
To TV SPEAKER
NOTES:
To operate
ON
OFF
TIME
To turn the speaker ON
or OFF
EXIT when finished
Note: TV Speaker settings will be
cancelled after a power interruption.
Note: Before you set TV Speaker from
Off to On, make sure that the TV
volume level is low! If the volume is
set too high, the sound will be
extremely loud.
––:–– ––
START CLOCK
To set the hour (AM/PM)
To move to minutes
To set the minutes
To move to START CLOCK
when done with settings
To start the clock
THANK YOU !!
If you want to synchronize the TV
clock with another clock or time signal,
press LEFT or RIGHT MENU arrow at the
appropriate time, and the clock will
start at that moment.
Note: If the TV is unplugged or you
experience a power outage, you
must reset the clock in order for any
of your timer functions to work.
CLOCK SET MESSAGE
If you do not set the clock but attempt
to use a timer function anyway, you
will get the following message:
PLEASE SET CLOCK FIRST !!
TIME
––:––
START CLOCK
––
Set Clock is
available on all
models.
18
G E N E R A L
NOTES:
Closed Caption
Note: Captions
are usually found
on CC1 and text
on T1. The other
caption and text
channels are
workable but are
for future purposes. If you want to
view captions or
text, most likely
you should
choose CC1 for
Captions and T1
for Text.
General Note:You
can exit the menu
at any time by
pressing the EXIT
button.
I T E M S
ON/OFF TIMER
LANGUAGE
Use the On/Off Timer as an alarm to
wake up, as a program reminder, or as
a decoy when you’re out of the house.
Choose from English, French, or Spanish
on-screen menus and displays.
Press the MENU button
Press the MENU button
To ON/OFF TIMER
To LANGUAGE
LANGUAGE
ENG
FRE
SPA
To operate
ON TIME
7 : 00 PM
OFF TIME
10 : 00 PM
CHANNEL
02
MODE
ONCE EVERYDAY
ON/OFF TIMER
YES NO
FINISH
To set the hour (AM/PM) you
want the TV to turn on
To move to minutes
To set the minutes
To accept ON TIME and to
move to OFF TIME (set time for
TV to turn off)
To move to CHANNEL
To select channel
To move to MODE
Choose ONCE or EVERYDAY
To YES NO
Choose YES for on, NO for off
To FINISH
To save settings
THANK YOU !!
Note: In order for ON/OFF Timer to
work, the clock must be set. After a
power interruption it will be cancelled.
Note: ON/OFF Timer cannot be set to
locked or guarded channels.
To choose a language
EXIT when finished
CLOSED CAPTION
If they are included in a program, you can
view closed captions or text information.
Press the MENU button
To CLOSED CAPTION
To operate
MODE
: CAPTION
CAPTION: CC1 CC2 CC3 CC4
TEXT
: T1
T2
T3 T4
FINISH
To select CAPTION, TEXT or OFF
TO CAPTION or TEXT
To select a caption or text channel
TO FINISH
To save settings and exit
Note: If you wish to view captions or text you
must set mode to CAPTION for captions, and
TEXT for text.
Note: If a black box covers half of the screen,
Text Mode is on. Press CC to turn it off.
Note: Closed captioning may not correctly
operate when the signal received is weak
or when you are playing a video tape.
BACKGROUND
Choose a black or clear menu background.
Press the MENU button
To BACKGROUND
BACKGROUND
BLACK
To operate
EXIT when finished
CLEAR
B U T T O N
F U N C T I O N S
DISPLAY
VIDEO STATUS
The Display screen shows the current
status of timers and inputs.
The VIDEO STATUS button lets you select the
“Choice” settings of the Set Video Status
menu, or raise the level of detail with “Game”,
or reset to factory settings.
DISPLAY
07
NOW
SLEEP TIMER
ON/OFF TIMER
ON TIME
OFF TIME
“Standard” resets the picture settings to
factory standard levels.
12:20 PM
OFF
EVERYDAY
7:00 PM
10:00 PM
“Choice” consists of the settings that
you saved in the Set Video Status menu,
page 14.
“Game” enhances video graphics.
❑ The channel or AV input (Channel 07)
❑ Current time (12:20 PM)
❑ Sleep Timer status minutes remaining (Off)
❑ On/Off Timer status (Everyday, on at
7:00 PM, off at 10:00 PM)
❒ Each press of the DISPLAY button
changes the display mode:
DISPLAY
TIME
CHANNEL
OFF
VIDEO STATUS
CHOICE
GAME
STANDARD
SLEEP TIMER
Sleep Timer turns off the TV for you in
case you fall asleep. Program it to work
in intervals of 15 minutes up to 180
minutes.
SLEEP TIMER
0 15 30 45 60 75 90 105 120 135 150 165 180
SLEEP TIMER MESSAGE
20 seconds prior to the automatic
shut-off, this message will appear:
GOOD NIGHT ! !
PUSH SLEEP TIMER BUTTON
TO EXTEND.
You then have 20 seconds to press the
SLEEP TIMER button to delay turn off for
another 15 minutes.
HYPER SURROUND
RM-C345 ONLY.
Creates a deep, 3-dimensional sound effect
by channeling the sound through the TV’s
front firing speakers. Press the HYPER
SURROUND button to turn it on and off.
19
NOTES:
Please note that if
the clock,
SleepTimer, or
On/Off Timer are
not set, the initial
Display screen
will state “Clock
Not Set,” “Sleep
Timer Off,” and
“On/Off Timer Off,”
respectively.
20
NOTES :
RM-C241 does not
have VCR buttons.
B U T T O N
F U N C T I O N S
NUMBER BUTTONS
10 KEY PAD
Press two of the number buttons to move to
single and double digit channels.
To move to Channel 7:
0 (zero)
RETURN+
There are two kinds of Return…
Return+ — Set a “Return Channel” to
return to after scanning with CHANNEL -/+.
RETURN+ and hold for 3 seconds
7 (seven)
RETURN CHANNEL
PROGRAMMED !
Scan with CHANNEL -/+
100 + BUTTON
The 100+ button accesses all channels
above Channel 99.
To move to Channel 124:
RETURN+
Note: To cancel a Return channel, press and
hold Return+ for another 3 seconds until
“RETURN CHANNEL CANCELLED!” appears.
100+
Return — Return to the last channel
viewed after moving to another channel
via the 10 key pad.
2 (two)
4 (four)
RETURN+
MUTING
The MUTING button turns the sound off
completely when you press it.
Move to another channel with the
10 key pad.
RETURN+
MUTING
The sound will turn off
completely.
Note: To return the the original volume
press MUTING again.
VCR BUTTONS
RM-C340 and RM-C345 Only. This remote
will control your VCR. You can play,
rewind and fast-forward, record, pause,
stop, channel scan, and power on and
off.
MENU BUTTON
The MENU buttons allow you to access
the onscreen menu system. You then
use the CHANNEL –/+ and VOLUME –/+
buttons to move throughout the menu.
TV / VIDEO
TV/VIDEO selects the input mode.
TV/VIDEO
TV
VIDEO
Note: The remote is preset with the code
000 to control a JVC VCR. For any other
brand, you must set up the manufacturer’s
code (page 11).
T R O U B L E S H O O T I N G
PROBLEMS
21
CHECK
There is no power
• See if the power cord became unplugged.
• Perhaps you have experienced a blown circuit breaker or fuse or a power outage.
There is no picture
or no sound
• The antenna could be disconnected.
• The input mode (TV or Video) could not be set properly, refer to page 20.
• The tuner mode (in the Auto Tuner Setup) could be set improperly, refer to page 13.
• The station may be having difficulties, check to see if other channels are operating normally.
Remote control is
not operating or
operating properly
• Check that the batteries are still working and properly installed.
• Make sure there are no objects blocking a clear path from the remote to the TV.
• Check that the TV/CATV switch is in the proper position (RM-C340 and RM-C345) — set to TV to view television.
You cannot select a
certain channel
• Maybe you are too far from the TV, you must be within 23 feet (or 7 meters).
• Make sure the channels are programmed. See Channel Summary, page 13.
• Perhaps the channel is locked, select it with the 10 key pad and follow instructions.
The power turns off
by itself
• Perhaps the On/Off Timer is set, press the power button, check page 18.
• The power was interrupted or the power cord unplugged. Reset the clock, check page 17.
• The Sleep Timer may be set.
The clock is wrong
• The power was interrupted and the clock not reset. Reset the clock, check page 17.
On Timer is blinking
• There is a problem with the TV. Unplug the set and call for service.
PICTURE
CHECK
The picture color
quality is poor
• Tint and color may be improperly adjusted. Check page 15.
• Video Status mode may be set to an inappropriate setting. Check page 15.
There are lines
across the picture
• There could be interference from another energy consuming appliance, such as a computer,
another TV or VCR. Move any other such appliances farther away from the TV.
The picture is
spotted
• There could be interference from a running high wattage appliance such as a hair-dryer, vacuum
cleaner, or neon sign. You will have to move the antenna away from the source of the
interference or change it to a coaxial cable which is less prone to interference.
Double picture
(Ghosts)
• A building or airplane can reflect the original signal producing a second, delayed one. Adjust
the antenna position.
Snowy picture/
Image noise
• The antenna may be damaged, disconnected or turned. Check the antenna connection,
page 6, and your Quick Setup Guide. If it is damaged, you will have to replace it.
Screen is 80% black
SOUND
Bilingual or stereo
programs can’t be heard
• Closed Caption Text Mode is on. Turn it off in the Closed Caption Menu (page 18).
CHECK
• Make sure the MTS mode is properly set. Refer to page 16 for details on setting MTS Modes.
• TV Speakers may be turned off in the menu, see page 17.
There is no sound
from the TV speakers
NOT A PROBLEM
Static electricity
You hear occasional
crackling sounds
DON’T WORRY ABOUT THIS, IT’S NORMAL
• It is normal to feel a surge of static electricity if you brush over or touch the screen.
• It is normal for the TV to emit crackling sounds when turned on or off. Unless the sound or
picture become abnormal, this is fine.
22
L I M I T E D
W A R R A N T Y
For Canadian model televisions, see separate sheets for Warranty/Garantie and
JVC Authorized Service Centers in Canada.
JVC COMPANY OF AMERICA warrants this product and all parts thereof, except as set forth below TO THE ORIGINAL
PURCHASER AT RETAIL to be FREE FROM DEFECTIVE MATERIALS AND WORKMANSHIP from the date of original purchase
for the period as shown below (the “Warranty Period”). The picture tube is covered for two years.
Model No.
Serial No.
Parts
Labor
1 YEAR
1 YEAR
This limited warranty is valid only in the fifty (50) United States, The District of Columbia and the Commonwealth of Puerto
Rico.
JVC WILL:
If this product is found to be defective, repair or replace defective parts at no charge to the original owner. Such repairs will
be made during regular business hours only at JVC authorized service centers. All parts repaired or replaced are warrantied
for the remainder of this Warranty Period only. All products and parts should be brought to an authorized service center on
a carry-in basis except for those models with a screen size larger than 25 inches which are covered on an in-home basis.
YOU MUST:
• Return your products to a JVC authorized service center with a copy of your bill of sale. For the authorized JVC service
center nearest you, call toll free (800) 537-5722.
• If service is not locally available, box the product carefully, preferably in its original container, and ship it, insured, to the
nearest authorized service center with a copy of the bill of sale and a letter of explanation as to the problem. Call the toll free
number above for the address.
WHAT IS NOT COVERED:
1) Products which have been subject to abuse, accident, alteration, modification, tampering, negligence, misuse, faulty
installation, lack of reasonable care, or if repaired or serviced by anyone other than a service facility authorized by JVC to
render such service, or if connected to any attachment not provided with the products, or if the model or serial number has
been altered, tampered with, or removed;
2) Initial installation, removal for repair, and reinstallation after repair is not covered;
3) Operational adjustments covered in the Owner’s manual, normal maintenance, video and audio head cleaning;
4) Damage that occurs during shipment, due to an act of God, or of consequence to cosmetic changes;
5) Signal reception problems and failures due to line power surges;
6) Video Pick-up Tubes/CCD Image Sensor, Cartridge, Stylus (Needle) are covered for 90 days from the date of purchase;
7) Accessories, and;
8) Batteries (except for rechargeable batteries which are covered for 90 days from date of purchase.)
There are no express warranties except as listed above.
THE DURATION OF ANY IMPLIED WARRANTIES, INCLUDING THE IMPLIED WARRANTY OF MERCHANTABILTY, IS LIMITED
TO THE DURATION OF THE EXPRESS WARRANTY HEREIN.
JVC SHALL NOT BE LIABLE FOR THE LOSS OF USE OF THIS PRODUCT, INCONVENIENCE, LOSS OR ANY OTHER
DAMAGES, WHETHER DIRECT, INCIDENTAL OR CONSEQUENTIAL (INCLUDING, WITHOUT LIMITATION, DAMAGE TO
TAPES, RECORDS OR DISCS) RESULTING FROM THE USE OF THIS PRODUCT, OR ARISING OUT OF ANY BREACH OF
THIS WARRANTY, ALL EXPRESS AND IMPLIED WARRANTIES, INCLUDING THE WARRANTY OF MERCHANTABILITY AND
FITNESS FOR PARTICULAR PURPOSE, ARE LIMITED TO THE WARRANTY PERIOD SET FORTH ABOVE.
Some states do not allow the exclusion of incidental or consequential damages or limitations on how long the warranty lasts,
so these may not apply to you. This warranty gives you specific legal rights and you may also have other rights which vary
state to state.
If you have questions concerning your JVC product, please contact our Customer Relations Department:
JVC COMPANY OF AMERICA
1700 Valley Road
DIVISION OF JVC AMERICAS CORP.
Wayne, New Jersey 07470
Refurbished products carry a separate warranty. This warranty does not apply for details of refurbished product warranty.
Please refer to the refurbished product warranty information packaged with each refurbished product.
AUTHORIZED
SERVICE
QUALITY
C E N T E R S 23
SERVICE
HOW TO LOCATE YOUR JVC SERVICE CENTER
TOLL FREE: 1 (800) 537-5722
http://www.jvcservice.com
Dear Customer;
In order to receive the most satisfaction from your purchase, read the instruction booklet before operating the unit. In the
event that repair is necessar y, or for the address nearest your location, please refer to the factory service center list below
or within the Continental United States, call 1-800-537-5722 for your authorized servicer. Remember to retain your Bill of
Sale for Warranty Service.
— JVC
JVC SERVICE & ENGINEERING
COMPANY OF AMERICA
DIVISION OF JVC AMERICAS CORP.
FACTORY SERVICE CENTER LOCATIONS
Dear customer;
In order to receive the most satisfaction from your purchase, read this guide before operating the unit, and before calling
for service make sure you check the Troubleshooting pages at the end of this book. In the event that repair is necessary, or
for the address nearest you, please refer to the factory service center list below, or within the continental United States, call
the toll free number above for an authorized service center. Remember to retain your bill of sale for warranty service.
107 Little Falls Road
Fairfield, NJ 07004-2105
(973) 808-9279
1500 Lakes Parkway
Lawrenceville, GA 30243-5857
(404) 339-2522
705 Enterprise Street
Aurora, IL 60504-8149
(630) 851-7855
5665 Corporate Avenue
Cypress, CA 90630-0024
(714) 229-8011
2969 Mapunapuna Place
Honolulu, HA 96819-2040
(808) 833-5828
10700 Hammerly Suite 110
Houston, TX 77043
(713) 935-9331
13 Cummings Park
Woburn, MA 01801
(781) 376-9100
8192 State Road 84
Davie, FL 33324
(954) 472-1960
890 Dubuque Avenue
South San Francisco, CA 94080-1804
(650) 871-2666
Sophisticated electronic products may require occasional service. Just as quality is a keyword in the engineering and
production of the wide array of JVC products, service is key to maintaining the high level of performance for which JVC
is world famous. The JVC service and engineering organization stands behind our products.
NATIONAL HEADQUARTERS
JVC SERVICE & ENGINEERING COMPANY OF AMERICA
DIVISION OF JVC AMERICAS CORP.
1700 Valley Road
Wayne, New Jersey 07470
IF YOU SHIP THE PRODUCT
Pack your JVC unit in the original carton or one of equivalent
size and strength. Enclose, with the unit, a letter stating the
problem or symptom that exists and also a copy of the receipt or
bill of sale you received when you purchased your JVC unit. Print
your home return address on the outside and inside of the
carton, Send to the appropriate JVC Factory Service Center as
listed above.
Don’t service it yourself.
CAUTION
To prevent electrical shock, do not open the
cabinet. No user serviceable parts inside.
Refer to qualified service personnel.
ACCESSORIES
To purchase accessories for your JVC product, you may contact your local JVC Dealer. Or from the
48 Continental United States call toll free : 1 (800) 882-2345
BT-51011-3
(1098)
S P E C I F I C A T I O N S
MODEL
C-13010
C-13011
C-20010
AV-20020
AV-20021
NTSCSystem
Reception format
AV-27015
AV-27020
NTSC, BTSC System (Multi Channel Sound)
VHF 2 to 13. UHF 14 to 69
Sub Mid, Super, Hyper and Ultra bands
(181 channel frequency synthesizer system)
Reception range
Power consumption
60W / 1.1A
87W / 1.4A
87W / 1.4A
Screen size
13 inch / 34 cm
measured diagonally
Audio output
1W
1W
1W x 2
1.2W x 2
Speakers
3 1/16 / 8 cm round x 1
2 x 31/2 / 5 x 9cm
2 x 3 1/2 / 5 x 9cm
2 x 3 1/2 / 5 x 9 cm
oval x 1
oval x 2
oval x 2
20 inch / 51 cm
measured diagonally
full square
27 inch / 68 cm
measured diagonally
full square
Antenna terminal
75 ohms (VHF/UHF) (F-type Connector)
External input jacks
Video: 1 Vp-p, 75 ohms
Audio: 500mVrms (-4dBs) high impedance
Variable audio
output
More than 0 to 1550mVrms (+6dBs)
Low impedance (400 Hz when modulated 100%)
—
Headphone Jack
113W / 1.8A
Ø7 mm x 1
Dimensions (inches)
WxHxD (cm)
14 3/8 x 13 1/8 x 14 3/4
36.4 x 33.4 x 37.4
Weight (lbs. / kg.)
19.8 / 9.0
Accessories
—
19 7/8 x 17 7/8 x 19 1/2
50.3 x 45.2 x 49.3
43.2 / 19.6
25 3/4 x 23 3/8 x 19 1/2
65.4 x 59.3 x 49.4
43.8 / 19.9
68.5 / 31.1
Remote control unit x 1 / AAbatteries x 2
Specifications subject to change without notice.
JVC COMPANY OF AMERICA
DIVISION OF JVC AMERICAS CORP.
1700 Valley Road
Wayne, New Jersey 07470
JVC CANADA, INC.
21 Finchdene Square
Scarborough, Ontario
Canada M1X 1A7
LCT0305-001B-A
1198-TN-JII-JIM