1
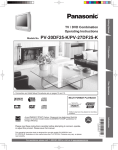
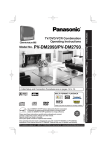
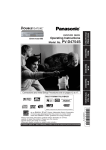
Operating Instructions
Model No.
PV-D4753S
Initial Setup
(Connection)
DVD/VCR DECK
Basic
Operation
VCR
Operation
MULTI FORMAT PLAYBACK
As an ENERGY S
Partner, Matsushita Electric Corporation
of America has determined that this product or product model
meets the ENERGY STAR® guidelines for energy efficiency.
Please read these instructions carefully before attempting to connect, operate or adjust this
product. Please save this manual.
Spanish Quick Use Guide is included.
LSQT0675A
(Guía para rápida consulta en español está incluida.)
For assistance, please call : 1-800-211-PANA(7262) or send e-mail to : [email protected]
D4753S P1-25.p65
1
2003/03/13, 11:32
For Your
Information
*Ability to play back may depend on recording conditions.
TAR ®
DVD
Operation
Connections and Initial Setup Procedures are on pages 12 to 17.
Important Safeguards and Precautions
FOR YOUR SAFETY, READ AND RETAIN ALL SAFETY
AND OPERATING INSTRUCTIONS. HEED ALL
WARNINGS IN THE MANUAL AND ON THE UNIT
INSTALLATION
1 POWER SOURCE CAUTION
Operate only from a power source indicated on the
unit or in this manual. If necessary, have your
Electric Utility Service Company or Video Products
Dealer verify the power source in your home.
2 POLARIZED OR GROUNDING PLUG
As a safety feature, this product comes with either
a polarized power cord plug (one blade is wider
than the other), or a three-wire grounding type plug.
POLARIZED PLUG CAUTION:
This plug will only fit into an outlet one way. If you cannot
fully insert the plug, try reversing it. If it still will not fit,
have an electrician install the proper wall outlet. Do not
defeat the safety feature by tampering with the plug.
GROUNDING PLUG CAUTION:
This plug will only fit into a three-hole grounding
outlet. If necessary, have an electrician install the
proper outlet. Do not defeat the safety feature by
tampering with the plug.
3 POWER CORD
Make sure power cords are routed so that they
are not likely to have anything rest on them, roll
over them, or be in the way of walking traffic.
If an extension cord is used, make sure it also
has either a polarized or grounded plug and that
the cords can be securely connected.
Frayed cords, damaged plugs, and damaged or
cracked wire insulation are hazardous and should
be replaced by a qualified service technician.
Overloaded outlets and extension cords are fire
hazards and should be avoided.
4 DO NOT BLOCK VENTILATION HOLES
Ventilation openings in the cabinet release heat
generated during operation. If they are blocked,
heat build-up inside the unit can cause failures that
may result in a fire hazard or heat damage to
cassettes or discs.
For protection, follow these rules:
a. Never cover ventilation slots or the unit while in
use, or operate the unit when placed on a bed,
sofa, rug, or other soft surface.
b. Avoid built-in installation, such as a book case
or rack, unless proper ventilation is provided.
5 PLACEMENT: AVOID EXTREMELY HOT LOCATIONS
OR SUDDEN TEMPERATURE CHANGES
Do not place the unit over or near heater or
radiator, in direct sunlight, inside closed vehicles,
in high temperature [over 104°F (40°C)], or in over
75% humidity. If the unit is suddenly moved from
a cold place to a warm one, moisture may
condense in the unit and on the tape causing
damage. Never subject the unit to vibration,
impact, or place it so that the surface is tilted as
internal parts may be seriously damaged.
6 TO AVOID PERSONAL INJURY
• Do not place unsecured equipment on a sloping
surface.
• Do not place this unit on any support that is not
firm, level, and adequately strong.
The unit could fall causing serious
injury to a child or adult and
damage to the unit.
• An appliance and cart
combination should be moved
with care. Quick stops,
excessive force, and uneven
surfaces may cause the appliance and cart
combination to overturn.
• Carefully follow all operating instructions and
use the manufacturer's recommended
accessories when operating this unit or
connecting it to any other equipment.
2
D4753S P1-25.p65
2
OUTDOOR ANTENNA INSTALLATION
1 SAFE ANTENNA AND CABLE CONNECTION
If an outside antenna or cable system is connected to the
equipment, be sure the antenna or cable system is grounded
so as to provide some protection against built up static
charges and voltage surges.
Section 810 of the National Electrical
Code, ANSI/NFPA 70 (in Canada,
part 1 of the Canadian Electrical
Code) provides information
with respect to proper grounding
of the mast and supporting
structure, grounding of the lead-in wire
to an antenna discharge unit, size of grounding conductors,
location of antenna discharge unit, connection to grounding
electrodes and requirements for the grounding electrode.
NEC - NATIONAL
ELECTRICAL CODE
ANTENNA
LEAD IN
WIRE
GROUND
CLAMP
ANTENNA
DISCHARGE UNIT
(NEC SECTION 810-20)
ELECTRIC
SERVICE
EQUIPMENT
GROUNDING CONDUCTORS
(NEC SECTION 810-21)
GROUND CLAMPS
POWER SERVICE GROUNDING
ELECTRODE SYSTEM
(NEC ART 250, PART H)
2 KEEP ANTENNA CLEAR OF HIGH VOLTAGE POWER LINES OR CIRCUITS
An outside antenna system should be located well away from
power lines, electric light or power circuits and where it will never
come into contact with these power sources if it should happen
to fall. When installing an outside antenna, extreme care should
be taken to avoid touching power lines, circuits or other power
sources as this could be fatal. Because of the hazards involved,
antenna installation should be left to a professional.
USING THE UNIT
If the unit has been in storage or moved to a new location,
refer first to the INSTALLATION section of these safeguards.
1 KEEP THE UNIT AWAY FROM WATER OR MOISTURE OF ANY KIND.
2 IF EQUIPMENT IS EXPOSED TO RAIN, MOISTURE, OR
STRONG IMPACT, unplug the unit and have it inspected by a
qualified service technician before use.
3 DURING AN ELECTRICAL STORM
During a lightning storm, whether indoors or outdoors, or
before leaving the unit unused for extended periods of time,
disconnect all equipment from the power source as well as
the antenna and cable system.
4 WHEN THE UNIT IS PLUGGED IN
• Never expose the unit to rain or water. DO NOT OPERATE
if liquid has been spilled into the unit. Immediately unplug
the unit, and have it inspected by a service technician.
Fire and shock hazards can result from electrical shorts
caused by liquid contact inside.
• Never drop or push any object through openings in the unit.
Some internal parts carry hazardous voltages and contact
can cause electric shock or fire hazard.
Do not put any foreign object on the disc tray.
• Avoid placing the unit directly above or below your TV set
as this may cause electrical interference. Keep all magnets
away from electronic equipment.
5 USING ACCESSORIES
Use only accessories recommended by the manufacturer to
avoid risk of fire, shock, or other hazards.
6 CLEANING THE UNIT
Unplug the unit. Then, use a clean, dry, chemically untreated
cloth to gently remove dust or debris. DO NOT USE cleaning
fluids, aerosols, or forced air that could over-spray, or seep
into the unit and cause electrical shock. Any substance such
as wax, adhesive tape, etc. may mar the cabinet surface.
Exposure to greasy, humid, or dusty areas may adversely
affect internal parts.
SERVICE
1 DO NOT SERVICE THIS PRODUCT YOURSELF
If, after carefully following the detailed operating
instructions, this product does not operate properly, do not
attempt to open or remove covers, or make any
adjustments not described in the manual. Unplug the unit
and contact a qualified service technician.
2 IF REPLACEMENT PARTS ARE REQUIRED
Make sure the service technician uses only parts specified
by the manufacturer, or those having the same safety
characteristics as the original parts. The use of unauthorized
substitutes may result in fire, electric shock, or other hazards.
3 HAVE THE SERVICE TECHNICIAN PERFORM A SAFETY CHECK
After any service or repairs to the unit, request the service
technician to conduct a thorough safety check as
described in the manufacturer’s service literature to ensure
that the unit is in safe operating condition.
2003/03/13, 11:32
Safety Precautions/Mesures de sécurité
WARNING: To prevent fire or shock hazard, do not expose this
equipment to rain or moisture.
CAUTION: To prevent electric shock, match wide blade of plug to
wide slot, fully insert.
Avertissement: Afin de prévenir tout risque d’incendie ou de chocs
électriques, ne pas exposer cet appareil à la pluie ou
à une humidité excessive.
Attention: Pour éviter les chocs électriques, introduire la lame la
plus large de la fiche dans la borne correspondante de la
prise et pousser jusqu’au fond.
This symbol warns the user that uninsulated voltage
within the unit may have sufficient magnitude to cause
electric shock.
Therefore, it is dangerous to make any kind of contact
with any inside part of this unit.
CAUTION
RISK OF ELECTRIC SHOCK
DO NOT OPEN
CAUTION: TO REDUCE THE RISK OF ELECTRIC SHOCK,
DO NOT REMOVE COVER (OR BACK)
This symbol alerts the user that important literature
concerning the operation and maintenance of this unit
has been included. Therefore, it should be read
carefully in order to avoid any problems.
NO USER-SERVICEABLE PARTS INSIDE
REFER SERVICING TO QUALIFIED SERVICE PERSONNEL
CAUTION:
UNIT IS A CLASS I LASER PRODUCT.
HOWEVER THIS UNIT USES A VISIBLE LASER BEAM WHICH COULD
CAUSE HAZARDOUS RADIATION EXPOSURE IF DIRECTED.
BE SURE TO OPERATE THE UNIT CORRECTLY AS INSTRUCTED.
WHEN THIS UNIT IS PLUGGED TO THE WALL OUTLET, DO NOT PLACE
YOUR EYES CLOSE TO THE OPENING OF THE DISC TRAY AND OTHER
OPENINGS TO LOOK INTO THE INSIDE OF THIS UNIT.
USE OF CONTROLS OR ADJUSTMENTS OR PERFORMANCE OF
PROCEDURES OTHER THAN THOSE SPECIFIED HEREIN MAY RESULT IN
HAZARDOUS RADIATION EXPOSURE.
DO NOT OPEN COVERS AND DO NOT ATTEMPT TO REPAIR YOURSELF.
REFER SERVICING TO QUALIFIED PERSONNEL.
CAUTION:
LASER RADIATION
WHEN OPEN DO NOT
STARE INTO BEAM.
ATTENTION:
RAYONNEMENT
LASER EN CAS
D’OUVERTURE.
NE PAS REGARDER
DANS LE FAISCEAU.
(Inside of product)
FCC NOTE:
This equipment has been tested and found to comply with part 15 of the FCC Rules. These limits are
designed to provide reasonable protection against harmful interference when operated in a residential
environment. If this equipment does cause interference to radio or television reception, which can be
determined by turning the equipment off and on, use the equipment in another location and/or utilize
an electrical outlet different from that used by the receiver.
If necessary, consult the dealer or an experienced radio/TV technician for help. The user may find the
booklet, “Something About Interference” available from FCC local regional offices helpful.
FCC Caution:
To assure continued compliance, (example- use only shielded interface cables when connecting to
other devices.) Any changes or modifications not expressly approved by the party responsible for
compliance could void the user’s authority to operate this equipment.
FCC Warning: Any unauthorized changes or modifications to this equipment would void the user’s
authority to operate.
Region Management Information:
This DECK is designed and manufactured to respond to the
Region Management Information that is recorded on a DVD
disc. If the Region number described on the DVD disc does
not correspond to the Region number of this DECK, this
DECK cannot play this disc.
● The Region number for this DECK is “1”.
● The Player will play DVD-Video marked with labels
containing “1” or “ALL”.
D4753S P1-25.p65
3
Example:
1
ALL
1
2
4
3
2003/03/13, 11:32
Before Using
Disc formats supported by this DECK
Congratulations
on your purchase of one of the most
sophisticated and reliable products on the
market today. Used properly, it will bring you
years of enjoyment. Please fill in the
information below. The serial number is on the
tag located on the back of your DECK.
• Date of Purchase
• Dealer Purchased From
• Dealer Address
• Dealer Phone No.
PV-D4753S
• Model No.
• Serial No.
DECK can play back discs bearing any of the following
[Discs Played 8cm (3") or 12cm (5")]
marks:
Logo
DVD-R (DVD-Video formatted
discs [finalized])
DVD-Audio
Video CD
CD (CD-DA)
CD-R/CD-RW (CD-DA,Video CD
formatted discs [finalized])
WMA, MP3, JPEG
Accessories
Remote Control
Batteries 2 “AA”
LSSQ0377
RF Coaxial Cable
LSJA0372
Disc type
DVD (DVD-Video)
Discs which cannot be played
• DVD with Region No. other than “1” or “ALL”
• PAL discs (the audio on DVD-Audio can be played),
DVD-RAM, DVD-ROM, DVD-RW, DVD+RW, CD-ROM,
CDV, CD-G, CVD, SVCD, SACD, Divx Video Disc and
Photo-CD
Notes
• Do not use irregularly shaped discs (e.g. heartshaped), as these can damage the unit.
• It may not be possible to play CD-R, CD-RW and
DVD-R in all cases due to the type of disc or
condition of the recording.
Disc Handling
Handling precautions
To order accessories, call toll free
1-800-332-5368.
Loading the Batteries
• Sticking a label on the disc may impair DVD-R playback.
• Do not attach sticker to discs. (Do not use discs with
exposed adhesive from tape or left over peeled-off
stickers.)
• Only hold disc by edges as shown below. Fingerprints,
dirt and scratches can cause skipping and distortion.
• Do not write on label side of disc.
• Never use record cleaning sprays, benzine, thinner,
static electricity prevention liquids, or any other solvent.
Disc tray
Disc
1) Open cover.
• Do not try to close disc tray when
disc is not properly placed.
To clean disc surface
2) Insert
batteries as
marked.
3) Close cover.
With a soft, damp (water only) cloth, gently
wipe from the center hole to the outer edge
as shown below. (Wiping in a circular
pattern will scratch the surface.)
If disc is brought from a cold to a
warm environment, moisture may
form on the disc
Wipe away moisture with a soft, dry, lint-free cloth
before using disc. (See above.)
Battery replacement caution
• Do not mix old and new batteries.
• Do not mix alkaline with manganese
batteries.
4
Improper disc storage
Discs could be damaged if stored or left in areas:
• exposed to direct sunlight.
• that are humid or dusty.
• near heat (i.e. heater, radiator, etc.).
For assistance, please call : 1-800-211-PANA(7262) or send e-mail to : [email protected]
D4753S P1-25.p65
4
2003/03/13, 11:32
Table of Contents
DVD / VCR
Important Safeguards and Precautions ............................ 2, 3
Before Using ............................................................................ 4
DECK & Cassette Information ........................................... 6 , 7
Location of Controls ....................................................... 8 ~ 10
Displays (On Screen Displays and Multi Function Display) .................... 11
Connections .................................................................. 12 ~ 15
Initial Setup for Basic Connections (Ready to Play) .......... 16, 17
Initial Setup
(Connection)
VCR
Reset Language, Channels, Clock, VCR’s Output Channel ... 18, 19
Playback/ Record on a Tape........................................... 20, 21
DVD
Basic DVD Operation ...................................................... 22, 23
Basic
Operation
Timer Recording .............................................................. 24, 25
MTS Broadcast/ VHS Hi-Fi Stereo System .................... 26, 27
Multi-Brand Control Feature ........................................... 28, 29
Tape Operation (Search System) ....................................... 30 ~ 32
Special VCR Features ..................................................... 33, 34
Copying Your Tapes (Dubbing) ......................................................... 35
VCR
Operation
Disc Operation ............................................................... 36 ~ 41
DVD Operation using On-Screen Displays ................. 42 ~ 44
MP3/WMA/JPEG Playback Operation .......................... 45 ~ 47
DVD Lock Feature ................................................................. 48
Settings for DVD Operation .......................................... 49 ~ 53
Language Code List .............................................................. 54
DVD
Operation
DVD / VCR
Warning and Instruction Displays........................................ 55
Before Requesting Service............................................. 56, 57
Limited Warranty ............................................................. 58, 59
Customer Services Directory ............................................... 59
Spanish (Español) Quick Use Guide............................. 60~ 65
Index ................................................................................. 66, 67
For Your
Information
5
D4753S P1-25.p65
5
2003/03/13, 11:32
DECK & Cassette Information
Head Cleaning
Prevent Accidental Tape Erasure
Playing older or damaged tapes may eventually
cause video heads to become clogged.
Video Head Clog Sensor
During playback, this
screen appears if
V I DEO HEADS MAY
NEED CLEAN I NG
clogging is detected.
PLEASE I NSERT HEAD
CLEAN I NG CASSETTE
To remove screen,
OR REFER TO MANUAL
press PLAY on the
END
: PLAY
remote or DECK.
• Use “dry” type head cleaning cassette
only. (Part No. NV-TCL30PT is recommended.)
• Follow cleaning tape instructions carefully.
Excessive use of tape can shorten head life.
• If head clog symptoms persist, contact your
nearest servicenter by visiting our Web Site
(see p. 59).
Break off the tab to
prevent recording.
Record Tab
Screw driver
To record again
Cover the hole
with cellophane tape.
Record/ Playback Time
Only use tapes with the
Tape Speed
Setting
mark in this DECK.
Type of Video Cassette
T60
T120
T160
2 Hours
SP
2 Hours 40 Minutes
(Standard Play) 1 Hour
LP
5 Hours
2 Hours 4 Hours
(Long Play)
20 Minutes
SLP
8 Hours
(Super Long Play) 3 Hours 6 Hours
Cleaning DECK
Use a soft cloth or dusting attachment of a vacuum cleaner to remove dust from the ventilation holes
on the back sides and bottom of the cabinet. Plastic surfaces are easily scratched and can be
marred by alcohol and various solvents. Avoid excessive use of oil-based furniture polishes since
the materials used in the cabinet will accumulate more dust. We recommend using a non-abrasive,
antistatic cleaner and polisher.
Features for a Quality Picture (VCR)
Digital Auto Picture
Automatically controls the video output signal for less noise depending on the tape condition.
Digital Auto Tracking
Continuously analyzes the signal and adjusts for optimum picture quality.
Manual Tracking Control
(to reduce picture noise)
Use during Playback and Slow Motion mode to reduce picture noise.
Press CH (TRACKING) / on the remote control or on DECK until the picture clears up.
To return to Auto Tracking, press POWER off, then on again a few seconds later.
R
R
R
R
R
R
R
R
V-Lock Control (to reduce picture jitter)
In Still mode, CH (TRACKING) / operate as a V-Lock control.
6
For assistance, please call : 1-800-211-PANA(7262) or send e-mail to : [email protected]
D4753S P1-25.p65
6
2003/03/13, 11:32
Specifications
Input/Output Terminal:
Input Terminal:
Output Terminal:
Operating Temperature:
Operating Humidity:
Weight:
Dimensions:
Discs Played
(1) DVD-Video Disc
DVD-Audio Disc
(2) Compact Disc
(CD-DA, Video CD)
(CD-R/CD-RW, MP3, WMA, JPEG)
Digital Audio Output:
Pickup:
120 V AC, 60 Hz
Power On: Approx. 32 watts, Power Off: Approx. 4 watts
EIA Standard NTSC color
4 rotary heads helical scanning system
1 track (Normal), 2 channel (Hi-Fi Audio Sound)
VHF 2 ~ 13, UHF 14 ~ 69
Midband A through I (14 ~ 22), Superband J through W (23 ~ 36)
Hyperband AA ~ EEE (37 ~ 64), Lowband A-5 ~ A-1 (95 ~ 99)
Special CABLE channel 5A (01), Ultraband 65 ~ 94, 100 ~ 125
Audio/Video Line Input/Output, RF Input/Output
Audio/Video Line Input (Front)
S-Video Output (DVD only), Component Video Output (DVD only)
Audio Output 2 (L), (R)
5 °C ~ 40 °C (41 °F ~ 104 °F)
10 % ~ 75 %
4.9 kg (10.8 lbs).
430 (W) x 95.5 (H) x 344 (D) mm
16-15/16” (W) x 3-12/16” (H) x 13-9/16” (D) inch
5”
5”
5”
3”
3”
3”
5”
3”
Initial Setup
(Connection)
Power Source:
Power Consumption:
Video Signal:
Video Recording System:
Audio Track:
Tuner:
Broadcast Channels:
CABLE Channels:
(12 cm) single-sided single-layer
(12 cm) single-sided double-layer
(12 cm) double-sided double-layer (one layer per side)
(8 cm) single-sided single-layer
(8 cm) single-sided double-layer
(8 cm) double-sided double-layer (one layer per side)
(12 cm) disc
(8 cm) disc
Digital Optical Connector
Wavelength: 655 nm (DVD), 790 nm (Video CD/CD)
Laser power: CLASS II
Note: • Designs and specifications are subject to change without notice.
Definition of Terms (DVD)
Angle:
Some DVD discs feature scenes simultaneously shot from different angles.
The ANGLE button can be used to view the scene from different angles.
(ANGLE Indicator lights on DECK when a scene recorded at different
angles is detected.)
Chapter Number: Titles are subdivided into numbered sections. You can quickly search for
a favorite scene using these numbers.
DVD:
A high-density optical disc on which high-quality pictures and sound have
been digitally recorded. DVD incorporates new video compression
technology (MPEG II) and high-density recording technology which allow
entire movies to be recorded with incredible playback quality.
Playback Control:With Video CD (version 2.0), scenes or information may be selected for
viewing or listening from an interactive menu that appears on the TV screen.
Subtitles:
Written dialogue which appears at the bottom of the screen.
Time Number:
The elapsed play time from the start of a disc or title. Use to quickly find
scenes. (May not work with some discs.)
Title Number:
For DVD discs with two or more titles, the title is numbered as title 1, title 2, etc.
Track Number: Numbers assigned to tracks on Video CDs and CDs to allow specific tracks
to be quickly located.
Video CD:
CD containing picture and sound with same quality level as video tape.
This DECK also supports Video CDs with playback control (version 2.0).
Apparatus Claims of U.S. Patent Nos. 4,631,603, 4,577,216, 4,819,098 and 4,907,093,
licensed for limited viewing uses only.
This product incorporates copyright protection technology that is protected by method claims of
certain U.S. Patents and other intellectual property rights owned by Macrovision Corporation and
other rights owners. Use of this copyright protection technology must be authorized by Macrovision
Corporation, and is intended for home and other limited viewing uses only unless otherwise
authorized by Macrovision Corporation. Reverse engineering or disassembly is prohibited.
D4753S P1-25.p65
7
2003/03/13, 11:32
7
Location of Controls
Bold:
VCR Function
Italic:
DVD Function
Bold Italic: VCR and DVD Functions
Normal:
Others
DISPLAY
Remote Control
EJECT /
OPEN / CLOSE
p. 11, 42
pp. 20, 22
TV mode
POWER
p. 28
VCR mode
DVD mode
p. 28
p. 28
DSS / CABLE mode
INPUT
p. 35
p. 28
PLAY
FAST FORWARD /
SEARCH / SLOW+
pp. 20, 22
pp. 20, 23
REWIND / SEARCH /
SLOW-
PAUSE / STILL
pp. 20, 23
pp. 20, 23
STOP
VCR/TV
pp. 20, 22
p. 21
ADD/DELETE / CLEAR
NUMBER keys
pp. 19, 39, 48
RETURN / SEARCH
Virtual Surround Sound (V.S.S.) /
ENTER
pp . 22, 30
ACTION
pp . 23, 28
pp. 18, 49
PROGRAM
p. 24
SKIP
SKIP
SELECT
p. 23
MENU
p. 38
TITLE
p. 38
SET
SUB TITLE
p. 36
ZOOM
ANGLE
p. 37
p. 37
COMMERCIAL SKIP /
ZERO SEARCH
AUDIO (SAP / Hi-Fi)
pp. 27, 36
pp. 31, 32
VOLUME + / -
CHANNEL /
TRACKING / V-LOCK
p. 28
pp. 6, 21
COUNTER
RESET
TAPE POSITION /
VOLUME ADJUST
p. 32
p. 34, 40
SPEED / PAGE
p. 21, 41
RECORD
p. 21
EJECT button: When this button is pressed in VCR mode, the tape is ejected.
This button is inoperative if pressed during recording.
If pressed in DVD mode, the disc tray opens or closes.
8
For assistance, please call : 1-800-211-PANA(7262) or send e-mail to : [email protected]
D4753S P1-25.p65
8
2003/03/13, 11:32
Bold:
VCR Function
Italic:
DVD Function
Bold Italic: VCR and DVD Functions
Normal:
Others
STOP/EJECT
If the disc cannot be removed...
First, unplug DECK. Then, prepare a rigid
wire (e.g. an extended paper clip) and,
applying moderate force, insert it straight
into the hole at the base of the tray.
The tray will eject a little. Now, pull the tray
all the way out and remove the disc.
p. 20
FAST FORWARD/SEARCH
p. 20
PLAY
Initial Setup
(Connection)
FrontView
View
DECK
Front
ofof
DECK
Over 2 inches
p. 20
REWIND/SEARCH
p. 20
Remote
Sensor
POWER
Cassette
Compartment
Audio/Video
Input Connector 2
(LINE 2) p. 35
Multi Function
Display
CHANNEL /
TRACKING/V-LOCK
Disc Tray
OPEN/CLOSE
p. 22
PROGRESSIVE
p. 10
PAUSE
p. 11
p. 23
pp. 6, 21
SKIP
SKIP
REC
p. 21
p. 23
PLAY
p. 22
STOP
p. 22
Reset All Memory Functions
Use when moving DECK to new location, or if a mistake was made in the Initial
Setup section (return to Factory Setting).
• Make sure a tape is not inserted in the DECK.
1
2
1
D4753S P1-25.p65
3
2
Turn DECK Power on.
Press and hold both VCR PLAY
and CHANNEL
on the DECK for
more than 5 seconds.
• The power shuts off.
Do “Initial Setup (Ready to Play)”
on page 16.
9
9
2003/03/13, 11:32
Location of Controls (continued)
Bold:
VCR Function
Italic: DVD Function
Bold Italic: VCR and DVD Functions
AC Power Plug
VHF/UHF Antenna Output Terminal
• While plugged into an AC outlet,
p.12
Rear View of DECK
this DECK consumes 4 W of
electrical power in off mode.
VHF/UHF Antenna Input Terminal
p. 12
Component Video Output
Connector (Y, PB, PR) (DVD Only)
p. 13
Video Output
Connector
p. 12
Video Input
Connector
p. 35
5.1ch Analog Audio Output
Connector (CENTER, SUB WOOFER,
SURROUND L/R, FRONT L/R)
(DVD Only) p. 15
•
Optical Digital Audio
Output Connector
(DVD Only)
p. 15
S-Video Out
Connector
(DVD Only)
pp. 10, 13
•
•
Audio Input
Connector (L/R)
p. 35
Audio Output 2
Connector (L/R)
p. 13
Audio Output 1
Connector (L/R)
p. 12
The following table shows the status of the output jacks when in VCR or DVD mode.
Video Output
Audio Out 1
Audio Out 2
VCR
DVD
YES
YES
Component
Video Output
S-VIDEO OUT
N/A
N/A
YES
Note • PROG functions on the remote are not available when using Component Video Output
and S-VIDEO OUT. Please set TV to either RF INPUT or VIDEO INPUT, and then press
PROG.
To enjoy PROGRESSIVE SCAN video
(1). Connect Component Video Output to the component video input terminals of a television.
(See p. 13.)
(2). When the PROGRESSIVE button is pressed, the ON lamp lights up (see p. 9) and the
PROGRESSIVE SCAN signal is output from the Component Video Output Connector.
Notes
• The PROGRESSIVE button can be operated when the DECK is in DVD function mode.
• The screen may shift off-center when using progressive output. Please adjust the screen
position if this occurs. (Refer to your TV manual.)
• The DECK outputs video signals (not PROGRESSIVE SCAN) from the “VIDEO OUT” and
“S-VIDEO OUT” terminals when the ON lamp is lit.
10
For assistance, please call : 1-800-211-PANA(7262) or send e-mail to : [email protected]
D4753S P1-25.p65
10
2003/03/13, 11:32
Displays (On Screen & Multi Function)
Function & Channel Displays
CH 0 8
When a function button
is pressed, e.g. PLAY,
or you change
channels, a 5-second
display appears.
➛ press DISPLAY.
Blank Tape/ No Video Signal
Indications
Whenever a blank section of a tape
comes up in Play mode, or when the
selected channel has no broadcast
signal with Weak Signal Display
Feature (p. 33) set to OFF, the TV
screen will turn solid blue.
Current Time
Function Status
VCR Status & Clock Displays
To display or remove
overlay at right,
Initial Setup
(Connection)
On Screen Displays (VCR)
Channel
CH 02
REC
1 2 : 0 0AM
-0 : 1 2 : 3 4
0 : 25
SP
STEREO
SAP
MONO
Rec Time Remaining
(OTR mode only,
see p. 21.)
Counter
Broadcast Audio
Being Received
(See p. 26.)
Tape Speed
(See p. 6.)
Multi Function Display
VCR mode Indicator
Tape Indicator
DISC Indicator
DVD mode Indicator
Lights up when
DECK is VCR mode.
Lights up when a tape
is inserted.
Lights up when a
disc is inserted.
Lights up when
DECK is DVD mode.
Timer Indicator
VCR REC Indicator
Lights up when
DECK is set for
Timer Recording,
or when One
Touch Recording
(OTR) is used.
Flashes when
Timer Recording is
set, but a tape has
not been inserted
into DECK and
when a power
interruption occurs
during Timer
Programming.
Lights up during
recording.
CD/MP3/WMA
Indicator
VCR
DVD
TIMER
REC
Hi - Fi
DIGITAL
DIGIT
Hi-Fi Indicator
Lights up when
Hi-Fi audio is
monitored in Play
mode.
C D MP3 WMA
ANGLE
AM
PM
CD : Lights when a
Video or Audio
CD is inserted
or JPEG file is
played.
MP3/WMA :
Lights when an
MP3 or WMA
file is played.
ANGLE Indicator
AM/PM
Indicator
Lights up when a
scene recorded at
different angles is
detected.
(See p. 37.)
(DVD only).
DTS Indicator
Lights up when DTS
formatted DVD is played.
(DVD only)
Clock/ Status/ Channel/ Speed Display
Displays the current time. Briefly displays DECK
status when a function button is pressed. Briefly
displays the channel number, or “L1” or “L2”
when a channel or line input is selected. Briefly
displays the recording speed when SPEED is
pressed.
Dolby Digital
Indicator
Lights up when “Dolby Digital”
formatted DVD is played.
(DVD only)
11
D4753S P1-25.p65
11
2003/03/13, 11:32
Connections
Basic Connections
• If your TV has AUDIO and VIDEO IN terminals, connect them to DECK for higher
quality picture and sound.
• You can enjoy stereo sound even if your TV is not stereo by connecting a stereo
amplifier to DECK.
• Connect DECK and TV with an RF Coaxial Cable a (supplied) or an AV Cable b
(not supplied) as shown in the figure below.
■ DSS Receiver
DECK
■ DECK
TV
■ Cable Box
TV
DECK
TV
Antenna or Cable
DSS
Receiver
IN
IN
IN
OUT
Cable Box
OUT
or
1 Disconnect antenna or cable from TV
and connect to DECK.
2 Connect DECK to TV with RF Coaxial Cable.
a
DVD/VCR DECK
TV
OUT
IN 1
RF COAXIAL CABLE
(supplied)
IN FROM ANT.
VIDEO
VHF/
UHF
L
VHF/UHF
AUDIO
OUT TO TV
AUDIO IN VIDEO
L
IN
R
R
b
AV CABLE (not supplied)
WARNING
When using “Nut type” RF coaxial cables, tighten with
fingers only. Overtightening may damage terminals.
Note to CABLE system installer
This reminder is provided to call the CABLE system installer’s attention to Article 820-40 of the
NEC in USA (and to the Canadian Electrical Code in Canada) that provides guidelines for proper
grounding and, in particular, specifies that the cable ground shall be connected to the grounding
system of the building, as close to the point of cable entry as practical.
12
For assistance, please call : 1-800-211-PANA(7262) or send e-mail to : [email protected]
D4753S P1-25.p65
12
2003/03/13, 11:32
Other Connections
You Can
IN 1
OUT
IN FROM ANT.
IN
Cable Box
VHF/UHF
OUT TO TV
IN
OUT
VHF/
UHF
R
L
ANT
or
CATV
OUT
Cable Box
IN
IN 1
IN FROM ANT.
OUT
VHF/UHF
OUT TO TV
2-Way Splitter
Cable Box
OUT 1 OUT 2
IN
OUT
A/B Switch
IN 1 IN 2
• record
scrambled
channels.
OUT
AUDIO
VIDEO
■ Connect With Two Cable Boxes
DVD/VCR DECK
• view any
(including
scrambled)
channel.
Initial Setup
(Connection)
■ With a Cable Box (DECK Cable Box TV)
DVD/VCR DECK
ANT or CATV
TV
You Cannot
• use Remote
Control to select
channels without
using Multi-brand
control feature.
You Can
• record and view
both scrambled
and unscrambled
channels if
additional
TV
equipment is
added.
IN OUT
This connection
R
AUDIO
requires: two
L
converter boxes,
VIDEO
an A/B switch,
VHF/
UHF
and a 2-way
splitter.
You Cannot
• view a channel
other than the
one selected
for any type of
recording.
• do a Timer
recording of a
channel unless
you select it on
the Cable Box.
Connections For DVD Only (enjoying higher picture quality)
1 Connect AUDIO OUT2 (L, R) to the AUDIO IN (L, R) of the TV. (audio input for COMPONENT
or S-VIDEO mode).
2 If your TV has COMPONENT VIDEO INPUT, connect to COMPONENT VIDEO OUT.
3
If your TV does not have COMPONENT VIDEO INPUT but has S-VIDEO INPUT, connect to
S-VIDEO OUT.
When in DVD mode, set your TV to either COMPONENT VIDEO IN or S-VIDEO IN.
Notes • You can watch DVDs through the S-VIDEO or COMPONENT VIDEO, VHF/UHF OUT TO TV,
and VIDEO OUT connections to your TV. The VCR and TUNER pictures are available only
from the VIDEO OUT and VHF/UHF OUT TO TV connections to your TV.
• PROG functions on the remote are not available when using S-VIDEO OUT and COMPONENT
Video Output. Please set TV to either RF INPUT or VIDEO INPUT, and then press PROG.
• TV must have capability to accept and display a progressive scan signal to use
PROGRESSIVE mode. Consult your TV operating instructions.
DVD/VCR DECK
DVD OUTPUT
COMPONENT
VIDEOOUT
TV
AUDIOOUT2
Y
IN
IN
IN
Y
L
PB
R
From DECK’s
A/V OUTPUT
AUDIO
L
PB
PR
S-VIDEO OUT
R
PR
VIDEO
S-VIDEO
IN
or
D4753S P1-25.p65
13
13
2003/03/13, 11:32
Connections (continued)
Audio Connections
Ready Checklist
Turn down the volume, then turn DECK, as well as other equipment to be connected,
off before proceeding with connection.
Do not block ventilation holes of any of the equipment and arrange them so that air can
circulate freely.
Read through the instructions before connecting other equipment.
Ensure that you observe the color coding when connecting audio and video cables.
■ Connecting Amplifier (2ch stereo system)
Speaker
DVD/VCR DECK
AUDIO OUT2
L
R
Amplifier
AUDIO IN
R L
Speaker
Enjoying digital audio output from the digital audio output connector
Notes on audio output from the optical digital audio output connector
Disc
Sound recording format
Optical digital audio output from connector
DVD
Dolby Digital
MP3
Dolby Digital bitstream (1-5.1 ch)
or PCM (48 kHz sampling/16 bit only)*1
Linear PCM (2 ch)
(48 kHz sampling/16 bit or 44.1 kHz sampling/
16 bit)*2
Bitstream or PCM (48 kHz sampling/16 bit only)*1
PCM (44.1 kHz sampling)
Linear PCM (44.1 kHz sampling)
Linear PCM (It depends on the MP3 file)
WMA
Linear PCM (It depends on the WMA file)
Video CD
CD
MP3
WMA
Linear PCM
(48/96/192/44.1/88.2/
176.4 kHz 16/20/24bit)
DTS
MPEG 1
Linear PCM
*1 The type of audio output from the connector can be selected by the Settings for DVD
Operation. (See p. 50.)
*2 Sound having 96/192 kHz sampling is converted into 48 kHz sampling (or 88.2/176.4 kHz
sampling is converted into 44.1 kHz sampling) when it is output from the DECK’s optical digital
audio output connector.
For your reference:
• Dolby Digital is a digital sound compression technique developed by the Dolby Laboratories
Licensing Corporation. Supporting 5.1-channel surround sound, as well as stereo (2-channel)
sound, this technique enables a large quantity of sound data to be efficiently recorded on a disc.
• Linear PCM is a signal recording format used in CDs. While CDs are recorded in 44.1 kHz/16 bit,
DVDs are recorded in 44.1 kHz/16 bit ~ 192 kHz/24 bit.
Manufactured under license from Digital Theater Systems, Inc. US Pat. No. 5,451,942, 5,956,674,
5,974,380, 5,978,762 and other world-wide patents issued and pending. “DTS” and “DTS Digital
Surround” are registered trademarks of Digital Theater Systems, Inc. Copyright 1996, 2000
Digital Theater Systems, Inc. All rights reserved.
Manufactured under license from Dolby Laboratories.
“Dolby” and the double-D symbol are trademarks of Dolby Laboratories.
14
For assistance, please call : 1-800-211-PANA(7262) or send e-mail to : [email protected]
D4753S P1-25.p65
14
2003/03/13, 11:32
■ Connecting Amplifier (5.1 ch Surround system)
Initial Setup
(Connection)
Enjoy the powerful movie theater and hall-like sound available with multiple
channel audio found on DVDs by connecting an amplifier and speakers.
There are two types of connection, digital and analog.
A. Digital connection (DECK OPTICAL Digital Audio Output Connector)
When DVDs recorded in Dolby Digital or DTS are played, Dolby Digital bitstream or DTS
bitstream is output from the DECK OPTICAL Digital Audio Output Connector. When DECK
is connected to a Dolby Digital decoder or DTS decoder, you can enjoy theater-quality
audio in your home. [An optical digital audio cable (optional) is required when an optional
Dolby Digital decoder or DTS decoder is used.]
B. Analog connection (5.1 ch Analog Audio Output Connector)
Connect an amplifier with multi-channel audio input terminals. This DECK can decode
Dolby Digital and DTS. There are no limitations on sampling frequency with this kind of
connection.
Notes on connecting an optical
digital audio cable (optional)
Surround
Speaker
Surround
Speaker
[5.1 ch Surround system]
• Firmly connect the cable to the
connector.
Center
Speaker
Front
Speaker
Front
Speaker
Amplifier
B. Analog connection
To multi-channel audio
input terminals
DVD/VCR DECK (Rear)
Subwoofer
Decoder with Dolby Digital
/DTS processing
A. Digital connection
Optical Digital Audio
Cable (optional)
To Optical Digital Audio
Input Connector
Caution for optical digital audio output connector:
• When connecting an amplifier (with an Optical Digital Input Connector) which does not
contain the Dolby Digital or DTS decoder, be sure to select “PCM” at “Dolby Digital”
and “PCM” at “dts” of the Settings for DVD Operation “Audio Output” (see p. 50).
Otherwise, any attempt to play DVDs may cause such a high level of noise that it may
be harmful to your ears and damage your speakers.
• When a Dolby Digital/DTS decoder is connected, please select “Bitstream” at “dts” or
“Dolby Digital” of the Settings for DVD Operation “Audio Output”.
If “PCM” is selected, there will be stereo sound. (See p. 50.)
• Video CDs and CDs can be played as usual.
Note:
• Some DTS decoders which do not support DVD-DTS interface may not work properly with
DECK.
15
D4753S P1-25.p65
15
2003/03/13, 11:32
Initial Setup for Basic Connections (Ready to Play)
Before doing Initial Setup
1 Turn TV on.
2
See connections a RF Coaxial Cable Connection and b AV Cable Connection on page 12.
<RF Coaxial Cable Connection>
Set TV to channel 3.
<AV Cable Connection>
Set TV to VIDEO.
3
[DECK ➛ TV]
• Go to “Initial Setup (Ready to Play).” (See below.)
[Cable Box ➛ DECK ➛ TV], [DSS ➛ DECK ➛ TV]
• Turn on Cable Box and set it to your Public Broadcasting Station (PBS) channel
in your time zone.
• If you use a DSS Receiver, it must be turned off.
Initial Setup (Ready to Play)
1
2
Press VCR on remote for VCR mode.
Plug DECK Power Cord into AC wall outlet. DECK comes on and auto channel
and clock set starts.
• If screen below does not appear, check DECK - TV connection and, if TV is tuned to
channel 3, try switching it to channel 4.
• To change VCR’s output channel, please refer to “VCR’s Output Channel” on page 19.
Plugging the AC Power Plug into
an AC outlet.
Notes
CH AUTO SET PROCEEDING
CANCEL : STOP
AUTO CLOCK SET
• Function buttons are inoperative during Initial Setup.
• To remove a cassette during Auto Set, press EJECT on
the remote or STOP/EJECT twice on the DECK.
In this case, settings must be made manually. (See p. 18.)
• Depending on conditions, Auto Clock Set may take longer
than 30 minutes. If so, press STOP to stop setup and
perform settings manually. (See p. 18.)
PROCEEDING
CANCEL : STOP
16
Continued on next page...
For assistance, please call : 1-800-211-PANA(7262) or send e-mail to : [email protected]
D4753S P1-25.p65
16
2003/03/13, 11:32
*Important: If a remote control button does not work when pressed,
press the VCR button on the remote and try the button again.
dy to Play)
Settings are made automatically.
When setup is done, this screen appears.
6 / 8/ 2003 SUN 2 : 20PM
EJECT
DST : ON
SETT I NG : CH 10
AUTO CLOCK SET
VCR
COMPLETED
If “AUTO CLOCK SET IS INCOMPLETE”
appears, manually set clock. See below.
ACTION
AUTO CLOCK SET IS
I NCOMPLETE
SELECT
PLEASE SET CLOCK BY
PRESSING ACT I ON KEY
Initial Setup
(Connection)
3
SET
Manual Clock Set
If Auto Clock Set was incomplete.
1
Press ACTION* on remote to display
CLOCK screen.
SET CLOCK
:
1/ /
DST : ON
-----------------------
SELE CT MONTH
SELECT :
SET
:SET
EXIT
: ACT I ON
2
STOP
Press
to select the month and SET to
set. In the same manner, select and set the
date, year, time, and DST (Daylight Saving
Time).
SET CLOCK
6 / 8 / 2003 SUN 2:20PM
DST : ON
----------------------SET COMPLETED
SET
: SET
START : ACT I ON
3
BACK :
Press ACTION to start clock and exit.
17
D4753S P1-25.p65
17
2003/03/13, 11:32
Reset Language, Channels, Clock,
1
Press ACTION*
to display MENU.
MENU
SET UP VCR
SET CLOCK
SET UP CHANNEL
IDIOMA/LANGUE : ENGLISH
VCR’S OUTPUT CH:3
VCR’s O
• PROGRAM functions are not available
when using COMPONENT Video Output
and S-VIDEO OUT. Please set TV to
either RF INPUT or VIDEO INPUT, and
then press PROGRAM.
SELECT :
SET:SET
EXIT
: ACTION
2
Language
Channels
1) Press
to select
language item.
1) Press
to select
“SET UP CHANNEL,”
and press SET.
MENU
SET UP VCR
SET CLOCK
SET UP CHANNEL
IDIOMA/LANGUE : ENGLISH
VCR’S OUTPUT CH:3
MENU
SET UP VCR
SET CLOCK
SET UP CHANNEL
IDIOMA/LANGUE : ENGLISH
VCR’S OUTPUT CH:3
SELECT :
SET:SET
EXIT
: ACTION
SELECT :
SET : SET
EXIT
: ACTION
2) Press SET repeatedly to
change language item as
shown below.
MENU
PREPARAR VCR
FIJAR RELOJ
FIJAR CANAL
LANGUE/LANGUAGE:ESPAÑOL
CANAL DE SALIDA : 3
➡
MENU
REGLAGE MAGNETOSCOPE
REGLAGE HORLOGE
REGLAGE CANAL
LANGUAGE/IDIOMA:FRANÇAIS
CA SORTIE : 3
• If you use a Cable Box,
set it to the PBS channel
in your time zone.
➡
MENU
SET UP VCR
SET CLOCK
SET UP CHANNEL
IDIOMA/LANGUE : ENGLISH
VCR’S OUTPUT CH:3
MENU
SET UP VCR
SET CLOCK
SET UP CHANNEL
IDIOMA/LANGUE : ENGLISH
VCR’S OUTPUT CH:3
SELECT :
SET : SET
EXIT
: ACTION
2) Press
to select
“MANUAL,” and press SET.
(For Auto Clock Set, select
“AUTO CLOCK SET.”)
CANCEL : STOP
• After Channel Auto Set
is finished, Auto Clock
Set will be performed.
For English
3) Press ACTION to exit.
AUTO CLOCK SET
MANU
NUAL
T I ME ZONE ADJUST : 0
SELECT :
EXIT
: ACT I ON
SET : SET
(“TIME ZONE ADJUST”
appears only when auto
clock is set.)
SET CLOCK
6 / 8 / 2003 SUN 12:00PM
DST : ON
----------------------SELECT HOUR
OUR
SELECT :
SET
: SET
EXIT
: ACT I ON
CH AUTO SET PROCEEDING
SELECT :
SET:SET
EXIT
: ACTION
18
SELECT :
SET : SET
EXIT
: ACT I ON
to select
3) Press
“AUTO SET,” then
press SET.
SEL.
:
REGLER:SET
QUITTER : ACTION
For French
1) Press
to select
“SET CLOCK,” and
press SET.
SET CLOCK
SET UP CHANNEL
ANTENNA : CABLE
AUTO SET
WEAK S I GNAL D I SPLAY : OFF
CABLE / DSS BOX SET UP
VCR Plus+ CH SET UP
ELEGIR :
FIJAR : SET
SALIR
: ACTION
For Spanish
2) Press
to select
“ANTENNA,” then
press SET to set your
antenna system
(“TV” or “CABLE.”)
Clock
BACK :
and to
3) Press
select, then set the date,
time, and DST (Daylight
Saving Time).
4) Press ACTION to start
Clock and exit this
mode.
For assistance, please call : 1-800-211-PANA(7262) or send e-mail to : [email protected]
D4753S P1-25.p65
18
2003/03/13, 11:32
k,
VCR’s Output Channel
*Important: If a remote control button does not work
when pressed, press the VCR button
on the remote and try the button again.
Time Zone Adjust
SELECT :
SET : SET
EXIT
: ACTION
2) Press
to select
“TIME ZONE ADJUST,”
1) Press
to select
“VCR’S OUTPUT CH.,”
and press SET.
ACTION
ADD/DLT
SELECT
MENU
SET UP VCR
SET CLOCK
SET UP CHANNEL
IDIOMA/LANGUE : ENGLISH
VCR’S OUTPUT CH:3
SET
SELECT :
SET : SET
EXIT
: ACTION
CH
/
2) Press SET.
I F YOU PRESS ACT I ON
KEY, VCR’ S OUTPUT CH
SW I TCHES TO CH 4.
SET CLOCK
AUTO CLOCK SET
MANUAL
T I ME ZONE ADJUST : 0
3) Press ACTION.
SELECT :
EXIT
: ACT I ON
NUMBER
keys
Basic
Operation
MENU
SET UP VCR
SET CLOCK
SET UP CHANNEL
IDIOMA/LANGUE : ENGLISH
VCR’S OUTPUT CH:3
VCR
VCR’s Output
Channel
(Only when Auto Clock is set.)
1) Press
to select
“SET CLOCK,” and
press SET.
POWER
SET : SET
Add or Delete a Channel
To add channel:
Select channel with NUMBER keys
and press ADD/DLT.
CHANNEL 08 ADDED
and press SET to
subtract or add hour(s)
as necessary.
• “TIME ZONE ADJUST”
returns to “0” if clock is
set manually.
➡
3) Press ACTION twice.
PLEASE TUNE YOUR TV TO
CH 4.
After 3 seconds
To delete channel:
Select channel with CH / or
NUMBER keys and press ADD/DLT.
CHANNEL 08 DELE TED
MENU
SET UP VCR
SET CLOCK
SET UP CHANNEL
IDIOMA/LANGUE : ENGLISH
VCR’S OUTPUT CH:4
SELECT :
SET : SET
EXIT
: ACTION
• To Make Corrections,
repeat steps 1) ~ 3).
DST (Daylight Saving Time)
DECK auto adjusts clock for DST.
(p. 17.)
Spring (First Sunday in April)
DST:ON ➛ Sets clock ahead one hour.
Autumn (Last Sunday in October)
DST:ON ➛ Turns clock back one hour.
• If your area does not observe
Daylight Saving Time, select
DST:OFF.
• Keep these time changes in mind
when programming DECK for
timer recordings.
19
D4753S P1-25.p65
19
2003/03/13, 11:32
Playback/ Record on a Tape
Ready Checklist
All connections are made. (pp. 12 ~ 15)
TV and DECK are plugged in.
TV is on and tuned to CH 3, 4, or VIDEO.
Remote is in VCR mode. (Press VCR.)
Playback a Tape
1
Insert a tape.
2
Press PLAY* to play a tape.
EJECT
DVD
VCR
PLAY
REW/SLOWVCR/TV
STOP
FF/SLOW+
PAUSE/
STILL
• DECK power comes on. If Auto VCR/TV (see
p. 32) is set to “OFF,” press VCR/TV on the
remote to be VCR mode.
• If tape has no rec. tab (p. 6), auto play begins.
Special Features During Play
Forward/Reverse Scene Search
➛ Press FF/SLOW+ or REW/SLOW-.
➛ Press PLAY to release.
After search has begun, each additional press of
FF or REW changes speed as shown below.
[SLP] : Approx. 21X ↔ Approx. 9X
[LP] : Approx. 9X ↔ Approx. 7X
[SP] : Approx. 7X ↔ Approx. 3X
If at 21X, 9X, or 7X speed the picture is
interrupted, change speed to 9X, 7X, or 3X.
Notes
• Picture interruption may occur with some TVs.
• FF and REW search speed may vary
depending on current tape position.
Still (Freeze) Picture
➛ Press PAUSE/STILL.
➛ Press PLAY to release.
Frame by Frame Picture
➛ Press PAUSE/STILL in Still mode.
➛ Press PLAY to release.
Slow Motion Picture
➛ Press FF/SLOW+ (increase speed) or
REW/SLOW- (decrease speed) in Still
mode.
➛ Press PLAY to release.
3
/
REC
SPEED
Notes
• These features work best in SP or SLP mode.
• The sound will be muted.
• To reduce picture noise, see “Manual Tracking
Control” on page 6.
• After DECK is in Still or Slow mode for 3 minutes,
it will switch to Stop mode automatically to
protect the tape and the video head.
Playback using DECK buttons
2 Press PLAY. 1 Insert a tape.
Press STOP to stop a tape.
Press REW/SLOW- or FF/SLOW+ in Stop
mode to rewind or fast forward a tape.
Press EJECT on remote, or STOP/EJECT
on DECK to eject a tape.
20
CH
Multi Function Display
Press STOP/EJECT to stop
and/ or eject a tape.
For assistance, please call : 1-800-211-PANA(7262) or send e-mail to : [email protected]
D4753S P1-25.p65
20
2003/03/13, 11:32
*Important: If a remote control button does not work when pressed,
press the VCR button on the remote and try the button again.
Record on a Tape
This video recorder, equipped with HQ
(High Quality) system, is compatible
with existing VHS equipment. Only use
mark. Only tapes
tapes with the
tested and inspected for use in 2, 4, 6,
and 8 hour machines are
recommended.
Insert a tape with a record tab (p. 6).
1
• DECK power comes on. If Auto VCR/TV (see p. 32)
is set to “OFF,” press VCR/TV on the remote to be
VCR mode.
2
Press CH
, or NUMBER keys
to select the channel.
• For “LINE” input, see p. 35.
• If channel is over 100, press 100 key then press
the remaining 2 digits.
Note
Press SPEED
to select the record speed (p. 6).
3
SP = Standard Play
LP = Long Play
SLP = Super Long Play
• Speed appears on-screen and on Multi Function Display.
4
Press REC
to start recording.
5
Press STOP
to stop recording.
Basic
Operation
Remove loose or peeling
labels from tapes to prevent
tape jam.
(The VCR REC indicator lights up on Multi Function
Display),
• To edit out unwanted scenes, press PAUSE/STILL
to pause, and again to resume recording.
• You cannot view another channel during recording.
One Touch Recording (recording in progress),
➛ press REC repeatedly to set the recording length
➛ (30 min. ~ 4 hours).
• DECK shuts off after the preset record length.
Normal Rec
4:00
3:00
0:30
2:00
1:00
1:30
Record one station, watch another,
➛ press VCR/TV on the remote
(change to TV mode),
➛ select channels at TV (recording continues).
Select Channels at DECK (In STOP or
REC. PAUSE mode),
Record using DECK buttons
1 Insert a tape.
4 Press
REC
to start
recording.
➛ press VCR/TV on the remote
(change to TV mode),
➛ select channels at DECK.
Play a disc while recording a tape.
➛ insert a disc during recording,
➛ press DVD, and then press PLAY.
Notes
• It is not possible to record from DVD/ Video
CD/ CD to VHS tape using DECK.
• Watching one channel and recording another
is not possible when using Cable Box or
DSS Receiver.
• After 5 minutes in Pause mode, DECK stops to
protect a tape and video heads.
D4753S P1-25.p65
21
2 Select
Channel.
Multi Function Display
Press STOP/EJECT to stop.
21
2003/03/13, 11:32
Basic DVD Operation
Ready Checklist
All connections are made. (pp. 12 ~ 15)
DECK is plugged in.
If DECK is connected to an audio amplifier,
turn the stereo system’s power on.
OPEN/
CLOSE
POWER
1
2
3
Press DVD to select DVD mode.
• If a disc is already inserted, go to step 4.
(Depending on the disc, playback may
start automatically.)
Press OPEN/CLOSE,
and then place a disc into the disc tray.
1
2
DVD
PLAY
REW/
SLOW-
FF/
SLOW+
STOP
PAUSE/
STILL
NUMBER
keys
4
RETURN
SKIP
SELECT
READING
SET
10
TITLE
<Example1>
T I TLE MENU
If an interactive DVD*1 or
a Video CD with playback
control*2 is used and TITLE
MENU appears, go to step 5.
5
Operation using DECK buttons
POWER.
• You may also close tray by
pressing OPEN/CLOSE.
• Data reading time differs with
each disc.
SKIP
MENU
1 Press
• Hold disc by its edges
only (p. 4) with printed
side up and use guides to
place into tray.
Use 1 3” (8 cm)
or 2 5” (12 cm) disc.
Press PLAY to start playing.
Disc tray closes automatically.
CLOSE
VSS
3, 7
Press
OPEN/CLOSE.
4 Press PLAY.
3 Insert a disc.
6 Press
STOP.
1
* Interactive DVD...
May include multiple camera angles,
stories, etc.
*2 Video CD with playback control...
Particular scenes or information can be
interactively selected from a menu that
appears on the screen.
22
Press POWER* on the remote or DECK.
Dogs
Cas t l es
Love r s
B i r ds
Press
or
NUMBER keys (see
below) to select title,
and press SET or
PLAY to start playing.
• “Pressing SET or PLAY”
is not necessary when
using NUMBER keys.
<Example2>
Using NUMBER keys starts playing automatically.
The number of available titles varies with each disc.
1 digit number
1 ••• 1
<Input
2 digit number
12 ••• 10 1 2
Example>
3 digit number
123 •••100 1 2 3
Press SKIP
| or |
to go to next or previous
menu screen.
• SKIP function not available with all discs.
Please refer to disc jacket for operation information.
To return to menu (play stops)
Press TITLE, MENU, or RETURN. (DVD-Video/
DVD-Audio)
Press RETURN. (Video CD)
6
7
Press STOP to stop playing.
Press OPEN/CLOSE to eject the disc.
For assistance, please call : 1-800-211-PANA(7262) or send e-mail to : [email protected]
D4753S P1-25.p65
22
2003/03/13, 11:32
*Important: If a remote control button does not work when pressed,
press the DVD button on the remote and try the button again.
■ Forward/Reverse Scene Search
Press FF/SLOW+ or REW/SLOWduring play.
Press PLAY to release.
• Starting forward/reverse search during play
started from menu on Video CDs may recall menu.
• Search speed, slow at first, increases with each
additional press of the button up to 5 levels.
■ Forward/Reverse Chapter/Track Skip
Press SKIP
| or |
SKIP during play.
Each press skips a chapter (DVD-Video) or
track (DVD-Audio/Video CD/CD).
from menu on Video CDs may recall menu.
Current playback position
Chapter/Track Chapter/Track Chapter/Track Chapter/Track
Reverse Skip
Forward Skip
■ Still Picture or Pause
VSS1
VSS OFF
VSS OFF (default)
VSS2
VSS3
Note
• Surround sound effects is available in DVD
mode only.
• Turn off the surround effects on the other
equipment.
• V.S.S. will not work, or will have less effect,
with some discs.
• Turn V.S.S. off if it causes distortion.
• Sound will only come from the two front
speakers if V.S.S. is on.
Basic
Operation
SKIP once midway through a
chapter/track returns to the start of that
chapter/track. Each additional press skips
back one chapter/track.
• Pressing SKIP
| or |
during play started
• Pressing |
V.S.S. (Virtual Surround Sound)
Enjoy a surround-like effect if you are
using two front speakers only. The effect
is broadened and sound seems to come
from virtual speakers on either side if the
disc has surround signals recorded on it.
Press VSS in DVD mode.
• The Surround sound effects can be
changed by pressing VSS repeatedly as
shown by the figure below.
Resume Function
DECK memorizes the point where STOP is
Press PAUSE/STILL during play.
is displayed on screen).
pressed (STOP
Press PLAY to resume play from this point.
Press PLAY to release.
• DVD/Video CD : DECK will enter still picture mode. Pressing STOP again or opening the tray
cancels RESUME, however, RESUME is not
• CD : DECK will enter pause mode.
canceled when power is turned off and on.
■ Frame by Frame Picture
(DVD/Video CD)
Press PAUSE/STILL in still mode.
Press PLAY to release.
• RESUME works only with discs for which
elapsed play time is displayed during play.
Enjoy Video CDs featuring
playback control without using
menus (Video CDs only)
• Each press advances picture one frame.
• Hold button down for consecutive frame advance.
• Whether pictures are advanced by “FRAME” or 1. Do steps 1-4 (previous page).
“FIELD” is selected automatically. (See p. 53.)
When menu appears, press STOP.
2. Press NUMBER keys to select desired
■ Slow Motion Picture
track (play begins).
(DVD/Video CD)
Press FF/SLOW+ or REW/SLOWin still mode.
Press PLAY to release.
• Check disc for track numbers.
• Press “1” to start at beginning of disc.
To Resume Menu use,
Press STOP and press PLAY, then the
menu will be displayed.
• Slow motion speed, slow at first, is increased
Now, go to step 5 (previous page).
with each additional press of the button up to
5 levels.
Notes
• Reverse slow motion is not available for Video CDs.
Auto-Power Off Function
Power turns off after DECK has been in
Stop mode (DVD) for about 5 minutes.
• When
appears on the screen while a button
is being operated, it means that the
corresponding operation is prohibited by DECK
or the disc.
D4753S P1-25.p65
23
• Please read the disc jacket for operation
information.
• If a single sided disc is placed in upside
down, “THIS TYPE OF DISC CANNOT BE
PLAYED. PLEASE INSERT A DIFFERENT
DISC” is displayed.
• Remove disc and press DECK POWER off
when not in use.
• Disc continues to rotate with menu displayed
even after play is done.
Press STOP to clear menu display when
finished with menu.
2003/03/13, 11:32
23
Timer Recording
Ready Checklist
All connections are made. (pp. 12 ~ 15)
TV and DECK are plugged in.
Clock set correctly. (p. 18)
Tape has rec.tab. (p. 6)
Remote is in VCR mode. (Press VCR.)
Sufficient tape remaining for recording time.
1
Press PROG*
to display Program.
2
13 SUN --:-- --:-- --
DATE
START
STOP
CH
SLP
TODAY
-----------------------SELE CT START DATE
SE
SELECT :
SET
: SET
END
: PROG
Example
VCR
1) To set record DATE,
to select:
press
1~31= one time, or
DAILY= MON~ FRI, or
WEEKLY= same time
each week and
press SET.
ADD/DLT
PROG
• See selection order left.
Today
14
1
31
12
DAILY
WEEKLY
(SUN)
SELECT /
Selection Order
13
POWER
WEEKLY
(MON)
WEEKLY
(SAT)
SELECT
2) To set remaining items,
press
to select and
press SET
to set START/ STOP times,
CH (channel) or LINE
input (p. 35), and tape
speed (SP, LP, SLP).
SET
Press PROG
to end programming.
3
DT
13
----
START
10 : 00 P
-- : --- : --- : --
STOP
12 : 00 P
-- : --- : --- : --
CH SPD
02
SP
-- --- --- --
CANCEL
: ADD / DLT
SELECT 1-8 :
ENTER
: SET
EXIT
: PROG
To Enter More Programs,
press
to select and
press SET
to set an unused program
number, and then repeat
step 2.
Or
Press PROG
to exit.
VCR mode Indicator
VCR REC Indicator
VCR
TIMER
REC
Hi - Fi
TIMER Indicator
<Multi Function Display>
• The “Timer” Indicator lights up on DECK.
• You can do Timer Recording with the power on or off.
• “TIMER REC WILL START SOON” appears on-screen for 2 minutes
before Timer Recording starts. If DECK is in DVD mode, no message
appears, but the VCR REC Indicator, the VCR mode indicator and
“REC” will flash on Multi function Display.
24
For assistance, please call : 1-800-211-PANA(7262) or send e-mail to : [email protected]
D4753S P1-25.p65
24
2003/03/13, 11:32
*Important: If a remote control button does not work when pressed,
press the VCR button on the remote and try the button again.
Review, Replace or Clear Program Contents:
(Recording is not in progress)
1
2
Press PROG
to display Program List.
DT START
STOP
7
9 : 00A 12 : 00A
8 10 : 00P 12 : 00P
10
8 : 00P 9 : 00P
9 : 00P 10 : 00P
SU
CANCEL
SELECT
ENTER
EXIT
3
CH SPD
08 SP
02 SP
10 SP
L1 LP
: ADD / DLT
1-8 :
: SET
: PROG
Press
to select number and
press SET
to display.
To cancel a Timer
Recording in progress...
Hold down STOP in VCR mode for
a few seconds to cancel the Timer
Recording.
(The “TIMER” Indicator goes out
on Multi Function Display.)
• Any future daily or weekly recording
will be performed as programmed.
To Replace program...
DATE
START
STOP
CH
7 SUN 9:00A 12:00A 08
SP
TODAY
Repeat Step 2 (p. 24)
to set new programs.
---------------------------------------SELE CT START DATE
SELECT
SET
END
:
: SET
: PROG
BACK :
VCR
Operation
or
To Clear program...
DT START
STOP
-- -- : -- -- : -8 10 : 00P 12 : 00P
10
8 : 00P 9 : 00P
SU
9 : 00P 10 : 00P
CANCEL
SELECT
ENTER
EXIT
4
CH SPD
-- -02 SP
10 SP
L1 LP
Press ADD/DLT.
: ADD / DLT
1-8 :
: SET
: PROG
Press PROG
to end the programming.
Notes
• If you are using a Cable Box, the VCR’s channel for Timer Recording must be set to
the Cable Box input channel and Cable Box must be manually set to the desired
channel. Cable Box power must be left on.
• 2 minutes before Timer Recording is performed, “PLEASE PREPARE FOR TIMER
REC” appears and Timer Indicator flashes.
Be sure a cassette with record tab is loaded and DECK is in Stop mode.
• If a power interruption occurs while programming the timer, the timer program(s) may be
canceled. If “TIMER PROGRAMS WERE LOST DUE TO POWER INTERRUPTION”
appears on-screen, please re-enter the timer programs.
• If the start time for Timer Recording comes up during recording and playing back,
Timer Recording will not be performed.
Important notes when using DSS Receiver
• When recording programs via DSS Receiver, DSS Receiver must be left on.
• When recording programs via an antenna or cable, DSS Receiver must be turned off.
25
D4753S P1-25.p65
25
2003/03/13, 11:32
MTS Broadcast/ VHS Hi-Fi Stereo System
Connection
Make the Audio/Video Connection as shown on pp. 12 ~ 15.
• You can use TV connected to a Stereo amplifier and speakers instead of Stereo TV.
Receivable Broadcast Types
The following are possible audio broadcast types and onscreen displays.
The signal being received is indicated with an “ ” mark
while the selected audio mode is indicated with an arrow.
DISPLAY
To display the broadcast signal being received,
➛ press DISPLAY*.
MTS Stereo and SAP broadcast
Multi-channel Television Sound
Stereo (main language) and
Secondary Audio Program (sub
language) broadcasts are being
received simultaneously.
Select STEREO or SAP audio mode.
MTS Stereo broadcast
STOP
STOP
Multi-channel Television Sound
Stereo broadcast. Select STEREO
audio mode.
1 2 : 0 0AM
CH 02
0 : 00 : 00
SP
1 2 : 0 0AM
CH 02
0 : 00 : 00
SP
STEREO
SAP
MONO
STEREO
SAP
MONO
AUDIO
(SAP/Hi-Fi)
• If stereo broadcast is weak and
display flickers, select MONO audio
mode for possible better results.
SAP broadcast
STOP
Secondary Audio Program (sub
language) broadcast. Select SAP
audio mode for the sub language.
MONO broadcast
STOP
Normal monaural sound broadcast.
STEREO
SAP
MONO
26
1 2 : 0 0AM
STEREO
SAP
MONO
1 2 : 0 0AM
CH 02
0 : 00 : 00
SP
CH 02
0 : 00 : 00
SP
®
Equipped with
-TV
Noise Reduction for
true MTS reproduction.
®
-TV Noise
Reduction is required
for good stereo
separation and audio
®
fidelity.
is a
registered trademark,
®
and is licensed by
Technology Licensing.
For assistance, please call : 1-800-211-PANA(7262) or send e-mail to : [email protected]
D4753S P26-35.p65
26
2003/03/13, 11:32
*Important: If a remote control button does not work when pressed,
press the VCR button on the remote and try the button again.
Audio Mode for Recording
1
Press AUDIO (SAP/Hi-Fi)
to display audio mode.
(Display disappears after 5 seconds.)
2
STEREO
SAP
MONO
Press AUDIO (SAP/Hi-Fi) repeatedly
to select desired mode.
• Refer to “Receivable Broadcast Types” on p. 26.
• Arrow indicates selection.
3
Make a recording.
See p. 21.
VCR
Operation
Audio Mode for Playback
1
2
3
Start playback.
See p. 20.
Press AUDIO (SAP/Hi-Fi)
to display audio mode.
H I F I : L/R
HIFI : L
HIFI : R
NORMAL
• Arrow indicates
selection.
Press AUDIO (SAP/Hi-Fi) repeatedly
to select desired mode.
• Select “HIFI (L/R)” or “HIFI (L)” or “HIFI (R)” to listen to stereo
recordings in stereo sound.
Select “NORMAL” for monaural sound.
• Display disappears after 5 seconds.
Notes
• Only tapes recorded in Hi-Fi stereo will playback with true stereo sound. Standard
stereo tapes will playback in monaural sound.
• To listen to Hi-Fi stereo playback, the DECK AUDIO (L/R) jacks must be connected to
a stereo TV or an external stereo amplifier and speakers. (See pp. 12, 14.)
• If tracking is adjusted during playback, Hi-Fi audio may revert to normal audio.
• Hi-Fi and normal audio playback volume level may differ.
27
D4753S P26-35.p65
27
2003/03/13, 11:32
Multi-Brand Control Feature
POWER
Multi-Brand Control Setup
VCR
The Remote Control can be set to control some TV and
Cable Box/DSS functions.
1
2
DSS/
CABLE
Find your TV and Cable Box/DSS Receiver
Brand Code Number on the following page.
TV
DVD
Set up for TV control,
➛ hold down TV button,
➛ enter code with NUMBER keys.
Set up for Cable or DSS control,
➛ hold down DSS/CABLE button,
➛ enter code with NUMBER keys.
• If code number is 100 or greater,
➛ e.g., press 1 - 0 - 2 for 102.
3
NUMBER
keys
Confirm code entry,
➛ press POWER to turn selected unit on or off.
• See table below for controllable functions in each mode.
ENTER
• Repeat setup after remote battery replacement.
• Remote will not control every TV, Cable Box, or
DSS made by the manufacturer listed. If you get
no response, your particular unit cannot be
controlled. There are NO additional codes for the
products listed. If your product is not listed, then
the remote is not compatible with that product.
Notes
Using Multi-Brand Control
After remote is set up, you can select VCR, DVD, TV, or
DSS/CABLE for the desired function.
Press VCR, DVD, TV, or DSS/CABLE on the remote.
(Table below shows available remote buttons for each mode.)
Mode
Unit
DVD/VCR
DVD/VCR
TV
CABLE/
DSS
All
VOL
EJECT/OPEN/CLOSE *,
DISPLAY, PLAY, STOP,
FF/SLOW+, REW/SLOW-,
VCR/TV, PAUSE/STILL, SKIP,
AUDIO, CM/ZERO,
TAPE POSITION,
COUNTER RESET, SPEED,
REC, PAGE
*
Notes
TV
Bold: VCR Function
Italic: DVD Function
CABLE/ DSS
+/-
POWER, INPUT,
NUMBER keys,
ENTER,
CH / ,
VOL +/VOL
+/ -
POWER, ENTER,
NUMBER keys
(except 100key),
CH /
Bold Italic: VCR and DVD Functions
Normal: TV, Cable Box or DSS Receiver
• Not all functions listed may be controllable.
• In TV or DSS/CABLE mode, it may be necessary to press ENTER after pressing
NUMBER keys for channel selection.
28
For assistance, please call : 1-800-211-PANA(7262) or send e-mail to : [email protected]
D4753S P26-35.p65
28
2003/03/13, 11:32
TV Brand Code Numbers
Panasonic ....................... 01,
Quasar ............................ 01,
RCA .......................................
GE .........................................
Zenith ....................................
Magnavox ..............................
02
02
03
03
04
05
Sylvania ................................
Sharp ............................... 06,
Sony ......................................
Toshiba .................................
Sanyo ....................................
Fisher ....................................
05
07
08
09
10
10
JVC ........................................
Hitachi ...................................
Mitsubishi ........................ 07,
Samsung ...............................
Gold Star ................... 15, 16,
11
12
13
14
17
Cable Box Brand Code Numbers
Oak Sigma ..................................... 46, 11, 129, 101
Panasonic .................................. 17, 16, 08, 87, 109
Philips ................... 23, 24, 20, 13, 07, 50, 128, 129
Pioneer ...................................................... 06, 05, 12
Pulsar .................... 04, 42, 63, 44, 30, 52, 124, 126
Quest ........................................................ 06, 05, 12
Radio Shack ............................... 44, 51, 75, 59, 126
RCA ............................................ 17, 16, 08, 87, 109
Realistic ..................................... 44, 51, 75, 59, 126
Recoton ...................................... 44, 51, 75, 59, 126
Regal ................. 41, 14, 15, 28, 102, 104, 103, 130
Regency .................................................. 28, 29, 130
Rembrandt ....... 44, 42, 63, 29, 01, 32, 39, 120, 126
Samsung ...................................... 42, 06, 32, 05, 40
Scientific Atlanta ................... 08, 09, 25, 61, 53, 87
Sheritech ............................................................... 27
Signal ............................................................ 26, 112
SL Marx ............. 42, 06, 32, 40, 43, 44, 52, 63, 126
Sprucer ...................................... 17, 16, 08, 87, 109
Standard Components ............... 32, 39, 42, 44, 126
Stargate .............. 04, 42, 32, 40, 63, 44, 30, 52, 06
124, 126
Sylvania .......................................................... 19, 18
Teknika ........................................................... 74, 35
Telecaption .................................................... 77, 127
Teleview ................................. 40, 19, 38, 32, 42, 06
Texscan .......................................................... 19, 18
Tocom ................................... 34, 33, 01, 42, 66, 120
Toshiba ................................................................. 36
Unika ........................... 44, 42, 63, 29, 01, 126, 120
Universal .............................. 52, 43, 44, 63, 42, 126
Viewstar .................. 62, 40, 22, 13, 58, 20, 26, 107
Videoway .......................................... 07, 23, 50, 129
Vidtek .................................................................... 64
Zenith ............................................... 07, 23, 50, 129
VCR
Operation
Archer ......................... 44, 06, 01, 120, 05, 63, 126
Cableview ................ 29, 09, 01, 63, 120, 44, 42, 30
52, 04, 124, 126
Citizen ................... 44, 52, 30, 63, 42, 04, 124, 126
Curtis ..................................... 08, 09, 25, 61, 53, 87
Century ...................................... 44, 51, 75, 59, 126
Cabletenna .................. 29, 09, 01, 63, 120, 44, 126
Cable Cinema .............. 29, 09, 01, 63, 120, 44, 126
Diamond ...................... 29, 09, 01, 63, 120, 44, 126
Eagle ....................... 62, 40, 22, 13, 58, 20, 26, 107
Eastern ................................................... 28, 29, 130
Explorer .................................. 08, 09, 25, 61, 53, 87
Gemini ..................................................... 30, 04, 124
General Electric ...................................... 01, 57, 120
General Instruments . 01, 84, 83, 34, 03, 02, 04, 55
65, 66, 67, 68, 120, 106, 121, 122, 115, 117, 118, 124
Gerrard ............................................... 44, 51, 75, 59
GC Electronics ............... 44, 42, 63, 29, 30, 52, 04
124, 126
Hamlin ............... 41, 14, 15, 28, 102, 104, 103, 130
Hitachi ................................................................... 31
Jerrold .......... 01, 84, 83, 34, 03, 02, 04, 55, 65, 66
67, 68, 120, 106, 121, 122, 115, 117, 118, 124
Jasco ...................................................... 30, 04, 124
Macom ................................................................... 31
Magnavox ...................................................... 26, 112
Matsushita ................................. 17, 16, 08, 87, 109
Movietime ...................... 32, 39, 42, 44, 126, 38, 40
Maestro ........................................................... 74, 35
NEC .................................................... 40, 19, 38, 32
NSC .................................................... 40, 19, 38, 32
Novavision ............................. 08, 09, 25, 61, 53, 87
Next Level ........... 01, 84, 83, 34, 03, 02, 04, 55, 65
66, 67, 68, 120, 106, 121, 122
Oak ................................................. 46, 11, 129, 101
DSS Brand Code Numbers
Toshiba .......................................................
Hitachi/ Hughes .................................... 91,
Primestar ....................................................
Drake ..........................................................
Magnavox ............................................. 94,
Uniden ................................................... 94,
90
99
92
93
95
95
Optimus ................................................ 94, 95
Panasonic ................................................... 96
ProScan ...................................................... 97
RCA ............................................................. 97
SONY .................................................. 98, 105
Important Notes
• Some manufacturers use several codes for one brand. If the first code entered fails, try the
next one listed.
• Some TV, Cable Box and DSS Receiver brands require you to turn on the power manually.
D4753S P26-35.p65
29
2003/03/13, 11:32
29
Tape Operation
Search System
For each recording, an invisible index mark is placed on the tape. A program index and
information are also included for timer recordings. These marks are used to access or
scan recordings.
Program End Search
Index Search
1
Press SEARCH*
to display SEARCH
in Stop or Play
mode, and then
press NUMBER
keys
to select recording
number.
INDEX SEARCH
ENTER INDEX NUMBER :1
USING 1- 9 KEYS
FORWARD SEARCH :FF
REVERSE SEARCH :REW
NEXT :SEARCH
EXIT :STOP
Locates end point of recording for continuity.
1
Press SEARCH twice
to display SEARCH in Stop or Play
mode.
2
• To calculate
number, see below.
SEARCH START : FF
Press FF/SLOW+
or REW/SLOW- on
the remote to start
search.
FORWARD SEARCH : FF
REVERSE SEARCH : REW
EXIT
Examples of Program End Search.
Fig. 1
Program 1
Fig. 2
3
4
5
6
To go to rec. 6 from rec. 2, enter 4 and press FF.
1
NOTE:
2
3
4
5
6
7
BLANK
End Point
the current tape position
Press SEARCH button
Program 1
BLANK
FF
Program 2
If search exceeds
a few seconds in
BLANK area.
Upon locating end point,
➛ search continues 7 sec. past end point,
➛ tape rewinds to 10 sec. before end point,
➛ tape plays to end point and stops.
indicates start points of each recording.
Note
Note
• If Index Search is started very close to an
index mark, that index mark may not be
counted in the search.
30
Program 2
FF
7
Example 2:
BLANK
the current tape position
Press SEARCH button
INDEX
2
INDEX
INDEX
Program 1
End Point
1
End Point
FF
Fig. 3
To go to rec. 2 from rec. 4, enter 3 and press REW.
Program 2 or BLANK
the current tape position
Press SEARCH button
• To cancel, press
PLAY or STOP.
To Calculate Index Number
Example 1:
• To cancel, press
PLAY or STOP.
:SEARCH
INDEX
2
Play begins at
search end.
To search forward
or back 1 index,
press FF/SLOW+ or
REW/SLOW- on the
remote while
screen left is
displayed (10 sec.).
INDEX SEARCH
Press FF/SLOW+
on the remote to
start PROGRAM
END SEARCH.
PROGRAM END SEARCH
• If Program End Search is started very close to
an index mark, that mark may be skipped over.
For assistance, please call : 1-800-211-PANA(7262) or send e-mail to : [email protected]
D4753S P26-35.p65
30
2003/03/13, 11:32
*Important: If a remote control button does not work when pressed,
press the VCR button on the remote and try the button again.
Auto Operation Functions
Auto Play
Insert a tape ➛ Power comes on,
➛ Play starts if there is no record tab
(see p. 6).
Auto Rewind
Play
Fast Forward
➛ Tape end ➛ Rewind
Play Auto Eject
REW/SLOWPLAY
(Repeat Play must be off)
Play ➛ Tape end ➛ Rewind
➛ Tape ejects if set some programs
FF/SLOW+
STOP
SEARCH
Commercial Skip
VCR fast forwards (skips) over 1~3 minutes
of recorded tape.
CM/ZERO
1
VCR
Operation
NUMBER
keys
Press CM/ZERO in Play mode.
• The skip time can be changed by
pressing CM/ZERO repeatedly as
shown by the figure below.
PLAY
1st Press
1 min Skip
2nd Press
2 min Skip
3rd Press
3 min Skip
• No indication appears on-screen.
31
D4753S P26-35.p65
31
2003/03/13, 11:32
Tape Operation (continued)
Repeat Play
VCR/TV Selector Feature
Set to playback a recording over and over.
1
2
Press ACTION*
to display MENU.
MENU
SET UP VCR
SET CLOCK
SET UP CHANNEL
IDIOMA/LANGUE : ENGLISH
VCR’S OUTPUT CH:3
Press
to select “SET UP VCR,” and
press SET.
SELECT :
SET : SET
EXIT
: ACTION
3
SET UP VCR
REPEAT PLAY
REMOTE WARN I NG
AUTO SHUT-OFF
AUTO VCR/TV
SELECT :
END
: ACT I ON
:
:
:
:
OFF
ON
OFF
OFF
Press
to select “REPEAT PLAY,”
and press SET
to set “ON” or “OFF.”
SET: SET
The VCR/TV selection can be set to
auto or manual.
1
2
Press ACTION twice
to return to normal screen.
Note
• For repeat play in DVD mode, see page 44.
Zero Search
To quickly return to a specified tape location.
1
2
3
4
5
Press DISPLAY during play
to display Counter.
PLAY
1 2 : 0 0AM
0 : 00 : 00
SP
Press COUNTER RESET
at desired position to reset
to “0:00:00”.
MENU
SET UP VCR
SET CLOCK
SET UP CHANNEL
IDIOMA/LANGUE : ENGLISH
VCR’S OUTPUT CH:3
SELECT :
SET : SET
EXIT
: ACTION
3
• Play repeats at tape end or if unrecorded portion
over 30 sec. is detected.
4
Press ACTION
to display MENU.
SET UP VCR
REPEAT PLAY
REMOTE WARN I NG
AUTO SHUT-OFF
AUTO VCR/TV
SELECT :
END
: ACT I ON
: OFF
: ON
: OFF
: OFF
SET: SET
Press
to select
“SET UP
VCR,” and
press SET.
Press
to select
“AUTO VCR/
TV,” and
press SET
to set “ON”
or “OFF.”
• OFF(Manual): You select “VCR” or
“TV” mode using the
VCR/TV button on the
remote.
• ON(Auto):
“VCR” mode is
automatically set when
VCR is turned on, or in
Play mode.
4
Press ACTION
to return to normal screen.
Note
• For more on VCR/TV selection, see
“Record one station, watch another”
and “Select channels at DECK”
sections (see p. 21).
Continue to record, playback etc.
Press STOP.
REW
1 2 : 3 0AM
CH 02
0 : 30 : 30
SP
STOP
1 2 : 3 1AM
CH 02
0 : 00 : 00
SP
Press CM/ZERO in Stop mode
to start Zero Search.
• DECK will go into FF or REW mode and stop
at the last point the Counter was set to 0:00:00.
32
For assistance, please call : 1-800-211-PANA(7262) or send e-mail to : [email protected]
D4753S P26-35.p65
32
2003/03/13, 11:32
Special VCR Features
*Important: If a remote control button does not work
when pressed, press the VCR button
on the remote and try the button again.
Weak Signal Display Feature
DISPLAY
When “ON,” picture is displayed regardless of signal
strength.
1
2
STOP
MENU
SET UP VCR
SET CLOCK
SET UP CHANNEL
IDIOMA/LANGUE : ENGLISH
VCR’S OUTPUT CH:3
SELECT :
SET : SET
EXIT
: ACTION
ACTION
SELECT
Press ACTION
to display MENU.
3
SET UP CHANNEL
ANTENNA : CABLE
AUTO SET
WEAK S I GNAL D I SPLAY:OFF
SET
SELECT :
EXIT
: ACT I ON
CM/ZERO
COUNTER
RESET
When set to ON, all operations
except for timer record and tape
eject are prohibited. Useful for
households with small children.
• ON: Picture is displayed regardless of signal
condition, and may not always be clearly visible.
OFF: Screen turns solid blue when signal is weak or
non-existent.
• Selecting ON has no effect on connected equipment
with blue back feature.
4
To turn on, hold down REC on
DECK in Stop mode with no
tape inserted for 7 seconds.
(Please ignore “NO CASSETTE”
warning.)
VCR LOCK ACT I VATED
Press
to select “WEAK SIGNAL
DISPLAY,” and
press SET
to set “ON” or “OFF.”
Press ACTION twice
to return to normal screen.
Auto Shut-Off Feature
The power shuts off at a preset time.
1
2
VCR
Operation
VCR Lock Feature
SET: SET
Press
to select “SET UP
CHANNEL,” and
press SET.
Press ACTION
to display MENU.
MENU
SET UP VCR
SET CLOCK
SET UP CHANNEL
IDIOMA/LANGUE : ENGLISH
VCR’S OUTPUT CH:3
Press
to select “SET UP VCR,” and
press SET.
SELECT :
SET : SET
EXIT
: ACTION
3
To turn off, repeat above.
SET UP VCR
REPEAT PLAY
REMOTE WARN I NG
AUTO SHUT-OFF
AUTO VCR/TV
:
:
:
:
OFF
ON
OFF
OFF
VCR LOCK OFF
SELECT :
EXIT
: ACT I ON
SET: SET
Press
to select “AUTO SHUT-OFF.”
Press SET repeatedly to
change shutoff time as
shown below.
2 Hours
OFF
• VCR Lock cancels in 24 hours if
clock is set.
4 Hours
6 Hours
4
Press ACTION twice
to return to normal screen.
Note
• The shut-off countdown will not function during Play or
Record.
REC
33
D4753S P26-35.p65
33
2003/03/13, 11:32
Special VCR Features (continued)
Remote Warning Feature
If Multi-brand feature is used (p. 28), and this feature is
set to on, a warning appears whenever an invalid key
is pressed in TV, DSS or CABLE mode.
1
2
Press ACTION*
to display MENU.
MENU
SET UP VCR
SET CLOCK
SET UP CHANNEL
IDIOMA/LANGUE : ENGLISH
VCR’S OUTPUT CH:3
SELECT :
SET : SET
EXIT
: ACTION
3
*Important: If a remote control button does not work
when pressed, press the VCR button
on the remote and try the button again.
SET UP VCR
REPEAT PLAY
REMOTE WARN I NG
AUTO SHUT-OFF
AUTO VCR/TV
SELECT :
EXIT
: ACT I ON
:
:
:
:
OFF
ON
OFF
OFF
SET: SET
INPUT
Press
to select “SET UP VCR,”
and
press SET.
STOP
PAUSE/
STILL
ACTION
Press
to select
“REMOTE WARNING,” and
press SET
to set “ON” or “OFF.”
SELECT
SET
• If “OFF,” remote warning will not appear
when invalid key is pressed.
4
TAPE
POSITION
Press ACTION twice
to return to normal screen.
REC
Tape Position and Tape Status Feature
To find out the present tape position and amount of tape remaining.
Tape position is displayed for VHS-C type Cassettes, tapes
under 30 minute long, and some other tapes, but the
position is not correct.
1
Press TAPE POSITION
to detect current tape position.
DETECTING TAPE POSITION
SP
R 120 M I N.
BEG I N
2
• “DETECTING TAPE POSITION” is displayed
only when a cassette is first inserted, and it
takes several seconds for correct tape
position to appear.
• The present tape position indication and
amount of tape remaining (according to
tape speed) is displayed.
• Tape remaining time display may not be
precise.
END
Press TAPE POSITION
to return to normal screen.
Note
This function cannot display exact amount of tape remaining for
tapes 30 minutes or less, or for tapes over 120 minutes in length.
34
For assistance, please call : 1-800-211-PANA(7262) or send e-mail to : [email protected]
D4753S P26-35.p65
34
2003/03/13, 11:32
Copying Your Tapes (Dubbing)
Connection
VCR/ Camcorder
(Hi-Fi)
OUT
OUT
VIDEO
AUDIO
TV
DVD/VCR DECK
IN 1
VIDEO IN 2
VIDEO
L
R
Front of DECK
IN FROM ANT.
L
AUDIO1
R
VHF/
UHF
VHF/UHF
OUT TO TV
L-AUDIO IN2-R
(Audio/Video In Terminals
on the front of DECK are
available)
1
Connect VIDEO OUT terminal on Playing VCR to VIDEO IN terminal on DECK.
To monitor the dubbing, also connect TV as shown.
2
Connect “L” and “R” AUDIO OUT terminals on Playing VCR to “L” and “R”
AUDIO IN terminals on DECK.
In place of Playing VCR, you can use other equipment, such as a Camcorder.
Simply connect the unit’s Audio/Video outputs to DECK.
Playing (Source) VCR
3
Insert a pre-recorded tape.
Insert a blank tape with record tab.
Press INPUT to set DECK Input mode to
LINE for Video Input.
VCR
Operation
1
2
Recording (Editing) DECK
(See “Selecting the Input Mode” below.)
Press PLAY, then PAUSE/STILL
immediately to enter PLAY/PAUSE
mode.
Press REC, then PAUSE/STILL
immediately to enter REC/PAUSE
mode.
The operation of steps 4 and 5 must be done on the
playing and recording VCRs at the same time.
4
5
Press PLAY to start dubbing.
Playing VCR starts playback.
Press PAUSE/STILL to start dubbing.
DECK starts recording.
Press STOP to stop dubbing.
Press STOP to stop dubbing.
To Monitor Dubbing on TV
Selecting the Input Mode
1 Turn TV on and tune to the Recording
VCR channel (CH 3 or CH 4).
2 If Auto VCR/TV (see p. 32) is set to
“OFF,” press VCR/TV on the remote to
be VCR mode.
Method 1: Press INPUT repeatedly.
Channel Number ↔ LINE1 ↔ LINE2
Method 2: Press CH / .
Display will change as below.
1
3
2
Press
LINE2
Note
• Dubbing tapes protected with Copy
Guard will result in poor quality
recordings.
LINE1
(CABLE) (TV)
125 or 69
Press
• “L1” or “L2” lights up on Multi Function Display
(about 4 seconds) when LINE1 or LINE2 is selected.
• LINE1: For rear audio/video connection.
LINE2: For front audio/video connection.
Caution:• Unauthorized exchanging and/or copying of copyrighted recordings may be
copyright infringement.
• Please note that some tapes cannot be dubbed on DECK. Also, it is not
possible to dub DVD/ Video CD/ CD to VHS tapes using DECK.
35
D4753S P26-35.p65
35
2003/03/13, 11:32
Disc Operation
Subtitle Language (DVD-Video only)
You can select a different subtitle language (if offered) than
the one set at the Settings for DVD Operation.
(See p. 49.)
1
Press SUB TITLE*
in Play mode to display
the subtitle selection
on-screen.
Ready Checklist
Please read “Basic DVD Operation”
on page 22.
[Subtitle language]
[Audio sound track language]
• Display disappears after
5 seconds.
• When no subtitles are offered,
“-” will be displayed instead of
the language number.
ENG
English
FRA
French
DEU
German
ITA
Italian
ESP
Spanish
NLD
Dutch
SVE
Swedish
NOR
Norwegian
DAN
Danish
POR
Portuguese
RUS
Russian
JPN
Japanese
Notes
CHI
Chinese
• If after several presses of the button the language does not
change, language selection is not offered on the disc.
• When disc is removed, subtitles revert to initial setting
language. If the initial language is not recorded on the disc,
the disc’s priority language will appear.
KOR
Korean
MAL
Malay
VIE
Vietnamese
THA
Thai
2
Te amo
Press
to select a language.
Press
to select “ON” or “OFF.”
Subtitle language being played back (see chart, right).
Audio Soundtrack Language (DVD only)
You can change the audio soundtrack language, selected
at the Settings for DVD Operation, to a different language
if available. (See p. 49.)
(This operation works only with discs on which multiple
audio soundtrack languages are recorded.)
AUDIO: 1 ENG
Dolby Digital 3/2.1ch
Hello
SELECT :
END
: AUDIO
2
AUDIO: 3 ESP
Dolby Digital 3/2.1ch
Press AUDIO
in Play mode to display the
audio selection on-screen.
• Display disappears after
5 seconds.
Audio attribute 1 type, sampling
frequency, bit No. of the disc or
number of speaker channel.
Press
to select desired language.
Hola
SELECT :
END
: AUDIO
Audio soundtrack language being played back (see chart,
above right).
36
Other
• Change the No. by pressing
and press SET.
,
[Audio attribute 1 type, sampling
frequency, bit No. of the disc (see
p. 50.)]
44.1 kHz 16 bit
20 bit Linear PCM disc
192 kHz 24 bit
Dolby Digital disc
Dolby Digital 1 ch - 5.1 ch
1 ch - 5.1 ch
DTS
DTS disc
LPCM
~
1
∗
Notes
• If, after several presses of the
AUDIO button the language does not
change, language selection is not
offered on the disc.
• When disc is removed, language
reverts to initial setting. If this
language is not recorded on the disc,
the language recorded will be heard.
For assistance, please call : 1-800-211-PANA(7262) or send e-mail to : [email protected]
D4753S P36-60.p65
36
2003/03/13, 11:32
*Important: if a remote control button does not work when pressed,
press the DVD button on the remote and try the button again.
When
appears on the screen while
a button is being operated, it means
that the corresponding operation is
prohibited by DECK or the disc.
Multiple Angle Viewing (DVD only)
DVDs may contain scenes shot from multiple camera
angles allowing the same scene to be viewed at different
angles. You can view these angles, if available, using the
ANGLE button.
1
Press ANGLE
in Play mode to display the
angle selection on-screen.
ANGLE Indicator
• Display disappears after
5 seconds.
Notes
SELECT :
• The ANGLE Indicator lights up on
DECK when a scene recorded at
different angles is detected.
• The angle number can be set
beforehand so that the angle is
switched whenever the ANGLE
Indicator lights up.
2
Press
to select the desired
angle.
SELECT :
Number of angle being played back.
Vocal Selection for Karaoke Discs (DVD/Video CD)
1
2
Press AUDIO in Play mode
to display the audio screen.
Press
(or
)
to select as shown below,
and
press (or ) to set.
(DVD only)
SELECT :
END
: AUDIO
• DVD Karaoke (1 vocal) VOCAL ON VOCAL OFF
• DVD Karaoke (2 vocals) VOCAL V1 VOCAL V2 VOCAL V1+V2 VOCAL OFF
SELECT
• Video CD
SUB TITLE
ZOOM
ANGLE
AUDIO
LR
L
R
Picture Zoom (DVD-Video only)
You can enlarge specific portions of a picture and
select the zoom ratio using the ZOOM button during
DVD playback.
DVD
Operation
SET
Press ZOOM repeatedly to change display
as follows.
Notes
• You can enlarge the center portion of the image
to one of 2 magnifications.
• The subtitle cannot be enlarged nor
can it’s position be changed.
• The picture zoom feature does not
work with a Video CD.
• During picture zoom, “ZOOM1” or
“ZOOM2” appears on-screen for 5
seconds.
• Zooming, on some discs, may result
■ Use the , , and
buttons to move the position
in poor picture quality, or may not
up, down, left and right.
operate at all.
37
D4753S P36-60.p65
37
2003/03/13, 11:32
Disc Operation (continued)
Title Menu (DVD only)
Some DVDs have more than one title, e.g. movies.
If the disc offers a title menu, you can select the desired
title number. (Operation may vary according to the disc.)
1
T I TLE MENU
Dogs
Cas t l es
Love r s
B i r ds
Press TITLE*
in Play mode
to display the title screen.
<Example>
2
T I TLE MENU
Dogs
Cas t l es
Love r s
B i r ds
B i rds
of the world
Press
or
NUMBER keys
to select a title, and
press SET or PLAY
to start playing.
PLAY
• “Pressing SET or PLAY” is
not necessary when using
NUMBER keys.
STOP
NUMBER
keys
<Example>
CLEAR
ACTION
SELECT
DVD Menu (DVD only)
DVDs may offer a special menu. This menu may include
guides to unique contents, audio/subtitle languages, etc.
Although contents and operation may vary, the following
steps show basic steps for using the menu.
1
DVD MENU
1 . SUBT I TLE
2 . AUD I O
MENU
SET
Press MENU
in Play mode to display
DVD MENU.
TITLE
3 . ANGLE
<Example>
2
DVD MENU
1 . SUBT I TLE
2 . AUD I O
3 . ANGLE
<Example>
38
Press
or
NUMBER keys
to select an item, and
press SET or PLAY
to perform.
• “Pressing SET or PLAY” is
not necessary when using
NUMBER keys.
Repeat step 2 if there is
more than one menu.
For assistance, please call : 1-800-211-PANA(7262) or send e-mail to : [email protected]
D4753S P36-60.p65
38
2003/03/13, 11:32
*Important: if a remote control button does not work when pressed,
press the DVD button on the remote and try the button again.
Program Play (Video CD/CD only)
Ready Checklist
DECK is in DVD mode, press DVD.
Video CD or CD is inserted.
You can program specific tracks and order of play.
1
2
Press ACTION
to display DVD MAIN MENU.
DVD MAIN MENU
DISC LANGUAGES
AUDIO OUTPUT
ST I L L MODE
: AUTO
TV MODE
: 4:3 Letterbox
PARENTAL LOCK :LEVEL 8
PLAY MODE
SELECT
SET
END
3
:
: SET
: ACTION
4
PROGRAM PLAY
RANDOM PLAY
1
2
3
4
5
:
: SET
: ACTION
PROGRAM PLAY
DISC
PROGRAM
6 11 16
5 8
7 12 17
15 6
8 13 18
1 13
9 14 19
3 2
10 15 20
2
CLEAR LAST
CLEAR ALL
SELECT
:
SET
: SET
END
: ACTION
1
2
START
Press
to select a track
number (Track
numbers on disc are
displayed.), and
press SET.
Do operation steps 1 through 5
at left on this page.
Press DISPLAY to display Disc
Information screen.
(Disc Information Screen)
TRACK
PBC
Press
to select
“PROGRAM PLAY,”
and
press SET to display.
PLAY MODE
SELECT
SET
END
Press
to select
“PLAY MODE,” and
press SET
to display.
Program Repeat Play
(Video CD/CD only)
SET
3
4
: 1
: OFF
: SET
VIDEO CD
01 : 35 : 12
NEXT : DISPLAY
Press DISPLAY to display
DECK Information screen.
Press SET to enter Select mode.
Cursor move to “OFF.”
(DECK Information Screen)
• Repeat step 4 to select another track.
• The selected track is added on the right side.
5
1 6
2 7
3 8
4 9
5 10
PROGRAM PLAY
DISC
PROGRAM
11 16
5 8
12 17
15 6
13 18
1 13
14 19
3 2
15 20
2
START
SET
5
: SET
Press
SELECT :
SET
: SET
• Up to 15 tracks can be programmed.
• “ ” or “ ” (depending on disc) indicates additional
PROGRAM PLAY screen.
Press
for next or previous screen.
• To clear the last program one by one
Press
to move to “CLEAR LAST” and
press SET. (Pressing CLEAR on remote control
also clears last program.)
• To clear all programs
Press
to move to “CLEAR ALL” and press
SET. (Programs are also cleared when the power
is turned off or the disc is removed.)
to select “DISC.”
(DECK Information Screen)
PLAY
REPEAT : DISC
PROGRAM PLAY
• To cancel, press STOP
during play, then press
CLEAR.
Notes
END : DISPLAY
6
END : DISPLAY
Press SET to set mode.
Cursor move to “REPEAT.”
To cancel, select “REPEAT :
OFF” in step 5, then press SET.
DVD
Operation
CLEAR LAST
CLEAR ALL
SELECT
:
SET
: SET
END
: ACTION
Press
to select “START,” and
press SET to start play
of programs in the
sequence selected.
39
D4753S P36-60.p65
39
2003/03/13, 11:32
Disc Operation (continued)
Random Play (Video CD/CD only)
Tracks are played in a random order.
1
2
Ready Checklist
DECK is in DVD mode, press DVD.
Press ACTION*
to display DVD MAIN MENU.
DVD MAIN MENU
DISC LANGUAGES
AUDIO OUTPUT
ST I L L MODE
: AUTO
TV MODE
: 4:3 Letterbox
PARENTAL LOCK :LEVEL 8
PLAY MODE
SELECT
SET
END
:
: SET
: ACTION
Press
to select “PLAY MODE,”
and
press SET
to display.
DISPLAY
STOP
3
PLAY MODE
PROGRAM PLAY
RANDOM PLAY
SELECT
SET
END
:
: SET
: ACTION
Press
to select
“RANDOM PLAY,” and
press SET
to begin random play.
NUMBER
keys
CLEAR
ACTION
SELECT
• To cancel, press STOP
during play, then press
CLEAR.
SET
VOLUME
ADJUST
PAGE
Setting the VOLUME ADJUST
Some DVDs are recorded in lower than average volume levels.
For these DVDs, this DECK can be set so that the average
volume is increased.
Press VOL.ADJ repeatedly to change “ON” ↔ “OFF.”
• “ON” or “OFF” lights up on Multi Function Display (about 3 seconds) when
press VOL.ADJ.
VOLUME ADJUST “OFF”
Some DVD
[Volume level is low]
Volume is the original level.
VOLUME ADJUST “ON”
Volume level is increased
when played back.
• “ON” is set ..... When a DVD is played back, the average volume is increased.
• “OFF” is set .... The volume level recorded on the disc is played back just as it is.
Notes
• This feature is available only for Dolby Digital sound tracks.
• When audio equipment is connected, setting the Sound Output level to “OFF” is recommended.
• If the sound becomes abnormal while playing a disc, set the Sound Output level to “OFF.”
40
For assistance, please call : 1-800-211-PANA(7262) or send e-mail to : [email protected]
D4753S P36-60.p65
40
2003/03/13, 11:32
*Important: if a remote control button does not work when pressed,
press the DVD button on the remote and try the button again.
DVD-Audio Operation
This DECK, equipped with a 192 kHz/ 24 bit Audio D/A converter, supports DVD-Audio
recorded with high quality sound.
The DVD-Audio feature includes “Still Image Skip” and “Bonus Group Playback”
functions. (See below.)
Please refer to “Basic DVD Operation” on pages 22 and 23.
Still Image Skip
DVD-Audio still images (only if contained) can be skipped over.
Press PAGE
in Play or Pause mode to display the still image and page
number.
Each press of PAGE changes page number as shown below.
PAGE : 1
PAGE : 2
• Pressing PAGE on the last page returns to PAGE 1.
SELECT :
Press PAGE
PAGE : 1
Press PAGE
PAGE : 2
PAGE : 3
Press PAGE
.......
Press PAGE
PAGE : XX
SELECT :
Note
• Still Image Skip function not available with all discs.
Bonus Group playback
Some DVD-Audio discs contain bonus groups. To enjoy these groups you may have to
enter a password. Refer to the disc's jacket.
1
Press DISPLAY in stop mode to display “On-Screen Displays.”
Note
GROUP
TRACK
: 2
: 1
DVD-AUDIO
00 : 12 : 34
SELECT :
SET
: SET
NEXT : DISPLAY
Press
to select “GROUP,” and press SET.
Press
or NUMBER keys to select bonus group
number, and press SET (see pp. 42, 43.)
Notes • If the proper secret code is already entered, Bonus Group tracks can be
selected. (Secret code enter screen is skipped.)
• This code is specifically for the disc and differs from Parental Lock secret code
(p. 48). Please refer to disc jacket instructions.
3
BONUS GROUP
ENTER 4-D I G I T CODE
----
Note
4
DVD
Operation
2
• During playback, Bonus Group tracks cannot be selected.
Press NUMBER keys
to enter bonus group secret code, and press SET.
To Make Corrections
Press repeatedly to move the cursor.
Press NUMBER keys to make the correction.
• When the proper secret code has been entered, Bonus Group track 1 playback
begins. If a mistake is made, the secret code enter screen is redisplayed.
Press CLEAR to return to normal screen.
41
D4753S P36-60.p65
41
2003/03/13, 11:32
DVD Operation using On-Screen Displays
When DISPLAY is pressed, On-Screen Displays show
disc information (title/chapter/track number, elapsed
playing time) and DECK information (repeat play, play
mode).
1
Ready Checklist
DECK is in DVD mode, press DVD.
Press DISPLAY* in Play or Stop mode
to display “On-Screen Displays.”
• Each press of DISPLAY changes the on-screen
display as follows. (Refer to pp. 43, 44.)
➡ ➡
➡Selected disc information
Selected DECK information
Normal Screen
2
Press
(or
)
to select an item, and
press SET.
3
Press
or NUMBER keys
to select the setting, and
press SET.
Note
DISPLAY button
does not function
while DVD TITLE
MENU is displayed.
DISPLAY
NUMBER
keys
CLEAR
<Example of DVD-Video>
SELECT
• When numbers are
displayed (e.g. title
number), NUMBER keys
are also available.
• If the number entered is
not on the disc, the entry
will have no effect.
Re-enter the correct
number.
• For more details, refer to
<Example of DVD-Audio> the disc operation
information.
SET
To return to normal
screen,
press CLEAR or
DISPLAY repeatedly.
Notes
• When DISPLAY button is pressed
during playback of a Video CD with
Playback control, NUMBER keys are
not available on the displayed screen.
In this case, press DISPLAY again to
remove the displayed screen.
<Example of Video CD>
• When
appears on the screen while
a button is being operated, it means
that the corresponding operation is
prohibited by DECK or the disc.
42
For assistance, please call : 1-800-211-PANA(7262) or send e-mail to : [email protected]
D4753S P36-60.p65
42
2003/03/13, 11:32
*Important: if a remote control button does not work when pressed,
press the DVD button on the remote and try the button again.
Detailed Descriptions of each On-Screen Display
■ Disc information screen (for DVD-Video)
1. TITLE No.
1
2
• Select “TITLE”, and press SET.
or NUMBER keys, and press SET.
• Change the No. by pressing
T I TLE
: 1
CHAPTER : 12
DVD
01 : 12 : 55
3
4
2. CHAPTER No.
• Select “CHAPTER”, and press SET.
• Change the No. by pressing
or NUMBER keys, and press SET.
SELECT :
SET
: SET
3. Disc currently being played
4. Elapsed playing time
T I TLE
: 1
CHAPTER : 12
The screen may be changed by selecting the elapsed time.
• Select the elapsed playing time (“xx:xx:xx”), and press SET.
• Change the elapsed time by pressing NUMBER keys.
Hours ➛ Minutes ➛ Seconds are entered in order.
If the time entered is not on the disc, the entry will have no effect.
Re-enter the correct time.
e.g., press 0 - 1 - 2 - 3 - 4 - 5 for 01 : 23 : 45.
Hour
ENTER : 0 - 9
SET
: SET
NEXT : DISPLAY
DVD
01 : -- : --
NEXT : DISPLAY
If SET is pressed while
making entries, unit returns
to the condition it was in
before entries were made.
Minutes Seconds
• This function does not work with some discs.
■ Disc information screen (for DVD-Audio)
A. GROUP No.
C
D
A
B
• Select “GROUP”, and press SET.
• Change the No. by pressing
or NUMBER keys, and press SET.
B. TRACK No.
• Select “TRACK”, and press SET.
• Change the No. by pressing
or NUMBER keys, and press SET.
C. Disc currently being played
D. Elapsed playing time
GROUP
TRACK
Hour
DVD-AUDIO
01 : -- : --
ENTER : 0 - 9
SET
: SET
NEXT : DISPLAY
If SET is pressed
while making entries,
unit returns to the
condition it was in
before entries were
made.
Minutes Seconds
• This function does not work with some discs.
■ Disc information screen (for Video CD/ CD)
a. TRACK No.
DVD
Operation
The screen may be changed by selecting the elapsed time.
• Select the elapsed playing time (“xx:xx:xx”), and press SET.
• Change the elapsed time by pressing NUMBER keys.
Hours ➛ Minutes ➛ Seconds are entered in order.
If the time entered is not on the disc, the entry will have no effect.
Re-enter the correct time.
e.g., press 0 - 1 - 2 - 3 - 4 - 5 for 01 : 23 : 45.
: 1
: 1
• Select “TRACK”, and press SET.
• Change the No. by pressing
or NUMBER keys, and press SET.
b. Playback control ON/OFF
[Video CD with playback control only]
ON Video CD menu play is displayed.
OFF Video CD menu play is not displayed.
c. Disc currently being played
Video CD
a
b
TRACK
PBC
SET
: 1
: OFF
: SET
VIDEO CD
01 : 35 : 12
c
d
NEXT : DISPLAY
CD
d. Elapsed playing time
Notes • Track No. and the elapsed playing time are not displayed during play started from
menu of Video CDs with playback control.
• When
appears on the screen while a button is being operated, it means that the
corresponding operation is prohibited by DECK or the disc.
D4753S P36-60.p65
43
2003/03/13, 11:32
43
DVD Operation using On-Screen Displays (continued)
■ DECK information screen (for DECK)
1. Repeat Play
• Select “REPEAT”, and press SET*.
• Change the desired mode during play by pressing
DVD-Video
CHAPTER
DVD-Audio
TRACK
Video CD/CD TRACK
, and press SET.
TITLE
OFF
GROUP OFF
DISC
OFF
2. Play mode [Video CD/ CD only] (See p. 39 or 40.)
1
PLAY
REPEAT : CHAPTER
PROGRAM PLAY program play
RANDOM PLAY
random play
---normal play
SELECT :
SET
: SET
END : DISPLAY
For your reference
2
• CHAPTER/TITLE REPEAT PLAY (DVD-Video)
PLAY
REPEAT : DISC
RANDOM PLAY
CURRENT PLAYBACK POSITION
TITLE
chapter
SET
chapter
: SET
END : DISPLAY
chapter
CHAPTER REPEAT
TITLE REPEAT
NORMAL PLAY
OPEN/
CLOSE
• TRACK/GROUP REPEAT PLAY (DVD-Audio)
POWER
PLAY
CURRENT PLAYBACK POSITION
GROUP
track
GROUP
track
track
track
track
track
FF/REW
PAUSE
STOP
TRACK REPEAT
GROUP REPEAT
NORMAL PLAY
NUMBER
keys
SKIP
• TRACK/DISC REPEAT PLAY (Video CD/CD)
CURRENT PLAYBACK POSITION
track
track
SKIP
SELECT
track
TRACK REPEAT
SET
DISC REPEAT
NORMAL PLAY
ACTION
Note
• For repeat play in VCR mode, see p. 32.
*Important: if a remote control button does not work when pressed,
press the DVD button on the remote and try the button again.
44
For assistance, please call : 1-800-211-PANA(7262) or send e-mail to : [email protected]
D4753S P36-60.p65
44
2003/03/13, 11:32
MP3/WMA/JPEG Playback Operation
This unit can play MP3/WMA/JPEG format CD-R or
CD-RW recorded for personal use on a PC, etc.
Some discs may not play due to the condition of the
recording.
1
2
Press POWER on the remote or DECK.
Press OPEN/CLOSE,
then place an MP3/WMA/JPEG disc into
the disc tray.
Press OPEN/CLOSE to close.
3
• MP3/WMA/JPEG menu is displayed.
• Playback starts automatically
(except JPEG files).
• CD directory is displayed.
Function
Status
<Example>
00 : 00 : 00
PLAY
ROOT
VA
TECHNO
POPS
JAZZ
Folder area
(Current folder
appears green.)
..
END_WALTZ
DD_CUB I C
NOCTURNE
NORN
Counter
Parent
folder
File area
PLAY MODE : NORMAL
PLAY MODE
:MP3 file
:WMA file
:Folder
:Parent folder
(Selected file/
folder is
highlighted.
Titles are
displayed
up to 11
characters.)
:JPEG file
<Example> (Diagram left shows CD directory
structure as displayed in example
OSD above.)
ROOT
VA
END_WALTZ
DD_CUB I C
NOCTURNE
NORN
a
b
Press
to select an MP3/WMA file ( / ).
(During STOP mode)
Press SET or PLAY to start playback.
■ Forward/Reverse Search
Press FF/SLOW+ or REW/SLOW- during play.
Press PLAY to release.
• Search speed, slow at first, increases with each
additional press of the button up to 5 levels.
■ Forward/Reverse Track Skip
Press SKIP
| or |
SKIP during play.
Each press skips a track.
• If pressed within first 3 seconds of playback,
skips to the previous track. If over 3 seconds,
SKIP only.)
returns to top of track. (|
• Put DECK in Stop mode before performing
folder/file selection (see step 4.)
■ Pause
Press PAUSE during play.
Press PLAY to release.
c
d
Press STOP to stop play.
Press OPEN/CLOSE to eject the disc.
The MP3/WMA/JPEG MENU is closed
automatically.
Note
• Copyright protected files and files
containing errors cannot be played
back. The DECK skips to the next file.
• Only File (not Folder) area
operation is possible.
• Files are displayed in the
following order:
(!...0,1....9,A,B......Z).
Press ACTION to return the DVD MAIN
MENU. (➛ Press ACTION again to return
to the MP3/WMA/JPEG MENU.)
D4753S P36-60.p65
45
DVD
Operation
POPS
5
Do steps 1~3 on left.
■ Select PLAY MODE [MP3/WMA Playback]
(During STOP mode)
1) Press
to move cursor to
JAZZ
PLAY MODE.
2) Press
to select the desired PLAY
• Select file (During STOP mode)
MODE (see below).
1) Press
to select an MP3/WMA file ( / ).
[PLAY MODE]
➡ MP3/WMA Playback (see right)
NORMAL:
2) Press
to select a JPEG file ( ).
All MP3/WMA files are selected and
➡ JPEG Playback (see p. 46)
played back one time only.
3) Press SKIP
| (next) or |
SKIP
SINGLE REPEAT:
(previous) to skip a file/folder page (7files)
The selected MP3/WMA file is played
in the File area.
back repeatedly.
• Select folder (During STOP mode)
FOLDER REPEAT:
1) Press
to select a folder ( ).
The MP3/WMA files contained in the
2) Press SET to display files/folders contained
selected folder are played back
in the folder.
repeatedly. However, folders below the
• Select parent folder (During STOP mode)
selected folder are not played back.
1) Press
to select a folder ( ).
DISC REPEAT:
2) Press SET to make changes to the previous
All MP3/WMA files are played back
directory display.
repeatedly.
TECHNO
4
Notes
MP3/WMA Playback
45
2003/03/13, 11:32
MP3/WMA/JPEG Playback Operation (continued)
JPEG Playback
You can play back JPEG images.
Displayable Image Size: 32x32~7680x7680 pixels
Note
• Some JPEG format may not be played
back.
Do steps 1~3 on page 45.
1
2
Press
to select an JPEG file (
).
Press SET or PLAY.
Selected JPEG file is displayed.
[JPEG Playback Screen]
<Example>
■ Returned on the MP3/WMA/JPEG MENU
➡ Press STOP. (See p. 45)
■ Next/Previous Search
➡ Press SKIP
| or |
SKIP.
■ Start Slide-show ➡ Press FF/SLOW+ or
REW/SLOW-. (below)
■ Enlarging an image ➡ Press ZOOM. (P. 47)
■ Rotating an image ➡ Press ANGLE. (P. 47)
3
[PLAY MODE]
NORMAL:
All JPEG files are selected and
played back one time only.
SINGLE REPEAT:
The selected JPEG file is played back
repeatedly.
FOLDER REPEAT:
The JPEG files contained in the
selected folder are played back
repeatedly. However, folders below the
selected folder are not played back.
DISC REPEAT:
All JPEG files are played back
repeatedly.
Press STOP to return the MP3/WMA/
JPEG MENU.
JPEG Slide-show
<Example>
(During JPEG Playback.)
JPEG files are displayed automatically
(about every 3 seconds) as a slide-show.
1
■ Select PLAY MODE [JPEG Slide-show]
(During STOP mode) (See p. 45)
1) Press
to move cursor to
PLAY MODE.
2) Press
to select the desired PLAY
MODE (see below).
Press FF/SLOW+ or REW/SLOW-.
Operation can be done when files are in
order, such as in the diagram below.
ROOT
<Example>
REW/SLOW01 PIC
FF/SLOW+
Image changes every 3 seconds.
■ Cancel slide show
➡ Press STOP to return the MP3/WMA/
JPEG MENU. (See p. 45)
■ Still picture
➡ Press STILL (only SLIDE).
➡ Press PLAY to release.
■ Forward/Reverse File Skip
➡ Press SKIP
| or |
SKIP.
Each press skips a file.
2
46
AAA
DDD
TTT
UUU
VVV
WWW
ZZZ
REW/SLOW-
FF/SLOW+
Press ACTION to return to the DVD MAIN
MENU.
For assistance, please call : 1-800-211-PANA(7262) or send e-mail to : [email protected]
D4753S P36-60.p65
46
2003/03/13, 11:32
JPEG Zoom
(During JPEG Playback.)
You can enlarge specific portions of a JPEG picture
and select the zoom ratio using the ZOOM button
on the remote during JPEG Playback screen.
Set Zoom size.
Press ZOOM repeatedly to change display as
follows.
➡ Press STOP to return the MP3/WMA/JPEG MENU.
PLAY
REW/
SLOW-
FF/
SLOW+
• You can enlarge the center portion of the image to
one of 2 magnifications.
• Operation can be done during Rotation (below).
X 1.0 (ORIGINAL)
STOP
STILL
X 1.5 (ZOOM 1)
1st press
X 2.0 (ZOOM 2)
2nd press
SKIP
3rd press
ACTION
SKIP
SELECT
SET
ZOOM
ANGLE
■ Use the , , and
buttons to move the
position up, down, left and right.
(Position cannot be changed on X1.0
ORIGINAL images.)
JPEG Rotation
(During JPEG Playback.)
You can rotate a JPEG picture using the ANGLE
button on the remote during JPEG Playback
screen. (The JPEG picture will be rotated 90 °
clockwise.)
Set rotation.
Press ANGLE repeatedly to change display
as below.
➡ Press STOP to return the MP3/WMA/JPEG MENU.
1st press
2nd press
3rd press
DVD
Operation
• Operation can be done during Zoom (above).
• The vertical/horizontal ratio of rotated JPEG
images may vary when they are displayed.
4th press
MPEG Layer-3 audio decoding technology licensed from Fraunhofer IIS and
Thomson multimedia.
Windows Media, and the Windows logo are trademarks, or registered
trademarks of Microsoft Corporation in the United States and/or other countries.
WMA is a compression format developed by Microsoft Corporation. It achieves
the same sound quality as MP3 with a file size that is smaller than that of MP3.
47
D4753S P36-60.p65
47
2003/03/13, 11:32
DVD Lock Feature
*Important: If a remote control button does not work when
pressed, press the DVD button on the remote
and try the button again.
You can prevent playback of DVDs of a specific
rating level which may be unsuitable for children.
• Some DVDs are encoded with a rating level. If the disc
rating is higher (stricter) than the one you preset,
playback will be prohibited.
Ready Checklist
DECK is in DVD mode, press DVD.
DVD Lock (DVD-Video only)
A 4-digit code must be entered to view a blocked
program or change rating settings.
1
2
Press ACTION*
to display DVD MAIN MENU.
DVD MAIN MENU
DISC LANGUAGES
AUDIO OUTPUT
ST I L L MODE
: AUTO
TV MODE
: 4:3 Letterbox
PARENTAL LOCK : LEVEL 8
SELECT
SET
END
Press
to select “PARENTAL LOCK,”
and
press SET to display.
Caution
Discs not encoded with rating
level will play even if the jacket
states it is for mature
audiences. For these discs, the
DVD Lock Ratings will not work.
<When DVD Lock is activated>
YOUR SELECTION
EXCEEDS THE
,
PLAYER S RATING LIMIT.
DO YOU WANT TO CHANGE THE
LIMIT?
:
: SET
: ACTION
YES
NO
3
ENTER 4-D I G I T CODE
---ENTER : 0 - 9
END
: ACT I ON
1) Press NUMBER keys
to enter your secret code.
2) Enter same secret code
again for confirmation.
3) Press SET to display.
To Make Corrections • Step 2) not necessary when
Press repeatedly to
move the cursor.
Press NUMBER keys to
make the correction.
4
changing rating or secret
code.
• Take care that you are not
observed entering the
secret code.
Press
to select rating level, and
press SET
to select “LOCKED” or
“UNLOCKED.”
LEVEL 0 : LOCK ALL, Playback of all DVDs, CDs, Video
CDs, WMA, MP3 and JPEG is prohibited.
(Use to prohibit play of mature theme DVDs not
encoded with rating level.)
LEVEL 1 : mature theme DVDs
LEVEL 2 : DVDs expressly for children can be played back.
LEVEL 3 to 7 : DVDs for general audiences/children can be
played back. (DVDs with mature content
are prohibited.)
LEVEL 8 : NO LIMIT: (Factory preset)
All DVDs can be played back.
SELECT :
SET
: SET
END : DISPLAY
After DVD Lock is set and a
blocked DVD is played, this
message will appear.
The message may differ
depending on the disc.
To continue viewing a blocked
program for now,
to select “YES” and
Press
SET. Then, enter your 4 digit
secret code (see step 3 left).
When “NO” is selected, blocked
programs cannot be viewed.
<When blocked programs>
PROGRAM RATING EXCEEDED
Change your secret code
• You will need your current code.
Do steps 1 ~ 2 left.
Enter current secret code.
Press CLEAR to clear the code.
Do step 4 to enter new code.
Note
• DO NOT forget your secret code.
48
For assistance, please call : 1-800-211-PANA(7262) or send e-mail to : [email protected]
D4753S P36-60.p65
48
2003/03/13, 11:32
Settings for DVD Operation
1
2
Press ACTION
to display DVD MAIN MENU.
DVD MAIN MENU
DISC LANGUAGES
AUDIO OUTPUT
ST I L L MODE
: AUTO
TV MODE
: 4:3 Letterbox
PARENTAL LOCK :LEVEL 8
Press
to select an item, and
press SET.
Once initial settings are done, they
remain in memory (even after power off)
until changed. This means DECK will
operate under the same conditions
(especially DVDs) each time.
Ready Checklist
DECK is in DVD mode, press DVD.
SELECT
SET
END
:
: SET
: ACTION
DISC LANGUAGES (See below)
All languages offered on the disc can be set.
If the language not offered is set, the original disc
language will be selected.
AUDIO OUTPUT (See p. 50.)
NUMBER
keys
You can set the audio output that comes from the
digital audio output terminal.
CLEAR
ACTION
STILL MODE (See p. 53.)
To select “FIELD” (Field still) or “FRAME” (Frame
still) to prevent jitter or make small text or fine
patterns clearly visible in a still picture. When
“AUTO” is set “FIELD” or “FRAME” is selected
automatically.
SELECT
SET
TV MODE (See p. 53.)
To select whether the video material for a widescreen will be played back in the Pan & Scan style,
Letterbox style or 16 : 9 style.
Disc Languages (DVD only)
To select and set the language of the audio
soundtrack, subtitles, or title/DVD menus for all discs
to be played.
DVD MAIN MENU
DISC LANGUAGES
AUDIO OUTPUT
ST I L L MODE
: AUTO
TV MODE
: 4:3 Letterbox
PARENTAL LOCK :LEVEL 8
SELECT
SET
END
:
: SET
: ACTION
Press
to select
“DISC LANGUAGES,”
and
press SET
to display screen.
(Factory preset: English)
To select the audio soundtrack language.
English/Spanish/French/Japanese
Original: Original disc language
OTHER ✱✱✱✱: Other language selection*1
“SUBTITLE” selections
(Factory preset: AUTO)
To select the subtitle language.
AUTO: Same language selected
for “AUDIO”
• If language set for “AUDIO” is used in
playback, subtitles will not appear.
• If another language is used during
playback, the subtitles will appear
in the language selected at “AUDIO”
setup.
English/Spanish/French/Japanese
OTHER ✱✱✱✱: Other language selection*1
DVD
Operation
3
“AUDIO” selections
“MENUS” selections
4
DISC LANGUAGES
AUDIO
SUBT I TLE
MENUS
SELECT
SET
END
5
: English
: AUTO
: English
:
: SET
: ACTION
Press
to select an item, and
press SET repeatedly
for desired language.
(Please refer right.)
Press ACTION to redisplay DVD MAIN
MENU and go to step 2 to setup another
item.
Or, press ACTION twice to exit.
(factory preset: English)
To select the language used in title
menus or DVD menus.
English/Spanish/French/Japanese
OTHER ✱✱✱✱: Other language selection*1
To enter OTHER ✱✱✱✱ code
number,
Press NUMBER keys (Please refer to
language codes on p. 54).
To make corrections, press
repeatedly to delete language code
number, and correct.
*1 If the selected language is not offered,
the original disc language is selected.
49
D4753S P36-60.p65
49
2003/03/13, 11:32
Settings for DVD Operation (continued)
Audio Output
Ready Checklist
Select the digital output to be output from the optical
digital audio output connector of DECK.
1
2
Press ACTION*
to display DVD MAIN MENU.
DVD MAIN MENU
DISC LANGUAGES
AUDIO OUTPUT
ST I L L MODE
: AUTO
TV MODE
: 4:3 Letterbox
PARENTAL LOCK :LEVEL 8
SELECT
SET
END
3
:
: SET
: ACTION
AUDIO OUTPUT
LPCM(DVD)
Dolby Digital
dts
DRC
SPEAKER SETUP
: OFF
: Bitstream
: Bitstream
: OFF
Press
to select
“AUDIO OUTPUT,”
and
press SET
to display screen.
Press
to select an item,
and
press SET
repeatedly for
output. (See below.)
DECK is in DVD mode, press DVD.
Type of amplifier
to be connected
Recommended setting
LPCM Dolby
DTS
( DV D ) Digital
No amplifier is connected
AV amplifier (with digital
audio input connector)
PCM
without Dolby Digital/DTS
decoder
AV amplifier including
Dolby Digital decoder
PCM* 1
PCM* 1
P C M Bitstream P C M
AV amplifier including
*2
Dolby Digital/DTS decoder P C M Bitstream Bitstream
• Make settings according to amplifier
connected to optical audio output as shown
in above table.
*1 When connecting an amplifier (with an
■ “LPCM (DVD)” selections
optical digital input connector) which does
OFF: Linear PCM of less than 48 kHz/16 bit is
not contain the Dolby Digital or DTS
output. When playing DVDs recorded in linear
decoder, be sure to select “PCM”.
PCM of over 48 kHz/20 bit, no digital audio is
If “Bitstream” is selected, starting DVD play
output. (Factory preset)
may cause such a high level of noise as to
PCM: When playing DVDs recorded in linear PCM of
be harmful to your ears and damage the
48 kHz/20 bit/24 bit or more, digital audio
speakers.
converted to 44.1 kHz/16 bit or 48 kHz/16 bit is
output.
*2 When a DTS decoder is connected, please
(Digital output of PCM audio is restricted to 48
select “Bitstream” in “dts”.
kHz/16 bit or below for copyright protection.)
SELECT
SET
END
:
: SET
: ACTION
■ “Dolby Digital” selections
Bitstream: Dolby Digital bitstream (1 ch - 5.1 ch) is
output. (Factory preset)
PCM: When you have connected a amplifier that
doesn’t have a built-in Dolby Digital decoder.
■ “dts” selections
Bitstream: DTS bitstream is output. (Factory preset)
PCM: When you have connected a amplifier that
doesn’t have a built-in DTS decoder.
■ “DRC (Dynamic Range Compression)”
selections
OFF: Normal audio range is selected. (Factory preset)
ON: For dynamic sound even at low volume, this
is useful for late-night listening. [Dolby Digital
DVDs only].
■ SPEAKER SETUP
➡
4
50
See pages 51, 52, 53.
Press ACTION to redisplay DVD MAIN
MENU and go to step 2 to setup another
item.
Or, press ACTION twice to exit.
For assistance, please call : 1-800-211-PANA(7262) or send e-mail to : [email protected]
D4753S P36-60.p65
50
2003/03/13, 11:32
*Important: If a remote control button does not work when pressed,
press the DVD button on the remote and try the button again.
Speaker Output Setup
Set the number of speakers connected to the receiver
(amplifier, decoder.) (See pp. 14, 15.)
1 Do steps 1~3 on page 50.
2
AUDIO OUTPUT
LPCM(DVD)
Dolby Digital
dts
DRC
SPEAKER SETUP
SELECT
SET
END
3
: OFF
: Bitstream
: Bitstream
: OFF
:
: SET
: ACTION
SPEAKER SETUP
SPEAKER OUTPUT : MULTI-CHANNEL
SPEAKER SIZE
OUTPUT BALANCE
DELAY TIME
SELECT
SET
END
:
: SET
: ACTION
Press
to select “SPEAKER
SETUP,” and
press SET to display
SPEAKER SETUP
screen.
Press
to select “SPEAKER
OUTPUT,”
and
press SET repeatedly.
(See below.)
ACTION
■ SPEAKER OUTPUT
SELECT
MULTI-CHANNEL: (Factory preset)
Use this setting when 3 or more speakers are
connected. In this case, it is necessary to set
[SPEAKER SIZE], [OUTPUT BALANCE], and
[DELAY TIME].
2-CHANNEL:
When 2 speakers are connected, it is not
necessary to set [SPEAKER SIZE], [OUTPUT
BALANCE], and [DELAY TIME] (these setting
menu are not displayed.)
4
SET
Press ACTION three times to exit.
Speaker Size Setup
1 Do steps 1~2 of “Speaker Output Setup” above.
2
SPEAKER SIZE
FRONT
CENTER
SURROUND
SUBWOOFER
SELECT
SET
END
: LARGE
: LARGE
: LARGE
: ON
:
: SET
: ACTION
Press
to select “SPEAKER SIZE,” and press SET
to display SPEAKER SIZE screen.
Press
to select an item, and press SET
repeatedly. (See below table.)
Setting
LARGE(factory preset)
SMALL
LARGE(factory preset)
CENTER
SMALL
NONE
LARGE(factory preset)
SMALL
SURROUND
NONE
ON(factory preset)
SUBWOOFER
OFF
Menu item
FRONT
3
Remark
When the front speakers (R/L) supports low-frequency (under 100 Hz) reproduction.
Select when the front speakers (R/L) does not support low-frequency reproduction.
When the center speaker supports low-frequency (under 100 Hz) reproduction.
Select when the center speaker does not support low-frequency reproduction.
If there is no center speaker.
When the surround speakers (R/L) supports low-frequency (under 100 Hz) reproduction.
Select when the surround speakers (R/L) does not support low-frequency reproduction.
If there is no surround speaker.
If there is a subwoofer.
If there is no subwoofer speaker.
Press ACTION four times to exit.
D4753S P36-60.p65
DVD
Operation
Speaker frequency properties and the existence of speakers is set.
51
** If SUBWOOFER is set to “OFF,”
the front speakers are set to
“LARGE” automatically.
2003/03/13, 11:32
51
Settings for DVD Operation (continued)
Output Balance Setup
Adjust the volume level output from the speakers. To adjust, play a disc or set the “TEST SIGNAL”
(p.53) to ON. Then adjust while confirming the volume. (Even if “OFF” or "NONE" is set in “SPEAKER
SIZE,” the speaker OUTPUT BALANCE can still be set.)
1 Do steps 1~2 of “Speaker Output Setup” on page 51.
2
*
Press
to select “OUTPUT BALANCE,” and press SET
to display OUTPUT BALANCE screen.
Press
to select an item, and press SET repeatedly.
(See below table.)
OUTPUT BALANCE
CENTER
SURROUND(R)
SURROUND(L)
SUBWOOFER
TEST SIGNAL
SELECT
SET
END
: 0dB
: 0dB
: 0dB
: 0dB
: OFF
:
: SET
: ACTION
Remark
Setting
Menu item
Adjust so that the center speaker volume is virtually the same
level (-6dB ~ +6dB) as the front speakers.
CENTER
Adjust so that the surround speaker(R) volume is virtually
the same level (-6dB ~ +6dB) as the front speakers.
-6dB ~ +6dB
SURROUND(R)
SURROUND(L)
0dB(factory preset)
Adjust so that the surround speaker(L) volume is virtually
the same level (-6dB ~ +6dB) as the front speakers.
Adjust so that the subwoofer speaker volume is optimum.
However, because no test sound will come from the
subwoofer, play a disc to confirm, then adjust.
SUBWOOFER
TEST SIGNAL : Switch test signal used for OUTPUT BALANCE setting to “OFF” or “FRONT(L)”....
➡ See page 53.
3
Press ACTION four times to exit.
Delay Time Setup
[See <Speaker Position> p.53.]
To enjoy 5.1 CH sound, it is ideal to place all
speakers, except the subwoofer, in a circular
arrangement. (See <Speaker Position> p. 53.)
If this is not possible, setting Delay Time gives the
sound output a delayed effect which gives you the
illusion of the ideal listening position. (See right.)
steps 1~2 of “Speaker Output
1 Do
Setup” on page 51.
2
Press
to select “DELAY TIME,” and press SET
to display DELAY TIME screen.
Press
to select an item, and press SET
repeatedly. (See below.)
Menu item
0ms
CENTER
SURROUND
3
0ms
1ms
5ms
Setting
2ms 3ms
10ms
Remark
4ms
15ms
5ms
20ms
Setting a delay effect.
0ms(Factory preset)
Press ACTION three times to exit.
52
•
,
•
,
: Delay time as 0ms
(Factory prest)
<
: Find the distance B1 , C1 in the
table (below) and change to
the recommended setting.
B1 Center speaker
Distance
B1
Setting
Approx. 50 cm (11/2 feet)
1.3 ms
Approx. 100 cm (3 feet)
Approx. 150 cm (5 feet)
Approx. 200 cm (6 feet)
2.6 ms
3.9 ms
5.3 ms
C1 Surround speaker
Distance
C1
Setting
Approx. 200 cm (6 feet)
5.3 ms
Approx. 400 cm (12 feet)
Approx. 600 cm (18 feet)
10.6 ms
15.9 ms
For assistance, please call : 1-800-211-PANA(7262) or send e-mail to : [email protected]
D4753S P36-60.p65
52
2003/03/13, 11:32
*Important: If a remote control button does not work when pressed,
press the DVD button on the remote and try the button again.
Test Signal Setup
Still Mode
This feature assists in the setting of
OUTPUT BALANCE. Starting with (L) front
speaker, a test sound is output in clockwise
order. While the test signal is output, adjust
the output of the center speaker and
Surround speaker (R/L).
(See “Output Balance Setup.” P. 52.)
steps 1~2 of “Output
1 Do
Balance Setup” on page 52.
2
SELECT
SET
END
: 0dB
: 0dB
: 0dB
: 0dB
: OFF
:
: SET
: ACTION
No sound will come from the subwoofer.
Adjust as desired when playing a disc.
While the TEST SIGNAL is output, if the
setting change in the OUTPUT BALANCE
(p. 52) is under 2 seconds, the output will
switch to the next speaker. The speaker
name from which the TEST SIGNAL is
currently being output is displayed.
(Example; "TEST SIGNAL : CENTER")
OFF
FRONT(L)
2sec
2sec
CENTER
FRONT(R)
2sec
2sec
SURROUND(L)
SURROUND(R)
2sec
3
1
2
This setting will reduce jitter when compared
with “AUTO” on some discs.
FRAME: “FRAME” (Frame still) is always selected.
Some texts and fine patterns will be seen clearly
when compared with “AUTO” on some discs.
3
TV Mode
1
2
SURROUND(R)
C1
<Speaker Position>
TV Mode
Example
• Video data not formatted in Pan & Scan
will play in letterbox style.
SUBWOOFER
4:3 Letterbox :
Wide-screen video data is played in
Letterbox style (top and bottom of screen
has black margin).
16:9 :
Set “16:9” when using Wide-screen TV.
3
DVD
Operation
SURROUND(L)
: SET
: ACTION
4:3 Pan & Scan (Factory preset) :
Wide-screen video data is played in
Pan & Scan style (left and right of screen
is trimmed.)
CENTER
Listening
position
Press ACTION
to display DVD MAIN MENU.
DVD MAIN MENU
Press
to select “TV
DISC LANGUAGES
MODE,” and press SET
AUDIO OUTPUT
ST I L L MODE
: AUTO
repeatedly for
TV MODE
: 4:3 Letterbox
PARENTAL LOCK :LEVEL 8
mode.
(See below.)
SELECT
:
SET
END
FRONT(R)
B1
Press ACTION
to exit this mode.
Set the screen display style for wide-screen video
material playback.
Press ACTION four times to exit.
FRONT(L)
Press ACTION
to display DVD MAIN MENU.
Press
DVD MAIN MENU
DISC LANGUAGES
to select “STILL MODE,”
AUDIO OUTPUT
ST
T I L L MODE
: AUTO
and
TV MODE
: 4:3 Letterbox
PARENTAL LOCK :LEVEL 8
press SET repeatedly
for mode. (See below.)
SELECT
:
Press
SET
: SET
END
: ACTION
to select “TEST
AUTO: “FIELD” (Field still) or “FRAME” (Frame still) is
SIGNAL,” and
automatically selected during the still mode.
press SET.
(Factory preset)
(See below.)
FIELD: “FIELD” (Field still) is always selected.
OUTPUT BALANCE
CENTER
SURROUND(R)
SURROUND(L)
SUBWOOFER
TEST SIGNAL
Set to reduce jitter in a displayed still picture or a motion
picture.
Press ACTION
to exit this mode.
[Pan & Scan (Factory preset)]
[Letterbox]
53
D4753S P36-60.p65
53
2003/03/13, 11:32
Language Code List
Enter the appropriate code number for the initial settings “AUDIO”, “SUBTITLE” and/or
“MENUS” (see p. 49).
Code Language
Code Language
Code Language
Code Language
6565 Afar
7079 Faroese
7678 Lingala
8375 Slovak
6566 Abkhazian
7082 French
7679 Laothian
8376 Slovenian
6570 Afrikaans
7089 Frisian
7684 Lithuanian
8377 Samoan
6577 Ameharic
7165 Irish
7686 Latvian, Lettish
8378 Shona
6582 Arabic
7168 Scots Gaelic
7771 Malagasy
8379 Somali
6583 Assamese
7176 Galician
7773 Maori
8381 Albanian
6588 Aymara
7178 Guarani
7775 Macedonian
8382 Serbian
6590 Azerbaijani
7185 Gujarati
7776 Malayalam
8385 Sundanese
6665 Bashkir
7265 Hausa
7778 Mongolian
8386 Swedish
6669 Byelorussian
7273 Hindi
7779 Moldavian
8387 Swahili
6671 Bulgarian
7282 Croatian
7782 Marathi
8465 Tamil
6672 Bihari
7285 Hungarian
7783 Malay
8469 Telugu
6678 Bengali; Bangla
7289 Armenian
7784 Maltese
8471 Tajik
6679 Tibetan
7365 Interlingua
7789 Burmese
8472 Thai
6682 Breton
7378 Indonesian
7865 Nauru
8473 Tigrinya
6765 Catalan
7383 Icelandic
7869 Nepali
8475 Turkmen
6779 Corsican
7384 Italian
7876 Dutch
8476 Tagalog
6783 Czech
7387 Hebrew
7879 Norwegian
8479 Tonga
6789 Welsh
7465 Japanese
7982 Oriya
8482 Turkish
6865 Danish
7473 Yiddish
8065 Panjabi
8484 Tatar
6869 German
7487 Javanese
8076 Polish
8487 Twi
6890 Bhutani
7565 Georgian
8083 Pashto, Pushto
8575 Ukrainian
6976 Greek
7575 Kazakh
8084 Portuguese
8582 Urdu
6978 English
7576 Greenlandic
8185 Quechua
8590 Uzbek
6979 Esperanto
7577 Cambodian
8277 Rhaeto-Romance
8673 Vietnamese
6983 Spanish
7578 Kannada
8279 Romanian
8679 Volapük
6984 Estonian
7579 Korean
8285 Russian
8779 Wolof
6985 Basque
7583 Kashmiri
8365 Sanskrit
8872 Xhosa
7065 Persian
7585 Kurdish
8368 Sindhi
8979 Yoruba
7073 Finnish
7589 Kirghiz
8372 Serbo-Croatian
9072 Chinese
7074 Fiji
7665 Latin
8373 Singhalese
9085 Zulu
54
For assistance, please call : 1-800-211-PANA(7262) or send e-mail to : [email protected]
D4753S P36-60.p65
54
2003/03/13, 11:32
Warning and Instruction Displays
These displays will alert you to a missed operation or provide further instructions.
OSD
PLEASE SET CLOCK BY
PRESSING ACTION KEY
PLEASE PREPARE FOR TIMER
REC
CHECK CASSETTE
RECORD TAB
NO CASSETTE
TO CANCEL TIMER REC
HOLD DOWN STOP KEY
FOR APPROX 3 SEC
VIDEO HEADS MAY NEED
CLEANING PLEASE INSERT
HEAD CLEANING CASSETTE
OR REFER TO MANUAL
END
Caution
Page
If you attempt to set or review a Timer
Recording and the Clock is not set...
If DECK is not in Stop mode or a cassette with
record tab is not inserted 2 minutes before a
Timer Recording is about to begin...
If you press REC on the remote control or DECK,
and a cassette is inserted with no record tab...
If you press PLAY, FF, REW, or REC on the
remote control or DECK without a cassette
inserted...
If you press STOP or POWER during a Timer
Recording...
(visible in VCR mode only)
If head cleaning becomes necessary while
playing back a tape...
24
24
25
6
20
21
25
6
: PLAY
If you press a function button other than STOP/
EJECT or POWER while DECK is
in VCR Lock mode...
If you press an invalid key on the remote while
in CABLE/DSS mode...
VCR LOCK ACTIVATED
REMOTE CONTROL IS SET
TO CABLE/DSS MODE
USE VCR : VCR KEY
USE DVD : DVD KEY
REMOTE CONTROL IS SET
TO TV MODE
USE VCR : VCR KEY
USE DVD : DVD KEY
PLEASE CHECK THE DISC,
AND FOR STAINS OR
SCRATCHES ON DISC
If you press an invalid key on the remote while
in TV mode...
If you press PLAY, and DECK reads data from a
stained or scratched disc in DVD mode.
THIS DISC MAY NOT BE PLAYED
IN YOUR REGION
THIS TYPE OF DISC CANNOT BE
PLAYED. PLEASE INSERT A
DIFFERENT DISC
Playback of a disc with different region number
was attempted. Only discs marked region “1”,
“ALL”, or those that include “1” are playable on
this DECK.
An unusable disc is inserted in the DECK.
THIS FILE IS PROTECTED
IT IS PROHIBITED TO COPY
DVD/VIDEO CD/CD TO VHS
If you press REC in DVD mode...
28
29
34
28
29
34
4
3
4
45
45
21
For Your
Information
This file format cannot be played.
(Appears during MP3/WMA/JPEG file playback)
This file is copyright protected and cannot be
played back. (Playback is prohibited.)
(WMA only)
CANNOT PLAY THIS FILE
33
55
D4753S P36-60.p65
55
2003/03/13, 11:32
Before Requesting Service
Check the following points if you are having trouble with your DECK.
Power
Correction
No power…
• Completely insert Power Plug into an AC outlet.
• Set POWER button to on.
• Make sure power source is active.
Power turns itself off...
• Auto power-off (shutoff) occurs after about 5 min.
in DVD mode with no operation, or if there is no
broadcast signal in TV or Playback mode.
Turn the power back on. (pp. 23, 33)
Correction
Recording & Playback
TV program cannot be recorded...
• Check connections between DECK, external
antenna, and TV.
• Check channel selections.
• Make sure your antenna system (CABLE or TV) is
correctly set. (Channels [p. 18])
• Make sure cassette record tab is intact. (p. 6)
Timer recording cannot be
performed…
• Confirm that clock is set to current time and date.
• Make sure Cable/DSS box (if used) is left on and
tuned to channel to be recorded.
• Set recording start/stop times correctly. (p. 24)
• Timer recording may not be performed or continued
if a power interruption occurs before or during a
Timer Recording, even after power is restored.
There is no playback picture, or the
playback picture is noisy or contains
streaks...
• Select channel 3 or 4 on TV to match VCR output
channel (3 or 4) (p. 16) or select LINE.
• Set VCR/TV selector to “VCR.”
• Adjust TRACKING control in either direction. (p. 6)
• Try Head Cleaning. (p. 6)
During special effects playback,
picture may contain some vertical
jitter when using a TV with an
Automatic Vertical Hold Control...
• Set TV’s Vertical Hold Control to MANUAL, then
adjust.
DECK cannot be controlled...
•
•
•
•
•
Remote Control
Correction
Make sure DECK power is on.
Check Remote batteries.
Make sure VCR LOCK is set to off. (p. 33)
Make sure Remote is in proper mode. (p. 28)
Make sure Timer Recording is not in progress.
DECK cannot be remote controlled...
•
•
•
•
•
•
PROG buttons do not respond...
• PROG functions are not available in COMPONENT
Video Output and S-VIDEO OUT. Set TV to either RF
IN or VIDEO IN. (p. 10)
• Check Remote batteries. (p. 4)
• Press VCR or DVD button for DVD/VCR mode. (p. 28)
56
Make sure DECK power is on.
Make sure Remote is in VCR mode.
Aim Remote Control directly at remote sensor on DECK. (p.9)
Avoid any object blocking signal path.
Check Remote batteries. (p. 4)
Exposing DECK remote sensor to direct fluorescent
or outdoor light may cause signal interference.
For assistance, please call : 1-800-211-PANA(7262) or send e-mail to : [email protected]
D4753S P36-60.p65
56
2003/03/13, 11:32
Check the following points if you are having trouble with your DECK.
DVD/ Video CD/ CD
Correction
Play fails to start even when PLAY is
pressed...
• This DECK cannot play discs other than DVDs,
Video CDs and CDs.
• The disc may be dirty and require cleaning.
Play starts but then stops immediately...
• Be sure disc is installed with label side up.
Picture is distorted during rapid
advance or rapid reverse...
• The picture will be somewhat distorted at times:
this is normal.
No Forward/Reverse Scene Search
play...
• Some discs may have sections which prohibit
Forward/Reverse Scene Search. (p. 23)
Play does not start even when title is
selected...
• Confirm the “DVD LOCK” setting. (p. 48)
Audio soundtrack and/or subtitle
language is not the one selected at
the initial settings...
No subtitles...
• If the audio soundtrack and/or subtitle language
selected at DVD initial settings does not exist
on the disc, it will not be accessible.
• Subtitles appear only when available on disc.
• “OFF” is selected at the changing subtitle
language. Select “ON” at the “Subtitle Languages”
section (p. 36) to display the subtitles.
Alternative audio soundtrack
(or subtitle) language cannot be
selected...
• Alternative language cannot be selected with discs
which do not contain more than one language.
• For some discs, alternative language cannot be
selected with the AUDIO or SUB TITLE button.
Try selecting it from the DVD MAIN MENU if available.
Angle cannot be changed...
• This function is dependent on software availability.
Even if disc has multiple angles, they may be
recorded for specific scenes only (ANGLE
indicator on DECK lights up). (p. 37)
Correction
Miscellaneous
Programs cannot be viewed on TV...
Video cassette cannot be inserted...
• Make sure TV is set to output of DECK.
• Check connections between DECK,
external antenna, and TV.
• Set VCR/TV selector to “TV.” (p. 21)
• Make sure proper signal source is selected.
• Insert the cassette with window side up; record
tab facing you.
The disc cannot be removed..
• First, unplug DECK. Then, prepare a rigid wire
(e.g. an extended paper clip) and, applying
moderate force, insert it straight into the hole at the
base of the tray. The tray will eject a little. Now, pull
the tray all the way out and remove the disc. (p. 9)
If you cannot resolve the problem, please call the Customer Call Center for product
assistance at 1-800-211-PANA (7262).
To locate an authorized servicenter, please call toll free 1-800-211-PANA (7262).
or send e-mail to : [email protected]
D4753S P36-60.p65
57
2003/03/13, 11:32
For Your
Information
Video cassette ejects when
• Make sure cassette record tab is intact. (p. 6)
a recording is started or the power is
turned off for timer recording...
In Stop mode, the motor (CYLINDER) • To enable Quick play mechanism, the cylinder will
continues to rotate...
rotate for about 3 minutes. This reduces response
time from Stop to Play mode.
57
Limited Warranty
PANASONIC CONSUMER ELECTRONICS COMPANY,
DIVISION OF MATSUSHITA ELECTRIC
CORPORATION OF AMERICA
One Panasonic Way Secaucus, New Jersey 07094
PANASONIC SALES COMPANY, DIVISION OF MATSUSHITA
ELECTRIC OF PUERTO RICO, INC.,
AVE. 65 de Infantería, Km. 9.5 San Gabriel Industrial Park,
Carolina, Puerto Rico 00985
Panasonic/Quasar Video Products
Limited Warranty
Limited Warranty Coverage
If your product does not work properly because of a defect in materials or workmanship, Panasonic
Consumer Electronics Company or Panasonic Sales Company (collectively referred to as “the warrantor”)
will, for the length of the period indicated on the chart below, which starts with the date of original purchase
(“warranty period”), at its option either (a) repair your product with new or refurbished parts, or (b) replace it
with a new or a refurbished product. The decision to repair or replace will be made by the warrantor.
Product
Parts
Labor
One (1) Year (except
CCD Image Sensor)
CCD Image Sensor - 6
(Six) Months
Camcorder
Contact Number
Service
Ninety (90) Days
Carry-In or Mail-In
1-800-211-PANA(7262)
1-800-211-PANA(7262)
Ninety (90) Days
DVD/VCR Deck, One (1) Year
A/V Mixer
TV/VCR, TV/DVD, One (1) Year (except
CRT)
TV/DVD/VCR
CRT - Two (2) Years
Combination
Ninety (90) Days
Carry-In or Mail-In
Ninety (90) Days
Carry-In: 21” CRT
and Smaller
1-800-211-PANA(7262)
In-Home or Carry-In:
22” CRT and Larger
One (1) Year (except
CRT)
CRT - Two (2) Years
Ninety (90) Days
TV/HDR
Combination
Rechargeable
Batteries
Ten (10) Days
(in exchange for
defective item)
Tape
(in exchange for Five (5) Days
defective item)
Memory Cards
(in exchange for Ninety (90) Days
defective item)
Ninety (90) Days
In-Home or Carry-In 1-888-843-9788
Ninety (90) Days
Not Applicable
Carry-In or Mail-In
1-800-211-PANA(7262)
Not Applicable
Carry-In or Mail-In
1-800-211-PANA(7262)
Not Applicable
Carry-In or Mail-In
1-800-211-PANA(7262)
During the “Labor” warranty period there will be no charge for labor. During the “Parts” warranty period,
there will be no charge for parts. You must carry-in or mail-in your product or arrange for in-home service,
as applicable, during the warranty period.
If non-rechargeable batteries are included, they are not warranted. This warranty only applies to products
purchased and serviced in the United States or Puerto Rico. This warranty is extended only to the original
purchaser of a new product which was not sold “as is”. A purchase receipt or other proof of the original
purchase date is required for warranty service.
Carry-In, Mail-in or In-Home Service
For Carry-In, Mail-In or In-Home Service (as applicable) in the United States call toll free contact number
listed above or visit Panasonic Web Site: http://www.panasonic.com
For assistance in Puerto Rico call Panasonic Sales Company (787)-750-4300 or fax (787)-768-2910.
In-Home service, if applicable, requires clear, complete and easy access to the product by the authorized
servicer and does not include removal or re-installation of an installed product. It is possible that certain
in-home repairs will not be completed in-home, but will require that the product, or parts of the product, be
removed for shop diagnosis and/or repair and then returned.
58
For assistance, please call : 1-800-211-PANA(7262) or send e-mail to : [email protected]
D4753S P36-60.p65
58
2003/03/13, 11:32
Limited Warranty Limits And Exclusions
This warranty ONLY COVERS failures due to defects in materials or workmanship, and DOES NOT
COVER normal wear and tear or cosmetic damage, nor does it cover markings or retained images on
the picture tube resulting from viewing fixed images (including, among other things, letterbox pictures
on standard 4:3 screen TV’s, or non-expanded standard 4:3 pictures on wide screen TV’s, or
onscreen data in a stationary and fixed location). The warranty ALSO DOES NOT COVER damages
which occurred in shipment, or failures which are caused by products not supplied by the warrantor,
or failures which result from accidents, misuse, abuse, neglect, mishandling, misapplication,
alteration, faulty installation, set-up adjustments, misadjustment of consumer controls, improper
maintenance, power line surge, lightning damage, modification, or commercial use (such as in a hotel,
office, restaurant, or other business), rental use of the product, service by anyone other than a
Factory Servicenter or other Authorized Servicer, or damage that is attributable to acts of God.
THERE ARE NO EXPRESS WARRANTIES EXCEPT AS LISTED UNDER “LIMITED WARRANTY
COVERAGE”. THE WARRANTOR IS NOT LIABLE FOR INCIDENTAL OR CONSEQUENTIAL
DAMAGES RESULTING FROM THE USE OF THIS PRODUCT, OR ARISING OUT OF ANY
BREACH OF THIS WARRANTY. (As examples, this excludes damages for lost time, cost of having
someone remove or re-install an installed unit if applicable, or travel to and from the servicer, loss of
media or images, data or other memory or recorded content. The items listed are not exclusive, but
are for illustration only.)
ALL EXPRESS AND IMPLIED WARRANTIES, INCLUDING THE WARRANTY OF
MERCHANTABILITY, ARE LIMITED TO THE PERIOD OF THE LIMITED WARRANTY.
Some states do not allow the exclusion or limitation of incidental or consequential damages, or
limitations on how long an implied warranty lasts, so the exclusions may not apply to you.
This warranty gives you specific legal rights and you may also have other rights which vary from
state to state. If a problem with this product develops during or after the warranty period, you may
contact your dealer or Servicenter. If the problem is not handled to your satisfaction, then write to the
warrantor’s Consumer Affairs Department at the addresses listed for the warrantor.
PARTS AND SERVICE (INCLUDING COST OF AN IN-HOME SERVICE CALL, WHERE
APPLICABLE) WHICH ARE NOT COVERED BY THIS LIMITED WARRANTY ARE YOUR
RESPONSIBILITY.
Customer Services Directory
For Product Information, Operating Assistance, Literature Request, Dealer Locations,
and all Customer Service inquiries please contact:
1-800-211-PANA (7262), Monday-Friday 9 am-9 pm; Saturday-Sunday 10 am-7 pm, EST.
or send e-mail : [email protected]
For hearing or speech impaired TTY users, TTY : 1-877-833-8855
Web Site: http://www.panasonic.com
You can purchase parts, accessories or locate your
nearest servicenter by visiting our Web Site.
For Your
Information
Accessory Purchases:
1-800-332-5368 (Customer Orders Only)
For hearing or speech impaired TTY users, TTY : 1-866-605-1277
Panasonic Services Company 20421 84th Avenue South, Kent, WA 98032
(6 am to 5 pm Monday - Friday; 6 am to 10:30 am Saturday; PST)
(Visa, MasterCard, Discover Card, American Express, Check)
Service in Puerto Rico
Matsushita Electric of Puerto Rico, Inc. Panasonic Sales Company/ Factory Servicenter:
Ave. 65 de Infantería, Km. 9.5, San Gabriel Industrial Park, Carolina, Puerto Rico 00985
Phone (787)750-4300 Fax (787)768-2910
As of August 2002
59
D4753S P36-60.p65
59
2003/03/13, 11:32
Spanish Quick Use Guide/ Guía para rápida consulta
CONEXIONES/CONFIGURACION
(READY TO PLAY)
Para
ajustar el idioma, canalINICIAL
y
Realice la conexión de la antena o TV por cable antes de enchufar el cable de CA.
El DVD/VCR iniciará automáticamente la fijación de los canales y del reloj al enchufar el cable de CA.
CONEXIONES
DVD/VCR
Para Ant/Cable ➛ DVD/VCR ➛ TV
1
2
Terminal IN FROM ANT.
Televisor
1
Conecte el cable de la antena al terminal IN
FROM ANT del DVD/VCR.
Conecte el terminal OUT TO TV del DVD/VCR
a la entrada de la antena VHF/UHF del TV con
el cable RF incluido.
Entrada (IN) desde
ANT./CABLE
Terminal
OUT TO TV
2
VHF/UHF
Para Sistema Digital de Satelite (DSS)/ Convertidor de cable ➛ DVD/VCR ➛ TV
1
2
Conecte la salida de convertidor de cable
al terminal IN FROM ANT.
Conecte el terminal OUT TO TV del DVD/VCR
a la entrada de la antena VHF/UHF del TV con
el cable RF incluido.
Televisor
2
CONFIGURACION INICIAL
1
2
Encienda el TV y cambie al canal 3.
Enchufe el cable de CA.
El DVD/VCR se encenderá e iniciará las
fijaciones de los canales y del reloj.
CANCEL : STOP
AUTO CLOCK SET
PROCEEDING
CANCEL : STOP
Si está usanndo un convertidor de TV por cable y
en su area hay un canal de Public Broadcast
Station (PBS), ajuste su convertidor al canal PBS
de su area. Si está usando un receptor DSS, este
debe estar apagado.
Nota
• Los botones de funciones no funcionan durante
la configuración inicial.
• Para retirar un cassette durante el ajuste
automático, presione EJECT en el control remoto
o STOP dos veces en el aparato. En este caso,
los ajustes de los canales y la hora se deben
hacer manualmente. Para los ajustes seleccione
la pantalla MENU (informaciones en inglés
página 18).
• Dependiendo de las condiciones, el ajuste
automático puede durar más de 30 minutos.
En ese caso, presione STOP para detener el
ajuste automático y realice los ajustes
manualmente en la pantalla MENU.
60
1
Terminal
OUT TO TV
Entrada (IN) desde
ANT./CABLE
Las fijaciones se realizan automáticamente.
Cuando termina las fijaciones, aparecerá la
siguiente pantalla.
6 / 8/ 2003 SUN 2 : 20PM
DST : ON
SETT I NG : CH 10
AUTO CLOCK SET
COMPLETED
Si aparece en la pantalla “AUTO CLOCK SET IS
INCOMPLETE (FIJACION AUTOMATICA DEL
RELOJ ES INCOMPLETO)”, Ajuste el reloj
como se describe a continuación.
Enchufe el cable de CA.
Al inicio, el idioma de la
pantalla está fijado a
inglés.
Para cambiar el idioma,
seleccione la pantalla
MENU (informaciones en
inglés página 18).
Estuche convertidor
de TV por cable
VHF/UHF
3
• Si no aparece la pantalla de abajo, compruebe
la conexión del DVD/VCR-TV y si el canal del
TV está a 3, intennte cambiando al canal 4.
• Para cambiar el canal de salida del DVD/VCR,
consulte las instrucciones de “Canal de salida
del VCR” (informaciones en inglés página 19).
CH AUTO SET PROCEEDING
Terminal
IN FROM ANT.
DVD/VCR
AUTO CLOCK SET IS
I NCOMPLETE
PLEASE SET CLOCK BY
PRESSING ACT I ON KEY
AJUSTE MANUAL DEL RELOJ
Si la fijación ha sido incompleta.
Presione la tecla ACTION en el control remoto
para visualizar la pantalla del menú SET
CLOCK.
SET CLOCK
1
1/ /
:
DST : ON
-----------------------
SELE CT MONTH
SELECT :
SET
:SET
EXIT
: ACT I ON
2
Presione
para seleccionar el mes y SET
para ajustar. De la misma forma, seleccione y
ajuste la fecha, año, hora y DST (hora de
verano).
SET CLOCK
6 / 8 / 2003 SUN 2:20PM
DST : ON
----------------------SET COMPLETED
3
Presione dos veces la tecla ACTION para
poner el RELOJ en marcha y salir.
PRECAUCIÓN
Al usar cables coaxiales RF del tipo “tuerca”,
apriételos solamente con los dedos. Un apriete
excesivo puede dañar los terminales.
For assistance,
Por
ayuda llame
please
al 1-800-211-PANA(7262)
call : 1-800-211-PANA(7262)
o envie
or send
e-mail
e-mail
a : to
[email protected]
: [email protected]
D4753S P36-60.p65
60
2003/03/13, 11:32
Programación fácil para la
grabación con temporizador
Operaciones básicas para la reproducción
1
Inserte un cassette,
• La alimentación del DECK se activa.
En la Pantalla de Visualización Multi
Función se ilumina “VCR”.
PROG
1 Presione
para visualizar la pantalla de Programacion.
2
Presione PLAY para reproducir el cassette.
2
• Si el cassette no tiene la lengüeta de
prevención de grabación (página 6), se
inicia la reproducción automáticamente.
3 Presione STOP para detener el cassette.
CA
7 SAB --:-- --:-- --
SLP
HOY
ELEGIR FECHA DE I N I C I O
ELEGIR :
FIJAR
:SET
TERMINAR : PROG
Detalles especiales durante la grabación
Presione FF/SLOW+ o REW/SLOW- para
búsqueda de escenas hacia delante/ hacia
atrás. Presione PLAY para liberar. Durante
la búsqueda, cada vez que presione FF o
REW se cambia la velocidad como sigue:
[SLP] aprox. 21X ↔ aprox. 9X
[LP]
aprox. 9X ↔ aprox. 7X
[SP]
aprox. 7X ↔ aprox. 3X
Si la imágen se interrumpe con la velocidad de
21X, 9X o 7X, cambie la velocidad a 9X, 7X o
3X.
Presione PAUSE/STILL para imagen Fija
(Congelada).
Presione PLAY para liberar.
Presione PAUSE/STILL en el modo de
imagen fija para imágenes cuadro a cuadro.
Presione PLAY para liberar.
Presione FF/SLOW+ o REW/SLOW- en el
modo de imagen fija para cambiar la
velocidad de las imágenes a cámara lenta.
FECHA I N I C I O PARADA
Orden para elegir
Ejemplo
1) Para ajustar la FECHA de
grabación, presione
para seleccionar:
1-31 = una vez, o
DIARIO = a la misma hora
de lunes a viernes, o
SEMANA = a la misma
hora cada semana y
presione SET para ajustar.
8
Fecha de hoy
9
/
7
31
1
2
6
Orden para elegir
SEMANAL
(SAB)
SEMANAL
(LUN)
DIARIO
SEMANAL
(DOM)
2) Para ajustar los ítems que quedan,
presione
para seleccionar y presione SET
para ajustar los tiempos de INICIO/PARADA,
CANAL, o entrada de LINEA (página 35), y
velocidad del cassette (SP, LP, SLP).
Presione PROG para finalizar PROGRAM.
3
FE I N I C
PARADA CA VEL
7
2 : 00 P
3 : 20 P 02 SLP
-- -- : --- : --- --- -- : --- : --- --- : --- --- -- : -CANCELAR: ADD / DLT
ELEGIR 1- 8 :
ENTRAR : SET
SAL I R : PROG
Presione REW/SLOW- o FF/SLOW+ en el
modo de parada para rebobinado/avance
rápido del cassette.
Presione EJECT en el control remoto,
o STOP/EJECT en el DECK para expulsar
el cassette.
Presione
para seleccionar un número
que no está usando para
ingresar mas programas y
presione SET
para ajustar.
Luego repita el paso 2.
O
Presione nuevamente
PROG para salir.
Operaciones básicas para la grabación
el cassette con lengüeta de
1 Inserte
protección de grabación (página 6).
Presione CH / , o las teclas de números
2 para
seleccionar el canal.
• SP = Reproducción estándar,
• LP = Larga duración,
• SLP = Superlarga duración.
4 Presione REC para comenzar a grabar.
• Para eliminar escenas indeseadas, presione
PAUSE/STILL para hacer una pausa, y al
presionar nuevamente continua la grabación.
• No podrá ver otro canal durante la
grabación.
Grabación de un toque
Presione REC repetidamente para ajustar la
hora de grabación (30 min - 4 horas).
• La videograbadora termina la grabación
a una hora programada.
Grabación normal
4:00
3:00
0:30
2:00
1:00
1:30
61
5 Presione STOP para detener la grabación.
D4753S P36-60.p65
61
Guía para rápida
consulta
SPEED para seleccionar la
3 Presione
velocidad de grabación (página 6)
2003/03/13, 11:32
Spanish Quick Use Guide/ Guía para rápida consulta
Operaciones básicas del DVD
Presione POWER en el control remoto o el
aparato.
1
2 Presione DVD para seleccionar el modo DVD.
OPEN/CLOSE.
3 1)2) Presione
Ponga un disco en la bandeja de disco.
• Sujete el disco sin tocar ninguna de sus
superficies, póngalo con el lado donde esté
impreso el título hacia arriba, alinéelo con las
guías y póngalo en su posición apropiada.
Disco de 3” (8 cm) / Disco de 5” (12 cm)
4
Presione PLAY para iniciar la reproducción.
La bandeja del disco se cierra
automáticamente.
5
6
7
Cuando se presiona DISPLAY, la visualización en
pantalla muestra la información del disco (título / capítulo
/ número de lista, tiempo transcurrido de reproducción,
audio / idioma del subtítulo, y ángulo) e información
(repetir la reproducción, modo reproducción, Karaoke
vocal encendido / apagado, etc.).
DISPLAY en el modo reproducción
1 Presione
o parada para visualizar las visualizaciones en
pantalla.
• Cada vez que se presione DISPLAY, la
visualización en pantalla cambia como se
muestra a continuación.
Información seleccionada del disco
➡ ➡
• Si está usando un DVD interactivo (Interactive
DVD) o un Vídeo CD con contol de
reproducción (playback control) y aparece un
menú de títulos (TITLE MENU) en la pantalla,
siga al paso 5.
Funcionnamiento del DVD utilizando
visualizaciones en pantalla
Información seleccionada del DECK
Pantalla normal
Presione
o las teclas numéricas para
seleccionar el artículo deseado.
Presione SET o PLAY para la reproducción.
Si usa las teclas numéricas, la
reproducción comienza automáticamente.
2 Presione
deseado.
Presione STOP para parar la reproducción.
Presione
3 deseado.
Presione OPEN/CLOSE para expulsar el disco.
■ Para buscar una escena particular
Búsqueda hacia adelante
Presione FF/SLOW+ en el modo de reproducción.
Búsqueda hacia atrás
Presione REW/SLOW- en el modo de reproducción.
(Para liberar, presione PLAY)
■ Para saltar un capítulo o una pista
Salto hacia adelante
Presione SKIP
l en el modo de reproducción.
Un capítulo (Vídeo DVD) o una pista (Audio
DVD/Vídeo CD/CD) se salta cada ves que se
oprime la tecla.
Salto hacia atrás
SKIP en el modo de reproducción.
Presione l
■ Para ver una imagen fija
Presione PAUSE/STILL durante la reproducción.
(Para liberar, presione PLAY)
■ Para ver imágenes cuadro a cuadro
(DVD/Vídeo CD)
Presione PAUSE/STILL en el modo de imagen fija.
La imagen avanza un cuadro cada vez que
presiona la tecla. (Para volver a la
reproducción normal, presione PLAY)
■ Para ver en cámara lenta (DVD/Vídeo CD)
Presione FF/SLOW+ o REW/SLOW- en el modo
de imagen fija.
(Para liberar, presione PLAY)
62
(o
) para seleccionar el ítem
Presione SET para ajustar.
para seleccionar el ajuste
Presione SET para ajustar.
Para volver a la pantalla normal,
Presione repetidamente CLEAR o DISPLAY.
<Ejemplo (Vídeo DVD)>
T I TULO : 12
CAPITULO: 11
DVD
00 : 12 : 34
ELEGIR :
FIJAR : SET SIGUIENTE: DISPLAY
T I TULO : 12
CAPITULO: 24
DVD
00 : 12 : 34
ELEGIR :
FIJAR : SET SIGUIENTE: DISPLAY
<Ejemplo (Vídeo CD)>
PISTA
PBC
FIJAR
: 12
: INACTIVO
VIDEO CD
00 : 12 : 34
PISTA
PBC
: SET SIGUIENTE: DISPLAY
FIJAR
: 17
: INACTIVO
VIDEO CD
00 : 12 : 34
: SET SIGUIENTE: DISPLAY
<Ejemplo (Audio DVD)>
GRUPO : 1
P I STA : 1
DVD-AUDIO
00 : 12 : 34
ELEGIR :
FIJAR : SET TERMINAR: DISPLAY
GRUPO : 1
P I STA : 1
DVD-AUDIO
00 : 12 : 34
ENTRAR: 0 - 9
FIJAR : SET TERMINAR: DISPLAY
For assistance,
Por
ayuda llame
please
al 1-800-211-PANA(7262)
call : 1-800-211-PANA(7262)
o envie
or send
e-mail
e-mail
a : to
[email protected]
: [email protected]
D4753S P36-60.p65
62
2003/03/13, 11:32
Fijaciones iniciales
Selección de IDIOMAS DEL
DISCO [DVD solamente]
1 Presione DVD para seleccionar el modo DVD.
ACTION en el modo de parada para
2 Presione
visualizar MENU.
para seleccionar el artículo deseado.
3 Presione
Presione SET.
IDIOMAS DEL DISCO
Seleccione “AUDIO”
Todos los idiomas ofrecidos en el disco pueden ser
ajustados. Si el idioma ajustado no es ofrecido en el
disco, se seleccionará el idioma original del disco.
SALIDA DE AUDIO
Puede usted ajustar la salida audio procedente del
terminal de salida audio digital.
DETENER RASTREO
Para seleccionar “CAMPO” o “CUADRO fijo” para prevenir
inestabilidad o para permitir ver textos pequeños o
patrones finos claramente en el modo de imagen fija.
TV PREFERENCIA
Para seleccionar cuando el material del vídeo es para
pantalla ancha y se quiere reproducir en el estilo
Pan&Scan, en el estilo Letterbox o en el estilo 16:9 en
la pantalla.
Presione
para seleccionar el artículo deseado.
4 Presione
SET.
Volver a visualizar el menú de DVD para
5 continuar
el ajuste.
(Fijación de fábrica : inglés)
Inglés / Español / Francés / Japonesa :
Original : Se seleccionará el idioma
original de cada disco.
OTRO ✱✱✱✱ : Se puede seleccionar el otro
idioma.
Seleccione “SUBTITULO”
AUTO : Se seleccionará el mismo que fue
seleccionado en la preparación de
“AUDIO”. (Fijación de fábrica)
• Si el idioma seleccionado en la preparación
de “AUDIO” se utiliza durante la
reproducción, los subtítulos no aparecerán.
• Si se utiliza otro idioma durante la
reproducción, los subtítulos aparecerán en el
idioma seleccionado en la preparación de
“AUDIO”
Inglés / Español / Francés / Japonesa :
OTRO ✱✱✱✱ : Se puede seleccionar el otro
idioma.
Seleccione “MENU”
(Fijación de fábrica : inglés)
Inglés / Español / Francés / Japonesa :
Presione ACTION y pase al paso 3 para ajustar otro OTRO ✱✱✱✱ : Se puede seleccionar el otro
ajuste o, para salir, presione ACTION tres veces.
idioma.
Cambio del idioma de subtítulos
[Vídeo DVD solamente]
Visión desde otro ángulo
[DVD solamente]
EI idioma de los subtítulos seleccionado al hacer las
fijaciones iniciales se puede cambiar por otro idioma
diferente, si éste se encuentra disponible.
Algunos discos DVD tienen escenas que han sido
filmadas simultáneamente desde ángulos diferentes.
Con estos discos, la misma escena podrá verse desde
Presione SUBTITLE durante cada uno de estos ángulos diferentes utilizando el botón
ANGLE.
la reproducción.
1
Cuando no haya subtítulos
grabados, se visualizará “-” en
lugar del número de idioma.
ELEGIR
:
ACTIVO / INACTIVO :
TERMINAR
: SUB TITLE
2
Presione
para
seleccionar el idioma deseado.
Presione
para
seleccionar “ACTIVO” o
“INACTIVO.”
ELEGIR
:
ACTIVO / INACTIVO :
TERMINAR
: SUB TITLE
Selección de vocal para los
discos de Karaoke [DVD/Vídeo CD]
Presione
(o
)
para seleccionar el ajuste
deseado.
Presione
(o ) para
ajustar. (DVD solamente)
ELEG I R
:
TERMI NAR : AUDIO
ANGULO: 1
ELEGIR :
2
ANGULO: 2
• Video CD
LR
L
Presione
para
seleccionar el ángulo
deseado.
ELEGIR :
Cambio del idioma de la pista
de sonido [DVD solamente]
EI idioma de la pista de sonido seleccionado al hacer
las fijaciones iniciales se puede cambiar por otro
idioma diferente, si éste se encuentra disponible.
1
ELEG I R
:
TERMI NAR : AUDIO
• DVD Karaoke (1 vocal) VOCAL ON VOCAL OFF
• DVD Karaoke (2 vocals) VOCAL V1 VOCAL V2 VOCAL V1+V2 VOCAL OFF
Presione ANGLE durante la
reproducción para visualizar
la selección del ángulo.
2
Presione AUDIO
durante la reproducción
para visualizar
SONIDO en la pantalla.
Presione
para
seleccionar idioma.
R
63
ELEG I R
:
TERMI NAR : AUDIO
D4753S P36-60.p65
Guía para rápida
consulta
1
2
Presione AUDIO durante la reproducción
para visualizar la pantalla AUDIO.
1
63
2003/03/13, 11:32
Spanish Quick Use Guide/ Guía para rápida consulta
Utilización de un menú de títulos
[DVD solamente]
Algunos discos con películas, vienen con dos o más
títulos. Por ejemplo, si el disco tiene un menú de
títulos grabados, el botón TITLE podrá utilizarse
para seleccionar el título de la película.
1
2
Presione TITLE durante la reproducción.
Ahora se visualiza una lista de los títulos del
disco.
Presione
o las
T I TLE MENU
teclas de números para
Dogs Cas t l es
seleccionar el título
Love r s B i r ds
deseado.
Dogs
Presione SET para elegir.
Utilización de un menú de DVD
[DVD solamente]
Algunos discos DVD ofrecen un menú especial.
Este menú incluye guías para contenidos únicos,
audio, subtitulos, idiomas, etc. Aunque los
contenidos y las operaciones se cambian, los
siguientes son unos pasos básicos para el uso del
menú.
1
2
of the world
Presione MENU durante la reproducción.
El menú de DVD introducido en el disco se
visualiza ahora.
Presione
o las
DVD MENU
teclas de números para
1 . SUBT I TLE
seleccionar el ítem deseado.
2 . AUD I O
Presione SET para elegir.
3 . ANGLE
<ejemplo>
<ejemplo>
Ampliación de la imagen [Vídeo DVD solamente]
Durante la reproducción de un DVD, puede ampliar partes específicas de una imagen y seleccionar la
relación de zoom usando el botón ZOOM.
Presione ZOOM repetidamente para cambiar el
tamaño de la imagen como se indica a continuación:
2da
■ Use los botones , ,
y
para desplazar
la posición hacia arriba, hacia abajo, hacia la
izquierda o hacia la derecha.
3da
Funcionamiento de la ejecución de MP3/WMA/JPEG
Puede utilizar esta unidad para reproducir audio de
formato MP3/WMA/JPEG, grabado para uso personal
con una computadora, etc., en un CD-ROM o CD-RW.
La ejecución no podrá realizarse en algunos casos,
debido a las condiciones de la grabación.
4
1 Presione POWER en el control remoto o DECK.
Presione OPEN/CLOSE y a continuacion
2 coloque
un disco MP3/WMA/JPEG en la bandeja
de discos.
Presione OPEN/CLOSE para cerrarla.
3
Se visualizará el MENU MP3/WMA/JPEG y la
ejecución se iniciará automáticamente. (Se
visualizará el directorio del CD.)
<ejemplo>
Estado de la
función
Area de las
carpetas
(La carpeta
visualizada
actualmente se
volverá verde)
ROOT
VA
TECHNO
POPS
JAZZ
64
Carpeta
principal
..
END_WALTZ
DD_CUB I C
NOCTURNE
NORN
MODE DE REPRODUCCION:
NORMAL
MODO DE REPRODUCCIÓN
:Archivo MP3
:Carpeta
Contador
00 : 00 : 00
REPROD
:Archivo WMA
:Carpeta principal
Area de
archivos
(El archivo/ la
carpeta se
visualiza con
un cursor.)
:Archivo JPEG
■ Ejecución MP3/WMA/JPEG (Durante el modo STOP)
Presione
para seleccionar un archivo MP3/WMA
( / ) o un archivo JPEG ( ), y presione SET o
PLAY.
• MP3/WMA
Búsqueda hacia adelante/hacia atrás
➡Presione FF/SLOW+ o REW/SLOW- durante la ejecución.
Salto de pista hacia adelante/hacia atrás
|o|
SKIP durante la ejecución.
➡Presione SKIP
• JPEG
Búsqueda siguiente/anterior
|o|
SKIP .
➡Presione SKIP
Inicie la muestra-diapositiva
➡Presione FF/SLOW+ o REW/SLOW-.
Ampliar una imagen ➡ Presione ZOOM.
Girar una imagen ➡ Presione ANGLE.
Presione STOP para detener la operación descrita arriba.
■ Seleccione MODO DE REPRODUCCION
(Durante el modo STOP)
Presione
para mover el cursor a MODO DE
para seleccionar el
REPRODUCCION, y Presione
MODO DE REPRODUCCIÓN deseado.
[MODO DE REPRODUCCIÓN]
NORMAL: Todos los archivos se reproducen sólo una vez
REPETICION DE UNA MUSIC:
El archivo seleccionado se reproduce repetidamente.
REPETICION DE UN ARCHIVO:
Los archivos que se encuentran en la carpeta
seleccionada se reproducen repetidamente.
REPETICION DEL DISCO:
Todos los archivos se reproducen repetidamente.
ACTION para regresar al DVD MENU
5 Presione
PRINCIPAL.
For assistance,
Por
ayuda llame
please
al 1-800-211-PANA(7262)
call : 1-800-211-PANA(7262)
o envie
or send
e-mail
e-mail
a : to
[email protected]
: [email protected]
D4753S P36-60.p65
64
2003/03/13, 11:32
Configuración de los altavoces
1
2
3
Presione POWER en el control remoto o el
aparato.
Presione DVD para seleccionar el modo DVD.
AJUSTE DE ALTAVOCES
SAL I DA PARA ALTAVOCES :
MULT I - CANALES
TAMAÑO DEL ALTAVOZ
BALANCE DE SAL I DA
T I EMPO ATRAZADO
ELEG I R
F I JAR
TERM I NAR
4
:
: SET
: ACTION
Presione
para
seleccionar “AJUSTE DE
ALTAVOCES,” y
Presione SET para
visualizar la pantalla
AJUSTE DE ALTAVOCES.
Presione
para seleccionar, y presione
SET para fijar.
■ SALIDA PARA ALTAVOCES
Fije el número de altavoces conectados al DECK.
MULTI-CANALES (Predeterminado en fábrica)
Cuando están conectados 3 o más altavoces.
2 CANALES
Cuando están conectados 2 altavoces.
■ TAMAÑO DEL ALTAVOZ
Se determinan las propiedades de frecuencia del
altavoz y la existencia de los altavoces.
FRENTE (GRANDE [predeterminado en fábrica]/
PEQUEÑO)
CENTRO (GRANDE [predeterminado en fábrica]/
PEQUEÑO/NINGUNO)
ENVOLVENTE (GRANDE [predeterminado en
fábrica]/PEQUEÑO/NINGUNO)
SUBWOOFER (ENCENDIDO [predeterminado en
fábrica]/APAGADO)
■ BALANCE DE SALIDA
Ajuste la salida de nivel de volumen para los altavoces.
CENTRO, ENVOLVENTE(DER)/(IZQ), SUBWOOFER
-6db ~ +6db (0db: predeterminado en fábrica)
SEÑAL PRUEBA
El sonido de prueba es la salida en sentido de las
manecillas del reloj.
■ TIEMPO ATRAZADO
Configurar el tiempo atrazado. Da a la salida de
sonido un efecto retrasado que le ofrece la ilusión de
encontrarse en la posición de escucha ideal.
5
Presione ACTION tres o cuatro veces
para salir.
Guía para rápida
consulta
65
D4753S P36-60.p65
65
2003/03/13, 11:32
INDEX
DECK & VCR
A ACTION button ................................. 8, 18
Accessories ............................................ 4
ADD/DELETE button
(Add or Delete a Channel) ............ 8, 19
Audio Broadcast types
(Stereo/SAP/Mono) ............................ 26
Audio Mode (Playback, Recording) .... 27
Auto Operation Functions .................... 31
Auto Shut-Off ........................................ 33
B Batteries ................................................. 4
C Channel (“SET UP CHANNEL”) .......... 18
Channel Up/Down,
Tracking/V-Lock Button .................... 6, 8
Clock (“SET CLOCK”) .......................... 18
Commercial Skip ................................. 31
Connections ................................. 12 ~ 15
Copy Your Tapes (Dubbing) ............... 35
COUNTER RESET button ............... 8, 32
Customer Services Directory ............... 59
D DISPLAY button ............................... 8, 11
DSS/CABLE mode button ............... 8, 28
DST (Daylight Saving Time) ................ 19
E EJECT button ................................... 8, 20
ENTER button
(For tuning TV Channel) ................ 8, 28
F FAST FORWARD/SEARCH button .. 8, 20
H Head Cleaning ...................................... 6
I Index Search ........................................ 30
Indicator (Multi Function Display) ....... 11
Initial Setup (Ready to Play) ......... 16, 17
INPUT button ................................... 8, 35
L Limited Warranty ........................... 58, 59
Location of Controls
(Remote, DECK) .......................... 8 ~ 10
M Multi-Brand Control ....................... 28, 29
O On-Screen Displays (VCR) ................. 11
One Touch Recording ......................... 21
P PAUSE/STILL button (Still Picture) .. 8, 20
PLAY button (Playback a Tape) ...... 8, 20
POWER button ....................................... 8
PROG button (PROGRAM) .............. 8, 24
Program Clear, Review, Replace ....... 25
Program End Search ........................... 30
Q Quality Picture ....................................... 6
66
R REC button (Record on a Tape) ..... 8, 21
Record Tab ............................................ 6
Remote Sensor ...................................... 9
Remote Warning .................................. 34
Repeat Play ......................................... 32
Reset All Memory Functions ................. 9
REWIND/SEARCH button ............... 8, 20
S SAP/Hi-Fi ............................................. 27
SEARCH
(Index and Program End Search) ..... 30
SLOW+/SLOW- button
(Slow Motion Picture) .................... 8, 20
Spanish Quick Use Guide ........... 60 ~ 65
Specifications ......................................... 7
SPEED button .................................. 8, 21
Still (Freeze) Picture ............................ 20
STOP button ..................................... 8, 20
T Tape Position, Tape Status ................. 34
Timer Recording .................................. 24
Trouble Shooting ........................... 56, 57
TV mode button ................................ 8, 28
V VCR Lock ............................................. 33
VCR mode button ............................ 8, 28
VCR/TV button ................................. 8, 21
VCR/TV Selector Feature .................... 32
VOLUME +/- button (TV Volume) .... 8, 28
WWarning and Instruction Displays ....... 55
Weak Signal Display ........................... 33
Z ZERO SEARCH button .................... 8, 32
For assistance, please call : 1-800-211-PANA(7262) or send e-mail to : [email protected]
D4753S P36-60.p65
66
2003/03/13, 11:32
S SEARCH button
(Forward/Reverse Scene Search) .. 8, 23
SKIP l or l button
(Forward/Reverse Chapter/Track) 8, 23
Slide-show ........................................... 46
SLOW+/SLOW- button
(Slow Motion Picture) .................... 8, 23
Speaker Output Setup ......................... 51
Speaker Position ................................. 53
Speaker Size Setup ............................. 51
STILL button
(Still Picture or Pause) ................... 8, 23
Still Mode
(For selecting “FIELD” or “FRAME”) .. 53
STOP button ..................................... 8, 22
SUB TITLE button
(For selecting Subtitle Language) ... 8, 36
S-Video Out .................................... 10, 13
T Test Signal Setup ................................ 53
TITLE button (Title Menu) ................ 8, 38
TV Mode
(For selecting the screen display style) .. 53
2-channel speaker system .............. 15, 51
V Video CD ............................................. 23
VOLUME ADJUST button ................ 8, 40
V.S.S. (Virtual Surround Sound) ..... 8, 23
WWMA ..................................................... 45
Z ZOOM button (Picture Zoom) ..... 8, 37, 47
For Your
Information
DVD
A ACTION button ................................. 8, 49
ANGLE button
(Multiple Angle Viewing) ......... 8, 37, 47
AUDIO button
(Audio Soundtrack Language) ...... 8, 36
Audio Output
(For Selecting Audio Output) ............. 50
Auto-Power Off Function ..................... 23
B Bonus Group (For DVD-Audio) ........... 41
C CLEAR button ............................ 8, 39, 48
Component Video Output .............. 10, 13
D Delay Time Setup ................................ 52
Disc Languages ................................... 49
DISPLAY button
(“On-Screen Display”) .................... 8, 42
DTS ...................................................... 14
DVD-Audio ........................................... 41
DVD Lock Ratings ............................... 48
DVD Menu ........................................... 38
DVD mode button ............................ 8, 28
F 5.1ch Analog Audio Output ........... 15, 51
Frame by Frame Picture ...................... 23
Forward/Reverse Chapter/Track Skip ... 23
Forward/Reverse Scene Search .......... 23
J JPEG ............................................ 45 ~ 47
K Karaoke
(Vocal Selection for Karaoke Discs) ... 37
L Language Code List ............................ 54
M MENU button
(To display DVD Menu) ................. 8, 38
MP3 ...................................................... 45
Multiple Angle Viewing ........................ 37
Multi-channel speaker system ...... 15, 51
O OPEN/CLOSE button ....................... 8, 22
Optical Digital Audio Output .......... 10, 15
Output Balance Setup ......................... 52
P PAGE button (Still Image Skip) ....... 8, 41
PLAY button (Play a Disc) ............... 8, 22
Program Play (For Video CD/ CD) ...... 39
PROGRESSIVE button .......................... 9
Progressive Scan ................................. 10
R Random Play (For Video CD/ CD) ...... 40
Repeat Play ......................................... 44
Resume Function ................................. 23
RETURN button ............................... 8, 22
Rotation ................................................ 47
67
D4753S P36-60.p65
67
2003/03/13, 11:32
Panasonic Consumer Electronics Company,
Division of Matsushita Electric Corporation of America
One Panasonic Way Secaucus, New Jersey 07094
Panasonic Sales Company (“PSC”),
Division of Matsushita Electric of Puerto Rico, Inc.
Ave. 65 de Infantería. Km. 9.5 San Gabriel Industrial Park, Carolina,
Puerto Rico 00985
D4753S P36-60.p65
68
P
Printed in Indonesia
LSQT0675A
S0303-0
2003/03/13, 11:32