1
CORE #92
934-095000
1/16/97 5:12 PM
92
Page 1
934-095000
92
INSTRUCTIONS
SPECIAL EXTENDED
WARRANTY OFFER
SPECIAL EXTENDED
WARRANTY OFFER
5 YEARS FOR 5 DOLLARS
For $5, Timex will extend the enclosed one year limited manufacturer's
warranty for an additional 4 years from date of purchase. This 5 year
warranty covers repairs on your watch under the same terms and
conditions as set forth in the manufacturer's warranty in this booklet.
Payment can be made with AMEX, Discover, Visa or MasterCard by calling
1-800-448-4639 during normal working hours or you can mail a check to:
Timex Extended Warranty
P.O. Box 1676, Dept. EF
Little Rock, AR 72203.
We will need your name, address, telephone number, date watch
purchased and 5 digit watch model number.
Payment must be made within 30 days after date of purchase.
Please read this booklet carefully to familiarize yourself with the operation
and care of your Timex watch and with the Limited Warranty.
SECTION 3 – WATER-RESISTANCE
If your watch is water-resistant, it will be indicated (
) on the watch face
or on the caseback.
• 50 Meter Water-Resistant watch withstands water pressure to 86 p.s.i.a.
(equals immersion to 164 feet or 50 meters below sea level).
• 100 Meter Water-Resistant watch withstands water pressure to 160
p.s.i.a. (equals immersion to 328 feet or 100 meters below sea level).
• 200 Meter Water-Resistant watch withstands water pressure to 284
p.s.i.a. (equals immersion to 656 feet or 200 meters below sea level).
WARNING: TO MAINTAIN WATER-RESISTANCE, DO NOT PRESS ANY
BUTTONS OR PULL OUT THE CROWN UNDER WATER UNLESS YOUR
WATCH IS INDICATED AS 200 METER WATER-RESISTANT.
NOTES:
1. The watch is water-resistant only as long as crystal/lens, push buttons
and case remain intact.
2. Even though the watch may be water-resistant to a significant depth
(100 or 200 meters), it is not a diver watch and should not be used for
diving.
3. Timex recommends rinsing your watch with fresh water after exposure to
salt water.
4. Shock-Resistance: If your watch is shock-resistant, it will be indicated
on the watch face or caseback. Timex shock-resistant watches are
designed to pass the FTC test for shock-resistance. However, care
should be taken to avoid damaging the crystal/lens.
SECTION 4 – GENERAL OPERATION/FEATURES
ANALOG (HANDS) PORTION
SECTION 1 – INDIGLO® NIGHT-LIGHT
Your Timex watch featuring INDIGLO night-light contains a patented
electroluminescent technology (U.S. Patent Numbers 4,527,096 and
4,775,964). The INDIGLO night-light illuminates the entire watch face
(digital or analog/digital) with a uniform bright light that offers superior
readability in all low light and nighttime conditions. Simply press the
appropriate button to activate.
INDIGLO is a registered trademark of Indiglo Corporation in the U.S. and other countries.
SECTION 2 – NIGHT-MODE®
Your Timex watch is equipped with NIGHT-MODE. This Timex patented
feature (U.S. Patent Number 4,912,688) enhances the benefits of the
INDIGLO® night-light. Once activated, any button pushed will cause the
INDIGLO night-light to stay on for 3 seconds. NIGHT-MODE is activated by
pressing and holding the INDIGLO button for 3 seconds. NIGHT-MODE will
stay activated for 3 hours or until you deactivate it by pressing and holding
the INDIGLO button again for 3 seconds.
EXAMPLE: When running lap times in low light conditions, press the
SPLIT/RESET button. At this time the INDIGLO night-light will
automatically stay on for 3 seconds, allowing you to read the lap and split
times...all with one simple push of a button.
• Hours, minutes, seconds
• 360˚ compass directional ring or time zone ring
DIGITAL PORTION
• Twelve-digit display
• Daily alarm
• Hourly chime
• 12/24 hour option (Aviator's use 24-hour or military time)
• 4 year "smart calendar" (automatically adjusts the date for months with
less than 31 days)
• 10-hour, 3-mode countdown timer
• 16-hour chronograph with 8-lap memory recall (lap/split times)
• 99-lap counter
ANALOG SETTING INSTRUCTIONS
To start your watch, remove the plastic guard from under the CROWN and
push the CROWN in completely. This will start your watch. The second
hand should now advance at one second intervals.
Setting the Time
• Pull the CROWN out completely.
• Slowly rotate the CROWN CLOCKWISE or COUNTERCLOCKWISE to the
desired time.
• Push the CROWN in completely to restart the watch.
CORE #92
1/16/97 5:12 PM
Page 3
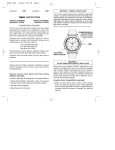
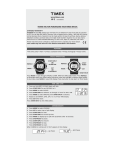
NORMAL TIME
First acquaint
yourself with
the location
of the buttons
that operate
your watch.
INDIGLO
MONTH
CROWN
MODE
SET
These buttons
DAY
are referred to
throughout this
HOUR
instruction
booklet.
START/STOP
HOUR
DATE
SECONDS
MINUTES
SPLIT/RESET
MONTH
DATE
DAY
INDIGLO
SET
MODE
SECONDS
MINUTES
START/STOP
Look for the
design on the face of Timex watches.
D. Press START/STOP to adjust MINUTES, press SPLIT/RESET to advance
minutes.
E. Press START/STOP to adjust MONTH, press SPLIT/RESET to advance
month.
F. Press START/STOP to adjust DATE, press SPLIT/RESET to advance date.
G. Press START/STOP to adjust DAY, press SPLIT/RESET to advance day.
H. Press START/STOP to select NORMAL (12 hour) or MILITARY (24 hour)
TIME. Use SPLIT/RESET to alternate between 12 and 24 hour time.
I. Return to NORMAL TIME by pressing SET.
SPLIT/RESET
is a trademark of Timex Corporation.
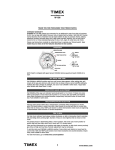
DIGITAL MODES
• From NORMAL TIME (illustrated) press MODE to view
CHRONOGRAPH.
Chronograph features simultaneous readout of
individual and cumulative laps, 8 lap memory recall,
and 99 lap counter with pause feature.
• From CHRONOGRAPH mode press MODE to view
COUNTDOWN TIMER.
Timer features three separate operations, countdown/
stop, countdown/ repeat and countdown/countup.
• From TIMER mode press MODE to view ALARM.
• From ALARM press MODE to view NORMAL TIME.
CDS CDR CDC
P
OTHER FEATURES
• 12 or 24 HOUR (Military) Time System.
• Automatic calendar adjustment for months with less than 31 days.
• Peek at chronograph and alarm setting from NORMAL TIME.
• HOURLY CHIME (with visible indicator) beeps twice every hour on the
hour.
• Simultaneous operation of two modes in addition to NORMAL TIME.
SECTION 5 – SETTING TIME/CALENDAR
A. From NORMAL TIME, press and hold SET firmly, ”HOLD“ appears on
the display, and then seconds begin flashing.
B. Press SPLIT/RESET to return SECONDS to zero.
C. Press START/STOP to adjust HOURS, press SPLIT/RESET to advance
hours. Watch carefully for "A" to appear between the hours and minutes to
indicate AM. When time displayed is PM, that area of display will be blank.
SECTION 6 – HOW TO USE MEMORY CHRONOGRAPH
From NORMAL TIME press MODE. You are in
CHRONOGRAPH mode. After displaying word CHRONO,
display will look like this:
NOTE: If words TIMER and CHRONO are alternating in display, then timer
is currently operating in Countdown/Countup mode (CDC or CC) and must
first be deactivated. See Section 7 to deactivate timer.
STANDARD CHRONOGRAPH WITH NET/ ELAPSED TIME
A. Press START/STOP to begin timing. CHR or CH will appear between the
upper and lower display to designate an active chronograph.
NOTE: You can leave CHRONOGRAPH mode with the chronograph running.
From NORMAL TIME press START/STOP to view the elapsed chrono time.
B. Press START/STOP again to Stop/Pause. STP or ST will appear on line
between upper and lower display.
C. Press START/STOP to resume timing. CHR or CH will appear on line
between upper and lower displays.
OR
Press and hold SPLIT/RESET to clear chrono and return to 00.00.00 on
both parts of display.
ADVANCED CHRONOGRAPH WITH LAP MODES / INDIVIDUAL &
CUMULATIVE SPLITS / MEMORY RECALL
A. Press START/STOP to begin timing.
B. Press SPLIT/RESET to temporary freeze chronograph readout and enter
first lap into memory.
C. After 10 seconds, the upper display will now show elapsed time of
current lap while lower display will alternate between number of the lap
(such as LAP 2) and total elapsed time for all laps combined (split time).
You can count up to 99 laps in this manner.
D. When event ends, press START/STOP. Upper display indicates final lap
time. Lower display alternates between number of the last lap (such as
LAP 99) and event (cumulative laps) time.
E. You may now review the final eight laps of the event. Each time you
press SPLIT/RESET, the elapsed time of a different lap will appear in
upper display. MEM or ME will appear on the line between the upper
and low displays to indicate use of the memory. Lower display will
alternate between number of the lap and cumulative (split) time after
that lap was completed.
F. To begin a new event press and hold SPLIT/RESET until zeros appear in
both display areas. At this point all memory of the previous event is
erased and you are now ready to repeat Steps A through F.
CORE #92
1/16/97 5:12 PM
Page 5
NOTE: If you need to pause the chronograph during a lap, press
START/STOP. Press START/STOP again to resume timing that lap. Digits
are displayed in 1/100th of a second up to an elapsed time of one hour.
Thereafter, they are displayed in seconds up to an elapsed time of 15
hours, 59 minutes and 59 seconds.
SECTION 7 – HOW TO SET/USE MULTI-MODE COUNTDOWN TIMER
SELECTING TIMER MODE / DURATION
A. Press and release MODE until TIMER appears in upper display. Timer
has three modes. Their symbols appear on the line dividing the upper
and lower displays. They are:
CDS or CS - COUNTDOWN/STOP Timer - counts down to zero then stops.
CDR or CR - COUNTDOWN/REPEAT Timer - counts down to zero, beeps,
and immediately begins counting down to zero again. This process repeats
indefinitely until stopped.
CDC or CC - COUNTDOWN/COUNTUP - when countdown timer reaches
zero, it beeps and begins to count off elapsed time and functions as a
chronograph. WHEN THIS MODE IS ACTIVATED, WATCH CANNOT BE
SIMULTANEOUSLY USED AS A CHRONOGRAPH.
B. First select one of the above modes by pressing SPLIT/RESET, then
press SET firmly to select flashing mode symbol and to begin setting
timer duration.
C. HOURS begin flashing in upper display, NORMAL TIME will appear in
lower display. Press SPLIT/RESET to adjust hours.
D. Press START/STOP to adjust TENS OF MINUTES, press SPLIT/RESET to
advance tens of minutes.
E. Press START/STOP to adjust MINUTES, press SPLIT/RESET to advance
minutes.
F. Press START/STOP to adjust TENS OF SECONDS, press SPLIT/RESET
to advance tens of seconds.
G. Press START/STOP to adjust SECONDS, press SPLIT/RESET to advance
seconds.
If you need to change a setting, press START/STOP to return to HOURS.
H. When you have completed setting, press SET to stop digits from
flashing. Timer is now set and in ready position. If you need to change
your setting press SET. If you do not wish to use the timer now, press
MODE to return to NORMAL TIME
OPERATION OF TIMER
A. From ready position, press START/STOP to begin operation of
countdown timer. While it is counting down, you may switch to another
mode of operation without affecting timer operation. Even if watch is in
another mode of operation, timer will still beep when reaching zero.
B. To stop timer, press START/STOP. YOU MUST BE IN TIMER MODE TO
STOP TIMER.
C. If timer has been stopped before reaching zero, press START/STOP to
continue to countdown from point at which countdown stopped, or
press SPLIT/RESET to bring timer back to starting point.
D. To set timer to new time in the same countdown mode, press SET . To
set timer to a new mode, press and hold SPLIT/RESET until the word
TIMER appears in upper display. You may then change mode between
CDS or CS, CDR or CR, CDC or CC by pressing SPLIT/RESET. Then
press SET to again begin process of setting timer duration.
SECTION 8 – HOW TO SET/ USE DAILY ALARM/HOURLY CHIME
HOW TO SET ALARM
A. Press and release MODE until ALARM appears in display. The ALARM
setting will appear in the upper display and NORMAL TIME in the lower
display.
B. Press SET to begin setting procedure.
C. Hours are now flashing, press SPLIT/RESET to advance hours. Pay close
attention to letter A (for AM) or P (for PM) in right side of upper display.
NOTE: AM or PM is displayed in NORMAL (12 hour) TIME only.
D. Press START/STOP to adjust TENS OF MINUTES, press SPLIT/RESET to
advance tens of minutes.
E. Press START/STOP to adjust UNITS OF MINUTES, press SPLIT/RESET
to advance units of minutes.
F. Press START/STOP to go back and change any of the settings.
G. Press SET to end setting operation and press MODE to return to
NORMAL TIME. Alarm is now set and armed. It is indicated by
on
the line between upper and lower display.
From NORMAL TIME, press SPLIT/RESET to view ALARM setting. Alarm
will not sound unless
is displayed.
HOW TO ACTIVATE ALARM AND HOURLY CHIME
A. Press and release MODE until ALARM appears in upper display.
B. After display changes again, press START/STOP as needed while looking
for the symbol
, which represents ALARM, on the line between upper
and lower display. If you see this symbol, alarm is armed. Alarm will
sound for 20 seconds every 24 hours unless disarmed. It can be
silenced by pressing any button.
C. Press SPLIT/RESET as needed while looking for the symbol
, which represents HOURLY CHIME, on the line between the upper
and lower display. When this symbol is shown, watch will beep 2 times
every hour on the hour. When chime is activated, watch will also beep
each time any button is pressed.
SECTION 9 – BRACELET ADJUSTMENT
Review the various adjustable bracelet types below to determine which one
is on your watch.
NOTE: The clasp can be damaged if excessive force is used.
SLIDING CLASP BRACELET
1. Open locking plate using nail file, small
screwdriver or other blunt instrument.
2. Move clasp to desired bracelet length.
3. While holding the locking plate with your finger and thumb, exert slight
pressure and slide the clasp back and forth until you feel the clasp engage
in one of the grooves on the underside of the bracelet.
4. Firmly press the locking plate down until it snaps to the closed position.
If it seems to be difficult to push closed, repeat Step 3 to ensure that
you have properly positioned the clasp.
OPEN
FOLDOVER CLASP BRACELET
You can adjust the bracelet size by moving the position of the bracelet within
the foldover clasp as shown. (Illustration shows bracelet in upright position.)
NOTE: The bracelet on your watch may be in a different position on the clasp
than is shown in the illustration.
CORE #92
1/16/97 5:12 PM
Page 7
1. Locate pushpin in the openings on the clasp.
Using a pointed tool, press the spring bar in and
gently twist bracelet for removal (Fig. 1). Keep
your hand over the pushpin and use caution when
Fig. 1
twisting the bracelet. The pushpin is spring
loaded and may eject from the opening.
2. Insert pushpin in the bracelet endpiece and
determine the desired position (Fig. 2). Insert one
Fig. 2
end of the pin securely in the pushpin opening and
depress the spring tip of the pushpin. Move the pin
to fit into the top opening of the clasp opposite the
opening in which the pin is positioned on the clasp
bottom (Fig. 3).
Fig. 3
BRACELET LINK REMOVAL INSTRUCTIONS
NOTE: Prior to removing any bracelet links, first determine if your watch
can be sized using the “FOLDOVER CLASP” instructions above. If not, then
follow the instructions below.
Removing Links: Place the bracelet upright
and insert a pointed tool in open space of
bracelet (see diagram). Slide bracelet pin in
the direction of the arrow. Push hard since
pins are designed to be difficult to remove.
Repeat this procedure until desired number of links are removed.
Reassembly: Position the two bracelet parts back together, and push pin in
from end it was removed, in opposite direction of the arrow. Be sure to
press the bracelet pin down securely all the way into the link of the bracelet
until it is flush with the rest of the bracelet.
SECTION 10 – BATTERY REPLACEMENT
One battery provides the power to operate your Timex watch. TIMEX
STRONGLY RECOMMENDS TAKING YOUR WATCH TO A LOCAL RETAILER
OR JEWELER TO HAVE THE BATTERY REPLACED. The battery type
required for your watch is indicated on the caseback.
IMPORTANT NOTE: After replacing the battery, be sure to press the reset
button if indicated on the battery clamp.
CAUTION: DO NOT DISPOSE OF OLD BATTERY IN FIRE OR ATTEMPT TO
RECHARGE. KEEP LOOSE BATTERIES AWAY FROM CHILDREN.
When installed at the factory, the battery life in this Timex watch is
estimated to last approximately 5 years. This estimate is based on the
alarm being used one time per day for ten seconds and the light being used
once per day for one second. Battery life may vary depending on your
actual usage experience. The use of NIGHT-MODE®, which causes the
INDIGLO® night-light to activate for three seconds with any button press,
may reduce battery life.
SECTION 11 – SERVICE
If your TIMEX watch should ever need servicing, send it to Timex
addressed as follows:
HOTLINE WATCH SERVICE, P.O. Box 2740, Little Rock, AR 72203
For service questions, call 1-800-448-4639.
For your convenience in obtaining factory service, participating Timex
Retailers can provide you with a pre-addressed Watch Repair Mailer.
See the Limited Warranty for specific instructions on the care and service
of your Timex watch.
Should you need a replacement strap or band, call 1-800-448-4639.
©1996 Timex Corporation
LIMITED WARRANTY
The Basic Coverage: This TIMEX Quartz Digital L.C.D. (liquid crystal display) watch (but
not any battery, crystal/lens, band or strap) is warranted to the owner for a period of ONE
YEAR from the date of purchase against defects in manufacture by Timex Corporation - not
by the dealer from whom the watch was purchased.
What Timex Will Do: If this watch develops such a defect within the one year period,
it will be repaired (i.e., a new or thoroughly reconditioned and inspected module will
be installed) or replaced ( a watch of equal value and similar appearance will be
supplied) at our option, provided it is returned with a $5.00 check or money order to
cover costs of postage, handling and service, and you provide proof of purchase and
date of purchase.
This Limited Warranty Does Not Cover:
1) Timex will not repair defects related to servicing not performed by Timex
Corporation or a Timex Authorized Service Center.
2) Timex will not provide any warranty service if your watch shows evidence that it
has been tampered with, misused, abused, or altered; for example:
• moisture damage sufficient to affect the proper function of the watch;
• damage to the case; or
• visible cracking of the crystal/lens.
3) Timex reserves the right to charge you for a replacement battery, if the battery in
your watch is depleted. No additional charge will be made unless the one year
warranty period has expired or servicing is necessary for reasons beyond our
control, in which case a moderate charge will be made.
4) TIMEX IS NOT LIABLE FOR INCIDENTAL, SPECIAL OR CONSEQUENTIAL
DAMAGES. Some states do not allow the exclusion or limitation of incidental,
special or consequential damages, so the above exclusion or limitation may not
apply to you.
Your Rights Under Implied Warranties and State Law: THIS LIMITED WARRANTY IS
IN LIEU OF ALL OTHER EXPRESSED WARRANTIES, OBLIGATIONS OR LIABILITIES.
TIMEX LIMITS THE DURATION OF ANY WARRANTY IMPLIED BY STATE LAW,
I N C L U D I N G B U T N O T L I M I T E D T O T H E IMPLIED WARRANTIES OF
MERCHANTABILITY AND FITNESS FOR A PARTICULAR PURPOSE, TO ONE YEAR
FROM THE DATE OF ORIGINAL PURCHASE. Some states do not allow limitations on
how long an implied warranty lasts, so the above limitation may not apply to you. This
warranty gives you specific legal rights, and you may also have other rights which
vary from state to state.
Care of Your Watch:
• Avoid exposing your watch to water, steam, or other forms of moisture if it is nonwater-resistant.
• If the crystal/lens becomes damaged, have it replaced at once to avoid damage to
the module.
• When your battery is depleted, have it replaced promptly. The particular type of
battery required is indicated on your caseback. You can get them from your local
Timex retailer.
Service of Your Watch:
If your TIMEX watch should ever need servicing, send it to Timex addressed as
follows: HOTLINE WATCH SERVICE, P.O. Box 2740, Little Rock, AR 72203
Because of possible loss, we recommend insuring your watch, return receipt
requested, when using the mails. If you do not obtain a receipt within a reasonable
time, start a tracer through the originating post office. NEVER INCLUDE A SPECIAL
WATCHBAND OR ANY OTHER ARTICLE OF PERSONAL VALUE IN YOUR SHIPMENT.
PLEASE NOTE THAT WE MAY SUBSTITUTE A WATCH OF EQUAL VALUE AND
SIMILAR APPEARANCE FOR YOURS ON BOTH IN-WARRANTY AND OUT-OFWARRANTY REPAIRS.
For your convenience in obtaining factory service, participating Timex retailers will be
pleased to provide you with a postage-paid, pre-addressed Watch Repair Mailer.
TIMEX is a trademark and a service mark of Timex Corporation.
REG. U.S. PAT. & TM. OFF.