1
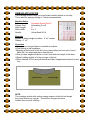
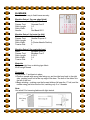
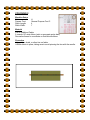
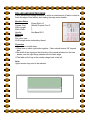
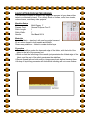
RIBBING APPLICATION ELASTIC APPLICATION NARROW CASING BLINDHEM BARTACK BUTTONHOLE BUTTON SEWING-ATTACHING A BUTTON COUCHING I COUCHING II SCALLOPED EDGE BOBBIN WORK SHELL EDGING WING NEEDLE WORK ROLLED AND WHIPPED EDGE LACE INSERTION TWIN NEEDLE PINTUCKS FAGOTING FAUX TATTED/CROCHETED EDGING APPLIQUE WITH BLANKET STITCH APPLIQUE WITH BLINDHEM STITCH CRAZY QUILTING CREATE TRIPLE STRAIGHT STITCH BLANKET STITCH EDGING NOTE: “QQ” will appear when the technique or step applies only to the Quantum Quilter. RIBBING APPLICATION The Overedge Stretch Stitch joins and finishes stretch seams in one step. This is ideal for applying ribbing in T-shirts and sweatshirts. Machine Setup Stitch: Presser Foot: Stitch Length: Stitch Width: Needle: Overedge Stretch Stitch P Overcasting Foot E S 6 or 7 Yellow Band 90/14 Materials Medium to heavy weight knit fabric - 6” x 6” square Ribbing - 3” x 6” Procedure Cut a curve in the knit fabric to resemble a neckline. Fold ribbing in half lengthwise. Starting at the left side of the knit curve, place ribbing on front side of curve. Match all 3 cut edges and place under the foot. Line up fabric edges with quide on foot E and stitch the length of the seam. Stretch ribbing slightly to fit the cut edge of the knit. When finished, lift foot and pull threads and fabric straight back behind foot and trim. NOTE: The overdege stretch stitch makes sewing seams in knits look as though they were finished on a serger. This stitch is stronger and more durable than overlock stitching. 1 ELASTIC APPLICATION Using stitches with built-in stretch, elastic can be applied directly to the fabric without having thread breakage when stretching the elastic. Machine Setup Stitch: Presser Foot: Stitch Length: Stitch Width: Needle: Multi-Zigzag Stitch F (for sample) Honeycomb Stitch F General Purpose Foot C 1.5 7 Yellow Band 90/14 Materials Nylon Tricot 4” x 8” 3/8” wide elastic - 7” strip Procedure Position elastic on fabric, end of elastic extending slightly beyond side of fabric, and keep elastic even with 5/8” seam line. Hold elastic in front of and behind foot, and stretch slightly while sewing. Trim top of fabric even with top edge of elastic. Draw a line 5/8” away from top edge of tricot wrong side. Position one end of elastic slightly off drawn line on tricot. Lower presser foot and press needle up/down button to hold elastic in place (QQ). [For 7350, manually lower needle into elastic.] Start stitching and hold elastic separately while stitching down center of elastic, pull slightly on elastic to create gathering. Trim 5/8” edge flush with elastic edge. 2 NARROW CASING Create a narrow casing for application of narrow ribbons, braids or elastic with the Closed Zigzag Stitch, Zigzag Stitch, or Blanket Stitch. Machine Setup Stitch: Presser Foot: Stitch Length: Stitch Width: Closed Zigzag Stitch E (for sample) Zigzag Stitch (alternative) Blanket Stitch (alternative) General Purpose Foot C S 5 Materials Batiste or other medium to lightweight base fabric 1/8” wide ribbon Procedure Position ribbon end on right side of fabric. Stitch over the ribbon using the Closed Zigzag Stitch, being careful that the needle does not penetrate the ribbon on either edge. Note: Substitute narrow elastic for ribbon to make easy casings. Elastic can be easily adjusted to fit area. Perfect for gathered areas on children’s clothes. 3 BLINDHEM Provides a fast way to finish hems securely. Machine Setup 1 (for raw edge finish) Stitch: Zigzag Stitch B Presser Foot: Overcast Foot E Stitch Length: 1.0 Stitch Width: 5 Needle: Red Band 80/11 Machine Setup 2 (to baste the fold) Stitch: Straight Stitch A Presser Foot: General Purpose C Stitch Length: 4 Stitch Width: 0 (Center Needle Position) Tension Dial: 2 Machine Setup 3 (to create the hem) Stitch: Blindhem Stitch C Presser Foot: Blindhem Foot F Stitch Length: 2.5-3.5 Stitch Width: 3.4 Tension Dial: 2 Materials Medium weight linen or shirting-type fabric 60-80 weight thread Procedure Fold under 1” and baste in place. Position sample with wrong side facing up, and turn the hem back to the right side, creating a soft fold at the top edge of the hem. The bulk of the fabric is to the left of the foot. Begin stitching – making sure the forward stitches fall near the ¼” fold, and the needle swing just bites into the fold, catching only 2 or 3 threads. Note: Use stitch D for hemming fabrics with light stretch. 4 BARTACK BUTTONHOLE Provides a sturdy utilitarian buttonhole. Machine Setup Stitch: Presser Foot: Stitch Length: Stitch Width: Buttonhole Stitch Buttonhole Foot 0-1 Buttonhole Symbol 5 (adjust to personal preference) Materials Shirting fabric Button to establish length of buttonholes Interfacing or tear-away stabilizer Procedure Place button in buttonhole foot to establish length. Fold fabric in half crosswise, with interfacing between layers. Place fabric under the foot in marked location. Lower presser foot. Lower Buttonhole Lever, and press toward back. Begin sewing buttonhole. Note: Reset foot after each buttonhole by pushing the buttonhole lever toward the back of the machine. 5 BUTTON SEWING - ATTACHING A 2 OR 4 HOLE BUTTON Easily attaches buttons using the basic Zigzag Stitch. Machine Setup Stitch: Presser Foot: Stitch Width: Feed Dogs: Zigzag Stitch B Button Sewing Foot Determined by button (usually 3mm) Down Position Materials Shirting One 2-hole button Procedure Fold fabric in half and place under foot. Position the button on the fabric so that the holes in the button are between the toes of the foot. Lower the presser foot to hold the button in place. Turn the hand wheel towards front of machine and into the right or left hole. Adjust the stitch width dial to fine tune the swing of the needle into the other hole. Recheck the swing of the needle into the other hole and then use foot control to stitch 5-6 stitches. Before removing the button and fabric from the machine, dial to straight stitch. Leave width at current setting and stitch in place for three stitches. This forms a tie-off on the back side to secure button. Apply a liquid fray-preventer on the backside of fabric on the knots. Trim threads after they dry, being careful not to cut thread knots. Note: - Remember to raise the feed dogs. Use the needle up/down button twice to bring up feed dogs easily (QQ). - You can also use the button sewing foot for attaching curtain rings, snaps and hook and eye closures. 6 COUCHING I Couching is the process of applying cords, pearls, braids, ribbons, or other trims to the right side of the fabric. Machine Setup Stitch: Presser Foot: Stitch Length: Stitch Width: Zigzag B or Decorative Stitch E General Purpose Foot C 3 or 4 Adjust according to trim width Material Monofilament Thread String Pearls Felt or Stabilized Woven Fabric Procedure Lay pearls or other couching trim on top of fabric. Stitch, adjusting width to ensure the stitch slightly encases trim. 7 COUCHING II Machine Setup Stitch: Presser Foot: Stitch Length: Stitch Width: H General Purpose Foot C 4 7 Material Felt or Stabilized Fabric 2 strands 1/8” wide ribbon (satin or grosgrain works best) Decorative thread to coordinate or contrast with ribbon Procedure Lay ribbon, braid, or other trim on fabric. Stitch ribbon in place, taking care to avoid piercing the trim with the needle. 8 SCALLOPED EDGE This delicate scallop stitch creates a beautiful, delicate edging for dresses, blouses, lingerie and children’s clothing. Machine Setup Stitch: Presser Foot: Stitch Length: Stitch Width: Scallop Stitch N General Purpose Foot C 0-1 Buttonhole Symbol 7 Materials Light weight fabric, such as batiste Rinse-away stabilizer 30 weight decorative thread Procedure Fold fabric in half. Place stabilizer under fold, extending 1” beyond fabric edge. Stitch a row of scallops. Align center of foot on folded edge. Trim away excess stabilizer, then rinse with water to remove remaining stabilizer. stabilizer 9 BOBBIN WORK Threads, ribbons or fine trims that are too large for the eye of the needle can be placed in the bobbin. Wind the thread, ribbon or trim onto the bobbin and sew with fabric’s wrong side face up. The ribbon will stitch on fabric’s right side, creating a bold, textured effect to projects. Machine Setup Stitch: Double Reinforced Blanket Stitch H (for sample) Stitch I (alternative) Stitch Q (alternative) (Any open stitch that does not have too much forward/reverse or side-to-side movement works well.) Presser Foot: General Purpose Foot C Stitch Length: 3 Stitch Width: 7 Materials Felt or Stabilized Fabric (for sample) 2mm Silk Ribbon Procedure Hand-wind ribbon onto bobbin, insert bobbin into the machine. Place matching thread through the needle. With wrong side of the fabric facing up, stitch a row of stitch H. Stop with the needle in the far right position, with the needle down. Pivot the work and stitch in the opposite direction, aligning the stitches so that they meet the previous row in the center. Note: - Use this technique to create textured effects for use in crazy quilts. - Experiment with other stitches. 10 SHELL EDGING This stitch provides a delicate decorative edging on stretch or lingerie fabrics. Machine Setup Stitch: Presser Foot: Stitch Length: Stitch Width: Overedge Stitch General Purpose Foot C 2 4 Materials Nylon Tricot 5” x 8” Procedure Fold fabric up 1” in on the long edge of the fabric. Sew a row of stitching, allowing the needle to slightly fall off the fold when it swings to the right. Trim excess fabric 1/4” away from straight edges. Note: This stitch also works well on lightweight woven fabrics cut on the bias. 11 WING NEEDLE WORK Wonderful effects can be created by simply stitching geometric shapes, straight lines, cross-hatching, etc., with a wing needle. This is an unique embellishment for ready-to-wear garments, such as a linen blouse, lingerie or special occasion gowns. Machine Setup Stitch: Presser Foot: Needle: Stitch Length: Stitch Width: Feather Stitch G General Purpose Foot C Wing Needle S 4-7 Note: Do not use built-in needle threader with wing needle in machine. Materials Linen or other natural fiber fabric – spray starched for added firmness 60-80 weight white sewing thread 60-80 weight white sewing thread in bobbin Procedure Trace a design onto fabric using chalk, water-soluble or air-soluble marker. (use stencils, templates or create a design) Stitch along the drawn lines of the design. Note: For best results in wing needle stitching, the stitch needs forward-back movement, so that the needle penetrates the same hole more than once. By reducing the width of the feather stitch to zero, this action is accomplished, and the desired holes will remain in the fabric. 12 ROLLED AND WHIPPED EDGE This is an heirloom sewing technique, in which a small amount of fabric is rolled to finish the edge of fine fabrics, also making the edge more durable. Machine Setup Stitch: Zigzag Stitch B Presser Foot: General Purpose Foot C Stitch Length: 1 Stitch Width: 3 Needle: Red Band 80/11 Materials Batiste Flat cotton lace 60-80 weight cotton embroidery thread Procedure Starch lace on both sides. Place lace on fabric, right sides together. Fabric should extend 1/8” beyond lace. Set width of the zigzag so the left swing of the needle stitches into the lace header, and the right swing extends over the fabric edge. The fabric will roll up as the needle swings back to the left. Note: Upper tension may need to be reduced. XXXXXXXXXXXXXXXXXXXXXXXXXXXXXXXXXXXXXXXX 13 LACE INSERTION Stitch the lace on top of the fabric, then trim fabric away from underneath to create a beautiful heirloom lace insertion. Machine Setup Stitch: Presser Foot: Stitch Length: Stitch Width: Needle: Zigzag Stitch B General Purpose Foot C 1.0 2.0-2.5 Red Band 80/11 Note: Adjust width as desired. Materials Batiste Strip of lace 60-80 weight fine cotton thread Procedure Starch lace and batiste. Center lace right side up lengthwise on batiste. Stitch lace to fabric by sewing a zigzag stitch down edges of lace. Try to just clear the heading on the lace. Carefully cut the fabric under the lace down the center. Turn these raw edges back away from the lace and finger press. Finish fabric’s edges by sewing a small zigzag through all layers, being careful not to catch too much lace. Turn fabric over and trim excess fabric seam allowances away. Note: A nice touch can be added by stitching a row of Hemstitching down each side of the lace. Use the Feather Stitch G with length at 2 and width at 0, and a wing needle. 14 TWIN NEEDLE PINTUCKS Use a twin needle and a straight stitch to make raised “tucks” in fabric. Pintucking adds an elegant touch to heirloom work, an interesting effect to crazy quilting, and texture to wearable art. Machine Setup Stitch: Presser Foot: Stitch Length: Tension: Straight Stitch A General Purpose Foot C 2 6 Materials Batiste 2.0 Twin Needle Accessory Spool Pin (optional accessory) required Note: Do not use Built-in Needle Threader. Procedure Refer to manual for threading. Pull thread in the fabric to establish straight line for first tuck. Stitch guiding the space between the two needles over the area of the pulled threads. Stitch several rows of pintucks. Use edge of foot as a guide against previous pintuck to keep rows straight. Note: - Spray starch may be needed for additional sizing on some fabrics – especially the polyester blends. - Try Shadow Pintucks – use dark color thread in bobbin. - Try Corded Pintucks – feed cord through a hollow plastic coffee stir stick taped to the bed of the machine, in front of the foot. - Optional Pintuck Foot is available to help space pintucks closer together without flattening. 15 FAGOTING The Fagoting stitch can be used to join two fabrics with an open lattice-like effect. Machine Setup 1 Stitch: Presser Foot: Stitch Length; Stitch Width: Tension: Straight Stitch A General Purpose C 4 0 (center needle position) 2 Machine Setup 2 Stitch: Presser Foot: Stitch Length: Stitch Width: Needle: Feather Stitch G General Purpose Foot C 2 to 3 7 Red Band 90/14 Materials Linen-like fabric 8” x 4”, cut into two 4” x 4” pieces Rinse-away stabilizer 25 wt. cotton thread in bobbin and needle Procedure Fold 4” pieces in half and press. Lay stabilizer under one piece of fabric, extending away from folded edge 1”. Set machine for Setup 1. Baste stabilizer to fold by stitching 1/2” away from folded edge. Repeat step with other edge, leaving approximately 1/4” gap between the two folded edges. Set machine for Setup 2. Center open area with stabilizer under the foot. Stitch down the stabilizer, slightly catching the edges of the folds. Remove basting stitches and stabilizer. Note: - Create rolled and whipped edges on both fabric pieces before doing the fagoting, for a more secure finish. - Fabric can also be secured to stabilizer by means of adhesive spray. 16 FAUX TATTED/CROCHETED EDGING This technique creates an elegant lacy edge that appears to have been either tatted or crocheted by hand. It is a lovely finish on collars, cuffs, linen towels, valance hems, and many other projects. Machine Setup Stitch: Presser Foot: Stitch Length: Stitch Width: Needle: Multi-Zigzag F General Purpose Foot C 1 7 Red Band 90/14 Materials Linen-like fabric – starched, with one long edge hemmed 25 wt. cotton thread in both needle and bobbin Rinse-away stabilizer – folded to create double layer Procedure Position stabilizer under the hemmed edge of the fabric, with the bulk of the fabric to the left of the presser foot. Stitch so that the left swing of the needle just penetrates the folded edge of the fabric, and the rest of the stitch penetrates the stabilizer. Secure thread tails on both ends by tying square knots before trimming them. A drop of liquid fray preventer will ensure that stitching will not come undone. 17 APPLIQUE WITH REINFORCED BLANKET STITCH This unique reinforced blanket stitch provides durability when securing dimensional appliqués. The stitch is ideal for appliquéing polar fleece or thick fabrics. It is also perfect for creating a “country-look” or “hand-picked” look appliqué. Machine Setup Stitch: Presser Foot: Stitch Length: Stitch Width: Blanket Stitch H General Purpose Foot C 1-3 3-7 Materials Polar fleece, felt, or stabilized background fabric Polar fleece appliqué shape 25 wt. cotton thread Tear-away stabilizer Spray-on adhesive Procedure Fuse appliqué shape in place using spray-on adhesive. Lay tear-away stabilizer under background fabric. Position stitch H so that the straight stitches penetrate the background fabric, and the needle swing penetrates the appliqué piece. Stitch counterclockwise. Trim any excess polar fleece away from outside of appliqué. Note: - For an invisible “hand-picked” look use monofilament thread. - Use the needle up/down to stop needle in down position when turning curves on appliqué. (QQ) - Experiment with stitches G or I for another “country-style” look. 18 APPLIQUE WITH BLINDHEM STITCH A hand-stitched look can be achieved using monofilament thread in the needle and the blind hemstitch to appliqué. Machine Setup Stitch: Presser Foot: Stitch Length: Stitch Width: Needle: Blindhem Stitch C General Purpose Foot C 2 1 to 2 Red Band 80/11 Materials Cotton background fabric Appliqué shape Monofilament thread Procedure Fold under edge of appliqué shape. Position stitch so that the “straight “ part of the stitch penetrates the background fabric and the needle swing or the zigzag part of the stitch penetrates the appliqué shape. l Note: - As a general rule, when using monofilament thread, use “clear” monofilament for light color fabrics, and “smoke” colored monofilament for darker colors. - Try using blind hem foot to help guide stitch around the appliqué. 19 CRAZY QUILTING Crazy quilting is done by stitching scraps of velvets, silks, satins and other fine fabrics onto a foundation fabric. The fabrics are various shapes. The seams are then embellished with decorative stitches, often done with decorative threads. This technique is popular, and can be used in wear able art, home decorator projects and more. Machine Setup Stitch: Presser Foot: Stitch Length: Stitch Width: F, G, H, I, L, M, N, O Stretch A, B, C, D, E, F, G, H, I, K, N, O, P, Q General Purpose Foot C Adjust according to preference Adjust according to preference Materials: Fabric scraps Foundation fabric or paper Procedure Crazy-piece the scraps onto the foundation fabric or paper, starting from the center and working outward. Select desired decorative stitch and center the stitching over the seam lines. Use rayon, metallic or other decorative threads. DDDDDD XXXXX X Note: Reference Singer Quilting Bible for more ideas on crazy quilting. 20 CREATE TRIPLE STRAIGHT STITCH This stitch is wonderful for built-in strength! Use for any seam where extra stress could be a problem, such as center back seam on pants. Use this stitch to recreate professional topstitching. Machine Setup Stitch: Stitch Length: Stitch Width: Needle: Reinforced Straight Stitch A S 0 Red Band 90/14 Materials Denim or shirting 6” x 6”, cut in half Procedure Put wrong sides together, aligning cut edges. Stitch a 5/8” seam down one long side. Seam is now stronger than even three rows of straight stitching. Adjust machine settings as follows: Stitch Length: S Stitch Width: 7(far left needle position) Presser Foot: Blindhem Foot F Press seam allowance to left side of seam. Adjust screw on blindhem foot until the white guide is far right. Position fabric under foot, putting guide in seam well. Stitch straight to end of seam. 21 BLANKET STITCH EDGING A wonderful decorative detail that can be used in place of topstitching. It is especially effective on fleece projects. Machine Setup Stitch: Stitch Length: Stitch Width: Needle: Blanket Stitch H 4 7 Red Band 90/14 Materials Heavy decorative thread in needle and bobbin Fleece Rinse-away stabilizer Size 14 machine needle 25 weight cotton thread Procedure Position fabric with raw edge on left. Place stabilizer under polar fleece. Extend stabilizer 1” beyond fleece edge. Stitch so that the forward motion stitches enter the stabilizer, and the needle swing enters the fleece. 22 Singer® and Quantum® are registered trademarks of the Singer Company Limited. © 2004 Singer Sewing Company Part # 640 5052550EO