1
OPERATORS MANUAL
SSE 35
HOME CINEMA EQUALIZER
QUICK START
Great video is ready-made; great audio is harder to get, but a SSE 35 makes it a lot easier. Read at least this boxed
section and you’ll be on your way toward great audio.
Hook-up is intuitive: In from the decoder; Out to the amplifiers. Just follow the silkscreened legends on the rear of the
unit. Use only high-quality RCA cables.
Set your Dolby Pro-Logic decoder's center channel to NORMAL Mode.
Familiarity with any other graphic equalizer makes you familiar with the SSE 35. If this is your first equalizer, be
gentle; it can overwhelm you. Use of a realtime analyzer is recommended; alternatively use an SPL meter and a test disc—
then try your ears.
Use the BYPASS switch as an aid in comparing equalized results with unequalized results. Pushbutton in and locked
(LED on) is the bypassed (unequalized) mode; pushbutton out and unlocked (LED off) is the normal equalized mode. See
the included Rane Note 132 for stereo or mono subwoofer tips. See the Operating Instructions on the back page for basic
alignment info.
Install the supplied security cover after completing all settings. Be sure the POWER light fits snugly into the hole in the
security cover.
NEVER CONNECT ANYTHING EXCEPT AN APPROVED RANE POWER SUPPLY TO THE RED MODULAR JACK ON THE REAR OF THE UNIT. This is an AC input and requires a power supply exactly like the one
originally packed with your unit. See the full explanation of the power supply requirements elsewhere in this manual.
Have fun.
Manual-1
FRONT PANEL DESCRIPTION
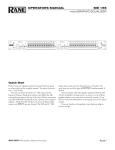
1. LEFT, RIGHT & CENTER CHANNEL equalizer controls. Each of the Left, Right and Center Channels have eleven
slide controls used to set the individual levels of the 2/3-octave spaced (160 Hz-16 kHz) constant-Q filters. Their range is
±6 dB. The grounded center-detent design ensures each filter is off when positioned to 0 dB. Each center frequency is
clearly labeled above the respective slide control.
2. LEFT & RIGHT SUBWOOFER/low frequency equalizer controls. Each of the Left & Right Subwoofer Channels (or the
L&R Front Low Frequency Bands if no subwoofer) have seven slide controls used to set the individual levels of the 1/3
octave spaced (25 Hz-100 Hz) constant-Q filters. Their range is ±6 dB. As above, the grounded center-detent design ensures
each filter is off when positioned to 0 dB. Each center frequency is clearly labeled above the respective slide control.
3. POWER indicator. This blue LED lights any time remote power is supplied from the Rane model RS 1 power supply
(included). To avoid confusion a distinction is made here between electrical and political power.
4. BYPASS switch & indicator. This pushbutton switch activates the relay-controlled BYPASS function. Engaging the
BYPASS switch (red BYPASS LED on) ties the INPUT connectors directly to their respective OUTPUT connectors (hardwired). This switch is particularly useful in performing “A/B” comparisons between equalized and non-equalized sound.
This switch does not bypass the subwoofer crossovers, only the equalizer sections. Use generously during set-up. During
the initial timed power-up sequence, the SSE 35 automatically goes into BYPASS mode.
Manual-2
REAR PANEL DESCRIPTION
1. Remote POWER supply input. The unit is supplied from the factory with a Model RS 1 Remote Power Supply suitable for
connection to this input jack. The power requirements of this unit call for an 18 volt AC center-tapped transformer only.
THIS IS NOT A TELEPHONE JACK. NEVER USE A POWER SUPPLY OTHER THAN THE ONE SUPPLIED OR A
REPLACEMENT APPROVED BY RANE CORPORATION. Using any other type of supply may damage the unit and void
the warranty.
2. Ground LIFT switch. This switch provides the ability to separate chassis ground and signal ground. Normally, this switch
should be in the LIFT position. In some circumstances, moving this switch eliminates hum problems. Always turn your
amplifier levels down before changing this switch and bring them up slowly.
3. Chassis ground. A 6-32 screw used for chassis grounding purposes. See CHASSIS GROUNDING below.
4. LEFT, CENTER & RIGHT OUTPUT connectors. Active unbalanced design. Use only high-grade RCA cables for
connection to the power amplifier inputs.
5. LEFT, CENTER & RIGHT INPUT connectors. Active unbalanced design. Use only high-grade RCA cables for connection to the surround sound decoder outputs.
6. SUBWOOFER OUTPUT connector. Active unbalanced design. Use only high-grade RCA cables for connection to the
subwoofer power amplifier input.
7. SUBWOOFER ENGAGE switches. Pressing both of these switches to the in position and illuminating the red LEDs
engages the crossovers and routes the low frequencies to the SUBWOOFER OUTPUTS.
8. SUB SOURCE switches. These switches determine if the SUBWOOFER OUTPUT for each Channel gets its input from the
Left, Right, or a summed Left/Right signal. Set these to LEFT and RIGHT for stereo subwoofers, and L&R when using a
mono subwoofer.
9. CROSSOVER FREQUENCY switches. One each for Left and Right Channels. This sets the built-in 24 dB per octave
crossover to only allow frequencies below 80 Hz or 125 Hz to the subwoofer(s) in each Channel, thereby improving
subwoofer efficiency. If the subwoofer has a crossover frequency ajustment, set it to its highest value when using the SSE
35. Refer to the OPERATING INSTRUCTIONS on page Manual-6.
CHASSIS GROUNDING
If after hooking up your system it exhibits excessive hum or buzzing, there is an incompatibility in the grounding
configuration between units somewhere.
Units with outboard power supplies do NOT ground the chassis through the line cord. Make sure that these units are
grounded either to another chassis which is earth grounded, or directly to the grounding screw on an AC outlet cover by
means of a wire connected to a screw on the chassis with a star washer to guarantee proper contact.
Please refer to RaneNote 110 “Sound System Incterconnection” (supplied in this manual) for further information on
system grounding.
Manual-3
SSE 35 CONNECTION
When first connecting the SSE 35, leave the power supply
for last. This gives you a chance to correct mistakes before
damaging fragile speakers, ears and nerves.
INPUTS
Inputs are unbalanced and fitted with standard RCA
phono jacks.
OUTPUTS
The Outputs mimic the Inputs. Only use high-quality RCA
cables for hook-up.
ALIGNMENT (See Operating Instructions).
Once the room is aligned, purists will install the security
cover and never adjust again until the room is re-arranged.
Some of you will be impressed with all those little sliders and
want to play. The choice is yours.
The SSE 35 comes ready for 19" rack mounting. The rack
ears may be moved forward to allow the security cover to be
mounted flush with the rack face. Simply remove the two
philips screws on each rack ear and relocate them to the
forward holes. If the unit is not to be rack mounted, attach the
supplied rubber feet to four corners of the bottom of the unit
to prevent scratching other components or shelving, and
remove the ears if you like.
SIGNAL LEVELS
The SSE 35 is designed for Home Theater Audio reference levels, and provides a minimum headroom of 26 dB
above reference, making it virtually unclippable.
With all slide controls located in their 0 dB detented
positions, the SSE 35 operates with unity gain from input to
output. No additional level controls are necessary. Use the
SSE 35 only for specific equalization, not as a gain control.
The average of all sliders should be 0 dB or less—volume
should be relatively the same when activating the BYPASS
switch. Try to cut rather than boost. Lowering the mountains
makes less filling in the valleys.
Typical System Connection Using Stereo Subwoofers
Manual-4
No Subwoofer
In all Dolby Pro-Logic modes (except Center Wide or Large), all bass information is retained in the left and right channels.
Only material above 100 Hz is routed to the center and surround channels. The SSE 35 provides 1/3 octave control of frequencies below 100 Hz in the Left and Right Channels, with 2/3 octave control of frequencies above 100 Hz in the Left, Center and
Right Channels. Set the rear panel ENGAGE switches to the out position (see REAR PANEL #7).
Mono Subwoofer
When a mono subwoofer is used with the SSE 35, use either the LEFT or RIGHT Subwoofer Output (LEFT in this example). Set both ENGAGE switches in, and the LEFT SOURCE to L&R (see REAR PANEL #7 and #8.) Only the Left set of
1/3 octave equalization affects subwoofer response.
Stereo Subwoofers
With stereo subwoofers, the full potential of music and soundtracks is realized regardless of out-of-phase bass signals
present in many recordings. Each subwoofer receives separate 1/3-octave control. Set both ENGAGE switches in, and each
SOURCE switch to LEFT and RIGHT (see REAR PANEL #7 and #8.)
Manual-5
OPERATING INSTRUCTIONS
DOLBY PRO-LOGIC AUDIO SYSTEM ALIGNMENT
The SSE 35 is for Dolby Pro-Logic systems, where Left,
Center and Right Channels should have matched response.
Though the SSE 35 helps a great deal, ±6 dB boost/cut may
not be enough to compensate between vastly different speaker
brands, models and designs. For best results, choose left,
center and right speakers that have a similar sound, and let the
SSE 35 do the “fine tuning.” Use a one-third octave real-time
analyzer and a sound pressure meter to “flatten” the system as
described in the analyzer or meter manual or the RaneNote on
“Home Theater Systems” included in this manual. Start with
the Center Channel first, then match the other Channels.
Use the Pro-Logic decoder’s NORMAL mode when using
the SSE 35. Normal mode directs all common or mono
information above 100 Hz from the Left and Right Channels
to the Center Channel.
SETTING UP THE CROSSOVER
When using one or two subwoofers, press both ENGAGE
switches in and the LEDs will light up. This routes the signal
through the crossovers and into the low frequency equalizer
to the separate subwoofer outputs.
When using one subwoofer or a pair or mono subwoofers,
set both SOURCE switches to L&R. When using stereo
subwoofers, set the SOURCE switches to LEFT and RIGHT
respectively.
Setting of the CROSSOVER FREQUENCY depends on
the type of speakers being used. Small left, center and right
speakers will not produce much bass in themselves, and
require the higher subwoofer setting of 125 Hz. Larger or full
range left, center and right speakers will sound better with the
setting of 80 Hz. You may wish to experiment and use your
ears to determine the best position for this switch. If the
subwoofer(s) have their own crossover, set the subwoofer's
crossover frequency as high as possible, allowing the 24 dB
crossover in the SSE 35 to do all the work.
If any THX® speakers are used for either mains or
subwoofer, use the 80 Hz setting. However, if a THX processor is being used, we recommend not using the crossover in
the SSE 35 and using the crossover in the processor — in this
case do not depress the ENGAGE switches or use the SSE 35
subwoofer outputs — connect your subwoofer to the processor directly.
The frequencies of the LEFT and RIGHT channels are not
affected by the low frequency equalizer when the ENGAGE
switches are depressed. This way, if the front speakers are
capable of producing bass they will do so — along with the
subwoofer.
Manual-6
SETTING CURVES USING THE SSE 35
Rane’s unique constant-Q circuitry makes setting curves
easy. With Rane graphic equalizers, for the most part what
you see is what you get — unlike previous equalizer designs
where the bandwidth changes with the slider positions. With a
constant-Q equalier, only frequencies within each band are
affected, allowing greater accuracy and control.
Place the speakers first, then analyze and equalize.
Referring to analyzer room curves, begin by positioning the
sliders to create the inverse curve shown by the instrumentation. Remember, most applications require only a few dB of
boost or cut. If more is required, use architectural and
mechanical means: change, add, remove, or relocate acoustically sensitive items (speakers, drapes, carpets, mirrors, etc.)
as required.
USING THE BYPASS SWITCH
The SSE 35 provides an equalizer BYPASS switch &
indicator as a useful tool for optimizing settings. Use the
BYPASS switch for making quick “A-B” comparisons, that
is, comparing “A”, equalized (BYPASS out, LED off), versus
“B”, unequalized (BYPASS in, LED on). To do this freely,
without danger of system damage, you must first pay attention to how much equalization is being used. Try for an
average of 0 dB for all sliders in a channel.
Since the SSE 35 always operates at unity gain in the
BYPASS mode, comparison after a lot of boosting or cutting
can result in startling level differences. Therefore you want to
keep the system level down until you first use the BYPASS
switch. Be very careful the first time you use it.
The crossover remains active regardless of the position of
the BYPASS switch. Keep this in mind when making comparisons and listening to the subwoofer range. Only the
equalizers are bypassed.
MONO OR STEREO SUBWOOFERS?
SUBWOOFER PLACEMENT?
EQUALIZING SURROUNDS?
Read the discussions in RaneNote 132 “Home
Theater Systems” included in this manual.
SSE 35 Features & Specifications
Parameter
LCR Equalizers: Bands
..........Type
..........Travel
..........Range
LR Subwoofer Equalizers:
..........Bands
..........Type
..........Travel
..........Range
Subwoofer LP Crossovers:
..........Type
..........Frequency
..........Slopes
Inputs: Type
..........Impedance
..........Maximum Level
Outputs: Type
..........Impedance
..........Maximum Level
Frequency Response
THD+Noise
SMPTE IM
Signal-to-Noise
Dynamic Range
Channel Separation
Unit: Agency Listing
..........120 VAC model
..........230 VAC model
Power Supply: Agency Listing
..........120 VAC model
..........230 VAC model
Power Supply: Input
..........Current
Unit: Size
..........Weight
Shipping: Size
..........Weight
Specification
(11) 2/3-Octave ISO Spacing
Constant-Q
20
±6
(7) 1/3-Octave ISO Spacing
Constant-Q
20
±6
4th-Order Butterworth
80 or 125
24 dB/Octave
Active Unbalanced
10k
+20
Active Unbalanced
100
+20
20-20 kHz
0.001
0.015
0.01
100
116
80
Class 2 Equipment
UL 813 Exempt
CSA Exempt
VDE, SELV
CE-EMC
CE-Safety Exempt
Model RS 1
UL Listed
CSA Certified
CE-EMC
CE-Safety
18 VAC w/center tap
750
1.75"H x 17.3"W x 8"D
5 lb
7" x 22" x 13"
9 lb
Limit
Units
0.25
mm
dB
0.25
mm
dB
Hz
1%
1
Ohms
dBu
1%
1
±1
typ
.005
.005
1
1
typ
Ohms
dBu
dB
%
%
%
dB
dB
dB
Conditions/Comments
From 160 Hz to 16 kHz
3% Accuracy to center frequency
Positive grounded center detent
Left & Right Subwoofers
From 25 Hz to 100 Hz
3% Accuracy to center frequency
Positive grounded center detent
Left & Right low pass filters
Slide switch selectable
4th-order
RCA phono connectors
11 Volts peak
RCA phono connectors
11 Volts peak into 2k ohms or greater
Left, Right & Center
1 kHz, +4 dBu
20-20 kHz, +4 dBu
60 Hz / 7 kHz, 4:1, +4 dBu
re +4 dBu; 20 kHz BW; flat
Max out / noise floor (+20 dBu/-96 dBu)
1 kHz
National Electrical Code
Class 2
Class 2
Safety Extra Low Voltage
EMC directive 89/336/EEC
Per article 1 of LVD 73/23/EEC
10%
Vrms
max
mA
w/o Rack Ears
File no. E88261
File no. LR58948
EMC directive 89/336/EEC
LV directive 73/23/EEC
6-pin mod plug
RMS current from remote supply
(4.4 cm x 43.9 cm x 20.3 cm)
(2.3 kg)
(18 cm x 56 cm x 33 cm)
(4.1 kg)
Note: 0 dBu=0.775 Vrms
Manual-7
Block Diagram
©Rane Corporation 10802 47th Ave. W., Mukilteo WA 98275-5098 TEL (425)355-6000 FAX (425)347-7757 WEB http://www.rane.com
All features & specifications subject to change without notice. JUN97
Manual-8