1
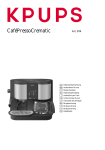
ORCHESTRO DIALOG
ORCHESTRO DIALOG - AUTOCAPPUCCINO
2 KAFFEE
70 ml
Operating manual
Betjeningsvejledning
Please read these TSM Success Manual® before operating
the appliance. In order to obtain drinks of good quality and
to avoid damage or injury, follow the instructions
precisely. Ensure that these instructions are given to any other
users of the appliance and that they are kept in a safe place
so that they can be referred to at any time. The appliance
has been strictly checked for safety and correct operation.
It left the factory in fault-free working order.
Læs venligst denne TSM®-betjeningsvejledning igennem før
maskinen tages i brug. Følg alle anvisninger nøje for at sikre
at de producerede drikke altid får en god smag og for at
u n d g å b e s k a d i g e l s e r o g s k a d e r. S ø r g f o r a t
betjeningsvejledningen altid er i nærheden af maskinen, også
hvis maskinen gives til andre! Maskinens sikkerhed og funktion
er blevet omhyggeligt kontrolleret og har forladt fabrikken
i fejlfri tilstand.
For domestic use only.
Kun til almindelig husholdningsbrug.
The guarantee does not include esspresso machines which
do not function, or do not function properly, because descaling
has not been carried out.
Garantien dækker ikke espressomaskiner, der ikke virker eller
ikke virker ordentligt som følge af manglende afkalkning.
Helpline
UK 0845 330 6460
IRL (01) 475 19 47
DK
44 66 31 55
Cover for ground coffee
Låg til malet kaffe
Grinding level setting
Indstilling af malestyrken
Coffee bean compartment
Beholder til kaffebønner
Cup rest
Bakke til kopper
Operating panel / Display / Coffee buttons
Betjeningspanel/display/kaffetaster
Water tank
Vandbeholder
Coffee outlets (adjustable)
Kaffeudløb (kan justeres)
Hot water button
Tast til varmt vand
Steam button
Tast til damp
Steam / hot water nozzle
Dyse til damp / varmt vand
Tray full indicator
Indikering om vand i spildbeholderen
Collector for used coffee grounds
Kaffegrumsbeholder
Drip tray grid
Placeringsgitter
Drip tray
Spildbeholder
First use
Ibrugtagning
Installation
Opstilling
Er der spor af brug på din maskine, stammer disse kun fra produktkontrollen, som
gennemføres på tilfældige maskiner.
Water/Filter
Vand/ Filter
Remove protective foil Remove paper strip
Træk beskyttelsesfoliet af Fjern papirstrimler
Pull out cord
Træk kablet ud
Insert plug
Sæt i stikkontakten
- do not fill with hot water,
mineral water, milk or
other liquids
- Intet varmt vand,
mineralvand, mælk eller
andre væsker
MAX
Remove tank
Tag beholderen ud
*Insert filter
*Sæt filteret i
Packaging Fill up to the «MAX»
Emballage mark
Replace tank
Sæt beholderen i
* Depending on model
* Afhængig af model
Fyld op til «MAX»
Language
Sprog
Fill with beans
Fyld op med bønner
3 sec.
3 sek.
Press
Tryk
fill with max. 250 g of beans
only use freshly roasted beans
Caution! Foreign matter (stones, ...) damage the grinding mechanism
fyld maks. 250 gram bønner i
anvend kun nyristede bønner
NB! Fremmedlegemer (sten,…) ødelægger kaffekværnen
Close lid
Luk låget
ENGLISH
OK
Choose language using
Vælg sprog med
3 Sec.
3 sek.
System fill
Fyldning af system
Beans
Bønner
-
For appliance with auto-cappuccino
Til maskiner med Auto-Cappuccino
Turn valve to
Drej ventilen til
Place receptacle
under nozzle
Sæt beholderen under
Stored settings are not lost following an interruption to the power supply or a power cut (just reset the clock)
Gemte indstillinger forsvinder ikke efter strømafbrydelse eller strømsvigt (kun tiden skal indstilles igen)
Settings
Indstillinger
Setting buttons
Indstillingstaster
Back to the main menu
Tilbage til hovedmenuen
Individual settings
Individuelle indstillinger
Factory setings
Fabriksindstillinger
TIME
--:--
TIME
TID
--:--
TID
AUTO STOP
5:00
AUTO STOP
5:00
AUTO STOP
AUTO STOP
TIME
OK
--:---:--
AUTO START
ok
OK
ok
TID
9:20
ok
OK
TIME
9:20
ok
TID
OK
TID
9:20
AUTO STOP
3:00
AUTO STOP
3:00
ok
/c
OK
AUTO STOP
3:00
AUTO STOP
3:00
AUTO STOP
ok
/c
AUTO STOP
OK
Automatisk frakobling når apparatet ikke længere anvendes efter timer og minutter
AUTO START
OK
AUTO START
OK
Automatic switch-on time in hours and min.
TIME
9:20
OK
Automatic switch-off time when not in use in hours and min.
AUTO START
confirm/ ok
Bekræft / ok
ok
AUTO START
8:30
AUTO START
8:30
ok
AUTO START
8:30
AUTO START
8:30
AUTO START
ok
OK
AUTO START
/c
OK
Automatisk tilslutning i timer og minutter.
Measuring hardness of water
Måling af vandets hårdhed
Hold the test strip in the water for 1 sec.
Teststrimlen holdes nede i vandet i ca. 1 sek
WATER HARDNESS
OK
ok
HÅRDHED VAND
OK
WATER HARDNESS
--> 3
OK
HÅRDHED VAND
--> 3
OK
FILTER SELECT
FILTER
VÆLG FILTER
FILTER
ok
CONTAINER UNDER
STEAM NOZZLE
BEHOLDER UNDER
DAMP DYSE
ok
COFFEE TEMP.
--> 3
OK
TEMP. KAFFE
--> 3
OK
WATER HARDNESS
3
HÅRDHED VAND
3
or /eller
Read off after 1 min....
Aflæs efter 1 minut.…
OK
OK
COFFEE TEMPERATURE
KAFFETEMPERATUR
2
2
COFFEE TEMP.
OK
TEMP. KAFFE
OK
ok
one degree of hardness per pink field
hvert lyserødt felt er 1 hårdhedsgrad
WATER HARDNESS
OK
HÅRDHED VAND
OK
/c
PRESS HOT
WATER BUTTON
TRYK PÅ
VARMT VAND
FILTER
RINSING
RENSER
FILTER
/c
COFFEE TEMP.
ok
OK
TEMP. KAFFE
/c
OK
low (1) - medium (2) - high (3) Lav (1) - middel (2) - høj ( (3)
COFFEE STRENGTH
KAFFENS STYRKE
weak
(1) to strong
PREBREWING
FORFUGTNING
COFFEE STRENGTH
OK
STYRKE KAFFE
OK
10 x
10 x
(16) Svag
NORMAL
NORMAL
For the development of a better aroma:
WITHOUT, NORMAL OR LONG
TOTAL COFFEES
KAFFE TOTAL
coffee brewed
STYRKE KAFFE
(1) til stærk
PREBREWING
OK
FORFUGTNING
OK
ok
TOTAL COFFEES
OK
KAFFE TOTAL
OK
ok
… see «Descale»
AFKALKNING
… se «Afkalkning»
ok
ok
/c
/c
(16)
ok
PREBREWING
OK
FORFUGTNING
OK
TOTAL COFFEES
54
OK
KAFFE TOTAL
54
OK
/c
Service recommended after 5000 brews.
Contact KRUPS Customer Services.
Når der er brygget kaffe 5000 gange, anbefales
det at få service. Henvend dig til Krups kundeservice.
Aromaen udnyttes bedre:
UDEN, NORMAL eller LANG
RINSE
PRESS
OK
SKYLNING
TRYK PÅ OK
COFFEE STRENGTH
OK
STYRKE KAFFE
OK
PREBREWING
NORMAL
FORFUGTNING
NORMAL
brygget kaffe
DESCALING
RINSING
SKYLNING
COFFEE STRENGTH
ok
RINSING IN
PROGRESS
SKYLNING
I GANG
CLEANING
… see «Clean»
RENGØRING
… se «Rengøring»
--:-APPLIANCE READY Process ends automatically
--:-Skylningen stopper automatisk
APPARAT KLAR
Espresso
Espresso
Recommendation: for perfectly digestible coffee prewarm cups
Anbefaling: Forvarm kopper for at opnå den bedste kaffe-nydelse
Ground coffee
Malet Kaffe
Coffee beans
Kaffebønner
1
Do not use instant coffee or
instant drink powder
Anvend ikke pulverkaffe eller pulverdrikke
1
Place cup(s) under outlet(s) Set outlet height
Indstil udløbshøjden
Sæt kop(per) under
Place cup(s) under outlet(s)
Sæt kop(per) under
1
2
11/2
2
Set outlet height
Indstil udløbshøjden
Open the cover
Åbn låget
Choice of coffee
Vælg kaffe
Choice of coffee
Vælg kaffe
1 normal strength
Kaffe
1 strong
Espresso
3
Select button required
(stop = press again)
Tryk på den ønskede tast
(Stop = tryk igen)
Fill with grounds
Fyld malede kaffebønner
1 normal strength
Kaffe
1 strong
Espresso
3
Select button required
(stop = press again)
Tryk på den ønskede tast
(Stop = tryk igen)
2 normal strength
Kaffe
2 normal strength
Kaffe
Individual setting of quantities
Individuel indstilling af mængde
1 COFFEE
4
120 ml
1 KAFFE
120 ml
Amount of coffee per cup
can be regulated from 30 –
250 ml (remain stored)
Kaffemængden kan
reguleres fra 30-250 ml
(forbliver gemt)
Change coffee quantity using
Kaffemængden ændres med
1 COFFEE
4
120 ml
1 KAFFE
120 ml
Amount of coffee per cup
can be regulated from 30 –
250 ml (remain stored)
Kaffemængden kan
reguleres fra 30-250 ml
(forbliver gemt)
Change coffee quantity using
Kaffemængden ændres med
2
–> normal strength
Kaffe
–> strong
Espresso
–> 2 normal strength
Kaffe
On /off
Tænd/sluk
Setting the grinding level
Indstil malingen
Only adjust during the grinding process!
Må kun indstilles under malingen!
2 Sek.
2 sec.
coarse / grov
fine / fin
Press
Rinse if necessary, see Settings
Tryk
Evt. skylning, se inostillinger
...effective after 2 cups
...aktiv efter 2 kopper
1
The finer the grinding level is set,
the stronger and creamier the coffee will be and
the longer the run through time will be.
Jo finere kaffens maling er,
desto stærkere og mere cremet er kaffen
efter en forlænget gennemløbstid.
2 normal strength
2 Kaffe
1 strong
1 Espresso
Steam
Damp
Hot water
Varmt vand
1 normal strength
1 Kaffe
2
2 KAFFEE
70 ml
3
4
Recipes
Opskrift
Cappuccino: 1/3 coffee, 1/3 hot milk, 1/3 froth
Café crème: 1/2 coffee, 1/2 slightly frothy milk
Hot chocolate: slightly frothy hot milk and then stir in cocoa powder
Cappuccino: 1/3 kaffe, 1/3 varmt vand, 1/3 opskummet mælk
Café crème: 1/2 kaffe, 1/2 let opskummet mælk
Varm chokolade: opskum den varme mælk let, rør kakaopulveret i
5
(or hot chocolate)
(eller varm chokolade)
for appliance with
auto-cappuccino
til maskiner med Auto-Cappucino
PREHEATING
STEAM
FORVARMNING
DAMP
Place receptacle under
Select steam
nozzle
Vælg damp
Stil beholderen under dysen
Watch display
Se displayet
...system heats up
...systemet varmer op
or/eller
1
STEAM READY
PRESS STEAM
DAMP KLAR
TRYK PAA DAMP
Steam nozzle
Dampdyse
Use chilled, very fresh milk in a slim jug
Anvend kolo skummet - eller letmælk i en smal kop
2
Turn valve to
Stil ventilen på
or/eller
Cappuccino
Cappuccino
Auto-Cappuccino
Auto-Cappuccino
Use chilled, very fresh milk in a slim jug
Anvend kolo skummet - eller letmælk
2
Fill jug with milk
Hæld mælk i koppen
Frothing accessory ok?
Opskumningshjælp ok?
2
Fill with cold milk
Hæld kold mælk i
3
3
Plunge into the milk
Dyk ned i mælken
Select steam
Vælg damp
Milk froth ready
Skummet mælk klart
Tube to the bottom
Slangen skal være i bunden
Turn the valve towards
for less frothy milk
Turn valve to
Drej ventilen til
Drej ventilen i
retningen
for mindre
opskummet mælk
3
Nozzle hot!
Dysen er varm!
(Scalding hazard)
(Risiko for forbrændinger)
4
Remove and clean
frothing accessory
Tag opskumningshjælpen
af og gør den ren
4
4
Place cup under nozzle Select steam
Sæt koppen under dysen Vælg damp
Clean the nozzle well
with a damp cloth
Rengør dysen
med en fugtigt klud
2x
hot!
varm!
5
5
Place receptacle
under nozzle
Sæt beholderen under
Flush out residual milk
Fjern mælkerester
End steam process
Afslut damp-process
Milk froth ready
Skummet mælk klart
Clean accessories
Rengør tilbehøret
Care
Pleje
Heating drinks
Opvarm drikken
Hot water
Varmt vand
for appliance with auto-cappuccino
til maskiner med Auto-Cappuccino
press - residual water
runs out
Spildevandet løber ud
a
press again once the steam escapes
når der slipper damp ud
Turn valve to
Stil ventilen på
Steam nozzle/Auto Cappuccino
Dampdyse/Auto-Cappuccino
with nozzle
Med dyse
Nozzle/Auto-Cappuccino
Dyse/Auto-Cappuccino
for appliance with auto-cappuccino
til maskiner med Auto-Cappuccino
with nozzle
Med dyse
2
for appliance with auto-cappuccino
til maskiner med Auto-Cappuccino
1
Remove frothing
Turn valve to
accessory
Drej ventilen til
Fjern opskumningshjælp
3
Hold cup under the nozzle
Hold koppen under dysen
Hold cup under the nozzle
Hold koppen under dysen
2
Plunge into the drink
Dyk ned i drikken
Select steam
Vælg damp
4
Select hot water
Vælg varmt vand
3
When the drink is hot,
press steam
Når drikken er varm,
tryk på damp
Remove cup
Tag koppen væk
Press the button to stop
water supply
Tryk på tasten for at afslutte
vandtilførslen
If a drink other than water was
heated:
:Når der blev varmet andet end vand:
0.827.091 FNF1-FNF2 – 01/2003
TSM SUCCESS MANUAL® - safe to use - easy to
understand due to TSM® - Total Security Management
and ergonomic communication® - 270303 by SEV-ASE
Displays
FILL
WATER TANK
Displays
Fill with water, rinse tank, descale if necessary
FYLD
VANDBEHOLDER
Fyld vand i, skyl beholder, afkalk evt.
--:-FILL UP BEANS
Fill up beans
--:-FYLD BØNNER
Fyld kaffebønner i
EMPTY DRIP TRAY
AND USED COFFEE
Empty drip tray and used coffee ground collector
and replace them after 10 seconds
TØM
SPILDBEHOLDER
Tøm beholderen og sæt den på plads efter 10 sek.
CHECK COLLECTING
TANKS
Insert correctly
KONTROLLER
SPILDBEHOLDER
Sæt korrekt i
CLEAN
Carry out cleaning process
(see «Cleaning»)
RENGØRING
Foretag en rengøring
(se «Rengøring»)
DESCALE
Carry out descaling process
(see «Descaling»)
AFKALKNING
Foretag en afkalkning
(se «Afkalkning»)
CONTAINER UNDER
STEAM NOZZLE
PRESS HOT
WATER BUTTON
1.Place container under nozzle
2.
BEHOLDER UNDER
DAMP DYSE
TRYK PÅ
VARMT VAND
1.Placer en beholder under dysen
2.
SERVICE + n° X
1. Switch off appliance and remove plug from mains
2. Re-connect appliance and switch on again
3. Repeat procedure if necessary
4. If the problem cannot be solved, call
KRUPS Customer Services
SERVICE + n° X
1. Sluk for maskinen og træk stikket ud
2. Tilslut igen maskinen og tænd for den
3. Gentag dette igen om nødvendigt
4. Hvis problemet ikke kan løses på denne
måde, kontakt da KRUPS kundeservice
Problems
Coffee is not hot enough
No steam/hot water from
the nozzle
Problemer
- Pre-heat cups with hot water
- Change temperature setting
Note: Coffee should not be boiling
- Nozzle blocked?
-> use fine needle to unblock it
- Nozzle blocked?
-> use fine needle to unblock it
- Check that the frothing aid is fitted
Only use very fresh, chilled milk
correctly
No proper frothy milk
- Prepare several espressos to clean
grinder. If this does not work, call
KRUPS Customer Services.
Note: you should still be able to prepare
an espresso with ready ground coffee.
1. Switch off appliance and remove
Collecting tank can no longer
plug from mains
be replaced
2. Insert drip tray without
used coffee collector
3. Re-connect appliance and
switch on again
4. Insert used coffee collector
- Take out drip tray and used coffee
EMPTY DRIP TRAY
AND USED COFFEE stays on display ground collector and replace them
after 10 seconds
Kaffen er ikke varm nok
- Dysen er tilstoppet?
Ingen damp/intet varmt vand
->stik erentilstoppet?
tynd nål op i
ud af dyse
Mælken
er ikke korrekt skummet - Dysen
-> stik en tynd nål op i
- Monter Cappuccino-tilbehøret korrekt
Kaffemøllen larmer meget
(fremmedlegemer i møllen)
- Tilbered nogle Espressoer for at rense
møllen, huælper dette ikke,
- Kontakt KRUPS kundeservice
NB: Man kan stadig lave espresso
med malet kaffe
Spildbeholderen kan ikke
sættes i
1. Sluk for maskinen og træk
netstikket ud
2. Sæt beholderen i uden
kaffegrumsbeholder
3. Tilslut maskinen og tænd for den
4. Sæt kaffegrumsbeholderen i
Grinder makes loud noise
(foreign body in the
grinding gear)
CONTAINER UNDER
STEAM NOZZLE
PRESS HOT
WATER BUTTON
DESCALE
CLEAN
Display
alternates
RINSE
... are no longer in the list
- Forvarm kopperne med varmt vand
- Temperaturindstillingen ændres
TØM
SPILDBEHOLDER
- Skil beholderen og sæt den på
vises veovarende plads efter 10 sek.
- Sæt beholderen i igen og
start maskinen igen
- Position drip tray and coffee collector
correctly and restart the appliance
BEHOLDER UNDER
DAMP DYSE
TRYK PÅ
VARMT VAND
- Switch off the appliance and
allow it to cool
AFKALKNING RENGØRING SKYLNING - Sluk for maskinen og lad den køle af
Display
skifter
... Står ikke længere i listen
0036198/209/0403/1000
Maintenance
regularly with mild, non-abrasive
cleaning agent
Pleje
Regelmæssigt med et mildt,
ikke skurende rengøringsmiddel
Before carrying out maintenance remove the plug
from the mains and allow the appliance to cool down
Træk netstikket ud før rengøringen og lad
maskinen køle af
Do not rinse / clean accessory parts in the dishwasher
Tilbehørsdele må ikke skylles/rengøres i
opvaskemaskinen
Wipe off with a soft damp cloth
Tør af med en blød, fugtig klud
Fill with fresh water before use
Fyld frisk vand i beholderen før anvendelsen
Rinse regularly with hot water and a little washing up
liquid, rinse with clear water and dry off
Skyl regelmæssigt med varmt vand og en smule
opvaskemiddel, skyl igennem med rent vand og
tør den af
Remove residual coffee grounds using a damp cloth,
dry off carefully
Kaffepulverrester fjernes med en fugtig klud,
tørres omhyggeligt af
Rinse regularly with hot water and a little washing up
liquid, rinse with clear water and dry off
Skyl regelmæssigt med varmt vand og en smule op
vaskemiddel, skyl igennem med rent vand og tør af
Clean nozzle with a damp cloth after use
Rengør dysen efter brug med en fugtig klud
Screw off nozzle head using the key,
clean under hot water
Skru dysehovedet af med nøglen,
rengør det med varmt vand
Nozzle head blocked? – use a fine needle to unblock it
Dysehoved tilstoppet? – stik en tynd nål op i
Take frothing accessory apart, rinse it in hot water
and dry it off
Skil opskumningshjælpen ad, skyl af i varmt vand
og tør af
Suction opening blocked? – use a fine needle to unblock it
Indsugningsåbning tilstoppet? – stik en tynd nål op i
Cleaning the auto-cappuccino accessories
1. Clean the receptacle and fill it 1/3 with water
2. Plunge tube into the receptacle and …
3 .connect the other end to the nozzle
4. Turn valve to
5. Place the receptacle under the nozzle
1.
2.
3.
4.
5.
6.
6.
7. Display:
8. Display:
9.
Press
4.
5. Display:
7. Display:
PREHEATING
STEAM
STEAM READY
PRESS STEAM
8. Display:
9.
Press
10. When the water has run through –> Press
11. Clean the nozzle with a damp cloth
Clean auto-cappuccino accessories regularly
During transport
1. Appliance is switched off
2. Place receptacle under nozzle
3. Only for auto-cappuccino: valve to
Tryk på
FORVARMNING
DAMP
DAMP KLAR
TRYK PÅ DAMP
Tryk på
10. Når der løber vand igennem –> tryk på
11. Rengør dysen med en fugtig klud
Rengør Auto-Cappuccino-tilbehørsdele regelmæssigt
Come protezione da danni
causati dal gelo durante
trasporto.
Under transport
1. Maskinen er slukket
2. Stil en beholder under dysen
3. Kun Auto-Cappuccino: Ventil på
4.
Press approx. 2 secs
STEAM
6.A little water runs out –> display goes out
Rengøring af auto-cappucino tilbehørsdele
Dyk slangen ned i beholderen og…
tilslut den anden ende til dysen
Drej ventilen til
Stil en anden beholder under dysen
Som beskyttelse mod
frostskader under transporten
Tryk ca. 2 sek. på
5. Display: DAMP
6. Der løber en smule vand ud –> display slukker
Cleaning
Rengøring
if necessary or
on request
CLEAN
15 min
MAX
2. CLEAN
OK
search
with
Fill water up to
the «MAX» mark
4. When
Maskinen kan stadig bruges, rengøring anbefales.
Anvend kun KRUPS rensetabletter (art.-nr. F055)!
MAX
1. Forberedelse
and confirm
with
2. RENGØRING
3. Cleaning process started … running
Duration of process:
~ 12 min.
RENGØRING
15 min
Appliance can still be used, cleaning is recommended.
Only use KRUPS cleaning tabs (art. no. F055)
1. Preparation
ved behov eller
på opfordring
søg
med
OK
Fyld vand i
til «MAX»
og bekræft
med
3. Rengøringen starter ... er i gang
Please follow
the instructions
shown on
the display
--:-APPLIANCE READY is displayed the cleaning is finished.
4. Når
Clean drip tray and used coffee collector with water and a little
5. washing up liquid and rinse.
Følg
henvisningerne
på displayet
Varighed:
~ 12 min.
--:-APPARAT KLAR
ses på displayet, er rengøringen færdig.
5. Rengør spildbeholderen med opvaskemiddel og skyl den efter.
Accessories / Tilbehør
Measuring spoon/Nozzle key
Måleske / dysenøgle
(No. art. F055)
KRUPS cleaning tabs
KRUPS rensetabletter
Water hardness strip
Vandhårdhedsstrimmel
(No art. F088 )
Filter cartridge
Filterpatron
(No art. F054)
KRUPS descaling agent
KRUPS afkalkningsmiddel
on request
Descaling
på opfordring
Afkalkning
DESCALE
AFKALKNING
OK
OK
35 min
35 min
Appliance can still be used, descaling is recommended.
Only use KRUPS descaling agent (art. no. F054)!
DESCALE
Maskinen kan stadig bruges, afkalking anbefales.
Anvend kun KRUPS-afkalkningsmiddel (art.-nr. F054)!
AFKALKNING
OK search with
and confirm with
OK søg med
EMPTY DRIP TRAY
AND SPENT COFFEE
TøM
SPILDBEHOLDERE
max. 0.5 ltr.
Fill water up to
0.5 litres.
Fill up descaling agent!
max. 0,5 l.
Fyld vand i op
til 0,5 l.
Fyld afkalkningsmiddel i
DESCALE
AFKALKNING
OK
OK
CONTAINER UNDER
STEAM NOZZLE
PRESS HOT
WATER BUTTON
min. 0.3 ltr.
BEHOLDER UNDER
DAMP DYSE
TRYK PÅ
VARMT VAND
DESCALING
IN PROGRESS
AFKALKNING
I GANG
EMPTY DRIP TRAY
AND SPENT COFFEE
TØM
SPILDBEHOLDERE
Empty receptacle
Tøm beholderen
Rinse water tank
well + fill up to
«MAX» mark
Beholdere skylles
godt igennem +
fyldes op til
«MAX»
CONTAINER UNDER
STEAM NOZZLE
PRESS HOT
WATER BUTTON
MAX
min. 0.3 ltr.
BEHOLDER UNDER
DAMP DYSE
TRYK PÅ
VARMT VAND
DESCALING
IN PROGRESS
AFKALKNING
I GANG
EMPTY DRIP TRAY
AND SPENT COFFEE
TØM
SPILDBEHOLDERE
Empty receptacle
RINSE
PRESS
og bekræft med
min. 0,3 l.
MAX
min. 0,3 l.
Tøm beholderen
SKYLNING
TRYK PÅ
OK
OK
Skyllevandet
løber direkte
ned i
spildbeholderen
--:-APPLIANCE READY
Clean the drip tray and used coffee ground collector
with water and a little washing up liquid and rinse
Change filter
1. Replace filter
...if CHANGE FILTER
2. Fill with water
MAX
3. Please follow the
instructions shown
on the display
until...
FILTER
RINSING
3 Sec.
--:-APPARAT KLAR
Rengør og skyl spildbeholder med opvaskemiddel
Udskiftning filterpatronen ved... SKIFT FILTER
1. Udskift filteret
2. Fyld vandi
3. Følg henvisningerne
på displayet indtil...
MAX
RENSER
FILTER
3 Sek.
Safety instructions
EMERGENCY
Remove plug from mains immediately
• Use of the appliance:
- This product has been designed for domestic use only.
Any commercial use, inappropriate use or failure to
comply with the instructions, the manufacturer accepts
no responsibility and the guarantee will not apply.
- to prepare coffee/hot water, as well as for frothing
milk and heating drinks using steam
• SETTING UP
- On a flat, stable surface, away from heat sources; at
least 10 cm away from walls/open flame (gas cooker)
- Plug must be within easy reach
- Keep the appliance/mains cord out of reach of children
- Frost damage possible under 0°C
• MAINS SUPPLY
- Only use a (3-pin) earthed plug
- For supply voltage refer to the specifications on the
base of the appliance
- Do not allow cord to hang down, danger of tripping
• DANGERS
- Children/uninstructed persons must not use the
appliance. The appliance is dangerous for children
- Beware of the dangers of scalding from steam, hot
water and steam/hot water nozzle. Never direct
steam/hot water to your own/anyone else's body parts
- Do not insert anything into the openings in the
appliance
- Store packaging material out of the reach of children
- Do not damage, jam or touch the mains cord/plug
with hot/sharp objects etc.
- Do not touch mains plug with wet hands, do not use
the plug to remove the cord from the socket
• CARE
Remove mains plug before carrying out maintenance and
allow the appliance to cool down. Never immerse the
appliance, supply cord or plug in water or any other liquid
• DESCALING
Follow the safety instructions of the manufactuer's descaling
agent; only use KRUPS descaling agent (art.-Nr. F054)
• FAULTS
Do not use the appliance if the mains cord/plug are
damaged, in case of faulty operation, visible damage
(e.g. after being dropped).
Replacement of the mains cord, any repairs or intervention
(except for cleaning as described in the manual) should
only be carried out by an authorised KRUPS Service Centre
to avoid any risk of danger.
• SPARE PARTS, ACCESSORIES
For safety reasons, only use the spare parts/accessories
recommended by KRUPS.
• DISPOSAL:
Cut off the mains cord from the appliance. Dispose of
the appliance at your local waste disposal centre.
This TSM SUCCESS MANUAL® has been examined by SEV for
conformity with the safety-relevant standards, and has been analysed
by an application-oriented risk analysis for the completeness and
correctness of the indications for a safe use of the appliance. Thereby
we assume a use with which can be reckoned based on commonsense.
Sikkerhedsanvisninger
I NØDSTILFÆLDE
træk straks stikket ud af stikdåsen
Anvend KUN maskinen
- indendørs til privat brug, ved misligeholdelse bortfalder
garantien
- til tilberedelse af kaffe/varmt vand, samt til
opskumning af mælk og opvarmning af drikke med
damp
Anvend ALDRIG maskinen
- på andre måder end anført her
- ukorrekt brug kan være farligt og fritager KRUPS for
ethvert ansvar
OPSTILLING:
- på en plan, stabil flade, ikke på komfurer, mindst
10 cm afstand til vægge/åben ild (gaskomfur)
- netstikket skal være tilgængeligt
- maskine/kabel skal ikke kunne nås af børn
- under 0ºC er der risiko for frostskader
STRØMTILSLUTNING:
- anvend kun en stikdåse med ekstra beskyttelse
- netspænding: se informationerne på maskinens
underside
- kablet må ikke hænge frit ned, der er risiko for at
snuble over det
RISICI:
- børn/uinformerede personer må ikke anvende
maskinen. Maskinen er farlig for børn
- der er risiko for forbrændinger på dampen, det varme
vand og damp-/varmtvandsdysen. Damp/varmt vand
må ikke rettes mod egne eller andres legemsdele
- stik ikke ting ind i maskinens åbninger
- opbevar emballagen væk fra børn
- strømkabel/-stik: må ikke beskadiges, klemmes, berøres
med varme/skarpe genstande osv.
- rør ikke ved strømkablet med våde hænder, hold
på selve stikket, når det skal tages ud af stikkontakken
SERVICE: Før service skal netstikket trækkes ud, maskinen
skal køles af. Kom aldrig maskine, strømkabel eller stik
ned i vand eller andre væsker
AFKALKNING: Overhold henvisningerne fra afkalkningsmidlets fabrikant; anvend kun KRUPS afkalkningsmiddel
(art.-nr. F054)
DEFEKT: Maskinen må ikke anvendes, hvis den har
beskadigede strømkabler/-stik, fejlfunktioner, synlige
skader (f.eks. efter et fald).
Udskiftning af strømkabel, reparationer, indgreb
(undtagen den i vejledningen beskrevne rengøring) må
kun foretages af KRUPS kundeservice for at undgå farer.
RESERVEDELE/TILBEHØR:
Af sikkerhedsmæssige hensyn må der kun anvendes de
reservedele/tilbehørsdele, som anbefales af KRUPS.
BORTSKAFFELSE:
Klip strømkablet af maskinen. Bortskaf maskine og
strømkabel i henhold til de nationale gældende
bestemmelser for affaldsindsamling.
Denne TSM SUCCESS MANUAL® er blevet kontrolleret af det
schweiziske elektrotekniske forbund (”SEV”). Det er blevet
kontrolleret om de sikkerhedstekniske standarder overholdes og
betjeningsvejledningen er blevet analyseret ved hjælp af en
brugerrelateret risiko-analyse for at kontrollere om henvisningerne
er komplette og korrekte for at sikre en risikofri brug af maskinen.
I den forbindelse gås der ud fra en fornuftig brug af maskinen.