1
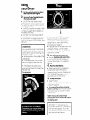
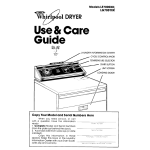
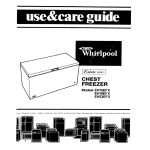
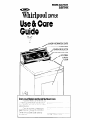
Models
WhidpOOl
3LE5700XK
3LG57OlXK
DRYER
Use & Care
Guide
LAUNDRY INFORMATION
CENTER
START BUTTON
URE SELECTOR
CYCLE CONTROL KNOB
Copy
your Model
and Serial Numbers
If you ever need to call for sewce,
you
.d need to gwe the Model and Serlol Nun?bers Your dwer has these numbers or a plate
Dehind the aoor
Copy the numbers in these spaces
i(eeo this book in the Laur,dry Information
Center >hiith your Dryer Guide, sales slop
and wcrronty
“/lode’
here
”
Before using
your Dryer
Please reaa this booklet to be
sure your dryer IS Walled
and used
properly
It WIII help you get the best
results and longest life your dryer was
destgned
to give
You are personally
responsible for making sure that your dryer...
Is installed
by a qualrfred
installer.
Is properly
Installed and leveled
in a
well ventilated
room. on a floor that
can support the weight
l Is connected
to the right kind of outlet,
electric
supply and grounding’
9 Is properly
connected
to fuel and
exhaust systems*
l Is used
only for jobs normally
expected
of home clothes dryers.
l Is properly
maintarned
l Is installed
in an area protected
from
the weather
l Is not run where
there may be explowe fumes
l Is not used
by children
or anyone
unable to operate
It properly.
Remove the Consumer Buy
Guide label before using your dryer. It
WIII be easier to remove
Wipe out the drum with a damp
cloth to remove any dust
l
l
SPECIAL INSTRUCTIONS: See the
Dryer Gulde for drying tips, information about permanent
press and
knits, instructtons
for drying special
items and for things not to be dried in
your dryer.
“See the lnstallatlon
lnstructlons
complete
informatlon
for
FOR YOUR SAFETY
If you smell gas:
1. Open windows
2. Don’t touch
electrical
switches
3. Extinguish any open
flame
4. Immediately
call
your gas supplier.
2
FOR YOUR SAFETY
Do not store or use
gasoline or other
flammable
vapors and
liquids in the vicinity of
this or any other
appliance.
Please read this manual
Follow the rnstructrons
to help
you get the best drying
results
Save the manual
for future use
I
Contents
Before Using Your Dryer
Loading Your Dryer
Understanding
Your Dryer
Lint Screen
Using Your Dryer
Selecting
Cycles and Temperature
Settings
Setting Drying limes
FLUFF AIR
:
TUMBLE PRESS” Control
If You Need Service or Help
Before Callrng for Servrce
If You Havea
Problem
2
3
3
3
4
5
6
6
6
7
7
loading
Dryer
your
4
For best dryrng results and energy
sort dryer loads carefully
Separate
loads according
to
the type of fabric and weight
For
example
l
Dry heavy fabrics (denims. towels,
cottons)
separately
from light fabrrcs
(permanent
press, synthetics)
l Separate
lent givers (towels, sweatshirts, etc ) from lent takers (synthetics,
blends
permanent
press]
l Keep
dark colors and light colors
separate
l Keep
colorfast
items away from noncolorfast
fabrrcs.
Allow room for Items to tumble
freely The load WIII dry faster wtth fewer
wrrnkles
When dryrng permanent
press,
dry smaller-than-normal
loads for the
best wrinkle removal
Use a mesh bag to hold small
Items such as baby socks
Read the Dryer Guide for more
hints on sorting and loading
savings,
In all these cycles, the heat shuts
off 5 minutes before the dryer stops
tumbling.
This helps cool down the load
The cool-down
trme IS burlt In so
the laundry will not be too hot when the
dryer stops tumblrng
1 When a load of hot laundry is
not tumbling,
wrinkles can set In.
2. A load of hot laundry can
be too hot to handle comfortably
The other cycle is PERMANENT
PRESS This cycle has a longer cooldown time at the end This extra time IS
designed
to give permanent
press fabrics the extra wrinkle protection
they
need
Thts Use & Core Gude contains
suggestions
on the way to use your dryer
to get the best results and longest useful
life from Your dryer Please read It
carefullv
lint Screen
The lint screen IS under the Ird on
top of the dryer
C/eon the hnt screen before each
ioad A screen that’s blocked
by lint
can cause longer drying times
Understanding
your Dryer
Your dryer has five cycles
The
EXTRA HEAVY. HEAVY, MEDIUM and
LIGHT Cycles are designed
to tumble
laundry for a certain
length of
time. .dependrng
on the load You
select the drying temperature
you want
To remove the screen. open the
IId and pull the screen straight out. Roll
the lint off the screen with your fingers
DO NOT rinse the screen or wash
it. Wet lint IS hard to remove
it firmly
When replacing
the screen,
into place
Close the IId
push
3
Using
your Dryer
1.
Put the sorted load in the dryer
and close the door tightly.
2.
Turn the Cycle Control
the cycle you want.
Knob to
Use LIGHT for small loads of lightwerght fabrrcs
The LIGHT Cycle runs for
the ‘east time Use LIGHT also to damp
dry loads for ironrng
l
Use MED for normal size loads of light
or medtum weight fabrics (sheets, pillowcases,
shirts. etc.)
l
Use HEAVY for normal size loads of
heavy fabrics [towels, jeans. corduroys)
l
Use EX HEAVY for large loads or for
heavy bulky Items (quilts, spreads,
blankets, etc )
l
SUGGESTION:
You can set the Cycle Control Knob
anywhere
past, between
or below
the EX HEAVY and LIGHT settings. For
the first few loads.
l
Set the pointer in the mlddle of the
load settrng
l
If the load IS drier than you want,
set It to the right (for less time) the
next time
l
If the load IS not as dry as you
want, set It to the left (for more tlmej
the next time
For example:
Use PERMANENT PRESS for a longer
period of cool-down
time Set the
pointer for the number of minutes of
drying time you want (See Setting
Drying Imes on page 6 )
l
If laundry IS left In the dryer after It has
stopped
tumbling,
use the Tumble
Press’ Control setting [page 6) to help
remove the wrinkles
l
3.
Set TEMPERATURE SELECTOR.
Turn the TEMPERATURE SELECTOR to
the drying temperature
needed
for
the load See page 5 for suggested
settings
l
4.
Push the Start Button.
Make sure the door IS closed and
Cycle Control IS set If the door IS
opened
during the cycle, the dryer WIII
stop To restart the dryer, close the
door and push the Start Button
l
5.
To stop the dryer:
Open the door
l
Or, turn the Cycle
of the OFF positions
l
Control
Knob to one
9 To change
the setting while the
dryer is running, turn the Cycle Control
Knob, erther way
ting you want
so It points
to the set-
NOTE: The Cycle Control Knob
should point to OFF when the dryer
not being used.
IMPORTANT
To help reduce wrinkling, take the load from the dryer as
soon OS tumbling
stops This IS very
Important
for permanent
press, knits
is
1
SELECTING CYCLES AND TEMPERATURE SETTINGS
Choose
the correct
setilngs
according
to the chart
below
CYCLE
TYPE OF LOAD
COTTONSLINENS
fXT/?L HEA:Y ueb large loads ~ Bedspreads
mattress
pads
quilts
HEAVY FABWCS ~ Towels jeans corduroys
work
clcthes
MEDIJMWE’GY~ COJ70PdS ~ Sheets. pIllowcases.
cot ton underwear
diapers
ilG~iiW~IGLiT20T~ONS
or damp
dry ~ Botlstes.
organdles
llngerle
PERMANENT
PRESS - SYNTHETIC
FIBERS AND
BLENDS
HEAVYIWGY:
FABRICS ~ Work clothes
jackets.
raIncoats
etc
MED~JM~E~GCI!
‘ABR CS ~ Shirts play clothes,
sheets slacks
L’Gtiivdt
G.27 iA@~?~CS ~ Llngerle
blouses
dresses,
etc
KNITS
~+tA!/iV~‘t1G7’~ ~ CaTTONS
RAYONS, BLENDS ~
T-shirts slacks
shirts etc
I'GHJbl'F G-‘: ~ SYNTHETIC FABRICS (polyester.
ocryllc
etc ) ard Blends - Lingerie
blouses,
dresses
etc
3t~ C/TEL) C3r%V,STp8-~CTt~ ;ABR:CS ~ Curtains
(2
or 3 Danels ] Sneers
FOAM RUBBERARTICLES ~ Follows
To Damp Dn clothes
20 mlnLtes
for lronlng
MIXED LOADS
If you drv a mlxed load of various
fabric
‘When dryer stops remove
bras
set control
etc
EX HEAVY
HEAVY
MEDIUM
LIGHT
PERMANENT
PRESS
40-50 MIN
30-40
MIN
20-30
MIN
PERMANENT
PRESS
40-50MIN
TEMPERATURE
SELECTOR
PERM T PRESSHEAVY HIGH
PERM’T PRESSHEAVY HIGH
PERM’T PRESS
HEAVY HIGH
PERM’T PRESSHEAVY HIGH
PERM’T PRESSHEAVY HIGH
PERM’T PRESS
HEAVY HIGH
PERM’T PRESSHEAVY HIGH
PERM’T PRESSHEAVY HIGH
30-00
MIN
KNITS GENTLE-LOW
20-30
MIN
KNITS GENTLE-LOW
PERMANENT
PRESS
20-30 MIN
In LIGHT setting
or PERMANENT
FLUFF-AIR
PRESS cycle
weights
of fabrics.
select the cycle for the lighter
the dry articles
and reset the control
for
weight
5
Setting
mmes
Drying
Modern
dryers are designed
wrth drying temperatures
needed
to
safely handle
modern
fabrics.
Cooldown times have been added
to heat
settings
You might notlce slrghtly
longer drying times.
The time It takes to dry a load
depends
on
l The k/nd
of fobnc, its wejghf, and the
size of the iood A large load of jeans
will take a lot longer to dry than a
small load of light synthetics.
l The amount
of moisture
/n the ioad
Towels hold a lot of moisture,
synthetics
don’t
Synthetics
dry faster
l Temperature
of the rinse water
Cold
rinses help save on energy
and wrenkles. but a cold load will take slrghtly
longer to dry than a warm one
l Amount of iint on the screen A full
lint screen slows the air flow and can
make drying time longer
l Temperature
around
the dryer The
dryer heats room air. If that air IS cold,
drying time will be longer and fabric
wrinkles may not be removed
l Proper
/nsto//ot/on
ond exhaust
sys
terns For the fastest possible
drying
time, installing
and exhausting
your
dryer properly
IS important.
See rnstallotion instructions.
FLUFF AIR
This temperature
setting is useful
for fluffing bedding,
pillows and clothing. or dusting drapes
It IS also best
to use when damp-drying
heatsensrtlve Items.
FLUFF AIR should be used for
such items as plastic shower curtains
or tablecloths,
rubber-backed
rugs,
some pillows,
stuffed toys, etc
6
Turn the TEMPERATURE SELECTOR to
FLUFF AIR
l
Turn the Cycle Control Knob to the
number of minutes you want in the
PERMANENT PRESS Cycle.
l
Push the Start Button.
l
TUMBLE PRESS ’
Control
This setting is useful for removing
wrinkles from packing
in suitcases
or
closets. TUMBLE PRESS will help put
them back Into their pre-set shape
l
Set Cycle Control
Knob to TUMBLE
PRESS
Set TEMPERATURE SELECTOR to
PERM’T PRESS HEAVY HIGH.
l
Push the Start Button
For best results, TUMBLE PRESS
only a few items at a time, put them
on hangers
or fold them as soon as
?he dryer stops
l
If You Need
Service or Help,
We suggest You
Follow These Three
Steps:
Before
calling
for service
...
Problems are sometImes
caused
by little things you can correct wlthout
tools Check this lrst before you call
for service
l
l
l
l
DRYER DOES NOT RUN
Is electric
power cord
plugged
In?
Is the dryer door closed tightly’
Your
dryer has a switch by the door that
shuts off the drY/er tf the door IS
opened
Did SOL push the Start Button’
Check circuit breakers
or fuses In the
fuse box
DRYER RUNS BUT DOES NOT HEAT
Is the Cycle Control Knob pointing
to at least 10 minutes or LIGHT’
[The last minutes are cool-down
time )
Is it a gas dryer’ See if the gas IS
turned on If not, turn the Cycle Contro
Knob tc OFF Turn on the gas and wait
five minutes for the automatic
switch
to reset. Then try starting It again
Is It an electric
dryer? Check the cir
curt breakers
or fuses In the fuse box
An electric
dryer WIII have two fuses If
one IS blown, the dryer may run, but
not heat
DRYING TIME IS LONGER THAN USUAL
l
Check the lint screen. Remove
lint
Keep the screen clean for best drying
results and trmes
l
Modern
dryers are desrgned
to dry at
the cooler temperatures
needed
by
modern
fabrics
They may need more
time than you are used to
If you move
To make sure that your
IS correctly
installed
and
appliance
to Insure Its continued
satisfactory
operation
call your dealer
(Installation cost will. of course,
be paid by
YOU 1
Helpful hints You can help your
service
representatrve
grve you faster
servtce
If you Include
the model
and
serial number
of your appliance
when requesting
service
Also, retain
your sales slip and warranty
to verify
your warranty
status
Remember
Your service
representattve IS trained
in the repairing
and
servicrng
of your WHIRLPOOL applrantes
He can help you maintain
the
quality
originally
built into your
WHIRLPOOL appliance
So why not
take the ttme, now to look up his telephone
number
and tot it down
in the
space
provided
on the cover
If you have a problem
:
Call your dealer
or write
Servrce
Manager.
lnternatlonal
Drvisron
Whirlpool
Corporation
AdmInIstrative
Center
2000 US 33 North
Benton Harbor. Michrgan
49022
If you must write, please provide
your
name, address,
telephone
number,
type of appliance,
brand, model, serial
number, date of purchase,
the dealer’s
name, and a complete
description
of
the problem
This InformatIon
is needed
In order to better respond to your
request for assistance
7
FSP IS a registered trademark
of whirlpool Corparallon
for
quolityparts
Look for this
symbol of quol!ty whenever
FSP
ycu need a replacement
pari
@ forywr Whirlpod appliance
FSP replacement
parts
will fit tight ond work right, because they are
mode to Ihe’same exacting specifications
used to bclild every new Whirlpool appliance
0
~irlpool
Home
Apphances
Quality. Our way of life.
Benian Harbor, Michlpan. Automalic Washers, Clolhes Dryers,
Freezers, Relrlgeretor-Freezers.
Ice Makers, Dishwashers.
llulli-In Ovens and Sutlace Units, Ranges. Microwave Ovens.
Compaclors, Atom Air Condiiioners, Oehumidlfiers. Cenlral
Healing and Air Conditioning Systems.
Part No. 691260
Printed
in U.S.A.