1
Models
DRYER
Use & Care
Guide
aa
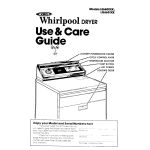
1 Copy
Your Model
When you
a question,
need
have
and Serial
Numbers
service,
or call
tnis information
with
ready:
1. Complete
Model and Serial Numbers
(from the plate just behind the door).
2. Purchase date from sales slip (or date
installed).
Copy
this information
in these
spaces. Keep this book in the Laundry
Information
Center with your Dryer Guide,
sales slip and warranty.
Here
LE7000XK;
LG7001XK
Before using
your Dryer
Please reo Y t-11s Dooklet to be
sure ,our =i%er IS 7s 3lled and used
properly
It AI I he rj ,OL get the best
resillts CW lzngeit
I fe :3ur dver was
designed
to give
You are personally
responsible for making sure that your dryer...
Is installed
by a qclalifled
installer
l Is ~nstailed
In ar orea protected
from
the weather
l Is properly
InstalieJ
and leveled
in a
well ventllated
rc’zrl
or a floor that
can support the .ueight
l Is located
in an area where the temperoture
IS above 45 F i7 2 C]
l Is connected
tc +i~ rlght kind of outlet,
electric
supply arid grounding
l Is properly
connected
to fuel and
exhaust systems
l Is used
only for lobs normally
expected
of horre [clothes dryers
l Is properly
maintained
l Is not run where
‘here may be explosive fumes
l Is rot
used by cMAren
or anyone
unable to operate
It properly
Remove the Consumer
Buy
Guide label before using your dryer It
will
be eusler to reTove
Wipe out the drum with a damp
cloth to remove unv dust
l
SPECIAL INSTRUCTIONS: See the
Dryer Guide for drying tips, information about permanent
press and
knits, instructions
for drying special
items and for things not to be dried in
your dryer.
See the lnstallotlon
Instructions
complete
Information
See Setting Dryng Times, page
‘for
4
FOR YOUR SAFETY
If you smell gas:
1. Open windows
2. Don’t touch
electrical
switches
3. Extinguish any open
flame
4. Immediately
call
your qas supplier.
FOR YOUR SAFETY
Do not store or use
gasoline or other
flammable
vapors and
liquids in the vicinity of
this or any other
appliance.
Piease
read this manual
Follow the Instructions
to help
you get the best drying
results
Save the manual
for future use
Contents
Before Using Your Dryer
Loading Your Dryer
Lint Screen
Using Your Dryer
Setting Drying limes
Selecting
Cycles and
Temperature
Settings
Using the Automatic
Settings
FLUFF AIR
TUMBLE PRESS’ Control
End-of-Cycle
Signal
Using the Drying Rack
If You Need Service or
Assistance
I. Before Calling for Assistance
2, If You Need Assistance
3. If You Need Service
4 If You Have a Problem
7
7
8
.a
8
loading
Dryer
your
y
For best dryng results and energy
sort dryer loads carefully
Separate
loads according
to
the tyoe of fabric and weight
For
example
l Dry neavy
fabrics
,den ms towels,
cottons]
separately
from light fabrrcs
(permanent
press synthetlcsj
0 Separate
lint givers (tow~els. sweatshirts, etc ! from lirt tokers {synthetics,
blends. permanent
pressi
l Keep
dark colors ana light colors
separate
l Keep
colorfast
i-ems away from, noncolorfast
fabrrcs
Allow
room for items to tumble
freely The load will dry faster wjrth fewer
wrinkles
When drying permanent
press,
dry smaller-than-normal
loads for the
best wrinkle removal
Use a mesh bag tc hold small
Items such as baby socks
Read the Dryer Guide for more
hints on sorting and loading
lint Screen
The lent screen IS under the lrd on
+op of the drver
C/eon +he !IP~ screen before
XX/ccc! A screen that’s blocked
by
lnt can cause longer dryrng times
savings.
To remove
the screen, open
the lrd and oull the screen straight out
Roll the lint off the screen with your
fingers
DO NOT rinse the screen or
wash it. Wet lint IS hard to remove
When replacrng
the screen,
push It firmly Into olace
Close the IId
Using Your Dryer
1.
Put the sorted load in the dryer
and close the door tightly.
2.
Turn the Cycle Control
the cycle you want.
Knob to
0 Lse ‘he Autc,mci-1: sy 1_ ry.i ‘sr w;s:
&ldc
Start ‘,s.Iti; +i;i. c, ;r ?-- ct ‘PF
middle cf 3r /;~,t :rr‘c! 1 Z Vc’e See
uage 6 for rr ore I f ,rrl c:t~ -‘r
l Use TIMED
DRY I\JG f rr arvlng a certalr
number of m~nut~c ‘or --r damp dryrIg
fluffl:,g
‘or t~~rnb~i~~y lte,r-s :,~th(out air
3.
Set TEMPERATURE SELECTOR.
Turr-, the TEMPERATURE SELECTOR tr
the crying temperaturcf
-ire&d
f-or thoad See page iI f?r sr,uqested
_.
settlr gs
l
4.
Push the Start Button.
Mcke sure the door,
:I =sea a7d the
Cycle ‘Control 1sset f t-e door is
opened
during :“e :v I.1 ‘he dr;/er .: ~
stop To restart the dryer, cl’ose tne
door and bush tre Cta,+ R,l+tor;
l
5.
To stop the dryer:
Open the door
l Or ‘urn tne Cyc 10 87: r,.‘:l
Knob to O’I+
of the OFF positlcJns
. To change
the setting while the
dryer
is running, turn the Cycle Control
Knob, either way so it points to the Seth
l
Setting
Drying limes
V&err1
dryers are designed
i6V~+”
aryl-,g temperatures
reeded
t’o safe sV
ha-c e modern
fabrics
Cool-dewr’
times have been added
to I?ea+ set
t:ngs You --lght notice slight y onger
3ir
g times
The time I* takes to drk a load
leper&
or
;‘: ! ‘“t:
. -i>? h ‘7~1 + + I.+;’ < +/ :,e g”’
) .‘c:, )+ +‘:e GJ : A large load of leans
$,I I take a lot longer to dry thar o small
load of light svnthetics
,-nc;j+,,re r +,,e ,~‘J~;
. -ne ,;‘TO,,‘)‘()f
To~+yc?lshold a lot of moisture
synthetics
don t Synthetics
dry faster
. ‘ti’y>per ;‘t,,ri: 0’ *he ‘t?se vm~;fer Cold
rlr-ses help save on energy ar83 wrinkles
but a cold load WIII take slightlv ‘anger
+c dry than a warm one
. ‘:,7yL,>“’ [If ,,~t 3’1 +he sccee*’ A ful lint
screen slobs the air flow and can make
drying time onger
l
%:?,7‘ iemoerature
The dryer heats
room a r If tne room air temperature
IS not above 45 F (7 2 C], the automatic
cycle ~111not advance
the timer and
shut off the dryer Use Trmed Dvlng as a
temporary
way of drying a load Drving
times WI/I be longer due to the cold air
Removal
of wrinkles may be poor
l
IMPORTANT
To help reduce wrin
kl,ng fake the l::cd fr3m the aryer OS
sc,orl as turmbl~~-,~ s+ir:s THIS 15 very
Nmportant for r~ermor~er~t press krl’s
ard other svnt-e’lc
*abrics
proper
,PS:JI/~+I~~~
:fn~j
exh:fus?
SI/S
tr--s
For the fastest possible
drying
tlrne installing
and exhuustrng
your
dryer properly
IS important
See ~nstalla
tion instructions
Be careful not to overdry. Overdrying can cause shrinkage,
damage
to some fabrics and static cling.
4
3
SELECTING CYCLES AND TEMPERATURE SETTINGS
Choose
the correct
settings
occordlng
to the chart
below
TYPE OF LOAD
COTTONS
j’EA;rl~
DRYING CYCLE
Bedspreads
IVIfDLMAND
diapers
Mattress
L’GHnl/ttGH’
towels
work
pods
~ Shirts
clothes
quilts
dresses,
sheets,
TEMPERATURE
SELECTOR
AUTOMATIC
REGULAR
AUTOMATIC
REGULAR
HEAVY
~ HIGH
HEAVY
~ HIGH
AUTOMATIC
PERMANENT
PRESS
AUTOMATIC
PERMANENT
PRESS
PERM T PRESS ~~
MED
PERMANENT PRESS
QE4yp
Work clothes
rZ/ltD’L’M
LVE~GHT
KNITS
tiiAW/tiEiGtiiislacks,
polo
lockets,
~ Shirts
raIncoots.
uniforms
COTTONS
RAYONS,
shirts, etc
dresses
slacks,
etc
BLENDS ~ T-shirts
.‘G~fii’0G~~SYNTHETIC FIBERS [polyester
eic ) AND BLENDS ~ Llngerle
blouses,
etc
DELICATELY CONSTRUCTED
etc
FABRICS-Sheer
ocn/l~c,
dresses,
Curtans
(2 or 3 panels]
FOAM RUBBER ARTICLES- Pillows
HEAT SENSITIVE FABRICS - Olefln
To damp
dry clothes
for lronlng
bras, etc
nylon, etc
set control In the TIMED
AUTOMATIC
PERMANENT
PRESS
AUTOMATIC
PERMANENT
PRESS
AUTOMATIC
PERMANENT
PRESS
PERM’T PRESS MED
PERM T PRESS MED
KNITS -LOW
GENTLE ~
EX-LOW
TIMED DRYING
FLUFF ~ AIR
TIMED DRYING
FLUFF AIR
DRYING Cycle for 15 to 25 minutes
MIXED LOAD
If you dry o load of various
weights
of fabrics.
select the cycle
When dryer stops, remove
the dry ortrcles and reset the control
for the lighter
weight
fabric
Using the
Automatic
Settings
With AUTOMATIC
REGULAR and
AUTOMATIC
PERMANENT PRESS, you
select how dry you want the loud to be
When the load IS as dry as the setting
you hove selected,
the Cycle Control
WI!/ advance
toward
ending the cycle
Use the AUTOMATIC
REGULAR
Cycle to dry most family loads
During
the last five minutes of the drying cycle,
the load IS tumbled
without heat This
helps make the load easier to handle.
Use the AUTOMATIC
PERMANENT
PRESS Cycle to dry permanent
press,
knits and other synthetic
fabrics. The lost
10 minutes of the drying cycle are without heat This cool-down
time helps
keep wrinkles from setting in
For the first few loads, set the
Cycle Control Knob to point in the mrddie between
VERY DRY and LESS DRY
When the dryer stops, feel the
Items In the load If they are about how
you like them, keep using this setting
If the Items are drier than you like,
use a setting nearer LESS DRY or COOL
DOWN the next time you dry a load like
that
If the Items are not as dry as you
want, use a setting nearer VERY DRY the
next time you dry a load !ike that
After drying a few< loads, you WIII
find a favorite
setting to use
FLUFFAIR
6
This temperature
setting IS useful
for fluffing beddrng
plliows and clothrng, or dusting drapes
It IS also best
to use when damp-drying
heat-sensitive
items
FLUFF AIR should be used for such
Items as plastic shower curtarns or
tablecloths
rubber-backed
rugs, some
pillows, stuffed toys, etc
l
Turn the TEMPERATURE SELECTOR to
FLUFF AIR
l
Turn the Cycle Control Knob to the
number of minutes you wan+ in the
TIMED DRYING Cycle
TUMBLE PRESS ’
Control
This setting IS useful for removing
wrinkles from packing
in suitcases or
closets TUMBLE PRESS will help put them
back into their pre-set shape
l
Set Cycle Control Knob to TUMBLE
PRESS
l
Set TEMPERATURE SELECTOR to
PERM’T PRESS MED or HEAVY HIGH
l
Push the Start Button
For best results, TUMBLE PRESS
only a few Items at a time, put them on
hangers or fold them as soon as the
dryer stops
End-of-Cycle
Signal
A signal will let you know that
the dryer has stopped.
The signal IS helpful when you are
drying permanent
press, synthetics
and other Items that really should be
taker, out as soon as the dryer stops
The signal can’t be turned off and
It IS not adiustable
If You Need
Service or
Assistance, We
Suggest You Follow
These Four Steps:
Using the
Drying ,
1. Before
The dwlng rack lets you dry items
like
that you may not want to tumble.
sneakers
stuffed toys. etc
1. Fit the rear legs of the rack into the
grooves on the back wall of the dryer
Push them In and let the front legs of the
rack do&n on the front of the dryer as
shown
2. Put Items to be drred on top of the
rack 4110~ scoce between
theT for 2:’
to move 0roLnd
3. The rack does not move, but the
drum turns Be sure nothlng hangs over
the edges of the rock Do not hang
items from the rock
4. Close the door and turn the Cycle
Control Knob to a time setting in the
TIMED DRYING Cycle
5. Drying time will depend
on how
much moisture the items hold Suggested drying temperatures
are given ir
the followrng
chart
6. Push the Start Button
7. To remove the rack pusn it back, lift
o and pull out
Items for
Rack Drying
Drying Temp.
Setting
1. Wool Socks
(Block to shape and
lay flat on rack 1
2. Stuffed Toys
(Cotton or polyester
fiber illled 1
3. Stuffed Toys
[Foam rubber’ fllleb
4. Sneakers
5. Foam Rubber
Pillows.
KNITS ~ LOU’
or PERM :
DRESS ~ MED
HEAy’” HlGh
‘LLF-
AIR
FLJF; AIR
FL’J’; AIR
calling
for assistance.
..
Performance
problems
often
result from lrttle things you can find and
fix yourself without tools of any kind
DRYER DOES NOT RUN
Is electric
potter
cord plugged
in3
B
41
l
l
l
3
..:
’
~s?he dryer door closed tightly’
Your
drver has a switch by the door that
shuts off the dryer if the door IS
opened
-.. .Did you push the
Start Button?
Check circuit breakers
or both fuses In
the fuse box
DRYER RUNS BUT DOES NOT HEAT
l Is the Cycle
Control Knob set correctly’
[The last 5 minutes are cooldown time In AUTOMATIC
REGULAR,
the last 10 minutes In AUTOMATIC
PERMANENT PRESS are wrthout heat )
l Is it a gas dryer?
See if the gas IS
tclrned on If not, turn the Cycle Control
Knob to OFF. Turn on the gas and wart
five minutes for the automatrc
swatch
to reset Then try starting it again
l Is it an electric
dryer7 Check the circult breakers
or fuses in the fuse box
An electric
dryer will have two fuses If
one IS blown
the dryer may run, but
not heat
DRYING TIME IS LONGER THAN USUAL
l Check
the lint screen
Remove lint
Keep the screen clean for best drying
results and times
l Modern
dryers ore designed
to dry at
the cooler temperatures
needed
by
modern
fabrics
They may need more
time than you are used to
l
Room temperature
IS cold
l
2. If you need
:
assistance.
FRANCHISED
Call the Whirlpool
service assistance
ber. Dial free from:
Continental
U.S.
Michigan,.
Alaska & Hawaii
...
SERVICE
~.
. ..-A
COOL-LINE’
telephone
num(800) 253-1301
(800) 632-2243
(800) 253-l 121
and talk wrth one ‘of our trained
Consultants The Consultant
Tar Instruct you
in how ‘c obtain so+rsfoctory
operation
from your oppl~ance
3r I‘ service is necessary, recomrnen8d
o quollfied
service
componv
lrl your 3rea
3. If you need service
. ..
Whrrlpool
has a notIonwide
network of franchrsed
TECH-CARE
Service
Companres
TECH-CARE service techn
clans are trained to fuifl,l tne product
warranty
ar,d provide
after-worranty
anywhere
lrI the ?Inlted States
service
To locate TECH-CARE seryrce In your
area, call our COOL-LINE
service OSSIStance telephone
number [see Step 2) or
look in your telephone
directory
Yellow
Pages under
OR
WASHING MACHINES.
8 IRONERS-SERVICING
+4Ah~-lSt3ltCH
CARE’FYV
,EH\~,~
t (‘O\fi’i
rYZSE9VlCECO
‘2; Macle
DRYERS
i
\/t.q
394 9999
4. If you have a problem”
.. .
Call our COOL-LINE service assistance telephone
number [see Step 2)
and talk with one of our Consultants.
or If
you prefer, write to,
Mr Guy Turner, Vice President
Whrrlpoo
Corporatron
Admrnrstratrve
Center
2000 US-33 North
Benton Harbor, Ml 49022
If you must call of wrote, please provrde
m&e1 number, serral number, date of
purchase,
and u complete
description
of
the problem
This information
IS needed
In order to better respond to your request
for assistance