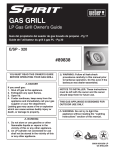
1
SUN400_2377_StandMxr_mech 3/14/02 11:38 AM Page 2
STAND MIXER
Model 2377
User
Manual
del Usuario
Manual
MODELO 2377
BATIDORA DE PIE
SUN400_2377_StandMxr_mech 3/14/02 11:38 AM Page 4
safety
IMPORTANT SAFEGUARDS
When using electrical appliances, basic safety precautions
should always be followed, including the following:
ii
Safety
safety
This Unit Is for Household Use Only
When your MIXMASTER® Mixer is first used, you
may experience an odor and possibly a slight wisp of
smoke from your mixer’s motor. This is caused by the
heat curing of the insulation which protects the motor
and is normal. After the first few uses, this effect will
disappear.
•
READ ALL INSTRUCTIONS BEFORE USING THE
MIXER.
•
To protect against risk of electrical shock, do not put
Mixer in water or other liquid. This may cause personal
injury or damage to the product.
•
Close supervision is necessary when Mixer is used by or
near children or incapacitated persons.
•
Unplug from outlet while not in use, before putting on or
taking off parts and before cleaning.
FOR PRODUCTS PURCHASED IN THE U.S. AND
CANADA ONLY
•
Avoid contacting moving parts. Keep hands, hair,
clothing, as well as spatulas and other utensils away from
beaters during operation to reduce the risk of injury to
persons and/or damage to the Mixer.
•
Do not operate Mixer with a damaged cord or plug or
after the appliance malfunctions, or is dropped or
damaged in any manner. Return appliance to the nearest
Authorized Sunbeam Appliance Service Center for
examination, repair or electrical or mechanical
adjustment.
To reduce the risk of electrical shock, this appliance has
a polarized plug (one blade is wider than the other).
This plug fits a polarized outlet only one way; if the
plug does not fit fully into the outlet, reverse the plug.
If it still does not fit, contact a qualified electrician.
Do not attempt to defeat this safety feature.
•
The use of attachments not recommended or sold by
Sunbeam may cause fire, electrical shock or injury.
•
Do not use outdoors or for commercial purposes.
•
Do not let cord hang over edge of table or countertop or
touch hot surfaces, including the stove.
•
Remove beaters from Mixer before washing.
•
Do not place Mixer or bowls on or near a hot gas or
electric burner, or in a heated oven.
•
Do not use Mixer for other than intended use.
•
Do not leave Mixer unattended while it is operating.
SPECIAL INSTRUCTIONS
SAVE THESE
INSTRUCTIONS
iii
SUN400_2377_StandMxr_mech 3/14/02 11:38 AM Page 6
contents
Table of Contents
Welcome . . . . . . . . . . . . . . . . . . . . . . . . . . . . . . . . . . . . .1
Features . . . . . . . . . . . . . . . . . . . . . . . . . . . . . . . . . .1
Learning About Your Stand Mixer . . . . . . . . . . . . . . . . .2
Assembling the Stand Mixer . . . . . . . . . . . . . . . . . . . . .3
Operating Instructions . . . . . . . . . . . . . . . . . . . . . . . . . .6
Mixing Guide . . . . . . . . . . . . . . . . . . . . . . . . . . . . . . . . . .7
Cleaning . . . . . . . . . . . . . . . . . . . . . . . . . . . . . . . . . . . . . .8
Welcome
welcome
Congratulations! You are the owner of a SUNBEAM®
Stand Mixer.
Before you use this product for the first time, please take
a few moments to read these instructions and keep it for
reference. Pay particular attention to the Safety
Instructions provided. Please review the product service
and warranty statements. For your future reference,
please note:
Date product received:
Service number:
(Located on the bottom of the stand mixer)
Helpful Hints . . . . . . . . . . . . . . . . . . . . . . . . . . . . . . . . . .9
Breads . . . . . . . . . . . . . . . . . . . . . . . . . . . . . . . . . . . . . .10
Using Dough Hooks . . . . . . . . . . . . . . . . . . . . . . .11
Tips . . . . . . . . . . . . . . . . . . . . . . . . . . . . . . . . . . . . .12
One-Year Limited Warranty . . . . . . . . . . . . . . . . . . . . .14
How to Obtain Warranty Service . . . . . . . . . . . .14
FEATURES
Thank you for choosing the SUNBEAM® Mixer. For
generations we have been helping cooks prepare moist
cakes, light and fluffy meringue and chewy cookies.
You can even make bread dough with your SUNBEAM®
Mixmaster® Mixer.
The SUNBEAM® Mixmaster® Mixer offers you a choice
of 12 different mixing speeds.
The Bowl-Fit Beaters and Bowls have been designed
to mix ingredients thoroughly and evenly.
No problem ejecting the beaters either – just push the
Ejector Button located on the side of the handle.
You’ll love being able to make so many things with
your Mixer!
iv
1
SUN400_2377_StandMxr_mech 3/14/02 11:38 AM Page 8
your mixer
stand mixer
Learning About Your Stand Mixer
Assembling the Stand Mixer
A. Beater Ejector
E. Headlock
J. Bowl-Fit Beaters
B. BURST OF
POWER®
Feature
F. Stand
Ka. Large Mixing
Bowl
Before assembling the mixer, be sure the speed
control dial is in the OFF position and the electric
cord is unplugged.
G. Dough Hooks
H. Turntable
Locator Switch
C. Speed Control
Dial
Kb. Small Mixing
Bowl
Attaching the Turntable
Place the revolving turntable into the base of the
stand by pressing the turntable into the center hole
of the adjustment slot until it snaps into place.
I. Turntable
D. Mixer-Release
Trigger
Adjusting the Turntable
The turntable must be adjusted depending upon
which bowl size is being used (see “Adding the
Mixing Bowl”). To adjust, press down on the
turntable locator switch and slide switch to the
proper icon.
B
A
C
Attaching and Removing Mixer Head
Ka
To attach the mixing head, press in on the mixerrelease trigger, located at the rear of the stand.
Kb
D
E
Place the mixer head on the stand so that the metal
pivot on the bottom of the mixer head goes into the
latched opening on the top of the stand.
As you release pressure from the mixer-release
trigger, the top of the latch should clamp around the
metal pivot. Once the mixing head is lowered into
position, it will lock into place.
J
F
I
H
2
G
To raise the mixing head, press the head lock button
downward while pulling up on the handle of the
mixing head. Once unlocked, the mixing head can be
removed by pressing the mixer release trigger. Be sure
the mixer head is securely in position before using.
NOTE: This mixer is NOT intended for use away
from the stand.
3
SUN400_2377_StandMxr_mech 3/14/02 11:38 AM Page 10
assembling
assembling
Assembling
Assembling
Adding the Mixing Bowl
ATTACHING THE DOUGH HOOKS
Move the turntable locator switch to the proper
setting – the large bowl icon if you are using the
large bowl; the small bowl icon if you are using a
small bowl. Place the desired mixing bowl onto the
turntable.
Set the speed dial in the OFF position and unplug
the electric cord from the electrical outlet. Lift mixer
head up and back to tilt it out of the way of the
bowl, while holding it in an upright position.
Mixing bowls should NEVER be used in a
conventional oven, microwave oven, on top of the
range or on any other heated surface. If mixing
bowls are scratched or chipped, do not use mixer.
Mixer bowl should not be used to blend in hot
liquids.
CONE SHAPED
BEATER
SQUARE
BEATER
The dough hook with the small washer and foot
goes into the socket on the side of the mixer nearest
the side of the bowl. The other dough hook with the
large washer goes into the socket nearest the center
of the bowl. See the dough hook symbols located on
the bottom of the mixer head.
Attaching the Beaters
Be sure the speed control dial is in the OFF position
and unplug electric cord from the electrical outlet.
Lift mixer head up and back to pull it out of the
way of the bowl.
NOTE: It is important that the beaters go into the
correct sockets. Otherwise the mixer will not give
you the proper mixing action. Do not risk ruining a
recipe or damaging your mixer. Read the following
instructions carefully.
One of the beaters is shaped like a cone and has a
nylon button on the bottom. It goes into the socket
on the side of the mixer nearest the side of the
bowl. The other beater is square-shaped and goes
into the socket nearest the center of the bowl. See
beater symbols located on the bottom of the mixer
head.
NOTE: The dough hooks must go into the correct
sockets. The mixer will operate with the dough
hooks in the wrong position. However, you will not
get proper kneading action and you could risk
ruining a recipe or damaging your mixer. Read the
following instructions carefully.
NYLON
BUTTON
SIDE OF BOWL
Insert the beaters, one at a time, using a
combination pressing and twisting motion, until the
beaters snap into position.
4
If a beater should not properly snap into place, pull
it out of the socket and rotate it one quarter turn.
Reinsert the beater into the socket until it snaps
into position.
CONE
BEATER
SQUARE
BEATER
5
SUN400_2377_StandMxr_mech 3/14/02 11:38 AM Page 12
operating
Mixing Guide
Operating Instructions
ABOUT THE SPEED CONTROL DIAL
The speed control dial is used for turning the mixer
ON and OFF and for selecting its 12 mixing speeds.
SPEED
INDICATOR
SPEED
CONTROL
DIAL
Rotate the speed control dial in a clockwise
direction to increase mixing speed; and in a counterclockwise direction to decrease mixing speed.
As you rotate the speed control dial, notice that a
numbered speed is aligned with the indicator on top
of the mixer head. This numbered speed indicates
the speed at which the mixer is operating.
Rotate the speed control dial until the indicator is
opposite the numbered speed you wish to use.
SPEED
SETTING
1
MIXING
GUIDE
Fold-Kneaded
2
Stir
3
Blend
4
Mix
5
Combine
6
Cake Mixes
7
Cream
8
Whip
9
Whip/Cream
10
11
Desserts
Frostings
12
Egg Whites
MIXING GUIDE
BURST OF POWER® FEATURE
Press down on button or top handle to
automatically increase the beater speed by 150
RPM for an immediate boost of power.
HEAD LOCK
The head lock feature locks the mixing head in the
down position for added control while mixing and
locks it in the up position for added convenience
while cleaning.
To unlock, press down the button on the side of the
stand.
To lock, lower mixing head until it automatically
locks in place.
guide
EXAMPLE
Use when mixing dry ingredients or when
folding two portions of a recipe together,
such as a beaten egg white into a batter
or when directions call for LOW speed.
Use for kneading bread.
Use when stirring liquid ingredients or
when gentle action is needed to moisten
dry ingredients.
Use when quick breads require a brisk
action, just enough to blend ingredients
but not enough to develop a smooth
batter.
Use when mixing dry ingredients and
liquid ingredients together alternately in
a recipe.
Use when recipe calls for combining
ingredients together.
Use when preparing packaged cake
mixes or when directions call for
MEDIUM speed.
Use when creaming sugar and butter
together.
Use to whip potatoes or to develop a
smooth batter.
Use to whip whipping cream or to
develop a light, fluffy texture.
Use to beat air into whipped desserts.
Use when preparing light, fluffy frostings
and candies.
Use when aerating eggs and egg whites.
Use when directions call for HIGH speed.
NOTE: Due to variations in ingredient temperatures and quantities, the Mixing
Guide speeds are only suggested. If necessary, adjust speeds as needed to
achieve desired results.
6
7
SUN400_2377_StandMxr_mech 3/14/02 11:38 AM Page 14
cleaning
hints
Caring For Your Mixer
Helpful Hints
EJECTING THE BEATERS OR DOUGH HOOKS
MIXING AND BAKING SUGGESTIONS
After you’ve finished mixing, turn the speed control
dial to OFF and unplug the electric cord from the
electrical outlet. Push the ejector button located near
the handle to remove beaters or dough hooks.
•
Ingredients should be added to the mixing bowl as they
are specified in the recipe. When combining dry and
wet ingredients, you may wish to moisten ingredients
on Speed 1 or 2, then turn to the desired mixing speed.
•
Use the mixing speed that is recommended in the
recipe. Use the handy mixing guide on the speed
control dial of the mixer to help you find the correct
speed to use.
•
If times are specified in the recipe, use them! BE
CAREFUL NOT TO OVERMIX. Overmixing can
cause the mixture to become very tough.
•
Should an object, such as a spatula, fall into the bowl
while the mixer is operating, turn the mixer OFF
immediately. Then, remove the object.
•
Remove beaters and place in sink for easy clean-up.
•
When preparing your favorite dish, DO NOT exceed
3 1/2 cups of flour in any recipe.
Scrape excess batter off the beaters using a rubber or
plastic spatula. Do not strike beaters on the rim of
the bowl.
CLEANING YOUR MIXER
To clean the mixer, wipe the mixer head, stand and
turntable with a damp cloth, then dry. DO NOT
IMMERSE THE MIXER HEAD OR STAND IN
WATER. Avoid the use of abrasive cleaners, as they
may mar the finish of the mixer.
Wash the beaters and bowls in hot, soapy water after
each use. Rinse thoroughly and dry. Beaters and
bowls may also be washed in an automatic
dishwasher.
STORING YOUR MIXER
Store the mixer in a dry location, such as on a
countertop or table top, or in a closet or cupboard.
Insert the beaters into the proper sockets. Place the
dough hooks in the mixing bowl.
Store the bowl(s) on the turntable. The beaters will
help hold the bowl in position. Wind the electric cord
into a coil, secure it with a twist fastener.
MAINTENANCE
The motor of your stand mixer has been carefully
lubricated at the factory and does not require any
additional lubricant. Other than the recommended
cleaning, no further user maintenance should be
necessary.
To Order additional ACCESSORIES,
CALL 1-800-458-8407.
DESCRIPTION
Dough Hooks
Beater
Large Glass Bowl
Small Glass Bowl
Large Stainless Steel Bowl
Small Stainless Steel Bowl
MODEL NO.
4964
4950
4938
4939
4951
4952
Return the mixer to the nearest Authorized Sunbeam
Service Center for servicing or repairs.
8
9
SUN400_2377_StandMxr_mech 3/14/02 11:38 AM Page 16
Breads
breads
SPECIAL INSTRUCTIONS FOR MAKING
KNEADED BREADS
When making kneaded breads, your mixer will
require more care than when making ordinary
mixtures, such as cake batter and cookie dough.
The elasticity of the bread dough and the shape of the
dough hooks may cause your mixer to do some
unusual things.
The bowl may tend to rock back and forth. We
suggest that you guide the bowl with one hand to
help control the rocking action. AVOID GETTING
YOUR HANDS TOO NEAR THE DOUGH HOOKS!
The kneading action may cause the mixer to slide on
a slippery work surface. Be sure the work surface and
rubber feet on the bottom of the mixer are clean and
dry.
CAUTION: Do not use the mixer too near the edge of
a table or counter top, where it could fall off.
dough hooks
Using Dough Hooks
BREAD MAKING INSTRUCTIONS
DO NOT LEAVE YOUR MIXER UNATTENDED
WHEN USING THE DOUGH HOOKS.
Ingredients should be added to the mixing bowl as
they are specified in the recipe.
Combine a small portion of the dry ingredients
with the wet ingredients. Mix on Speed 6. Continue
adding dry ingredients until the mixture becomes
sticky, then turn to Speed 1. Gradually add
remaining dry ingredients.
If there is high humidity in the air, it may be
necessary to add additional flour to the recipe. The
high humidity could also extend the amount of time
necessary for baking.
Guide the mixing bowl with your hands. Use
caution to keep hands out of the way of the dough
hooks.
Do not attempt to scrape the bowl while the mixer
is operating. Stop the mixer and scrape the sides of
the bowl as necessary. Use a rubber or plastic
spatula only.
DO NOT attempt to feed dough into the dough
hooks with your hands, a spatula or any other
utensil while the mixer is plugged into an outlet or
in operation.
If times are specified in the recipe, use them! BE
CAREFUL NOT TO OVERMIX. Overmixing can
cause the mixture to become tough. We suggest that
your total mixing time should be 6 – 8 minutes.
Should an object, such as a spatula, fall into the
bowl while the mixer is operating, turn the mixer
OFF immediately. Then remove the object. Remove
dough hooks and place in sink for easy clean-up.
10
11
SUN400_2377_StandMxr_mech 3/14/02 11:38 AM Page 18
Tips
tips
Tips
tips
DOUGH RISING TIPS
HOW TO SHAPE DOUGH FOR A LOAF PAN
A large, well-greased, glass mixing bowl is an
excellent container in which to raise or proof yeast
dough. The ideal temperature is 85°F / 30°C in an
area that is draft free. Cover with a light cloth. The
final rising should be after the dough has been
shaped and placed on the greased baking sheet or
pan recommended in the recipe. Again, cover the
rising dough and place in a warm, draft-free area. If
you live in a high altitude area, yeast breads will
require a shorter rising time. Allow the dough to rise
only until it has doubled in size. Slightly less flour
should be used because flour is dryer at higher
altitudes.
1. Using a rolling pin, roll dough into a rectangle.
2. Roll dough into a loaf, starting from narrow end.
HOW TO PUNCH DOWN YEAST DOUGH
1. Plunge fist into center of risen dough to punch
out excess air.
3. Flatten ends with sides of hands, as shown.
2. Fold outer edges over into center. Turn dough
over and let rise until doubled, if recipe directions
so specify.
4. Pinch along seam to seal.
5. Fold ends under and place seam-side down in a
well-greased loaf pan.
12
13
SUN400_2377_StandMxr_mech 3/14/02 11:38 AM Page 20
warranty
One-Year Limited Warranty
Sunbeam Products, Inc. (“Sunbeam”) warrants that for a period of ONE
year from the date of purchase, this product will be free from defects in
material and workmanship. Sunbeam, at its option, will repair or replace
this product or any component of the product found to be defective during
this warranty period. Replacement will be made with a new or
remanufactured product or component. If the product is no longer available,
replacement may be made with a similar product of equal or greater value.
This is your exclusive warranty.
Notes
notes
This warranty is valid for the original retail purchaser from the date of
initial retail purchase and is not transferable. Keep the original sales receipt.
Proof of purchase is required to obtain warranty performance. Sunbeam
dealers, service centers or retail stores selling Sunbeam products do not have
the right to alter, modify or any way change the terms and conditions of this
warranty.
This warranty does not cover normal wear of parts or damage resulting
from any of the following: negligent use or misuse of the product, use on
improper voltage or current, use contrary to the operating instructions,
disassembly, repair or alteration by anyone other than Sunbeam or an
Authorized Service Center. Further, the warranty does not cover Acts of God
or nature, such as fire, flood, hurricanes and tornadoes.
Sunbeam shall not be liable for any incidental or consequential damages
caused by the breach of any express or implied warranty. Except to the extent
prohibited by applicable law, any implied warranty of merchantability or
fitness for a particular purpose is limited in duration to the duration of the
above warranty. Some states, provinces or jurisdictions do not allow the
exclusion or limitation of incidental or consequential damages or limitations
on how long an implied warranty lasts, so the above limitations of exclusion
may not apply to you. This warranty gives you specific legal rights, and you
may also have other rights that vary from state to state or province to
province. NOTE: For products aquired outside the United States, please see
country specific warranty insert.
HOW TO OBTAIN WARRANTY SERVICE
Take the product to an Authorized Sunbeam Service Center. You can find the
nearest Authorized Sunbeam Service Center by calling 1 800 458-8407 or
visit our Web site at www.sunbeam.com.
DO NOT RETURN THIS PRODUCT TO THE PLACE OF PURCHASE
14
15
SUN400_2377_StandMxr_mech 3/14/02 11:38 AM Page 22
Impreso en China
N. P. 109541
Nos. de patente EE. UU. 5,782,558; D395,572
©2002 Sunbeam Products, Inc. Todos los derechos reservados.
Sunbeam es marca comercial registrada de Sunbeam Products, Inc.
Distribuido por Sunbeam Products, Inc.
Boca Raton, FL 33431
NO
ENVÍE ESTE PRODUCTO A LA DIRECCIÓN QUE APARECE MÁS ARRIBA
www.sunbeam.com
Para hacer consultas sobre el producto:
Sunbeam Consumer Service
P. O. Box 948389
Maitland, FL 32794-8389
1.800.458.8407
ENVÍE ESTE PRODUCTO AL LUGAR DONDE LO COMPRÓ
TO THE
P LACE
OF
P URCHASE
For product questions:
Sunbeam Consumer Service
P. O. Box 948389
Maitland, FL 32794-8389
1.800.458.8407
www.sunbeam.com
D O N OT S END P RODUCT
TO THE
A BOVE A DDRESS
©2002 Sunbeam Products, Inc. All rights reserved.
Sunbeam is a registered trademark of Sunbeam Products, Inc.
Distributed by Sunbeam Products, Inc.
Boca Raton, FL 33431
U.S. Patent Nos. 5,782,558; D395,572
Printed in China
P. N. 109541
NO
D O N OT S END T HIS P RODUCT
SUN400_2377_StandMxr_mech 3/14/02 11:38 AM Page 2
STAND MIXER
Model 2377
User
Manual
del Usuario
Manual
MODELO 2377
BATIDORA DE PIE
seguridad
Seguridad
Al usar aparatos eléctricos, siga siempre las precauciones
eléctricas básicas, incluidas las siguientes:
Esta unidad es para uso doméstico únicamente.
LEA TODAS LAS INSTRUCCIONES ANTES DE USAR
LA BATIDORA.
•
Para protegerse contra el riesgo de un choque eléctrico,
no sumerja la batidora en agua ni en ningún otro líquido.
Esto puede causarle lesiones personales o dañar el
producto.
•
Se debe vigilar cuidadosamente el uso de la batidora por
parte de niños o personas incapacitadas o cerca de ellas.
•
Desenchúfela del tomacorriente cuando no la use, antes
de colocar o sacar implementos y antes de limpiarla.
Evite el contacto con las partes móviles. Mantenga las
manos, el cabello, la ropa , las espátulas y demás
utensilios lejos de las paletas durante el funcionamiento
para reducir el riesgo de lesiones personales y/o daños a
la batidora.
•
No haga funcionar la batidora si tiene el cable o el
enchufe dañado, después de un mal funcionamiento, o si
se cae o se daña de alguna otra manera. Devuelva el
aparato al Centro de Servicio Autorizado para
Electrodomésticos Sunbeam más cercano para su
reparación o su ajuste eléctrico o mecánico.
•
El uso de accesorios no recomendados o no vendidos por
Sunbeam puede causar un incendio, choque eléctrico o
lesiones.
•
No usar al aire libre ni con fines comerciales.
•
No permita que el cable cuelgue del borde de la mesa o
del mostrador ni que toque superficies calientes, incluida
la cocina.
•
Reitre las paletas de la batidora antes de lavarlas.
•
No ponga la batidora ni los tazones sobre o cerca de una
estufa de gas ni eléctrica caliente ni en un horno caliente.
•
No use la batidora para fines que no sean aquéllos para
los que está destinada.
•
No deje la batidora sin vigilancia mientras esté
funcionando.
Al usar por primera vez su batidora MIXMASTER® es
posible que sienta olor y que salga una pequeña hilera
de humo del motor de la batidora. Esto es provocado
por el termocurado del aislamiento que protege el motor
y es normal. Luego de los primeros usos, este efecto
desaparece.
INSTRUCCIONES ESPECIALES
PARA PRODUCTOS ADQUIRIDOS EN LOS EE.UU.
Y CANADÁ ÚNICAMENTE
Para reducir el riesgo de choque eléctrico, este aparato
tiene un enchufe polarizado (una pata es más ancha
que la otra). Este enchufe calza en un tomacorriente
polarizado sólo de una manera; si el enchufe no cabe
totalmente en el tomacorriente, gire el enchufe.
Si aún así no calza, consulte a un electricista calificado.
No intente anular esta característica de seguridad.
GUARDE ESTAS
INSTRUCCIONES
iii
SUN400_2377_StandMxr_mech 3/14/02 11:38 AM Page 40
•
•
ii
seguridad
SALVAGUARDAS IMPORTANTES
seguridad
Seguridad
Al usar aparatos eléctricos, siga siempre las precauciones
eléctricas básicas, incluidas las siguientes:
Esta unidad es para uso doméstico únicamente.
LEA TODAS LAS INSTRUCCIONES ANTES DE USAR
LA BATIDORA.
•
Para protegerse contra el riesgo de un choque eléctrico,
no sumerja la batidora en agua ni en ningún otro líquido.
Esto puede causarle lesiones personales o dañar el
producto.
•
Se debe vigilar cuidadosamente el uso de la batidora por
parte de niños o personas incapacitadas o cerca de ellas.
•
Desenchúfela del tomacorriente cuando no la use, antes
de colocar o sacar implementos y antes de limpiarla.
Evite el contacto con las partes móviles. Mantenga las
manos, el cabello, la ropa , las espátulas y demás
utensilios lejos de las paletas durante el funcionamiento
para reducir el riesgo de lesiones personales y/o daños a
la batidora.
•
No haga funcionar la batidora si tiene el cable o el
enchufe dañado, después de un mal funcionamiento, o si
se cae o se daña de alguna otra manera. Devuelva el
aparato al Centro de Servicio Autorizado para
Electrodomésticos Sunbeam más cercano para su
reparación o su ajuste eléctrico o mecánico.
•
El uso de accesorios no recomendados o no vendidos por
Sunbeam puede causar un incendio, choque eléctrico o
lesiones.
•
No usar al aire libre ni con fines comerciales.
•
No permita que el cable cuelgue del borde de la mesa o
del mostrador ni que toque superficies calientes, incluida
la cocina.
•
Reitre las paletas de la batidora antes de lavarlas.
•
No ponga la batidora ni los tazones sobre o cerca de una
estufa de gas ni eléctrica caliente ni en un horno caliente.
•
No use la batidora para fines que no sean aquéllos para
los que está destinada.
•
No deje la batidora sin vigilancia mientras esté
funcionando.
Al usar por primera vez su batidora MIXMASTER® es
posible que sienta olor y que salga una pequeña hilera
de humo del motor de la batidora. Esto es provocado
por el termocurado del aislamiento que protege el motor
y es normal. Luego de los primeros usos, este efecto
desaparece.
INSTRUCCIONES ESPECIALES
PARA PRODUCTOS ADQUIRIDOS EN LOS EE.UU.
Y CANADÁ ÚNICAMENTE
Para reducir el riesgo de choque eléctrico, este aparato
tiene un enchufe polarizado (una pata es más ancha
que la otra). Este enchufe calza en un tomacorriente
polarizado sólo de una manera; si el enchufe no cabe
totalmente en el tomacorriente, gire el enchufe.
Si aún así no calza, consulte a un electricista calificado.
No intente anular esta característica de seguridad.
GUARDE ESTAS
INSTRUCCIONES
iii
SUN400_2377_StandMxr_mech 3/14/02 11:38 AM Page 40
•
•
ii
seguridad
SALVAGUARDAS IMPORTANTES
Índice temático
índice
bienvenido
Bienvenido
Instrucciones de operación . . . . . . . . . . . . . . . . . . . . . 6
¡Felicitaciones! Usted es propietario de una batidora de pie
SUNBEAM®.
Antes de usar este producto por primera vez, tómese
unos minutos para leer estas instrucciones y guárdelas
para consultarlas cuando sea necesario. Preste
especial atención a las instrucciones de seguridad
proporcionadas. Lea también la información sobre
servicio y garantía del producto. Para referencia futura,
anote:
Guía de batido . . . . . . . . . . . . . . . . . . . . . . . . . . . . . . . . 7
Fecha de recepción del producto:
Limpieza . . . . . . . . . . . . . . . . . . . . . . . . . . . . . . . . . . . . . 8
Número de servicio:
(Ubicado en la parte inferior de la batidora de pie)
Bienvenido . . . . . . . . . . . . . . . . . . . . . . . . . . . . . . . . . . . 1
Características y funciones . . . . . . . . . . . . . . . . . 1
Descripción de su batidora de pie . . . . . . . . . . . . . . . 2
Montaje de la batidora de pie . . . . . . . . . . . . . . . . . . . 3
Consejos útiles . . . . . . . . . . . . . . . . . . . . . . . . . . . . . . . 9
Panes. . . . . . . . . . . . . . . . . . . . . . . . . . . . . . . . . . . . . . . 10
Uso de los ganchos para amasar . . . . . . . . . . . . 11
Consejos . . . . . . . . . . . . . . . . . . . . . . . . . . . . . . . . 12
Garantía limitada por un año . . . . . . . . . . . . . . . . . . . 14
Cómo solicitar servicio de garantía . . . . . . . . . . 14
CARACTERÍSTICAS Y FUNCIONES
Gracias por elegir la Batidora SUNBEAM®. Por
generaciones hemos ayudado a los cocineros a preparar
pasteles jugosos, ligeros y esponjosos merengues y
apetitosas galletas. Puede incluso amasar pan con su
Batidora SUNBEAM® Mixmaster®.
La Batidora SUNBEAM® Mixmaster® le ofrece una gama
de 12 velocidades de batido diferentes.
Las paletas adaptadas al tazón y los tazones han sido
diseñados para mezclar los ingredientes en forma
completa y uniforme.
Retirar las paletas no es un problema, simplemente hay
que pulsar el Botón eyector ubicado al costado del
mango.
¡Estará encantado de poder hacer tantas cosas con
su batidora!
1
SUN400_2377_StandMxr_mech 3/14/02 11:38 AM Page 38
iv
su batidora
Batidora de pie
Descripción de su batidora de pie
Montaje de la batidora de pie
A. Eyector de
paletas
E. Traba del
cabezal
J. Paletas ajustadas
al tazón
B. Función BURST
OF POWER®
F. Pie
Ka. Tazón grande
Antes de montar la batidora, asegúrese de que la
perilla de control de velocidad esté en posición OFF
(APAGADO) y de que el cable de alimentación esté
desenchufado.
G. Ganchos para
amasar
Kb. Tazón pequeño
Colocación del plato giratorio
C. Perilla de
control de
velocidad
D. Gatillo para
retirar la
batidora
H. Interruptor
localizador del
plato giratorio
Ponga el plato giratorio en la base del pie
presionándolo en el orificio central de la ranura de
ajuste hasta que calce.
I. Plato giratorio
Ajuste del plato giratorio
El plato giratorio debe ajustarse según el tamaño
del tazón utilizado (ver “Colocación del tazón”).
Para ajustarlo presione hacia abajo el interruptor
localizador del plato giratorio y deslícelo hasta el
icono que corresponda.
B
A
C
Colocación y extracción del cabezal
de la batidora
Ka
Para colocar el cabezal de la batidora, presione el
gatillo ubicado en la parte posterior del pie.
Kb
D
E
Ponga el cabezal de la batidora sobre el pie de modo
que el pivote de metal de la parte inferior del cabezal
de la batidora calce en el orificio con traba que se
encuentra en la parte superior del pie.
Al soltar el gatillo para retirar la batidora, la parte
superior de la traba debe cerrarse alrededor del
pivote de metal. Al bajar el cabezal de la batidora a
su posición, el cabezal se traba en su lugar.
J
F
I
H
G
Para levantar el cabezal de la batidora, presione el
botón de traba del cabezal hacia abajo mientras tira
hacia arriba del mango del cabezal de la batidora.
Una vez destrabado, se puede retirar el cabezal de la
batidora pulsando el gatillo. Asegúrese de que el
cabezal esté firmemente asentado en su posición antes
de usar la batidora.
NOTA: Esta batidora NO puede usarse fuera del pie.
3
SUN400_2377_StandMxr_mech 3/14/02 11:38 AM Page 36
2
Montaje
montaje
Montaje
Colocación del tazón
COLOCACIÓN DE LOS GANCHOS
PARA AMASAR
Mueva el interruptor localizador del plato giratorio
al punto correcto, al icono del tazón grande, si va a
usar el tazón grande o al icono del tazón pequeño,
si va a usar éste. Ponga el tazón deseado sobre el
plato giratorio.
NUNCA se deben usar los tazones de la batidora en
un horno convencional, horno de microondas, sobre
la cocina o en cualquier otra superficie caliente. Si
los tazones están rayados o cuarteados, no use la
batidora. No se debe usar el tazón de la batidora
para incorporar líquidos calientes.
Ponga la perilla de velocidad en posición OFF
(APAGADA) y desenchufe el cable de alimentación
del tomacorriente. Levante el cabezal de la batidora
hacia arriba y hacia atrás para retirarlo del tazón,
manteniéndolo en posición vertical.
PALETA
CÓNICA
PALETA
CUADRADA
Colocación de las paletas
Asegúrese de que la perilla de control de velocidad
esté en posición OFF (APAGADA) y desenchufe el
cable de alimentación del tomacorriente. Levante el
cabezal de la batidora hacia arriba y hacia atrás
para retirarla del tazón.
NOTA: Es importante que las paletas entren en los
conectores correctos. De lo contrario, la batidora
no funcionará correctamente. No se arriesgue a
arruinar una receta o dañar su batidora. Lea
cuidadosamente las siguientes instrucciones.
Una de las paletas tiene forma de cono y tiene un
botón de nylon en la parte inferior. Debe insertarse
en el conector del lado de la batidora que está más
cerca del costado del tazón. La otra paleta tiene
forma cuadrada y debe insertarse en el conector que
está más cerca del centro del tazón. Vea los
símbolos de las paletas ubicados en la parte inferior
del cabezal de la batidora.
montaje
BOTÓN DE
NYLON
NOTA: Los ganchos para amasar deben colocarse
en el conector correcto. La batidora funciona con
los ganchos para amasar en posición incorrecta, sin
embargo, no logrará un amasado correcto y correrá
el riesgo de arruinar una receta o dañar su
batidora. Lea cuidadosamente las siguientes
instrucciones.
El gancho para amasar con la arandela y el soporte
pequeño debe insertarse en el conector del lado de
la batidora que está más cerca del costado del
tazón. El otro gancho para amasar con la arandela
grande debe insertarse en el conector que está más
cerca del centro del tazón. Vea los símbolos de los
ganchos para amasar en la parte inferior del
cabezal de la batidora.
COSTADO DEL TAZON
Inserte las paletas, de una en una, usando un
movimiento combinado de presión y rotación, hasta
que calcen en su lugar.
4
PALETA PALETA
CUADRADA CUADRADA
5
SUN400_2377_StandMxr_mech 3/14/02 11:38 AM Page 34
Si una paleta no calza correctamente, retírela del
conector y gírela un cuarto de vuelta. Vuelva a
colocar la paleta en el conector hasta que quede
trabada en posición.
Montaje
montaje
Montaje
Colocación del tazón
COLOCACIÓN DE LOS GANCHOS
PARA AMASAR
Mueva el interruptor localizador del plato giratorio
al punto correcto, al icono del tazón grande, si va a
usar el tazón grande o al icono del tazón pequeño,
si va a usar éste. Ponga el tazón deseado sobre el
plato giratorio.
NUNCA se deben usar los tazones de la batidora en
un horno convencional, horno de microondas, sobre
la cocina o en cualquier otra superficie caliente. Si
los tazones están rayados o cuarteados, no use la
batidora. No se debe usar el tazón de la batidora
para incorporar líquidos calientes.
Ponga la perilla de velocidad en posición OFF
(APAGADA) y desenchufe el cable de alimentación
del tomacorriente. Levante el cabezal de la batidora
hacia arriba y hacia atrás para retirarlo del tazón,
manteniéndolo en posición vertical.
PALETA
CÓNICA
PALETA
CUADRADA
Colocación de las paletas
Asegúrese de que la perilla de control de velocidad
esté en posición OFF (APAGADA) y desenchufe el
cable de alimentación del tomacorriente. Levante el
cabezal de la batidora hacia arriba y hacia atrás
para retirarla del tazón.
NOTA: Es importante que las paletas entren en los
conectores correctos. De lo contrario, la batidora
no funcionará correctamente. No se arriesgue a
arruinar una receta o dañar su batidora. Lea
cuidadosamente las siguientes instrucciones.
Una de las paletas tiene forma de cono y tiene un
botón de nylon en la parte inferior. Debe insertarse
en el conector del lado de la batidora que está más
cerca del costado del tazón. La otra paleta tiene
forma cuadrada y debe insertarse en el conector que
está más cerca del centro del tazón. Vea los
símbolos de las paletas ubicados en la parte inferior
del cabezal de la batidora.
montaje
BOTÓN DE
NYLON
NOTA: Los ganchos para amasar deben colocarse
en el conector correcto. La batidora funciona con
los ganchos para amasar en posición incorrecta, sin
embargo, no logrará un amasado correcto y correrá
el riesgo de arruinar una receta o dañar su
batidora. Lea cuidadosamente las siguientes
instrucciones.
El gancho para amasar con la arandela y el soporte
pequeño debe insertarse en el conector del lado de
la batidora que está más cerca del costado del
tazón. El otro gancho para amasar con la arandela
grande debe insertarse en el conector que está más
cerca del centro del tazón. Vea los símbolos de los
ganchos para amasar en la parte inferior del
cabezal de la batidora.
COSTADO DEL TAZON
Inserte las paletas, de una en una, usando un
movimiento combinado de presión y rotación, hasta
que calcen en su lugar.
4
PALETA PALETA
CUADRADA CUADRADA
5
SUN400_2377_StandMxr_mech 3/14/02 11:38 AM Page 34
Si una paleta no calza correctamente, retírela del
conector y gírela un cuarto de vuelta. Vuelva a
colocar la paleta en el conector hasta que quede
trabada en posición.
operación
PERILLA DE CONTROL DE VELOCIDAD
La perilla de control de velocidad se usa para
encender (ON) y apagar (OFF) la batidora, y para
seleccionar sus 12 velocidades de batido.
INDICADOR
DE
VELOCIDAD
PERILLA DE
CONTROL DE
VELOCIDAD
Gire la perilla de control de velocidad hacia la
derecha para aumentar la velocidad de batido y
hacia la izquierda para disminuirla.
A medida que rota la perilla de control de
velocidad, verá que un valor de velocidad se alinea
con el indicador en la parte superior del cabezal de
la batidora. Esta velocidad numerada indica la
velocidad a la cual está funcionando la batidora.
Gire la perilla de control de velocidad hasta que el
indicador esté frente a la velocidad que desee usar.
FUNCIÓN BURST OF POWER®
Presione hacia abajo el botón o el mango superior
para aumentar automáticamente la velocidad de las
paletas en 150 RPM para un refuerzo inmediato de
la potencia.
VELOCIDAD
GUÍA DE
VALOR
BATIDO
1
Incorporar-amasado
2
Revolver
3
Licuar
4
Mezclar
5
Combinar
6
Mezclas para pasteles
7
Crema
8
Batir
9
Batir/Crema
10
11
Postres
Baños
12
Claras de huevo
GUÍA DE
BATIDO
TRABA DEL CABEZAL
La función de traba del cabezal traba el cabezal en
una posición hacia abajo para mayor control
durante el batido y lo traba en la posición hacia
arriba para mayor comodidad de limpieza.
Para destrabarlo, pulse el botón que está al costado
del pie.
Para trabarlo, baje el cabezal de la batidora hasta
que se trabe automáticamente.
guía
Guía de batido
Instrucciones de operación
EJEMPLO
Para mezclar ingredientes secos o
incorporar dos partes de una receta,
como por ejemplo clara de huevo batida
a una masa, o cuando las instrucciones
indican BAJA velocidad. Para amasar
pan.
Para revolver ingredientes líquidos o
cuando se necesita una acción suave
para humedecer ingredientes secos.
Para panes rápidos que requieren una
acción rápida y breve, suficiente para
mezclar los ingredientes pero no como
para hacer una masa lisa.
Para mezclar ingredientes secos y
líquidos en forma alternada según la
receta.
Para combinar los ingredientes según la
receta.
para preparar mezclas para pasteles
envasadas o cuando las instrucciones
requieren velocidad MEDIA.
Para hacer una crema con azúcar y
mantequilla.
Para batir papas o preparar una masa
lisa.
Para batir crema o desarrollar una textura
ligera y esponjosa.
Para incorporar aire en postres batidos.
Para preparar baños o dulces ligeros y
esponjosos.
Para batir huevos y claras.
Para cuando las instrucciones indican
ALTA velocidad.
NOTA: Debido a las variaciones en las temperaturas y las cantidades de los
ingredientes, las velocidades de la Guía de Batido son sólo sugerencias. En
caso necesario, ajuste la velocidad para lograr los resultados deseados.
7
SUN400_2377_StandMxr_mech 3/14/02 11:38 AM Page 32
6
limpieza
Consejos útiles
RETIRO DE LAS PALETAS O LOS GANCHOS
PARA AMASAR
SUGERENCIAS PARA BATIDOS Y HORNEADOS
LIMPIEZA DE LA BATIDORA
Para limpiar la batidora, pase un paño húmedo y
luego un paño seco por el cabezal de la batidora, el
pie y el plato giratorio. NO SUMERJA EL CABEZAL
NI EL PIE DE LA BATIDORA EN EL AGUA. Evite
usar limpiadores abrasivos, ya que pueden arruinar el
acabado de la batidora.
Lave las paletas y los tazones en agua jabonosa
caliente luego de cada uso. Enjuáguelos bien y
séquelos. Las paletas y los tazones también se pueden
lavar en un lavavajillas automático.
ALMACENAMIENTO DE SU BATIDORA
Guarde la batidora en un lugar seco, como por
ejemplo una mesa o un mostrador, o en un armario o
alacena. Ponga las paletas en los conectores correctos.
Coloque los ganchos para amasar en el tazón.
Guarde el(los) tazón(s) en el plato giratorio. Las
paletas ayudarán a mantener el tazón en posición.
Enrolle el cable de alimentación y sosténgalo con un
sujetador flexible.
MANTENIMIENTO
El motor de su batidora de pie ha sido
cuidadosamente lubricado en la fábrica y no
requiere lubricante adicional. Aparte de la limpieza
recomendada, no debería requerirse ningún otro
mantenimiento por parte del usuario.
Devuelva la batidora al Centro de Servicio
Autorizado Sunbeam más cercano para su servicio
o reparación.
•
Debe añadir los ingredientes al tazón según lo
especifica la receta. Al combinar ingredientes secos y
húmedos, quizás desee humedecer los ingredientes en
Velocidad 1 ó 2 y luego pasar a la velocidad de
mezclado deseada.
•
Use la velocidad de batido recomendada en la receta.
Use la guía práctica de batido que tiene la perilla de
control de velocidad para encontrar la velocidad
correcta.
•
Si la receta especifica tiempos, ¡respételos! TENGA
CUIDADO DE NO BATIR DEMASIADO. El batido
excesivo puede hacer que la mezcla se ponga
demasiado dura.
•
En caso de que un objeto, como por ejemplo una
espátula, caiga dentro del tazón mientras la batidora
está en funcionamiento, APÁGUELA (OFF)
inmediatamente. Luego retire el objeto.
•
Retire las paletas y póngalas en el fregadero para
lavarlas fácilmente.
•
Cuando prepare su receta preferida, NO exceda las
3 1/2 tazas de harina nunca.
Para solicitar ACCESORIOS adicionales,
LLAME AL 1-800-458-8407.
DESCRIPCIÓN
MODELO NO.
Ganchos para amasar
4964
Paleta
4950
Tazón de vidrio grande
4938
Tazón de vidrio pequeño
4939
Tazón de acero inoxidable grande
4951
Tazón de acero inoxidable pequeño
4952
9
SUN400_2377_StandMxr_mech 3/14/02 11:38 AM Page 30
Una vez completado el batido, ponga la perilla de
control de velocidad en posición OFF (APAGADA)
y desenchufe el cable de alimentación del
tomacorriente. Pulse el botón eyector que está cerca
del mango para retirar las paletas o los ganchos
para amasar.
Raspe el exceso de mezcla de las paletas usando una
espátula de goma o plástico. No golpee las paletas
contra el borde del tazón.
8
consejos
Cuidado de la batidora
Panes
panes
INSTRUCCIONES ESPECIALES PARA
AMASAR PAN
Al amasar pan, su batidora requerirá mayor cuidado
que cuando prepare mezclas comunes, como por
ejemplo mezcla para pasteles o masa para galletas.
La elasticidad de la masa para pan y la forma de los
ganchos para amasar pueden hacer que su batidora se
comporte de modo inusual.
El tazón puede tender a moverse hacia adelante y
hacia atrás. Sugerimos que guíe el tazón con una
mano para ayudar a controlar este movimiento de
vaivén. ¡EVITE ACERCAR DEMASIADO LAS
MANOS A LOS GANCHOS PARA AMASAR!
El amasado puede hacer que la batidora se deslice en
una superficie de trabajo resbaladiza. Asegúrese de
que la superficie de trabajo y los topes de goma de la
parte inferior de la batidora estén limpios y secos.
PRECAUCIÓN: No use la batidora demasiado cerca
del borde de una mesa o mostrador de donde pueda
caerse.
ganchos para
amasar
Uso de los ganchos para amasar
INSTRUCCIONES PARA HACER PAN
NO DEJE LA BATIDORA SIN VIGILANCIA
MIENTRAS USA LOS GANCHOS PARA
AMASAR.
Debe añadir los ingredientes al tazón según lo
especifica la receta.
Combine una pequeña cantidad de los ingredientes
secos con los ingredientes húmedos. Mezcle a
Velocidad 6. Continúe agregando ingredientes secos
hasta que la mezcla se haga pegajosa, luego pase a
Velocidad 1. Añada gradualmente los ingredientes
secos restantes.
Si hay mucha humedad ambiente, puede resultar
necesario añadir más harina a la receta. La alta
humedad también podría prolongar el tiempo de
horneado necesario.
Guíe el tazón con las manos. Evite acercar
demasiado las manos a los ganchos para amasar.
No intente raspar el tazón mientras la batidora esté
funcionando. Pare la batidora y raspe los costados
del tazón según sea necesario. Use solamente una
espátula de goma o plástico.
NO intente poner masa en los ganchos con las
manos, con una espátula o con cualquier otro
utensilio mientras la batidora esté enchufada en un
tomacorrientes o funcionando.
Si la receta especifica tiempos, ¡respételos! TENGA
CUIDADO DE NO BATIR DEMASIADO. El
batido excesivo puede hacer que la mezcla se ponga
demasiado dura. Sugerimos que el tiempo total de
batido sea de 6 - 8 minutos.
En caso de que un objeto, como por ejemplo una
espátula, caiga dentro del tazón mientras la
batidora está en funcionamiento, APÁGUELA
(OFF) inmediatamente. Luego retire el objeto.
Retire los ganchos para amasar y póngalos en el
fregadero para lavarlos fácilmente.
11
SUN400_2377_StandMxr_mech 3/14/02 11:38 AM Page 28
10
Consejos
consejos
CONSEJOS PARA LEUDAR
Un tazón de vidrio grande, bien engrasado, es un
excelente envase para hacer leudar una masa con
levadura. La temperatura ideal es 85°F / 30°C en
una zona sin corrientes de aire. Cúbralo con un
paño ligero. El levado final debe realizarse después
de que se ha conformado la masa y se la ha
colocado en la placa de horneado engrasada
recomendada en la receta. Nuevamente, cubra la
masa que se está leudando y póngala en una zona
cálida, sin corrientes de aire. Si vive a gran altitud
sobre el nivel del mar, el pan con levadura demorará
menos en leudar. Deje que la masa leude sólo hasta
que haya duplicado su tamaño. Use un poco menos
de harina porque la harina es más seca a mayor
altitud.
CÓMO AMASAR LA MASA CON LEVADURA
1. Primero presione el centro de la masa levada para
que salga el exceso de aire.
Consejos
consejos
CÓMO CONFORMAR LA MASA EN FORMA
DE HOGAZA
1. Con un rodillo para amasar, estire la masa hasta
formar un rectángulo.
2. Enrolle la masa para formar una hogaza,
comenzando por el extremo más angosto.
3. Aplane los extremos con los costados de las
manos, como se muestra.
2. Doble los extremos hacia el centro. Dé vuelta la
masa y déjela levar hasta que duplique su
volumen, si así lo indica la receta.
4. Pellizque la unión para sellarla.
5. Doble los extremos hacia abajo y apóyela con la
unión hacia abajo en una bandeja para pan bien
engrasada.
13
SUN400_2377_StandMxr_mech 3/14/02 11:38 AM Page 26
12
Consejos
consejos
CONSEJOS PARA LEUDAR
Un tazón de vidrio grande, bien engrasado, es un
excelente envase para hacer leudar una masa con
levadura. La temperatura ideal es 85°F / 30°C en
una zona sin corrientes de aire. Cúbralo con un
paño ligero. El levado final debe realizarse después
de que se ha conformado la masa y se la ha
colocado en la placa de horneado engrasada
recomendada en la receta. Nuevamente, cubra la
masa que se está leudando y póngala en una zona
cálida, sin corrientes de aire. Si vive a gran altitud
sobre el nivel del mar, el pan con levadura demorará
menos en leudar. Deje que la masa leude sólo hasta
que haya duplicado su tamaño. Use un poco menos
de harina porque la harina es más seca a mayor
altitud.
CÓMO AMASAR LA MASA CON LEVADURA
1. Primero presione el centro de la masa levada para
que salga el exceso de aire.
Consejos
consejos
CÓMO CONFORMAR LA MASA EN FORMA
DE HOGAZA
1. Con un rodillo para amasar, estire la masa hasta
formar un rectángulo.
2. Enrolle la masa para formar una hogaza,
comenzando por el extremo más angosto.
3. Aplane los extremos con los costados de las
manos, como se muestra.
2. Doble los extremos hacia el centro. Dé vuelta la
masa y déjela levar hasta que duplique su
volumen, si así lo indica la receta.
4. Pellizque la unión para sellarla.
5. Doble los extremos hacia abajo y apóyela con la
unión hacia abajo en una bandeja para pan bien
engrasada.
13
SUN400_2377_StandMxr_mech 3/14/02 11:38 AM Page 26
12
Garantía limitada por un año
garantía
Sunbeam Products, Inc. (“Sunbeam”) garantiza que por un período de
UN año a partir de la fecha de compra, este producto no tendrá defectos
de material ni de mano de obra. Sunbeam, a su elección, reparará o
reemplazará este producto o cualquier componente del mismo que tenga
defectos durante el período de garantía. El reemplazo se realizará por un
producto o componente nuevo o reparado. Si el producto ya no estuviera
disponible, se lo reemplazará por un producto similar de valor igual o
superior. Esta es su garantía exclusiva.
La garantía es válida para el comprador minorista original a partir de la
fecha de la compra original y no es transferible. Conserve el recibo de
compra original. Se requiere que presente un comprobante de compra para
solicitar servicio en garantía. Los agentes y centros de servicio de Sunbeam o
las tiendas minoristas que venden productos Sunbeam no tienen derecho a
adulterar, modificar o cambiar de cualquier otro modo los términos y las
condiciones de esta garantía.
Esta garantía no cubre el desgaste normal de las piezas ni los daños que se
produzcan como resultado de: uso negligente o mal uso del producto, uso
con tensión o corriente inapropiada, uso contrario a las instrucciones de
operación, desarmado, reparación o alteración por un tercero que no sea
Sunbeam o un Centro de Servicio Autorizado Sunbeam. Asimismo, la
garantía no cubre fuerza mayor ni desastres naturales tales como incendios,
inundaciones, huracanes y tornados.
Sunbeam no será responsable de daños incidentales o emergentes
causados por el incumplimiento de ninguna garantía expresa o implícita.
Excepto en la medida prohibida por la ley aplicable, cualquier garantía
implícita de comerciabilidad o aptitud para un fin determinado se limita en
cuanto a su duración a la duración de la garantía antes mencionada. Algunos
estados, provincias o jurisdicciones no permiten la exclusión o limitación de
los daños incidentales o emergentes ni las limitaciones a la duración de
las garantías implícitas, de modo que es posible que la exclusión o las
limitaciones antes mencionadas no se apliquen en su caso. Esta garantía le
otorga derechos legales específicos y es posible que tenga otros derechos que
varíen entre un estado o provincia y otro. NOTA: Para productos adquiridos
fuera de los Estados Unidos, consulte el folleto de garantía específico para el
país correspondiente.
Notas
notas
CÓMO SOLICITAR SERVICIO DE GARANTÍA
Lleve el producto a un Centro de Servicio Autorizado Sunbeam. Encontrará
el Centro de Servicio Autorizado Sunbeam más cercano llamando al
1 800 458-8407 o visitando nuestro sitio web en www.sunbeam.com.
NO DEVUELVA ESTE PRODUCTO AL LUGAR DONDE LO COMPRÓ
15
SUN400_2377_StandMxr_mech 3/14/02 11:38 AM Page 24
14
SUN400_2377_StandMxr_mech 3/14/02 11:38 AM Page 22
Impreso en China
N. P. 109541
Nos. de patente EE. UU. 5,782,558; D395,572
©2002 Sunbeam Products, Inc. Todos los derechos reservados.
Sunbeam es marca comercial registrada de Sunbeam Products, Inc.
Distribuido por Sunbeam Products, Inc.
Boca Raton, FL 33431
NO
ENVÍE ESTE PRODUCTO A LA DIRECCIÓN QUE APARECE MÁS ARRIBA
www.sunbeam.com
Para hacer consultas sobre el producto:
Sunbeam Consumer Service
P. O. Box 948389
Maitland, FL 32794-8389
1.800.458.8407
ENVÍE ESTE PRODUCTO AL LUGAR DONDE LO COMPRÓ
D O N OT S END T HIS P RODUCT
TO THE
P LACE
OF
NO
P URCHASE
For product questions:
Sunbeam Consumer Service
P. O. Box 948389
Maitland, FL 32794-8389
1.800.458.8407
www.sunbeam.com
D O N OT S END P RODUCT
TO THE
A BOVE A DDRESS
©2002 Sunbeam Products, Inc. All rights reserved.
Sunbeam is a registered trademark of Sunbeam Products, Inc.
Distributed by Sunbeam Products, Inc.
Boca Raton, FL 33431
U.S. Patent Nos. 5,782,558; D395,572
Printed in China
P. N. 109541