1
Installing set-up information and the ICC profile (For Windows)
Depending on the type of computer or OS, you
may need to install the monitor set-up information
on your system. If so, follow the steps below to
install the monitor set-up information. (Depending
on the type of computer or OS, command names
and methods may differ. Please follow the
computer's own operation manual while reading
this.)
For Windows 98
Installing monitor set-up information into
Windows 98, and setting the monitor's ICC profile
as a predetermined value.
This explanation assumes that the CD-ROM drive
is "D" drive.
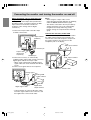
If the "Add New Hardware Wizard" has appeared:
1. Load the accessory CD-ROM into the CD-ROM
drive of the computer.
2. Click [Next].
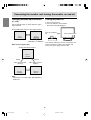
3. Check [Display a list of all the drivers in a
specific location, so you can select the driver
you want.], then click [Next].
4. When [Models] is displayed, click on [Have
disk], confirm that [Copy manufacturer's files
from:] is [D:], and click [OK].
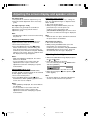
5. Confirm that the monitor details are selected,
then click [Next], [Next], and [Finish]. If the "Add
New Hardware Wizard" appears, repeat the
installation commands beginning from 2
above.
About the ICC profile
An ICC (International Color Consortium) profile is
a file that describes the color reproduction
characteristics of the LCD monitor. Using an
application compatible with an ICC profile, highly
accurate color reproduction can be realized.
- Windows 98/2000/Me/XP all use the ICC profile.
- When installing Windows 98/2000/Me/XP set-up
information (described below), the ICC profile is
also installed. If you would like to install the ICC
profile only, please refer to Installing the ICC
profile on page 30.
- When using the ICC profile, set as follows:
- [DISPLAY MODE]: [STD] or [OFFICE]
- [WHITE BALANCE]: [STD]
- [GAMMA]: [0]
If the "Add New Hardware Wizard" has not
appeared:
1. Load the accessory CD-ROM into the CD-ROM
drive of the computer.
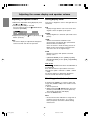
2. Click on the [Start] button. From [Settings],
choose [Control Panel].
3. Double click on [Display].
4. Click on [Settings], [Advanced] and [Monitor].
5. In [Options], check [Automatically detect Plug &
Play monitors] and click on [Change].
6. Click [Next].
7. Click on [Display a list of all the drivers in a
specific location, so you can select the driver
you want.], then click [Next].
8. When [Models] is displayed, click on [Have
disk], confirm that [Copy manufacturer's files
from:] is [D:], and click [OK].
9. Confirm that the monitor details are selected,
then click [Next], [Next], and [Finish].
10. Check that the monitor details are displayed,
then click [Apply].
11. Click [OK], and close the window.
For Windows 95
Installing monitor set-up information into
Windows 95.
This explanation assumes that the CD-ROM drive
is "D" drive.
1. Load the accessory CD-ROM into the CD-ROM
drive of the computer.
2. Click on the [Start] button. From [Settings],
choose [Control Panel].
3. Double click on [Display].
4. Click on [Settings], [Advanced Properties], and
[Monitor], then [Change].
5. Click on [Have disk], confirm that [Copy
manufacturer's files from:] is [D:] then click [OK].
6. Confirm that the monitor details are selected,
and click [OK].
7. Check that the monitor details are displayed,
then click [Apply].
8. Click [OK], and close the window.
28
171AG_gb.P65
28
12/4/2003, 1:14 PM