1
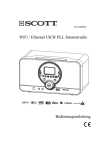
r x 400wl
Wi-Fi Internet / Ethernet/ FM PLL Radio
Instruction Manual
PRECAUTIONS
Follow the advice below for safe and appropriate operations.
ON PLACEMENT
. Do not use the unit in places, which are extremely hot, cold, dusty, or humid.
. Place the unit on a flat and even surface.
. Do not restrict the airflow of the unit by placing it in a place with poor airflow, by
covering it with a cloth, or by placing it on a carpet.
ON SAFETY
. When connecting and disconnecting the AC/DC adapter from the AC mains outlet, grip
the plug and not the cord itself. Pulling the cord may damage it and create a hazard.
. The mains plug must remain readily operable.
. When you are not going to use the unit for a long period of time, disconnect the AC/DC
adapter from the AC mains outlet.
ON AC VOLTAGE
. Before use, check that the voltage that can be borne by the appliance matches your
local mains voltage.
ON CONDENSATION
. When there is condensation inside the unit, the unit may not function normally.
. Let it stand for 1 to 2 hours before turning the power on, or gradually heat the room up
and dry the unit before use.
. Ensure a minimum distance of 5 cm around the apparatus for sufficient ventilation.
. Ensure that the ventilation is not impeded by covering the ventilation openings with
items, such as newspapers, tablecloths, curtains, etc.
. Do not place naked flame sources, such as lighted candles on the apparatus.
. Pay attention to the environmental aspects of battery disposal.
. Use the apparatus only in moderate climates (not in tropical climates).
. Do not expose the apparatus to dripping or splashing.
. Do not place objects filled with liquids, such as vases, on the apparatus.
The lightning flash
with arrowhead symbol
within the triangle is a
warning sign alerting
the user of “dangerous
voltage” inside the unit.
ATTENTION : To reduce the rlsk of
electric shock, do not remove the cover.
There are no user serviceable parts
inside the unit, Refer all servicing to
qualified personnel.
GB- 1
The exclamation point
within the triangle is a
warning sign alerting
the user of important
i n s t r u c t i o n s
accomp anying th e
product.
TABLE OF CONTENTS
PRECAUTIONS……………………………………………………………………
TABLE OF CONTENTS…………………………………………………………..
BOX CONTENTS……..……………………………………………………………
FEATURES…….…………………………………………………………………...
LOCATION OF CONTROLS……………………………………………………...
PREREQUISITES FOR INTERNET RADIO……………………………………
CONNECTIONS……………………………………………………………………
INSTALLING BATTERIES……………………...……………….………………..
BASIC OPERATIONS……………………………….…………………………….
FM RADIO OPERATION……….…………………………………………………
INTERNET RADIO OPERATION…………….…………………….………….…
USB DEVICE AND SD/MMC CARD OPERATION……………………….……
AUX IN FUNCTION………………………………………………………………..
RECORD FUNCTION……………………………………………………………..
MEDIA SERVER……………….…………………………………………………..
MAINTENANCE……………………………………………………………………
TROUBLE SHOOTING GUIDE…………………………………………………..
TECHNICAL SPECIFICATIONS…………………………………………………
1
2
2
2
3
5
5
6
7
9
10
12
12
13
13
14
15
16
BOX CONTENTS
1. Main unit
2. AC/DC adapter
3. Remote control with battery
4. AUX IN cable
5. Interchangeable inlays (x3)
6. Instruction manual
FEATURES
This unit let you enjoy thousands of Internet radio stations as well as your
favorite local FM stations, with following features:
• Access your web radio even when your PC is off. vTuner live internet radio
service provides more than 5000 radios worldwide and more than 10000
regularly updated podcasts.
• Enjoy music recorded on a PC connected to your network.
• Connect the unit to your Internet network wirelessly (Wi-Fi) or with a cable
(Ethernet).
• Five preset stations for each web radio station and local FM radio station.
• With your Internet radio, you can record (for private use only) web radio and
FM radio broadcasts on a USB device or SD/MMC card.
• Play files on a USB device or SD/MMC card and copy files from your USB
device to your SD/MMC card and vice-versa.
• Using the AUX IN jack, you can connect an external audio device to your
radio and use it as a docking station.
• Clock and alarm functions (wake-up at selectable source, snooze function).
• Stylish, flexible design with interchangeable inlays in different colors.
• Firmware can easily be upgraded via the Internet.
Note: Due to continuous improvements, the features may be subject to change without
notice. You should upgrade the firmware regularly by browsing through the menus:
Main menu Æ Settings Æ System Æ Upgrade. Please download the latest update
of the instruction manual at http://www.awox.com/scott.
GB- 2
LOCATION OF CONTROLS
Unit back view
1. Bass reflex hole
2. FM antenna
3. Time back up battery
cover
4. Ethernet jack
5. DC IN 12V jack
1
2
3
4
5
1
Unit front view
1. Speakers
1 2 3 4 5 6 7 8 9 10 11 1
ALARM OFF button
2.
3. ( ) ON/STANDBY button
4. Preset P1 button
5. Preset/Previous
P2/ button
6. Preset/Play/Pause
P3/
button
7. LCD display
8. Preset/Next
P4/ button
9. Preset/Stop
P5/ button
10. VOLUME + button
11. VOLUME - button
12. Interchangeable inlay
21 20 19 18 17 16 15 14 13 12
13. SD/MMC card slot
14. RECORD
button
15. USB port
/
16. Repeat/Shuffle
button
17. SCROLL/SELECT/SNOOZE knob
18. BACK button
19. Headphones jack
20. AUX IN jack
21. IR (Infra-red) remote control sensor
GB- 3
Remote control
7
1. ( ) ON/STANDBY button
2. BACK button
3. DOWN
button
4. Preset P1 button
5. Repeat/Shuffle
/
button
button
6. Preset/Previous P2/
7. SNOOZE button
ALARM OFF button
8.
9. VOLUME +/- buttons
10. SELECT button
11. UP button
12. Preset/Play/Pause P3/
button
13. Preset/Stop P5/ button
14. Preset/Next P4/
button
15. RECORD
button
1
9
2
10
3
11
4
12
5
13
6
14
15
LCD display
1
1. The heading of the menu
2. Connection status (Wi-Fi or Wired)
3. Navigation
4. Volume
5. Clock time
6. The content of the menu
2
6
3
5
Meaning of LCD icons
8
4
Reminders
Connection (Top right)
WiFi connection
Volume
Wired connection
Shuffle
Repeat one
Navigation
Repeat folder
Previous / Next Level
Stereo
Previous / Next Item
Misc. Information
Items
Progress Bar
Folder
Tuning
File
Radio
Action in progress
Play
Pause
Stop
Record
Track
Favorites
Audio Format
WAV
MP3
WMA
Options
Select / Enable
Deselect / Disable
GB- 4
PREREQUISITES FOR INTERNET RADIO
First of all, you will need a broadband Internet connection and a wireless access
point (Wi-Fi) connected to the broadband Internet via a router and a modem
(cable/DSL). You can choose between a wired connection (Ethernet) and a
wireless connection (Wi-Fi).
CONNECTIONS
Note: In order to avoid any malfunctions, do not turn on the unit before making
any connections.
Wired connection (Ethernet)
Connect the unit to the broadband Internet using an
RJ45 Ethernet cable (not supplied) via the router
and broadband modem (cable/DSL) as illustrated.
Follow your router’s instruction manual to ensure a
proper Internet connection.
MODEM
If you do not have a router, you should connect the
unit directly to the modem.
RJ45 ETHERNET
CABLE (NOT
SUPPLIED)
ROUTER
INTERNET
DATA PORT
Wi-Fi connection
Use a router (not supplied) to connect the wireless
access point (Wi-Fi) to the broadband Internet as
illustrated. Should you have problems with the
Internet connection setup, contact your networking
device supplier and/ or Internet service provider.
Note: The unit should work anywhere within a range
of at least 15 metres around the wireless access point.
However, the connection will depend on your router
performance and environmental factors such as the
number/ thickness of the walls, doors or windows.
Configurations
MODEM
ROUTER
INTERNET
DATA PORT
• If your wireless network is protected by Wired Equivalent Privacy (WEP) or WiFi Protected Access (WPA) data encryption, you need to know the WEP or
WPA code in order to connect the unit to the network.
• If your wireless network is configured to accept trusted
stations only, you need to enter the unit MAC address into
your wireless access point. The unit MAC address can be
located by browsing through the menu: Main menu Æ
Settings Æ System Æ Connection Æ Status Æ Configuration.
• To enter the unit MAC address into your wireless access point, you must read
the instructions supplied with the wireless access point.
• For more details on configurations, refer to the “INTERNET RADIO
OPERATION” section.
GB- 5
Connecting the power supply
Insert the AC/DC adapter plug into an AC mains outlet with a 230V AC ~ 50Hz
power source, and the other end to the DC IN 12V jack at the back of the unit.
Connecting an external audio device (e.g. MP3 player)
Connect the line out or headphones jack on an external audio device (such as a
MP3 player) to the unit’s AUX IN jack with the AUX IN cable (supplied).
Connecting headphones
Plug the headphones (not supplied) into the unit’s headphones jack for private
listening. The speaker output will be shut off automatically.
INSTALLING BATTERIES
Installing the remote control battery
1. Remove the battery compartment cover on the bottom of the remote control,
by pressing the left tab to the right whilst removing the cover.
2. Insert a 3V lithium battery (CR2025 or equivalent) with polarity (+) matching
the mark on the bottom of the remote control.
3. Replace the battery compartment cover.
Note: The remote control battery normally lasts for about one year, although it
depends on how often and for what operations the remote control is used.
If the remote control fails to work even when it is operated near the unit,
replace the battery.
Install time back up batteries
Time back up
The clock time can be maintained during a power failure by using 2 x AAA/ LR03
batteries (not supplied). During a power interruption, the time may go forward or
back slightly and may require resetting.
Battery insertion
1. Remove the battery cover on the back of the unit by pressing on the battery
cover catch whilst removing it.
2. Insert 2 x AAA/ LR03 batteries (alkaline batteries are recommended) into the
battery compartment, following the correct polarities marked inside the battery
compartment.
3. Replace the battery cover.
Note: For optimum performance, the batteries should be replaced every 6
months
Precautions when using batteries
1. CAUTION: Danger of explosion if battery is incorrectly replaced. Replace only
with the same or equivalent type of battery.
2. Ensure you follow the correct polarities when installing the batteries (see
marks in the battery compartment). Reversed batteries may damage the
remote control.
3. Exhausted batteries must be removed as they may leak.
4. Dispose of batteries properly according to environmental regulations.
GB- 6
BASIC OPERATIONS
ON/ STANDBY mode
After connecting the power supply (refer to previous section - CONNECTIONS),
press the ( ) ON/STANDBY button to turn on the unit or go to standby mode.
Navigation and number/character entry
Using the buttons on the unit
Turn the SCROLL/SELECT/SNOOZE knob to scroll through
the menu and press it to enter the highlighted item. You can
press the BACK button to return to previous menu. Press and
hold the BACK button to return to the main menu. When
entering numbers, e.g. a time, turn the SCROLL/SELECT/SNOOZE knob to
adjust and press it to confirm. When entering characters, such
as a WEP/WPA key during the Wi-Fi connection set-up, turn
the SCROLL/SELECT/SNOOZE knob to adjust the number/
character and press it to confirm. Use the P2/ , P4/ buttons
to move to the previous or next number/ character. Press and
button) to
hold down the SCROLL/SELECT/SNOOZE knob (or press the
complete and confirm the entry.
Using the remote control
This is similar to using the unit except that you will need to use the UP or
DOWN
button to scroll through the menu and adjust the item. To complete
button as the “press and hold” button
and confirm the entry, press the
operation does not work on the remote control.
In the main menu, you can choose: “FM Radio”, “Internet Radio”, “Media Server”,
“USB/SD/MMC”, “Aux In” and “Settings”.
“Settings” menu:
Settings
Descriptions
Display
Time
Set the hour and minute of the clock time.
“disable”: Disable the alarm function.
Alarm
“set / Set the alarm time and enable alarm
enable”: function.
Select the alarm source: “FM
“select
preset”, “FM tune”, “Internet radio”,
source”:
“USB/ SD/MMC” or “buzzer”.
System
Set up the configuration to connect
“Connection” the Wi-Fi or Ethernet, or check the
connection status.
“Upgrade”: Upgrade the firmware via the Internet.
“Language”: Select the on-screen-display language.
“Reset”: Reset all settings to default values.
GB- 7
TIME set
Set the clock
1. Select Settings ÆTime. The clock time is displayed.
2. Turn the SCROLL/SELECT/SNOOZE knob to adjust the
hour and press it to confirm.
3. Repeat the step (2) to adjust the minutes.
Set the alarm time
1. Select Settings ÆAlarm Æ set/enable. The alarm time will be displayed.
2. Follow the steps (2) to (3) in “Set the clock” to set the alarm time.
The unit allows you to choose the sound to which you would like to wake up.
1. To enable the alarm function, select “Settings” Æ”Alarm” Æ
“set/enable” and if necessary, set the alarm time. Press the
SELECT button to confirm.
2. To select the alarm source, choose “select source”: “FM
preset”, “FM tune” (manual tuning to a local FM radio station), “Internet radio”,
“USB/SD/MMC” and “buzzer”.
3. When the preset alarm time is reached, the unit will switch on with the selected
alarm source.
4. Press the
button to stop the alarm and it will sound again the next day at
the same time.
5. To disable the alarm completely, select “Settings” Æ”Alarm” Æ “disable”.
Note: The default alarm source is the buzzer. When another source is selected
but is not available at the alarm time, it will automatically switch to the
buzzer alarm.
The buzzer volume level is fixed. However the sound level can be adjusted
for the other sources using the VOL +/- button.
SNOOZE function
When the alarm sounds, press the SCROLL/SELECT/SNOOZE knob to stop the
alarm and it will sound again after 8 minutes. This alarm cycle will repeat for up
to one hour. To cancel SNOOZE function and repeat the alarm the next day,
press the
button.
GB- 8
FM RADIO OPERATION
This mode allows you to listen to local FM radio stations.
Listen to FM radio
1. Press the ON/STANDBY ( ) button to turn on the unit.
2. Select FM Radio ÆTune.
3. To search automatically, turn the SCROLL/SELECT
/SNOOZE knob on the unit (or the UP
or DOWN
button on the remote control) and release to tune to a
station.
4. To search manually, press the SCROLL/SELECT/SNOOZE knob once to go
to manual search mode and then turn it to search for a station. Press it again
to return to the auto search mode.
Achieve optimum reception
When listening to a FM radio station, extend and position the FM antenna to
achieve optimum reception.
Preset FM radio stations
You can store up to five preset stations for FM radio.
1. Tune the radio to a desired station, then press and hold
down the preset buttons P1 to P5 on the unit to store the
station.
2. Repeat step (1) to store any other desired stations.
Note: The press and hold button operation does not work on the remote control.
Listen to a preset FM station
Direct entry
In FM radio mode, press one of the preset buttons P1 to P5 to listen to the preset
station.
Via the “Favorites” menu
The preset stations are stored with the favorite stations in the
“Favorites” menu. Select the following menus: “FM Radio” Æ
“Favorites” and select the desired preset station. Press the
SELECT button to confirm.
GB- 9
INTERNET RADIO OPERATION
Your unit can be connected to a wireless network (Wi-Fi) or an Ethernet. This
allows you to enjoy the vTuner live Internet radio service.
Note: Before operating this mode, make sure that you have read and understood
the instructions in “PREREQUISITES FOR INTERNET RADIO” and
“CONNECTIONS”.
Configurations setup
Wired connection (Ethernet)
1. Connect the unit to the broadband Internet using an RJ45
Ethernet cable (not supplied). Refer to “CONNECTIONS”
for more details.
2. Select “Settings” Æ “System” Æ “Connection” Æ “Ethernet”
Æ “DHCP” or “STATIC IP”.
Depending on your Internet connection type, select “DHCP” or “STATIC IP” to
enable the unit to connect to the Internet. In “DHCP” mode, an IP address is
automatically assigned to the unit. In “STATIC IP” mode, you must check with
your service provider to obtain the correct IP data as follows:
“IP address” Æ “IP mask” Æ “IP gateway” Æ “DNS”
Wi-Fi connection
1. Use a router (not supplied) to connect the wireless access point (Wi-Fi) to the
broadband Internet, refering to the “CONNECTIONS”
section.
2. Select “Settings” Æ “System” Æ “Connection” Æ “Wi-Fi”. The
unit will scan for all available wireless networks and display
the network names (SSID).
3. Select the network and press the SELECT button to confirm.
4. Select the correct encryption security system: Open network,
WEP key or WPA.
5. Open network: Select “DHCP” or “STATIC IP”.
WEP key: Enter the WEP code.
WPA key: Enter the WPA code.
Note: After entering the WEP or WPA key, you need to select “DHCP” or
“STATIC IP”.
Turn the SCROLL/SELECT/SNOOZE knob to adjust the number/
character and press it to confirm. Then use the P2/ and P4/ button to
move to the previous or next number/ character. Press and hold down the
button on the remote
SCROLL/SELECT/SNOOZE knob (or press the
control) to complete and confirm the entry.
For both the wired (Ethernet) and Wi-Fi connection, the message “Connection
successful” will be displayed to confirm that the internet is connected. If this is not
the case, “Connection failed” will be displayed. You should try above steps again
to enter correct IP data, WEP or WPA key and also make sure that the wired or
wireless networks are available and working.
GB-10
Listening to a web radio station
After successfully connecting to the Internet, you can enjoy the
vTuner live internet radio service by selecting “Internet Radio”.
The following options are available:
Options
Descriptions
The unit can automatically detect the country in which the unit
Country
is located and display the web radio stations in that country.
The “Favorites” option allows you to find your favorite stations.
Favorites
This option allows you to select a country and then select a
Location
web radio station in this country.
This option allows you to choose a category: “News”,
Format
“Comedy”, “Dance” and “Sports”. etc.
New Stations Select the new stations that have been added since the last update.
Most Popular
Select the most popular stations based on web site usage.
Stations
Podcasts By Select your favorite type of podcast such as “Arts”,
“Entertainment”, “Lifestyle”, “Music”, “Talk”, “TV” and “Variety”.
Genre
Podcasts By
Select your favorite type of podcast type by the location.
Location
Preset web radio stations
You can store up to five preset stations for web radio. The procedure for storing
web station is the same as “Preset FM radio stations” using the preset buttons
P1 to P5.
Listen to a preset web station
The procedure is the same as the one described in “Listen to a preset FM
station”. You can listen to a preset web station directly using the buttons P1 to
P5 or by browsing through the “Favorites” menu in Internet Radio mode.
List of favorite stations
You can bookmark the current web radio station in a list of “Favorites”. This list is
stored in the “Favorites” menu.
1. When you wish to store a web radio station, press and hold
down the SELECT button on the unit to bookmark it in the
“Favorites” menu.
Note: The press and hold button operation does not work on
the remote control.
2. To find a station stored in the “Favorites” menu, browse through the following
menus: “Internet Radio” Æ “Favorites” and select the desired station.
3. Press the SELECT button to confirm.
4. To remove the bookmark for a station, press the
/
button. Exit the
“Favorites” and re-enter it to check that the station is not in the “Favorites” list.
Notes: Some web radio stations do not broadcast 24 hours per day, and some are
not always on-line.
Unlike the FM antenna, the Wi-Fi antenna is built into the unit. To achieve
optimum reception of the wireless connection, place the unit close to the
wireless access point. Reception depends on your router performance and
environmental factors.
GB-11
USB DEVICE AND SD/MMC CARD OPERATION
This unit allows you to listen to files on a USB device or SD/MMC card. You can
also copy files from your USB device to your SD/MMC card and vice-versa. You
can also record web radio and FM radio to a USB device or SD/MMC card.
Playback
1. Insert a USB disk into the USB port
or/and an SD/MMC
card into the SD/MMC card slot on the front of the unit.
2. Select “USB/SD/MMC” Æ”Playing” Æ”USB” or “SD/MMC”.
3. Turn the SELECT button to select a folder and press it to confirm the selection.
Then turn the SELECT button to select a file and press it to start playback.
4. To skip to the next/ previous file, press the P2/
, P4/
button.
5. To pause playback, press the P3/
button. Press it again to resume
playback.
6. To stop playback, press the P5/ button.
REPEAT and RANDOM playback
Press the
/
button repeatedly to select one of the following playback
, Repeat folder
, Random
or Repeat/ Random off.
modes: Repeat one
Copy files
1. Insert both a USB disk and an SD/MMC card into the unit.
2. Select “USB/SD/MMC” Æ”Copy” Æ”USB” or “SD/MMC”.
3. Select the file to you wish to copy and press the SELECT
button to confirm.
button to
4. Select the destination folder and press the
confirm. Note: If the destination device is full, copying will fail.
Note: Ensure that the device contains at least one folder in which to place the
copied file.
Some external hard disks may not be supported. Hard disks that have a
built- in power supply should be favored.
Due to different formats, some models of USB, SD/MMC storage devices or
MP3 players may take longer time to be read or even may not be read.
AUX IN FUNCTION
An AUX IN jack is provided with the cable to connect your external audio device,
such as a MP3 player, in order to listen to the music through this unit.
1. Plug the AUX IN cable (supplied) into the AUX IN jack. Refer
to the “CONNECTIONS” section.
2. In the main menu, select “Aux IN”.
3. Operate your external audio device as usual to select and play the music.
4. Adjust the volume controls on both your external audio device and this unit to
the desired volume level.
Note: In AUX IN mode, this unit display cannot show any music information (e.g.
track no.) for your external audio device.
GB-12
RECORD FUNCTION
You can record a web radio or FM radio broadcast on a USB device or SD/MMC
card for private use only, or record an audio file read by an appliance connected
via the AUX IN jack.
Recording web and FM radio station broadcasts
1) Insert a USB device and/ or SD/MMC card into the unit and
listen to the desired web or FM radio station.
button and if both devices are inserted,
2) Press the
select the destination device (USB or SD/MMC). Press the
SELECT button to confirm.
3) You can name the file you are about to create. In order to do
so, use the SCROLL/SELECT/SNOOZE knob to choose a
character, use the BACK button to delete a character and
the P4 button to skip to the next character. Then press the
or SELECT button to start recording.
button. The file is saved.
4) To stop recording, press the
Instant record function
button on the unit to start recording
You can also press and hold down the
immediately on the USB device with the default filename. However you cannot
create your own file name. If no USB device is inserted, the recording will be
recorded to the SD/MMC card.
Note: The press and hold button operation does not work on the remote control.
Recording with the AUX IN function
1. Refer to “AUX IN FUNCTION” to play the
music on an external appliance.
2. Follow steps (2) to (4) in the “Record web
and FM radio” section to record the music from a web or FM station
broadcast.
Note: If the space available on the device is not sufficient, recording will fail.
Playing recorded files
Refer to “USB DEVICE AND SD/MMC CARD OPERATION” to play the recorded
files.
MEDIA SERVER
Step 1: Set Up Media Sharing in Windows Media Player 11
After you download and install Windows Media Player 11 and connect your radio
to the network, you need to set up media sharing so that you can share music
with your radio. The following steps describe how to set up media sharing in
Windows Media Player 11.
1. In Windows Media Player 11, click the small arrow
below the Library tab, and then click Media
Sharing.
GB-13
2. In the Media Sharing dialogue box, select
the Share my media check box.
3. Check the “share my media to” box. In the
list, click your Radio*, click Allow, the
selected device will now show a green tick
and then click OK.
z If your device does not appear in the list of
devices, perform the following steps;
From the main menu of your internet radio select "Media Server". A list of
available computers will appear. Select the required computer.
Your device will now appear in the list. If you want to check that this is your radio,
right click on the device and select “Properties”: your radio's MAC address will be
shown.
Note: Please ensure that your PC is connected to the same network as your
internet radio.
You can choose the folders you want to share using the Library tab.
Step 2: Play Music on the Internet Radio.
After installing and configuring your radio and Windows Media Player 11, you are
now ready to play music via a wireless connection. The following steps describe
how to play music with your radio.
1. Select "Media Server" in the main menu.
2. Select the computer you wish to play the music files from.
3. Use the controls to browse according to the following criteria: All Music,
Genre, All Artists, Contributing Artists, Album Artists, Composers, Albums,
Playlists, Folders or Star Ratings and then press the SELECT button to
confirm.
4. Select the tracks you want to play, then press the SELECT button. Enjoy the
music!
MAINTENANCE
Care and maintenance
To clean the casing, unplug the unit and wipe off dust and stains with a soft cloth
moistened with a mild soap and water solution only. Do not use benzene, thinner
or similar chemicals.
If at any time in the future you should need to dispose of this product,
please note that waste electrical products should not be disposed of with
household waste. Please recycle where facilities exist. Check with your
local authority or retailer for recycling advice. (Waste Electrical and
Electronic Equipment Directive)
GB-14
TROUBLE SHOOTING GUIDE
Problems
Recommendations
FM Radio
1. Noise or distorted
sound
1.1 Extend and position the FM antenna to achieve the best reception.
Internet Radio
2. Does not connect
to the Internet
3. The
Internet
connection
is
successful
but
cannot play a
particular station
2.1 Ensure that you have configured your home network correctly by
connecting to the Internet from a PC using the same network.
2.2 For a wired connection (Ethernet), check that the Ethernet cable is
properly plugged in.
2.3 Ensure that a DHCP server is available or that you have
configured a static IP address. To configure the DHCP, you must
read the instructions supplied with the wireless access point.
2.4 Ensure that your wireless access point does not restrict
connections to particular MAC addresses. The unit MAC address
can be located by browsing through the menus: “Settings”
Æ”System”Æ”Connection”Æ”Status”Æ”Configuration”.
2.5 If you have an encrypted network, ensure that the correct WEP or
WPA codes have been entered correctly.
3.1 The station does not broadcast 24 hours per day.
3.2 The station has reached the maximum allowed number of on-line
listeners.
3.3 The station does not broadcast anymore.
3.4 The link on the unit is out of date.
3.5 The Internet connection between you and the server (often located
in a different country) is slow.
USB device, SD/MMC card
4.
USB device
or SD/ MMC card
cannot be inserted
5. USB device or,
SD/MMC card is
not read
4.1 Insert it the other way round.
5.1 Some external hard disks may not be supported. Hard disks that
have a built-in power supply should be favored.
5.2 NTFS format is not supported. Check with the USB device file
system and format it with FAT or FAT32.
5.3 Due to different technical specifications, some models of USB
devices, SD/MMC cards or MP3 players may not be read.
General
6. System hangs up
or
abnormal
display indication
7. No sound
8. The
remote
control does not
work
6.1 Press the ON/STANDBY ( ) button to go to Standby mode and
press it again to turn on the unit.
6.2 Reset by unplugging the AC/DC adapter for few seconds and
plugging it back in.
7.1 Adjust the volume.
7.2 Disconnect the headphones.
8.1 Move closer to the unit and point toward the IR remote control
sensor.
8.2 Insert the battery with the polarity (+) matching the mark on the
bottom of the remote control.
8.3 Replace the battery.
8.4 The press and hold button operation works on the unit only.
Note: Should the problem persist, please download the firmware for this Internet
radio from http://www.awox.com/scott and place it on a USB device. Unplug
the AC/DC adapter and insert the USB device into the unit. Plug the AC/DC
adapter back in and it will automatically upgrade the system.
GB-15
TECHNICAL SPECIFICATIONS
Amplifier
Output power……………………………. 6 W (2 x 3W)
Speakers.………………………………… 3” 4 Ohm
FM Radio
Tuning range…………………………….. 87.5 – 108 MHz
Number of stations that can be stored... 5
FM antenna…………………………....... Telescopic type, external
Internet Radio
Wired connection………………………..
Wireless (Wi-Fi) connection……………
vTuner live internet radio service………
Number of stations that can be stored...
Wi-Fi antenna…………………………….
Network 10/100 RJ 45 Ethernet jack
802.11b/g with WEP/WPA encryption
¾ 5000 stations + 10000 podcasts
5
Built into the unit
Media Server/ USB device/ Card
Compatible files………………………….
USB port type…………………………….
USB maximum handling capacity……...
Card type…………………………………
Card maximum handling capacity……..
MP3 sampling rate………………………
WMA sampling rate……………………..
MP3, WMA, WAV
2.0
320 GB
SD/MMC
2.0 GB
32, 44, 48 kHz
44, 48 kHz
Other connections
AUX IN jack………………………………
Headphones jack………………………..
3.5 mm stereo jack
3.5 mm stereo jack
General
Power consumption……………………..
AC/DC adapter…………………………..
DC Output………………………………..
Remote control battery………………….
Time back-up battery……………………
Dimension………………………………...
Weight (without AC/DC adapter)…........
12 W
AC 100 – 240V ~ 50Hz
DC IN 12V/ 1200mA
3V lithium battery (CR2025)
2 x AAA/LR03 (Not supplied)
138 (H) x 253 (W) x 131 (D) mm
1.5 Kg
Note: Due to continuing improvements, the technical specifications are subject to
change without notice.
GB-16