1
A / V
D I S T R I B U T I O N
&
C O N T R O L
S Y S T E M S
Smart
Select
Volume
Control
Instruction Manual
1
1. Product Overview
The Smart Select™ Volume Control (SSVC) is the next evolution in Volume Control systems. The SSVC integrates
Russound’s well-known Ultra-Match™ impedance-matching volume control technology with multi-zone functionality and automation. Smart Select™ offers many outstanding features such as “All On” and “All Off” wholesystem commands, one-button function control interface and an easy to read, three color status indicator light.
Russound Ultra-Match™ Volume Controls eliminate the need for an impedance-matching speaker selector. With
a few simple calculations and jumper settings, your SSVC system can be configured to connect up to 16 pairs of
speakers to a single amplifier.
To other Smart Select™
INPUT
Volume Controls
2. What You Will Need
Figure 1
EZB-1, 4-Way
• Russound SSVC(s) (1 included)
Connecting
Block
AMP/Receiver
• Russound EZB-1 Connecting Blocks (2 per system)
• Russound EZB-2 Add-On Connecting Blocks (2 when connecting 5-8 volume controls, 4 when connecting 9-12 volume controls) (limit 12 volume controls per system)
Smart Select™
Volume Control
• Russound Smart Select™ Power Interrupter (1 per system)
OUTPUT INPUT
To power
• Russound 846XP 12v, 1A, DC power supply (1 per system)
and data
connections
• Amplifier or stereo receiver
(figure 2)
Speaker Pair
• Stereo speaker pair(s) (1 per volume control)
• 18-12 AWG speaker cable constructed for in-wall use
• 22 AWG, 4 conductor (2 twisted pair) data cable with overall
shield and drain
• Wire cutters, wire strippers, small flat head screwdriver
NOTE: When using the optional Smart AC™ Power Controller, it is not necessary to install the Smart Select™
Power Interrupter or the #846XP Power Supply.
L+ L–
SPEAKERS
SPEAKERS
SPEAKERS
SPEAKERS
R– R+ L+
L– R– R–
3. Connection Instructions
IMPORTANT - If you are unsure of any of the installation procedures, the products should be installed by a professional custom installer.
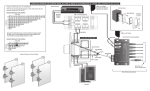
3.1 Amplifier / Speaker Connections (Refer to Figure 1)
1) Make sure that the amplifier or receiver that will be connected is turned Off.
2) Use only 18-12 AWG speaker cable constructed for in-wall use (refer to the Russound product catalog for recommended speaker cables).
3) Strip 1/8” of insulation from the ends of all the speaker wires that will be connected to the volume control. If
necessary, twist or solder the ends to keep from fraying and shorting with other wires.
4) Connect the leads from the amplifier’s speaker outputs to the connector labeled “INPUT” on the EZB-1
Connecting Block as shown in Figure 1. The wires must stay consistent, left + of the amplifier’s output to left +
input of the connecting block, observing polarity and channel.
NOTE: If more than 4 volume controls are to be connected, use Russound Part No. EZB-2 Add-On Connecting
Blocks to allow for as many as 12 connected volume controls.
5) Connect the leads from the connecting block outputs labeled “SPEAKERS” to the connector labeled “INPUT”
on the volume control. The wires must stay consistent, left + of the connecting block output to left + input of
the volume control.
6) Connect the wires from the speakers to the connector labeled “OUTPUT” on the volume control as shown in
Figure 1.
CAUTION: Do not reverse the input and output connections!
2
SPEAKERS
L+ L–
R– R+ L+
DATA
(YELLOW)
SPEAKERS
SPEAKERS
GND1(BLACK)
GND2(BLACK)
SPEAKERS
12V+(RED)
INPUT
To other Smart
3.2 Power and Data Connections (Refer to Figure 2)
Select™
Figure 2
Volume
EZB-1,
4-Way
Smart Select™
IMPORTANT: If you are unsure of any of the installation proceControls
Connecting
Block
dures, the products should be installed by a professional custom
installer.
1) Make sure the amplifier or receiver is turned Off, and that the
12 Volt power supply is not plugged in.
4 conductor,
22AWG 2 twisted
2) Use 4 conductor, 2 twisted pair wire with shield and drain to
pair wire with sheild
make power and data connections (Russound Part No.
To speakers
and connecting
AW2260AB).
block (figure 1)
3) Strip 1/4” of insulation from the ends of the power and data
OUTPUT INPUT
wire that will be connected to the SSVC.
12V 1000mA
power supply
4) Using butt connectors, wire nuts or other wire connectors rated pt.
No. 846XP
for this application and the size and type of the wire being
used, make connections to the SSVC’s power and data wires as
shown in Figure 2. If several volume controls will be connectSmart Select™
ed, use Russound EZB-1 and EZB-2 connecting blocks to make
Volume Control
wiring easier. These connecting blocks would be additional to
any connecting blocks used for the amplifier and speaker connections in Figure 1.
NOTE: The EZB-1 and EZB-2 connecting blocks have connectors that are labeled L+, L-, R-, R+. You will need to
make connections to the connecting block using alias names (i.e. 12v=L+, Gnd1=L–, Gnd2=R–, Data=R+).
5) Connect the Smart Select™ Power Interrupter to the EZB-1 connecting block as shown in Figure 2. The +V
connection from the Smart Select™ Power Interrupter should connect to the terminal of the EZB-1 which corresponds to the +12V connection of the SSVC. The GND connection from the Smart Select Power Interrupter
should connect to the terminal of the EZB-1 which corresponds to the Gnd1 connection of the SSVCs.
6) To eliminate the risk of damaging one or more components of the Smart Select™ system, make sure that all
connections are correct and that no wires are shorted .
7) Once all connections are made, install the SSVC in the junction box or plaster ring. Insert carefully to avoid
excessive strain on the connector. Taking the time to feed the excess wire out the back of the junction box will
help you with the final assembly. If a junction box will be used, Russound recommends you use plastic junction boxes, if possible. This is to help ensure that the volume control does not short against the surface of a
metal junction box during installation or removal. The junction box must also have a depth of at least 3 1/8”.
L– R– R–
4. Ultra-Match™ Configuration Instructions
With a few simple calculations, Russound Ultra-Match™ Volume Controls eliminate the need for a speaker
selector. By determining the impedance of the system, the correct jumper settings for the volume controls can be
calculated to allow safe operation of your system.
1) Determine the minimum impedance capability of the amplifier. Normally, this information can be found near
the speaker output terminals on the back of the amplifier (look for a measurement in OHMS).
WRITE THE AMPLIFIER’S MINIMUM IMPEDANCE HERE:__________
2) Determine the impedance of your speakers. Most speakers have this information printed on the back near the
speaker terminals. Most speakers are 4 Ohm or 8 Ohm.
WRITE THE SPEAKER’S IMPEDANCE HERE:__________
** If you are using speakers of different impedances, you need to determine the average or common impedance.
For example, a pair of 4 ohm speakers can be considered 2 pairs of 8 ohm speakers.
3) Count the number of speaker pairs you intend to connect to the amplifier.
WRITE THE NUMBER OF SPEAKER PAIRS HERE:___________
Now that you have determined all this information you can calculate the settings on the Ultra-Match™ Volume
Control. The Ultra-Match™ Volume Controls have jumper settings on one side of the circuit board. The jumpers
have settings for 2x, 4x, 8x. These settings are multipliers and must be set according to the number of speaker
3
pairs you connect.
4) Calculate the system impedance:
EXAMPLE:
SYSTEM IMPEDANCE
=
2Ω SYSTEM IMPEDANCE
SPEAKER IMPEDANCE
NUMBER OF SPEAKER PAIRS
=
8Ω SPEAKERS
4 PAIRS OF SPEAKERS
5) Since you have determined the system impedance you can now calculate the jumper setting needed to protect your amplifier.
EXAMPLE:
AMPLIFIER’S MIN. IMPEDANCE (step 1)
JUMPER SETTING =
SYSTEM IMPEDANCE (step 4)
4X JUMPER SETTING
= 8Ω AMPLIFIER
2Ω SYSTEM
NOTE: All volume controls in the system should be set to the same jumper setting.
5. Operation Instructions
1) Make sure the amplifier or receiver is turned Off and it’s volume set to minimum.
2) Connect 12 Volt power to the Smart Select System (see Figure 2)
NOTE: The 12 Volt power supply (Russound part No. 1201A) must be connected through the Russound Smart
Select™ Power Interrupter Module (Figure 2). You may also power the SSVC system directly from the Smart AC™
Power Controller (See Smart AC™ instruction manual).
3) The status indicator light should be illuminated red on all volume controls connected. This means that the volume control is currently in Mute mode, and that the speakers are disabled.
4) Press the function control button once. The status indicator should now blink 3 times and then turn solid
green. This means that the SSVC is now in Active mode, and that the speakers are enabled.
5) Repeat step 4 on all remaining volume controls.
6) Set the Smart Select™ volume to maximum (fully clockwise).
7) Turn On the amplifier or receiver and select a music source, such as tuner or CD player.
8) Slowly turn up the amplifier or receiver volume and set it to a comfortable (not maximum) listening level. Be
careful not to overdrive your amplifier. If the sound becomes muddy or distorted, you have reached the limit of
your amplifier’s or receiver’s volume capability and should quickly reduce the volume to avoid damaging your
speakers and/or your amplifier or receiver.
NOTE: 12 o’clock on most receivers is close to full volume.
9) Adjust the volume of the SSVCs to the desired listening level.
10)To turn Off your speakers, press the function control button once. The status indicator will turn red and your
speakers will be muted again. You may also turn the volume control knob to the full counter clockwise position to turn Off the speakers.
6. Smart Select™ Special Features Operation
In addition to On and Off control, the function control button can be used to send system-wide commands to
turn all SSVCs On or Off.
To mute all volume controls (All Off feature)
1) On any SSVC, press the function control button until the status indicator light is red.
2) Press and hold the function control button until the status indicator blinks amber.
3) All connected SSVCs will now be in mute mode.
To enable all volume controls (All On feature)
1) On any SSVC, press the function control button until the status indicator light is solid green.
4
2) Press and hold the function control button until the status indicator blinks amber.
3) All connected SSVCs will now be in Active mode.
To turn Off Smart Select™ System and connected source equipment (System Off feature, Smart AC™ Power
Controller required)
1) On any SSVC, press the function control button until the status indicator light is red.
2) Press and hold the function control button until the status indicator blinks amber, and then turns red.
3) All connected SSVCs will now be in Mute mode.
4) Press and hold the function control button again until the status indicator blinks amber.
5) The status indicator will no longer be illuminated.
6) The SSVCs are now in Standby mode and the AC power to the components connected to the Smart AC™
Power Controller is turned Off according to the settings of the Smart AC™ Controller (see Smart AC™ instruction manual).
To turn On Smart Select™ System and connected source equipment (System On feature Smart AC™ Power
Controller required)
1) On any SSVC, press the function control button once. The status indicator will light green.
2) The SSVC is now in Active mode. All other SSVCs will be in Mute mode. AC Power to the components connected to the Smart AC™ Power Controller is turned on according to the settings on the Smart AC™ Controller
(see Smart AC™ instruction manual).
7. Specifications
Audio•Power rating / channel:
•126 watts power handling
•14 watts RMS, continuous
•Uses Ultra-Match impedance matching autoformers.
•Accepts up to 12 AWG wire.
•Attenuation: 12 steps, including “Off” 43dB total attenuation
•2 channel stereo control
•Can be used with any combination of 4 Ohm to 8 Ohm speakers and amplifiers.
•Frequency response: 20Hz - 20kHz, +1 / -0.5 dB at rated power
DC power•Input voltage: +12 VDC
•Power consumption: 80 mA, .96 watts
Mounting•Fits into most 20 cubic in. Junction boxes. 1 5/8”W x 2 7/8”H x 2 5/8”D (4.1 x 7.3 x 5.4 cm)
Weight•1.1 lbs (.5 kg)
8. Limited Warranty
The Russound Smart Select™ Volume Control is fully guaranteed for Two (2) years from the date of purchase against all
defects in materials and workmanship. During this period Russound will replace any defective parts and correct any defect
in workmanship without charge for either parts or labor. For this warranty to apply, the unit must be installed and used
according to its written instructions. If service is necessary, it must be performed by Russound. The unit must be returned to
Russound at the owner’s expense and with prior written permission. Accidental damage and shipping damage are not considered defects under the terms of the warranty. Russound assumes no responsibility for defects resulting from abuse or servicing performed by an agency or person not specifically authorized in writing by Russound. Damage to or destruction of
components due to improper use voids the warranty. In these cases the repair will be made at the owner’s expense. To
return for repairs, the unit must be shipped to Russound at the owner’s expense, along with a note explaining the nature of
the service required. Be sure to pack in a corrugated container with at least 3 inches of resilient material to protect the unit
from damage in transit.
5