1
RF-NBSKHBP_NBSKHBG_NBSKHBGR_11-0708_QSG_V3_EN.eps 1 7/19/2011 10:51:11 AM
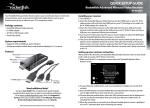
Package contents
System requirements
•
•
•
•
• One available USB port
• Operating system: Windows 7,
Windows Vista, Windows XP, or
Mac OS X v10.2.8 or above
Rocketfish USB 2.0 4-port hub
A-to-mini-B USB cable
Suction cup
Quick Setup Guide
Features
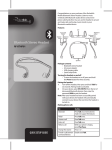
USB 2.0 4-Port Hub
Installation Instructions
•
•
•
•
•
•
•
•
•
•
Attach up to four USB devices to your computer
One port for connecting to your computer
Four enhanced, high-speed, USB 2.0 480 Mbps ports
Compatible with USB 1.1 and USB 2.0 devices
Data transfer rates of 1.5 Mbps, 12 Mbps, and 480 Mbps
Plug-and-Play installation
Three power status LED indicators
Convenient attachment to any smooth surface with provided suction cup
USB Implementers Forum (USB-IF) certification
Can purchase (not included) AC power adapter 5V 2.1A
Power connector
Upstream port
Downstream port
Downstream port
Downstream port
Downstream port
LED indicator lights
Using the USB hub
RF-NBSKHBP/RF-NBSKHBG/
RF-NBSKHBGR/RF-NBSKHBB
QUICK SETUP GUIDE
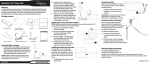
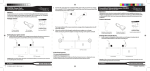
1 Plug the mini-B USB end of the cable into the upstream port, then plug the
USB-A end into an available USB port on your computer.
Note: If you use a USB 1.1 port on your computer, all devices connected to
your USB hub will run at the slower USB 1.1 speed.
2 Plug USB devices into any of the four downstream ports.
3 Plug the AC adapter (optional) into a power outlet, then plug the DC
connector into the DC power jack on the USB hub. When your USB hub is
receiving power, the blue LED lights on the hub base turn on.
Note: The hub can be used without the power supply when connected
devices draw a total of 100mA of current or less. If you are unsure of the total
connected current, use the power supply.
RF-NBSKHBP_NBSKHBG_NBSKHBGR_11-0708_QSG_V3_EN.eps 2 7/19/2011 10:51:11 AM
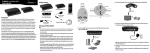
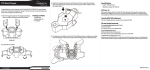
Installing the suction cup mount
1 Insert the suction cup into the mounting hole on the bottom of the hub.
2 Attach the suction cup to a notebook surface or any other smooth surface.
Suction cup
Suction cup
Suction cup
Cable management
For easy storage, wrap the USB cable around the hub’s suction cup.
Troubleshooting
Problem
Solution
USB hub operates
erratically.
Your USB hub may have been exposed to static
electricity. Disconnect the A-to-mini-B cable from your
computer, then disconnect the hub’s power cord from
the power outlet. Wait at least five seconds, then
reconnect the USB cable and power cord.
Connected USB devices
operate erratically or
not at all.
You have not connected your USB hub to a power
outlet. Some USB devices require more power than
your computer can provide. Connect the AC power
adapter to your USB hub.
The USB hub does not
work at all.
Your computer’s operating system may not support
USB. For more information, see “System requirements.”
Specifications
USB ports
Downstream: USB type A (4)
Upstream: USB type mini B (1)
LED
Power mode
Output voltage
Output current
3 blue LED power indicators
Bus power
Self-power (optional)
+5V DC (per port)
500mA (max per port)
Operating temperature
Storage temperature
Humidity
Weight
Dimensions
(includes suction cup)
41°F to 104°F (5°C to 40°C)
-4°F to 140°F (-20°C to 60°C)
0 to 80% RH non-condensing
1.2 ounces (34 grams)
2.20 × 2.38 × 1.08 inches
(56 × 60.4 × 27.4 mm)
Housing
Plastic
Legal notices
FCC Part 15
This equipment has been tested and found to comply within the limits for a Class B digital
device, pursuant to Part 15 of the FCC rules. These limits are designed to provide reasonable
protection against harmful interference in a residential installation. This equipment
generates uses and can radiate radio frequency energy and if not installed and used in
accordance with the instructions, may cause harmful interference to radio communications.
However, there is no guarantee that interference will not occur in a particular installation. If
this equipment does cause harmful interference to radio or television reception, which can
be determined by turning the equipment off and on, the user is encouraged to try to correct
the interference by one or more of the following measures:
• Reorient or relocate the receiving antenna.
– Increase the separation between the equipment and receiver.
– Connect the equipment into an outlet on a circuit different
from that to which the receiver is connected.
• Consult the dealer or an experienced radio/TV technician for help.
FCC warning
Changes or modifications not expressly approved by the party responsible for compliance
with the FCC Rules could void the user’s authority to operate this equipment.
Canada ICES-003 statement
This Class B digital apparatus complies with Canadian ICES-003.
One-year limited warranty
Visit www.rocketfishproducts.com for details.
Contact Rocketfish:
For customer service, call 1-800-620-2790
www.rocketfishproducts.com
© 2011 BBY Solutions, Inc., All Rights Reserved.
Distributed by Best Buy Purchasing, LLC
7601 Penn Avenue South, Richfield, MN USA 55423-3645
ROCKETFISH is a trademark of BBY Solutions, Inc. All other products and brand
names are trademarks of their respective owners.
ENGLISH 11-0708