1
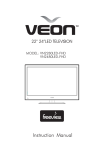
INSTRUCTION MANUAL
LED TV
RLED3218
Table of Contents
Caution
2
Important Safety Precautions
3
Desktop TV Bracket Installation
& Assembly
4
Front/Back panel diagram
5
Remote Controller
Battery Installation
Using the Remote Control
6
Install TV
Set your TV
Connect Antenna and power
Turn On TV
7
Systems Connection
AV Input
S-Video Input
PC Input
HDMI Input
Y Pb Pr Input
8-10
ADVANCE
Sleep Timer
TTX Language
Auto Format
EARPHONE Output
PICTURE
Picture Mode
Contrast
Brightness
HUE
Saturation
Sharpness
Color Temp
Scale Mode
3D NR
MPGE NR
11
SOUND
11
Sound Mode
Bass
Treble
Balance
AVC
Audio only
OSD
Language
H-Position
V-Position
Duration
Halftone
MEM-RECALL
12-13
11
1
CHANNEL
Auto Scan
Fine Tuning
Add/Erase
Source
13
PIP
Multi Window
Sub Source
Size
Border Color
Sound Source
Swap
PIP Position
13
PC
Picture Mode
Contrast
Brightness
Color Temp
Scale Mode
Auto Adjust
14
GEOMETRY
Auto Adjust
H Position
V Position
Clock
Phase
14
SOURCE
15
RESOLUTION
15
NICAM
15
HELP
16
SPECIFICATIONS
17
Caution
The lightening flash with arrowhead symbol, within an equilateral triangle is
intended to alert the user to the presence of un-insulated "dangerous voltage"
within the products enclosure that may be of sufficient magnitude to constitute a
risk of electric shock to the persons.
The exclamation point within an equilateral triangle is intend to alert the user to
the presence of important operating and maintenance (servicing) instructions in
the literature accompanying the appliance.
Cor rect disposal of this Product
W aste Electrical & Electronic Equipment (WEEE)
Your product is designed and manufactured with high quality materials and
components which can be recycled and reused.
This symbol means that electrical and electronic equipment, at their end-of-life,
should be disposed of separately from your household waste.
Please dispose of this equipment at your local community waste
collection/recycling centre.
In the European Union there are separate collection systems for used electrical
and electronic products. Please help us to conserve the environment we live in!
2
Caution:
To reduce the risk of fire or electric shock, do not expose this apparatus to rain or moisture.2
19) Do not place any sources of danger on the apparatus (e.g. liquid filled objects, lighted candles).
20) Wall or Ceiling Mounting - The appliance should be mounted to a wall or ceiling only as
recommended by the manufacturer.
These servicing instructions are for use by qualified service personnel only. To reduce the risk of
electric shock do not perform any servicing other than that contained in the operating instructions.
unless you are qualified to do so.
3
Desktop TV Bracket Installation & Assembly
cloth
5
205
205
VOL+
VOL CH+
CH MENU
SOURCE
not include
This products can be mounted on the plasterboard wall or other wall .
4
Side panel diagram
VOL+
VOL CH+
CH VOL+
MENU
VOL CH+
CH MENU
SOURCE
SOURCE
OFF
ON
POWER SWITCH
17
Y
Pb
Pr
16
HDMI2
VIDEO
L
R
VIDEO2
L2
R2
15 14 9
HDMI1
Av 1
AV 2
VIDEO
L
R
AV-OUT
VGA/AUDIO: VGA audio input.
(3.5mm)
ANT 75 ohm: Connect the antenna to
the antenna input.
HDMI1 Input: Digital signal input from
HDMI video connector
14/15. VIDEO/R/L 1/2 : external AV
YPbPr: Color difference
components input and relevant
video input
S-VIDEO: Color and brightness
difference components input.
AV Output
signal input and relevant right/left
sound channel.
16. HDMI2 Input
17.USB: For upgrade use only
There are two digital RCA transfer cable in the accessory box , used for
transfer AV - IN and AV - OUT professionally
5
Remote Controller
1. POWER : Sets your TV to power on or standby mode.
2. MUTE : Press to mute the sound. Press again or press
VOL+ to unmute.
3. 0--9 Press 0~9 to select a TV channel directly while watching
TV. The channel will change after 2 seconds.Applicable for
entering page number in teletext mode and so on.
4.
:
Return to the previously viewed program.
5. CH +/- : Press to scan through or to select a channel.
6. V +/-: Press to increase / decrease the sound level.
7. - /- - Press this button to enter a program number for
different digit. eg. -/ - - / ---
MUTE
POWER
2 8
9
4 1
5
1
57
53
47
43
1
2
3
4
5
6
7
8
9
0
P.MODE
S.MODE
SLEEP
MTS
2 14
CH+
1B 13
MENU
8. DISPLAY : Press to display the source and channel's info.
7
9.
9
6
VOL-
3 12
EXIT
10. SOURCE: Press to list the source items.
SOURCE
ENTER
CH -
VOL+
3
D
5B
5F
7 4B
4 4F
11 A
17 C
16 6
10 E
1F
13
5
17
B
8 F
DISPLAY
SCALE
11. SLEEP: Select amount of time before TV turn itself
off automatically.
50 18
44
40 15
48
STILL
12. EXIT: Exits from the menu or sub-menu and menus and adjust
the system settings to your preference.
13. MENU : Allows you to navigate the on-screen menus.
14.P.MODE::Press to cycle through the different picture settings
15. PIP/POP: (Picture in picture)
NO/OFF: Press to On / Off the PIP function .
SOURCE: Press to cycle the PIP source
SWAP: PIP/main picture position swap
16. S.MODE: Press to cycle through the different sound settings.
17. MTS:: Press to select the MTS mode.(for example,Nicam ,
BTSC,MONO,STEREO .eg )
18.
19. STILL: image still.
Battery Installation:
Remove the battery compartment lid on the rear of the remote control. Put two AAA batteries
inside the battery compartment with their + and - ends aligned as indicated. Do not mix old
and new batteries or different types of batteries Replace the battery compartment lid.
Slide the lid until you hear it click into place.
Using the Remote Control:
Unless stated otherwise, the remote control can operate all the features of the TV.
Always point the remote control directly at the remote sensor in the front of the TV.
Universal Remote Control code:007F
6
19 4C
side
3
indicator
The Light is red
7
Systems Connection
1.AV INPUT/OUTPUT
Video / Audio input, use the SOURCE button select AV on the remote control .
HDMI2
HDMI1
Av 1
AV 2
AV-OUT
2.S-VIDEO INPUT
S-VIDEO input, use the SOURCE button select S-VIDEO on the remote control .
HDMI2
HDMI1
Av 1
8
AV 2
AV-OUT
Systems Connection
3.PC INPUT
PC (VGA) input, use the SOURCE button select PC on the remote control .
PC AUDIO
OUTPUT
VGA OUTPUT
DVD VGA
OUTPUT
VGA OUTPUT
HDMI2
Y
Pb
HDMI1
Av 1
AV 2
AV-OUT
Pr
4.HDMI INPUT
HDMI input, use the SOURCE button select HDMI on the remote control .
HDMI2
HDMI1
Av 1
HDMI 2 OUTPUT HDMI 1 OUTPUT
9
AV 2
AV-OUT
Systems Connection
5.Y Pb Pr Input
Y Pb Pr input, use the SOURCE button select Y Pb Pr on the remote control.
Y
Pb
Pr
HDMI2
(3.5mm)
Y
Pb
Pr
10
HDMI1
Av 1
AV 2
AV-OUT
PICTURE
Picture Mode: Select the picture mode.
you can choose “STANDARD,DYNAMIC,
SOFT,USER”
Contrast: Adjust picture contrast.
Brightness: Adjust picture brightness.
Tint: Adjust NTSC colour signal.
Saturation: Adjust picture color.
Sharpness: Adjust picture sharpness.
Colour Temp: Adjust picture colour temp:
cool, normal, warm mode.
Scale Mode: Select picture scale.
3D NR: 3D roise reduce,you can choose
"Off,Low,Mid,High"
MPEG NR: MPEG roise reduce, you can
choose “Off,Low,High"
SOUND
Sound Mode: Select the sound mode.
you can choose " Standard,User,Music,
Movie. "
Bass: Adjust bass volume.
Treble: Adjust treble volume.
Balance: Adjust the balance of sound
between left and right speakers.
AVC: Auto Volume contrl function on or off.
OSD
language: Into OSD menu select OSD Language.
H-Position: Adjust the H Position of the OSD menu.
V- Position: Adjust the V Position of the OSD menu.
Duration:A djust the duration of OSD menu .
Halftone:A djust the halftone of OSD menu.
MEM-RECALL:Restored to the factory default state .
11
Sleep Timer: Select the sleep time to put
automatically the TV in standby mode.
Timer can be selected as 5min/10min/
15min/30min/45min/60min/Off. Also you
can select the sleep time by pressing SLEEP
button repeatedly on the remote control
CLOSE CAPTION:Select the caption and TEXT
modes(CC1,CC2,CC3,CC4,TT1,TT2,TT3,
TT4,OFF).
R
+
+
+
The originality password is“0000”.
12
AND +
AND +
AND +
AND +
CHANNEL
Auto Scan: press "
"button to select this item
then press Enter button to enter the Auto
Channel Search Program.
Fine Tuning: if there are something wrong with
the quality of picture and sound of TV, press "
"
to fine tune the tuner frequency, you can get the
correct picture and sound.
Add/Erase: Add/Erase the Tv channel.
Source: select tuning band mode(Available tuning
band mode: Air/Cable)
MTS:: Press to select the MTS mode.(for example,Nicam ,
BTSC,MONO,STEREO .eg )
PIP
PIP
Multi Window
Sub Source
Size
PIP Position
Border Color
Sound Source
Swap
:SEL
PIP
YPBPR
Large
Left Up
Blue
Main
:ADJ
MENU :EXIT
Multi Window: Adjust PIP ,POP Full and Off
Sub Source : PIP input mode select.
Size : Adjust PIP picture size.
PIP Position: Adjust PIP picture display
position.
Border Color: Select PIP border color.
(BLACK/BLUE)
Sound Source: Select main picture or
other input audio.
Swap: PIP / Main picture position swap.
13
PC
you can choose “STANDARD,DYNAMIC,
SOFT,USER”
GEOMETRY
H Position: Adjust the H Position of the
PC signal.
V Position: Adjust the V Position of the
PC signal.
Clock: Adjust the clock of the PC signal.
Phase: Adjust the phase of the PC signal.
14
SOURCE
SOURCE
TV
AV
AV 2
S-Video
Y Pb Pr
PC
HDMI
HDMI 2
1
Press "SOURCE" button to display the source list;
2
Press "▼ / ▲" button to select the "source" you want to watch;
3
Press "ENTER" button to enter the Input source ;
:OK
RESOLUTION
VGA
Resolution
Vertical frequency Hz
640x480
60/75
800x600
60/75
1024x768
60/75
1360x768
60
HD(Y Pb Pr)
Resolution
Vertical frequency Hz
480i
60
480p
60
576i
50
576p
50
720p 1080i/p
50/60 50/60
480i
60
480p
60
576i
50
576p
50
720p 1080i/p
50/60 50/60
HDMI
Resolution
Vertical frequency Hz
MTS
Press the MTS button:
Usually set to stereo to provide the best reproduction, but if reception deteriorates or if the
service is not Available then switch to Mono.
Mono (M1) and (M2) can also be selected if a mono signal is being transmitted.
15
HELP
No Power
Signal receive
not properly
No picture
Video is ok ,but
without audio
Audio is ok, but
color error or no
picture.
snow statics
picture and noise
Level broken line
Dual-Image or
"simulacrum"
The TV no
response with
the Remote.
NO Video In.
(PC Mode)
Vertical twinkling
(PC Mode)
horizontal ripping
(PC Mode)
The screen is too
bright or too dark
(PC Mode)
PC Function no
response
Ripping line in
RCA connecting
Problem still
exist
Check the AC cord of TV is plus in or not. If still no power, please
Pull out the plug and replug in after60 seconds. And open the TV
again.
To cause double image or phantom if there has high building or high
mountain round -TV. You can adjust image effect by manually
operation: consult instruction of vernier regulation or change the direction
of external antenna.
If you use the indoor antenna . under certain circumstance, receive will be
more difficult .So you can change the direction of the antenna to adjust the
image effect . If can't change image receiving effect either , you have to
use external antenna.
Check the antenna at the back of TV is connected properly or not.
Try to select other channels and check whether the TV problem itself or not.
Increase the volume.
Check the TV is in mute mode or not , and please press the mute
button to make sound resume.
Increase contrast and brightness.
Check the antenna at the back of TV is connected or not .
Maybe has electrical appliance interfere, such as hair drier, vacuum
cleaner and so on, please turn off these kinds of electrical appliance.
Perhaps the location for the antenna is not good.Use the tall beamed
antenna can be improved quality of the display image.
Operate the remote direct to the remote sensor on the TV.If still no
response for the TV, please check if the plastic bag on the remote take or
not. And checkif the location for the battery is correct.Change the new
battery.
The TV will shift to the STAND BY if no response from the remote in the
few minutes.
Please check if the display cable connect to the VGA correcte .
Please check if there has the bend on the display cable.
Enter the main menu, Use the clock regulator for the Video display noise
to eliminate the vertical line.
Adjust the Audio sound horizontal in the main menu to clear the horizontal
ripping line.
Adjust the contrast ratio or brightness in the main menu.
Check the computer setting in the state of compatible display resolution
Please use good quality connecting cable.
Unplug the power cable and wait for 30 seconds, then connect.If there is
some problem with our TV, do not repair it by yourself, please contact with
the customer service center.
Note: There will be complete picture and the brightness will come down if the TV
is in the static picture for too long time, So please do not keep the TV in a state of same
Menu or same picture that has much difference in brightness and contrast ratio for too
long time.
16
SPECIFICATIONS
Screen Size
Viewing angle
TV system
Video system
Preset Channels
Input/Output
Speaker Output
32”
175° (Horizontal) / 175° (Vertical)
NTSC
PAL/NTSC
1-200
TV, AV, S-Video, YPbPr, PC, USB,HDMI
8
2X7W
Power requirement
AC 100--240V~, 50/60Hz
Power consumption
65W
Accessories
Remote controller
User's manual
2 x AAA Batteries 2 x AV cable
NOTE:
This user manual is for reference only. Specifications are subject to change
without notice.
17