1
Please read before using this equipment.
Owner’s Manual
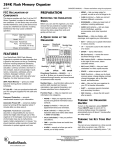
192K Flash Memory
Organizer
ˆ FCC Declaration of
Conformity
This device complies with Part 15 of the
FCC Rules. Operation is subject to the
following two conditions: (1) this device
may not cause harmful interference, and
(2) this device must accept any interference received, including interference that
may cause undesired operation.
Product:
192K Flash Memory
Organizer
Model: 65-779
RadioShack
Responsible
100 Throckmorton
Party:
Fort Worth, TX 76102
Phone: 817-415-3200
© 2001 RadioShack Corporation. All Rights Reserved.
RadioShack.com is a trademark
used by RadioShack Corporation.
2
FCC Declaration of Conformity
ˆ Contents
Features .............................................. 5
Preparation ......................................... 7
Removing the Insulation Strips ........ 7
A Quick Look at Your Organizer ...... 8
Turning the Organizer On/Off ........ 11
Turning the Key Tone On/Off ......... 12
Using the Backlight ........................ 12
Using the Function Menu .............. 13
Languages ................................ 14
Date Format .............................. 14
Setting the Clock/Calendar .............
Setting/Viewing Home Date/Time ..
Viewing World Times .....................
Using the Calendar ........................
15
15
19
20
Entering Data/Using Records ......... 22
Recalling a Record ........................ 23
Editing a Record ............................ 24
Contents
3
Deleting a Record .......................... 26
Storing Phone Records ................... 27
Storing Memo/To Do Records ......... 29
Using the Daily Alarm ...................... 31
Setting the Daily Alarm Time .......... 31
Turning the Daily Alarm On/Off ...... 33
Schedule Alarms ............................ 33
Entering a Schedule Alarm ............ 35
Turning Schedule Alarms On/Off ... 36
Using the Unit Converter ................. 38
Using a Password ............................ 40
Using the Calculator ........................ 41
Memory Calculations ..................... 42
Using the PC Link ............................. 44
Installing the Windows Link
Software ......................................... 45
Synchronization ............................. 46
Synchronizing the Data .................. 47
4
Contents
Care ................................................... 52
Replacing the Batteries ................. 54
Resetting the Organizer ................ 57
Specifications .................................. 59
ˆ Features
Your RadioShack 192K Flash Memory
Organizer is a pocket-size data organizer
that is great for the person on the go,
combining functions including three telephone directories, alarm clock, schedule
alarms, a calculator, and more in one
compact, easy-to-use package. It puts
names, companies, addresses, phone
numbers, e-mail addresses, and notes all
at your fingertips. The organizer’s features include:
Features
5
PC Link Interface — lets you synchronize data with your PC using the supplied
PC link cable and software.
192K Flash Memory — gives you ample
space for storing phone numbers and
schedules.
Illuminator Backlight — lets you easily
see the display in low-light situations.
Password — prevents unauthorized access to your information.
Automatic Power-Off — conserves battery power by turning off the organizer
about 7 minutes after you stop using it.
Important: RadioShack Corporation assumes no responsibility for any loss or
claims that might arise through use of this
organizer or for damages incurred as a
6
Features
result of information loss due to malfunctions, repairs, battery replacement, or
misuse. You should maintain written
records of important information to protect against such loss.
ˆ Preparation
REMOVING THE
INSULATION STRIPS
Before you can use the organizer, you
must remove the protective insulation
strip from inside the battery compartment. To remove the strip, grasp the end
and gently pull it out.
Preparation
7
A QUICK LOOK AT YOUR
ORGANIZER
Function
Keys
Directional
Controls
Number
Keys
LINK
DEL
ON/OFF
Backlight
SPACE
DSP/INS
Reset
EDIT
ENTER
Directional Controls — SEARCH
or
and6or7allow you to search
forward or backward, through or within
records.
8
Preparation
Number Keys — allows you to perform
both standard and memory calculations.
Function Keys — help you organize
your information into categories.
• PHONE — helps you organize phone
records and general information
about contacts.
• SCHED (schedule) — lets you set
appointment times and reminders.
• MEMO/TODO — lets you keep notes
for yourself, as well as a list of things
to do.
• CALC (calculator) — lets you perform
calculations.
• TIME — provides home and world
time information.
Preparation
9
• ALARM — sounds at a time you set
to remind you of daily events.
• CALN (calendar) — helps you find
important dates listed in the schedule function.
• CONV (conversion) — helps you convert between different currencies.
• PASSWORD — prevents unauthorized access to your information.
Special Keys — help you display, edit,
rearrange, and organize your information.
• EDIT — allows you to update information in various records.
•
10
/C/CE — moves the cursor to the
next line of a record; clears calculator entries.
Preparation
• SYM (symbol) — allows you to select
special characters.
• ENTER — stores information and
confirms actions.
• DEL (delete) — deletes characters.
• INS (insert)/DSP (display) — lets you
insert characters in a field; shows the
full record after a search.
• SPACE — enters a space in a field.
• LINK — lets you link your organizer
to your PC to transfer information.
TURNING THE ORGANIZER
ON/OFF
To turn on the organizer, press ON/OFF.
Press ON/OFF again to turn it off. To conserve battery power, the organizer autoPreparation
11
matically turns off about 7 minutes after
you stop using it.
TURNING THE KEY TONE
ON/OFF
You can set your organizer so a key tone
sounds each time you press a key. With
the organizer turned on, repeatedly press
(V) to turn the key tone on or off. appears when the key tone is turned on.
Note: You can only turn the key tone on
or off when the display shows the current
date and time.
USING THE BACKLIGHT
To turn on the illuminator backlight for
about 20 seconds, press .
12
Preparation
To turn it off before it turns off automatically, press
again.
USING THE FUNCTION
MENU
When you press TIME to enter the home
time mode, # appears beside the city
name to indicate the home city.
Display Contrast
Press TIME to enter the home time mode,
then press or hold down 8or9# to adjust the display contrast.
Preparation
13
Languages
This organizer lets you choose from three
languages — English, French and Spanish. Press TIME to enter the home time
mode, then press ENG (J), FRE (K), or
SPA (L) to select the desired language.
Date Format
Press TIME to enter the home time mode,
then press6or7to select one of the
three date formats.
14
Preparation
ˆ Setting the Clock/
Calendar
SETTING/VIEWING HOME
DATE/TIME
1. Turn on the organizer.
2. Press TIME. # appears beside the
city name to indicate the home city.
(See “City Codes” on Page 18.)
Repeatedly press 12/24 (Z) to toggle
between the 12- and 24-hour time
formats.
Note: $0 or 30 appears in the 12hour format.
Setting the Clock/Calendar
15
3. Press SEARCH
or
until your
city appears. If your city is not listed,
use a city in the same time zone as
yours.
4. Press EDIT. The first digit of the date
flashes.
5. Use the number keys to enter the
date (month, day, and year) on the
first line.
Press7to move the cursor to the
next line without changing an entry.
6. Enter the current hour and minute. If
you are in 12-hour time format, press
AM/PM (X) to choose AM or PM.
Note: If you make a mistake,
press6or7to move backward or
16
Setting the Clock/Calendar
forward to the digit you want to
change. Then enter the correct digit.
7. Press ENTER to store the date and
time. The day of the week automatically appears.
8. To turn daylight saving time on or off,
press DST (C). '67 appears when
daylight saving time is turned on.
Note: If any information you entered is invalid (for example, you entered 25 for the
hour), the first incorrect digit flashes after
you press ENTER. Enter the correct digit,
then press ENTER again.
To view the home date and time at any
time, press TIME.
Setting the Clock/Calendar
17
City Codes
City Name Code
LON
Paris
PAR
Berlin
BER
Tokyo TYO
Hong Kong HKG
Rome ROM
Adelaide ADL
Singapore
SIN
Helsinki
HEL
Sydney SYD
Cairo
CAI
Noumea NOU
Moscow MOW
18
City Name Code
London
Wellington WLG
Riyadh
RUH
Honolulu HNL
Tehran
THR
Anchorage ANC
Dubai
DXB
Los Angeles LAX
Kabul
KBL
Karachi
KHI
Chicago
Delhi
DEL
New York City NYC
Denver DEN
CHI
Dhaka
DAC
Toronto YYZ
Rangoon
RGN
Caracas CCS
Bangkok
BKK
Rio De Janeiro
Setting the Clock/Calendar
RIO
VIEWING WORLD TIMES
Once you set your home time, follow
these steps to view the time in any of 32
cities around the world.
1. With the home date and time displayed, press TIME. The date and
time of the last selected city appears.
2. Repeatedly press SEARCH
to select the desired city.
or
Note: To see daylight savings time in
the selected U.S. city, press DST.
Press TIME again to return to the home
date and time display.
Setting the Clock/Calendar
19
USING THE CALENDAR
To view any week from January 1901 to
December 2099 on your organizer’s calendar, follow these steps.
1. Press CALN. The display shows the
day of the week, the current year
and month, and the dates for the current week. The current date flashes.
2. To move forward or backward one
or
month at a time, press SEARCH
.
3. To move forward or backward one
week at a time, press 9or 8.
4. To move forward or backward one
day at time, press 6or 7.
20
Setting the Clock/Calendar
Note: When * appears next to a date in
the calendar, a Schedule Alarm has been
set for that date. See “Schedule Alarms”
on Page 33.
Setting the Clock/Calendar
21
ˆ Entering Data/
Using Records
You enter data in each function (PHONE,
SCHED, MEMO/TODO, and so on) in the
same way.
• To enter a symbol, repeatedly press
SYM until the desired symbol
appears, then press7to select it.
• Press SPACE to enter a space.
• If you make an incorrect entry, press
6or7to move to the character you
want to change, then type the correct
character.
• To skip a field, press ENTER.
22
Entering Data/Using Records
• To go back to a previous field,
repeatedly press 8 until the desired
field appears.
Note: If not enough space is available for
the record you have entered, )8// appears. Delete phone records, schedule
alarms, or memo records to free additional space.
RECALLING A RECORD
1. Press the desired function key
(PHONE, for example) until the
desired directory prompt appears.
or
to view the
2. Press SEARCH
first record. You can also enter the
first few characters of the record you
want to find, then press SEARCH
or . The first matching record
appears.
Entering Data/Using Records
23
Note: If there are no records stored
in your organizer or if there is no
matching record, 127 )281' appears.
3. Press DSP (display)/INS to view the
information in the record.
4. Press 8 or
fields.
9 to move through the
5. To view another record, repeat Steps
1–4.
EDITING A RECORD
1. Recall the record you want to edit.
2. Press EDIT.
3. Press6or7to move the cursor to
the character you want to edit. To
24
Entering Data/Using Records
change a character, simply enter the
correct character.
To add a character, press DSP/INS
(insert) so a space appears, then
enter the desired character.
Press SPACE to enter a space in
place of a character.
To delete a character, press DEL.
4. When you finish editing the first field,
press ENTER. The next field in the
record appears on the first line of the
display.
Note: Memo records are only one
field long.
5. Repeat Steps 1–4 to edit other fields
in the record.
Entering Data/Using Records
25
6. To store the edited record, press
ENTER.
7. Repeat Steps 1–6 to edit additional
records or press a function key to
exit.
DELETING A RECORD
1. Recall the record you want to delete.
2. Press DEL. '(/(7( 2." appears.
3. To delete the record, press ENTER;
otherwise, press any key except
ENTER.
26
Entering Data/Using Records
ˆ Storing Phone
Records
Your organizer has three phone directories (3+21( 4, 3+21( 5, and 3+21( 6). This
section explains how to store a phone list
record. See “Entering Data/Using
Records” on Page 22 to recall, edit, or
delete a phone list record.
You can store a name, company name,
address, three telephone numbers, email address, and notes in each phone
list record. Each record can be up to 199
characters.
1. Press PHONE once (for 3+21( 4),
twice (for 3+21( 5), or three times
(for 3+21( 6). The phone list’s name
Storing Phone Records
27
(such as 3+21(4), the amount of free
space, and 1$0(" appear.
2. Enter the desired name and press
ENTER. (Since the organizer stores
phone list records alphabetically by
name, you might want to enter last
names first.)
3. Enter each type of information as the
organizer prompts you for it
($''5(66, WHO#4, and so on).
4. To store the record, press ENTER.
The phone list’s name (such as
3+21(# 4), the amount of free space,
and 1$0(" appear.
5. Repeat Steps 2–4 to store additional
records, or press any function key to
exit.
28
Storing Phone Records
ˆ Storing Memo/To
Do Records
The Memo function lets you record notes
to yourself, while the To Do function lets
you keep a list of things to do. Each entry
can be up to 206 characters long.
These sections explain how to store
memo and to do records. See “Entering
Data/Using Records” on Page 22 for data
entry tips and instructions for recalling,
editing, or deleting either type of record.
MEMO RECORDS
1. Press MEMO. 0(02" appears.
2. Enter the memo.
3. To store the record, press ENTER.
Storing Memo/To Do Records
29
4. Repeat Steps 2 and 3 to store additional records, or press any function
key to exit.
TO DO RECORDS
1. Press MEMO twice. 72'2" appears.
2. Enter the task and other information
you want to store.
3. To store the record, press ENTER.
4. Press a number key (1–3) to assign a
priority level to the record.
5. Repeat Steps 2–4 to store additional
records, or press any function key to
exit.
30
Storing Memo/To Do Records
ˆ Using the Daily
Alarm
You can set an alarm to sound at a set
time of day, even if the organizer is off.
When the daily alarm is on,
appears
and a tone sounds at the set time for
about 20 seconds. To silence the alarm
sooner, press any key.
Note: Because pressing any key turns off
the alarm, the alarm might not sound if
you are entering information at the alarm
time.
SETTING THE DAILY
ALARM TIME
1. Press ALARM. $/$50 and the current
alarm time appear.
Using the Daily Alarm
31
2. Press EDIT. The first digit of the
alarm time flashes.
3. Use the number keys to enter each
digit of the alarm time.
Note: If you make an incorrect entry,
press6or7to move backward or
forward to the digit that you want to
change. Then enter the correct digit.
4. If you are using the 12-hour time format, press AM/PM to select the correct AM or PM hour.
5. Press ENTER to store the alarm time.
appears when the alarm is on.
6. Press TIME to return to the current
date and time display or press any
other function key.
32
Using the Daily Alarm
TURNING THE DAILY
ALARM ON/OFF
Press ALARM.
time appear.
and the current alarm
Press
(V) to turn the alarm on or off.
appears when the alarm is on.
Note: Turning the daily alarm on or off
does not affect schedule alarms (see
“Schedule Alarms”).
SCHEDULE ALARMS
Schedule alarms keep you in control of
your busy schedule by reminding you of
meetings and other important events. For
each alarm, you can enter an alarm message of up to 206 characters.
Using the Daily Alarm
33
At the set time, the alarm sounds for 20
seconds and your stored alarm message
appears. If the organizer is off at the set
alarm time, the organizer turns on,
sounds the alarm tone, and displays the
alarm message.
To silence the alarm sooner, press any
key.
Notes:
• Since pressing any key turns off the
alarm, it might not sound (and the
alarm message might not appear) if
you are entering information at the
schedule alarm time.
• If your organizer is locked at the
schedule alarm time, the alarm
sounds but the alarm message does
not appear. To display the alarm
34
Using the Daily Alarm
message, you must enter the password (see “Using a Password” on
Page 40).
ENTERING A SCHEDULE
ALARM
To store a schedule alarm, you must enter both the alarm time and a message.
See “Entering Data/Using Records” on
Page 22 for data entry tips and instructions for editing or deleting schedule
records.
1. Press SCHED. 6&+('8/( and the current date appears. The first digit of
the month flashes.
2. Enter the date and time of the event.
Using the Daily Alarm
35
3. If you are using the 12-hour time format, press AM/PM to select the correct AM or PM hour.
4. Press ENTER, then enter the message you want to have displayed
when the schedule alarm sounds.
5. To store the record, press ENTER.
6. Repeat Steps 2–5 to store additional
records or press any function key to
exit.
TURNING SCHEDULE
ALARMS ON/OFF
1. Press SEARCH
or
to access
the schedule alarms. Then press 8
or 9to recall the desired schedule
alarm record.
36
Using the Daily Alarm
2. Press DSP to display the full record.
3. Press
(V) to turn the schedule
alarms on or off.
appears when
the alarm is on.
Note: Turning a schedule alarm on or off
does not affect a daily alarm.
Using the Daily Alarm
37
ˆ Using the Unit
Converter
CONV easily and conveniently converts
between the following units of measurement:
•
•
•
•
•
•
•
•
38
inch and centimeter
feet and meter
yard and meter
mile and kilometer
US fluid ounce and milliliter
UK fluid ounce and milliliter
ounce and gram
pound and kilogram
Using the Unit Converter
Follow these steps to convert between
two units of measurement.
1. Press CONV. Two units appear.
2. Repeatedly press 8or9# until the
desired unit conversion pair appears.
3. Enter the amount you want to convert.
4. Press6or7to convert and to toggle between the two units.
Using the Unit Converter
39
ˆ Using a Password
You can block unauthorized access to information by entering it in an area which
is protected by a password that you assign. Once you set the password, you
must enter the password each time you
turn on the organizer.
PASSWORD.
1. Press
appears.
3$66:25'"
2. Enter a password, up to 8 characters
long.
3. Press ENTER.
appears.
4. Repeat Steps 1–3 to change the
password.
Note: To cancel the password, repeat
Steps 1 and 3.
40
Using a Password
ˆ Using the
Calculator
You can use the organizer to perform basic calculations as you would any other
calculator.
Press CALC once to use the calculator.
&$/1 and 31 appear.
once to clear the last enPress C/CE
try. Press C/CE twice to clear all pending
calculations.
Note: ( (error) appears if the result of a
calculation has more than 10 digits, if you
try to calculate the square root of a negative number, or if you try to divide by 0.
To clear the error, press C/CE.
Using the Calculator
41
MEMORY CALCULATIONS
The memory calculation feature lets you
perform multi-step calculations easily.
• Press MC (Q) to clear the memory.
• Press MR (W) to recall the value in
memory.
• Press M– (E) to total a calculation
and subtract the total from the value
in memory.
• Press M+ (R) to total a calculation
and add the total to memory.
• Press MC to clear the memory. ²0²
appears when you store a value in
memory, and disappears when you
clear the memory.
42
Using the Calculator
For example, to perform this calculation:
(4 × 5) + (28 + 2) – (7 – 2) + (75 ÷ 5) = 60
You Press
You See
CALC
31
31
31
0.1
²0²#531
0.1
²0²#631
0²
²0²#81
0.1
²0²#481
²0²#931
931
C/CE
MC
4 × 5 = M+
28 + 2 = M+
7 – 2 = M–
75 ÷ 5 = M+
MR
MC
Using the Calculator
43
ˆ Using the PC
Link
To synchronize data between your organizer and a computer, first connect the
supplied PC link cable between the PC
PORT jack on the organizer and your
PC’s serial port. Then follow the steps
under “Installing the Windows Link Software” on Page 45 and “Synchronization”
on Page 46.
can only transfer BOOKMARK,
PHONE, SCHED, MEMO/TO DO, or ANNIV
You
records.
44
Using the PC Link
INSTALLING THE WINDOWS
LINK SOFTWARE
1. Close all programs in use on the PC,
then insert the supplied CD-ROM
into your computer’s CD-ROM drive.
2. Select Run from the Start menu.
Then type '=?,167$//?,167$// and
click OK. Follow the on-screen
instructions.
3. After the software is installed, click
the Windows Link icon on the screen
to run the software.
Notes:
• D: usually refers to the CD-ROM
drive.
• The owner’s manual for the PC
link software is located at
Using the PC Link
45
D:\User’s Guide on the supplied
CD-ROM.
• To view the Acrobat version
(.PDF) manual, you need Acrobat
Reader (included on the supplied
CD-ROM).
• If Acrobat Reader is not already
installed, select Run from the Start
menu, then type '=?,167$//?$&520
%$7?6(783 and click OK. Follow
the onscreen instructions.
SYNCHRONIZATION
Synchronization lets you combine the additions, changes, and deletions you have
made to your records without manually
entering each transaction, so your organizer and PC have the same information.
46
Using the PC Link
When data between the organizer and
PC are being synchronized:
• Any record (phone, schedule, or
memo) which has been added,
deleted, or changed in the organizer
but not in the PC is also added,
deleted, or changed in the PC.
• Any record (phone, schedule, or
memo) which has been added,
deleted, or changed in the PC but
not in the organizer is also added,
deleted, or changed in the organizer.
SYNCHRONIZING THE DATA
1. Connect the PC link cable between
the PC port jack on the organizer
and your PC’s serial port.
2. Run the Windows link software.
Using the PC Link
47
3. Select Synchronize with Organizer
from the File menu, or click the Synchronize button.
4. Select Change Port to access COM
options. COM 1 is configured as the
default communication port for synchronization with the organizer.
To change the COM port, select
Change Port then select COM 1–4.
Unavailable ports appear in grey.
5. Click Test to determine port availability.
6. Click Synch Options to select:
Synch — When the same record is
changed or deleted on both the PC
and the organizer, the result is deter-
48
Using the PC Link
mined by the
options setting:
synchronization
• Keep Databank version: The
organizer version of the record
replaces the PC record. If the
organizer record is deleted, the
PC record is also deleted. This is
the default setting.
• Keep PC database version: The
PC version of the record replaces
the organizer record. If the PC
record is deleted, the organizer
record is also deleted.
• Keep both versions: Both the PC
and organizer versions are saved.
If the record was changed on both
the organizer and the PC, the
organizer record and PC record
will be treated as separate
Using the PC Link
49
records for future synchronizations, even if they were edited to
contain exactly the same information. If one version of the record
was deleted and the other was
changed, the changed record is
saved on both the PC and organizer.
Backup — To back up all the data in
the organizer to a data file in the PC,
select Backup. Use this option when
you create a new file on the PC and
want to backup the organizer data to
this new file. Any existing PC data is
deleted and replaced by the organizer data.
Restore — Select Restore to transfer
all the data stored in the PC to the
Organizer. Any existing organizer
50
Using the PC Link
data is deleted and replaced by the
PC data.
7. Press PHONE on your organizer.
8. Press
LINK
on
6<1&+112: appears.
your
organizer.
Notes:
• If an error occurs during the transfer,
(5525 appears. Repeat Steps 3–8.
• When the record transfer to the organizer is complete, the organizer
pauses to update its records, then
the normal display appears.
• When using the Restore option, wait
for the exporting dialog box to close
before pressing LINK on the organizer.
Using the PC Link
51
ˆ Care
Keep the organizer dry; if it gets wet,
wipe it dry immediately. Use and store
the organizer only in normal temperature
environments. Handle the organizer carefully; do not drop it. Keep the organizer
away from dust and dirt, and wipe it with
a damp cloth occasionally to keep it looking new.
Modifying or tampering with the organizer’s internal components can cause a
malfunction and might invalidate its warranty and void your FCC authorization to
operate it. If your organizer is not performing as it should, take it to your local
RadioShack store for assistance.
52
Care
Notes:
• At very low temperatures, the display’s response time might slow
down or the display might fail completely. This is only temporary. The
organizer works normally again
when it returns to a normal temperature.
• If the organizer is exposed to strong
static electric charges, the display
might become dim or the organizer
might fail to operate properly. If this
happens, reset your organizer (see
“Resetting
the
Organizer” on
Page 57).
Care
53
REPLACING THE
BATTERIES
Caution: To avoid losing stored data:
• Be sure to turn off your organizer
when replacing the batteries.
• Remove the old batteries and
replace them with the new ones one
at a time.
• Remove the old batteries and install
the new ones as quickly as possible.
Your organizer comes with two 3V
CR2032 lithium, button-cell batteries for
power.
When the display dims or the organizer
stops working properly, replace the batteries. For the best performance and
54
Care
longest life, we recommend RadioShack
batteries.
Warning:
• Keep button-cell batteries away from
children. Swallowing a button-cell
battery can be fatal.
• Dispose of old batteries promptly
and properly. Do not burn or bury
them.
Cautions:
• Use only fresh batteries of the
required size and recommended
type.
• Do not mix old and new batteries,
different types of batteries (standard,
alkaline, or rechargeable), or
Care
55
rechargeable batteries of different
capacities.
Follow these steps to replace the batteries.
1. Press ON/OFF to turn off the organizer.
2. Use a small Phillips screwdriver to
remove the screw from the battery
compartment cover, then slide the
cover in the direction of the arrow to
remove it.
3. Use a pointed object, such as a
straightened paper clip or the end of
a screwdriver, to gently pry out both
batteries, then install the new ones
with the positive (+) sides facing up.
4. Replace the cover and the screw.
56
Care
Note: After replacing the batteries, reset
the time and date, as necessary.
RESETTING THE
ORGANIZER
If the organizer stops operating properly
or you forget your password, you might
need to reset it.
Follow these steps to reset the organizer
and clear all the stored information in the
organizer.
1. Press ON/OFF to turn off the organizer.
2. Use a pointed object, such as a
straightened paper clip, to press
RESET. 5(6(7#2." appears.
Care
57
3. Press ENTER to reset the organizer.
The factory installed date and place
appear. All the information stored in
the organizer’s memory is cleared.
Otherwise, press any key except
ENTER to cancel.
4. Reset the date, time, and any alarm
settings, as necessary.
58
Care
ˆ Specifications
Power Source: ......................... 2 × 3V Lithium
CR2032 Batteries
Battery Life ........................... About 6 Months
Automatic Power-Off ............ About 7 Minutes
Working Temperature ................. 32° to 104°F
(0° to 40°C)
Dimensions (HWD) .......... 213/16 × 43/4 × 1/2 in
(72 × 120 × 13 mm)
Weight (with Batteries) ......................... 3.0 oz
(85.3 g)
Specifications are typical; individual units
might vary. Specifications are subject to
change and improvement without notice.
Specifications
59
Limited One-Year Warranty
This product is warranted by RadioShack against manufacturing defects in material
and workmanship under normal use for one (1) year from the date of purchase from
RadioShack company-owned stores and authorized RadioShack franchisees and
dealers. EXCEPT AS PROVIDED HEREIN, RadioShack MAKES NO EXPRESS
WARRANTIES AND ANY IMPLIED WARRANTIES, INCLUDING THOSE OF MERCHANTABILITY AND FITNESS FOR A PARTICULAR PURPOSE, ARE LIMITED IN
DURATION TO THE DURATION OF THE WRITTEN LIMITED WARRANTIES CONTAINED HEREIN. EXCEPT AS PROVIDED HEREIN, RadioShack SHALL HAVE
NO LIABILITY OR RESPONSIBILITY TO CUSTOMER OR ANY OTHER PERSON
OR ENTITY WITH RESPECT TO ANY LIABILITY, LOSS OR DAMAGE CAUSED
DIRECTLY OR INDIRECTLY BY USE OR PERFORMANCE OF THE PRODUCT
OR ARISING OUT OF ANY BREACH OF THIS WARRANTY, INCLUDING, BUT
NOT LIMITED TO, ANY DAMAGES RESULTING FROM INCONVENIENCE, LOSS
OF TIME, DATA, PROPERTY, REVENUE, OR PROFIT OR ANY INDIRECT, SPECIAL, INCIDENTAL, OR CONSEQUENTIAL DAMAGES, EVEN IF RadioShack HAS
BEEN ADVISED OF THE POSSIBILITY OF SUCH DAMAGES.
Some states do not allow limitations on how long an implied warranty lasts or the exclusion or limitation of incidental or consequential damages, so the above limitations
or exclusions may not apply to you.
In the event of a product defect during the warranty period, take the product and the
RadioShack sales receipt as proof of purchase date to any RadioShack store.
RadioShack will, at its option, unless otherwise provided by law: (a) correct the defect by product repair without charge for parts and labor; (b) replace the product with
one of the same or similar design; or (c) refund the purchase price. All replaced parts
and products, and products on which a refund is made, become the property of
RadioShack. New or reconditioned parts and products may be used in the performance of warranty service. Repaired or replaced parts and products are warranted
for the remainder of the original warranty period. You will be charged for repair or replacement of the product made after the expiration of the warranty period.
This warranty does not cover: (a) damage or failure caused by or attributable to acts
of God, abuse, accident, misuse, improper or abnormal usage, failure to follow instructions, improper installation or maintenance, alteration, lightning or other incidence of excess voltage or current; (b) any repairs other than those provided by a
RadioShack Authorized Service Facility; (c) consumables such as fuses or batteries;
(d) cosmetic damage; (e) transportation, shipping or insurance costs; or (f) costs of
product removal, installation, set-up service adjustment or reinstallation.
This warranty gives you specific legal rights, and you may also have other rights
which vary from state to state.
RadioShack Customer Relations, 200 Taylor Street, 6th Floor, Fort Worth, TX 76102
We Service What We Sell
12/99
RadioShack Corporation
Fort Worth, Texas 76102
65-779
02A01
Printed in Hong Kong