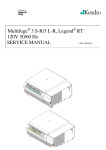
1
INSTALLATION/OPERATION
VMX200 Software
C1534M (1/06)
Contents
Description . . . . . . . . . . . . . . . . . . . . . . . . . . . . . . . . . . . . . . . . . . . . . . . . . . . . . . . . . . . . . . . . . . . . . . . . . . . . . . . . . . . . . . . . . . . . . . . . . . . . . . . . . . 7
VMX210 Workstation Specifications . . . . . . . . . . . . . . . . . . . . . . . . . . . . . . . . . . . . . . . . . . . . . . . . . . . . . . . . . . . . . . . . . . . . . . . . . . . . . . . . . 7
Getting Started . . . . . . . . . . . . . . . . . . . . . . . . . . . . . . . . . . . . . . . . . . . . . . . . . . . . . . . . . . . . . . . . . . . . . . . . . . . . . . . . . . . . . . . . . . . . . . . . . . . . . . . 8
System Configuration . . . . . . . . . . . . . . . . . . . . . . . . . . . . . . . . . . . . . . . . . . . . . . . . . . . . . . . . . . . . . . . . . . . . . . . . . . . . . . . . . . . . . . . . . . . . . . . . . . 9
Add Devices . . . . . . . . . . . . . . . . . . . . . . . . . . . . . . . . . . . . . . . . . . . . . . . . . . . . . . . . . . . . . . . . . . . . . . . . . . . . . . . . . . . . . . . . . . . . . . . . . . . . . 9
The Device Configuration Window . . . . . . . . . . . . . . . . . . . . . . . . . . . . . . . . . . . . . . . . . . . . . . . . . . . . . . . . . . . . . . . . . . . . . . . . . . . . . . . 9
Add A Device . . . . . . . . . . . . . . . . . . . . . . . . . . . . . . . . . . . . . . . . . . . . . . . . . . . . . . . . . . . . . . . . . . . . . . . . . . . . . . . . . . . . . . . . . . . . . . 10
Draw the Wire Connections . . . . . . . . . . . . . . . . . . . . . . . . . . . . . . . . . . . . . . . . . . . . . . . . . . . . . . . . . . . . . . . . . . . . . . . . . . . . . . . . . . . 12
Edit the Device Configuration Diagram . . . . . . . . . . . . . . . . . . . . . . . . . . . . . . . . . . . . . . . . . . . . . . . . . . . . . . . . . . . . . . . . . . . . . . . . . . 13
Save and Cancel Changes . . . . . . . . . . . . . . . . . . . . . . . . . . . . . . . . . . . . . . . . . . . . . . . . . . . . . . . . . . . . . . . . . . . . . . . . . . . . . . . . . . . . 17
Close the Device Configuration Window . . . . . . . . . . . . . . . . . . . . . . . . . . . . . . . . . . . . . . . . . . . . . . . . . . . . . . . . . . . . . . . . . . . . . . . . . 18
Backup the Device Configuration . . . . . . . . . . . . . . . . . . . . . . . . . . . . . . . . . . . . . . . . . . . . . . . . . . . . . . . . . . . . . . . . . . . . . . . . . . . . . . . 18
Configure Users . . . . . . . . . . . . . . . . . . . . . . . . . . . . . . . . . . . . . . . . . . . . . . . . . . . . . . . . . . . . . . . . . . . . . . . . . . . . . . . . . . . . . . . . . . . . . . . . . 18
Add a User . . . . . . . . . . . . . . . . . . . . . . . . . . . . . . . . . . . . . . . . . . . . . . . . . . . . . . . . . . . . . . . . . . . . . . . . . . . . . . . . . . . . . . . . . . . . . . . . 18
Delete A User . . . . . . . . . . . . . . . . . . . . . . . . . . . . . . . . . . . . . . . . . . . . . . . . . . . . . . . . . . . . . . . . . . . . . . . . . . . . . . . . . . . . . . . . . . . . . . 20
Edit a User . . . . . . . . . . . . . . . . . . . . . . . . . . . . . . . . . . . . . . . . . . . . . . . . . . . . . . . . . . . . . . . . . . . . . . . . . . . . . . . . . . . . . . . . . . . . . . . . . 20
Copy a User . . . . . . . . . . . . . . . . . . . . . . . . . . . . . . . . . . . . . . . . . . . . . . . . . . . . . . . . . . . . . . . . . . . . . . . . . . . . . . . . . . . . . . . . . . . . . . . . 20
User Environment Options . . . . . . . . . . . . . . . . . . . . . . . . . . . . . . . . . . . . . . . . . . . . . . . . . . . . . . . . . . . . . . . . . . . . . . . . . . . . . . . . . . . . 20
Configure Site Maps . . . . . . . . . . . . . . . . . . . . . . . . . . . . . . . . . . . . . . . . . . . . . . . . . . . . . . . . . . . . . . . . . . . . . . . . . . . . . . . . . . . . . . . . . . . . . 22
The Site Map Window . . . . . . . . . . . . . . . . . . . . . . . . . . . . . . . . . . . . . . . . . . . . . . . . . . . . . . . . . . . . . . . . . . . . . . . . . . . . . . . . . . . . . . . 22
Additional Configuration . . . . . . . . . . . . . . . . . . . . . . . . . . . . . . . . . . . . . . . . . . . . . . . . . . . . . . . . . . . . . . . . . . . . . . . . . . . . . . . . . . . . . . . . . . 28
Configure Presets . . . . . . . . . . . . . . . . . . . . . . . . . . . . . . . . . . . . . . . . . . . . . . . . . . . . . . . . . . . . . . . . . . . . . . . . . . . . . . . . . . . . . . . . . . . 28
Configure Sequences . . . . . . . . . . . . . . . . . . . . . . . . . . . . . . . . . . . . . . . . . . . . . . . . . . . . . . . . . . . . . . . . . . . . . . . . . . . . . . . . . . . . . . . . 29
Configure Macros . . . . . . . . . . . . . . . . . . . . . . . . . . . . . . . . . . . . . . . . . . . . . . . . . . . . . . . . . . . . . . . . . . . . . . . . . . . . . . . . . . . . . . . . . . . 32
Configure Scheduled Events . . . . . . . . . . . . . . . . . . . . . . . . . . . . . . . . . . . . . . . . . . . . . . . . . . . . . . . . . . . . . . . . . . . . . . . . . . . . . . . . . . . 35
Configure Camera Auxiliary Points . . . . . . . . . . . . . . . . . . . . . . . . . . . . . . . . . . . . . . . . . . . . . . . . . . . . . . . . . . . . . . . . . . . . . . . . . . . . . . 38
Configure Input/Output Points . . . . . . . . . . . . . . . . . . . . . . . . . . . . . . . . . . . . . . . . . . . . . . . . . . . . . . . . . . . . . . . . . . . . . . . . . . . . . . . . . 39
Configure FTP Settings . . . . . . . . . . . . . . . . . . . . . . . . . . . . . . . . . . . . . . . . . . . . . . . . . . . . . . . . . . . . . . . . . . . . . . . . . . . . . . . . . . . . . . . 41
Configure the Capture Card . . . . . . . . . . . . . . . . . . . . . . . . . . . . . . . . . . . . . . . . . . . . . . . . . . . . . . . . . . . . . . . . . . . . . . . . . . . . . . . . . . . 43
Configure the Video Format . . . . . . . . . . . . . . . . . . . . . . . . . . . . . . . . . . . . . . . . . . . . . . . . . . . . . . . . . . . . . . . . . . . . . . . . . . . . . . . . . . . 43
Operation . . . . . . . . . . . . . . . . . . . . . . . . . . . . . . . . . . . . . . . . . . . . . . . . . . . . . . . . . . . . . . . . . . . . . . . . . . . . . . . . . . . . . . . . . . . . . . . . . . . . . . . . . . 44
Getting Started . . . . . . . . . . . . . . . . . . . . . . . . . . . . . . . . . . . . . . . . . . . . . . . . . . . . . . . . . . . . . . . . . . . . . . . . . . . . . . . . . . . . . . . . . . . . . . . . . 44
Start VMX210 . . . . . . . . . . . . . . . . . . . . . . . . . . . . . . . . . . . . . . . . . . . . . . . . . . . . . . . . . . . . . . . . . . . . . . . . . . . . . . . . . . . . . . . . . . . . . . 44
Log In as a New User . . . . . . . . . . . . . . . . . . . . . . . . . . . . . . . . . . . . . . . . . . . . . . . . . . . . . . . . . . . . . . . . . . . . . . . . . . . . . . . . . . . . . . . . 44
Navigate Between Site Maps . . . . . . . . . . . . . . . . . . . . . . . . . . . . . . . . . . . . . . . . . . . . . . . . . . . . . . . . . . . . . . . . . . . . . . . . . . . . . . . . . 45
Operating the System . . . . . . . . . . . . . . . . . . . . . . . . . . . . . . . . . . . . . . . . . . . . . . . . . . . . . . . . . . . . . . . . . . . . . . . . . . . . . . . . . . . . . . . . . . . . 45
Select a Camera . . . . . . . . . . . . . . . . . . . . . . . . . . . . . . . . . . . . . . . . . . . . . . . . . . . . . . . . . . . . . . . . . . . . . . . . . . . . . . . . . . . . . . . . . . . . 45
Camera Control . . . . . . . . . . . . . . . . . . . . . . . . . . . . . . . . . . . . . . . . . . . . . . . . . . . . . . . . . . . . . . . . . . . . . . . . . . . . . . . . . . . . . . . . . . . . . 46
Video Window Adjustment . . . . . . . . . . . . . . . . . . . . . . . . . . . . . . . . . . . . . . . . . . . . . . . . . . . . . . . . . . . . . . . . . . . . . . . . . . . . . . . . . . . . 47
View An External Monitor . . . . . . . . . . . . . . . . . . . . . . . . . . . . . . . . . . . . . . . . . . . . . . . . . . . . . . . . . . . . . . . . . . . . . . . . . . . . . . . . . . . . 47
Operate a Preset . . . . . . . . . . . . . . . . . . . . . . . . . . . . . . . . . . . . . . . . . . . . . . . . . . . . . . . . . . . . . . . . . . . . . . . . . . . . . . . . . . . . . . . . . . . . 48
Operate Sequences . . . . . . . . . . . . . . . . . . . . . . . . . . . . . . . . . . . . . . . . . . . . . . . . . . . . . . . . . . . . . . . . . . . . . . . . . . . . . . . . . . . . . . . . . . 49
Operate Macros . . . . . . . . . . . . . . . . . . . . . . . . . . . . . . . . . . . . . . . . . . . . . . . . . . . . . . . . . . . . . . . . . . . . . . . . . . . . . . . . . . . . . . . . . . . . 49
Alarm Point Events . . . . . . . . . . . . . . . . . . . . . . . . . . . . . . . . . . . . . . . . . . . . . . . . . . . . . . . . . . . . . . . . . . . . . . . . . . . . . . . . . . . . . . . . . . 50
Operate a VCR . . . . . . . . . . . . . . . . . . . . . . . . . . . . . . . . . . . . . . . . . . . . . . . . . . . . . . . . . . . . . . . . . . . . . . . . . . . . . . . . . . . . . . . . . . . . . . 52
Image Capture . . . . . . . . . . . . . . . . . . . . . . . . . . . . . . . . . . . . . . . . . . . . . . . . . . . . . . . . . . . . . . . . . . . . . . . . . . . . . . . . . . . . . . . . . . . . . . 54
Operate Auxiliaries and Output Points . . . . . . . . . . . . . . . . . . . . . . . . . . . . . . . . . . . . . . . . . . . . . . . . . . . . . . . . . . . . . . . . . . . . . . . . . . . 59
Advanced Controls . . . . . . . . . . . . . . . . . . . . . . . . . . . . . . . . . . . . . . . . . . . . . . . . . . . . . . . . . . . . . . . . . . . . . . . . . . . . . . . . . . . . . . . . . . 60
2
C1534M (1/06)
Appendix . . . . . . . . . . . . . . . . . . . . . . . . . . . . . . . . . . . . . . . . . . . . . . . . . . . . . . . . . . . . . . . . . . . . . . . . . . . . . . . . . . . . . . . . . . . . . . . . . . . . . . . . . . . 62
The VMX200 Site Map Window . . . . . . . . . . . . . . . . . . . . . . . . . . . . . . . . . . . . . . . . . . . . . . . . . . . . . . . . . . . . . . . . . . . . . . . . . . . . . . . . . . . . 62
Site Map Menu Bar . . . . . . . . . . . . . . . . . . . . . . . . . . . . . . . . . . . . . . . . . . . . . . . . . . . . . . . . . . . . . . . . . . . . . . . . . . . . . . . . . . . . . . . . . 62
Site Map Zoom Icons . . . . . . . . . . . . . . . . . . . . . . . . . . . . . . . . . . . . . . . . . . . . . . . . . . . . . . . . . . . . . . . . . . . . . . . . . . . . . . . . . . . . . . . . 64
Site Map Status Bar . . . . . . . . . . . . . . . . . . . . . . . . . . . . . . . . . . . . . . . . . . . . . . . . . . . . . . . . . . . . . . . . . . . . . . . . . . . . . . . . . . . . . . . . . 64
The VMX210 Device Configuration Window . . . . . . . . . . . . . . . . . . . . . . . . . . . . . . . . . . . . . . . . . . . . . . . . . . . . . . . . . . . . . . . . . . . . . . . . . . . 65
Device Configuration Window Menu Bar . . . . . . . . . . . . . . . . . . . . . . . . . . . . . . . . . . . . . . . . . . . . . . . . . . . . . . . . . . . . . . . . . . . . . . . . . 65
Device Configuration Window Tool Bar . . . . . . . . . . . . . . . . . . . . . . . . . . . . . . . . . . . . . . . . . . . . . . . . . . . . . . . . . . . . . . . . . . . . . . . . . . 66
Reference Information for Adding Devices . . . . . . . . . . . . . . . . . . . . . . . . . . . . . . . . . . . . . . . . . . . . . . . . . . . . . . . . . . . . . . . . . . . . . . . . . . . . 67
Add A Camera . . . . . . . . . . . . . . . . . . . . . . . . . . . . . . . . . . . . . . . . . . . . . . . . . . . . . . . . . . . . . . . . . . . . . . . . . . . . . . . . . . . . . . . . . . . . . . 67
Add a Switcher . . . . . . . . . . . . . . . . . . . . . . . . . . . . . . . . . . . . . . . . . . . . . . . . . . . . . . . . . . . . . . . . . . . . . . . . . . . . . . . . . . . . . . . . . . . . . 68
Add an External Monitor . . . . . . . . . . . . . . . . . . . . . . . . . . . . . . . . . . . . . . . . . . . . . . . . . . . . . . . . . . . . . . . . . . . . . . . . . . . . . . . . . . . . . . 68
Add a VCR . . . . . . . . . . . . . . . . . . . . . . . . . . . . . . . . . . . . . . . . . . . . . . . . . . . . . . . . . . . . . . . . . . . . . . . . . . . . . . . . . . . . . . . . . . . . . . . . . 69
Add a Digital Input/output Device . . . . . . . . . . . . . . . . . . . . . . . . . . . . . . . . . . . . . . . . . . . . . . . . . . . . . . . . . . . . . . . . . . . . . . . . . . . . . . 69
Software Installation and Registration . . . . . . . . . . . . . . . . . . . . . . . . . . . . . . . . . . . . . . . . . . . . . . . . . . . . . . . . . . . . . . . . . . . . . . . . . . . . . . . 70
VMX210 Software Reinstall . . . . . . . . . . . . . . . . . . . . . . . . . . . . . . . . . . . . . . . . . . . . . . . . . . . . . . . . . . . . . . . . . . . . . . . . . . . . . . . . . . . 70
Software Registration . . . . . . . . . . . . . . . . . . . . . . . . . . . . . . . . . . . . . . . . . . . . . . . . . . . . . . . . . . . . . . . . . . . . . . . . . . . . . . . . . . . . . . . . 71
Feature Upgrade Registration - For Future Use . . . . . . . . . . . . . . . . . . . . . . . . . . . . . . . . . . . . . . . . . . . . . . . . . . . . . . . . . . . . . . . . . . . . 73
CCTV Device Drivers . . . . . . . . . . . . . . . . . . . . . . . . . . . . . . . . . . . . . . . . . . . . . . . . . . . . . . . . . . . . . . . . . . . . . . . . . . . . . . . . . . . . . . . . . 73
Troubleshooting . . . . . . . . . . . . . . . . . . . . . . . . . . . . . . . . . . . . . . . . . . . . . . . . . . . . . . . . . . . . . . . . . . . . . . . . . . . . . . . . . . . . . . . . . . . . . . . . . 73
Emergency Backup and Restore Procedures . . . . . . . . . . . . . . . . . . . . . . . . . . . . . . . . . . . . . . . . . . . . . . . . . . . . . . . . . . . . . . . . . . . . . . . . . . . 75
C1534M (1/06)
3
List of Illustrations
1
2
3
4
5
6
7
8
9
10
11
12
13
14
15
16
17
18
19
20
21
22
23
24
25
26
27
28
29
30
31
32
33
34
35
36
37
38
39
40
41
42
43
44
45
46
47
48
49
50
51
52
53
54
55
56
57
58
59
4
Log-In Dialog Box . . . . . . . . . . . . . . . . . . . . . . . . . . . . . . . . . . . . . . . . . . . . . . . . . . . . . . . . . . . . . . . . . . . . . . . . . . . . . . . . . . . . . . . . . . . . . . . . . 8
Sample VMX210 Monitor Displays on a Single-Monitor System (left) and a Dual-Monitor System (right) . . . . . . . . . . . . . . . . . . . . . . . . . . . . 8
VMX200 Device Configuration Window. . . . . . . . . . . . . . . . . . . . . . . . . . . . . . . . . . . . . . . . . . . . . . . . . . . . . . . . . . . . . . . . . . . . . . . . . . . . . . . . 9
Sample Add Device Dialog Box . . . . . . . . . . . . . . . . . . . . . . . . . . . . . . . . . . . . . . . . . . . . . . . . . . . . . . . . . . . . . . . . . . . . . . . . . . . . . . . . . . . . . 10
Sample Device Details Dialog Box . . . . . . . . . . . . . . . . . . . . . . . . . . . . . . . . . . . . . . . . . . . . . . . . . . . . . . . . . . . . . . . . . . . . . . . . . . . . . . . . . . . 11
Looping and Daisy-Chain Connections . . . . . . . . . . . . . . . . . . . . . . . . . . . . . . . . . . . . . . . . . . . . . . . . . . . . . . . . . . . . . . . . . . . . . . . . . . . . . . . . 13
Mirror Option . . . . . . . . . . . . . . . . . . . . . . . . . . . . . . . . . . . . . . . . . . . . . . . . . . . . . . . . . . . . . . . . . . . . . . . . . . . . . . . . . . . . . . . . . . . . . . . . . . . 14
Device Configuration Diagram Icon Label . . . . . . . . . . . . . . . . . . . . . . . . . . . . . . . . . . . . . . . . . . . . . . . . . . . . . . . . . . . . . . . . . . . . . . . . . . . . . 15
Device Inventory Window. . . . . . . . . . . . . . . . . . . . . . . . . . . . . . . . . . . . . . . . . . . . . . . . . . . . . . . . . . . . . . . . . . . . . . . . . . . . . . . . . . . . . . . . . . 15
Find Device Dialog Box . . . . . . . . . . . . . . . . . . . . . . . . . . . . . . . . . . . . . . . . . . . . . . . . . . . . . . . . . . . . . . . . . . . . . . . . . . . . . . . . . . . . . . . . . . . . 17
Save Configuration Message Box . . . . . . . . . . . . . . . . . . . . . . . . . . . . . . . . . . . . . . . . . . . . . . . . . . . . . . . . . . . . . . . . . . . . . . . . . . . . . . . . . . . 18
Users Dialog Box. . . . . . . . . . . . . . . . . . . . . . . . . . . . . . . . . . . . . . . . . . . . . . . . . . . . . . . . . . . . . . . . . . . . . . . . . . . . . . . . . . . . . . . . . . . . . . . . . 18
User Properties Dialog Box. . . . . . . . . . . . . . . . . . . . . . . . . . . . . . . . . . . . . . . . . . . . . . . . . . . . . . . . . . . . . . . . . . . . . . . . . . . . . . . . . . . . . . . . . 19
User Options Dialog Box. . . . . . . . . . . . . . . . . . . . . . . . . . . . . . . . . . . . . . . . . . . . . . . . . . . . . . . . . . . . . . . . . . . . . . . . . . . . . . . . . . . . . . . . . . . 20
Startup Options Tab . . . . . . . . . . . . . . . . . . . . . . . . . . . . . . . . . . . . . . . . . . . . . . . . . . . . . . . . . . . . . . . . . . . . . . . . . . . . . . . . . . . . . . . . . . . . . . 21
Alarm Options Tab . . . . . . . . . . . . . . . . . . . . . . . . . . . . . . . . . . . . . . . . . . . . . . . . . . . . . . . . . . . . . . . . . . . . . . . . . . . . . . . . . . . . . . . . . . . . . . . 21
Site Map Window. . . . . . . . . . . . . . . . . . . . . . . . . . . . . . . . . . . . . . . . . . . . . . . . . . . . . . . . . . . . . . . . . . . . . . . . . . . . . . . . . . . . . . . . . . . . . . . . 22
Maps Dialog Box. . . . . . . . . . . . . . . . . . . . . . . . . . . . . . . . . . . . . . . . . . . . . . . . . . . . . . . . . . . . . . . . . . . . . . . . . . . . . . . . . . . . . . . . . . . . . . . . . 23
Open Site Map Dialog Box . . . . . . . . . . . . . . . . . . . . . . . . . . . . . . . . . . . . . . . . . . . . . . . . . . . . . . . . . . . . . . . . . . . . . . . . . . . . . . . . . . . . . . . . . 23
Default Icon Colors Device Drop-down Box . . . . . . . . . . . . . . . . . . . . . . . . . . . . . . . . . . . . . . . . . . . . . . . . . . . . . . . . . . . . . . . . . . . . . . . . . . . . 24
Color Selection Palette . . . . . . . . . . . . . . . . . . . . . . . . . . . . . . . . . . . . . . . . . . . . . . . . . . . . . . . . . . . . . . . . . . . . . . . . . . . . . . . . . . . . . . . . . . . . 25
Editing Tool Bar . . . . . . . . . . . . . . . . . . . . . . . . . . . . . . . . . . . . . . . . . . . . . . . . . . . . . . . . . . . . . . . . . . . . . . . . . . . . . . . . . . . . . . . . . . . . . . . . . 25
Place Camera Dialog Box . . . . . . . . . . . . . . . . . . . . . . . . . . . . . . . . . . . . . . . . . . . . . . . . . . . . . . . . . . . . . . . . . . . . . . . . . . . . . . . . . . . . . . . . . . 26
Camera Icon on Site Map . . . . . . . . . . . . . . . . . . . . . . . . . . . . . . . . . . . . . . . . . . . . . . . . . . . . . . . . . . . . . . . . . . . . . . . . . . . . . . . . . . . . . . . . . . 26
Zoom Icons . . . . . . . . . . . . . . . . . . . . . . . . . . . . . . . . . . . . . . . . . . . . . . . . . . . . . . . . . . . . . . . . . . . . . . . . . . . . . . . . . . . . . . . . . . . . . . . . . . . . . 26
Resize Buttons on Editing Tool Bar. . . . . . . . . . . . . . . . . . . . . . . . . . . . . . . . . . . . . . . . . . . . . . . . . . . . . . . . . . . . . . . . . . . . . . . . . . . . . . . . . . . 27
Link Action Dialog Box . . . . . . . . . . . . . . . . . . . . . . . . . . . . . . . . . . . . . . . . . . . . . . . . . . . . . . . . . . . . . . . . . . . . . . . . . . . . . . . . . . . . . . . . . . . . 27
Sample Map Site Link Area . . . . . . . . . . . . . . . . . . . . . . . . . . . . . . . . . . . . . . . . . . . . . . . . . . . . . . . . . . . . . . . . . . . . . . . . . . . . . . . . . . . . . . . . 27
Sample Device Window . . . . . . . . . . . . . . . . . . . . . . . . . . . . . . . . . . . . . . . . . . . . . . . . . . . . . . . . . . . . . . . . . . . . . . . . . . . . . . . . . . . . . . . . . . . 28
Preset Save/Edit Dialog Box. . . . . . . . . . . . . . . . . . . . . . . . . . . . . . . . . . . . . . . . . . . . . . . . . . . . . . . . . . . . . . . . . . . . . . . . . . . . . . . . . . . . . . . . 29
Sequences Dialog Box . . . . . . . . . . . . . . . . . . . . . . . . . . . . . . . . . . . . . . . . . . . . . . . . . . . . . . . . . . . . . . . . . . . . . . . . . . . . . . . . . . . . . . . . . . . . 30
Blank Sequence Editor Window . . . . . . . . . . . . . . . . . . . . . . . . . . . . . . . . . . . . . . . . . . . . . . . . . . . . . . . . . . . . . . . . . . . . . . . . . . . . . . . . . . . . . 30
Sequence Event Details Dialog Box . . . . . . . . . . . . . . . . . . . . . . . . . . . . . . . . . . . . . . . . . . . . . . . . . . . . . . . . . . . . . . . . . . . . . . . . . . . . . . . . . . 30
Sequence Editor Window Edit Menu . . . . . . . . . . . . . . . . . . . . . . . . . . . . . . . . . . . . . . . . . . . . . . . . . . . . . . . . . . . . . . . . . . . . . . . . . . . . . . . . . 31
Macros Dialog Box . . . . . . . . . . . . . . . . . . . . . . . . . . . . . . . . . . . . . . . . . . . . . . . . . . . . . . . . . . . . . . . . . . . . . . . . . . . . . . . . . . . . . . . . . . . . . . . 33
Macro Editor Dialog Box. . . . . . . . . . . . . . . . . . . . . . . . . . . . . . . . . . . . . . . . . . . . . . . . . . . . . . . . . . . . . . . . . . . . . . . . . . . . . . . . . . . . . . . . . . . 33
Snapshot Macro Name Dialog Box . . . . . . . . . . . . . . . . . . . . . . . . . . . . . . . . . . . . . . . . . . . . . . . . . . . . . . . . . . . . . . . . . . . . . . . . . . . . . . . . . . 35
Scheduled Events Dialog Box . . . . . . . . . . . . . . . . . . . . . . . . . . . . . . . . . . . . . . . . . . . . . . . . . . . . . . . . . . . . . . . . . . . . . . . . . . . . . . . . . . . . . . . 35
Edit Schedule Dialog Box . . . . . . . . . . . . . . . . . . . . . . . . . . . . . . . . . . . . . . . . . . . . . . . . . . . . . . . . . . . . . . . . . . . . . . . . . . . . . . . . . . . . . . . . . . 36
Which Days Dialog Box . . . . . . . . . . . . . . . . . . . . . . . . . . . . . . . . . . . . . . . . . . . . . . . . . . . . . . . . . . . . . . . . . . . . . . . . . . . . . . . . . . . . . . . . . . . 37
Sunrise/Sunset Setup Dialog Box . . . . . . . . . . . . . . . . . . . . . . . . . . . . . . . . . . . . . . . . . . . . . . . . . . . . . . . . . . . . . . . . . . . . . . . . . . . . . . . . . . . 37
Auxiliaries Dialog Box. . . . . . . . . . . . . . . . . . . . . . . . . . . . . . . . . . . . . . . . . . . . . . . . . . . . . . . . . . . . . . . . . . . . . . . . . . . . . . . . . . . . . . . . . . . . . 38
Edit Point Properties Dialog Box. . . . . . . . . . . . . . . . . . . . . . . . . . . . . . . . . . . . . . . . . . . . . . . . . . . . . . . . . . . . . . . . . . . . . . . . . . . . . . . . . . . . . 38
Sample Input/Output Points Dialog Box. . . . . . . . . . . . . . . . . . . . . . . . . . . . . . . . . . . . . . . . . . . . . . . . . . . . . . . . . . . . . . . . . . . . . . . . . . . . . . . 39
CM9760-ALM (left) and CM9760-REL (right) Point Properties Dialog Boxes. . . . . . . . . . . . . . . . . . . . . . . . . . . . . . . . . . . . . . . . . . . . . . . . . . . 40
FTP Sites Dialog Box . . . . . . . . . . . . . . . . . . . . . . . . . . . . . . . . . . . . . . . . . . . . . . . . . . . . . . . . . . . . . . . . . . . . . . . . . . . . . . . . . . . . . . . . . . . . . . 41
Proxy Details Dialog Box. . . . . . . . . . . . . . . . . . . . . . . . . . . . . . . . . . . . . . . . . . . . . . . . . . . . . . . . . . . . . . . . . . . . . . . . . . . . . . . . . . . . . . . . . . . 41
FTP Host Details Dialog Box . . . . . . . . . . . . . . . . . . . . . . . . . . . . . . . . . . . . . . . . . . . . . . . . . . . . . . . . . . . . . . . . . . . . . . . . . . . . . . . . . . . . . . . . 42
Image Capture Configuration Dialog Box . . . . . . . . . . . . . . . . . . . . . . . . . . . . . . . . . . . . . . . . . . . . . . . . . . . . . . . . . . . . . . . . . . . . . . . . . . . . . . 43
Log-In Dialog Box . . . . . . . . . . . . . . . . . . . . . . . . . . . . . . . . . . . . . . . . . . . . . . . . . . . . . . . . . . . . . . . . . . . . . . . . . . . . . . . . . . . . . . . . . . . . . . . . 44
Log-In Command on the File Menu. . . . . . . . . . . . . . . . . . . . . . . . . . . . . . . . . . . . . . . . . . . . . . . . . . . . . . . . . . . . . . . . . . . . . . . . . . . . . . . . . . . 44
Sample Map Site Link Area . . . . . . . . . . . . . . . . . . . . . . . . . . . . . . . . . . . . . . . . . . . . . . . . . . . . . . . . . . . . . . . . . . . . . . . . . . . . . . . . . . . . . . . . 45
Back Icon. . . . . . . . . . . . . . . . . . . . . . . . . . . . . . . . . . . . . . . . . . . . . . . . . . . . . . . . . . . . . . . . . . . . . . . . . . . . . . . . . . . . . . . . . . . . . . . . . . . . . . . 45
Automation Menu. . . . . . . . . . . . . . . . . . . . . . . . . . . . . . . . . . . . . . . . . . . . . . . . . . . . . . . . . . . . . . . . . . . . . . . . . . . . . . . . . . . . . . . . . . . . . . . . 46
Monitor Icon on Site Map Tool Bar . . . . . . . . . . . . . . . . . . . . . . . . . . . . . . . . . . . . . . . . . . . . . . . . . . . . . . . . . . . . . . . . . . . . . . . . . . . . . . . . . . 48
External Monitor Window . . . . . . . . . . . . . . . . . . . . . . . . . . . . . . . . . . . . . . . . . . . . . . . . . . . . . . . . . . . . . . . . . . . . . . . . . . . . . . . . . . . . . . . . . 48
Select Sequence Dialog Box. . . . . . . . . . . . . . . . . . . . . . . . . . . . . . . . . . . . . . . . . . . . . . . . . . . . . . . . . . . . . . . . . . . . . . . . . . . . . . . . . . . . . . . . 49
Macros Dialog Box . . . . . . . . . . . . . . . . . . . . . . . . . . . . . . . . . . . . . . . . . . . . . . . . . . . . . . . . . . . . . . . . . . . . . . . . . . . . . . . . . . . . . . . . . . . . . . . 50
Alarm Viewer . . . . . . . . . . . . . . . . . . . . . . . . . . . . . . . . . . . . . . . . . . . . . . . . . . . . . . . . . . . . . . . . . . . . . . . . . . . . . . . . . . . . . . . . . . . . . . . . . . . 50
C1534M (1/06)
60
61
62
63
64
65
66
67
68
69
70
71
72
73
74
75
76
77
78
79
80
81
82
C1534M (1/06)
Capture Viewer . . . . . . . . . . . . . . . . . . . . . . . . . . . . . . . . . . . . . . . . . . . . . . . . . . . . . . . . . . . . . . . . . . . . . . . . . . . . . . . . . . . . . . . . . . . . . . . . . . 51
VCR Icon on Site Map Tool Bar. . . . . . . . . . . . . . . . . . . . . . . . . . . . . . . . . . . . . . . . . . . . . . . . . . . . . . . . . . . . . . . . . . . . . . . . . . . . . . . . . . . . . . 52
VCRs Window . . . . . . . . . . . . . . . . . . . . . . . . . . . . . . . . . . . . . . . . . . . . . . . . . . . . . . . . . . . . . . . . . . . . . . . . . . . . . . . . . . . . . . . . . . . . . . . . . . . 52
VCR Control Icons . . . . . . . . . . . . . . . . . . . . . . . . . . . . . . . . . . . . . . . . . . . . . . . . . . . . . . . . . . . . . . . . . . . . . . . . . . . . . . . . . . . . . . . . . . . . . . . . 52
VCR Advanced Properties Dialog Box. . . . . . . . . . . . . . . . . . . . . . . . . . . . . . . . . . . . . . . . . . . . . . . . . . . . . . . . . . . . . . . . . . . . . . . . . . . . . . . . . 53
Right-Click Pop-up Menu . . . . . . . . . . . . . . . . . . . . . . . . . . . . . . . . . . . . . . . . . . . . . . . . . . . . . . . . . . . . . . . . . . . . . . . . . . . . . . . . . . . . . . . . . . 54
Capture Viewer . . . . . . . . . . . . . . . . . . . . . . . . . . . . . . . . . . . . . . . . . . . . . . . . . . . . . . . . . . . . . . . . . . . . . . . . . . . . . . . . . . . . . . . . . . . . . . . . . . 55
Capture Viewer Folder List . . . . . . . . . . . . . . . . . . . . . . . . . . . . . . . . . . . . . . . . . . . . . . . . . . . . . . . . . . . . . . . . . . . . . . . . . . . . . . . . . . . . . . . . . 55
Filter Dialog Box . . . . . . . . . . . . . . . . . . . . . . . . . . . . . . . . . . . . . . . . . . . . . . . . . . . . . . . . . . . . . . . . . . . . . . . . . . . . . . . . . . . . . . . . . . . . . . . . . 56
Filter By Date and Time. . . . . . . . . . . . . . . . . . . . . . . . . . . . . . . . . . . . . . . . . . . . . . . . . . . . . . . . . . . . . . . . . . . . . . . . . . . . . . . . . . . . . . . . . . . . 56
Select a Sequence of Images . . . . . . . . . . . . . . . . . . . . . . . . . . . . . . . . . . . . . . . . . . . . . . . . . . . . . . . . . . . . . . . . . . . . . . . . . . . . . . . . . . . . . . . 57
Maintenance Macro Set to Delete Captures . . . . . . . . . . . . . . . . . . . . . . . . . . . . . . . . . . . . . . . . . . . . . . . . . . . . . . . . . . . . . . . . . . . . . . . . . . . 58
Frame Capture Viewer . . . . . . . . . . . . . . . . . . . . . . . . . . . . . . . . . . . . . . . . . . . . . . . . . . . . . . . . . . . . . . . . . . . . . . . . . . . . . . . . . . . . . . . . . . . . 58
Digital Output Control Window . . . . . . . . . . . . . . . . . . . . . . . . . . . . . . . . . . . . . . . . . . . . . . . . . . . . . . . . . . . . . . . . . . . . . . . . . . . . . . . . . . . . . 59
Sample Camera Advanced Properties Dialog Boxes: General Tab (left) and Advanced Tab (right). . . . . . . . . . . . . . . . . . . . . . . . . . . . . . . . . . 60
External Device Advanced Properties. . . . . . . . . . . . . . . . . . . . . . . . . . . . . . . . . . . . . . . . . . . . . . . . . . . . . . . . . . . . . . . . . . . . . . . . . . . . . . . . . 61
Advanced Properties Menu Option for CM6800 . . . . . . . . . . . . . . . . . . . . . . . . . . . . . . . . . . . . . . . . . . . . . . . . . . . . . . . . . . . . . . . . . . . . . . . . 61
Site Map Menu Bar . . . . . . . . . . . . . . . . . . . . . . . . . . . . . . . . . . . . . . . . . . . . . . . . . . . . . . . . . . . . . . . . . . . . . . . . . . . . . . . . . . . . . . . . . . . . . . 62
Site Map Zoom Icons . . . . . . . . . . . . . . . . . . . . . . . . . . . . . . . . . . . . . . . . . . . . . . . . . . . . . . . . . . . . . . . . . . . . . . . . . . . . . . . . . . . . . . . . . . . . . 64
Site Map Status Bar . . . . . . . . . . . . . . . . . . . . . . . . . . . . . . . . . . . . . . . . . . . . . . . . . . . . . . . . . . . . . . . . . . . . . . . . . . . . . . . . . . . . . . . . . . . . . . 64
Device Configuration Window Menu Bar. . . . . . . . . . . . . . . . . . . . . . . . . . . . . . . . . . . . . . . . . . . . . . . . . . . . . . . . . . . . . . . . . . . . . . . . . . . . . . 65
Device Configuration Window Tool Bar . . . . . . . . . . . . . . . . . . . . . . . . . . . . . . . . . . . . . . . . . . . . . . . . . . . . . . . . . . . . . . . . . . . . . . . . . . . . . . . 66
Backup Databases Dialog Box . . . . . . . . . . . . . . . . . . . . . . . . . . . . . . . . . . . . . . . . . . . . . . . . . . . . . . . . . . . . . . . . . . . . . . . . . . . . . . . . . . . . . . 75
5
List of Tables
A
B
C
D
E
F
G
H
I
J
6
User Permissions Table . . . . . . . . . . . . . . . . . . . . . . . . . . . . . . . . . . . . . . . . . . . . . . . . . . . . . . . . . . . . . . . . . . . . . . . . . . . . . . . . . . . . . . . . . . . 19
Sequence Editor Dialog Boxes . . . . . . . . . . . . . . . . . . . . . . . . . . . . . . . . . . . . . . . . . . . . . . . . . . . . . . . . . . . . . . . . . . . . . . . . . . . . . . . . . . . . . . 31
Macro Editor Dialog Box Icons . . . . . . . . . . . . . . . . . . . . . . . . . . . . . . . . . . . . . . . . . . . . . . . . . . . . . . . . . . . . . . . . . . . . . . . . . . . . . . . . . . . . . . 34
Scheduled Events Schedule Options . . . . . . . . . . . . . . . . . . . . . . . . . . . . . . . . . . . . . . . . . . . . . . . . . . . . . . . . . . . . . . . . . . . . . . . . . . . . . . . . . 37
Keyboard Camera Control. . . . . . . . . . . . . . . . . . . . . . . . . . . . . . . . . . . . . . . . . . . . . . . . . . . . . . . . . . . . . . . . . . . . . . . . . . . . . . . . . . . . . . . . . . 47
Capture Viewer Icons . . . . . . . . . . . . . . . . . . . . . . . . . . . . . . . . . . . . . . . . . . . . . . . . . . . . . . . . . . . . . . . . . . . . . . . . . . . . . . . . . . . . . . . . . . . . . 55
Output Control Icons . . . . . . . . . . . . . . . . . . . . . . . . . . . . . . . . . . . . . . . . . . . . . . . . . . . . . . . . . . . . . . . . . . . . . . . . . . . . . . . . . . . . . . . . . . . . . . 60
Site Map Menu Bar Commands . . . . . . . . . . . . . . . . . . . . . . . . . . . . . . . . . . . . . . . . . . . . . . . . . . . . . . . . . . . . . . . . . . . . . . . . . . . . . . . . . . . . . 63
Device Configuration Window Menu Bar Commands . . . . . . . . . . . . . . . . . . . . . . . . . . . . . . . . . . . . . . . . . . . . . . . . . . . . . . . . . . . . . . . . . . . . 65
Device Configuration Window Tool Bar Icons . . . . . . . . . . . . . . . . . . . . . . . . . . . . . . . . . . . . . . . . . . . . . . . . . . . . . . . . . . . . . . . . . . . . . . . . . . 66
C1534M (1/06)
Description
Pelco’s Video Management System (VMX210) is an advanced, PC-based CCTV control system that offers the ability to integrate a variety of video
surveillance equipment into a single, easy-to-use system. The VMX210 provides video and surveillance applications with a high level of
functionality and user-friendly operation.
The VMX210 workstation is designed in the following configurations:
•
Dual-monitor, single video system with a Video-for-Windows VGA card
•
Dual-monitor system with quad video display
VMX210’s strengths lie in its ability to control virtually any number and combination of devices with “point and click” simplicity. Both local and
remote CCTV cameras, monitors, switchers, VCRs, and alarm input devices are easily added to the system and controlled with seamless
integration.
VMX210 WORKSTATION SPECIFICATIONS
•
Intel® Pentium® III processor, 800 MHz or faster
•
128 MB of memory or greater
•
Matrox Millennium video capture/display card
•
AGP slot to accept video capture/display card
•
100BaseT Ethernet port
•
40 GB hard drive
•
CD-RW drive
•
3.5-inch disk drive
•
Standard PC keyboard
•
Microsoft® Windows® 2000
•
PS/2 Microsoft IntelliMouse®
C1534M (1/06)
7
Getting Started
To use the VMX210, you must complete the following steps:
•
Connect the hardware; refer to the VMX210 Video Management System Installation/Operation Manual.
•
Configure your system; instructions are provided in the following pages.
The VMX210 workstation is shipped with the VMX200 software factory-installed. Refer to the Software Installation and Registration section in
the Appendix for instructions on reinstalling the software.
1. Click the Windows Start button.
2. Choose Programs > VMX200 > VMX200.
If you installed the program in a folder other than VMX200, choose that folder from the Start > Programs menu.
3. The VMX200 splash screen appears. In about five seconds the Log-in dialog box appears. If a message box appears, prompting you to type
in a Base License, refer to the Software Installation and Registration section in the Appendix for instructions.
Figure 1. Log-In Dialog Box
4. Enter the administrator user name and password (both are case sensitive):
User Name: administrator
Password: 2899100
The administrator’s user name and preferences cannot be changed. Pelco recommends that the administrator change the administrator password
to maintain security. To protect the administrator’s ability to manage other user accounts, only the following settings can be changed for the
administrator’s user name:
•
Password
•
Priority level
•
Start-up macro
To modify user settings, refer to Configure Users in the System Configuration section.
5. Click OK. The VMX200 video window(s) and the site map window appear on the system monitor(s).
Figure 2. Sample VMX210 Monitor Displays on a Single-Monitor System (left) and a Dual-Monitor System (right)
8
C1534M (1/06)
System Configuration
Complete the following tasks to configure your system:
•
Add devices: Use the Device Configuration window to add and track CCTV equipment connected to the system. You can add any of the following devices:
–
Cameras
–
Switchers and Genex® multiplexers
–
External Monitors
VMX210 can support multiple external monitors connected to any of the output ports on an external switcher or connected to an available output port on the VMX210 workstation.
–
VCRs
–
Input/Output Devices - alarm or relay interface units
VMX210 uses digital input/output devices for handling inputs from alarms or sending on/off signals to external relay devices.
• Configure users: Enter user names, passwords, and preferences.
• Configure site maps: Import and edit site maps of the facility.
ADD DEVICES
To add new devices to the system, complete the following tasks:
•
Add each device in the Device Configuration window. Instructions are provided in the following pages.
•
Draw the device wiring connections in the Device Configuration diagram. Refer to the Draw the Wire Connections section for instructions.
•
Place the icons listed below on system site maps, as necessary. Refer to the Configure Site Maps section for instructions.
–
Cameras
–
Alarm points
–
Macros
–
External monitors
–
VCRs
THE DEVICE CONFIGURATION WINDOW
The Device Configuration window is a graphical representation of the system’s design, which allows the administrator to control how data from
video sources is routed through and to various components of the system. Select Configure > Devices from the site map menu bar. The Device
Configuration window appears.
Figure 3. VMX200 Device Configuration Window
C1534M (1/06)
9
The VMX200 Device Configuration window contains the following components:
•
The menu bar
•
The tool bar
•
The device configuration diagram
The device configuration diagram includes the following components:
•
•
•
•
Port nodes on each device; these are represented by color-coded tabs
Wires between each device; these are also color-coded
Switch paths
Device icon labels
Port nodes and device wires are designated by color. The Node Legend provides an on-screen lengend to the node and wire color coding,
and is useful for keeping track of connections when diagramming larger systems. Click View > Node Legend to hide the Node Legend box
(or to display the box when it is hidden from view).
Refer to the Appendix for a description of the Device Configuration window menu bar and tool bar.
There are three ways to perform operations on the configuration window:
•
Select an option from the menu bar.
•
Click the right mouse button on the diagram, and then select an option from the pop-up menu.
•
Click a tool bar icon.
ADD A DEVICE
1. Select Configure > Devices. The Device Configuration window appears.
2. Click the appropriate add device icon (for example, the camera icon) on the tool bar. The applicable add device dialog box appears.
Alternate Step 2
From the menu bar select Edit > Add, and then select the appropriate device (for example, Edit > Add > Camera).
OR
Right-click the device configuration diagram, select Add from the right mouse pop-up menu, and then select the appropriate device
(for example Add > Camera).
OR
To add a device without adding an icon to the diagram, use the Device Inventory. Refer to the Device Inventory section.
Figure 4. Sample Add Device Dialog Box
3. Complete the fields in each dialog box, and then click Next until a dialog box with the message “Device configuration complete” appears.
The dialog boxes contain instructions for completing the entry fields. However, if you need assistance, field definitions are provided in the
Appendix; refer to the Reference Information for Adding Devices section.
NOTE: To install a new device driver, click Have Disk on the Make and Model dialog box; refer to the CCTV Device Drivers section in the
Appendix.
10
C1534M (1/06)
4. Click Finish.
5. The device icon appears in the center of the configuration diagram. Drag the icon to an appropriate position in the window, and draw
connections to other pieces of equipment to reflect the physical system wiring.
Refer to the Draw the Wire Connections section for instructions on drawing the device connections.
NOTE: The Device Configuration window does not include a function for saving your work. To save changes you must exit the Device
Configuration window and click Yes in the Save Configuration dialog box. Refer to the Close the Device Configuration Window section. Also refer
to the Emergency Backup and Restore Procedures in the Appendix for information on safeguarding your work.
Additional Steps for Adding an External Monitor
VMX210 can support an unlimited number of external display monitors. These monitors must be physically connected to available outputs of
switchers connected to the system. Once they are installed and properly connected on the system configuration diagram, they must also be
added to the site map. Refer to Configure External Device Windows in the Configure Site Maps section for instructions.
Additional Steps for Adding an Input/Output Device
Relay Interface Units
To be able to access and use a relay interface unit you must do either or both of the following:
• Configure a macro event to set the output point to true or false; refer to Configure Macros in the Additional Configuration section.
• Call the relay unit manually from the Output Control dialog box; refer to Digital Output Point Controls in the Operation section.
Alarm Interface Units
Animated icons for specific alarm points can be placed on appropriate site maps. These icons indicate when activity has occurred at the point,
and provide easy access to the Alarm Viewer. Refer to Add a Map Icon in the Configure Site Maps section.
In addition, you can configure an alarm input point to launch a macro. Refer to Configure Input/Output Points in the Additional Configuration
section for instructions on launching a macro based on an input alarm or reset.
Edit Device Properties
You can change device settings by completing the following steps from the Device Configuration window:
1. Double-click the appropriate device icon. The appropriate device details dialog box appears.
Alternate Step 1
Right-click the appropriate device icon, and then select Properties from the pop-up menu.
OR
Click the device, and then select Edit > Properties from the menu bar.
Figure 5. Sample Device Details Dialog Box
2. Edit the device properties as necessary. If the device has more than one page of properties, click the appropriate tab. For example, to edit a
VCR’s address, click the Make/Model tab.
3. Click OK.
C1534M (1/06)
11
DRAW THE WIRE CONNECTIONS
1. Move the mouse to the appropriate tab on the first device. The mouse pointer changes to a crosshair icon.
2. Click the tab. This anchors the wire line to the device.
3. Move the mouse to the appropriate tab on the connecting device. The mouse pointer changes to a crosshair icon again.
4. Click the tab to complete the connection.
5. Repeat for each device. When every device has been added, save the diagram changes by exiting the Device Configuration window. Refer
to the Close the Device Configuration Window section.
Drawing Tips
The mouse pointer remains a crosshair icon when you move to a compatible connection tab. If you point to an incompatible connection tab the
mouse pointer returns to an arrow and you cannot click the incompatible connection tab. To change the direction of a line from vertical or
horizontal or from horizontal to vertical, click the mouse at each change of direction.
NOTE: Press the ESC key to delete a wire before completing the connection.
Drawing Camera Connections
Draw a connection between each camera and an external switcher or one of the VMX210 workstation’s internal switcher card terminals. If the
camera is controlled through a serial connection, draw a wire from the camera’s control tab to one of the serial control (COM port) tabs on the
PC icon.
Drawing Switcher Connections
External switchers may be “stacked” to multiply the number of cameras that can be added to the system. To do this, connect the output terminals
from one switcher into the input terminals of another.
Drawing External Monitor Connections
Draw a connection between each external monitor and an external switcher or one of the VMX210 workstation’s internal switcher card terminals
(VMX210-SYS-Q only).
Drawing VCR Connections
Draw connections from the VCR icon’s video input tab and video output tab to the appropriate switcher tabs. Note that a proper routing path from
the video source must be available.
Drawing Digital Input Device Connections
Draw a connection from the digital input device icon to one of the serial control (COM port) tabs on the PC icon.
Looping Inputs
Video output nodes support the creation of multiple connections to video inputs on other devices. Click the mouse on the video output node and
draw the connections to other input nodes one at a time. This feature can be used to simulate looping inputs.
12
C1534M (1/06)
Daisy-Chaining Serial Communications
VMX210 supports daisy-chain serial configuration of addressable devices by permitting two connections to each of the communication ports on
cameras, switchers, multiplexers, recorders, and other serial equipment. Device addressing must be carefully observed when designing chained
devices.
Figure 6. Looping and Daisy-Chain Connections
EDIT THE DEVICE CONFIGURATION DIAGRAM
Select Elements on the Diagram
Do one of the following:
•
Click the desired icon.
•
Click and drag a box around multiple icons.
•
Select multiple icons by holding the Ctrl key while clicking each desired icon.
Move Icons
1. Click the icon.
2. Drag the icon to a new location on the diagram.
The wire line remains connected to the icon but may be poorly positioned after moving a device icon. To adjust the wire line:
a.
Click the wire line. The selected wire is highlighted blue.
b.
Click any of the line’s anchor points, and then drag to a new location.
3. Optional: Use the keyboard arrow keys (left, right, up, down) to move the icon one grid space.
Copy Icons
1. Click the icon.
2. Select Edit > Copy from the Menu Bar.
3. Select Edit > Paste to place a duplicate icon.
The device properties are copied from the original device. The new device is named “Copy of <original device’s name>.”
Alternate Step 3
Select Edit > Paste Many to place more than one duplicate icon. Specify the number of duplicate icons.
4. Drag the new icon(s) to an appropriate location.
5. Draw wire connections to other system equipment as described in the Draw the Wire Connections section.
6. If necessary, change the name and device properties, as described in the Edit the Device Configuration Diagram section.
C1534M (1/06)
13
Change Icon Orientation
1. Click the device icon, and then select Edit > Mirror from the menu bar.
Alternate Step 1
Right-click the device icon, and then select Mirror.
Figure 7. Mirror Option
2. From the Mirror submenu, select the desired orientation:
Horizontally: This option reverses the icon left-to-right.
Vertically: This option flips the icon top-to-bottom.
Delete a Device
Deleting a device from the device configuration diagram also removes the device wire lines and the device settings specified when the device
was added to the system.
1. Click the device icon.
2. Press the Delete key. The device is deleted from the diagram and the Device Inventory.
This action cannot be reversed. If you delete a device icon by mistake, you can either
•
revert to the last saved version of the configuration drawing,
OR
•
close the current configuration drawing without saving any changes, and then open it again.
NOTE: However, that you will lose any other changes made during the current editing session.
Adjust Wire Lines
1. Click the desired wire line. The line appears bright blue and displays anchor points at each change in direction of the line.
2. Click an anchor point, and then drag it to the desired location to change the wire line.
Delete Wire Lines
1. Click the desired wire line. The line appears bright blue.
2. Press the Delete key.
3. Redraw the wire as desired.
14
C1534M (1/06)
Device Icon Labels
Icon labels are provided for each device installed in the system.
Figure 8. Device Configuration Diagram Icon Label
Move a Label
1. Click the label.
2. Drag it to a new position.
Change Label Orientation
1. Right-click a label to turn it 90 degrees counterclockwise.
2. Right-click again until the label is at the desired orientation.
Edit a Label
A device label reflects the name selected when the device is added to the system. To change the device label, change the device name in
the device Properties, as described in the Changing Device Settings section.
View/Hide Labels
Select View > Labels from the menu bar; in the submenu, click the desired device type to view or hide all labels for that device type. The check
mark beside the item indicates that the label is visible.
Device Inventory
To define devices without adding them to the current configuration diagram, use the Device Inventory. The Device Inventory provides a means of
saving the specific installation details of any device within the system without adding it to the device configuration diagram.
Opening the Device Inventory
1. Select Edit > Device Inventory > Open from the Device Configuration window menu bar.
Alternate Step 1
Right-click the device configuration diagram, and then select Device Inventory > Open.
2. The Device Inventory window appears.
Figure 9. Device Inventory Window
The Device Inventory includes all devices shown on the device configuration diagram, plus any devices that have been added directly to the
inventory without including them on the diagram. The column on the right side of the Device Inventory window, labeled “In Use,” indicates
whether the device is included in the device configuration diagram (“Yes” or “No”).
C1534M (1/06)
15
Adding Devices to the Device Inventory
1. In the Device Inventory window, click New. The Select Device dialog box appears.
2. Select the device type from the drop-down box. Note that you cannot add input/output devices to the Device Inventory.
3. Click OK. The applicable add device dialog box appears.
4. Add the device, as described in the Adding Devices to the Device Inventory section.
5. When you have finished, the device appears on the list of devices in the Device Inventory window.
NOTE: Deleting a device in the device inventory also deletes the device from the device configuration diagram; refer to Delete a Device in the
preceding section.
Move Devices to the Device Inventory
When a device is moved to the Device Inventory from the device configuration diagram, all connections to other devices are removed and must
be redrawn if the device is moved back to the diagram.
You can move a device to the Device Inventory in either of the following ways:
1. Click the device icon.
2. Select Edit > Device Inventory > Move Selected To from the Device Configuration window menu bar.
3. The device icon disappears from the device configuration diagram.
OR
1. Open the Device Inventory window.
2. Drag the device icon from the device configuration diagram to the Device Inventory window. The device appears on the list of devices in the
Device Inventory window and the “In Use” designation changes to “No.”
Adding a Device to the Device Configuration Diagram from the Device Inventory
1. Click the device in the list of devices in the Device Inventory window.
2. Drag the device to the device configuration diagram. The icon appears on the diagram and the “In Use” designation in the Device Inventory
window changes to “Yes.”
3. Draw the wire connections, as described in the Draw the Wire Connections section.
Additional Device Inventory Features
The following additional features are available on the Device Inventory window:
16
•
Print: This option opens a standard Windows print dialog box, allowing you to print the contents of the inventory list.
•
Filter: This option opens the Device Filter dialog box, allowing you to filter the list of devices visible in the Device Inventory window according to the device type(s) selected.
•
Find Device: This option opens the Inventory Find Device dialog box, allowing you to find specific devices in the inventory based on both a
device-type filter, and optional name, location, and description field keywords.
C1534M (1/06)
Find Device Utility
The Find Device utility assists with the management of large and complicated system diagrams. This feature locates a specific device and
centers the configuration diagram on that device.
1. Select Edit > Find Device from the Device Configuration window menu bar. The Find Device dialog box appears.
Alternate Step 1
Right-click the configuration diagram, and then select Find Device from the pop-up menu.
Figure 10. Find Device Dialog Box
2. Select a device type from the drop-down box.
3. A corresponding list of installed components appears. Click the name of the device you want to find.
4. Click Locate. The configuration diagram repositions to center on the specified device.
Print the Device Configuration Diagram
A printed copy of the configuration diagram can be helpful during installation and for system record keeping.
1. From the Device Configuration window, select File > Print. A standard Windows print dialog box appears.
2. Select the appropriate print options.
3. Click OK. The configuration diagram prints on the specified printer.
NOTE: To use the print function, you must have a printer connected to the VMX210 workstation parallel port. Refer to the Windows 2000
documentation for printer installation instructions.
SAVE AND CANCEL CHANGES
Save Changes
When you exit the Device Configuration window, the Save Configuration message box prompts you to save changes. Refer to the Close the
Device Configuration Window section.
As the system saves your changes, it will report any conflicts or errors in the wiring diagram, and errors must be corrected before the changes
can be saved. Due to inherent design flexibility, many errors are outside the scope of the software’s diagnostic tests. Careful planning and
documentation is recommended in order to avoid problems and speed system integration time.
Cancel Changes\Revert
To cancel the changes you have made in the Device Configuration window, you can reload the previously saved configuration diagram.
1. Select File > Revert from the menu bar.
Alternate Step 1
Click the Revert icon on the tool bar.
2. Click Yes in the “Revert to last saved configuration?” message box. The previously saved configuration diagram appears.
C1534M (1/06)
17
CLOSE THE DEVICE CONFIGURATION WINDOW
1. Select File > Close to exit the Device Configuration window.
If you have made any changes to the device configuration, the Save Configuration message box appears.
Figure 11. Save Configuration Message Box
•
•
•
Click Yes to save the changes and rebuild routing information, and then exit to the site map window.
Click No to cancel the changes and exit to the site map window.
Click Cancel to remain in the Device Configuration window.
If you have not made any changes to the device configuration, the Save Configuration message box does not appear.
2. The Device Configuration window closes and the site map window appears.
BACKUP THE DEVICE CONFIGURATION
Pelco strongly recommends that you make a backup copy of the device configuration, in the unlikely event of a serious system failure. Refer to
the Emergency Backup and Restore Procedures section in the Appendix for information.
CONFIGURE USERS
NOTE: The administrator user name and preferences cannot be changed.
Each user must log in to the system with a user name and password. The system administrator assigns a user name by creating a user profile,
and then configures it with the appropriate level of access to system configuration tools.
ADD A USER
1. Select Configure > Users from the site map menu bar. The Users dialog box appears.
Figure 12. Users Dialog Box
18
C1534M (1/06)
2. Click New. The User Properties dialog box appears
.
Figure 13. User Properties Dialog Box
3. Complete the following fields as appropriate for the specific user:
Username:
The username is case sensitive and can be a maximum of 64 characters.
Full Name:
Enter the user’s proper name.
Password:
The password is case sensitive and can be a maximum of 64 characters. The user can change the
password at any time.
Confirm Password:
Re-type the password entered in the password field. If the two entries differ, an error message appears.
User Priority:
This option is not used at this time.
Permissions:
Select the check boxes beside the user permissions appropriate for the new user. For a complete
description of the available permissions, refer to the User Permissions Table.
4. Click OK.
User Permissions
Each User ID can be configured with specific user permissions, allowing the user access to specific functionality in the software.
Table A. User Permissions Table
C1534M (1/06)
Can Add/Remove Users
The user can create, edit, and delete user accounts. Pelco recommends that this capability be
restricted to system administrators only.
Can Alter Device Configurations/
Manage Databases
The user can add, edit, and delete equipment and wiring on the device configuration diagram.
The user can also access advanced switcher properties. Most users should not have access to
this capability.
Can Configure FTP Sites
The user can add and edit proxy and FTP server settings.
Can Define Automation Functions
The user can access the automation functions, which include the sequence, macro, and
schedule editors, digital output control (if a digital device is installed), and the camera following
feature.
Can Configure/Edit Maps
The user can edit the site map images, including importing new images.
Can Configure Digital I/O Devices
The user can edit alarm input points and relay output points.
Can Configure Auxiliary Points
The user can edit camera auxiliary point names and logic settings.
Can Configure Overlay/Capture Cards
The user can select the capture file format and set the compression level for JPG captures.
Can Configure VCR/Ext. Monitor Windows
The user can alter the configuration of VCRs and monitors within their drag and drop windows.
19
DELETE A USER
1. In the Users dialog box select the desired user name from the list of users.
2. Click Delete.
3. Click OK.
EDIT A USER
1. In the Users dialog box select the desired user name from the list of users.
2. Click Edit. The Edit User Properties dialog box appears.
3. Change the user’s properties as necessary.
4. Click OK.
COPY A USER
The copy utility allows an administrator to create standard user accounts quickly.
1. In the Users dialog box select the user name of a typical user from the list of users.
2. Click Copy. The Edit User Properties dialog box appears.
3. Change the user name (the default is “Copy of <original user name>”) and other properties as necessary.
4. Click OK.
USER ENVIRONMENT OPTIONS
The following options can be configured either by the system administrator or by the user. Each option setting is saved with the user profile and
remains active each time the user logs onto the system.
Change General Options
1. Select Edit > Options from the site map menu bar. The Options dialog box appears.
Figure 14. User Options Dialog Box
2. Select the following options as appropriate:
Hotlinks:
Select Always Visible to make the hot link regions on site maps visible. Select Only Visible When Editing
Map to make the hot link regions on site maps visible only when the map is being edited.
Video Minimize:
Select this option to make all VMX200 video windows minimize on the Windows desktop whenever the
Site Map window is minimized.
3. Click OK.
20
C1534M (1/06)
Change Start-Up Options
1. Select Edit > Options from the site map menu bar. The Options dialog box appears.
2. Click on the Startup tab. The start-up options appear.
Figure 15. Startup Options Tab
3. Select the following options as appropriate:
Startup Map:
Select the map to be loaded when the user logs in. If you have not yet imported site map images, the only
option available is the Default Map. Refer to Import a Site Map Image in the Configure Site Maps section.
Startup Macro:
Select the desired start-up macro to be run when the user logs in, immediately after the AutoRun macro.
This setting is specific for each user and can be executed or disabled on the login dialog box.
The AutoRun macro initializes the VMX200 video windows and will call up the system settings that were
valid when the software was last exited.
The user’s start-up macro might be a specific set of cameras displayed on specific monitors, or it might be
designed to run a quick tour of facilities.
NOTE: You must create system macros before you can select a start-up macro for the user. Refer to Configure Macros in the Additional
Configuration section for more information on macros.
4. Click OK.
Change Alarm Options
1. Select Edit > Options from the site map menu bar. The Options dialog box appears.
2. Click on the Alarms tab. The Alarms option appears.
Figure 16. Alarm Options Tab
3. 3. Click the Alarm Viewer check box to make the alarm viewer pop-up automatically each time a new alarm point is activated.
OR
Leave the Alarm Viewer check box unchecked if the user will rely on a periodic manual scan of the alarm viewer as a check for new alarm
events.
4. Click OK.
C1534M (1/06)
21
CONFIGURE SITE MAPS
Site maps are at the heart of the VMX200 user environment. Maps provide the system operator with a graphical representation of the camera
installations, eliminating the need to remember camera and monitor selection codes. VMX200 provides tools to place, move, and delete installed
equipment, and to create links to other site maps.
THE SITE MAP WINDOW
The site map window contains the following elements:
•
Menu bar
•
Tool bar
•
Site map image
•
Status bar
Refer to the Appendix for a detailed description of the menu bar, tool bar, and status bar.
Figure 17. Site Map Window
Work with Site Map Images
Graphics created in software packages such as Adobe® Photoshop® or AutoCAD® can be imported into the VMX200, and then used as a
graphical representation of system camera positions.
Site Map Image Formats
Before using such site map images, they must first be imported into VMX200 in one of the following image formats:
•
Bitmap (.bmp)
•
JPEG (.jpg)
•
Windows meta file (.wmf)
•
Extended meta file (.emf).
Pelco recommends the following image format parameters:
22
•
Use meta file formats (.wmf and .emf) if possible. These are vector graphic formats and are recommended because they provide the advantage of being scalable without losing detail.
•
Size your maps to 1016 x 673 pixels and 16-bit color when you are creating them. This will allow you to optimize your workspace and prevent having to resize the map each time it is loaded.
•
With bitmap formats (.bmp and .jpg) use a resolution of 72 dpi (dots per inch). This resolution provides an optimal file size for display and
memory.
C1534M (1/06)
Open the Site Maps Dialog Box
Select Configure > Maps. The Maps dialog box appears, displaying a list of all maps imported into VMX200 and a thumbnail preview of the
selected map. Or, right-click the map image, and then select Maps from the pop-up menu.
Figure 18. Maps Dialog Box
The Maps dialog box displays the following information:
•
The resolution (in pixels) and size (in inches) of the site map diagram on the monitor (Viewport Size)
•
The resolution and size of the selected map
•
The filename of the selected map
Import a Site Map Image
Save or copy images to the Site Maps directory within the VMX200 directory on the workstation hard drive. If necessary, you can save map
images to another folder, but the system refers to the Site Maps directory first when installing a new map. Use Windows Explorer to assist you
in finding the appropriate directory.
1. In the Maps dialog box, click New. The Open Site Map dialog box appears.
Figure 19. Open Site Map Dialog Box
2. If necessary, navigate though system folders until the list of map image files appears. By default, VMX200 site map images are located in
the “Program Files\CamControlSvr\sitemaps” folder.
C1534M (1/06)
23
3. Click the desired map image file, and then click Open.
The map image appears in the list of VMX200 maps and can be loaded by
•
clicking Open from the Maps dialog box,
OR
•
creating a link from another map; refer to Create a Link to Another Site Map Image.
4. Click Cancel to close the Maps dialog box.
Delete a Map Image
1. In the Maps dialog box, click the desired map file.
2. Click Delete. The Confirm Map Delete dialog box appears.
3. Click OK.
NOTE: This delete operation cannot be reversed. However, the file is only removed from the VMX210 system, not from the computer’s hard
drive. If you delete a file accidentally, you must import it into VMX200 again. Refer to Import a Site Map Image.
Rename a Map Image
This action changes the name assigned to the map within VMX200, but does not change the image file name.
1. In the Maps dialog box, click the desired map file.
2. Click Rename. The Map Rename dialog box appears.
3. Type the new name, and then click OK.
Create a Default Map Image
Each user can specify the specific start-up map to be displayed when the user logs into the system. Refer to the User Environment Options
section for more information.
Open a Map Image
1. In the Maps dialog box, click the desired map file.
2. 2. Click Open. The selected map image appears on the main map window.
3. 3. Click Close.
Change Map Icon Default Colors
VMX200 provides an option to modify the default color for each device-type icon used in a site map.
1. In the Maps dialog box, click the desired map file.
2. In the Default Icon Colors section of the Maps dialog box, select the desired device-type icon from the device drop-down box.
Figure 20. Default Icon Colors Device Drop-down Box
24
C1534M (1/06)
3. Click Edit. The color selection palette appears, showing both the default color for the selected icon along with the new setting.
Figure 21. Color Selection Palette
4. Select a new color for the device icon.
5. Click OK. The new default color will be applied each time a new icon of that device-type is added to the selected map.
6. Repeat for each map that requires a change in default icon colors. To change the color of a specific icon while editing an individual map,
refer to Change a Map Icon Color in the Edit Site Maps section.
Edit Site Maps
Site Map images can be edited to include items such as camera, alarm, or macro icons, and links to associated maps. To enter the site map
editing mode:
1. Select > Edit > Site Map.
Alternate Step 1
Right-click the map image, and then select Edit Map from the pop-up menu.
2. The editing tool bar appears.
Figure 22. Editing Tool Bar
To exit the edit mode, click the X in the top right corner of the editing tool bar.
Add a Map Icon
1. Click the camera, alarm, or macro button on the editing tool bar. The mouse pointer changes to the selected icon.
NOTE: To add a macro or an alarm to the map, you must have previously defined the macro or alarm within the VMX210 system. Refer to
Configure Macros and Configure Input/Output Points in the Additional Configuration section for more information.
C1534M (1/06)
25
2. Click the map in the desired icon location. The appropriate Place Icon dialog box appears, displaying a list of the cameras, alarms, or
macros available.
Figure 23. Place Camera Dialog Box
3. Click the desired camera, alarm, or macro from the list, and then click OK. The icon appears on the map.
Figure 24. Camera Icon on Site Map
Change a Map Icon Color
1. Right-click the camera, alarm, or macro icon that you wish to change, and then select Edit Icon Color from the pop-up menu.
2. The color selection palette appears. Click a color to replace the default color for the selected icon. To return to the default icon color, click
the Default Color field.
3. Click OK.
Move a Map Icon
1. Click the pointer tool on the editing tool bar.
2. Click the desired icon.
3. Drag the icon to a new location.
Alternate Step 3
Use the keyboard arrow keys to move the icon to the new location.
Delete Map Icons
1. Click the pointer tool on the editing tool bar.
2. Right-click the desired icon, and then select Delete from the pop-up menu.
3. The selected icon is removed from the site map.
Deleting an icon removes the icon from the site map, but it will not delete the device from the system. To remove a device from the system,
refer to Delete a Device in the System Configuration section.
Zoom a Map Image
Use the Zoom In, Zoom Out, Zoom 1 to 1, and Zoom to Page icons on the site map window to increase or decrease the size of the currently active
map image. To use the Zoom In icon, click Zoom In, and then click the site map. Release the mouse button or drag a box around the section of the
map that you want to enlarge.
Figure 25. Zoom Icons
26
C1534M (1/06)
Resize a Map Icon
Use the + and - buttons on the editing tool bar to increase and decrease the size of the icons placed on the currently active map image. The size
of the map icons remains constant relative to the map image when using the map zoom functions. It is recommended that icons be sized for the
map at the zoom level used most often.
Figure 26. Resize Buttons on Editing Tool Bar
Create a Link to Another Site Map Image
You can link related maps, allowing for cameras to be easily located and managed. Pelco recommends that you document a site map’s hierarchy
on paper prior to working in the VMX210 system in order to avoid creating incorrect, unnecessary, or confusing links. Since a defined area may be
invisible to the user except for a change in the mouse cursor, you may want to add a link graphic to desired areas of the images before importing
them into VMX200.
1. Click the hyperlink button on the editing tool bar.
2. Position the mouse crosshairs at a desired starting point on the site map image, and then click several points around the perimeter of the
area you wish to define as a link. Continue clicking perimeter points until you have created the link area.
3. Once the link area is defined, right-click inside it. The Link Action dialog box appears.
Figure 27. Link Action Dialog Box
4. Click Load Map and then select the desired map file from the Maps drop-down box.
5. Click OK.
Once you close the editing tool bar, the lines around the link areas disappear. As you move the mouse over a linked area, the mouse pointer
changes to a finger pointer to indicate a linked area. The name of the destination map for a link area appears in the bottom of the map window.
Figure 28. Sample Map Site Link Area
Delete Links to Other Site Map Images
1. Click one of the link area’s lines. The blue boundary lines change to pink.
2. Press the Del key on the keyboard.
NOTE: This action cannot be reversed. If you delete a link by accident, you must redraw it.
Configure External Device Windows
All installed external monitors, VCRs, and DVRs, are represented on the site map window by the appropriate icons on the site map tool bar. Refer
to the Operation section for more information on using these icons.
C1534M (1/06)
27
Add a Device to the Drag and Drop Areas
1. Select Configure > External Monitors Window (or any other device type that appears on the Configure menu).
Alternate Step 1
Right-click the desired device on the tool bar, and then select Configure from the pop-up menu. The specified device window appears.
add device
icon
Figure 29. Sample Device Window
2. Click the add device icon in the device window tool bar. The cursor changes to represent the device-type.
3. Move to the desired area of the window and click to add the device icon. A select dialog box appears that displays all the installed devices
that have yet to be placed in the window.
4. Select a device, and then click OK. More than one device can be selected by holding down the Shift or Ctrl keys.
NOTE: You can arrange devices in the window to represent their physical arrangement in your system console, racks, or monitor wall.
Edit the Drag and Drop Icons
1. From the device window, select Configure > Edit layout from the menu bar.
2. Click Edit to display the Edit submenu, which contains the following options:
Edit Submenu Option
Icon Alignment
Sub-option
Centers
Middles
Function
Align the icons vertically.
Align the icons horizontally.
Icon Spacing
Increase horizontally
Make equal horizontally
Decrease horizontally
Make equal vertically
Increase vertically
Decrease vertically
Snap to Grid
Increase the horizontal space between icons.
Space the icons at an equal distance horizontally.
Decrease the horizontal space between icons.
Space the icons at an equal distance vertically.
Increase the vertical space between icons.
Decrease the vertical space between icons.
Align all icons to a fixed grid.
NOTE: To use the Icon Alignment and Icon Spacing options, the Snap to Grid option must be turned off.
ADDITIONAL CONFIGURATION
CONFIGURE PRESETS
Many cameras have the capability to store frequently used camera positions as presets. These positions can be defined and named within the
VMX210 system for use manually and as elements of more complex automation features.
Create a Preset
1. Drag and drop the desired camera into one of the VMX200 video windows to view its output.
2. Pan, tilt, and zoom the camera to the desired view, and then right-click the video image. The video control pop-up menu appears.
28
C1534M (1/06)
3. Select Save > Edit Preset to view the list of presets available for that camera. If the Save/Edit Preset menu item is not available, then the
camera does not have any preset capability.
Figure 30. Preset Save/Edit Dialog Box
4. Select one of the presets named Unassigned, and then click Save.
Alternate Step 4
Double-click one of the presets named Unassigned.
5. Type a preset name, and then click OK to return to the Preset Save/Edit dialog box.
Edit a Preset
1. Right-click the desired camera’s video display, and then select Save/Edit Preset from the pop-up menu.
2. Click Rename.
3. Type the new preset name, and then click OK. Renaming a preset does not save the position.
Unassign a Preset
Because a preset is a characteristic of the camera, it cannot be deleted. You can, however, unassign the preset setting by selecting the preset
and clicking the Unassign button. You can also reassign a preset by selecting an existing preset instead of an unassigned one when saving and
naming a new preset.
CONFIGURE SEQUENCES
Sequences combine preset camera moves, image captures, and time elements into a single script that can be triggered manually or included in
macro automated events.
Open the Sequences Dialog Box
1. Select Automation > Sequences > Edit from the site map window menu bar.
Alternate Step 1
Right-click the site map window, and then select Sequences > Edit from the pop-up menu.
C1534M (1/06)
29
2. The Sequences dialog box appears, with a list of sequences. From this dialog box, you can create, delete, edit, and rename any sequences.
Figure 31. Sequences Dialog Box
Create a Sequence
1. From the Sequences dialog box click New.
2. Type a name in the Sequence name dialog box.
3. Click OK. The Sequence Editor window appears.
Figure 32. Blank Sequence Editor Window
4. Each line in the editor is a separate event to be executed sequentially. Drag and drop the appropriate camera for the first action from the
site map to the Sequence Editor window. VMX200 creates a new line in the sequence and opens a series of Event Details dialog boxes.
Figure 33. Sequence Event Details Dialog Box
30
C1534M (1/06)
5. Complete the necessary fields in each dialog box, and then click Next. Refer to Table B for instructions on completing each dialog box.
Table B. Sequence Editor Dialog Boxes
Camera Action
Specify the required camera actions. Note that the camera must be viewed in order to capture an image.
Total Event Time
Specify the total time allocated for the event before the system processes the next event. Allow enough time to
include any Move to Preset and Capture options.
Wait for Capture Time
If the image capture option was selected in the first dialog box, specify the amount of time the system is to wait
before capturing an image.
This value should allow the camera time to finish a preset function prior to capturing an image. The pan and tilt
speed of the selected camera must be considered in setting this value; a degrees-per-second value may be
provided in the appropriate camera user manual.
Select Preset
This dialog box appears if Move to Preset was selected in the first dialog box. Select the preset the camera will
be sent to. If you are using a PelcoNet device, enter the amount of time to delay the preset switch (this allows
time for the PelcoNet device to switch over the network).
FTP Setting
If you select Capture in the first dialog box, you can send an image capture file to an Internet file server, using
File Transfer Protocol (FTP). To use FTP, you must first configure FTP settings. Refer to the Configure FTP Settings
section.
To send a file, complete the following steps:
a
Click Yes, and then select the FTP server from the drop-down box.
b
If you enter a name in the Upload Filename field, VMX200 assigns the specified filename to the
capture file, and each capture overwrites previous captures with the same name on the FTP server.
VMX200 adds an appropriate file-type extension.
If you leave the Upload Filename field blank, VMX200 assigns a sequential filename to the file,
similar to the filenames assigned to alarm-based captures.
Finish
Click Finish to complete the sequence event, or click Back to edit any of the previous steps.
6. For each event in the sequence, drag a camera to the sequence editor window and complete the dialog boxes. When finished, select
File > Save, and then select File > Close.
Alternate Save And Close Steps
a. Click the X in the top right corner to close the Sequence Editor window.
b.
Click Yes in the Save Changes message box.
Edit a Sequence
1. From the Sequences dialog box, select a sequence from the list, and then click Edit. The Sequence Editor window appears.
Alternate Step 1
Double-click the desired sequence.
2. Select an event in the sequence, and then click Edit on the Sequence Editor Menu Bar or right-click a sequence event. The Edit menu
appears.
Edit the event using any of the edit options listed below.
Figure 34. Sequence Editor Window Edit Menu
Change the Order of Sequence Events
To change the order of an event within the sequence, select the desired event line, and then select Move Up or Move Down.
C1534M (1/06)
31
Cut and Paste a Sequence Event
To cut and paste an event line to a new position, select the event, and then select Copy or Cut. Click the event line that is to follow the
copied event, and then select Paste Insert.
Delete a Sequence Event
If you copy an event, you must delete the original event to avoid duplication. Click the original event, and then select Delete.
Edit Sequence Properties
a. Select an event, and then click Properties. The Event Details dialog box appears.
OR
Double-click the event.
b.
Edit the properties as necessary.
3. When finished, save the changes and close the Sequence Editor window.
Rename a Sequence
1. From the Sequences dialog box, select a sequence from the list, and then click Rename.
2. Type a new name, and then click OK.
Delete a Sequence
1. From the Sequences dialog box, select a sequence from the list, and then click Delete.
2. Click OK to confirm the deletion. Note that the delete action cannot be reversed.
CONFIGURE MACROS
Macros provide a means of specifying a combination of system events, which can include the following devices or actions:
•
Camera switch
•
Sequence
•
Image capture (as an event in a sequence)
•
Monitors
•
Recording devices
Macros can be triggered either manually or in response to an alarm event.
For example, in response to a door alarm, the system can trigger a macro that executes the following commands:
•
Three cameras move to presets that focus on the area indicated by the door alarm.
•
The system displays these images on three specified monitors.
•
Start a sequence with image capture.
•
Direct a VCR to start recording one of the cameras.
Open the Macros Dialog Box
1. Select Automation > Macros from the site map window menu bar.
Alternate Step 1
Right-click the site map window, and then select Macros from the pop-up menu.
32
C1534M (1/06)
2. The Macros dialog box appears with a list of macros. From this dialog box, you can create, delete, edit, rename, and run any macro.
Figure 35. Macros Dialog Box
Create a Macro
1. From the Macros dialog box, click New.
2. Type a macro name in the Macro Name dialog box.
3. Click OK. The Macro Editor dialog box appears.
Figure 36. Macro Editor Dialog Box
Edit a Macro
1. From the Macros dialog box, select a macro, and then click Edit. The Macro Editor dialog box appears.
2. Use the Macro Editor tools to adjust existing commands or add new commands, as necessary. Refer to Table C for a description of each
Macro Editor tool.
C1534M (1/06)
33
Table C. Macro Editor Dialog Box Icons
Icon
Icon Name
Function
Cut
Copy
Use these functions to cut, copy, and paste macro actions into a different order.
Paste
Delete
Delete a specific macro command.
Properties
You can edit an individual command line in the macro with this function. Select a macro command line, and then
click Properties.
View Camera
Insert a macro command to switch the output of a specific camera to a specific monitor. In the View Camera dialog
box, select the camera (Video Sources) and monitor (Video Destinations), and, if desired, select a Preset.
Run/Stop
Sequence
Insert a macro command to run a sequence on a specific monitor. In the Run Sequence dialog box, select the
sequence, monitor (Video Destinations), and the sequence action. A sequence must be created prior to creating a
macro so that it appears on the list of sequences in the dialog box.
Load Profile
Insert a macro command to load a particular camera profile to the appropriate camera. Refer to the Advanced
Camera Controls section for information on creating camera profiles from the advanced camera properties sheets.
VCR Control
Insert a macro command to execute an action on one of the system VCRs. If you select Record, the specified VCR
will begin to record the source currently routed to it. To specify the video source routed to the specified VCR,
include a View Camera command as an earlier step in the macro, with the VCR as the Video Destination.
Output Point
Control
Insert a macro command to set any of the system’s relay output points to True or False. Select the desired device
and any one of the device’s corresponding points.
Run External
Application
Insert a macro command to start any external application stored on the workstation. Enter the desired application,
command line arguments to locate and run the application, and the desired method for displaying the program
window on the desktop.
Comm Port
Output
Insert a macro command to send control data to any serial device that is not otherwise supported by VMX200.
Select the desired COM port, and then enter the serial data string to be sent.
Load Site
Map
Insert a macro command to load and display the specified site map.
Maintenance
Insert a macro command to clean the alarm log and manual image capture files. You can eliminate alarm log
entries based on acknowledged status or age. Note that all images associated with a particular log entry will be
deleted along with it. Manual image captures may be deleted based only on a specified age basis.
Rename a Macro
1. From the Macros dialog box, select the desired macro, and then click Rename.
2. Type the new name, and then click OK. All references to this macro will be updated to reflect the new name.
Run a Macro
Run a Macro Manually
Run a macro manually in either of the following ways:
•
Place a macro icon onto the appropriate facility map image. Double-click the icon to execute the macro. Refer to Add a Map Icon in the
Configure Site Maps section for more information on placing macro icons onto maps.
•
From the Macros dialog box, select the desired macro, and then select Run. This method is primarily used to test a macro for proper execution after creating it.
Configure an Automated Macro
You can configure the VMX210 to launch an automated macro in either of the following ways:
34
•
Link a macro to an alarm input point, so that a specific action can be executed automatically in response to an alarm. Refer to Configure
Input/Output Points in this section for instructions.
•
Schedule a macro to run at a specific time through the Scheduler utility. Refer to Scheduled Events in the following section.
C1534M (1/06)
Delete a Macro
1. From the Macros dialog box, select a macro from the list, and then click Delete.
2. Click OK to confirm the deletion. Note that the delete action cannot be reversed.
Duplicate a Macro
Click Duplicate to save a copy of the macro with another name. This is useful for saving multiple copies of the same basic macro, each of which
can be edited later for its specific purpose.
Create a Snapshot Macro
The macros snapshot feature provides a means of recording current settings as a new macro. This might include displaying specific cameras on
specific monitors, running sequences, and playing or recording VCRs.
Configure the system as desired. Once the system is displaying and performing the desired functions, complete the following procedure:
1. Open the Macros dialog box.
2. Click Snapshot. The Macro Name dialog box appears.
Figure 37. Snapshot Macro Name Dialog Box
3. Enter the macro name, and then click OK. If necessary, you can edit the snapshot macro; refer to Edit a Macro.
CONFIGURE SCHEDULED EVENTS
VMX200 provides a utility for scheduling macros to execute at specific times.
Open the Scheduled Events Dialog Box
Select Automation > Scheduler from the menu bar. The Scheduled Events dialog box appears, displaying a list of all scheduled events.
Figure 38. Scheduled Events Dialog Box
C1534M (1/06)
35
Create a New Scheduled Event
1. From the Scheduled Events dialog box, click New. The Name dialog box appears.
2. Type the event name, and then click OK. The Edit Schedule dialog box appears.
Figure 39. Edit Schedule Dialog Box
36
C1534M (1/06)
3. Specify the event interval in the Run section and the Start At setting in the Start At section. Table D describes the schedule options:
Table D. Scheduled Events Schedule Options
Run schedule
Start At options
Monthly
Specify the time of day and day of the month.
Hourly
Specify how many minutes past the hour.
Weekly
Specify the time of day and day of the week.
By Minutes
Specify the interval in minutes.
Daily
1.
Click Which Days, and then specify the appropriate days in the Which Days dialog box.
Figure 40. Which Days Dialog Box
Sun Rise/Set
2.
3.
Click OK to return to the Edit Schedule dialog box.
Specify the time of day the event is to run.
1.
Click Setup to open the Sunrise/Sunset Setup dialog box, and then specify the appropriate settings:
Figure 41. Sunrise/Sunset Setup Dialog Box
Time:
Select Sunrise or Sunset.
Plus/Minus:
Specify how many minutes before or after the event should run.
Latitude/Longitude: Specify the latitude and longitude of the workstation site (needed for calculating the
exact time that sunrise and sunset will occur during the year).
By Seconds
Specify the interval in seconds.
Once
Specify the time of day and calendar date.
4. In the Macro section of the Edit Schedule dialog box, select a macro from the drop-down box of available macros.
5. Click OK to return to the Scheduled Events dialog box.
6. Click Close to return to the site map window.
C1534M (1/06)
37
Edit a Scheduled Event
1. From the Scheduled Events dialog box, select the desired event, and then click Edit. The Edit Schedule dialog box appears.
2. Change the schedule options as necessary, and then click OK.
Rename an Event
1. From the Scheduled Events dialog box, select the desired event, and then click Rename.
2. Type a new event name, and then click OK.
Delete an Event
1. From the Scheduled Events dialog box, select the desired event, and then click Delete.
2. Click OK to confirm the deletion. Note that the delete action cannot be reversed.
Suspend or Resume an Event
In the Scheduled Events dialog box, the Status column displays the current status of each event. When an event is “Running,” you can click
Suspend to stop the event. When an event is “Suspended,” you can click Resume to restart the event.
CONFIGURE CAMERA AUXILIARY POINTS
Configure camera auxiliary points by completing the following steps from the site map window:
1. Select Configure > Auxiliary Points from the menu bar. The Auxiliaries dialog box appears.
Alternate Step 1
Right-click the appropriate camera icon, and then select Edit Auxiliary Points from the pop-up menu.
Figure 42. Auxiliaries Dialog Box
2. Select a camera from the Cameras drop-down box.
3. In the list of auxiliary points double-click one of the points listed. The Edit Point Properties dialog box appears.
Figure 43. Edit Point Properties Dialog Box
4. Edit the information in the following fields as necessary:
Point Name:
38
Enter up to 64 characters. The point name is used to describe the point in the auxiliary control menus.
C1534M (1/06)
Point Logic:
The point logic tells the system if the auxiliary point is normally open (NO) or normally closed (NC). This is
used as the basis for sending appropriate control signals to the camera.
Momentary:
Check this box to set the auxiliary point for momentary control.
5. Click OK to close the Edit Point Properties dialog box.
6. Click OK to close the Auxiliaries dialog box.
Refer to Operate Camera Auxiliaries in the Operation section for more information on controlling camera auxiliaries.
CONFIGURE INPUT/OUTPUT POINTS
VMX200 supports contact closure alarms and relay outputs from external units such as the CM9760-ALM and CM9760-REL. (VMX200 does not
support camera alarms or video loss alarms.)
Configure the alarm input points and relay output points by completing the following steps from the site map window:
1. Select Configure > Input/Output Points from the menu bar. The Digital I/O Devices dialog box appears.
2. Select the device from the list of system devices, and then click OK. The Input/Output Points dialog box for the specific device appears.
Figure 44. Sample Input/Output Points Dialog Box
NOTE: The input/output point number used in VMX200 refers to the physical alarm input or relay contact number on the rear panel of the
interface unit. VMX200 does not use the GPI numbers associated with relay contacts on the relay interface unit, or the alarm group numbers
associated with the alarm inputs on the alarm interface unit.
C1534M (1/06)
39
3. In the list of specific input or output points, double-click one of the points listed. The Point Properties dialog box appears. The specific fields
contained in the dialog box depend on whether you are editing points for an alarm interface unit (CM9760-ALM) or a relay interface unit
(CM9760-REL).
Figure 45. CM9760-ALM (left) and CM9760-REL (right) Point Properties Dialog Boxes
4. Enter a Point Name (up to 64 characters) and then edit the information in the dialog box as necessary:
Alarm Interface Unit
Alarm Actions:
Specify what actions are required when the input point changes from its normal state.
To note the event in the alarm log, select Log This Message, and then enter an appropriate alarm log
message.
To trigger a macro, select Run This Macro, and then select the desired macro from the drop-down box. To
capture an image with the alarm, you must first configure a sequence to include the necessary image
captures, and then configure a macro to run the sequence.
Refer to Configure Sequences and Configure Macros for more information.
Automatically Rearm:
If you select this option, you also must specify a time delay value.
Relay Interface Unit
Start-up Setting:
For relay output points, click Enabled, and then select the start-up setting.
Point setting Description
Last known value
Start up with the output point in the same logic state (True or False) that was in effect when the system
was shut down.
True
At startup, reset the output point to a “true” logic state.
False
At startup, set the output point to a “false” logic state.
Note that the logic determines if “True” means “On” or “Off.” Example: for an output that turns a motor “off” when the output is “true,” set the
point to True, and label the point “Turn Motor Off”.
NOTES:
• Alarm and relay contact settings (such as normally open/normally closed) are configured through the DIP switches on the alarm or relay
interface unit. These settings are duplicated in the configuration when you add the device (refer to the Reference Information for Adding
Devices section in the Appendix).
•
The definition of “True” in depends on the DIP switch setting. For example, if you configure Alarm Group 1-16 in an alarm interface unit as
normally open, then “True” equals open for alarm point 1 through point 16.
5. Click OK to close the Point Properties dialog box, and then click OK to close the Input/Output Points dialog box.
40
C1534M (1/06)
CONFIGURE FTP SETTINGS
If you configure a sequence to send an image capture file to an Internet file server, you must configure the FTP (File Transfer Protocol) server and
network proxy server information.
Configure Network Proxies
1. Select Configure > FTP Sites from the site map window. The FTP Sites dialog box appears.
Figure 46. FTP Sites Dialog Box
2. Click Edit Proxies, and then click New. The Proxy Details dialog box appears.
Figure 47. Proxy Details Dialog Box
3. Complete the following fields according to your network design. Consult your network administrator for information on specific settings.
Name:
Enter the name given to the proxy server.
Address:
Enter the IP address or FTP address of the proxy server.
Port:
Enter the appropriate port.
Logon Name:
Enter the proxy server’s login name.
Password:
Enter the proxy server’s login password.
Type:
Select the appropriate proxy server logon type.
4. Click OK and then click Close.
C1534M (1/06)
41
Configure the FTP Server
1. From the FTP Sites dialog box, click New. The FTP Host Details dialog box appears.
Figure 48. FTP Host Details Dialog Box
2. Complete the following fields according to your network design. Consult your network administrator for information on specific settings.
Name:
Enter the name given to the destination server.
Host:
Enter the IP address or FTP address of the destination server.
Port:
Enter the appropriate port.
Logon Name:
Enter the destination server’s logon name.
Password:
Enter the destination server’s logon password.
Confirm Password:
Re-enter the destination server’s logon password.
Upload Directory:
Enter the specific target directory on the destination server (this entry is optional).
Connect Type:
Select the appropriate connection type.
Proxy (Firewall):
Specify any Proxy Server or firewall needed for Internet access.
3. Click OK.
42
C1534M (1/06)
CONFIGURE THE CAPTURE CARD
The capture card in the VMX210 workstation is configured to capture JPEG images.
If you need to change the capture card settings, complete the following steps:
1. Select Configure > Capture Card from the site map window. The Image Capture Configuration dialog box appears.
Figure 49. Image Capture Configuration Dialog Box
2. Select an appropriate file format (BMP or JPEG) according to the capability of the capture card.
If you select JPEG, set the Image Quality level. The higher the level, the better the quality. (A low setting equals higher compression levels,
resulting in a smaller file size, but also a degradation of image quality.) The exact file size will depend on the image content.
3. Click OK.
CONFIGURE THE VIDEO FORMAT
VMX210 workstations are configured for NTSC at the factory. To change the video format complete the steps described below for the appropriate
system:
VMX210 Quad Workstations (VMX210-SYS-Q)
1. Select Configure > Video Card Driver from the site map window. The Video Drivers dialog box appears.
2. Click Advanced. The Signal Type dialog box appears.
3. Select the appropriate format, and then click OK.
4. Click OK to close the Video Drivers dialog box.
VMX210 Single Video Workstations (VMX210-SYS-1)
1. Right-click in the video window, and then select Adjust Video from the pop-up menu. The Adjust Video dialog box appears.
2. Click Source. The Video Source dialog box appears.
3. Select the appropriate format, and then click OK.
4. Click OK to close the Adjust Video dialog box.
C1534M (1/06)
43
Operation
VMX200 uses a simple drag and drop technique, taking advantage of the simplicity of a computer mouse. System functions are represented
graphically by buttons or icons, or are featured in the menu system.
GETTING STARTED
START VMX210
1. Click the Windows Start button.
2. Choose Programs > VMX200 > VMX200.
If you installed the program in a folder other than VMX200, choose that folder from the Start > Programs menu.
3. The VMX200 splash screen appears. In about five seconds the Log-in dialog box appears.
Figure 50. Log-In Dialog Box
4. Enter your user name and password (both are case sensitive). Each user has a specific user profile and user preferences.
5. If desired, check or uncheck the Execute Startup Macro box. If this field is checked, the system will execute the user’s start-up macro
immediately following the execution of the AutoRun Macro that initializes the VMX200 video windows.
Each user’s start-up macro is defined by the user in his user options. Refer to Change Start-Up Options in the Configure Users section.
6. Click OK. Once you log in, the VMX200 video window(s) and the site map window appear on the system monitor(s).
LOG IN AS A NEW USER
Each time a new user begins using the system, the user must first log in to the system in order to activate his specific user preferences.
1. Select File > Log in as a New User. The Log-in dialog box appears.
Figure 51. Log-In Command on the File Menu
2. Enter your user name and password, and then check or uncheck the Execute Startup Macro box.
3. Click OK. This will end the current session and open a new session for the new user.
44
C1534M (1/06)
NAVIGATE BETWEEN SITE MAPS
1. Move the mouse cursor over the site map. When you reach an area defined as a link, the cursor pointer changes to a hand. The destination
map image file name is displayed in the status bar.
Figure 52. Sample Map Site Link Area
2. Double-click the mouse inside the link area. The new image map appears.
3. To return to the previously viewed map, click the Back icon that appears on the site map tool bar after you have used a link.
Figure 53. Back Icon
ALTERNATE STEP 3
Press the Esc key on the keyboard.
You can also change the active site map by opening a map image from the Maps dialog box. Refer to Open a Map Image in the Configure Site
Maps section.
For information on creating links between facility image maps, refer to Create a Link to Another Site Map Image in the Configure Site Maps
section.
OPERATING THE SYSTEM
SELECT A CAMERA
1. Click a camera icon on the facility map image, and then drag it to one of the VMX200 video windows.
2. Release the mouse button. Video from the selected camera is routed to the specified VMX200 video window.
Next/Previous
1. Click in a VMX200 video window to select it.
2. Press the F4 key to advance to the next camera installed on the switcher currently being viewed. The sequence of installed cameras is
based on the system configuration, as programmed in the device configuration window.
OR
Press the F3 key to move to the previous camera installed on the switcher currently being viewed.
NOTE: If your system has more than one switcher, the Next and Previous commands cannot advance between switchers. Only the cameras on
the switcher currently being viewed can be called with the Next and Previous commands.
C1534M (1/06)
45
Camera Following
The Camera Following feature provides an easy way to follow an object across an area covered by multiple cameras, such as a person moving
through a building, or a vehicle traveling along a roadway.
NOTE: An operator can also track objects through macros and/or using “Next” and “Previous” to “step” cameras along a route. However, the
Camera Following functionality switches a group of cameras in one step, and does not require operators to remember macro numbers or camera
numbers.
1. Click Automation on the site map window menu bar. If Automation does not appear on the menu bar, the user profile does not have
permission to access this feature. If necessary, ask an administrator to turn it on.
2. A check mark next to Camera Following indicates that the feature is turned on. If necessary, click Camera Following to turn the feature on.
Figure 54. Automation Menu
3. Double-click a VMX200 video window. The Camera Following functionality varies, depending on the type of system:
Single video system
Video from the associated camera(s) displays on the specified external monitor(s). If a site map has been associated with the camera, the
new site map image appears in the site map window.
Quad system
Video from the selected camera is routed to the first VMX200 video window. Video from the associated camera(s) is routed to the specified
VMX200 video window(s). Video from associated camera(s) may also display on external monitor(s), depending on the configuration. If a
site map has been associated with the camera, the new site map image appears in the site map window.
4. You can continue loading associated camera views by double-clicking any of the VMX200 video windows, or you can drag a camera icon
from the site map image to display a different camera view. If necessary, Select Automation > Camera Following to remove the check mark
and turn off the Camera Following feature.
CAMERA CONTROL
Once video has been routed to one of the VMX200 video windows, you can control the camera directly on the video image with the mouse. You
can also control certain camera functions with the keyboard. Refer to Table E.
NOTE: The camera control functionality described here applies to the video on the VMX200 video windows only, not to any external monitors
you may have connected to the VMX210 system.
Pan and Tilt Control
Click and hold the left mouse button while the crosshair pointer is inside the selected VMX200 video window. The camera will follow the
mouse’s movement.
The pan and tilt functions are under variable speed control. The further the mouse pointer is from the center of the VMX200 video window, the
faster the pan and tilt movement.
You can also control pan and tilt functions with the arrow keys or the numeric keypad on the VMX200 keyboard. Refer to Table E for a description
of keyboard control functions.
Zoom and Focus Control
Use the mouse wheel to zoom and focus the lens.
Zoom: While inside the selected VMX200 video window, roll the mouse wheel forward to zoom in and backwards to zoom out.
Focus: To focus, hold the Shift key while rolling the mouse wheel. If the camera features auto focus, the manual focus action will revert back to
auto focus following any subsequent mouse movement.
46
C1534M (1/06)
Mouse wheel rolls are queued to allow a camera to be zoomed (or focused) in or out without having to continuously roll the wheel. If the wheel
is rolled forward several times in quick succession, the user must roll the wheel backward one step in order to stop the zoom (or focus).
You can also control zoom and focus functions with the numeric keypad on the VMX200 keyboard. Refer to Table E for a description of keyboard
control functions.
Iris Control
When using a camera offering iris control, press the Alt key and roll the mouse wheel to adjust the iris setting on the camera. Cameras
supporting auto iris will revert to their auto settings following any subsequent mouse movement.
Table E. Keyboard Camera Control
Function
Key(s)
Description
Control/Display Monitor Selection
Tab
Press the Tab key to select the next control/display window in sequence
Camera Pan and Tilt
Numeric Keypad
Press the 2 (down) or 8 (up) key to tilt the selected camera.
Press the 4 (left) or 6 (right) key to pan the selected camera.
Press the 1 (left and down), 3 (right and down), 7 (left and up), or 9 (up and
right) key for a pan and tilt combination.
Arrow Keys
Press the up or down arrow to tilt the selected camera.
Press the left or right arrow to pan the selected camera.
Numeric Keypad
Press the + key to zoom in.
Press the - key to zoom out.
Hold the Shift key, and then press the + or – key to control the focus.
Camera Zoom and Focus
VIDEO WINDOW ADJUSTMENT
Quad Systems
You can adjust each VMX200 video window to fit the video source image exactly within the video window borders. To make adjustments, rightclick the desired window and select Adjust Video from the pop-up menu. The Adjust Video dialog box appears. Adjust the following parameters
for the selected window as necessary:
Left
Change the left edge position; this value must be in multiples of 16.
Right
Change the upper edge position; this value must be in multiples of two.
Horizontal offset
Offset the video window left or right by increments of one from the position specified in the Left field.
Width
Set the total width of the video window; this value must be in multiples of 16.
Height
Set the total height of the video window, by increments of one.
Vertical offset
Offset the video window up or down by increments of one from the position specified in the Top field.
You can also adjust the Contrast, Brightness, Saturation, and Hue as necessary.
NOTE: There always will be a black strip approximately 1 mm wide on the left side of the image. This is normal and does not affect the images
being displayed or captured.
Single Video Systems
The display card included with the single video workstations provides specific settings and video display controls. Right-click in the VMX200
video window, and then select Adjust Video from the pop-up menu. The Video Adjustment window displays the controls offered by the display
card manufacturer. Refer to the Video-for-Windows card user manual for instructions on configuration settings.
VIEW AN EXTERNAL MONITOR
You can route camera output and other video sources to an external display monitor using the methods described below. PTZ control of cameras
displayed on external monitors is limited to the keyboard functions described in Table E. To control PTZ function on these cameras with the
VMX210 workstation mouse, display the same camera in a VMX200 video window and control the camera there.
C1534M (1/06)
47
Route Video to an External Monitor
1. Drag a camera icon to the monitor icon on the site map tool bar.
Figure 55. Monitor Icon on Site Map Tool Bar
2. The External Monitors window appears.
3. Position the camera icon on the desired monitor and release the mouse button. The monitor will switch to video from the specified camera,
and the External Monitors window closes.
Alternate Method
1. Double-click the monitor icon on the site map menu bar. The External Monitors window appears.
Figure 56. External Monitor Window
2. Drag a camera icon from the site map image to the External Monitors window.
3. Position the camera icon on the desired monitor and release the mouse button.
OPERATE A PRESET
Call a Preset
1. Right-click inside one of the PC video windows, and then select Go to Preset from the pop-up menu.
2. Select the desired preset position from the Preset submenu.
3. The camera moves to the preset position.
Call a Preset on an External Monitor
1. From the External Monitor window, right-click the desired external monitor icon, and then select the desired preset from the pop-up menu.
2. The camera moves to the preset position.
48
C1534M (1/06)
OPERATE SEQUENCES
Run a Sequence
1. Right-click inside one of the PC video windows, and then select Run Sequence from the pop-up menu. The Select Sequence dialog box
appears.
Figure 57. Select Sequence Dialog Box
2. Select the desired sequence, and then click OK.
Stop a Sequence
Click inside one of the PC video windows to stop a sequence.
OR
Select Automation > Sequences > Stop All from the site map menu bar to stop all running sequences.
Run a Sequence on an External Monitor
1. From the External Monitors window, right-click the desired external monitor icon, and then select the desired sequence from the pop-up
menu.
2. The sequence will run until you right-click the external monitor icon and then select Stop Sequence or Pause Sequence from the popup
menu.
OPERATE MACROS
Run a Macro
Double-click any macro icon on any site map to run a macro manually.
OR
1. Select Automation > Macros from the site map window menu bar.
OR
Right-click the site map, and then select Macros from the pop-up menu.
C1534M (1/06)
49
The Macros dialog box appears.
Figure 58. Macros Dialog Box
2. Select the desired macro from the macro list, and then click Run.
3. Click Close to return to the site map window.
ALARM POINT EVENTS
VMX200 can respond to alarm input devices by logging events and executing specified macro automation events. For information on integrating
alarm devices into VMX200, refer to Configure Input/Output Points in the Additional Configuration section.
View Alarm Events
Alarm events can be configured to generate an entry in the Alarm Viewer. These entries can be monitored in either of the following ways:
•
A user can open the Alarm Viewer manually when necessary, in either of the following ways.
–
Select View > Alarms from the site map menu bar.
–
Double-click an alarm point icon on the site map. An icon begins flashing when an event has occurred at the corresponding alarm point.
The icon continues to flash until the user acknowledges the event.
•
A user can choose to have the Alarm Viewer pop up whenever an alarm is set or reset. Refer to User Environment Options in the Configure
Users section for information on this setting.
Figure 59. Alarm Viewer
The Alarm Viewer displays alarm events in reverse chronological order, with the most recent event at the top of the list. Each time a new alarm
event occurs for a particular input device point, older events at the same device point are moved to a nested position under this newest event.
NOTE: The alarm point number used in VMX200 refers to the physical alarm input number on the rear panel of the alarm interface unit. VMX200
does not use the alarm group numbers associated with the alarm inputs on the alarm interface unit.
50
C1534M (1/06)
Alarm-Based Image Captures
To capture an image with an alarm, you must first configure a sequence to include the necessary image capture, and then configure a macro to
run the sequence. Refer to Configure Sequences and Configure Macros in the Additional Configuration section for more information.
A camera icon next to an alarm event indicates that the system captured images associated with the alarm event. To view these image captures:
1. Select the event.
2. Click the View Images icon on the tool bar. The Capture Viewer appears.
Figure 60. Capture Viewer
The Capture Viewer displays a thumbnail picture of each image. Tool bar icons allow the user to filter images by date and time, and by camera,
and to navigate between screens of captures, selecting and deleting images. Refer to the Image Capture section.
Acknowledge an Alarm
In the Alarm Viewer, click the check box beside each event you wish to acknowledge. The check can be removed by clicking the check box again.
OR
Select the event you wish to acknowledge, and then click the Acknowledge icon on the Alarm Viewer tool bar.
Delete a Log Item
Select the desired event, and then click the Delete icon in the Alarm Viewer tool bar.
NOTE: Deleting alarm events will remove the selected event(s) and all associated images. This action cannot be reversed. Pelco recommends
saving a backup copy of any important image captures on external media, such as a CD.
Print the Alarm Log
Click Print. The alarm log prints as it is currently displayed.
Manage Alarm Image Capture Files
Alarm-related image capture files are stored within the system separately from manual image captures, but they can be managed in the same
way. Refer to the Image Capture section for information on managing alarm-based image files.
C1534M (1/06)
51
OPERATE A VCR
Route Video to a VCR
1. Drag a camera icon to the VCR icon on the site map menu bar.
Figure 61. VCR Icon on Site Map Tool Bar
2. The VCRs window appears.
Alternate Steps 1 and 2
1. Double-click the VCR icon on the site map menu bar. The VCRs window appears.
2.
Drag a camera icon from the site map image to the VCRs window.
3. Position the camera icon on the desired VCR and release the mouse button. The Route Image pop-up menu appears.
4. Select whether to route the video to the VCR and start recording, or just route the video. The VCRs window closes.
Figure 62. VCRs Window
Viewing Video That Is Being Recorded
From the VCRs window, click the desired VCR icon and drag it to an appropriate VMX200 video window. The video that is being routed to the VCR
is displayed on the VMX200 video window, along with the VCR control tool bar.
OR
Drag and drop the same camera that is routed to the VCR into a VMX200 video window. This allows the camera to be viewed and controlled
through the VMX200 video window while it is being recorded on the VCR. This is useful in smaller systems when it is easy to remember which
camera is being recorded.
VCR Control
1. Drag a VCR icon from the VCRs window to any of the VMX200 video windows.
2. Use the VCR control icons to control the selected VCR.
3. To change the camera routed to the VCR, click a new camera icon, and then drag it to the VCR icon.
Figure 63. VCR Control Icons
PTZ control of the camera viewed through the VCR is limited to the keyboard functions described in Table E. To control PTZ function on these
cameras with the VMX210 workstation mouse, display the same camera in a separate VMX200 video window and control the camera there.
52
C1534M (1/06)
Alternate Method
1. In the VCRs window, select the desired VCR icon. The icon turns bright blue.
2. Use the VCR control icons to control the selected VCR. This option is used mainly for controlling a VCR when it is not being viewed.
Tape-To-Tape VCR Recording
Each VCR can be treated as a video source as well as a destination. To record the contents of one VCR onto another, you must route the source
VCR to the destination VCR.
1. In the VCRs window, drag one VCR icon (the source VCR) onto another VCR icon (the destination VCR).
2. Display each VCR in a VMX200 video window.
3. Press the Play icon for the source VCR.
4. Press the Record icon for the destination VCR.
Advanced Controls
Each VCR has its own set of special controls for setting recording speed, time and date stamps, etc. To use these advanced controls:
1. From the VCRs window right-click the desired VCR icon, and then select Advanced Properties from the pop-up menu.
Alternate Step 1
If you are displaying the VCR video in one of the VMX200 video windows, right-click the window, and then select Advanced Properties from
the pop-up menu.
2. The Advanced Properties dialog box appears. Refer to the appropriate TLR3000 Series VCR Installation/Operation Manual.
Figure 64. VCR Advanced Properties Dialog Box
C1534M (1/06)
53
IMAGE CAPTURE
The format of the image file created depends on the settings selected when the system administrator configured the capture card. Refer to
Configure the Capture Card in the System Configuration section.
Image Capture Methods
You can capture an image using any of the following methods:
•
Manual capture
•
Hot-key capture
•
Incorporate a capture command into an automated event
Manual Capture
Right-click the desired VMX200 video window, and then select Capture from the pop-up menu to capture the frame.
Figure 65. Right-Click Pop-up Menu
Hot-Key Image Capture
Use the following function keys on the keyboard to capture images in the VMX200 video windows:
Function Key
F5
F6
F7
F8
VMX200 Video Window Number
1
2 (quad system only)
3 (quad system only)
4 (quad system only)
Automated Capture Events
You can include a command to capture an image in both sequence and macro events. Specify a capture command when designing an appropriate
sequence event. Any macro that includes this sequence also will execute the capture. Refer to Configure Sequences in the Additional
Configuration section for more information.
54
C1534M (1/06)
Open the Capture Viewer
All captured images can be viewed, sorted, printed, and deleted through the Capture Viewer.
1. Select View > Captures from the site map window.
2. The Capture Viewer appears.
Figure 66. Capture Viewer
3. The Capture Viewer displays images captured from all system cameras. To view images from a specific camera, click the appropriate folder
in the folder list.
Figure 67. Capture Viewer Folder List
The Capture Viewer tool bar contains the following icons:
Table F. Capture Viewer Icons
Icon
C1534M (1/06)
Icon Name
Function
Open
Open the selected image in the Frame Capture Viewer.
Copy
Copy the selected image.
Print
Print the selected image(s).
Refresh
Update the image set with any new images that have been captured since
the Capture Viewer was opened. Images captured while the capture viewer
is open will not be displayed until the refresh button is clicked. The number of
queued images appears in the Capture Viewer status bar.
Delete
Delete the selected image.
Configure Filter
Filter the image captures by date and time.
Clear Filter
Clear the settings selected in the Filter dialog box.
55
Filter Images
1. Click the Filter icon on the Capture Viewer tool bar. The Filter dialog box appears.
Alternate Step 1
Select View > Filter from the Capture Viewer menu bar.
Figure 68. Filter Dialog Box
2. Select the filter settings from the following options:
Previous
This option displays the images captured during the specified previous time period; specify the number of minutes, hours, or days.
Between
This option displays the images captured during the specified time interval. Select dates from the calendars that appear when you click the
down arrows. If necessary, you can filter the search further by specifying the time of day during the search days (such as between 8:00 AM
and 4:00 PM on each day from August 24 to 28).
Figure 69. Filter By Date and Time
Sort Images
1. Select View > Sort By from the Capture Viewer menu bar, and then select the sort option. You can sort either by date/time or by camera
name.
2. If necessary, select View > Sort Order to specify ascending or descending order.
56
C1534M (1/06)
Select Images
In the Capture Viewer, you can select one or more capture images for printing or deleting by using any of the following methods:
•
To select an individual image click the image
•
To select all images shown in the Capture Viewer, use Ctrl-A, or select Edit > Select All from the Capture Viewer menu bar.
•
To select a group of images press and hold the Ctrl key, and then click the desired images.
•
To select a sequence of images click and drag the mouse to draw a box around the desired images. The selected images are highlighted.
NOTE: To invert the selection (deselect the previously selected images, and select all of the previously unselected images) click Edit > Invert
Selection from the Capture Viewer menu bar.
Figure 70. Select a Sequence of Images
Copy an Image
1. Select an image, and then click the Copy icon.
2. The image is copied to the system clipboard. You can then paste the image into another application.
Save Image Captures
Pelco recommends saving a backup copy of any important image captures on external media, such as a CD. Image captures are stored in the
“Program Files\CamControlSvr\AlarmImage” folder. Manual captures are saved in the “IDO” subfolder.
The VMX210 system includes a Read/Writer CD drive, which you can use to create a CD backup of image captures. Follow the CD creation
instructions provided in the CD software.
Delete Images
Select one or more images, and then click the Delete icon.
C1534M (1/06)
57
You can also delete images with a macro. Create a macro containing a Maintenance event set to remove images according to the specified time
frame, as shown in Figure 72.
Figure 71. Maintenance Macro Set to Delete Captures
NOTE: To optimize hard disk space, delete images regularly. A maximum of 32,000 images is allowed. Once you have deleted an image,
you cannot restore it to the system.
Open an Image
Select an image and then click the Open icon on the Capture Viewer tool bar. The full-size image appears in the Frame Capture Viewer.
Alternate Method
Double-click an image.
Figure 72. Frame Capture Viewer
Print Images
Print Thumbnail Images
1. Select the desired image(s), and then click the Print icon on the Capture Viewer tool bar. A standard Windows print dialog box appears.
2. Select the appropriate print options.
3. Click OK. The image(s) print on the specified printer.
58
C1534M (1/06)
Print a Full-Size Single Image
1. Open an image in the Capture Viewer.
2. From the Frame Capture Viewer menu, select File > Print. The image is printed with the filename and date stamp as displayed in the viewer
window.
ALTERNATE Step 2
Select File > Print Setup to modify the printer settings, and then click Print.
NOTE: To use the print function, you must have a printer connected to the VMX210 workstation parallel port. Refer to the Windows 2000
documentation for printer installation instructions.
OPERATE AUXILIARIES AND OUTPUT POINTS
Operate Camera Auxiliaries
Camera auxiliaries defined through the camera device configuration procedures may be controlled from VMX200 through the following steps:
1. Drag the desired camera into one of the VMX200 video windows.
2. Right-click the VMX200 video window, and then select the appropriate auxiliary from the pop-up menu. The device is turned on.
If you display the pop-up menu again, you will see that the selected auxiliary control now has a check mark next to it. Once an auxiliary is
on, it will remain on until it is turned off or the system is shut down.
3. To turn the auxiliary off, display the pop-up menu and select the auxiliary. The check mark disappears.
Digital Output Point Controls
You can use VMX200 to control external relay devices such as lights, gates, or motors using the system’s digital output controls. Refer to
Configure Input/Output Points in the Additional Configuration section for instructions on configuring relay output points.
1. Select Automation > Digital Output Control from the site map menu bar. The Output Control window appears.
Figure 73. Digital Output Control Window
2. All output points for the specified device are displayed on the right side of the window.
NOTE: The output point number used in VMX200 refers to the physical relay contact number on the rear panel of the interface unit. VMX200
does not use the GPI numbers associated with relay contacts on the relay interface unit.
Use the following output control icons to change the state of each relay output point:
C1534M (1/06)
59
Table G. Output Control Icons
Icon
Icon Name
Function
Momentary True/False
Click this icon to momentarily change the output point’s state to “true.” When
you release the icon, the output point’s state returns to “false.”
True
Click this icon to set the selected point to “true.” This icon appears pressed
down when the output point is in a “true” logic state.
False
Click this icon to set the selected point to “false.” This icon appears pressed
down when the output point is in a “false” logic state.
Logic state example: A floodlight is normally off. The output point is configured to represent off as a “false” state. When you click the “true”
icon, the floodlight is turned on. Refer to Configure Input/Output Points in the Additional Configuration section for additional information on
output point startup configuration.
NOTES:
•
Relay contact settings (such as normally open/normally closed) are configured through the DIP switches on the relay interface unit. These
settings are duplicated in the VMX200 configuration when you add the device (refer to the Reference Information for Adding Devices
section in the Appendix).
•
The definition of “True” in VMX200 depends on the DIP switch setting. For example, if you configure relay contacts 1-16 in a relay interface
unit as normally open, then “True” equals open for VMX200 relay point 1 through point 16.
ADVANCED CONTROLS
Advanced Camera Controls
To access the advanced controls for a camera, right-click the camera icon on the site map image, and then select Advanced Controls from the
pop-up menu. Or you can right-click the mouse in the VMX200 video window displaying the desired camera, and then select Advanced Controls
from the pop-up menu.
Figure 74. Sample Camera Advanced Properties Dialog Boxes: General Tab (left) and Advanced Tab (right)
The Advanced Properties dialog box provides a way to configure a camera’s special features. The specific fields contained in the dialog box vary,
depending on the features supported by the camera. For example, with a Spectra camera, you can configure settings such as camera labels, lens
speed, and patterns. The Display Properties button on the Advanced page opens the camera menu. The circle button below the Display Properties
button controls iris open and iris close.
In some cases, the Advanced Properties dialog box contains a Profile tab. Use this page to save camera settings as a specific “Profile” for that
camera. Profiles are loaded manually or through an automated macro. This is a useful feature for outdoor cameras that must adjust their
exposure for varying light conditions during the day.
Click the Driver Logs tab to view error messages related to the device driver. If system cameras are controlled by Coaxitron® through a switcher,
the driver log displays errors related to the switcher driver, since commands to move cameras are sent to the switcher. If system cameras are not
controlled through a switcher, the camera driver log displays camera errors and timeouts.
The driver log is a good troubleshooting tool, especially when used in combination with the Diagnostic Log. Refer to View the Diagnostic Log in
the Troubleshooting section of the Appendix.
60
C1534M (1/06)
Advanced CCTV Device Properties
VMX200 provides access to the advanced properties of other CCTV devices through a dialog box specifically designed for each device.
Advanced Control for an External Monitor or VCR
1. Open the external device window.
2. Right-click the device icon, and then select Advanced Controls from the pop-up menu. The appropriate Advanced Control dialog box
appears.
Figure 75. External Device Advanced Properties
Advanced Control for a Switcher or Multiplexer
1. Select View > Advanced Properties > Switchers from the site map menu bar.
2. Select the specific switcher or multiplexer. The appropriate Advanced Control dialog box appears.
NOTE: This option is restricted under User Permissions.
Figure 76. Advanced Properties Menu Option for CM6800
C1534M (1/06)
61
Appendix
THE VMX200 SITE MAP WINDOW
The VMX200 site map window contains the following sections:
•
Menu bar
•
Tool bar
•
Site map image
•
Status bar
SITE MAP MENU BAR
Mouse Operation
1. Click the desired menu; the drop-down menu appears.
2. Click the desired command in the drop-down menu.
Keyboard Operation
1. Press Alt + underlined letter (for example, Alt+F for File); the drop-down menu appears.
2. Use the up or down arrow key to navigate to the desired option.
3. Press Enter.
Figure 77. Site Map Menu Bar
62
C1534M (1/06)
Table H describes the commands available through the site map menu bar.
Table H. Site Map Menu Bar Commands
Menu
Command
Function
File
Log in as a New User
Open the Log-In dialog box for the next user.
Exit
Exit the VMX200.
Site Map
Select the Site Map image editing mode.
Options
Open the user-specific settings dialog box.
Advanced Properties
Open Advanced Properties for any switchers or multiplexers that offer advanced controls.
Alarms
Open the Alarm Viewer, which displays the alarm log.
Edit
View
Configure
Captures
Open the Capture Viewer.
FTP Activity
Open the FTP Activity Log. This log displays a record of communications.
Icon Labels
Click to remove or add a check mark next to each type of icon; a check mark indicates that the
label will be displayed on the site map for that type of icon.
Modem Activity
This is reserved for future use.
Diagnostic Log
Open the Log Viewer, which is a log of system events. This log is used primarily for support
diagnostics.
Devices
Open the Device Configuration window.
Auxiliary Points
Open the Auxiliaries dialog box for configuration of camera auxiliary points.
Input/Output Points
Open the device’s Point Properties dialog box for configuration of input/output points.
Maps
Open the Maps dialog box for adding and renaming facility map images.
Users
Open the Configure Users dialog box where user preferences are specified.
FTP Sites
Open the FTP Sites dialog box for configuration of remote servers and firewalls.
Sockets
This is reserved for future use.
Video Card Driver
Open the configuration settings for the Video-For-Windows card installed on the VMX210.
NOTE: Do not change this setting. For proper video functionality, 41VP (version 2) must be
designated as the video overlay option.
Capture Card
Open the Capture Card Configuration dialog box for editing file format and compression.
External Monitors
Window
Open the appropriate device window for editing the layout of the installed devices.
VCRs Window
Automation
Sequences
Edit
Stop All
Utilities
C1534M (1/06)
Stop all currently running sequences.
Macros
Open the Macro Editor dialog box.
Scheduler
Open the Scheduler dialog box.
Digital Output Control
Open the Digital Output Control dialog box from which external devices can be activated.
Camera Following
Enables the Camera Following feature.
Database Utilities
Backup
Generate a backup copy of the workstation database.
Restore
Open and restore a backup copy of the workstation database.
Compact
Help
Create or edit a sequence from the Sequences dialog box.
About VMX200
Compact the database currently being used.
Displays VMX200 software registration and version information.
63
SITE MAP ZOOM ICONS
The site map zoom icons increase and decrease the size of the currently displayed map image. To use the Zoom In icon, click Zoom In, and then
click the site map. Release the mouse button or drag a box around the specific section of the map. that you want to enlarge.
Figure 78. Site Map Zoom Icons
SITE MAP STATUS BAR
The status bar provides the following information:
•
A prompt identifying a link to another site map
•
Macro status information
•
The current time, as defined in the VMX210 workstation operating system
Figure 79. Site Map Status Bar
64
C1534M (1/06)
THE VMX210 DEVICE CONFIGURATION WINDOW
DEVICE CONFIGURATION WINDOW MENU BAR
Figure 80. Device Configuration Window Menu Bar
Table I describes the commands available through the Device Configuration window Menu Bar.
Table I. Device Configuration Window Menu Bar Commands
Menu
Command
Function
File
Revert
Revert to the last saved configuration settings.
PageSetup
Open the page setting dialog box.
Print Preview
Previews print job with current page settings.
Print
Open print job dialog box.
Close
Close the Device Configuration window.
Edit
Copy
Copy the selected object.
Paste
Insert the copied object.
Paste
Many Insert a specified number of copies of the object.
Delete
Remove the selected object from the configuration diagram.
Select All
Select all objects on the configuration diagram.
Find Device
Locates a specified object on the configuration diagram.
Mirror
Horizontally
Vertically
Device Inventory
View
C1534M (1/06)
Flip selected device icons around a vertical axis (left to right).
Flip selected device icons around a horizontal axis (top to bottom).
The Device Inventory allows you to save installation details of any system device without having to
include it on the device configuration diagram.
Open
Open the Device Inventory window.
Move Selected To
Move the selected device directly to the Device Inventory without opening the Device Inventory
window.
Add
Add the designated device to the system configuration. Select from the list of devices displayed on
the submenu.
For each device, complete the fields in each dialog box, and then click Next to continue to the
subsequent dialog box until the device configuration is complete.
Properties
Open the Device Details dialog box for the selected object.
Zoom
You can zoom the diagram view. Select from the following list of zoom settings, which are displayed
on the submenu.
• To Page (accommodate all icons in the viewing area)
• 100%
• 75%
• 50%
• 25%
Show Switch Paths
Display the current status of all system video and audio switch paths on the diagram.
Labels
Click to remove or add a check mark next to each type of device; a check mark indicates that the
device label will be displayed on the diagram for that type of device.
Node Legend
Toggles the configuration screen’s node color legend on and off.
65
DEVICE CONFIGURATION WINDOW TOOL BAR
Figure 81. Device Configuration Window Tool Bar
Table J describes the icons available on the Device Configuration window tool bar.
Table J. Device Configuration Window Tool Bar Icons
Icon
Icon Name
Menu Bar Command
Function
Print
Print
Open print job dialog box.
Copy
Edit > Copy
Copy the selected object.
Paste
Edit > Paste
Insert the copied object.
Properties
Edit > Properties
Open the Device Details dialog box for the selected object.
Zoom In
The menu bar does not
containfunctions equivalent to
these icons. with this tool. Use
the View > Zoom functions
instead.
Enlarge a specific area of the diagram by dragging a box with
this tool. You can also use this tool to center a specific area of
the diagram by clicking it on the desired area.
Zoom Out
66
Use this tool to zoom out in increments.
Zoom Selected
Use this tool to focus on a specific object or group of objects.
Zoom 1 to 1
Use this tool to revert to the default drawing size.
Zoom to Page
Use this tool to display the entire area available to the
configuration diagram.
Add Camera
Edit > Add > Camera
Add the designated device to the system configuration.
Add Switcher
Edit > Add > Switcher
Add External Monitor
Edit > Add > External Monitor
Add VCR
Edit > Add > VCR
Add Input/Output Device
Edit > Add > Input/Output Device
Add DVR
Edit > Add > DVR
This is reserved for future use.
Add Modem
Edit > Add > Modem
This is reserved for future use.
Add Avitech VCC4
This is not available on the menu
bar.
This is reserved for future use.
C1534M (1/06)
REFERENCE INFORMATION FOR ADDING DEVICES
The dialog boxes for adding devices contain instructions for completing the entry fields. If you need further assistance, refer to the field
definitions provided below.
ADD A CAMERA
General Information
Name:
Enter a camera name (up to 64 characters). This name can contain letters, numbers, and symbols.
Location:
Enter a description of the camera location, such as “Parking Lot B” (up to 255 characters). This text is
displayed in the title bar of the video display window when the camera is selected.
Description:
Enter any other relevant information, such as the camera serial number or specific communications
settings (up to 255 characters).
Camera Capabilities
Pan, Tilt, Zoom, Focus, Iris:
Select the appropriate options that the camera provides. Leave all options unchecked for fixed cameras.
Presets:
If your camera stores preset positions, check this option.
Auxiliary Contacts:
Check this option if your camera has options such as a wiper blade or lamps that require operator control.
Positional Feedback:
This is reserved for future use.
Control Commands
Coaxial Cable:
Check this option if both video data and control data are sent to and from the camera along the same
coaxial cable, through either a switcher or a multiplexer.
Switcher Serial Port:
Check this option if the camera’s control data is to be sent serially through a matrix switcher or
multiplexer.
PC Serial Port (or Modem):
Check this option if the camera’s control data will be sent serially (such as with RS-232) from the VMX210
or through the Ethernet COM port.
Make and Model
This dialog box appears only when you add a camera that is controlled serially through the VMX210 communications port.
Manufacturer:
Select Pelco.
Model:
Select the appropriate camera model.
Camera Addressing
Cameras that are controlled serially through the VMX210 communications port or a switcher control port must be addressed to ensure proper
communication with the system.
Automatic Addressing:
Select this option if the cameras are controlled by Coaxitron. If the cameras are controlled by D or P
protocol, you can use automatic addressing provided the camera addresses match the switcher input
numbers (camera 1 to input 1, and so on). Automatic addressing assigns the camera an address that is the
same as the logical number of the switching device node that it is connected to. If physical/logical
mapping has been applied to the switching device, then the camera’s address will be taken from the
logical number of the input port instead of the physical port number. If the camera is connected to multiple
switching devices, the camera’s address will be taken from the first node it is connected to.
Manual Addressing:
Enter an address number corresponding to the address (DIP switch setting) on the camera. If more than
one camera is installed on the same serial line (such as in a daisy-chain configuration from the VMX210
serial port), each camera must have a unique address. Changes in switcher physical/logical mapping have
no effect on communications with manually addressed cameras.
Preset Capacity
Number of Presets:
Enter the number of camera presets, if the camera supports presets.
Auxiliary Contacts
Number of Auxiliary Contacts:
C1534M (1/06)
Enter the number of auxiliary contacts in the camera, if applicable.
67
ADD A SWITCHER
Use Add a Switcher to add matrix switchers and Genex multiplexers to the system configuration.
General Information
Name:
Enter a switcher name (up to 64 characters). This name can contain letters, numbers, and symbols.
Location:
Enter a short description of the switcher’s physical location (up to 255 characters).
Description:
Enter any other relevant information, such as the serial number (up to 255 characters).
Make and Model
Manufacturer:
Select Pelco.
Model:
Select the appropriate switcher model.
Device Addressing
Switchers that are controlled serially through the VMX210 communication port must be addressed to ensure proper communication with the
system.
Select Manual Addressing, and enter an address number corresponding to the address (DIP switch setting) on the switcher itself. If more than
one switcher is installed on the same serial line (such as in a daisy-chain configuration), each switcher must have a unique address.
NOTE: For the CM9760 switcher the address must match the PIN number of the CM9760-KBD. For the Genex multiplexer the address must
match the GenexUnit ID number (for example, Unit ID 1 = address 1).
Video Inputs and Outputs
Number of Video Inputs/
Number of Video Outputs:
Physical/Logical Mapping:
Enter the number of video input and output connections on the switcher. If necessary, refer to the
switcher’s installation/operation manual.
This optional feature provides a means of assigning a non-sequential numbering system to the physical
inputs and outputs of a matrix switcher. Note, however, that this VMX210 mapping information cannot be
transmitted to the matrix switcher.
Control Ports
Number of Switcher
Control Serial Ports:
Enter the number of switcher control ports.
Number of Camera
Control Serial Ports:
Enter the number of camera control ports on the switcher.
ADD AN EXTERNAL MONITOR
The VMX210 quad workstation (VMX210-SYS-Q) can support multiple external monitors connected to any output port on an external switcher or
an available output port on the VMX210.
General Information
Name:
Enter a monitor name (up to 64 characters). This name can contain letters, numbers, and symbols.
Location:
Enter a short description of the monitor’s physical location (up to 255 characters).
Description:
Enter any other relevant information, such as the serial number (up to 255 characters).
NOTE: This information is for VMX210 system reference only. The text entered in these fields does not appear on system monitors.
68
C1534M (1/06)
ADD A VCR
General Information
Name:
Enter a VCR name (up to 64 characters). This name can contain letters, numbers, and symbols.
Location:
Enter a short description of the VCR’s physical location (up to 255 characters).
Description:
Enter any other relevant information, such as the serial number (up to 255 characters).
Make and Model
Manufacturer:
Select Pelco.
Model:
Select the appropriate VCR model.
Device Addressing
VCRs that are controlled serially through a VMX210 communication port must be addressed to ensure proper communication with the system.
Select Manual Addressing, and enter address “0” unless the VCR’s internal setting is different.
ADD A DIGITAL INPUT/OUTPUT DEVICE
VMX210 uses digital input/output device types for handling inputs from alarm interface units or sending on/off signals to external relay devices.
General Information
Name:
Enter a device name (up to 64 characters). This name can contain letters, numbers, and symbols.
Location:
Enter a short description of the device’s physical location (up to 255 characters). This text is displayed in
the title bar of the video display window when the device is selected.
Description:
Enter any other relevant information, such as the serial number (up to 255 characters).
Make and Model
Manufacturer:
Select Pelco.
Model:
Select the appropriate model number.
Dip Switch Settings
Set the DIP switch settings to match the settings on the front panel of the alarm or relay unit.
Point Configuration
You can configure the alarm input points or relay output points at this time, or you can configure them at a later time. Refer to Configure Input/
Output Points in the Additional Configuration section.
C1534M (1/06)
69
SOFTWARE INSTALLATION AND REGISTRATION
Please call Pelco’s 24-hour Technical Support at 1-800-289-9100 or 1-559-292-1981 before installing an upgrade or reinstalling the VMX200
software from CD.
VMX210 SOFTWARE REINSTALL
The following instructions are necessary only in the event that you need to reinstall the software. Do not complete these instructions unless
advised to do so by a Pelco Technical Support representative.
1. Uninstall the previously installed VMX200 software.
a.
Click the Windows Start button.
b.
Choose Settings > Control Panel.
c.
Select Add/Remove Programs.
d.
Select the VMX200.
e.
Click Add/Remove or Change/Remove (Windows 2000).
NOTE: When you reinstall the VMX200 software, the existing database from the previous installation will be recognized and used for the new
installation. You should not change the installation directory when reinstalling the VMX200 software, otherwise the existing database will not be
found.
2. When the uninstall process is complete, close all programs on the VMX210 workstation.
3. Insert the VMX210 Resource CD into the CD drive on your VMX210 workstation.
4. The VMX200 Installation and User Guide window appears.
If it does not appear:
a.
Select the Windows Start button.
b.
Select Run.
c.
Type D:\setup.exe (if necessary, substitute the appropriate letter of your CD drive for D).
5. Select Install VMX200.
6. Follow the on-screen instructions to complete the installation.
7. When the installation is complete you will be prompted to enter the Base License; see License ID below.
NOTE: When you reinstall the VMX200 software, the existing database from the previous installation will be recognized and used for the new
installation. You should not change the installation directory when reinstalling the VMX200 software, otherwise the existing database would not
be found.
70
C1534M (1/06)
SOFTWARE REGISTRATION
The first time you start the VMX200 software, a message box prompts you to enter a Base License. Click Yes to open the Add License dialog box.
1.
Enter your License ID in the Add License dialog box.
The License ID (a two-part number) is printed on a sticker located on the VMX210 CD case.
The Hardware ID is entered by Pelco at the factory.
LICENSE ID
NOTE: Once you have entered your License ID,
you must obtain your Activation Code (Step 2) and
then enter it (Step 3) within 30 days.
2.
Obtain your Activation Code:
a.
Open your Internet browser and go to
the VMX210 Activation page at
Pelco.com.
https://www.pelco.com/
vmxactivation/ (Note the “s” in
“https” – this is a secure server
address.)
b.
Enter your Hardware ID and License
ID, and then complete the remaining
fields.
c.
Click Activate. A confirmation screen
appears, containing your Activation
Code.
OR
Call Pelco Technical Support:
1-800-289-9100 or
1-559-292-1981
C1534M (1/06)
71
3.
Enter your Activation Code in the
Add License dialog box.
4.
Click Apply.
5.
Click Close.
NOTES: To refer to the Installation ID or Activation Code at a later time, complete the following steps:
1. Select Help > About VMX200 from the menu bar, and then click Registration. The My Licenses dialog box appears.
2. Click your license, and then click Properties. The License Properties dialog box appears.
72
C1534M (1/06)
FEATURE UPGRADE REGISTRATION - FOR FUTURE USE
When you purchase a feature upgrade, Pelco will send you a software License ID number. Complete the following steps to upgrade the software:
1. Select Help > About VMX200 from the menu bar. The About VMX200 dialog box appears.
2. Click Registration. The My Licenses dialog box appears.
3. Click Add. The Add License dialog box appears.
4. Follow the instructions provided in the Software Registration section.
CCTV DEVICE DRIVERS
Hardware such as cameras, switchers, and VCRs require special files—device drivers—that tell the VMX210 how to communicate with them. A
current set of device drivers and corresponding command databases are installed with the VMX200 software.
If you need to install additional device drivers or update existing drivers complete the steps in the following sections.
Install a New Device Driver
1. Follow the steps for adding the new device as described in the System Configuration section of this manual.
2. When you reach the Make and Model dialog box, click the Have Disk button.
3. In the file manager window, select the .cci file from the disk containing the new driver, and then click Open. The .cci file is the device
driver’s setup file, which will manage the installation.
4. Select the device and click Next. The device then will be available in the manufacturer/model window.
5. Complete the remaining device configuration wizard screens.
This device driver now will be available when adding another device of that type.
Update a Device Driver
1. Open the Device Configuration window.
2. Double-click the device icon on the diagram for which you wish to update. The device details dialog box appears.
3. Click the Make/Model tab or the Control tab (the tab name depends on the device type), and then click Have Disk.
4. In the file manager window, select the .cci file from the disk containing the new driver, and then click Open.
5. Select the desired device from the list.
NOTE: A warning appears if the driver being installed is older than the one currently installed in the system. If you are unsure whether to
continue with the installation, contact Pelco’s 24-hour technical support for assistance.
6. Click OK to close the device details dialog box and to accept changes. The new driver now will be available any time you wish to add
another device of that type. This process also updates all other existing instances of the device.
TROUBLESHOOTING
VMX200 Software Unexpectedly Quits
If the software unexpectedly quits, make a note of the following information:
•
Actions and events immediately prior to the shut-down
•
The screen from which the error occurred
•
Any error messages that were displayed
Then restart VMX210. Should the system fail to restart, refer to the Emergency Backup and Restore Procedures section for system recovery
information.
If the system quits again under the same conditions as the first failure, contact Pelco immediately and report the conditions that preceded the
event in both instances.
C1534M (1/06)
73
The Software Requires a Backup Database During a Restart
If the VMX210 suffers a serious system error resulting in a corruption of the system configuration information, the software will prompt the user
to specify an alternative database during system restart. Refer to the Restore the VMX210 Database section for instructions.
The Video Window Turns Black or Blue After Dropping a Camera
This problem indicates that the selected camera’s video link is broken. This may be the result of a fault at the camera, the video cables, the
switcher connections, or the system configuration diagram. Use the following checklist to determine the location of the fault.
NOTE: A black video window indicates a problem between the camera and the switcher. A blue video window indicates a problem between the
switcher and the VMX210 workstation.
Verify camera operation:
Check the camera to ensure that it is receiving power and has not sustained any damage.
Verify camera configuration:
Open the device configuration window and confirm that the camera is connected properly to a switcher or
the main VMX210 video inputs in exactly the same way that it is connected physically.
Test cables and connections:
Check the system cables and connectors with cables and connectors that are known to be functioning
correctly.
Presets Have Moved From Their Original Positions
Check the camera’s mounting structure to ensure that no camera movement has occurred or is possible. If the problem persists, it is likely a
problem with the camera hardware. Contact your camera manufacturer.
NOTE: Some cameras will lose their preset settings when the dome is changed.
Incorrect Cameras Are Being Displayed When an Alarm Is Activated
This type of error can be the result of either an incorrect macro specification in the alarm (digital input point) configuration or incorrect camera
specification within the alarm’s macro. Verify that both the macro and alarm configuration have been designed properly.
A Facility Map Image Will Not Load Properly or at All
Verify that the desired image is in the Video Management Software “Site Maps” directory and has been saved in one of the acceptable image
file formats (.jpg, .bmp, .wmf, .emf, and .gif). If the image is too large or small, it must be edited to an acceptable size for the Video Management
Software map window (1016 x 673, 16-bit color is ideal).
Blue Lines Remain on the Facility Map Image After Closing the Map Edit Tool Bar
This error will occur after drawing an image link area but not specifying the linked map. This problem can be fixed by selecting File > Edit Image
Map, right-clicking inside the identified link area, and selecting the desired linked image from the pop-up window.
Video is Displayed When a Camera is Dropped Onto a Video Window, but there is No Ptz Control
This error is typically the result of a problem with the controls being sent to the cameras or with the control lines themselves. First, verify that the
camera’s installation details are correct with respect to how the camera is controlled and/or how the camera is addressed. The com port settings
on the VMX210 workstation or other serial device distribution system should match the specifications for the serial devices connected to it. This
includes baud rate, parity, and start and stop bits. If correcting these does not solve the problem, check all serial connections to ensure that there
are no bad cables or connections, and check that the serial addressing within the camera matches what is specified within the VMX210.
The Capture Viewer Displays Blue Images or None at All
Verify that there is a valid video source to capture an image from. If the video window Status Bar does not indicate a failure and the source can
be viewed in any other video display window, restart the system and note any error messages that appear during device initialization.
A Video Window Displays the Simulated Video
VMX200 will display a Simulated Video image if the system’s display/control windowing board fails to initialize properly. Restarting VMX200
software will correct this problem.
The Control/Display Monitor Windows are Displaying a Green Tint
This is another indicator that the windowing board failed to initialize properly. Power down the system completely (cold boot) and restart to
correct the problem.
The Video Control/Display and Map Windows Are Not In the Desired Positions or Do Not Utilize the Additional Monitors Installed If the monitor
and Windows desktop resolution settings are changed, window placement may not appear correctly. If this happens, the “.ccm” configuration
file must be deleted so that the system is forced to re-create the file with the proper monitor resolution parameters. The file can be found in the
“WinNT\System32\ccsupp” directory. Before deleting the .ccm file, ensure that the monitor and desktop resolution parameters within the
Windows system control panel are configured properly.
The resolution of VMX210 workstation monitors are configured at the factory to 1024 x 768 so that the Windows desktop becomes multiples of
these values. A dual monitor system is configured with a desktop resolution of 2048 x 768 (or 1024 x 1536). Note that monitors must also be set
to 60Hz with high color depth (16 bit).
74
C1534M (1/06)
A special “.ccm” file editor program program, called “Window Placement Editor,” was installed with the control system and may be found under
the Start menu. This utility program allows users to manage their system’s window configuration through a simple interface. Contact Pelco for
assistance.
View the Diagnostic Log
Before contacting Pelco, refer to the Diagnostic Log to see if it detected errors. The Diagnostic Log records errors starting drivers and errors
related to the VMX200 software (such as with macros or sequences). The Diagnostic Log also records when Macros are started.
1. Select View > Diagnostic Log.
2. Write down any unusual entries in the log.
3. When you discuss your system problem with Pelco, provide the technical support staff with the Diagnostic Log entries.
EMERGENCY BACKUP AND RESTORE PROCEDURES
Backup the VMX210 Database
VMX200 makes a backup copy of the configuration database each time the configuration screen is closed successfully. A total of five backup files
are retained, based on the most recent dates. Use the Backup utility to make additional copies and to save backup databases to alternative
media. Pelco recommends also saving a copy of the database on external media (such as a CD).
Users with administration privileges can save the current database to a backup file name and location.
1. Select Utilities > Database Utilities > Backup from the map screen menu bar. The Save Database Backup As dialog box appears.
2. Type an appropriate filename, and then select a new location, if necessary.
3. Click Save.
Restore the VMX210 Database
In the unlikely event that your VMX210 system suffers a serious system error resulting in a corruption of the system configuration information,
the following steps should ensure that the system recovers smoothly:
1. Restart VMX210.
2. The system may prompt you to specify an alternative database. If not, select Utilities > Database Utilities > Restore. The Backup Databases
dialog box appears.
Figure 82. Backup Databases Dialog Box
3. Select the most recent backup file from the backup files saved automatically by VMX210 or from the copies manually saved with the
Backup utility described in the Backup the VMX210 Database Database section, above.
4. Click OK, and then restart VMX210.
The system will now perform properly. If problems still exist, contact Pelco immediately.
C1534M (1/06)
75
76
C1534M (1/06)
Index
A
Add devices 9
Adjust video 47
Advanced camera controls 60
Advanced CCTV device properties 61
Alarm
view alarm events 50
Alarms
Acknowledge an alarm 51
add icon to site map 25
alarm interface unit 69
alarm viewer 50
alarm-based image captures 51
configure alarm input points 39
view alarm events 21
Automation 63
Auxiliary points, configure 38
B
Backup 75
C
Camera
add 67
add icon to site map 25
advance controls 60
operation 45
PTZ control 46
Camera auxiliary points
configure 38
operation 59
Capture card, configure 43
Capture viewer 51, 55
CCTV device driver 73
CCTV devices, properties 61
Configuration
system 9
Configure
alarm input points 39
camera auxiliary points 38
capture card 43
external device windows 27
FTP settings 41
macros 32
presets 28
relay output points 39
scheduled events 35
sequences 29
site maps 22
users 18
Connect devices 12
D
Daisy-chain serial communications 13
Database, backup and restore 75
C1534M (1/06)
Default Map 21
Device
configure 9
connections 12
Edit 11
icon 11
icon labels 15, 63
inventory 10, 65
properties 11
Device Configuration
close 18
edit 13
Device configuration
diagram 10
print 17
save 17
window 9
Device drivers 73
Diagnostic log 63
Digital input device, add 69
Digital output point 59
Drawing connections 12
E
Edit
auxiliary point properties 38
device configuration 13
site maps 25
External device windows, configure 27
External Monitor
add 11, 68
External monitor
operation 47
F
Feature upgrade 73
Filter images 56
Find device 17
I
Image capture
filter 56
format 22
operation 54
Image captures
alarms 51
Import, site map image 23
Install
devices 9
VMX210 8
Inventory
device 10
L
Label, device icon 15
Link
77
site map image 27
Log in 44
Log In as a New User 44
Log viewer 63
M
Macro
add icon to site map 25
configure 32
operation 49
snapshot 35
startup 21
Map icon, resize 27
Map, start-up 24
Maps. See Site map
Mirror 14
Monitor. See External monitor
N
Network Proxies
configure 41
NTSC, select video format 43
O
Operation
camera auxiliary points 59
cameras 45
digital output points 59
external monitor 61
image captures 54
macros 49
presets 48
PTZ control 46
sequences 49
site maps 45
VCR 52
Options, user environment 20
P
PAL, select video format 43
Password 19
Permissions
user 19
Presets
configure 28
operation 48
Print
device configuration diagram 17
image captures 58
Print Images 58
Properties
device 11
PTZ control 46
Resize, map icon 27
Restore 75
Revert 17
S
Save device configuration 17
Scheduled events, configure 35
Select camera 45
Sequence
configure 29
operation 49
Site map
configure 22
edit 25
image 22
link 27
status bar 64
window 62
zoom icons 26
Snapshot macro 35
Start VMX210 44
Startup
macro 21
map 21
options 21
Status bar, site map 64
Switcher, add 68
T
Troubleshooting 73
U
Upgrade 73
User
configure 18
permissions 19
properties 19
User environment options 20
Username 19
V
VCR
add 69
operation 52
Video window adjustment 47
View alarm events 50
Z
Zoom icons, site map 26, 64
R
Relay interface unit, operation 59
Requirements
system 9
78
C1534M (1/06)
PRODUCT WARRANTY AND RETURN INFORMATION
WARRANTY
Pelco will repair or replace, without charge, any merchandise proved defective in material or
workmanship for a period of one year after the date of shipment.
• Three years on Genex® Series products (multiplexers, server, and keyboard).
If a warranty repair is required, the Dealer must contact Pelco at (800)þ289-9100 or
(559) 292-1981 to obtain a Repair Authorization number (RA), and provide the following
information:
1. Model and serial number
2. Date of shipment, P.O. number, Sales Order number, or Pelco invoice number
3. Details of the defect or problem
• Three years on Camclosure® and fixed camera models, except the CC3701H-2,
CC3701H-2X, CC3751H-2, CC3651H-2X, MC3651H-2, and MC3651H-2X camera models,
which have a five-year warranty.
If there is a dispute regarding the warranty of a product which does not fall under the
warranty conditions stated above, please include a written explanation with the product when
returned.
Exceptions to this warranty are as noted below:
• Five years on FT/FR8000 Series fiber optic products.
• Three years on PMCL 200/300/400 Series LCD monitors.
• Two years on standard motorized or fixed focal length lenses.
• Two years on Legacy®, CM6700/CM6800/CM9700 Series matrix, and DF5/DF8 Series fixed
dome products.
• Two years on Spectra®, Esprit®, ExSite™, and PS20 scanners, including when used in
continuous motion applications.
• Two years on Esprit® and WW5700 Series window wiper (excluding wiper blades).
Method of return shipment shall be the same or equal to the method by which the item was
received by Pelco.
RETURNS
In order to expedite parts returned to the factory for repair or credit, please call the factory at
(800) 289-9100 or (559) 292-1981 to obtain an authorization number (CA number if returned for
credit, and RA number if returned for repair).
• Two years (except lamp and color wheel) on Digital Light Processing (DLP®) displays.
The lamp and color wheel will be covered for a period of 90 days. The air filter is not
covered under warranty.
All merchandise returned for credit may be subject to a 20% restocking and refurbishing
charge.
• Eighteen months on DX Series digital video recorders, NVR300 Series network video
recorders, Endura™ Series distributed network-based video products, and TW3000 Series
twisted pair transmission products.
Goods returned for repair or credit should be clearly identified with the assigned CA or RA
number and freight should be prepaid. Ship to the appropriate address below.
• One year (except video heads) on video cassette recorders (VCRs). Video heads will be
covered for a period of six months.
• Six months on all pan and tilts, scanners or preset lenses used in continuous motion
applications (that is, preset scan, tour and auto scan modes).
Pelco will warrant all replacement parts and repairs for 90 days from the date of Pelco
shipment. All goods requiring warranty repair shall be sent freight prepaid to Pelco, Clovis,
California. Repairs made necessary by reason of misuse, alteration, normal wear, or accident
are not covered under this warranty.
Pelco assumes no risk and shall be subject to no liability for damages or loss resulting from
the specific use or application made of the Products. Pelco’s liability for any claim, whether
based on breach of contract, negligence, infringement of any rights of any party or product liability, relating to the Products shall not exceed the price paid by the Dealer to Pelco for such
Products. In no event will Pelco be liable for any special, incidental or consequential damages
(including loss of use, loss of profit and claims of third parties) however caused, whether by
the negligence of Pelco or otherwise.
The above warranty provides the Dealer with specific legal rights. The Dealer may also have
additional rights, which are subject to variation from state to state.
If you are located within the continental U.S., Alaska, Hawaii or Puerto Rico, send goods to:
Service Department
Pelco
3500 Pelco Way
Clovis, CA 93612-5699
If you are located outside the continental U.S., Alaska, Hawaii or Puerto Rico and are
instructed to return goods to the USA, you may do one of the following:
If the goods are to be sent by a COURIER SERVICE, send the goods to:
Pelco
3500 Pelco Way
Clovis, CA 93612-5699 USA
If the goods are to be sent by a FREIGHT FORWARDER, send the goods to:
Pelco c/o Expeditors
473 Eccles Avenue
South San Francisco, CA 94080 USA
Phone: 650-737-1700
Fax: 650-737-0933
This equipment contains electrical or electronic components that must be recycled properly to comply with Directive 2002/96/EC of the European Union
regarding the disposal of waste electrical and electronic equipment (WEEE). Contact your local dealer for procedures for recycling this equipment.
REVISION HISTORY
Manual #
C1534M
Date
1/06
Comments
Original version.
Pelco, the Pelco logo, Camclosure, Esprit, Genex, Coaxitron, Legacy, and Spectra are registered trademarks of Pelco.
Intel and Pentium are registered trademarks of Intel Corporation.
AutoCAD is a registered trademark of Autodesk, Inc.
DLP is a registered trademark of Texas Instruments, Inc.
Endura and ExSite are trademarks of Pelco.
Adobe and Photoshop are registered trademarks of Adobe Systems Incorporated
Microsoft, Windows, and IntelliMouse are registered trademarks of Microsoft Corporation.
©Copyright 2006, Pelco. All rights reserved.
Worldwide Headquarters
3500 Pelco Way
Clovis, California 93612 USA
USA & Canada
Tel: 800/289-9100
Fax: 800/289-9150
International
Tel: 1-559/292-1981
Fax: 1-559/348-1120
www.pelco.com
ISO9001
United States
| Canada | United Kingdom | The Netherlands | Singapore | Spain |
Scandinavia
| France | Middle East