1
®
®
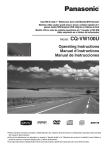
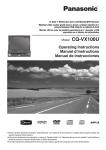
DVD Player/Receiver with CD Changer Control
Lecteur DVD/récepteur avec contrôle de changeur CD
Reproductor de discos DVD/receptor con control de cambiador de discos CD
CQ-D5501U
CQ-D5501U
Panasonic Consumer
Electronics Company,
Division of Panasonic
Corporation of North America
One Panasonic Way, Secaucus,
New Jersey 07094
http://www.panasonic.com
Panasonic Sales Company,
Division of Panasonic Puerto
Rico, Inc. (“PSC”)
Ave. 65 de Infanteria, Km. 9.5
San Gabriel Industrial Park,
Carolina, Puerto Rico 00985
http://www.panasonic.com
YEFM285697A
Panasonic Canada Inc.
5770 Ambler Drive,
Mississauga, Ontario
L4W 2T3
http://www.panasonic.ca
NT0105-2055
Printed in China
Imprimé en Chine
Impreso en China
Operating Instructions
Manuel d’instructions
Manual de Instrucciones
®
TEXT
¡Please read these instructions (including “Limited Warranty” and “Customer Services Directory”) carefully before using this product
and keep this manual for future reference.
¡Prière de lire attentivement ces instructions (y compris la “Garantie limitée” et le “Répertoire des services à la clientèle”) avant d’utiliser ce produit et conserver ce mode d’emploi pour s’y référer ultérieurement.
¡Lea con atención estas instrucciones antes de utilizar el producto y guarde este manual para poderlo consultar en el futuro.
E
N
G
L
I
S
H
1
Safety Information
■ Read the operating instructions for the unit and all other components of your car audio system carefully before using the
system. They contain instructions about how to use the system in a safe and effective manner. Panasonic assumes no
responsibility for any problems resulting from failure to
observe the instructions given in this manual.
Warning
This pictograph intends to alert you to the presence of important operating instructions and
installation instructions. Failure to heed the
instructions may result in severe injury or death.
Warning
Observe the following warnings when using
this unit.
❑ The driver should neither watch the display nor
operate the system while driving.
Watching the display or operating the system will distract
the driver from looking ahead of the vehicle and can cause
accidents. Always stop the vehicle in a safe location and use
the parking brake before watching the display or operating
the system.
❑ Use the proper power supply.
This product is designed for operation with a negative
grounded 12 V DC battery system. Never operate this product with other battery systems, especially a 24 V DC battery
system.
❑ Keep batteries out of reach of infants.
Batteries can be ingested, so keep them out of the reach of
infants. If an infant ingests a battery, please seek immediate
medical attention.
❑ Protect the Deck Mechanism.
Do not insert any foreign objects into the slot of this unit.
❑ Do not disassemble or modify the unit.
Do not disassemble, modify the unit or attempt to repair the
product yourself. If the product needs to be repaired, consult your dealer or an authorized Panasonic Servicenter.
❑ Do not use the unit when it is out of order.
If the unit is out of order (no power, no sound) or in an
abnormal state (has foreign objects in it, is exposed to
water, is smoking, or smells), turn it off immediately and
consult your dealer.
❑ The remote control unit should not lie about in the
car.
If the remote control unit lies about, it could fall on the floor
while driving, get wedged under the brake pedal, and lead to
a traffic accident.
❑ Refer fuse replacement to qualified service personnel.
When the fuse blows out, eliminate the cause and have it
replaced with the fuse prescribed for this unit by a qualified
service engineer. Incorrect replacement of the fuse may lead
to smoke, fire, and damage to the product.
■ This manual uses pictographs to show you how to use the
product safely and to alert you to potential dangers resulting
from improper connections and operations. The meanings of
the pictographs are explained below. It is important that you
fully understand the meanings of the pictographs in order to
use this manual and the system properly.
Caution
This pictograph intends to alert you to the presence of important operating instructions and
installation instructions. Failure to heed the
instructions may result in injury or material damage.
Observe the following warnings when
installing.
❑ Disconnect the lead from the negative (–) battery
terminal before installation.
Wiring and installation with the negative (–) battery terminal
connected may cause electrical shock and injury due to a
short circuit.
Some cars equipped with the electrical safety system have
specific procedures of battery terminal disconnection.
FAILURE TO FOLLOW THE PROCEDURE MAY LEAD TO THE
UNINTENDED ACTIVATION OF THE ELECTRICAL SAFETY
SYSTEM RESULTING IN DAMAGE TO THE VEHICLE AND
PERSONAL INJURY OR DEATH.
❑ Never use safety-related components for installation, grounding, and other such functions.
Do not use safety-related vehicle components (fuel tank,
brake, suspension, steering wheel, pedals, airbag, etc.) for
wiring or fixing the product or its accessories.
❑ Installing the product on the air bag cover or in a
location where it interferes with airbag operation is
prohibited.
❑ Check for piping, gasoline tank, electric wiring, and
other items before installing the product.
If you need to open a hole in the vehicle chassis to attach or
wire the product, first check where the wire harness, gasoline tank, and electric wiring are located. Then open the hole
from outside if possible.
❑ Never install the product in a location where it interferes with your field of vision.
❑ Never have the power cord branched to supply other
equipment with power.
❑ After installation and wiring, you should check the
normal operation of other electrical equipment.
The continuation of their using in abnormal conditions may
cause fire, electrical shock or a traffic accident.
❑ In the case of installation to an airbag-equipping
car, confirm warnings and cautions of the vehicle
manufacturer before installation.
❑ Make sure the leads do not interfere with driving or
getting in and out of the vehicle.
❑ Insulate all exposed wires to prevent short circuiting.
Caution
Observe the following cautions when using this
unit.
❑ Keep the sound volume at an appropriate level.
Keep the volume level low enough to be aware of road and
traffic conditions while driving.
❑ Do not insert or allow your hand or fingers to be
caught in the unit.
To prevent injury, do not get your hand or fingers caught in
moving parts or in the disc slot. Especially watch out for
infants.
❑ This unit is designed for use exclusively in automobiles.
❑ Do not operate the unit for a prolonged period with
the engine turned off.
Operating the audio system for a long period of time with the
engine turned off will drain the battery.
❑ Do not expose the unit to direct sunlight or excessive heat.
Otherwise these will raise the interior temperature of the
unit, and it may lead to smoke, fire, or other damage to the
unit.
❑ Do not use the product where it is exposed to water,
moisture, or dust.
Exposure of the unit to water, moisture, or dust may lead to
smoke, fire, or other damage to the unit. Make especially
sure that the unit does not get wet in car washes or on rainy
days.
❑ Do not install the product where it is exposed to
strong vibrations or is unstable.
Avoid slanted or strongly curved surfaces for installation. If
the installation is not stable, the unit may fall down while
driving and this can lead to an accident or injury.
The product should be installed in a horizontal position with
the front end up at a convenient angle, but not more than
30˚.
The user should bear in mind that in some areas there may
be restrictions on how and where this unit can be installed.
Consult your dealer for further details.
❑ Wear gloves for safety. Make sure that wiring is
completed before installation.
❑ To prevent damage to the unit, do not connect the
power connector until the whole wiring is completed.
❑ Do not connect more than one speaker to one set of
speaker leads. (except for connecting to a tweeter)
Observe the following cautions when handling
the battery for the remote control unit.
● Use only specified battery (CR2025).
● Match the polarity of the battery with the (+) and (–) marks
in the battery case.
● Replace dead battery as soon as possible.
● Remove the battery from the remote control unit when not
using it for an extended period of time.
● Insulate the battery (by placing them in a plastic bag or covering them with vinyl tape) before disposal or storage.
● Dispose of the battery according to the local regulations.
● Do not disassemble, recharge, heat or short the battery. Do
❑ Refer wiring and installation to qualified service
personnel.
In case of battery leakage
● Thoroughly wipe the battery liquid off the battery case and
❑ Follow the instructions to install and wire the product.
2
❑ Installation Angle
Observe the following cautions when
installing.
Installation of this unit requires special skills and experience.
For maximum safety, have it installed by your dealer.
Panasonic is not liable for any problems resulting from your
own installation of the unit.
E
N
G
L
I
S
H
not throw a battery into a fire or water.
insert new battery.
● If any part of your body or clothing comes into contact with
battery liquid, wash it with plenty of water.
● If battery liquid comes into contact with your eyes, wash
them with plenty of water and get immediate medical attention.
Not following the instructions to properly install and wire the
product could cause an accident or fire.
❑ Take care not to damage the leads.
When wiring, take care not to damage the leads. Prevent
them from getting caught in the vehicle chassis, screws, and
moving parts such as seat rails. Do not scratch, pull, bend or
twist the leads. Do not run them near heat sources or place
heavy objects on them. If leads must be run over sharp
metal edges, protect the leads by winding them with vinyl
tape or similar protection.
❑ Use the designated parts and tools for installation.
Use the supplied or designated parts and appropriate tools
to install the product. The use of parts other than those supplied or designated may result in internal damage to the unit.
Faulty installation may lead to an accident, a malfunction or
fire.
❑ Do not block the air vent or the cooling plate of the
unit.
Blocking these parts will cause the interior of the unit to
overheat and will result in fire or other damage.
2
CQ-D5501U
CQ-D5501U
3
E
N
G
L
I
S
H
3
Safety Information (continued)
Caution
Panasonic welcomes you to our constantly growing family of electronic products owners.
We endeavor to give you the advantages of precise electronic and mechanical engineering, manufactured with carefully
selected components, and assembled by people who are proud of the reputation their work has built for our company. We
know this product will bring you many hours of enjoyment, and after you discover the quality, value and reliability we have
built into it, you too will be proud to be a member of our family.
E
N
G
L
I
S
H
Customer Services Directory
4
The following applies only in the U.S.A.
THIS PRODUCT IS A CLASS I LASER PRODUCT.
USE OF CONTROLS OR ADJUSTMENTS OR PERFORMANCE
OF PROCEDURES OTHER THAN THOSE SPECIFIED HEREIN
MAY RESULT IN HAZARDOUS RADIATION EXPOSURE.
DO NOT OPEN COVERS AND DO NOT REPAIR BY YOURSELF.
REFER SERVICING TO QUALIFIED PERSONNEL.
Part 15 of the FCC Rules
FCC Warning:
Any unauthorized changes or modifications to this
equipment would void the user's authority to operate
this device.
U.S.A.
Obtain Product Information and Operating Assistance; locate
your nearest Dealer or Servicenter; purchase Parts and
Accessories; or make Customer Service and Literature requests
by visiting our Web Site at:
http://www.panasonic.com/support
or, contact us via the web at:
http://www.panasonic.com/contactinfo
You may also contact us directly at:
1-800-211-PANA (7262),
Monday-Friday 9 am-9 pm; Saturday-Sunday 10 am-7 pm, EST.
For hearing or speech impaired TTY users, TTY : 1-877-8338855
Accessory Purchases:
Purchase Parts, Accessories and Instruction Books online for all
Panasonic Products by visiting our Web Site at:
http://www.pasc.panasonic.com
or, send your request by E-mail to:
[email protected]
You may also contact us directly at:
1-800-332-5368 (Phone) 1-800-237-9080 (Fax Only) (MondayFriday 9 am to 8 pm, EST.)
Panasonic Services Company
20421 84th Avenue South, Kent, WA 98032
(We accept Visa, MasterCard, Discover Card, American Express,
and Personal Checks)
CANADA
WARRANTY SERVICE
For product operation and information assistance, please contact
your Dealer or our Customer Care Centre at:
Telephone #: (905) 624-5505 Fax #: (905) 238-2360
Web: www.panasonic.ca
For product repairs, please contact one of the following:
・Your Dealer who will inform you of an authorized Servicentre
nearest you.
・Our Customer Care Centre at (905) 624-5505 or
www.panasonic.ca
・A Panasonic Factory Servicentre listed below:
Richmond, British
Columbia
Panasonic Canada Inc.
12111 Riverside Way
Richmond, BC V6W 1K8
Tel: (604) 278-4211
Fax: (604) 278-5627
Calgary, Alberta
Panasonic Canada Inc.
6835-8th St. N. E. Calgary,
AB T2E 7H7
Tel: (403) 295-3955
Fax: (403) 274-5493
Mississauga, Ontario
Panasonic Canada Inc.
5770 Ambler Dr.
Mississauga, ON L4W 2T3
Tel: (905) 624-8447
Fax: (905) 238-2418
Lachine, Quebec
Panasonic Canada Inc.
3075, rue Louis A. Amos
Lachine, QC H8T 1C4
Tel: (514) 633-8684
Fax: (514) 633-8020
For hearing or speech impaired TTY users, TTY : 1-866-6051277
Service in Puerto Rico
For your safety, this system is designed not to see the moving
picture while you are driving.
When connecting this unit to the front monitor (ondash/in-dash):
Panasonic Puerto Rico, Inc.
Panasonic Sales Company
Factory Servicenter:
Ave. 65 de Infantería, Km. 9.5, San Gabriel Industrial Park,
Carolina, Puerto Rico 00985
Phone (787) 750-4300, Fax (787) 768-2910
Warning
¡ Park your car in a safe place and use the parking brake lever
before seeing the moving picture.
¡ For your safety, you must ensure that the connection of the
parking brake lead is correct. (a Page 50)
When driving please enjoy sound only.
4
CQ-D5501U
CQ-D5501U
5
Accessories
exclusions may not apply to you.
U.S.A.
This warranty gives you specific legal rights and you may also have other
rights which vary from state to state. If a problem with this product develops
during or after the warranty period, you may contact your dealer or
Servicenter. If the problem is not handled to your satisfaction, then write to
warrantor’s Consumer Affairs Department at the addresses of the warrantor.
PANASONIC CONSUMER ELECTRONICS COMPANY,
DIVISION OF PANASONIC CORPORATION OF NORTH AMERICA
One Panasonic Way, Secaucus, New Jersey 07094
PANASONIC SALES COMPANY,
DIVISION OF PANASONIC PUERTO RICO, INC.
Ave. 65 de infanteria, Km. 9.5, San Gabriel Industrial Park
Carolina, Puerto Rico 00985
PARTS AND SERVICE WHICH ARE NOT COVERED BY THIS LIMITED WARRANTY ARE YOUR RESPONSIBILITY.
PANASONIC AUTO PRODUCTS
LIMITED WARRANTY
LIMITED WARRANTY COVERAGE
If your product does not work properly because of defects in materials and
workmanship.
Panasonic Consumer Electronics Company or Panasonic Sales Company (collectively referred to as “the warrantor”) will, for the length of the period indicated in the chart below, which starts with the date of original purchase (“warranty period”), at its option either (a) repair your product with new or refurbished
parts, or (b) replace it with a new or refurbished product. The decision to
repair or replace will be made by the warrantor.
Categories
Audio Components (except items listed below)
Parts
One (1) Year
Labor
Customer’s Record
Model
No.
Serial
No.
Dealer’s
No.
Code
No.
Dealer’s
Address
Date of
Purchase
XXXXXXXXXXXXXXX
XXXXXXXXXXXXXXXXX
XXXXXXXXXXXXXX
XXXXXXXXXXXXXXXX
6
OO-OOOOO
Operating
Instructions
(YEFM285697)
Owners
Information
Card
Lock Cancel
Plate
Q'ty: 2
Instruction kit
Mounting
Bolt
Q'ty: 1
Rubber
Bushing
Clip
Connector
Q'ty: 1
Q'ty: 1
Installation kit (YEP0FZ5724)
Q'ty: 1 set
POWER
SOURCE
RET
Two (2) Years
Two (2) Years
One (1) Year
Not Applicable
Accessories (in exchange for defective items)
Ninety (90) Days Not Applicable
CARRY-IN OR MAIL-IN SERVICE
For Carry-In or Mail-In Service in the United States, call 1-800-211-PANA
(7262) or visit
Panasonic Web Site: http://www.panasonic.com
For assistance in Puerto Rico, call Panasonic Sales Company (787)-750-4300
or fax (787)-768-2910.
LIMITED WARRANTY LIMITS AND EXCLUSIONS
This warranty ONLY COVERS failures due to defects in materials and workmanship, and DOES NOT COVER normal wear and tear or cosmetic damage.
The warranty ALSO DOES NOT COVER damages which occurred during shipment, failures which are caused by products not supplied by the warrantor,
failures which result from accident, misuse, abuse, neglect, mishandling, misapplication, alteration, faulty installation, set-up adjustment, maladjustment of
consumer control, improper maintenance, improper antenna, inadequate signal
reception or pickup, power line surge, improper voltage supply, lightning,
modification, commercial use (such as use in hotels, offices, restaurants, or
other business uses) or rental use of the product, or service by anyone other
than the technician from Factory Servicenter or other authorized service centers, or damage that is attributable to acts of God.
THERE ARE NO EXPRESS WARRANTIES EXCEPT AS LISTED UNDER “LIMITED WARRANTY COVERAGE”. THE WARRANTOR IS NOT LIABLE FOR INCIDENTAL OR CONSEQUENTIAL DAMAGES RESULTING FROM THE USE OF
THIS PRODUCT, OR ARISING OUT OF ANY BREACH OF THIS WARRANTY.
(As examples, this excludes damages for lost time, cost of having someone
remove or re-install an installed unit if applicable, travel to and from the servicer, and loss of media, data or other memory contents. The items listed are
not exclusive, but are for illustration only.) ALL EXPRESS AND IMPLIED WARRANTIES, INCLUDING THE WARRANTY OF MERCHANTABILITY, ARE LIMITED TO THE PERIOD OF THE LIMITED WARRANTY.
PLAY
3
SEL
EN
1
2
4
5
6
RANDOM
SCAN
REPEAT
7
8
9
OSD
VOL
TRACK
GRP
0
MUTE
DRC TITLE / CHAPTER
CAR AV
CANADA
Panasonic Canada Inc.
5770 Ambler Drive, Mississauga Ontario L4W 2T3
PANASONIC PRODUCT LIMITED WARRANTY
During the “Labor” warranty period, there will be no charge for labor. During
the “Parts” warranty period, there will be no charge for parts. You must carryin or mail-in your product during the warranty period. If non-rechargeable batteries are included, they are not warranted. This warranty only applies to products purchased and serviced in the United States or Puerto Rico. This warranty
is extended only to the original purchaser of a new product which was not sold
“as is”. A purchase receipt or other proof of the original purchase date is
required for warranty service.
PAUSE
TITLE
MENU
SUBTITLE AUDIO ANGLE
One (1) Year
MXE Series Audio Components (except items
listed below)
Speakers
STOP
SRC
TRACK / SEARCH
RETURN
R
5
Limited Warranty
E
N
G
L
I
S
H
TE
E
N
G
L
I
S
H
Panasonic Canada Inc. warrants this product to be free from defects in materials and workmanship and agrees to remedy any such defect for a period as
stated below from the date of original purchase.
RCA Cord
Power
Connector
Mounting
Collar
Removable
Face Plate
Case
Trim Plate
Remote
Control Unit
(YEAJ071740)
(YEAJ012851)
(YEFX0217263)
(YEFA131839)
(YEFC05652)
(YEFX9995584)
Q'ty: 1
Q'ty: 1
Q'ty: 1
Q'ty: 1
Q'ty: 1
Q'ty: 1
CAR AUDIO PRODUCT – ONE (1) YEAR, PARTS AND LABOUR
(The labour to install or remove the product is not warranted)
LIMITATIONS AND EXCLUSIONS
This warranty does not apply to products purchased outside Canada or to any
product which has been improperly installed, subjected to usage for which the
product was not designed, misused or abused, damaged during shipping, or
which has been altered or repaired in any way that affects the reliability or
detracts from the performance, nor does it cover any product which is used
commercially. Dry cell batteries are also excluded from coverage under this
warranty.
This warranty is extended to the original end user purchaser only. A purchase
receipt or other proof of the original purchase date is required before warranty
service is performed.
THIS EXPRESS, LIMITED WARRANTY IS IN LIEU OF ALL OTHER WARRANTIES, EXPRESS OR IMPLIED, INCLUDING ANY IMPLIED WARRANTIES
OF MERCHANTABILITY AND FITNESS FOR A PARTICULAR PURPOSE.
IN NO EVENT WILL PANASONIC CANADA INC. BE LIABLE FOR ANY SPECIAL,
INDIRECT OR CONSEQUENTIAL DAMAGES.
In certain instances, some jurisdictions do not allow the exclusion or limitation
of incidental or consequential damages, or the exclusion of implied warranties,
so the above limitations and exclusions may not be applicable.
IF YOU SHIP THE PRODUCT TO A SERVICENTRE
Carefully pack and send prepaid, adequately insured and preferably in the original carton.
Include details of the defect claimed, and proof of the date of original purchase.
Battery
(CR2025)
Q'ty: 1
Note:
¡ The number in parentheses underneath each accessory part name is the part number for maintenance and service.
¡ Accessories and their parts numbers are subject to modification without prior notice due to improvements.
¡ Trim Plate and Mounting Collar are mounted on the main unit at shipment.
Some states do not allow the exclusion or limitation of incidental or consequential damages, or limitations on how long an implied warranty lasts, so the
6
CQ-D5501U
CQ-D5501U
7
7
Features
System Upgrade
■ DVD video, Video CD Playback
You can enjoy watching DVDs and VCDs if the optional
monitor (CY-VH9300U or CY-V7100U) is connected.
(DVD/VCD Player a Page 28)
■ MP3 Playback from CD-R/RW
(MP3 Player a Page 24)
*This unit is not compatible with WMA file.
■ DVD-R, DVD-RW Playback
(a Page 10, 47 for details)
■ Fully Motorized Face Plate
A touch is all it takes to slide the face plate down for access
to the disc slot. A three-stage tilt function permits viewing
angle to be adjusted to 15, 25 or 35 degrees for optimum
display visibility.
About XM
The direct satellite-to-receiver broadcasting technology is used to
provide listeners with crystal clear sound smoothly from coast to
coast. XM is over 130 channels of sheer variety: digital-quality
music, news, sports, comedy, traffic & weather, talk, children’s
programs, and more. The XM name and related logos are
trademarks of XM Satellite Radio Inc.
■ CD Changer
Option
You can connect the optional Panasonic CD changer unit
(CX-DP880). For details, refer to the operating instructions
for the CD changer unit.
Note:
¡This unit does not support a DVD changer due to shortage
of displayable digit number or other causes.
❑ Optional system (Example)
This unit can be combined with other components like
shown below. For more details, refer to the operating
instructions for the connected devices.
You can connect the optional XM receiver (XMD1000) with
optional digital Adapter (XMDPAN100). For details, refer to
the operating instructions for the XM receiver. (XM Satellite
Radio a Page 20)
¡ Toll free number
XM Tuner P/N: XMD1000
Call 1-800-XM-RADIO(96-72346)
Extension cord P/N: XMDPAN100
Call 1-800-942-TERK(8375)
You have 6 preset modes (FLAT, ROCK, POP, VOCAL,
JAZZ, CLUB). You can customize your setting for these
(except FLAT) and save them for instant recall.
Common
Safety Information .............................................. 2
Customer Services Directory..............................5
Limited Warranty .................................................6
Accessories ........................................................ 7
Features ............................................................. 8
Contents ............................................................. 8
System Upgrade ................................................ 9
Discs that can be Played Back ...................... 10
Preparation (Battery Replacement, Cancellation of
demonstration, TV Type setting, Clock Setting) ...........11
General (Main Unit) ........................................... 12
General (Remote Control Unit) ........................ 16
Each source
Radio ................................................................. 18
XM Satellite Radio ............................................ 20
Before Disc Playback ....................................... 22
CD Player .......................................................... 23
MP3 Player ........................................................ 24
8
CQ-D5501U
Headrest Monitor: CY-V7100U
PHONES
CD Changer:
CX-DP880
DIGITAL
PRO LOGIC
PROCESSOR
DIGATAL
SURROUND
CE
SOUR
AC300
display
super
MUTE
Contents
SOURCE
bright
& 30w
Power
Amplifier
for Center
4
3
Speaker
DIMMER
SPACE
POSITION
multi-color
2
1
DR COMP
POSI
SPC
DIM
Digital Surround Processor:
CY-AC300EX
PWR
External Power Amplifier
CD Changer: CX-DP880
Notes on MP3 ................................................... 26
DVD/VCD Player ............................................... 28
OSD (On-Screen Display) ................................ 31
CD Changer Control ......................................... 32
As needed
Audio Settings .................................................. 34
Function Settings (Spectrum Analyzer Display Patterns,
Mute/Attenuation, Security Function) ........................ 38
User Settings (TV Type, etc.) ............................... 40
Language Code List ......................................... 44
Definition of Terms .......................................... 45
Anti-Theft System ............................................ 46
Fuse ................................................................... 47
Maintenance ..................................................... 47
Notes on Discs ................................................. 47
Installation ........................................................ 48
Wiring ................................................................ 50
Troubleshooting ............................................... 56
Specifications ................................................... 63
Headrest Monitor:
CY-V7100U
CY-V7100U
CY-V7100U
VOL
SQ3 (3-Band Sound Quality)
Center frequency and level are adjustable in each of 3
bands. This lets you fine-tune sound quality for each genre
to suit car-interior acoustics and your personal preferences. (a Page 34)
8
PHONES
SEL
Option
E
N
G
L
I
S
H
CQ-D5501U
Over Head Monitor: CY-VH9300U
Digital audio output terminal for upgrading to Dolby Digital
and dts surround [Requires separately sold optical cable
(CA-LRD60) and digital surround processor (CYAC300EX)].
■ XM Satellite Radio
Just connecting a monitor display and CD Changer with
this unit.
Preparation:
¡ The video signal setting of this unit (“TV Type” a Page
42) should be the same as the input signal setting
(NTSC/PAL) of the monitor to be connected. Otherwise,
pictures appear incorrectly.
■ Digital Audio Output
■ SQ (Sound Quality)
❑ Basic System
❑ 5.1-channel Surround System
This unit has an optical digital output. To connect the
optional digital surround processor (CY-AC300EX) with
this unit, you can build the 5.1-channels surround system in order to play DVD software in a way that creates
“You are here” feel in a car.
Center Speaker:
EAB-CF2
Front Speakers:
CJ-DA1600U
XM receiver: XMD1000*
*manufactured by XM Satellite Radio
Note:
¡A CD changer, an XM receiver and AUX cannot be
connected at the same time.
Over Head Monitor:
CY-VH9300U
Panasonic
CQ-D5501U
DIGITAL
PRO LOGIC
PROCESSOR
DIGATAL
SURROUND
SOURCE
AC300
display
super
VOL
MUTE
SEL
E
N
G
L
I
S
H
SOURCE
bright
& 30w
Power
Amplifier
for Center
4
2
3
Digital Surround
Processor:
CY-AC300EX
Speaker
DIMMER
SPACE
POSITION
multi-color
1
PWR
DR COMP
DIM
SPC
POSI
Power amplifier
Surround Speakers:
CJ-DA6920U
Subwoofer:
CJ-HD303U
CQ-D5501U
9
E
N
G
L
I
S
H
9
Discs that can be Played Back
❒ Disc Type
DISC
DVD
VCD
(Video CD)
CD
CD-R/RW
❒ Symbols used on jackets
(Examples of such symbols include)
2
¡
: Number of subtitle languages
Recordable
Mark/logo
TEXT
Disc Size
Video
Format
Audio
Format
Region No.
12 cm {5”} / 8 cm {3”}
NTSC / PAL
LPCM,
MPEG1, LPCM (CDMPEG2,
DA*),
Dolby
MPEG1
Digital
¡ 2
: Number of audio tracks
¡
: Number of angles
ReWritable
3
The numbers indicate the number of languages,
tracks, angles, etc., recorded on the disc.
Preparation
Remote Control Unit
Battery Replacement
q Remove the battery holder with
the remote control unit placed
on a flat surface.
q Stick your thumbnail into
the groove, and push the
holder in the direction of the
arrow at the same time.
w Pull it out in the direction of
the arrow using a tough
pointed object.
1, ALL
*CD-DA : A general music CD format.
Note:
¡About CD-Rs and CD-RWs, refer to “Notes on CDRs/RWs, DVD-Rs/RWs”. (a Page 47)
¡Some copy-protected music CDs are not playable.
¡Even if you play a dts DVD or a dts CD, analog sound cannot be reproduced. (Only digital output comes out)
❒ Notes on DVD-Rs/RWs
¡Only video formatted discs are playable. Discs in the
video recording (VR) format are unplayable.
¡Unfinalized discs are unplayable.
¡Some discs are unplayable depending on the disc itself,
device, drive and software that are used for disc recording.
❒ Discs not supported
The following discs are not played back on this product.
¡DVD-Audio
¡DVD-ROM
¡DVD-RAM
¡DVD+R
¡DVD+RW
¡SVCD
¡VSD
¡CVD
¡CD-G
¡CD-ROM (except MP3)
¡CD-RW (except MP3 and CD-DA)
¡CD-R (except MP3 and CD-DA)
¡SACD
¡Photo CD
¡CDV
¡Hybrid SACD (except CD-DA)
¡Divx Video Discs
¡CD-EXTRA (audio-only playback possible)
¡DVDs with a region number other than “1” or “ALL”
¡Playing back a photo CD disc with this unit could
damage the data that is recorded on the disc.
¡
4:3
: 4:3 standard size
¡
LB
: Letterbox (a Page 43, 45)
¡ 16:9 wide size
Tough pointed object
16:9 PS
Note:
¡The size of the image that is displayed on the screen
depends on the screen mode (“TV Display” a Page
42), and on the screen size for the content on the disc.
❒ Region Management Information
This product is designed and manufactured to
respond to the Region Management Information that
is recorded on a DVD disc. If the Region number
described on the DVD disc does not correspond to the
Region number of this product, this product does not
play the disc.
The Region number for this product is “1” or “ALL”.
Example:
1
1 3
4 6
w
q
w Put a battery in the case with
(+)-side facing up.
e Put the case back.
w
CQ-D5501U
¡ Remove and dispose of an old battery immediately.
¡ Do not disassemble, heat or short a battery. Do not
throw a battery into a fire or water.
¡ Follow local regulations when disposing of a battery.
¡Improper use of a battery may cause overheating, an
explosion or ignition, resulting in injury or a fire.
Note:
¡Battery Information:
Battery Type: Panasonic lithium battery (CR2025)
Battery Life: Approximately 6 months under normal use
(at room temperature)
e
Main Unit
Cancellation of demonstration
The demonstration message appears for initial
use.
q Set your car’s ignition switch to the ACC or ON position.
The demonstration screen appears.
w Press [DISP].
The demonstration screen is canceled, and no more
appears.
Note:
¡If you would like to turn on the power and make the
demonstration message appear, press and hold [SRC]
(PWR) for more than 4 seconds.
Clock Setting
The 12-hour system is used for the clock.
q Press [SRC] (PWR) to turn on the power.
w Press [DISP].
Clock display
e Press and hold [DISP] for more than 2 seconds.
Hour blinks
r Adjust the hour.
[[]: put forward hour.
[]]: put back hour.
Hour entered
t Press [DISP].
Minute blinks
ALL
y Adjust the minute.
[[]: put forward minute.
[]]: put back minute.
Minute entered
[SRC]
(PWR: Power)
[DISP] (Display)
[]] [[]
(Hour/minute adjustment)
TV Type setting
Refer to “Optional system (Example)” (a Page 9) and “TV
Type” (a Page 42).
10
¡Keep batteries away from children to avoid the risk of
accidents. If an infant ingests a battery, please seek
immediate medical attention.
Caution
Back side
: Playback in letterbox format on a standard screen (4:3).
: Playback in PAN & SCAN (pan and scan)
(a Page 43, 45) format on a standard
screen (4:3).
16:9 LB
10
1
Warning
Screen size (H:V aspect ratio)
LPCM (CD-DA*),
MP3
E
N
G
L
I
S
H
u Press [DISP].
Completed
Note:
¡“ADJUST” is displayed before adjusting the clock.
¡Press and hold [[] or []] to change numbers rapidly.
CQ-D5501U
11
E
N
G
L
I
S
H
General (Main Unit)
[SRC: Source] (PWR: Power)
CD Player mode display (a Page 23)
Remote control sensor (a Page 16)
11
(SQ3) indicator
Spectrum analyzer (a Page 38)
Source
SQ (Sound Quality)
Press [SRC] to change the source.
You have 6 preset modes (FLAT, ROCK, POP, VOCAL,
JAZZ, CLUB). You can customize your setting for these
(except SQ-FLAT) and save them for instant recall.
SQ3 (3-Band Sound Quality)
Center frequency and level are adjustable in each of 3
bands. This lets you fine-tune sound quality for each genre
to suit car-interior acoustics and your personal preferences. (a Page 34)
Radio
(a Page 18)
CD Player
1
2
3
4
5
Preset Buttons [1] to [6]
OR
DVD/VCD Player (VCD disc)
Volume
(Default)
(FLAT) flat frequency response:
does not emphasize any part.
(When an VCD data disc is
in the player a Page 28)
OR
DVD/VCD Player (DVD disc)
ON : Press [SRC] (PWR).
Up
Down
Note:
¡ When the ignition switch is set to ON, the face plate is
tilted to secure their former positions.
¡ If you turn the key to the ACC OFF position during the
security function is active, the security message
appears with a warning alarm. (Default: SLED ON)
(a Page 38 about Security Function setting)
Preset number
(When an MP3 data disc is
in the player a Page 24)
[DISP] (Display)
Set your car's ignition switch to the ACC or ON position.
OFF : Press and hold [SRC] (PWR) until you hear a
beep (approximately 1 second), then release it.
Press [SQ] to select the sound type as follows:
OR
MP3 Player
[MUTE] (Mute/attenuation)
Power
12
1
(a Page 23)
6
[SQ] (Sound Quality)
[VOLUME]
E
N
G
L
I
S
H
(ROCK) speedy and heavy sound:
exaggerates bass and treble.
(When an DVD data disc is
in the player a Page 28)
Default: 18
Setting range: 0 to 40
(POP) wide-ranged and deep sound:
slightly emphasizes bass and treble.
Note:
¡ The volume level can be set independently for each
source. (For radio, one volume setting for AM, one volume setting for all FMs)
XM Satellite Radio
Mute/Attenuation
OR
CD Changer Control
ON : Press [MUTE].
OFF : Press [MUTE] again.
You can select mute or attenuation. (a Page 38)
OR
(When the optional XM
receiver is connected a
Page 20)
(When an optional CD
changer is connected a
Page 32)
AUX
(Sound source connecting to
the AUX input terminal)
(VOCAL) clear sound:
emphasizes middle tone and slightly
emphasizes treble.
(JAZZ) jazz-specific deep sound:
sound with emphasis on sharpness of
high-hat and echo of saxophone.
indicator
Note:
¡AUX cannot be used when the CD changer or XM receiver is connected to the DIN connector.
(CLUB) club and disco-specific sound:
reproduction of realism being in a
club.
Press [DISP] to return to the regular mode.
Note:
¡ After pressing [SQ] on the main unit, you can also
select a sound type by pressing the preset buttons [1]
to [6].
12
CQ-D5501U
CQ-D5501U
13
E
N
G
L
I
S
H
13
Clock Display (at Power off)
E
N
G
L
I
S
H
When the power of the unit is set to OFF, press [DISP].
14
General (Main Unit) (continued)
Caution
¡Do not pinch your finger or hand in the face plate.
[u: Eject]
(TILT/OPEN)
(Clock time) (Default)
(Display off)
When the power is set to ON, refer to the description for
each source mode.
indicator
[DISP]
Open the Face Plate
Face Plate Angle (Tilt)
Press [u] (OPEN).
Press and hold [u] (TILT) until you hear a beep (approximately 1 second) from the speaker output, then release it.
Set the face plate to the position at which it is easy to read
what is on the display. Each time the above operation is
repeated, the face plate angle changes in the sequence
shown below.
Note:
¡The face plate automatically closes after a warning alarm
sounds if no operation is performed for approximately
20 seconds.
¡ When a disc is already loaded (
lights), the disc
will be ejected after the face plate fully opens.
(Disc Eject a Page 22)
Close the Face Plate
Press [u] (OPEN).
TILT 1
TILT 2
TILT 3
OPEN
TILT OFF
Note:
¡The positions specified at “Face Plate Angle (Tilt)” are
memorized even after the following operations.
¡Open/close
¡ACC on/off
14
CQ-D5501U
CQ-D5501U
15
E
N
G
L
I
S
H
15
E
N
G
L
I
S
H
General (Remote Control Unit)
❑ General
❑ Discs (DVD/VCD/CD/MP3)
In this manual, the pictographs shown below are used to indicate compatible types of discs and operating units.
Discs
: DVD Video
DVD VCD
: CD
DVD VCD CD MP3
DVD VCD
DVD VCD CD MP3
[■] (STOP) DVD VCD CD MP3
¡Stops playback.
: VCD (Video CD)
[❚❚] (PAUSE) DVD VCD CD MP3
¡Pause.
: CD-R/RW’s containing MP3 files
[}] [{]
¡Selects (vertically)
or adjusts an
operation or item.
[❚❚] DVD VCD
¡Frame to Frame Play.
[B] (PLAY) DVD VCD CD MP3
¡Playback.
16
[RET] (RETURN) DVD VCD CD MP3
¡Return to the previous display.
¡Input the number again.
¡Displays the video CD’s menu.
[MENU] (TITLE) DVD VCD
¡Displays the DVD menu. (Operations
vary according to the disc.)
¡Displays the Title menu. (Operations
vary according to the disc.)
[s] [d] DVD VCD CD MP3
¡Goes to the beginning.
¡Chapter/track selection.
¡Fast forward/fast reverse.
DVD
CD] MP3
[sVCD
] [d
¡Goes to the beginning.
¡File selection.
[d] DVD VCD
¡Slow playback.
[]] [[]
¡Selects (horizontally)
or adjusts an operation or item.
[}]
[0] to [9]
¡Sets the language
code.
[OSD] (On-Screen Display)
¡Displays information about
each source on the screen.
PAUSE
PLAY
SRC
[]]
POWER
SOURCE
[[]
2
3
SEL
SUBTITLE AUDIO ANGLE
4
5
6
RANDOM
SCAN
REPEAT
7
8
9
OSD
[ENTER]
¡Determines an operation or item.
2
3
SEL
4
5
6
RANDOM
SCAN
REPEAT
7
8
9
OSD
[VOL]
¡Adjusts the sound
volume.
VOL
TRACK
GRP
0
MUTE
DRC TITLE / CHAPTER
[GRP] (Group) (TRACK) (TITLE/CHAPTER) DVD VCD CD MP3
¡Direct title/chapter selection.
¡Direct track selection.
¡Direct folder/file selection.
[0] to [9] DVD VCD
¡Selects an item on the menu.
[1] (SUBTITLE) DVD VCD
¡Switches the subtitle language.
DVD VCD CD MP3
[4] (RANDOM)
¡Random play.
[0] to [9] DVD VCD CD MP3
¡Direct title/chapter selection.
¡Direct track selection.
¡Direct folder/file selection.
[2] (AUDIO) DVD VCD
¡Switches the audio language.
VCD CD
[5] DVD
(SCAN)
¡Scan play.
DVD VCD
[2] (AUDIO)
¡Switches between stereo and
monaural sound.
[6] (REPEAT) DVD VCD CD MP3
¡Repeat play.
[3] (ANGLE) DVD VCD
¡Switches the angle.
CQ-D5501U
¡Selects a folder.
¡Folder up/down.
CAR AV
[MUTE]
¡Mutes the sound temporarily.
16
DVD
VCD[{]
CD MP3
[}]
SUBTITLE AUDIO ANGLE
TRACK
GRP
0
MUTE
DRC TITLE / CHAPTER
CAR AV
1
[ENTER] DVD VCD CD MP3
¡Determines an operation or item.
EN
[ENTER]
VOL
RET
TITLE
MENU
RETURN
R
[{]
TITLE
MENU
EN
1
[}] [{] []] [[] DVD VCD
¡Selects an operation or item.
PLAY
TRACK / SEARCH
R
RET
PAUSE
SRC
TRACK / SEARCH
RETURN
STOP
TE
[MENU]
¡Shows the menu
screen.
STOP
TE
[SRC]
¡Toggles power on/off.
¡Selects a source.
POWER
SOURCE
[0] (DRC) DVD VCD
¡Selects a range of dynamic range
compression.
CQ-D5501U
17
E
N
G
L
I
S
H
E
N
G
L
I
S
H
Radio
[SRC: Source]
(Stereo) indicator
17
[]] [[]
(TUNE)
18
1
[BAND]
(APM: Auto Preset Memory)
Preset Buttons [1] to [6]
(Preset station)
q
Radio Mode
Press [SRC] to select the radio mode.
[DISP] (Display)
Display Change
Press [DISP] to change the display as follows.
Station Preset
Frequency
Up to 6 stations can be stored in each of the FM1, FM2, FM3 and AM band selections.
Band
Frequency
Clock Time
Preset number
w
Band
Press [BAND].
Display Off
Note:
¡ New stations overwrite existing saved stations after these procedures.
Warning
¡To ensure safety, never attempt to preset stations while you are driving.
Auto Preset Memory (APM)
Manual Preset Memory
With this operation, stations with good receiving conditions can be automatically stored in the preset memory.
q Select a band. (a Previous page)
w Press and hold [BAND] (APM) for more than 2 seconds.
6 stations with first to 6th highest in signal strength will
be preset to each band.
Once set, the preset stations are sequentially scanned
for 5 seconds each. (scanning)
With this operation, a station can be manually stored in the
preset memory.
q Select a band and frequency. (a Previous page)
w Press and hold one of the preset buttons from [1] to [6]
until the display blinks once.
Preset number
e Tuning
[[]: Higher frequency
[]]: Lower frequency
Press and hold [[] or []] for more than 0.5
seconds, then release it. Seeking will start.
Note:
¡ To stop scanning, press one of the buttons from [1] to
[6].
Preset Station Calling
q Select a band. (a Previous page)
w Press one of the preset buttons from [1] to [6].
18
CQ-D5501U
CQ-D5501U
19
E
N
G
L
I
S
H
XM Satellite Radio
[SRC: Source]
(Satellite) indicator
[]] [[]
(Channel Selection)
[{] / [}]
(Category Selection)
[BAND]
(Band/Category Setting)
19
Display Change
Preset Channel Calling
Press [DISP] to change the display as follows.
q Select a band. (a Previous page)
w Press one of the preset buttons from [1] to [6].
Band/Channel
Channel name
(
) (Data loading)
E
N
G
L
I
S
H
20
Note:
¡ Because preset memory setting is performed with
Service IDs in each channel, a channel may switch to
another that has been stored under the same Service
IDs when calling up a preset channel. However, broadcasting contents are the same as what the stored channel provides.
(Default)
Preset Buttons [1] to [6]
(Channel station)
Preparation:
¡ Connect the optional XM receiver (XMD1000) with
optional Digital Adapter (XMDPAN100).
Category Setting
[DISP] (Display)
Artist name
q XM Satellite Radio Mode
Press [SRC] to select the XM Satellite Radio
mode.
Getting Started
Band
Note:
¡ “LOADING” is displayed when it takes more than 2 seconds to receive the XM Satellite Radio.
w
XMD 1000
L/C 1144XXXXXX
XM RADIO ID : XXXXXXXX
Channel
Band
) (Data loading)
¡ Enables category switching.
¡ Enables channel selection only within the category selected by category switching.
Category name
(
) (Data loading)
Clock Time
Category Selection
q Press [}] or [{] to display the category name. (CAT
ON)
w Press [}] or [{] while the category name is displayed to select a category. Seeking will start.
Direct Channel Selection
Note:
¡ “UPDATING” is displayed when channel information is
updated.
(RADIO ID display)
(Only for remote control unit)
Example: Channel number 5
Channel Preset
e Channel Selection
[[]: Higher channel
[]]: Lower channel
Note:
¡ Channel selection is not available during the reception of
channel 1 with category ON. To receive other channels, set the
category to OFF or switch to another category. (a Next
page)
CQ-D5501U
appears at category mode ON
Display Off
¡ Check the ID shown by tuning your XM Radio to channel 0. (Refer to “Channel Selection” on this page.)
20
Press and hold [BAND] for more than 2 seconds to
switch category mode ON or OFF.
Song title
Press [BAND].
XM RADIO ID
w Activate the XM Satellite Radio
Select either of the below to sign up.
¡ Web site: http://www.xmradio.com/activation
¡ Phone number: 1-800-852-9696
) (Data loading)
(Category mode ON)
(
It is required to sign up to become an XM Satellite Radio
subscriber. After checking your XM Satellite Radio ID, sign
up on the XM’s website or by calling them.
q Check of XM Satellite Radio ID
¡ Write down the ID indicated on the lower right of your
XM receiver (XMD1000).
(
Up to 6 channels can be stored in each of the XM1, XM2
and XM3 band selections.
With this operation, a channel can be manually stored in
the preset memory.
q Select a band and channel. (a Previous page)
w Press and hold one of the preset buttons from [1] to [6]
until the display blinks once.
Note:
¡ New channels overwrite existing saved channel after
this procedure.
q Press [GRP].
w Press [5]
e Press [ENTER].
Note:
¡ When a channel is selected, Category Setting is turned
off.
¡ The previous screen reappears if a nonexistent channel
is selected.
¡ “OFF AIR” is displayed and the previous screen reappears in a few seconds if an off-the-air channel is
selected.
CQ-D5501U
21
E
E
N
N
G
G
L
L
II
S
S
H
H
21
1
Before Disc Playback
CD Player
[SRC: Source]
Disc Insert
Caution
¡ Do not use irregularly shaped discs.
¡ Do not use discs that have a seal or label attached.
¡ To avoid damaging the face plate, do not push it
down or place objects on it while it is open.
¡ Do not pinch your finger or hand in the face plate.
¡ Do not insert foreign objects into the disc slot.
Note:
¡ Refer to “Discs that can be Played Back”. (a Page 10)
¡ Refer to the section on “Notes on MP3” (a Page 26)
and “Notes on Discs” (a Page 47).
¡ The power will be turned on automatically when a disc
is loaded.
¡ A disc which has both CD-DA data and MP3 data on it
may not be played back normally.
For DVDs
When you select the DVD source for the first time since
turning the key to ACC ON, the following message appears
for 7 seconds during which you can only perform power
off and disc ejection.
E
N
G
L
I
S
H
q Press [u] (OPEN).
When a disc is already loaded (
lights), the disc
will be ejected after the face plate fully opens.
[u: Eject]
(OPEN)
w Insert a disc.
[3] (SCROLL) [5] (SCAN)
[4] (RANDOM) [6] (REPEAT)
Printed Side
Note:
¡ It may take some time to start playing.
¡ Playback will start automatically after recognizing the
data of the loaded disc.
When CD is in the player
Pause (y / 5)
Press [SRC] to select the CD player mode and playback
starts.
Track
Play time
Press [BAND] (y / 5).
Display Change
Press [DISP].
Track/Play time
OR
(a Page 24 about MP3 Player)
(Only for remote control unit)
You can set up the optional monitor to display or hide the
following information: title/artist name for CDs,
album/title/artist name for MP3, playtime for VCDs and
title/chapter/playtime for DVDs.
Press [OSD] to switch the OSD text displays. (a Page 31)
OR
(a Page 28 about DVD/VCD Player)
q Press [u] (OPEN).
The disc will be ejected after the face plate fully opens.
w Take the disc out.
e Press [u] (OPEN) to close the face plate.
Note:
¡ The face plate is automatically closed after a warning
alarm sounds if no operation is performed for approximately 20 seconds.
CQ-D5501U
Random Play
All the available tracks are played in a random sequence.
Press [4] (RANDOM).
lights.
Press [4] (RANDOM) again to cancel.
Scan Play
The first 10 seconds of each track is played in sequence.
Press [5] (SCAN).
Clock time
Press [5] (SCAN) again to cancel.
Display off
Disc Eject
22
Track title
OR
(a Page 28 about DVD/VCD Player)
[DISP] (Display)
Press [BAND] (y / 5) again to cancel.
Disc title
OSD (On-Screen Display)
22
1
[BAND]
(y / 5: Pause/play)
WARNING :
NOT FOR USE WHERE VIDEO MONITOR IS
VISIBLE TO DRIVER TO AVOID RISK OF
SERIOUS INJURY OR POSSIBLE VIOLATION
OF LAWS
[s] / [d] (a / f)
(Track selection/fast forward/fast reverse)
indicator
Note:
¡ “NO TEXT” is displayed when there is no information on
the disc.
¡ To have another circle scroll while a title is displayed,
press [3] (SCROLL).
Track Selection
[d]: Next track
[s]: Beginning of the current track
For the previous track, press twice.
Fast Forward/Fast Reverse
Press and hold for more than 0.5 seconds.
Each time you press the button, the speed changes as follows.
Regular speed /2 times /5 times /10 times /20 times
[d] (f): Fast forward
[s] (a): Fast reverse
Press [BAND] (y / 5) to cancel.
Repeat Play
The current track is repeated.
Press [6] (REPEAT).
lights.
Press [6] (REPEAT) again to cancel.
Direct Track Selection
(Only for remote control unit)
Example: Track number 10
q Press [GRP].
w Press [1] [0]. (Press [RET] to cancel.)
e Press [ENTER].
Note:
¡ To suspend direct selection, press [DISP].
¡ Random, Scan and Repeat plays are canceled once
[ENTER] is pressed.
CQ-D5501U
23
E
N
G
L
I
S
H
MP3 Player
23
[SRC: Source]
E
N
G
L
I
S
H
This unit is not compatible with WMA file.
[s] / [d]
(File selection)
[{] / [}] (FOLDER)
(Folder selection)
[BAND] (y / 5: Pause/play)
indicator
[3] (SCROLL)
[4] (RANDOM)
When a disc is in the player
Press [SRC] to select the MP3 player mode and playback
starts.
Folder
[DISP] (Display)
[6] (REPEAT)
Note:
¡ “NO TEXT” is displayed when there is no information on
the disc.
¡ To have another circle scroll while a title is displayed,
press [3] (SCROLL).
Folder Selection
File
Display Change
[}]: Next folder
[{]: Previous folder
Press [DISP].
Folder/File
File Selection
[d]: Next file
[s]: Beginning of the current file
For the previous file, press twice.
Play time
Folder name
(
) (Data reading)
24
1
Pause (y / 5)
Press [BAND] (y / 5).
Random Play
Direct Selection
All the available files are played in a random sequence.
(Only for remote control)
Press [4] (RANDOM).
lights.
Press [4] (RANDOM) again to cancel.
Folder Random Play
All the files in the current folder are played in a random
sequence.
Press [BAND] (y / 5) again to cancel.
) (Data reading)
(
Album name
(
) (Data reading)
Title and Artist name
(
) (Data reading)
Example: Folder number 10 (a Page 27)
q Press [GRP] twice.
w Press [1] [0]. (Press [RET] to cancel.)
e Press [ENTER].
Direct File Selection
Example: File number 10
Press and hold [4] (RANDOM) for more than 2 seconds.
light.
Press and hold [4] (RANDOM) again for more than 2
seconds to cancel.
Repeat Play
The current file is repeated.
File name
Direct Folder Selection
Press [6] (REPEAT).
lights.
Press [6] (REPEAT) again to cancel.
q Press [GRP].
w Press [1] [0]. (Press [RET] to cancel.)
e Press [ENTER].
Note:
¡To suspend direct selection, press [DISP].
¡Random, Folder Random, Repeat and Folder Repeat
plays are canceled once [ENTER] is pressed.
Folder Repeat Play
The current folder is repeated.
Press and hold [6] (REPEAT) for more than 2 seconds.
light.
Press and hold [6] (REPEAT) again for more than 2 seconds to cancel.
Clock time
Display off
24
CQ-D5501U
CQ-D5501U
25
E
N
G
L
I
S
H
Notes on MP3
25
MP3 (MPEG Audio Layer-3) is the compression format of digital
audio. It is developed by MPEG (Motion Picture Experts Group).
Using this compression format, you can record the contents of
about 10 music CDs on a single CD (This figure refers to data
recorded on a 650 MB CD-R or CD-RW at a fixed bit rate of 128
kbps and a sampling frequency of 44.1 kHz).
What is MP3 ?
Note:
¡ MP3 encoding and CD writing software programs are not
supplied with this unit.
Points to remember when making MP3 files
¡ High bit rate and high sampling frequency are recommended
for high quality sound.
¡ Selecting VBR (Variable Bit Rate) is not recommended
because playing time is not displayed properly and sound
may be skipped.
¡ The playback sound quality differs depending on the encoding
circumstances. For details, refer to the instructions of your
own encoding software and writing software.
¡ It is recommended to set the bit rate to “128 kbps or more”
and “fixed”.
Caution
¡ Never assign the “.mp3” file name extension to a file that is not in the MP3 format.
This may not only produce noise from the
speaker damage, but also damage your
hearing.
Display Information
Recording Recording
MP3 filesMP3/WMA
on a CD-media
files on a CD-media
Displayed items
¡ CD-TEXT
Disc title
Track title
E
N
G
L
I
S
H
¡ MP3 (ID3 tag)
Album name
Title and Artist name
¡ MP3
Folder name
File name
Displayable characters
¡ Displayable length of file name/folder name: within 64 characters.
¡ Name files and folders in accordance with the standard of
each file system. Refer to the instructions of writing software
for details.
¡ ASCII character set can be displayed.
¡ You are recommended to minimize the chances of making a
disc that contains both CD-DA files and MP3 files.
¡ If CD-DA files are on the same disc as MP3 files, the songs
may not play in the intended order, or some songs may not
play at all.
¡ Do not record files other than MP3 files and unnecessary folder on a disc.
¡ The name of an MP3 file should be added by rules as shown
in the following descriptions and also comply with the rules of
each file system.
¡ The file extension “.mp3” should be assigned to each file
depending on the file format.
¡ You may encounter trouble in playing MP3 files or displaying
the information of MP3 files recorded with certain writing
software or CD recorders.
¡ This unit does not have a play list function.
¡ Although Multi-session recording is supported, the use of
Disc-at-Once is recommended.
¡ Packet writing software is not supported.
26
1
Supported file systems
ISO 9660 Level 1/Level 2, Apple Extension to ISO 9660, Joliet,
Romeo
Note:
¡ Apple HFS, UDF 1.50, Mix CD and CD Extra are not supported.
Compression formats (Recommendation: “Points to remember when making MP3 files” on the previous page)
ASCII character set
A to Z, a to z, digits 0 to 9, and the following symbols:
(space) ! ” # $ % & ’ ( ) * + , - . / : ; < = > ? @ [ \ ] ˆ _ ` { | }
~
Note:
¡ With some software in which MP3 format files have been
encoded, the character information may not be displayed
properly.
¡ Undisplayable characters and symbols will be converted into
an asterisk ( ).
¡It is recommended that the length of the file name is less than
8 (excluding the file extension).
Compression method
Bit rate
VBR
Sampling frequency
MPEG 1 audio layer 3 (MP3)
32 k - 320 kbps
Yes
32, 44.1, 48 kHz
MPEG 2 audio layer 3 (MP3)
8 k - 160 kbps
Yes
16, 22.05, 24 kHz
Folder selection order/file playback order
Maximum number of files/folders
¡ Maximum number of files: 999
¡ Maximum number of files in one folder: 255
¡ Maximum depth of trees: 8
¡ Maximum number of folders: 255 (Root folder is included.)
Root Folder
(Root Directory)
1
2
q
Folder Selection
4
e
In the order
1
–
8
3
Note:
¡ This unit counts the number of folders irrespective of the presence or
absence of an MP3 file.
¡ If the selected folder does not contain any MP3 files, the nearest MP3
files in the order of playback will be played.
¡ Playback order may be different from other MP3 players even if the
same disc is used.
¡ “ROOT” appears when displaying the root folder name.
w
File Selection
In the order
–
y
q
5
6
r
8
7
Tree 1
Tree 2
Tree 3
t
y
Tree 4
Tree 8
(Max.)
Copyright
It is prohibited by copyright laws to copy, distribute and
deliver copyrighted materials such as music without the
approval of copyright holder except enjoying yourself
personally.
No warranty
Above description complies with our investigations as of
December 2004. It has no warranty for reproducibility
and displayability of MP3.
26
CQ-D5501U
CQ-D5501U
27
DVD/VCD Player
You can enjoy watching DVDs and VCDs if the optional monitor (CY-VH9300U or CY-V7100U) is connected.
[SRC: Source]
[s] / [d] (a / f)
(Chapter selection/fast
forward/fast reverse/
slow play)
[BAND]
(y / 5: Pause/play)
[DISP] (Display)
[6] (REPEAT)
When a disc is in the player
Chapter Selection
Press [SRC] to select the DVD/VCD player mode and playback starts. (If automatic start is not performed, press [5]
(PLAY) of the remote control, or try to operate it manually
according to the menu screen of the disc.)
[d]: Next chapter
[s]: Beginning of the current chapter
For the previous chapter, press twice.
(When DVD disc is in the player)
Title
Chapter
(When VCD disc is in the player)
Fast Forward/Fast Reverse
Press and hold for more than 0.5 seconds.
Each time you press the button, the speed changes as follows.
Regular speed /2 times /5 times /10 times /20 times
[d] (f): Fast forward
[s] (a): Fast reverse
Press [BAND] (y / 5) to cancel.
Pause (y / 5)
Display Change
Stop
Subtitle
DVD VCD
Press [3] (STOP).
Press [5] (PLAY) to resume playback from the point where
[3] (STOP) is pressed. (Continued playback function)
To cancel continued playback, press [3] (STOP) again in
the stop mode.
Frame to Frame Play
Direct Selection (during playback)
DVD VCD
Example: Chapter number 10
q Press [GRP].
w Press [1][0]. (Press [RET] to cancel.)
e Press [ENTER].
Direct Title Selection
You can select a subtitle language if the loaded disc has
multi-language subtitles.
When [1] (SUBTITLE) is kept pressed for more than 1
second, the subtitle language is changed over at the intervals of 1 second.
DVD VCD
Press [y] (PAUSE) to go to next frame in the pause.
To resume normal playback, press [5] (PLAY).
Direct Chapter Selection
DVD VCD
DVD VCD
Example: Title number 10
Audio
DVD VCD
You can select an audio channel if the disc holding multiaudio channels is loaded.
When [2] (AUDIO) is kept pressed for more than 1 second, the audio channel is changed over at the intervals of 1
second.
DVD VCD
Audio
You can select audio output among “STEREO”, “MONO L”
and “MONO R”.
When [2] (AUDIO) is kept pressed for more than 1 second, the audio output is changed over at the intervals of 1
second.
STEREO
MONO L
MONO R
Press [BAND] (y / 5).
Press [DISP].
Press [BAND] (y / 5) again to cancel.
3DVD disc
Title/Chapter
28
Functions Only by Remote Control Unit
3VCD disc
VCD
q Press [GRP] twice.
w Press [1][0]. (Press [RET] to cancel.)
e Press [ENTER].
Slow play
DVD
List Selection
(Only for PBC-applicable discs a Page 45)
Example: List number 10
q Press [1][0]. (Press [RET] to cancel.)
w Press [ENTER].
Clock time
Clock time
Press and hold [d] for more than 0.5 seconds during
pausing.
Press [BAND] (y / 5) again to cancel.
Display off
Display off
Repeat Play
VCD
The current chapter is repeated.
Press and hold [6] (REPEAT) for more than 2 seconds.
light.
Press and hold [6] (REPEAT) again for more than 2 seconds to cancel.
Note:
¡ If a non-existent title/chapter/track/number is input and
entered, the command is invalid and the display returns to
regular mode.
¡ Direct title selections can be made by pressing [GRP] once
in the stop mode. DVD VCD
¡ To return to the regular mode, press [DISP].
Angle
DVD VCD
You can select an angle if a multi-angle disc is loaded.
When [3] (ANGLE) is kept pressed for more than 1 second, the angle is changed over at the intervals of 1 second.
[3] (STOP)
[y] (PAUSE)
POWER
SOURCE
STOP
PAUSE
PLAY
3
SEL
SRC
TRACK / SEARCH
RET
TITLE
MENU
1
2
RETURN
[RET]
[5] (PLAY)
[ENTER]
R
27
E
N
G
L
I
S
H
TE
E
N
G
L
I
S
H
EN
SUBTITLE AUDIO ANGLE
[0] – [9]
4
5
6
RANDOM
SCAN
REPEAT
7
8
9
OSD
VOL
TRACK
GRP
0
MUTE
DRC TITLE / CHAPTER
[GRP]
CAR AV
28
CQ-D5501U
CQ-D5501U
29
E
N
G
L
I
S
H
DVD/VCD Player (continued)
E
N
G
L
I
S
H
OSD (On-Screen Display)
You can see OSDs (On-Screen Display) if the optional monitor (CY-VH9300U or CY-V7100U) is connected.
29
Functions Only by Remote Control Unit (continued)
Disc Menu
D.Range Compression
DVD VCD
You can stop playing the disc temporarily and call up the
on-disc menu screen.
Press [MENU] (TITLE) during playback.
Title Menu
DVD VCD
You can stop playing the disc temporarily and call up the
on-disc title menu screen.
Press and hold [MENU] (TITLE) during playback for
more than 2 seconds.
DVD VCD
You can select a range of dynamic range compression.
This function is effective for playback of Dolby
Digital/Dolby Surround DVD video. The words of an actor
hardly audible during playback at a low volume, for example, will become easier to listen to by selecting “MINIMUM”.
q Press and hold [0] (DRC) during playback for more
than 2 seconds to activate the DRC selection mode.
w Press and hold [0] (DRC) for more than 2 seconds to
select a range of DRC.
OSD (On-Screen Display)
Each time you press [OSD], the display changes according to the disc type.
3CD (Music CD)
Track play time
Play
Title
MINIMUM
STANDARD
Mode recommended by software
creators for listening at low
volumes.
Does not compress the dynamic
range. (Default)
Conversation level
MINIMUM
STANDARD
OFF
Track 12 : FAVORITE
PLAY
TITLE
MENU
[MENU]
1
2
TE
RET
RETURN
R
TRACK / SEARCH
EN
3
SEL
SUBTITLE AUDIO ANGLE
4
5
6
RANDOM
SCAN
REPEAT
7
8
9
OSD
[0] (DRC)
VOL
Play
: BEST OF MUSIC
CD
Artist
: GREAT SINGER
3MP3
ID3 TAG ON
Play
Artist
PLAYER
MODE
: GREAT SINGER
Track: 12/22 Time: 01:00:13
Track: 12/22 Time: 00:00:13
MP3 player mode
Play
Folder
:MP3 MUSIC
File
:WINTER.mp3
ID3Tag
Album :BEST OF MUSIC
Title
:FAVORITE
Artist
:GREAT SINGER
MP3 PLAYER MODE
Folder : 001/009 File : 001/100 Time: 00:00:13
Chapter play time
Total play time
Play
Caution
PAUSE
Title
Track 12 : FAVORITE
3DVD (DVD Video)
Text off
STOP
CD player mode
Play
: BEST OF MUSIC
Folder : 001/009 File : 001/100 Time: 00:00:13
SRC
Total play time
Track: 12/22 Time: 00:03:13
Most compressed mode: TV
broadcasts, etc
OFF
POWER
SOURCE
30
(Only for remote control unit)
You can set up the optional monitor to display or hide the following information: title/artist name for CDs, album/title/artist
name for MP3, playtime for VCDs and title/chapter/playtime for DVDs.
¡ The sound of DVD video covers a wide dynamic range
of more than 100 dB. Thus, the reproduced sound
volume of some DVD discs may be significantly low.
When you increase the volume in this case, the sound
may reach the peak level suddenly and it may lead to
a traffic accident. To avoid such an accident, you can
use this function.
Title:02/03
3VCD (Video CD)
Text off
Play
Chapter:025/050 Time: 00:05:59
Title:02/03
Chapter:025/050 Time: 02:35:40
SUBTITLE AUDIO ANGLE
Play time
Play
TRACK
GRP
0
MUTE
DRC TITLE / CHAPTER
4
5
6
RANDOM
SCAN
REPEAT
7
8
9
OSD
VOL
TRACK
GRP
MUTE
DRC TITLE / CHAPTER
0
CAR AV
CAR AV
Time: 00:00:13
[OSD]
30
CQ-D5501U
CQ-D5501U
31
E
N
G
L
I
S
H
E
N
G
L
I
S
H
CD Changer Control
[SRC: Source]
indicator
indicator
31
[s] / [d] (a / f)
(Track selection/fast forward/fast
reverse)
[{] / [}] (DISC)
(Disc selection)
[5] (SCAN)
[4] (RANDOM)
[6] (REPEAT)
Note:
¡Trouble may occur while playing CD-Rs. Refer to the section on “Notes on Discs” (a Page 47)
¡This unit does not support the following through the CD changer.
¡CD-RW playback. (except when CX-DP880 is connected)
¡MP3/WMA playback.
¡CD text display
¡Pausing does not function in the CD changer mode.
¡This unit does not support a DVD changer due to shortage of displayable digit number or other causes.
[DISP] (Display)
¡CD changer functions are designed for optional
Panasonic CD changer unit (CX-DP880).
Preparation:
¡Connect the CD changer, and load a magazine (CDs).
Disc Selection
Random Play
Repeat Play
[}]: Next disc
[{]: Previous disc
All the available tracks are played in a random sequence.
The current track is repeated.
CD Changer Mode
Track Selection
Press [4] (RANDOM).
lights.
Press [4] (RANDOM) again to cancel.
Press [6] (REPEAT).
lights.
Press [6] (REPEAT) again to cancel.
Disc Random Play
Disc Repeat Play
All the available tracks on the current disc are played in a
random sequence.
The current disc is repeated.
Press [SRC] to select the CD changer mode and playback
starts.
Track
Play time
Disc
Note:
¡ Load a magazine with CDs when “NO DISC” is displayed.
¡ The power will be turned on automatically when a
magazine is loaded.
Display Change
Press [DISP].
32
1
[d]: Next track
[s]: Beginning of the current track
For the previous track, press twice.
Fast Forward/Fast Reverse
Press and hold
[d] (f): Fast forward
[s] (a): Fast reverse
Release them to resume the playback.
Press and hold [4] (RANDOM) for more than 2 seconds.
blinks.
Press and hold [4] (RANDOM) again for more than 2
seconds to cancel.
Press and hold [6] (REPEAT) for more than 2 seconds.
blinks.
Press and hold [6] (REPEAT) again for more than 2 seconds to cancel.
Scan Play
Direct Disc Selection
The first 10 seconds of each track is played in sequence.
(Only for remote control)
Example: Disc number 5
q Press [GRP].
w Press [5].
e Press [ENTER].
Press [5] (SCAN).
Clock time
Press [5] (SCAN) again to cancel.
Disc Scan Play
Display Off
From the next disc, the first 10 seconds of the first track of
all the discs is played in sequence.
Note:
¡ To suspend direct selection, press [DISP].
¡ Random, Disc Random, Scan, Disc Scan, Repeat and
Disc Repeat plays are canceled once [GRP] is pressed.
Press and hold [5] (SCAN) for more than 2 seconds.
Press and hold [5] (SCAN) again for more than 2 seconds to cancel.
32
CQ-D5501U
CQ-D5501U
33
E
N
G
L
I
S
H
E
N
G
L
I
S
H
Audio Settings
Regular mode
Turn [VOLUME]. (Press [VOL }] or
[VOL {] on the remote control unit.)
33
VOLUME
BASS
SQ SET
[SQ] (Sound Quality)
SUBW LPF
Press [VOLUME]
(PUSH SEL: select).
(Press [SEL] on the
remote control unit.)
Preset Buttons [2] to [6]
[DISP] (Return to the regular mode)
TREBLE
[[] / []]
[{] / [}]
[BAND]
SUBW LEV
FADER
34
1
BALANCE
Note:
¡ To return to the regular mode, press [DISP].
¡ If no operation takes place for more than 5 seconds in audio setting (2 seconds in the volume adjustment, 10 seconds in the SQ adjustment), the display returns to the regular mode.
¡ The volume can also be adjusted directly using [VOLUME] on the main unit. (a Page 12)
¡ Please refer to page 13 for calling up a preset SQ.
Turn [VOLUME].
Volume
Default: 18
Setting range: 0 to 40
Bass/Treble
You can adjust the bass and treble sounds.
Default: BAS (bass) 0 dB
TRE (treble) 0 dB
Setting range: –12 dB to +12 dB (by 2 dB)
Press [VOLUME] (PUSH SEL)
to open the menu.
q : Up
w : Down
Turn [VOLUME].
Press [VOLUME] (PUSH SEL).
q : Up
w : Down
Turn [VOLUME].
Press [VOLUME] (PUSH SEL).
q : Up
w : Down
q Press [[] or []] to select a frequency
SQ Adjustment
You can adjust the characteristics of the currently selected
sound type (SQ).
It is also possible to preset up to 5 different adjusted SQs.
Tone/SQ adjustable range: –12 dB to +12 dB (by 2 dB)
SQ Low/Bass : ± 12 dB (at 60 Hz, 80 Hz, 100 Hz, 200 Hz)
SQ Mid
: ± 12 dB (at 500 Hz, 1 kHz, 2 kHz, 3 kHz)
SQ High/Treble : ± 12 dB (at 10 kHz, 12 kHz, 15 kHz, 18 kHz)
¡ The bass/treble control frequency is fixed to the frequency
that has been selected for SQ.
Press [VOLUME] (PUSH SEL).
The SQ adjustment mode can be
established also by pressing [SQ]
for more than 2 seconds.
FTo return an adjusted SQ to the default setting
q Press [SQ], and select the SQ which is to be returned to
the default setting. (Only for main unit)
w Press and hold [BAND] for more than 2 seconds.
Note:
¡ You cannot save
any SQ presetting
value in [1] button.
¡ Any SQ adjustments will not
change the call up
screen names such
as ROCK and JAZZ.
band (Low, Mid, High).
[[]: Higher frequency band
[]]: Lower frequency band
Turn [VOLUME] to select a frequency.
q: Higher frequency
w: Lower frequency
[}] or [{] to adjust the level.
Press
w
Frequency
The selected frequency band
blinks.
[}]: Up
[{]: Down
e Press and hold one of the preset buttons
from [2] to [6] for more than 2 seconds.
¡The adjusted SQ is preset in the number of the selected button, and return
to the regular mode resumes.
Level
¡When you suspend the SQ preset adjustment, each level remains your recent
adjustment until a new SQ presetting operation is performed or you call up
the SQ preset.
34
(Page 36)
CQ-D5501U
CQ-D5501U
35
E
N
G
L
I
S
H
Audio Settings (continued)
Regular mode
Turn [VOLUME]. (Press [VOL }] or
[VOL {] on the remote control unit.)
VOLUME
BASS
TREBLE
SQ SET
35
SUBW LPF
Press [VOLUME]
(PUSH SEL: select).
(Press [SEL] on the
remote control unit.)
SUBW LEV
FADER
E
N
G
L
I
S
H
36
BALANCE
Note:
¡ To return to the regular mode, press [DISP].
¡ If no operation takes place for more than 5 seconds in audio setting, the display returns to the regular mode.
¡ Adjustments of the subwoofer level and low pass filter are effective when the subwoofer is connected.
[DISP] (Return to the regular mode)
Balance/Fader
You can adjust the sound level among the right, left, front and
rear speakers.
Default: BAL (balance) CNT (center)
FAD (fader) CNT (center)
Setting range: 15 levels each and CNT (center)
Turn [VOLUME].
Press [VOLUME] (PUSH SEL).
Turn [VOLUME].
Press [VOLUME] (PUSH SEL).
Subwoofer Level
You can change the subwoofer volume level.
Default: 0
Setting range: MUTE (–∞), – 6 dB to + 6 dB (by 2 dB)
36
CQ-D5501U
q : Front enhanced
w : Rear enhanced
Turn [VOLUME].
Press [VOLUME] (PUSH SEL).
q : Up
w : Down
Turn [VOLUME].
Subwoofer LPF (Low Pass Filter)
You can select the upper limit frequency of the sound from subwoofer.
Default: 80 Hz
Setting range: 80 Hz, 120 Hz
q : Right enhanced
w : Left enhanced
Press [VOLUME] (PUSH SEL).
q : 120 Hz
w : 80 Hz
CQ-D5501U
37
E
N
G
L
I
S
H
Function Settings
Regular mode
Turn [VOLUME]. (Press [}] or [{] on
the remote control unit.)
PATTERN
MUTE KEY
SECURITY
37
E
N
G
L
I
S
H
38
1
Press and hold
[VOLUME] (PUSH
SEL: select) for more
than 2 seconds. (Press
and hold [SEL] for
more than 2 seconds
on the remote control
unit.)
Note:
¡ To return to the regular mode, press [DISP].
¡ If no operation takes place for more than 10 seconds in function setting, the display returns to the regular mode.
[DISP] (Return to the regular mode)
Turn [VOLUME].
Spectrum Analyzer Display Patterns
Default: Pattern 1
Variety: 6 types, OFF
: Off
Press and hold [VOLUME]
(PUSH SEL) for more than 2
seconds to open the menu.
: Pattern 1 (Default)
w
q
: Pattern 6
Turn [VOLUME].
Mute/Attenuation
Press [VOLUME] (PUSH SEL).
You can select mute or attenuation. (a Page 12)
Default: MUTE
q
: 10 steps decrease (Attenuation)
w
: No sound (Mute) (Default)
Turn [VOLUME].
Security Function
You can activate the anti-theft function when leaving your car.
Default: ON
q
The security function is activated. (Default)
w
The security function is not activated.
Press [VOLUME] (PUSH SEL).
SLED (Security Light Emitted Diode) ON
When the ignition switch is turned OFF...
¡ The security message will be displayed.
¡ The face plate removal alarm will be active.
(a Page 46)
When the face plate is removed...
¡ The security indicator (SLED) blinks. (a Page 46)
38
CQ-D5501U
CQ-D5501U
39
E
N
G
L
I
S
H
User Settings
39
q
E
N
G
L
I
S
H
The following information explains the settings only about the disc player and displayed contents on the screen.
(Only for Remote Control Unit)
Display “Main Menu”.
Press [MENU].
w
Select each setting menu.
Press one of the numeric buttons from [1] to [8].
(Example: “1. Menu Language”)
<Main Menu>
1. Menu Language
2. Subtitle Language
3. Audio Language
4. OSD Language
5. TV Type
6. TV Display
7. On-Screen Messages
8. D. Range Compression
: English
: English
: English
: English
: NTSC
: WIDE
: ON
: OFF
1. Menu Language
2. Subtitle Language
3. Audio Language
4. OSD Language
5. TV Type
6. TV Display
7. On-Screen Messages
8. D. Range Compression
<Menu Language>
: English
: English
: English
: English
: NTSC
: WIDE
: ON
: OFF
Select
Language
1. English
2. French
3. Spanish
4. Chinese
5. German
6. Italian
7. Other
8. Return
r
Finish the setting.
40
Press [0] (Exit). (The setting is completed.)
Note:
¡To apply changes to the setting, be sure to
press [0] (Exit) at the end.
¡After the user settings have been changed and
entered, the player returns to the start of the
disc.
¡When the disc has predetermined language or
other settings, the user settings are not
reflected.
0. Exit
Note:
¡The Main Menu has been set for this unit. It is
not set for any DVD disc.
¡Main menu setting is possible only if the disc
source has been selected. (No disc playing)
1. Menu Language
Default: English
2. Subtitle Language
Default: English
STOP
Press one of the numeric buttons from [1] to [9].
(Example: “1. English”)
<Main Menu>
0. Exit
POWER
SOURCE
e
Select each item.
PAUSE
PLAY
1. English
2. French
3. Spanish
4. Chinese
5. German
6. Italian
7. Other
8. Return
(a Page 44)
The display returns to “Main Menu”.
1. English
2. French
3. Spanish
4. Chinese
5. German
6. Italian
7. Other
8. Disp Off
9. Return
(a Page 44)
Subtitle language is not displayed.
The display returns to “Main Menu”.
1. English
2. French
3. Spanish
4. Chinese
5. German
6. Italian
7. Other
8. Return
(a Page 44)
The display returns to “Main Menu”.
1. English
2. Chinese
3. Return
The display returns to “Main Menu”.
Note:
¡ A disc supporting closed captioning and subtitles
may overlap on the screen. In this case, turn the
subtitle off.
SRC
TRACK / SEARCH
[MENU]
2
3
SEL
SUBTITLE AUDIO ANGLE
4
5
6
RANDOM
SCAN
REPEAT
7
8
9
OSD
[0]
(Finish the
setting.)
CQ-D5501U
VOL
TRACK
GRP
MUTE
DRC TITLE / CHAPTER
0
CAR AV
40
Default: English
EN
1
Numeric buttons
[1] – [9]
R
RET
3. Audio Language
TITLE
MENU
TE
RETURN
4. OSD Language
Default: English
CQ-D5501U
41
E
N
G
L
I
S
H
User Settings (continued)
41
q
E
N
G
L
I
S
H
The following information explains the settings only about the disc player and displayed contents on the screen.
(Only for Remote Control Unit)
Display “Main Menu”.
Press [MENU].
w
Select each setting menu.
Press one of the numeric buttons from [1] to [8].
(Example: “6. TV Display”)
<Main Menu>
1. Menu Language
2. Subtitle Language
3. Audio Language
4. OSD Language
5. TV Type
6. TV Display
7. On-Screen Messages
8. D. Range Compression
e
Select each item.
Press one of the numeric buttons from [1] to [4].
(Example: “2. Pan & Scan (4:3)”)
<Main Menu>
: English
: English
: English
: English
: NTSC
: WIDE
: ON
: OFF
1. Menu Language
2. Subtitle Language
3. Audio Language
4. OSD Language
5. TV Type
6. TV Display
7. On-Screen Messages
8. D. Range Compression
0. Exit
<TV Display Mode>
: English
: English
: English
: English
: NTSC
: WIDE
: ON
: OFF
Select TV
Display Mode
5. TV Type
1. NTSC
TV standard format setting
Default: NTSC
Note:
Setting should be made to match the format of the connected monitor. Select NTSC if connections are made
possible for both NTSC and PAL. If you select PAL, a
picture may be partly omitted.
2. PAL
3. Multi
4. Return
6. TV Display
Display aspect setting
Default: WIDE
STOP
42
Press [0] (Exit). (The setting is completed.)
Note:
¡To apply changes to the setting, be sure to
press [0] (Exit) at the end.
¡After the user settings have been changed and
entered, the player returns to the start of the
disc.
¡When the disc has predetermined language or
other settings, the user settings are not
reflected.
0. Exit
Note:
¡The Main Menu has been set for this unit. It is
not set for any DVD disc.
¡Main menu setting is possible only if the disc
source has been selected. (No disc playing)
POWER
SOURCE
1. WIDE (16:9)
2. Pan & Scan (4:3)
3. Letterbox (4:3)
4. Return
r
Finish the setting.
PAUSE
The unit transmits the NTSC formatted signal in either case, playing an NTSC formatted video or a
PAL formatted video.
The unit transmits the PAL formatted signal in either case, playing an NTSC formatted video or a
PAL formatted video.
The unit transmits the same video signal as the output of playing video software.
Note:
¡If the connected monitor cannot automatically select between NTSC and PAL according to the
video signal of the disc to be reproduced, images on the screen may be distorted. Select NTSC
or PAL at the monitor side depending to the disc to be reproduced.
The display returns to “Main Menu”.
1. WIDE (16:9)
2. Pan & Scan (4:3)
3. Letterbox (4:3)
4. Return
Plays in Wide mode when a wide-screen monitor is connected.
Plays in Pan & Scan mode when a conventional monitor is connected.
Plays in Letterbox mode when a conventional monitor is connected.
The display returns to “Main Menu”.
Note:
¡If “Pan & Scan” or “Letterbox” is already set in the software, this setting is ignored.
PLAY
SRC
TITLE
MENU
[MENU]
1
2
Numeric buttons
[1] – [9]
TE
RET
RETURN
R
TRACK / SEARCH
EN
3
SUBTITLE AUDIO ANGLE
4
5
6
RANDOM
SCAN
REPEAT
7
8
9
OSD
[0]
(Finish the
setting.)
CQ-D5501U
VOL
TRACK
GRP
0
MUTE
DRC TITLE / CHAPTER
CAR AV
42
SEL
7. On-Screen Messages
This is to select On-screen Display messages which
will be displayed when On-screen Display is turned
off by pressing [OSD] (a Page 31).
Default: ON
8. D.Range Compression
By compressing the range of the playback level (the
dynamic range), it is possible to maintain the impact
of audio even at low volumes.
This function only works with Dolby Digital encoded
material.
Default: OFF
1. ON
2. OFF
3. Return
1. Minimum
2. Standard
3. OFF
4. Return
When power is turned on, On-Screen Display message such as “Play” and “Pause”
will be displayed on the screen for 5 seconds.
When power is turned on, On-Screen Display messages such as “Play” and
“Pause” will not be displayed on the screen.
The display returns to “Main Menu”.
Most compressed mode: TV
broadcasts, etc
Mode recommended by software
creators for listening at low volumes.
Does not compress the dynamic
range.
The display returns to “Main Menu”.
Note:
¡ When it is difficult to hear comparatively small
sound (such as movie dialogue), setting “Minimum”
will make those sounds easier to hear.
CQ-D5501U
43
Definition of Terms
(Only for Remote Control Unit)
In “Other” cases (Menu Language, Subtitle Language, Audio Language) (a Page 40)
q
Press numeric buttons from
[0] to [9] to input the 4 digit
language code. (See below.)
¡ To input the number again,
press [RET] (RETURN).
w
Press [ENTER] to finalize the
selection.
¡ Setting is finished and the
display returns to “Main
Menu”.
POWER
SOURCE
STOP
PAUSE
PLAY
3
SEL
SRC
TRACK / SEARCH
[RET]
RET
TITLE
MENU
1
2
RETURN
R
43
Language Code List
[ENTER]
TE
E
N
G
L
I
S
H
EN
SUBTITLE AUDIO ANGLE
4
5
6
RANDOM
SCAN
REPEAT
8
9
7
OSD
[0] – [9]
VOL
TRACK
GRP
0
MUTE
DRC TITLE / CHAPTER
CAR AV
44
Code
Language Name
Code
Language Name
Code
Language Name
6565
6566
6570
6577
6582
6583
6589
6590
6665
6669
6671
6672
6678
6679
6682
6765
6779
6783
6789
6865
6869
6890
6976
6978
6979
6983
6984
6985
7065
7073
7074
7079
7082
7089
7165
7168
7176
7178
7185
7265
7273
7282
7285
Afar
Abkhazian
Afrikaans
Ameharic
Arabic
Assamese
Aymara
Azerbaijani
Bashkir
Byelorussian
Bulgarian
Bihari
Bengali; Bangla
Tibetan
Breton
Catalan
Corsican
Czech
Welsh
Danish
German
Bhutani
Greek
English
Esperanto
Spanish
Estonian
Basque
Persian
Finnish
Fiji
Faroese
French
Frisian
Irish
Scots Gaelic
Galician
Guarani
Gujarati
Hausa
Hindi
Croatian
Hungarian
7289
7365
7378
7383
7384
7387
7465
7473
7487
7565
7575
7576
7577
7578
7579
7583
7585
7589
7665
7678
7679
7684
7686
7771
7773
7775
7776
7778
7779
7782
7783
7784
7789
7865
7869
7876
7879
7982
8065
8076
8083
8084
8185
Armenian
Interlingua
Indonesian
Icelandic
Italian
Hebrew
Japanese
Yiddish
Javanese
Georgian
Kazakh
Greenlandic
Cambodian
Kannada
Korean
Kashmiri
Kurdish
Kirghiz
Latin
Lingala
Laothian
Lithuanian
Latvian, Lettish
Malagasy
Maori
Macedonian
Malayalam
Mongolian
Moldavian
Marathi
Malay
Maltese
Burmese
Nauru
Nepali
Dutch
Norwegian
Oriya
Punjabi
Polish
Pashto, Pushto
Portuguese
Quechua
8277
8279
8285
8365
8368
8372
8373
8375
8376
8377
8378
8379
8381
8382
8385
8386
8387
8465
8469
8471
8472
8473
8475
8476
8479
8482
8484
8487
8575
8582
8590
8673
8679
8779
8872
8979
9072
9085
Rhaeto-Romance
Romanian
Russian
Sanskrit
Sindhi
Serbo-Croatian
Singhalese
Slovak
Slovenian
Samoan
Shona
Somali
Albanian
Serbian
Sundanese
Swedish
Swahili
Tamil
Telugu
Tajik
Thai
Tigrinya
Turkmen
Tagalog
Tonga
Turkish
Tatar
Twi
Ukrainian
Urdu
Uzbek
Vietnamese
Volapük
Wolof
Xhosa
Yoruba
Chinese
Zulu
CQ-D5501U
Digital audio output connector (Optical)
The digital audio output connector (optical) converts
electrical signals into optical signals and transfers
them to the amplifier. Consequently, it has a number
of features including its immunity from electrical interference from external sources and its ability to prevent
the generation of noise and its minimal effect on the
external environment.
Dolby Digital
This fully discrete format divides the music signals
into 5.1 channels: Front Left (L), Front Right (R),
Center (C), Left Surround (LS), Right Surround (RS)
and Subwoofer (SW: 0.1 channel) for recording and
playback. The number of channels that are recorded
depends on the software. (1 to 5.1 channels)
Manufactured under license from Dolby
Laboratories. “Dolby” and the double-D symbol
are trademarks of Dolby Laboratories.
Confidential unpublished works. Copyright
1992–1997 Dolby Laboratories. All rights
reserved.
Interactive DVD
An interactive DVD is DVD software which includes
multiple angles, multiple plot endings, etc.
Letterbox screen
This refers to a screen on which the playback picture
of wide-screen DVDs or VCD (Video CD)s appears
with black bands running along the top and bottom.
LPCM (Linear PCM audio)
In this format, the audio signal is converted to digital
data and recorded in two channels without compression. Because the capacity of a DVD disc is large, it
can store more data with better accuracy than a CD.
MPEG (Moving Picture Experts Group)
MPEG is an international standard format for the compression of motion video as defined by the Moving
Picture Experts Group, a working committee which
functions under the auspices the International
Electrotechnical Commission. The Group established
the MPEG 2 Standard in 1994. MPEG2 built on
MPEG1 with many improvements, and it yield a higher
picture quality level.
Pan & Scan screen
This refers to a screen on which the playback picture
of wide-screen DVDs or VCD (Video CD)s is cut off at
the left and right sides.
E
N
G
L
I
S
H
44
Playback control (VCD (Video CD))
If the VCD (Video CD) has “With Playback Control” or
others written on the disc surface or on the jacket, the
scenes or information to be viewed (or listened to) can
be selected interactively with the screen by looking at
the menu shown on the screen.
In these instructions, playback using the menu screen
is referred to as the “menu play” for video CDs. This
player supports Video CDs with playback control.
Title, Chapter (DVD)
DVDs are divided into some large sections (titles) or
some small sections (chapters). Each section is numbered; these numbers are called “Title number” or
“Chapter number”.
Title 1
Chapter 1
Title 2
Chapter 2 ……
Chapter 1 ……
Track (Video CD/CD)
Video CDs or CDs are divided into some sections
(tracks). Each section is numbered; these numbers are
called “Track number”.
Track 1
Track 2
Track 3
Track ……
“DTS” and “DTS Digital Out” are trademarks of Digital
Theater Systems, Inc.
This product incorporates copyright protection
technology that is protected by U.S. patents and
other intellectual property rights. Use of this
copyright protection technology must be authorized
by Macrovision, and is intended for home and other
limited viewing uses only unless otherwise
authorized by Macrovision. Reverse engineering or
disassembly is prohibited.
CQ-D5501U
45
E
N
G
L
I
S
H
45
Anti-Theft System
E
N
G
L
I
S
H
Fuse
If the fuse blows out, consult your dealer, or your nearest authorized Panasonic Servicenter.
This unit is equipped with a removable face plate. Removing
this face plate makes the unit totally inoperable. SLED will
blink.
Warning
Contact
Remove the Face Plate
q Switch off the power of the unit.
w Press [
] (Release) to remove the face plate. (The face
plate disengages with a click when it is removed.)
e Place the face plate into the case and take it with you when
you leave the car.
[
¡Use fuses of the same specified rating (15 A). Using substitutes or fuses with higher ratings, or connecting the unit
directly without a fuse could cause fire or damage to the unit. If the replaced fuse fails, contact your nearest
authorized Panasonic Servicenter.
46
1
] (Release)
Maintenance
Removable
Face Plate
Case
This unit is designed and manufactured to ensure the minimum of maintenance. Use a dry, soft cloth for routine exterior
cleaning. Never use benzine, thinner, or other solvents.
Note:
¡Be absolutely sure to turn off the power of the unit before
removing the face plate.
¡Do not install or remove the face plate while it is moving.
Notes on Discs
How to hold a disc
Install the Face Plate
¡ Do not touch the underside of a disc.
¡ Do not scratch a disc.
¡ Do not bend a disc.
¡ When not in use, keep a disc in a case.
Contact
q Slide the left side of the face plate in place.
w Press the right end of the face plate until a “click” is heard.
2
Do not use irregularly shaped discs.
Do not leave discs in the following places:
1
¡ In direct sunlight
¡ Near car heaters
¡ Dirty, dusty and damp areas
¡ On seats and dashboards
Security Indicator (SLED)
Disc cleaning
SLED blinks when the face plate is removed from the unit.
This function is activated when the Security Function is ON.
(a Page 38)
Do not attach any seals or labels to your discs.
<Wrong>
SLED
¡ This face plate is not waterproof. Do not expose it to water or excessive moisture.
¡ Do not remove the face plate while driving your car.
¡ Do not place the face plate on the dashboard or nearby areas where the temperature rises high.
¡ Do not touch the contacts on the face plate and on the main unit, since this may result in poor electrical contact.
¡ If dirt or other foreign substances get on the contacts, wipe them off with a clean and dry cloth.
¡ To avoid damaging the face plate, do not push it down or place objects on it while it is open.
¡ The face plate will automatically close about 5 seconds after [
] (Release) is pressed while the face plate is tilted
or open, so take care to ensure that your fingers will not be pinched by the closing face plate.
CQ-D5501U
<Correct>
Do not write on the disc label with a ballpoint pen or other
hard-point pens.
Caution
46
Do not use irregularly shaped discs.
Use a dry, soft cloth to wipe from the center outward.
Face Plate Removal Alarm
This alarm sounds to warn you not to forget to remove the
face plate before leaving your car.
This function is activated when the Security Function is ON.
(a Page 38)
Printed side
Notes on CD-Rs/RWs, DVD-Rs/RWs
¡ You may have trouble playing back some CD-R/RW, DVD-R/RW discs recorded using CD/DVD recorders (CD-R/RW,
DVD-R/RW drives), either due to their recording characteristics or dirt, fingerprints, scratches, etc. on the disc surface.
¡ CD-R/RW, DVD-R/RW discs are less resistant to high temperatures and high humidity than ordinary music CDs/DVDs.
Leaving them inside a car for extended periods may damage and make playback impossible.
¡ Some CD-R/RWs, DVD-R/RWs cannot be played back successfully due to incompatibility among writing software, a
CD/DVD recorder (CD-R/RW, DVD-R/RW drive) and the discs.
¡ This player cannot play the CD-R/RW, DVD-R/RW discs if the session is not closed.
¡ Be sure to observe the instructions of the CD-R/RW, DVD-R/RW disc for handling it.
¡ This player cannot play the CD-R/RW discs which contain other than CD-DA or MP3 data.
CQ-D5501U
47
E
N
G
L
I
S
H
47
E
N
G
L
I
S
H
Installation
Consult a professional for installation.
Warning
❐ This installation information is designed for professional installers with knowledge of automobile electrical safety systems and is not intended for non-technical, do-it-yourself individuals. It does not contain instructions on the electrical
installation and avoidance of potential harm to air bag, anti-theft and ABS braking or other systems necessary to install
this product. Any attempt to install this product in a motor vehicle by anyone other than a professional installer could
cause damage to the electrical safety system and could result in serious personal injury or death.
❐ If your car is equipped with air bag and/or anti-theft systems, specific procedures may be required for connection and
disconnection of the battery to install this product. Before attempting installation of this electronic component against
the manufacturer’s recommendation, you must contact your car dealer or manufacturer to determine the required procedure and strictly follow their instructions.
FAILURE TO FOLLOW THE PROCEDURE MAY RESULT IN THE UNINTENDED DEPLOYMENT OF AIR BAGS OR ACTIVATION OF THE ANTI-THEFT SYSTEM RESULTING IN DAMAGE TO THE VEHICLE AND PERSONAL INJURY OR DEATH.
How to install the unit
Verify the radio using the antenna and speakers before installation.
Mounting Angle
side to side : horizontal
front to rear : 0 – 30°
53 mm
mm
53
0 – 30°
Supplied Hardware
No.
4.5 mm
mm
4.5
mm–-6.0
6 mm
Item
Diagram
Mounting Collar
Q'ty
1
No.
Item
the cable from the battery
1 Remove
negative terminal.
collar q insertion.
2 Mounting
Bend appropriate tabs to secure the
unit without backlash.
3 Connection of power connector t.
unit securing
4 Main
q Screw the mounting bolt w into the main unit.
Remove Mounting Collar q and Trim Plate r from the
main unit temporarily, which are already mounted at shipment.
Q'ty
1
(YEFC05652)
1
Power Connector
1
(YEAJ012851)
1
Rubber Bushing
2
Lock Cancel Plate
*
*
* w, e, y and u consist of a set. (YEP0FZ5724)
1
Clip Connector
*
How to remove the unit
1 Remove the face plate.
3 Lock release
q Insert the lock cancel plate y until you hear a click.
w Pull the main unit.
q
w Secure to the fire wall.
e Snap the right and left springs into each hole.
2
3
Diagram
Trim Plate
(YEFX0217263)
*
¡ Wear gloves for safety
¡ Make sure that wiring is completed
before installation.
¡ When this unit is installed in dashboard,
ensure that there is sufficient air flow around the unit to
prevent damage from overheating, do not block any
ventilation holes on the unit.
{2 3/32”}
182
mm{7 5/32 ”}
182
mm
Mounting Bolt (5 mmø)
Caution
48
Mounting Space
q
5
6 Battery Cable reconnection
Trim plate r mounting
4
w
q
w
e
4
w
2 Remove the trim plate r.
Securing to fire wall
Using the rubber bushing e Using the rear support strap
(Option)
3 mm ø
4
Tapping screw (Option)
Rubber Bushing e
Mounting Bolt w
Clank!
Rear support
strap (Option)
5
6
Mounting Bolt w
Rear support To the unit
bracket
Hexagonal nut
(supplied with car)
(Option)
48
CQ-D5501U
4 Pull out the unit with both hands.
e
q
w
Snapping Point
CQ-D5501U
49
E
N
G
L
I
S
H
Wiring
Before Wiring
49
Connection with the CD Changer and the Overhead Monitor (CY-VH9300U)
Connecting the Parking Brake Connection Lead
50
Connection with CD changer and the overhead monitor (option, CX-DP880, CY-VH9300U).
Note:
¡Refer to the operating instructions for the connected devices, in addition.
VIDEO-OUT (Yellow)
VIDEO-OUT
¡ Exclusively operated with 12 V battery with negative (–) ground.
¡ Connect the power lead (red) very last.
¡ Connect the battery lead (yellow) to the positive (+) terminal of the battery or fuse block terminal (BAT).
¡ Strip about 5 mm {1/4 ”} of the lead ends for connection.
¡ Apply insulating tape to bare leads.
¡ Secure loosened leads.
E
N
G
L
I
S
H
(L)(White)
CH/AUX-IN
RCA Cord
CH/AUX-IN
Antenna
CX-DP880 (Option)
CD Changer Unit
(R)(Red)
Caution
¡ For safety, be sure to ask your nearest professional installer to do this connection.
Foot brake
q Attach a Clip Connector u to the end
of the parking brake connection lead.
Parking brake
switch
Fuse*
CQ-D5501U
PARKING BRAKE
Parking Brake Lead
(Blue/yellow stripe)
1
Battery Lead
To the car battery, continuous + 12 V DC
Motor Antenna Relay Control Lead
(Blue)
3
RCA Cord
2
Battery
Clip Connector u
External Amplifier Control Power Lead
(Blue/white stripe)
(Black)
Ground Lead
To a clean, bare metallic part of the car
chassis.
–
Not used
(Red)
ACC
Car chassis
Power source side lead
When connecting this unit to the rear monitor (overhead/headrest):
¡ The parking brake lead and grand lead should be connected to the same terminal.
¡ Use ungrounded speakers only.
Allowable input: 50 W or more
Impedance: 4 – 8 Ω
¡ Distance between speaker and amplifier: 30 cm {12”} or more
¡ Do not use a 3-wire type speaker system having a common
earth lead.
VIDEO-CONT
Video Control Lead
(Green/yellow stripe)
(Yellow)
BATTERY 15A
Battery Lead
To the car battery, continuous + 12 V DC
FRONT SP
Connect as follows
Power Lead
To ACC power, + 12 V DC
REAR SP
Speaker Connection
Green/black stripe
VIDEO-IN
(Yellow)
VTR1 – IN
Brake light
+
Caution
Violet/black
stripe
¡ Do not connect more than one speaker to one set of
speaker leads. (except for connecting to a tweeter)
+ Green
-
Left
Gray/black
stripe
White/black
stripe
+ Violet
-
Right
Rear Speakers
CJ-DA6920U
CQ-D5501U
Parking Brake Lead
(Blue/yellow stripe)
Be sure to wire the parking brake
for safety and preventing accident.
*Fuse (15 A) Refer fuse replacement to your nearest authorized Panasonic Servicenter. Do not try fuse
replacement by yourself.
w The Clip Connector u is connected to
the power source side lead of the parking brake.
PARKING BRAKE
50
Ground Lead
To a clean, bare metallic
part of the car chassis.
Power Connector
DVD Player/Receiver
The parking brake switch position varies with the car
model.
For details on the exact location of the parking brake
switch in your car, contact your dealer.
Parking Brake Lead
(Blue/yellow stripe)
When the parking brake lever is
engaged, the unit is grounded by the
chassis.
Extension Cord
(DIN/BATT/RCA/GND)
Antenna Cable
VIDEO CONT
Hand brake
DIN Cord
+ White
-
Left
+ Gray
-
CY-VH9300U (Option)
Over Head Monitor
Right
Front Speakers
CJ-DA1600U
CQ-D5501U
51
E
N
G
L
I
S
H
51
E
N
G
L
I
S
H
Wiring (continued)
Connection with the Digital Surround Processor (CY-AC300EX)
52
Connection with Digital Surround Processor (CY-AC300EX, Option) Power Amplifiers (Option) and monitors.
Note:
¡Refer to the operating instructions for the connected devices, in addition.
REAR
Digital Surround Processor
CY-AC300EX (Option)
DIGITA
OUND
AL SURR
DIGAT
SO
UR
R
PROCESSO
PRE-OUT (Front)
VIDEO-OUT (Yellow)
PRE-OUT FRONT
(R)(Red)
(L)(White)
L
RCA Cord (supplied with CQ-D5501U)
VIDEO-OUT
PRO LOGIC
ker
er Spea
lifier
i-color
super
VOL
MUTE
L
(L)(White)
RCA Cord (Option)
FRONT
CE
AC300
SE
Operating Unit/Main Unit
Connecting DIN Cord
(Supplied with CY-AC300EX)
SUB•W
SOURCE
display
& 30w
Powe
t mult
brigh
4
2
for Cent
r Amp
POSITION
DR COM
E
SPAC
ER
DIMM
DIM
(R)(Red)
SPC
P POSI
3
CY-AC300EX
Main Unit (Rear)
1
PWR
(Front)
ANALOG-IN
L L
CQ-D5501U
DVD Player/Receiver
DIGITAL-IN
L R
(Black)
(Red)
Power Lead
To ACC power,
+12 V DC
ACC
R R
Power
Connector
(Supplied with
CY-AC300EX)
RCA Cord (option)
(When a Y-shaped
cord is used)
Resistor (220 Ω)
(R)(Red)
(L)(White)
(R)(Red)
(R)(Red)
Fuse (5 A)
Ground Lead
To a clean, bare metallic part of the car chassis.
(Blue/yellow stripe)
PARKING BRAKE
4ch External Power
Amplifier
(option)
2ch External
Power Amplifier
(option)*
Parking brake lead
Be sure to wire the parking brake for safety and
preventing accident.
Center Speaker Cord
(Black)
AMP-CONT MAX 0.1A
(Blue/white stripe)
VTR OUT
BATTERY 15A
Battery Lead
To the car battery, continuous + 12 V DC
External Amplifier Control
Power Lead
(Blue/white stripe)
(Connect to AMP-CONT)
Sub-Woofer
CJ-HD303U
VTR OUT
(Yellow)
External Amplifier
Control Power Lead
(Blue/white stripe)
Center Speaker
EAB-CF2
Motor Antenna Relay
Control Lead
(Blue)
External Amplifier
Control Power Lead
(Blue/white stripe)
Power Lead
To ACC power, + 12 V DC
Right
Left
Rear Speakers
CJ-DA6920U
Not used
(Red)
ACC
ACC
CENTER
External
Amplifier
Control Power
Lead
Video control Lead
(Green/yellow stripe)
VTR1 – IN
(L)(White)
(L)(White)
BATTERY 5A
(Black/green stripe)
VIDEO-IN
(Yellow)
VIDEO-CONT
(Black)
(Yellow)
Battery Lead
To the car battery,
continuous +12 V DC
Power Connector
Digital out
Optical Fiber Cable
(CA-LRD60, option)
VIDEO CONT
Ground Lead
To a clean, bare metallic part of the
car chassis.
Left
Right
Notes on handling optical fiber cable:
¡Do not allow the cable to be damaged by getting it
caught in the door, placing a heavy object on it, etc.
¡Make sure that the cable is not strained when it is
connected.
¡Do not bend the cable sharply.
CY-VH9300U (Option)
Over Head Monitor
Front Speakers
CJ-DA1600U
25 mm {1”} or more
* For use as a monaural amplifier (Bridge connection)(option)
52
CQ-D5501U
CQ-D5501U
53
E
N
G
L
I
S
H
53
Wiring (continued)
Connection with Headrest Monitor (CY-V7100U)
Connecting with an XM Receiver
Connection with the headrest monitor (CY-V7100U) (Option).
Note:
¡Refer to the operating instructions for the connected devices, in addition.
XMD1000
(Option)
S.W-OUT
(Red)
(R) (Red)
(L)(White)
(L) (White)
PRE-OUT REAR
PRE-OUT (Rear)
54
System Upgrade Example: Connecting with an XM Receiver
(White)
SW-OUT (Mono)
E
N
G
L
I
S
H
VIDEO-OUT (Yellow)
(R)(Red)
(L)(White)
RCA Cord (Option)
RCA Cord
VIDEO-OUT
DIN Connector
PRE-OUT FRONT
PRE-OUT (Front)
(R)(Red)
(L) (White)
Ground Lead
CH/AUX-IN
XMDPAN100
(Option)
(R) (Red)
Battery Lead
CQ-D5501U
Hide-away Unit (Front)
CY-V7100U
Power Connector
DVD Player/Receiver
RCA Cord (option)
(Black)
Ground Lead
To a clean, bare metallic
part of the car chassis.
Parking Brake Lead
(Yellow)
BATTERY 15A
Battery Lead
To the car battery, continuous + 12 V DC
External Amplifier
Control Power Lead
(Blue/white stripe)
(Blue/yellow stripe)
Be sure to wire the parking brake
for safety and preventing accident.
CQ-D5501U
VIDEO-CONT
(Red)
ACC
VTR-2
VIDEO-CONT
Video Control Lead (output)
(Green/yellow stripe)
Video Control Lead (input)
(Green/yellow stripe)
Motor Antenna Relay
Control Lead
(Blue)
4ch External
Power Amplifier
(option)
Lead Connections
DIN Connector
CY-V7100U
Sub-woofer
CJ-HD303U
Rear Speakers
CJ-DA6920U
Front Speakers
CJ-DA1600U
PHONES
Display Unit
CY-V7100U
*For use as a monaural amplifier
(Bridge connection)(option).
-
54
CQ-D5501U
+
-
+
-
+
-
XMDPAN100: Please understand that Panasonic is not liable for modification of specifications, shape, name, and
the like of the optional XM receiver and digital adapter without prior notice because they are not manufactured by
Panasonic.
Note:
¡A CD changer, an XM receiver and AUX cannot be connected at the same time.
Final Installation
Hide-away Unit
(Rear)
CY-V7100U
2ch External
Power Amplifier
(option)*
DIN Cord
Power Lead
PARKING BRAKE
Power Lead
To ACC Power, + 12 V
PRE-OUT (Front/Rear)
VTR-1
Connect all wires, making sure that each connection is insulated and secure. Bundle all loose wires and fasten them with tape so they
will not fall down later. Now insert the unit into the mounting collar.
Congratulations! After making a few final checks, you’re ready to enjoy your new auto stereo system.
Final Check
1. Make sure that all wires are properly connected and insulated.
2. Make sure that the main unit is securely held in the mounting collar.
3. Turn on the ignition to check the unit for proper operation.
If you have difficulties, consult your nearest authorized professional installer for assistance.
+
CQ-D5501U
55
E
N
G
L
I
S
H
Troubleshooting
55
Check and take steps as described below.
If You Suspect Something Wrong
Warning
If the described suggestions do not solve the problem, it is recommended to take the unit to your nearest authorized Panasonic
Servicenter. The product should be serviced only by qualified
personnel. Please refer the checking and the repair to professionals. Panasonic shall not be liable for any accidents arising
out of neglect of checking the unit or your own repair after your
checking.
¡Do not use the unit in an irregular condition,
for example, without sound, or with smoke or
a foul smell, which can cause ignition or electric shock. Immediately stop using the unit
and consult your dealer.
¡Never try to repair the unit by yourself
because it is dangerous to do so.
■ Common
Problem
Possible cause a Possible solution
The power cord (battery, power and ground) is connected in the wrong way.
aCheck the wiring.
No power to the unit
Sound is not generated.
The demonstration
screen displayed and
no operable
Fuse blows out.
aEliminate the cause of fuse blowout and replace the fuse with new one.
Consult your dealer.
MUTE is set to ON.
aSet MUTE to OFF.
The wiring of speaker lines is not correct, or a break or poor contact arises.
aCheck the wiring in accordance with the wiring diagram. (a Page 51)
There is an electromagnetic-wave generator such as a cellular phone near the
unit or its electrical lines.
aKeep the electromagnetic-wave generator such as a cellular phone away
from the unit and the wiring of the unit. If noise cannot be eliminated
due to the wiring harness of the car, consult your dealer.
Noise
■ Common (continued)
Problem
The contact of the ground lead is poor.
aMake sure that the ground lead is connected to an unpainted part of the
chassis securely.
Noise is made in step
with engine revolutions.
Alternator noise comes from the car.
aChange the wiring position of the ground lead.
aMount a noise filter on the power supply.
Some operations are
not executable.
Some operations are not executable in particular modes such as menu mode.
aRead the operating instructions carefully and cancel the mode. If the
unit is still out of order, consult your dealer.
CQ-D5501U
56
1
Balance/Fader setting is not appropriate.
aReadjust Balance/Fader.
No sound from speaker(s)
There is a break, a short circuit, poor contact or wrong wiring regarding the
speaker wiring.
aCheck the speaker wiring.
The speaker channels
are reversed between
right and left.
The speaker wiring is reversed between right and left.
aPerform the speaker wiring in accordance with the wiring diagram.
The sound field is not
clear in the stereo
mode. Central sound is
not settled.
The plus and minus terminals at right and left channels of speakers are connected reversely.
aPerform the speaker wiring in accordance with the wiring diagram.
The power of the unit
fails unintentionally.
The safety device works.
aConsult your dealer, or your nearest Panasonic Servicenter.
■ Radio
Problem
Possible cause a Possible solution
Antenna installation or wiring of antenna cable is faulty.
aCheck whether the antenna mounting position and its wiring are correct.
In addition, check to see whether the antenna ground is securely connected to the chassis.
Poor reception or
noise
No power is supplied to the antenna amplifier (when using a film antenna,
etc.).
aCheck the wiring of the antenna battery lead.
The number of auto
preset stations is less
than 6.
The number of receivable stations is less than 6.
aMove to an area where receivable stations number is maximum, and try
presetting.
Preset stations cannot
be stored.
The contact of the battery lead is poor, or the battery lead is not always powered.
aMake sure that the battery lead is connected securely, and preset stations again.
■ XM Satellite Radio
Problem
Channel unselectable
56
Possible cause a Possible solution
You cannot operate the unit while the demonstration screen appears.
aPress [DISP] to end the demonstration screen.
If the demonstration screen appears frequently, there is a possibility that poor
contact or wrong wiring arises between the battery lead of the unit and the
battery cable of the car. (The battery lead should be always powered.)
aCheck the battery wiring in accordance with the wiring diagram.
E
N
G
L
I
S
H
Option
Possible cause a Possible solution
No contract with XM Satellite Radio Inc.
aRefer to page 20 of this book and the XM's website to sign up for XM
Radio service.
CQ-D5501U
57
E
N
G
L
I
S
H
57
Troubleshooting (continued)
■ CD
■ DVD/VCD
Problem
No playback or disc
ejected
Sound skipping or
noise
Sound skipping due to
vibration
Disc unejectable
Possible cause a Possible solution
The disc is inserted upside down.
aInsert a disc correctly.
There is a flaw or foreign objects on the disc.
aRemove the foreign objects, or use a flawless disc.
There is a flaw or foreign objects on the disc.
aRemove the foreign objects, or use a flawless disc.
The unit is not sufficiently secured.
aSecure the unit to the console box.
The unit is tilted at over 30˚ in the front-to-end direction.
aMake the angle 30˚ or less.
Something such as a peeled label obstructs the disc coming out.
aPress and hold the [OPEN] for more than 2 seconds when the face plate
is open (disc forced ejection). In case that the disc forced ejection does
not work, consult your dealer.
Problem
No playback or disc
ejected
The CD-R/RWs that are
playable on other
devices are not
playable on this unit.
Sound skipping or
noise
Note:
¡Refer to “Notes on MP3”. (a Page 26)
CQ-D5501U
Problem
No playback or disc
ejected
Sound skipping or
noise
Sound skipping due to
vibration
Disc unejectable
The microcontroller in the unit operates abnormally due to noise or other factors.
aUnplug the power cord and plug it again. In case the unit is still out of
order, consult your dealer.
■ MP3
58
E
N
G
L
I
S
H
Possible cause a Possible solution
The disc has unplayable formatted data.
aRefer to the description about MP3 for playable sound data except CDDA (i.e. music CD).
The playability of some CD-R/RWs may depend on the combination of media,
recording software and recorder to be used even if these CD-R/RWs are
playable on other devices such as a PC.
aMake CD-R/RWs in a different combination of media, recording software
and recorder after referring to the description about MP3.
There is a flaw or foreign objects on the disc.
aRemove the foreign objects, or use a flawless disc. For MP3, refer to the
description about MP3.
Playing VBR (Variable Bit Rate) files may cause sound skipping.
aPlay Non-VBR files.
Possible cause a Possible solution
58
1
There is a flaw or foreign objects on the disc.
aRemove the foreign objects, or use a flawless disc.
The disc has unplayable formatted data.
aRefer to the description about available disc types.
There is a flaw or foreign objects on the disc.
aRemove the foreign objects, or use a flawless disc.
The unit is not sufficiently secured.
aSecure the unit to the console box.
The unit is tilted at over 30˚ in the front-to-end direction.
aMake the angle 30˚ or less.
Something such as a peeled label obstructs the disc coming out.
aPress and hold the [OPEN] for more than 2 seconds when the face plate
is open (disc forced ejection). In case that the disc forced ejection does
not work, consult your dealer.
The microcontroller in the unit operates abnormally due to noise or other factors.
aUnplug the power cord and plug it again. In case the unit is still out of
order, consult your dealer.
The picture does not
appear on the monitor.
Cables are not correctly connected.
aConnect cables correctly.
aStop the car and apply the parking brake.
The picture appears
incorrectly.
The video signal setting of this unit (NTSC/PAL) does not match with the
video signal setting of the connected monitor.
aMake the same setting between this unit and the monitor.
Video CD menu playback does not work.
aVideo CD menu playback works only when playing a video CD that has
the playback control feature.
The picture becomes
distorted while fast forwarding or reversing.
aA certain amount of distortion is normal.
No subtitles appear.
Subtitle must be recorded on the disc, or they will not appear.
aRefer to the guide provided with your disc.
It is difficult to hear small
sounds. (Dolby digital
DVD software only)
aSet “D.Range Compression” to “Minimum”.
Cannot switch the
audio language/subtitle language/angle.
It is not possible to switch if the disc does not have multiple audio languages/subtitle languages/angles recorded on it.
aRefer to the guide provided with your disc.
aSome discs permit switching through a menu screen.
aSometimes, switching angle is possible only with certain scenes.
The audio/subtitle language selected in the
user settings is not
used.
If audio or subtitles in that language are not recorded on the disc, the audio or
subtitles do not switch to that language. (Some discs permit switching
through a menu screen.)
aRefer to the guide provided with your disc.
CQ-D5501U
59
E
N
G
L
I
S
H
59
E
N
G
L
I
S
H
Troubleshooting (continued)
■ DVD/VCD (continued)
Error Display Messages (continued)
Problem
A DVD-R or DVD-RW is
not playable.
Possible cause a Possible solution
The disc is still unfinalized.
aFinalize the disc.
Refer to “Discs that can be Played Back” (a Page 10) or “Notes on
Discs” (a Page 47) for other cases.
■ CD Changer
Display
Possible cause a Possible solution
The disc is dirty or upside down.
The disc has scratches.
Note:
¡Refer to “Discs that can be Played Back”. (a Page 10)
After 5 seconds
To next disc automatically
■ Remote control unit
Problem
The battery is weak.
aReplace the battery with new one.
No disc is in the CD Changer (magazine).
a Insert discs into the changer (magazine).
The aiming direction of the remote control unit is wrong.
aAim the remote control unit at the sensor of the unit and press buttons.
The sensor is exposed to direct sunlight. (The remote control unit may not be
operable when the sensor is exposed to direct sunlight. In such a case, the
system is not faulty.)
aBlock off sunlight to the sensor.
a Eject the magazine.
¡Check the disc.
¡Load the disc again.
No operation by some cause.
a Eject the magazine. If the failure persists, press the reset switch on
the CD changer. If normal operation is not restored, consult your
dealer or the nearest Panasonic Servicenter to ask for repairs.
Possible cause a Possible solution
The battery is inserted in the wrong direction. A wrong battery is inserted.
aInsert a correct battery in the correct direction.
No response to pressing buttons
60
Option
The changer has become disconnected from the unit in the changer mode.
a Verify the wiring.
Note:
¡ Messages in the action and display sections of the error chart vary with changer. Refer to the operating instructions for
the CD changer for details.
Error Display Messages
■ XM Satellite Radio
■ CD/MP3
Display
Possible cause a Possible solution
The disc is dirty.
The disc has scratches.
a Eject the disc.
No operation by some cause.
a Eject the disc. If the disc is not ejected when you press [u] (eject),
unplug the power cord and plug it again. In case the unit is still out
of order, consult your dealer.
Display
Option
Possible cause a Possible solution
Cannot receive XM satellite radio.
a Verify the wiring.
XM antenna unconnected.
a Connect the XM antenna.
XM broadcasts unreceivable because of poor receiving conditions.
a Move to an area where XM broadcasts can be received well.
Channel not in service.
a This channel is not currently in service. Tune to another channel.
The disc is upside down.
The player for some reason cannot read the file you are trying to play.
(File recorded in an unsupported file system, compression scheme, data
format, file name extension, damaged data, etc.)
a Eject the disc. Select a file that the player can read. Check the type
of data recorded on the disc. Create a new disc if necessary.
60
CQ-D5501U
CQ-D5501U
61
E
N
G
L
I
S
H
61
Troubleshooting
(continued)
Error Display Messages (continued)
■ DVD/VCD
Display
Possible cause a Possible solution
The disc is dirty.
The disc has scratches.
a Eject the disc.
The player will not operate for some reason.
a Eject the disc. If the disc is not ejected when you press [u] (eject),
unplug the power cord and plug it again. In case the unit is still out of
order, consult your dealer.
The disc is upside down.
The player for some reason cannot read the file you are trying to play.
(File recorded in an unsupported file system, compression scheme, data
format, file name extension, damaged data, etc.)
a Eject the disc. Select a file that the player can read. Confirm the type
of data recorded on the disc. Create a new disc if necessary.
This disc may not be played in your region.
An attempt was made to play a disc with a region number that was not “1”
or “ALL”.
a Eject the disc.
Specifications
General
Power supply
: DC 12 V (11 V - 16 V), test
voltage 14.4 V, negative
ground
Current consumption
: Less than 2.3 A (CD mode,
0.5 W 4-channels)
Maximum power output
: 50 W x 4 (at 1 kHz)
volume control maximum
Video Signal system
: NTSC/PAL 1.0 Vp-p 75 Ω
RCA pin jack
Tone/SQ adjustment range : SQ Low/Bass: ± 12 dB (at 60
Hz, 80 Hz, 100 Hz, 200 Hz)
SQ Mid: ± 12 dB (at 500 Hz,
1 kHz, 2 kHz, 3 kHz)
SQ High/Treble: ± 12 dB (at
10 kHz, 12 kHz, 15 kHz,
18 kHz)
Speaker impedance
: 4-8Ω
Pre-amp output voltage
: 2 V (CD mode, 1 kHz, 0 dB)
Subwoofer output voltage : 2 V
Pre-amp output impedance : 200 Ω
Subwoofer output impedance : 200 Ω
Dimensions (W x H x D)
: 178 x 50 x 160 mm
{7” x 1 15/16 ”x 6 5/16”}
Weight
: 1.8 kg
{3 lbs. 16 oz}
Discs played
(1) DVD-Video disc
12 cm {5“} single-sided, single-layer/double-layer
12 cm {5“} double-sided, single-layer/double-layer
8 cm {3“} single-sided, single-layer/double-layer
8 cm {3“} double-sided, single-layer/double-layer
FM Stereo Radio
Frequency range
:
Usable sensitivity
:
50 dB quieting sensitivity :
Frequency response
:
Alternate channel selectivity :
Stereo separation
:
Image rejection ratio
:
IF rejection ratio
:
Signal to noise ratio
:
AM Radio
Frequency range
Usable sensitivity
Disc Player
DA converter
Pick-up type
Light source
Frequency response
Signal to noise ratio
Wow and flutter
87.9 MHz - 107.9 MHz
10.2 dBf. (0.9 µV, 75 Ω)
15.2 dBf. (1.6 µV, 75 Ω)
30 Hz - 15 kHz (±3 dB)
75 dB
35 dB (1 kHz)
55 dB
100 dB
62 dB
E
N
G
L
I
S
H
62
: 530 kHz - 1 710 kHz
: 27 dB/µV (22 µV, S/N 20 dB)
:
:
:
:
:
1 bit DAC System
Astigma 3-beam
Semiconductor laser
20 Hz - 20 kHz (CD)
20 Hz - 22 kHz (DVD video
48 kHz sampling)
: 20 Hz - 44 kHz (DVD video
96 kHz sampling)
: 95 dB (IHF, A)
: Below measurable limits
(2) Compact disc (CD-DA, Video CD, CD-R, CD-RW)
12 cm {5“} disc
8 cm {3“} disc
Digital audio output
Disc
DVD
Video CD
CD
MP3
Sounds recording format
Dolby Digital
DTS*
Liner PCM
(48 kHz 16/20/24 bit)
MPEG 1
Linear PCM
Linear PCM
DTS*
Optional digital audio output from connector
Dolby Digital bitstream (1 - 5.1ch)
DTS bitstream (1 - 5.1ch) (The analog portion is not output.)
Liner PCM (2 ch)
(48 kHz sampling/16 bit)
MPEG 1 bitstream
Linear PCM (2 ch) (44.1 kHz sampling/16 bit)
MP3
Linear PCM (2ch) (32 kHz/44.1 kHz/48 kHz sampling/16 bit)
Linear PCM (2 ch) (44.1 kHz sampling/16 bit)
DTS bitstream (1 - 5.1ch) (The analog portion is not output.)
*DTS only works optical outputs.
Above Specifications comply with EIA standards.
Power Output:
18 W RMS x 4 Channels at 4 Ω and ≤ 1%
THD+N
Signal to Noise Ratio:
85 dBA (reference: 1 W into 4 Ω)
62
CQ-D5501U
Note:
¡Specifications and design are subject to modification
without notice due to improvements.
¡Some figures and illustrations in this manual may be
different from your product.
CQ-D5501U
63