1
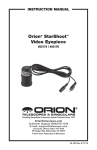
instruction Manual
Orion® StarShoot™ Deep Space
Video Camera
#52185 (NTSC) / #52186 (PAL)
Welcome to a new world of adventure. Your new StarShoot Deep
Space Video Camera (DSVC) is capable of providing pleasing realtime color views of the 110 Messier objects, as well as many other
bright galaxies, star clusters and Nebulas. The Planets, Moon, and
Sun (with full-aperture solar filter) can all be imaged. Create spectacular views on your display device which can be saved for emailing
or printing later. The DSVC can even be used during the day to take
images of terrestrial subjects. You’ll find that this inexpensive, yet
capable and easy to use, camera will enhance all of your journeys
with your telescope.
Please read this instruction manual before attempting to use the
camera or install the software.
Providing Exceptional Consumer Optical Products Since 1975
OrionTelescopes.com
Customer Support (800) 676-1343
E-mail: [email protected]
Corporate Offices (831) 763-7000
89 Hangar Way, Watsonville, CA 95076
© 2011 Orion Telescopes & Binoculars
IN 411 Rev. A 04/11
Parts List
• StarShoot™ Deep Space Video
Camera (DSVC)
• C mount to 1.25" nosepiece
adapter (threaded for 1.25" filters)
• BNC/RCA Adapter
• RCA Cable (10 ft)
• Mains Power Adapter
Figure 2. TV as a displaying device.
• Field Battery Power Adapter
• Orion Video Capture device, video
adapter cables and Software CD
System
Requirements
Figure 1. Camera attached to telescope.
(refer to Figure 1)
Telescope
The DSVC can be used with virtually any telescope that is compatible with 1.25"
format eyepieces. The camera simply is inserted into a focuser in the same way
as a standard eyepiece (Figure 1). If you use a star diagonal, you should remove
it before installing the DSVC. If your telescope does not have enough inward
focus travel, you will need to use an optional 1.25" Barlow lens to extend the
telescope’s focal plane to the camera’s imaging plane (Barlow sold separately).
Mount
While using an equatorial (EQ) mount is recommended to achieve the best
results, one is not absolutely required for imaging with the DSVC.
For obtaining the best deep space and planetary images, however, we do recommend an equatorial mount. Deep space imaging requires the longest exposure and hence requires more accurate tracking.
Planetary imaging requires combining many individual images, and having an
equatorial mount will prevent the planet from drifting out of the field of view of
the camera during the time it takes to acquire the large number of images necessary. A motor drive (single-axis) is recommended too for convenient capture of
sequential images without manual re-adjustment of the telescope’s position.
For the best results a GoTo mount is highly recommended.
Figure 3. Laptop as a displaying/
capture/broadcasting device.
Viewing Devices
The Camera outputs a standard composite video signal that can be displayed
or recorded on any device with composite video input such as a TV, Projector,
Camcorder, DVR or VCR (Figure 2).
Optionally using the included Orion Video Capture Device, camera output can
also be viewed and captured on a PC/Laptop (Figure 3).
(Read the Orion StarShoot Video Capture Device manual for details).
Camera Feature List
• Frame integration for up to 4 seconds exposure (256x Sense up).
• Automatic Gain control for deep space objects.
• Auto Light Control (ALC) shutter speeds from 1/10000 second to 1/100
second.
• Super Digital Noise Reduction virtually eliminates all hot pixels and the need
for dark frames.
• Color Bar display for display calibration and testing of video signal.
• 2X digital zoom feature.
• Customizable Title text display.
• Light & Dark Gamma modes.
• High and Mid sharpness enhancement modes.
• Horizontal and vertical mirror functions.
• Auto white balance mode.
• Wide and Narrow Auto Tracking White Balance (ATW) modes aid in light
polluted skies.
• Auto, Color and Black and White day/night modes.
2
3
• Customizable cross hairs enable the Deep Space Video Camera to be used
with a finder scope and aid in centering objects.
Getting Started During Daylight
We recommend using the DSCV for the first time during the day. This way, you
can become familiar with the camera and its functions without having to stumble
around in the dark. Set up your telescope and mount so the optical tube is pointing at an object at least a couple of hundred feet away. Insert an eyepiece and
focus as you normally would.
To obtain first images with the DSCV, follow these step-by-step instructions:
1. Remove the lens cap and unscrew black CS ring mount from camera.
2. Screw the 1.25" nosepiece adapter onto the gold camera lens threads.
3. Connect the BNC/RCA adapter to the BNC Video Out plug on the back of
the camera.
4. Connect one end of the RCA cable to the BNC/RCA adapter.
5. Connect the other end of the RCA video cable directly to your viewing device
such as TV RCA input.
6. To connect the camera to the telescope, simply replace the telescope’s 1.25"
eyepiece with the camera. Make sure the securing thumbscrew on the focuser
drawtube is tightened after the camera is inserted.
7. You will now need to refocus the camera for the centered object. Focusing
will be the hardest thing to learn in the initial stages. If you are starting out
in daylight, as is recommended, you may need to turn the exposure and/
or brightness control of the camera down before attempting to focus. (See
Camera Controls)
8. Look at the Live Video Window on the viewing device screen and adjust
the focus knob accordingly to determine best image focus.
9. Image orientation can be changed by rotating the camera within the focuser
drawtube. Simply loosen the thumbscrew on the drawtube and rotate
the camera until the desired image orientation is achieved. Retighten the
thumbscrew on the focuser drawtube when done. You may need to slightly
refocus (using the telescope’s focus knob) if the focuser drawtube has moved
a bit inward or outward when the camera was rotated.
10. You have now viewed your first images with the DSVC! This simple method of
imaging is exactly how the camera is used to capture terrestrial subjects during
daylight hours. Close-up images of birds and other wildlife or faraway vistas
can all be obtained in this way with the DSVC. Solar images can also be taken
during the day with a full-aperture solar filter over the front of the telescope.
11. Take some time to use the camera during the day to become familiar and
comfortable with their basic operation. For best results, you can optimize
4
your images with the camera
controls.
Camera Field of View
The camera’s field of view is approximately equivalent to the field of view
through the telescope when looking
through a typical (i.e. not wide-field)
6mm focal length eyepiece (Figure 4).
Camera Controls
All camera features are controlled
via the OSD menu (ON SCREEN
DISPLAY). Selections are made using
the navigational Menu buttons (up/
down/left/right) and select button (center) (Figure 5).
Figure 4. Comparison field of view
between DSVC (rectangle) and standard
6mm Plössl eyepiece (circle).
Pressing the center button for a short
period of time will bring up the OSD
menu (Figure 6).
Different camera settings are required
depending upon the targets observed.
Daytime Terrestrial, Lunar and planetary imaging requires short exposure times whilst deep space objects
require much longer exposure times.
Figure 5. Camera rear view.
WHITE BAL. (white balance).
CCD security cameras feature this
adjustment to compensate for ambient
light color. Since there’s a color difference between standard light bulb light
and sunlight, white balance adjusts to
ensure a more realistic picture.
Figure 6. Main OSD menu screen.
There are two white balance control
modes, namely Auto tracking white
balance (ATW) and Auto White Balance (AWB).
AWB – Auto White Balance
AWB is a preset type function whereby white color in the scene is detected and
white balance is automatically adjusted, then the setting status is stored. It automatically memorizes the adjusted white balance value every time the AWB but-
5
FLC – Flickerless mode
ON or OFF
ton is turned on. ATB is most suitable
for environment with little change in
light source.
Flickerless mode is used for suppressing the flicker of light (illuminating the captured scene) produced depending upon the frequency of the power source. In
50Hz area, the CCD exposure time is 1/50sec and if NTSC camera is used with
working frequency of 60Hz, there will be flicker on the screen. Same will happen
in using PAL camera in a 60Hz area. The shutter speed is fixed to 1/100 sec for
the 50 Hz area and 1/120 sec for the 60 Hz area to reduce the flicker of the fluorescent light.
ATW – Auto Tracking Balance
MODENARROW (darkness adjustment)
WIDE (Light adjustment)
ATW functions by detecting white color
in the scene at a color temperature
from 3200 to 10000 Kelvin.
Figure 7. ALC Shutter speed menu.
AGC – automatic GAIN Control
ON or OFF
The color temperature is being monitored continuously and the white balance is set automatically by internal
controller.
The AGC function provides a clear image in low light condition. This controls
an amplifier that is used to boost the video signal when the light dims so as to
increase the camera’s sensitivity. Normally AGC will be turned OFF for Lunar,
Planetary, Solar (with full-aperture solar filter) and Terrestrial imaging and turned
ON for low light deep space objects.
ATW is most suitable for viewing
objects with changing color temperature and which can make the picture
color look more natural. This mode is
also helpful in light polluted skies.
ALC/AES
ALC – Auto Light Control
Figure 8. Sense Up menu.
SHUTTER
OFF, 1/100, 1/250, 1/500, 1/1000, 1/2000, 1/4000, 1/10000
Automatic Light Control (ALC) indicates the image sensor’s ability to automatically adjust in diverse lighting conditions to yield the most vivid video image possible (Figure 7). Shutter speeds can be selected for Terrestrial, Lunar, Planetary
and Solar (with full-aperture solar filter) imaging.
For low light deep space objects SHUTTER should be turned OFF.
AES – Auto Electronic Shutter
AES is used when a manual or fixed iris lens is fitted and the shutter speed will
respond to the amount of light to keep the signal output at optimum level. AES
allows changing the iris level automatically without using the auto iris lens.
Note: The AES should be switched off when an Auto Iris Lens is fitted. AES is
not normally used for astronomy.
6
Note: FLC is not normally used for astronomy.
SENSE UP
OFF, x2, x4, x8, x16, x32, x64, x128, x256
Sense-Up: An image processing technology which allows user selectable digital
slow shutter speeds in order to allow extra light into a camera thereby providing
higher sensitivity in low light conditions (Figure 8). The minimum frame integration (x2) is 1/32 of a second for NTSC (1/40 for PAL). The maximum frame integration (x256) is 4 seconds for NTSC (5 seconds for PAL).
Set SHUTTER SPEED (ALC) to OFF for frame integration.
For bright solar system objects such as moon, planets sense up would be set at
a minimum or off.
Low light objects such as galaxies and nebulae require a high value sense up
setting such as x256 which gives a total exposure time of up to 4 seconds NTSC
(5 seconds PAL).
BACK LIGHT – Background Light Compensation
Background Light Compensation is used when there is a very bright background
with very dim front image.
Note: BACK LIGHT is not normally used for astronomy.
7
COLOR BAR
The Color Bar (Figure 13) is a useful
feature to test video output from camera to your viewing device and can be
used to test signal before and/or after
camera is attached to telescope.
GAMMA
TYPE A – 0.45 Gamma (Lighter)
TYPE B – 1.0 Gamma (Darker)
MASK
Figure 10. OPTION sub menu.
ZOOM
Digital zoom x2 – ON or OFF
ENHANCER
MID Sharpness or HIGH Sharpness
DAY/NIGHT
AUTO – Automatically switches to
COLOR for bright objects and BLACK
& WHITE for low light object.
Figure 9. Using MASK option for custom on-screen crosshairs.
Up to 4 rectangular masks that can be resized and positioned anywhere on
screen can be useful to make a cross-hair to aid in centering objects on screen
(Figure 9). This feature enables the Deep Space Video Camera to be used as a
finderscope camera.
OPTION
The option menu contains features that will be modified less frequently than the
main menu features. (Figure 10).
TITLE
Use UP/DOWN/LEFT/RIGHT and CENTER buttons to select up to 20 characters
to be used as an on-screen title (Figure 11 & 12.).
H-REV
Horizontal Mirror Function – Image is flipped in the Horizontal axis.
DAY/EXT – COLOR mode always.
Figure 11. TITLE edit menu.
NIGHT – BLACK & WHITE mode
always.
PRIORITY
PRIORITY (AGC/SENSE) controls the
auto-darkening on bright objects.
Set to AGC for low light deep space
objects.
RETURN
Select to return to main menu.
Figure 12. TITLE being used with live
image.
EXIT
SAVE – exit and save current settings.
PRESET – exit and default to factory
defined settings.
V-REV
Vertical Mirror Function – Image is flipped in the Vertical axis.
Figure 13. Color Bar Test.
8
9
Typical Camera
Settings
at the terminator (that tiny thin line
between the shadow and light, see
Figure 14). To get more of the moon
in the image, a focal reducer will need
to be used. For close-ups of craters
use a Barlow lens (see “Using Focal
Reducers and Barlow Lenses”).
Terrestrial, Lunar, Planetary
and Solar.
WHITE BAL. - ATW
ALC/AES
- ALC (SHUTTER
1/10000 to 1/100)
AGC
-OFF
SENSE UP
-
Figure 14. The moon’s surface detail
looks the best along the terminator.
OFF
Low Light Deep Space Objects.
WHITE BAL. - AWB/ATW
ALC/AES
-
ALC (SHUTTER OFF)
AGC
-ON
SENSE UP
-
ON (x2 to x256)
Try several different settings to get a feel of how the camera controls work and
affect the resultant image on the computer screen. The SHUTTER speed (ALC)
and SENSE UP controls are the ones you will use the most.
The telescope being used, seeing conditions, and object being imaged will dictate how these camera controls should be set.
Astronomical Imaging
Now that you’re familiar with basic camera and software operation, it’s time to
take the DSVC out at night under the stars to capture some astronomical images. We recommend starting with the Moon, as it is easy to acquire into the camera’s field of view, and typically does not require stacking of multiple exposures
as planetary images do.
Lunar Imaging
Imaging the Moon is much like imaging terrestrial objects during the day. Since
the exposure is very short, it is not critical that the telescope be precisely polar
aligned.
When the moon is past first quarter, it is hard to get detail due to the tremendous glare off of the lunar surface. Most detail, even on a thin crescent, will be
10
Planetary Imaging
The best planetary images will be
obtained by stacking (combining)
many individual images in order to
reduce noise, atmospheric effects
and improve image contrast, brightness, and detail (Figure 15). This
is accomplished using one of the
many post processing software tools
such as Registax or AVIStack. (see
SOFTWARE)
Figure 15. Planetary imaging stacking.
A great way to obtain images for
Figure 16. Globular cluster M13 using
stacking is to take several seconds
256x sense up, AGC on and ALC shutter
of video of the planet, then break the
off.
video into individual frames for stacking. Since the DSVC has a maximum
frame rate of 30 frames per second for NTSC (25 frames per second for PAL),
you can literally obtain hundreds of images for stacking in seconds! You save
time by taking one video instead of dozens of individual pictures!
Since you will be taking multiple images over a period of time, it is important you
have a decent polar alignment in order to keep the planet within the field of view
of the camera. To this end, having a motor drive (at least single-axis) will also be
helpful. Otherwise, you will periodically need to rotate the R.A. slow-motion knob
to keep the planet within the camera’s field.
Deep Space Imaging
Deep space imaging requires the longest exposure times and therefore having
a good polar alignment and accurate tracking is critical to keep the target on
screen.
Multiple Deep space images can also be stacked and/or tuned via software in
order to reduce noise, atmospheric effects and improve image contrast, brightness, and detail.
11
Solar Imaging
Solar imaging requires short exposure
times and the use of a solar filter or
dedicated solar scope (Figure 17).
Terrestrial Imaging
Similar to Lunar, Solar and Planetary
imaging, terrestrial imaging requires
short exposure times.
Utility software such as HandyAVI can
be used to detect motion and hence
automatically record detected objects
when user is not present (Figure 18).
Broadcasting Services
The Night Skies Network Is a free
service that allows astronomers with
video cameras to broadcast their live
views over the Internet.
Figure 17. Using a full aperture solar
filter to image sunspots.
Software Installation
Select each piece of software on the
CD launcher to be directed to a website to download the latest software.
Software
The Orion Video Capture Device
included with the DSVC is compatible
with the following highly recommended
software:
Image Processing Software
Figure 19. Orion Video Capture Device
CD web links menu.
For detailed information on each piece of software consult the websites of each
software provider. Tutorials and user groups can be found online also.
Figure 18. Using motion detection
software to capture wildlife.
Image Processing Software such as RegiStax, AviStack and MaximDL can Align
and Stack (combine) hundreds of individual images contained within your AVI
into a single resultant image to help reduce noise and atmospheric effects and
also perform some additional image processing to bring out subtle details or to
make the image appear more pleasing overall.
Utility Software
Utility programs such as HandyAVI and UFO Capture can track and detect
motion from meteors and atmospheric phenomena and automatically save, email
and FTP images and movie files to a website.
HandyAVI also has features to allow time lapse photography and stop motion
animation.
12
Website links are provided in the
launcher on the Video Capture Device
CD to download popular astronomy
software that is compatible with the
DSVC and Orion Video Capture
Device (Figure 19).
Tips
Focusing
One of the hardest things to do in planetary imaging is achieving good focus. You
can make this process easier by simply watching the Live Video window to focus.
Depending upon the viewing conditions you may notice that the image goes in
and out of focus, this is due to viewing conditions. This is to be expected and
one of the reasons why post processing software can bring out the best in your
captured images. Focus as best as possible with the average frame being at
best focus to ensure more in focus frames than out of focus. Image processing
software can then be used to select the best frames to combine for best results
and can also reject the poorest frames.
Refocus often throughout your imaging session. This ensures at least some of
your images will have an excellent focus. It is also not uncommon for telescope
movements to alter the focus slightly, so be sure to refocus for any new astroimaging targets.
Choosing a Site for Astro-Imaging
Once you have a focused image, you may find your image shifting and washed
out. This can be caused by many environmental factors. Poor seeing (movement
of molecules in the air, such as heat rising) and poor transparency (moisture,
smoke, or other sky contaminants) will all serve to reduce image quality. That is
13
why most major astronomical telescopes are on high mountains in thin air, to get
above much of the seeing and transparency problems. Also, wind will move your
telescope and affect images. Your eyes viewing through an eyepiece can change
slightly to compensate for disturbances like these, but the camera cannot. Keep
these factors in mind when choosing an observing site for astronomical imaging.
For the best astro-images, we recommend finding a location with dry air, some
altitude, and away from city or streetlights. Even a nearby hilltop in the countryside
can provide better viewing conditions than many convenient backyard locations.
Using Focal Reducers and Barlow Lenses
Focal reducers serve to decrease the focal length of your telescope. This
increases the field of view and image brightness seen by the camera (decreases
camera magnification). This can be useful for obtaining images of wider objects,
such as the full Moon or a landscape vista.
Barlow lenses, or other tele-extenders, increase the focal length of your telescope, which makes the camera field of view narrower (increases camera magnification). This is useful for high-power planetary images. Keep in mind that
when the focal length is doubled, the image will become four times dimmer, so a
longer exposure may be necessary.
(Focal Reducers and Barlow lenses available through Orion, check the catalog
or www.OrionTelescopes.com for more information).
Filters
For some types of imaging, you may want to use color filters to bring out subtle
details. Any standard Orion 1.25" filter will thread into the front of the DSVC’s
barrel. Try using different color filters on a planet to see which filters help best
show planetary details.
Neutral-density Moon filters and variable-polarizer filters are useful to reduce the
glare from the moon. They can also be used to reduce the glare from Venus.
(Available through Orion, check the catalog or www.OrionTelescopes.com for
more information).
Things to Do
Group Viewing
• Show your live view to a group of astronomers at a star party with a TV,
projector or laptop/PC.
Internet broadcasting
• Broadcast your live views over the internet using the video capture device
and the free Night Skies network service.
Deep Space
• Try your own messier marathon to see how many of the messier objects you
can see in one evening
• Do you know your doubles? image double stars
Moon
• Image and identify the craters and mares.
• Image the different phases from New moon to Full Moon
• Image the detail at the terminator
• Create a moon mosaic using multiple lower resolution images to create one
high resolution image
Solar System
• Take a movie of the position of the great red spot of Jupiter during the Gas
Giant’s <10 hour day.
Solar Filter
Warning: Always use a full aperture solar filter when viewing the sun.
• Image Jupiter’s moons and their shadows as they transit across the Gas Giant
With a properly fitting full-aperture solar filter attached to your telescope, you can
use the DSVC to take images of the Sun and the sunspots on its surface.
• Create a time lapse movie of a distant planet moving at a different rate than
the background stars
(Filters available through Orion, check the catalog or www.OrionTelescopes.com
for more information).
• Using a full aperture Solar Filter to image sunspots
Flip Mirror
As easy as flipping a switch, the Imaging Flip Mirror enables the astrophotographer to find, center and focus a target visually with a 1.25" telescope eyepiece,
then photograph it with a CCD camera. All without swapping out any equipment.
It’s a real time saver, making the normally tedious task of focusing with the CCD
camera alone easier and quicker.
14
• Follow in Galileo’s footsteps by Imaging the different phases of Venus
• Capture rare astronomical events such as Venus or Mercury transiting our
nearest star
• Create a movie of the International space station as it transits across the Sun
• Automatically detect and capture a movie of a meteor and automatically
send image/s via email or a movie via FTP to a website
• Create a time lapse movie of an asteroid or comet moving at a different rate
than the background stars
15
Recommended Reading
(Books available through Orion, check the catalog or
www.OrionTelescopes.com for more information).
Specifications
Sensor:
Mintron Color sensor 72S85HN-EX-R (NTSC);
72S85HP-EX-R (PAL)
TV System:
NTSC/PAL Composite Video out (BNC/RCA)
Sensor size:
1/2"
Number of pixels:
0.4 megapixel resolution
NTSC – 768 x 494 (effective) 811 x 508 (total)
PAL – 752 x 582 (effective) 795 x 596 (total)
Pixel size:
8.4µm x 9.8µm
Video frame rate:
NTSC: 30 frames/second; PAL: 25 frames/second
A/D conversion:
8 bit
IR filter:
Yes
Barrel:
1.25" threaded for filters
Operation Temperature: -20°C to 50°C
Power Supply:
DC12V 150mA
One-Year Limited Warranty
This Orion StarShoot Deep Space Video Camera is warranted against defects in materials
or workmanship for a period of one year from the date of purchase. This warranty is for the
benefit of the original retail purchaser only. During this warranty period Orion Telescopes &
Binoculars will repair or replace, at Orion’s option, any warranted instrument that proves to
be defective, provided it is returned postage paid to: Orion Warranty Repair, 89 Hangar Way,
Watsonville, CA 95076. If the product is not registered, proof of purchase (such as a copy of
the original invoice) is required.
This warranty does not apply if, in Orion’s judgment, the instrument has been abused,
mishandled, or modified, nor does it apply to normal wear and tear. This warranty gives
you specific legal rights, and you may also have other rights, which vary from state to state.
For further warranty service information, contact: Customer Service Department, Orion
Telescopes & Binoculars, 89 Hangar Way, Watsonville, CA 95076; (800) 676-1343.
OrionTelescopes.com
89 Hangar Way, Watsonville, CA 95076
Customer Support Help Line (800) 676-1343
© 2011 Orion Telescopes & Binoculars