1
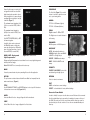
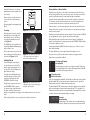
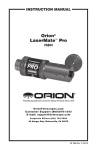
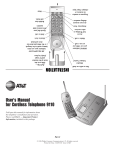
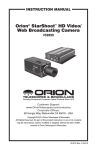
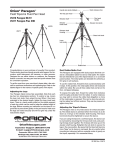
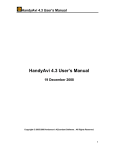
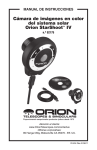
INSTRUCTION MANUAL
Orion® StarShoot™ AllSky Camera
#52187 (NTSC)
#52188 (PAL)
Providing Exceptional Consumer Optical Products Since 1975
OrionTelescopes.com
Customer Support (800) 676-1343
E-mail: [email protected]
Corporate Offices (831) 763-7000
89 Hangar Way, Watsonville, CA 95076
© 2011 Orion Telescopes & Binoculars
IN 416 Rev. A 06/11
Parts List
Orion StarShoot AllSky Camera (SSASC)
• Allen Key (For Vandal Proof screws)
• 50 ft Dual RCA/Power extension Cable
• BNC/RCA Adapter
• Mains Power Adapter
• Field Battery Power Adapter
• Orion Video Capture device, video adapter cables and Software CD
• Orion HandyAVI® Special Edition software CD
Practical Uses of the All-Sky Camera
Astronomer’s Sky Monitor
Figure 1. The Orion StarShoot AllSky Camera and included items.
Welcome to a new world of adventure. Your new Orion StarShoot AllSky Camera (SSASC) is capable of providing 180
degree color views of the night skies from horizon to horizon
in real-time. The SSASC can even be used during the day to
take images of daytime skies.
Primarily designed to monitor sky conditions, the SSASC
can also capture meteors, satellites, International Space
Station, atmospheric phenomena and much more.
With the included Orion Video Capture device the SSASC can be used to broadcast your real time images across the internet.
The included Orion HandyAVI® special edition software features time-lapse photography, meteor detection and ability to send images via email or FTP images/
movie to a website.
The weather proof dome housing makes it possible to permanently mount the
SSASC making it an ideal tool for observatories, schools and home use (mounting options sold separately).
Please read this instruction manual before attempting to use the camera or
install the software.
2
• Use to check sky conditions at remote locations by broadcasting the realtime views over the internet via email, website and/or the free night skies
network service
• See the Milky Way
• Constellations and planets can be easily identified
Meteor/Satellite Detector
• Automatically detect and capture meteors using the included Orion
HandyAVI® Special Edition software.
• Images and movies of detected objects can be automatically downloaded to
websites via FTP or email.
All-Weather Camera
• Create time-lapse movies of cloud movements
• Image cloud types
• Image storms, lightning, rainbows, sunsets, auroras
Other
• Create a 24 hour time-lapse from dusk until dawn
• Take images at automated times to capture analemma and retrograde
movements of the moon and bright planets over long periods of time.
• Take the portable all-sky camera to star parties, air shows, balloon festivals,
mountain ranges, cities with landmarks etc. to make interesting time-lapse
movies.
3
• Horizontal and vertical mirror functions.
• Auto white balance mode.
• Wide and Narrow Auto Tracking White Balance (ATW) modes aid in light
polluted skies.
• Auto, Color and Black and White day/night modes.
Lens Feature List
• High Quality Fujinon Fish Eye Lens
• Vari-focal (1.4mm->3.1mm) with horizontal field angle of 185-94°
Figure 2. TV as a displaying device.
Figure 3. Laptop as a displaying/
capture/broadcasting device.
Viewing Devices
The SSASC outputs a standard composite video signal that can be displayed
or recorded on any device with composite video input such as a TV, Projector,
Camcorder, DVR or VCR (Figure 2).
Optionally using the included Orion Video Capture Device, camera output can
also be viewed and captured on a PC/Laptop (Figure 3). You can even broadcast your views over the internet using the included Orion Video Capture device
and free online service Night Skies Network.
(Read the included Orion Video Capture Device manual for details).
Camera Feature List
• 768 x 494 (NTSC), 752 x 582 (PAL) screen resolution
• 24 bit color
• 30hz Video frame rate (NTSC), 25hz (PAL)
• Built-In ND filter supporting super sensitive cameras
• DC Auto-Iris for day viewing
Housing Feature list
• Weather proof IP66 certified
• Distortion free acrylic dome bubble window
• Heater and fan to prevent fogging of dome bubble cover
Getting Started During Daylight
We recommend using the SSASC for the first time during the day. This way, you
can become familiar with the camera and its functions without having to fumble
with controls and settings around in the dark.
Place the SSASC on a stable flat surface outdoors. The SSASC can be tested
indoors but focusing is best done outside with a real sky.
• Waterproof Wired Remote control
Plug the male power jack (Red) of the Dual Power/Video extension cable into the
SSASC and plug the mains adapter jack into the female power jack (Red).
• Frame integration for up to 4 seconds exposure (256x Sense up).
Plug the mains adapter into a wall socket. The device should now have power.
• Automatic Gain control.
When used with the included field battery power adapter and a field battery
(such as the Dynamo Pro available through Orion) the SSASC becomes a more
portable device.
• Auto Light Control (ALC) shutter speeds from 1/10000 second to 1/100
second.
• Super Digital Noise Reduction virtually eliminates all hot pixels.
• Color Bar display for display calibration and testing of video signal.
• 2X digital zoom feature.
• Customizable Title text display.
• Light & Dark Gamma modes.
• High and Mid sharpness enhancement modes.
4
• Wide aperture of f/1.4, optimizing the performance at low lighting intensity
Plug the Video jack (Yellow) that is closest to the male power jack (Red) into the
SSASC and the other end into a TV.
Power the TV and select the input channel that the video cable was plugged into.
A live video should now appear on screen. The screen will be black until the
camera controls are activated.
To adjust camera settings the SASC comes attached with a waterproof remote
control (Figure 4).
5
Camera Controls
ALC/AES
ALC – Auto Light Control
The SSASC camera settings will initially be set to factory default values.
SHUTTER
All camera features are controlled via
remote control and the OSD menu
(On Screen Display). Selections are
made using the navigational Menu
buttons (up/down/left/right) and select
button (center) of the remote control
(Figure 4).
OFF, 1/100, 1/250, 1/500, 1/1000,
1/2000, 1/4000, 1/10000
Figure 4. The 5 button remote control.
Pressing the center button for a short
period of time will bring up the OSD
menu (Figure 5).
WHITE BAL. (white balance).
CCD security cameras feature this
adjustment to compensate for ambient
light color. Since there’s a color difference between standard light bulb light
and sunlight, white balance adjusts to
ensure a more realistic picture.
Automatic Light Control (ALC) indicates the image sensor’s ability to
automatically adjust in diverse lighting
conditions to yield the most vivid video
image possible (Figure 6. Shutter
speeds can be selected for different
lighting conditions.
Figure 6. ALC Shutter speed menu.
For the optimum results at night SHUTTER should be turned OFF.
Figure 5. Main OSD menu screen.
AES – Auto Electronic Shutter
AES is used when a manual or fixed iris lens is fitted and the shutter speed will
respond to the amount of light to keep the signal output at optimum level. AES
allows changing the iris level automatically without using the auto iris lens.
Note: The AES should be switched off when an Auto Iris Lens is fitted hence
AES is not used in this application.
There are two white balance control modes, namely Auto tracking white balance
(ATW) and Auto White Balance (AWB).
FLC – Flickerless mode
ON or OFF
AWB – Auto White Balance
AWB is a preset type function whereby white color in the scene is detected and
white balance is automatically adjusted, then the setting status is stored. It automatically memorizes the adjusted white balance value every time the AWB is
selected. AWB is most suitable for environment with little change in light source.
ATW – Auto Tracking Balance
Flickerless mode is used for suppressing the flicker of light (illuminating the captured scene) produced depending upon the frequency of the power source. In
50Hz area, the CCD exposure time is 1/50sec and if NTSC camera is used with
working frequency of 60Hz, there will be flicker on the screen. Same will happen
in using PAL camera in a 60Hz area. The shutter speed is fixed to 1/100 sec for
the 50 Hz area and 1/120 sec for the 60 Hz area to reduce the flicker of the fluorescent light.
NARROW (darkness adjustment)
Note: FLC is normally set to ON.
WIDE (Light adjustment)
AGC – Automatic GAIN Control
ON or OFF
ATW functions by detecting white color in the scene at a color temperature from
3200 to 10000 Kelvin. The color temperature is being monitored continuously
and the white balance is set automatically by internal controller.
ATW is most suitable for viewing objects with changing color temperature and
which can make the picture color look more natural. This mode is also helpful in
light polluted skies.
6
The AGC function provides a clear image in low light condition. This controls
an amplifier that is used to boost the video signal when the light dims so as to
increase the camera’s sensitivity.
SENSE UP
OFF, x2, x4, x8, x16, x32, x64, x128, x256
7
COLOR BAR
The Color Bar (Figure 11) is a useful
feature to test video output from camera to your viewing device.
Sense-Up: An image processing technology which allows user selectable
digital slow shutter speeds in order to
allow extra light into a camera thereby
providing higher sensitivity in low light
conditions (Figure 7).
GAMMA
TYPE A – 0.45 Gamma (Lighter)
The minimum frame integration (x2) is
1/32 of a second for NTSC (1/40 for
PAL).
The maximum frame integration
(x256) is 4 seconds for NTSC (5 seconds for PAL).
TYPE B – 1.0 Gamma (Darker)
Figure 7. Sense Up menu.
Set SHUTTER SPEED (ALC) to OFF
for frame integration.
Low light objects such as stars and
the Milky Way require a high value
sense up setting such as x256 which
gives a total exposure time of up to 4
seconds NTSC (5 seconds PAL).
Figure 8. OPTION sub menu.
BACK LIGHT – Background
Light Compensation
Background Light Compensation is used when there is a very bright background
with very dim front image.
Note: BACK LIGHT is not normally used for astronomy.
ZOOM
Digital zoom x2 – ON or OFF
The Digital zoom is a useful feature to
aid focusing.
ENHANCER
MID Sharpness or HIGH Sharpness
DAY/NIGHT
AUTO – Automatically switches to
COLOR for bright objects and BLACK
& WHITE for low light object.
DAY/EXT – COLOR mode always.
PRIORITY
PRIORITY (AGC/SENSE) controls the
auto-darkening on bright objects.
OPTION
The option menu contains features that will be modified less frequently than the
main menu features. (Figure 8).
RETURN
Select to return to main menu.
H-REV
Horizontal Mirror Function – Image is flipped in the Horizontal axis.
V-REV
Vertical Mirror Function – Image is flipped in the Vertical axis.
8
Figure 10. TITLE being used with live
image.
NIGHT – BLACK & WHITE mode
always.
MASK
A security camera feature for privacy masking. Not used in this application.
TITLE
Use UP/DOWN/LEFT/RIGHT and CENTER buttons to select up to 20 characters
to be used as an on-screen title (Figure 9 & 10).
Figure 9. TITLE edit menu.
EXIT
SAVE – exit and save current settings.
Figure 11. Color Bar Test.
PRESET – exit and default to factory defined settings.
Removal of Dome Bubble
In order to initially focus your view, the dome cover will first need to be removed.
Use the included allen key to unscrew the 4 vandal-proof screws on the top of
the SASC. Be careful not to hit the acrylic dome with the allen key, screws or
other hard objects. Also be careful not to lose the non standard Vandal-proof
allen key.
9
Carefully lift the dome cover directly
upwards from the base and place in a
safe location.
Remove the lens cap. Be careful not
to touch the lens to avoid having to
clean it.
FAR
NEAR
WIDE
TELE
Using the allen key, gently tighten each screw until a small bit of resistance is
felt, then move onto the next screw. Repeat for all screws. Next tighten each
screw more firmly and evenly to help ensure a weatherproof seal.
(Cleaning supplies sold separately by
Orion)
Focusing
Now using your live view as a guide,
adjust the zoom (focal length) and
then adjust the focus of the fish eye
lens using the thumbscrews on the
side (Figure 12).
Figure 12. The SSASC fish eye lens.
2X Digital Zoom
Use the 2X digital zoom feature in
the options menu as focus aid. This
mode is most useful at night to focus
on stars. Turn off the 2X digital zoom
when finished focusing.
When installing at night, follow the same focus procedure as in daytime. Be
patient as focusing on stars in longer exposure mode (SENSEUP X256) will take
~4seconds to update on screen.
A permanently installed SSASC should only require you to set the focus once
when initially installing.
The Dome Bubble cover can be wiped clean with a damp soft cloth.
Figure 13. At 1.4mm more sky is seen
(~181 degree angle of view). Image is
smallest and low detail resolution.
Focusing can be difficult with longer
exposure settings. If possible set the
camera to a faster exposure time
(SENSEUP x2) whilst focusing.
Figure 14. At 3.1mm less sky is seen
At night longer exposures are neces(~90 degree angle of view). Image is larger
sary (SENSEUP X256) in order to
and higher detail resolution.
see as many stars as possible under
the given conditions. Therefore more
patience is required when focusing to see the adjusted result on screen (~4 seconds).
After focusing, the dome cover can now be placed back onto the base.
10
Take some time to use the camera during the day to become familiar and comfortable with its basic operation. For best results, you can optimize your images
with the camera controls.
Now that you’re familiar with basic camera operation, it’s time to take the SSASC
out at night under the stars to capture some astronomical images.
The SSASC lens has a variable focal
length from 1.4mm to 3.1mm giving a
range of field of view.
As the camera user, you get to decide
which setting is preferred for your particular needs (Figures 13, 14).
Re-Installation of Dome Bubble
Carefully line up the groove on the inside of the dome cover with the notch on
the base and gently allow the cover to drop into place. The dome cover should
now be seated evenly and all 4 screws lined up ready for installation.
Be careful not to scratch the surface when cleaning or moving the device.
(Spare domes are available at Orion)
Viewing and Capture
on Laptop/PC
View and capture your skies on a laptop or desktop PC by using
the included Capture Device. (See Video Capture Device Manual
for installation and usage instructions).
Time-lapse and
Meteor detection
Install the included Orion HandyAVI® Special Edition software by selecting “install
Orion HandyAVI SE” from the launcher menu. Instructions are located on the
launcher menu and in the software drop down help menu.
The Orion HandyAVI® SE software features Timelapse, Meteor detection and the
ability to send images via email and movies/images via FTP to a website. The
software also includes features such as timestamps, Scanning AVI files for meteors, frame selection and automated time/day recording.
Internet
Broadcasting
Broadcasting on the internet can be accomplished using
the Orion Video Capture Device and the free astronomy specific internet broad-
11
casting service “Night Skies Network” (NSN). Visit www.nightskiesnetwork.com
for details.
Specifications
Sensor:
Mintron Color sensor
52K9BHN-EXCS (NTSC); 52K9BHP-EXCS (PAL)
TV System:
NTSC/PAL Composite Video out (BNC/RCA)
Sensor size:
1/2”
Extension cables
The included 50 foot dual Power/Video cable can be further extended with an
additional cable (sold separately by Orion)
Number of pixels:
0.4 megapixel resolution
NTSC – 768 x 494 (effective) 811 x 508 (total)
PAL – 752 x 582 (effective) 795 x 596 (total)
Pixel size:
8.4µm x 9.8µm
Replacement Dome Cover
Replacement dome covers are also available for the SSASC (sold separately by
Orion).
Video frame rate:
NTSC: 30 frames/second; PAL: 25 frames/second
A/D conversion:
8 bit
IR filter:
Yes
Typical Camera Settings
Operation Temperature:
-20°C to 50°C
Power Supply:
DC12V 150mA
Mounting options
As well as being a portable device, the SSASC can be permanently installed
on buildings with additional accessories. (Mounting options sold separately by
Orion)
For best daytime images
WHITE BAL.
ATW
ALC/AES
ALC (SHUTTER 1/10000 to 1/100)
AGCOFF
SENSE UP
OFF
For best nighttime images
WHITE BAL.
AWB/ATW
ALC/AES
ALC (SHUTTER OFF)
AGC
SENSE UP
ON
ON (x2 to x256)
For best dual day/night images
WHITE BAL.
AWB/ATW
ALC/AES
ALC (SHUTTER OFF)
AGCON
SENSE UP
ON (x2 to x256)
Try several different settings to get a feel of how the camera controls work and
affect the resultant image on the computer screen. The WHITE BAL, SHUTTER
speed (ALC) and SENSE UP controls are the ones you will use the most.
12
13
One-Year Limited Warranty
This Orion StarShoot AllSky Camera is warranted against defects in materials or workmanship for a period of one year from the date of purchase. This warranty is for the benefit of
the original retail purchaser only. During this warranty period Orion Telescopes & Binoculars
will repair or replace, at Orion’s option, any warranted instrument that proves to be defective,
provided it is returned postage paid to: Orion Warranty Repair, 89 Hangar Way, Watsonville,
CA 95076. If the product is not registered, proof of purchase (such as a copy of the original
invoice) is required.
This warranty does not apply if, in Orion’s judgment, the instrument has been abused,
mishandled, or modified, nor does it apply to normal wear and tear. This warranty gives
you specific legal rights, and you may also have other rights, which vary from state to state.
For further warranty service information, contact: Customer Service Department, Orion
Telescopes & Binoculars, 89 Hangar Way, Watsonville, CA 95076; (800) 676-1343.
OrionTelescopes.com
89 Hangar Way, Watsonville, CA 95076
Customer Support Help Line (800) 676-1343
© 2011 Orion Telescopes & Binoculars