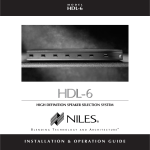
1
M O D E L
IPC-6
IPC-6 INTELLIGENT POWER CONTROLLER
PROGRAM
POWER
A-TRIGGER-B
ON
OFF
SELECT
TIME
1
2
3
4
5
6
C1
C2
NILES
IPC-6
INTELLIGENT POWER CONTROLLER
NILES ®
Niles Audio
Corporation
NILES
www.nilesaudio.com
12331 S.W. 130 Street
Miami, Florida 33186
Tel: (305) 238-4373
Fax: (305) 238-0185
©1999 Niles Audio Corporation. All rights reserved. Niles and the Niles logo are registered trademarks
of Niles Audio Corporation. All other trademarks are the properties of their respective owners. Because
we continually strive to improve our products, Niles reserves the right to change product specifications
without notice. The technical and other information contained herein is not intended to set forth all
technical and other specifications of Niles products. Additional information can be obtained on-line at
www.nilesaudio.com or by calling Niles at 1-800-289-4434. Printed in USA 5/99 LT00089D.
®
I N S TA L L AT I O N & O P E R AT I O N G U I D E
I
N T E L L I G E N T
P
O W E R
C
O N T R O L L E R
I
N T E L L I G E N T
P
O W E R
C
O N T R O L L E R
IPC-6*
Intelligent
Power
Controller
TABLE OF CONTENTS
Introduction
1
Features and
Benefits
3
Installation
Considerations 5
Installation
6
Programming 12
Troubleshooting
Introduction
The IPC-6 is a sophisticated intelligent power controller. It is
capable of complete power on/off management in the most
complicated Audio or Home Theater Systems. When a component that is plugged into one of its two current sensing
outlets is turned on, the IPC-6 activates other outlets and
relays based upon a user pre-programmed sequence. Two
separate current-sensing outlets provide 2 individual triggering sequences. Conversely, when the "triggering" component
is turned off, the IPC-6 initiates a separate user pre-programmed power off sequence. You may also choose to trigger one or both of the sequences by using the unit's 12 volt
DC smart-sensing trigger inputs.
Specifications 18
Components connected to the IPC-6's switched AC power
outlets must be of the "latching" type, that is, they must stay
in the "on" state when you remove AC power (unplug it) so
that they are "on" when you reapply power (plug it in again).
NILES ®
Additionally, the IPC-6 is able to control 2 devices or components which need a 12 volt DC signal to turn on (e.g., video
projectors and electric screens). Finally, the IPC-6 can control
2 devices that require a switch or relay contact closure for
operation (e.g., electric curtains and blinds or low voltage
lighting).
1
18
*Patents applied for.
Unlike other “current-sensing” power controllers, the Niles
IPC-6 uses "smart" current-sensing outlets. The IPC-6 is able
to automatically sense as little as a 2 watt difference between
a component's "on" and "standby" state. The IPC-6 does not
require the triggering component to have a 10, 20, or 30
percent difference between its "on" and "standby" states.
You can add to the capabilities of the IPC-6 by using it in
combination with other Niles products. Niles makes a series
of devices which can be controlled by an IPC-6 including
speaker switchers, line-level audio switchers, RF switchers,
and composite video switchers.
TECH
SUPPORT
HOTLINE
If you have
questions regarding
the operation of the
Niles IPC-6, contact
your local Niles
dealer or Niles
Customer Service at
1-800-289-4434.
2
I
N T E L L I G E N T
P
O W E R
C
I
O N T R O L L E R
N T E L L I G E N T
P
O W E R
C
O N T R O L L E R
TOOLS
REQUIRED
• 1/8" Standard
Slotted Screwdriver
• Wire Stripper
3
Features and Benefits
The IPC-6 offers unique technology never before available.
●
Advanced microprocessor design allows unparalleled flexibility and control.
●
The IPC-6 AccusenseTM circuitry automatically “locks on” to
tiny differences in power consumption between a component’s “on” and “standby” states.
●
The IPC-6 PowertrackerTM circuitry will track those tiny differences even under varying line voltage conditions.
●
The IPC-6 AccusenseTM circuitry will work with all types of
power supplies including switching types.
●
Advanced arc suppression techniques prevent power relay
contact arcing, ensuring long relay life.
●
After a power failure, the IPC-6 will wait for you to again
turn on the system. It does not blindly activate whatever
was happening before the power failure.
●
The IPC-6 remembers which components you want turned
on in two different situations. One situation is triggered by
device “A”, the other situation is triggered by device “B”.
●
You can trigger either the “A” or the “B” sequences with a
12 volt DC signal applied to the 12 volt sensing inputs.
●
The IPC-6 can remember different delay times for each of
its switched outlets and control relays.
●
Total delay time is adjustable from 0 to 99 seconds.
●
Separate "on" and "off" delay times and sequences can be
programmed into the IPC-6.
●
The IPC-6's 12 volt DC outputs can operate many of the
Niles automated switchers.
●
The IPC-6 has 2 sets of normally open and normally closed
low voltage relay contacts controllable by either or both
sequences.
●
Printed circuit board design assures high reliability.
●
Ideal for home theater, multiroom audio, home automation, boardrooms, museum exhibits, and commercial
installations of all types.
●
Limited two year parts and labor warranty.
●
Proudly made in the USA.
4
I
N T E L L I G E N T
P
O W E R
C
O N T R O L L E R
Installation Considerations
IMPORTANT
Do not exceed 1500
watts of total power
consumption for the
devices plugged into
each IPC-6.
IMPORTANT
Do not connect 120
volt AC power to the
C1 and C2 terminals,
they are low voltage
only!
Do not connect any
signal higher than 30
volts to the trigger
inputs!
5
N T E L L I G E N T
P
O W E R
C
O N T R O L L E R
with a switched AC outlet on the IPC-6.
Installation
IPC-6 Total Power Capacity
Check that the total power consumption of all the devices
plugged into the IPC-6 does not exceed 1500 watts. If the
total power is greater than 1500 watts, you will need to trigger a Niles AC-3 voltage controlled power strip from one of
the IPC-6's 12 volt control outputs. Since the maximum
power output of most home outlets is 1500 watts, you'll
need to plug the AC-3 into a wall outlet that is on a different
circuit breaker than the IPC-6.
IPC-6 Low Voltage Contacts (C1 & C2 Controlled
Outputs)
The IPC-6 has both normally-open and normally-closed contacts to control devices that need a switch to control them.
These are low voltage contacts only. DO NOT connect 120
volts AC to these contacts.
12 Volt Trigger Inputs
IMPORTANT
I
The IPC-6's external trigger inputs accept 3-30 volts AC or DC.
Switched 120 Volt AC Outlets
Test each component to determine whether it has the “latching" type of power control. Start by turning the component
on. Next, unplug its AC power cord. Wait 5 minutes, then
plug it back in. If the component returns to its fully “on”
state rather than to a “standby” state it is suitable for use
1. Select a convenient location for the IPC-6.
2. Run all the necessary wiring to the IPC-6’s planned location. Label the wires with both their origin (which component they power) and their destinati on (which of the
switched outl ets that component wi ll use). Use the
Programming Worksheet on Page 17 to write down your
choices. You will need a convenient written record when you
program your IPC-6.
3. Make the low voltage connections to the IPC-6. If you are
using any of the low-voltage inputs or outputs, you should
remove the IPC-6’s connectors. It is easier to attach the wire
to the connector first, before putting the IPC-6 in place. To
remove a connector grasp it from the top and bottom with
your thumb and forefinger and simply pull straight back.
Strip 3/8” of insulation from the end of each wire. Tightly
twist the stripped wire to eliminate any frayed ends. Insert
each wire into the appropriate hole in the connector block
and tighten the terminal with an 1/8” slotted screwdriver. Be
certain that the positive terminal on the IPC-6 is connected
to the positive terminal of a 12 volt device (see Figure 1).
4. Put the IPC-6 into position and make the connections to it.
While carefully observing each label, plug each low voltage
connector, switched outlet plug, and triggering component
into its respective place (see Figure 2 on page 11).
Figure 1
Connecting the
Low Voltage Wires
6
I
N T E L L I G E N T
P
O W E R
C
I
O N T R O L L E R
N T E L L I G E N T
P
O W E R
C
O N T R O L L E R
Press the PROGRAM and the SELECT buttons at the same time
to enter the PS program mode.
The SELECT button steps you through programming each
outlet's amount of delay—first for turning on (the on light is
lit), then for turning off (the off light is lit).
PROGRAM LED
Indicates the IPC-6 is in one
of the program modes.
ON AND OFF LEDS
POWER LED
Indicates the IPC-6
has power.
DIGITAL DISPLAY
Shows you the currently
selected delay.
SELECT BUTTON
IPC-6 INTELLIGENT POWER CONTROLLER
PROGRAM
POWER
A-TRIGGER-B
ON
SELECT
1
OFF
2
3
4
5
6
C1
C2
03
TIME
NILES
PROGRAM BUTTON
Begins and ends all
programming.
7
TRIGGER BUTTONS
"A" AND "B"
OUTLET CONTROL LEDS
Normally, these indicate whether the outlet is on or
activated. However, if you are in the PS program
mode these indicate which outlet is being programming.
TIME BUTTONS
Allow you to adjust
the delay between 0
and 99 seconds.
8
I
P
N T E L L I G E N T
O W E R
C
I
O N T R O L L E R
N T E L L I G E N T
P
O W E R
C
O N T R O L L E R
ACCUSENSETM 120 VOLT AC POWER OUTLETS
Turning on the device plugged into one of these outlets will trigger the corresponding (A or B) ON sequence. Turning off the device plugged into one
of these outlets will trigger the corresponding (A or B) OFF sequence.
POWER CORD
Plugs directly into the
wall AC outlet.
CONTROLLED 12 VOLT DC OUTPUTS
Positive = Terminal 1 Ground = Terminal 2
TRIGGER
INPUTS
CONTROL OUTPUTS
C2
C1
CONTROL
OUTPUT
RELAYS
C1 and
C2 rated
at 5 Amps,
30 Volts
Max., AC
or DC.
C
N O N
O M C
12V
0.1 AMP
+ -
C
N O N
O M C
12V
0.1 AMP
+ -
CURRENT SENSE OUTLETS
120 Volts AC 60 Hz.
1500 Watts Max.
NILES
RELAY
DC OUT
CONTACT
GROUP
ONE
RELAY
DC OUT
CONTACT
GROUP
TWO
A
B
A
SENSING 3-30V
AC or DC INPUTS
Contact groups provide you with a NORMALLY OPEN (N.O.) contact that closes,
or a NORMALLY CLOSED (N.C.) contact that opens when C1 or C2 are activated.
N.O. = Terminal 1, COMMON = Terminal 2, N.C. = Terminal 3
9
SWITCHED OUTLETS
3-30V 3-30V
AC/DC AC/DC
+ + -
B
1
2
3
4
5
6
Niles Audio
Corporation, Inc.
Miami, Florida USA
SWITCHED 120 VOLT AC POWER OUTLETS
These turn on and off according to the way you
have programmed your IPC-6.
REMEMBER: THE TOTAL POWER CONSUMPTION OF ALL DEVICES
PLUGGED INTO THE IPC-6 MAY NOT EXCEED 1500 WATTS.
10
I
N T E L L I G E N T
P
C
O W E R
I
O N T R O L L E R
5. Plug the IPC-6's AC power plug into an unswitched AC
power outlet. All the lights on the front panel will light for 2
seconds while the IPC-6’s microprocessor checks all conditions. If everything is ok, all but the red POWER LED will turn
off. You are now ready to program your IPC-6.
Surround Sound
Processor
Pre-amp
Figure 2
Wiring Diagram
N T E L L I G E N T
P
O W E R
C
O N T R O L L E R
Programming
You must program your IPC-6 in two steps.
1. The IPC-6’s AccusenseTM circuitry needs to measure the
“on” and the “standby” states of the device you have connected to the sensing 120 volt AC outlet(s).
2. The IPC-6 also needs you to specify which outlets to activate along with their corresponding time delays.
Measuring Power “On” and “Standby” States.
CONTROL OUTPUTS
TRIGGER
INPUTS
C2
C1
CONTROL
OUTPUT
RELAYS
C1 and
C2 rated
at 5 Amps,
30 Volts
Max., AC
or DC.
C
N O N
O M C
12V
0.1 AMP
+ -
C
N O N
O M C
12V
0.1 AMP
+ -
RELAY
DC OUT
RELAY
DC OUT
CURRENT SENSE OUTLETS
120 Volts AC 60 Hz.
1500 Watts Max.
NILES
A
B
A
B
Screen
Blind
Controller
1
2
3
4
Equalizer
5
6
Niles Audio
Corporation, Inc.
Miami, Florida USA
Center Amp
Lighting
Controller
Some devices (television sets, stereo receivers, etc) actually
have 3 power states. You can turn them on with a remote
control, you can place them in “standby” with a remote control, and you can use a manual power (or “vacation”) switch
to turn them completely off. You want the IPC-6 to measure
what happens to your device when you use the remote control. Unless you are sure there is not a third power state, use
the remote control to turn the device on and off.
1. Turn off the device(s) plugged into the “A” or "B" sensing
120 volt AC outlets.
2. In order to enter the “PA” programming mode, press and
hold down the PROGRAM button on the front panel of the
IPC-6. While you are holding it down, press the “A” Trigger
button, then release both buttons.
Projector
11
SWITCHED OUTLETS
3-30V 3-30V
AC/DC AC/DC
+ + -
Main Amp
Surround Amp
The front panel LED's will sequence to the left and right
while the AccusenseTM circuitry measures your device's stand12
I
N T E L L I G E N T
P
O W E R
C
O N T R O L L E R
by current. After the sequencing stops, the ON LED should be
blinking. This means that the IPC-6 is ready to measure the
device’s “on” state.
3. Turn on the device. The front panel LED's will sequence to
the left and right while the AccusenseTM circuitry measures
your device. After the sequencing of the LED's stops the OFF
LED will blink.
4. Turn off the device. The front panel LED's will sequence to
the left and right while the AccusenseTM circuitry checks your
device. After the sequencing of the LED's stops and the IPC-6
has confirmed the programming, all the front panel LED’s will
light while the IPC-6 stores the program into memory. You
are now back in normal operating mode.
To program the device plugged into the ”B” sensing outlet,
repeat steps 1 through 4 using the “B” button and outlet.
When you begin programming, the IPC-6 will display “Pb”
instead of “PA”.
Programming Switched 120 volt and
Controlled (low voltage) Outlets
You will need to program 3 different parameters for each of
the switched outlets (1-6) and control outputs (C1, C2).
1. Which trigger (A, B, or both) will activate the outlet?
Pressing both trigger buttons means that the outlet will be
active if either or both triggers are active.
2. The turn on time delay (indicated by the ON LED being lit).
13
I
N T E L L I G E N T
P
O W E R
C
O N T R O L L E R
Program the delays for each outlet to build your "turn on"
sequence. Delays are calculated in 1 second increments after
your triggering device is turned "on" or "off". Therefore, if
you would like outlet 1 to activate 2 seconds after your trigger device is turned on, program outlet 1's time delay to 02.
If you would like outlet 2 to activate 2 seconds after outlet 1,
program outlet 2's time delay to 04, etc.
3. The turn off time delay (indicated by the OFF LED being lit).
Program the delays for each outlet to build your "turn off"
sequence.
Enter the PS programming mode
Turn off the devices plugged into the 2 sensing outlets before
programming any of the switched or controlled outlets or
the IPC-6 will not enter PS programming mode.
"TECH TIP"
Devices must be
turned off before
programming any
of the outlets.
Press and hold down the PROGRAM button on the front panel
of the IPC-6. While you are holding it down, press the SELECT
button. Release both buttons. When you begin programming the IPC-6 will display "PS" only momentarily.
The IPC-6 will light the ON and "Outlet 1" LED's. You are now
ready to program the "turn on" sequence for each switched
outlet.
1. Select either or both of the trigger buttons (A, B). This will
determine which device(s) will trigger outlet 1 to turn on.
2. Adjust the "on" time delay. The two buttons to the right of
14
I
N T E L L I G E N T
P
O W E R
C
O N T R O L L E R
the display allow you to adjust the delay from 0 to 99 seconds.
3. Press the SELECT button to lock in your programming and
move to the next outlet. Repeat steps 1-3 for outlets 2
through 6 and C1, C2. Pressing the SELECT button after you
have programmed C2 enables you to program the "off" time
delays. If you elect not to program one or more of the outlets,
you will still need to press SELECT until you have gone past C2
to program the "off" times. The IPC-6 will now light the OFF
and "Outlet 1" LED's.
4. Adjust the "off" time delay. There is no need to select a
trigger. After you have programmed your "off" time for
Outlet 1, use the SELECT button to step through outlets 2-6
and C1, C2. Adjust the "off" time delay of each.
5. Pressing the SELECT button after you have programmed C2
will cycle you back to programming the "on" time delays.
6. Press the PROGRAM button and release it. All the front panel
LED's will light for 2 seconds. You have completed programming your IPC-6.
I
N T E L L I G E N T
P
O W E R
C
O N T R O L L E R
grammed, return to the programming section of this manual
and verify that the IPC-6 has been programmed correctly or
simply reprogram the IPC-6.
Errors - The display reads E1
The IPC-6 detected a contradictory reading. Check your connections to the sensing 120 volt AC outlets. Perhaps “A” and
“B” have been reversed or are actually plugged into another
outlet.
Press the PROGRAM button to turn off the display of E1, then
begin again at step one. Make sure you are "on" and "off"
when the directions say you should be.
Cancel Programming
At any time, you may stop programming by simply pressing
and holding the PROGRAM button for one second.
Test
Test that you have programmed your IPC-6 properly by turning on the components plugged into the "A" trigger outlet.
The IPC-6 should now activate your other components
according to the sequence you have programmed. Repeat
this test with the component plugged into the "B" sensing
outlet.
If the IPC-6 fails to initiate the sequence you have pro15
16
I
N T E L L I G E N T
P
O W E R
C
I
O N T R O L L E R
N T E L L I G E N T
P
O W E R
C
O N T R O L L E R
IPC-6 PROGRAMMING WORKSHEET
Sense A
Outlet
Controlled
Outlet
AC Power
#1
AC Power
#2
AC Power
#3
AC Power
#4
AC Power
#5
AC Power
#6
Troubleshooting
Sense B
Outlet
Device you are controlling
Trigger Trigger
A
B
You have not completed "on" programming for each
controlled outlet. Go to page 12 and follow the step-bystep instructions.
2. You are in the middle of programming your IPC-6 and you
see a display of E1.
●
Press and hold the PROGRAM button for one second. This
returns you to normal operating mode. Now, repeat the
programming you last attempted.
3. The wrong devices are turning on with the trigger device.
Opening
Contact
Closing
Contact
●
Check which sensing outlet the trigger device is plugged
into and recheck your programming.
●
Check the outlet's programmed trigger source.
Power Requirements
120 Volts AC, 1500 Watts
max.
High Voltage Outlets
2 - Current sensing
unswitched 120V AC
outlets
6 - Controlled 120V AC
outlets
Low Voltage Inputs
2 - 3-30V AC/DC control
inputs
Low Voltage Outputs
2 - 12V DC, 0.1A control
outputs
2 - 30V AC/DC, 5A
control output relays
Overall Dimensions
17" wide x 2" high x
8-1/4" deep
12 Volt
Output
C2
OFF
Delay
●
12 Volt
Output
C1
ON
Delay
1. You turn on the device plugged into Trigger "A" or "B" and
nothing happens.
SPECIFICATIONS
Opening
Contact
Weight
6-1/4 lbs.
Closing
Contact
✓ the A, B, or A and B trigger for each device.
Write in the time delay for each device.
17
18