1
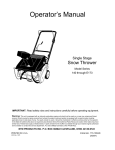
Operator’s Manual
Single Stage
Snow Thrower
Models 285 & 295
Models E285 &E295
IMPORTANT: Read safety rules and instructions carefully before operating equipment.
Warning: This unit is equipped with an internal combustion engine and should not be used on or near any unimproved forestcovered, brush-covered or grass-covered land unless the engine’s exhaust system is equipped with a spark arrester meeting
applicable local or state laws (if any). If a spark arrester is used, it should be maintained in effective working order by the operator.
In the State of California the above is required by law (Section 4442 of the California Public Resources Code). Other states may have
similar laws. Federal laws apply on federal lands. A spark arrester for the muffler is available through your nearest engine authorized
service dealer or contact the service department, P.O. Box 368022 Cleveland, Ohio 44136-9722.
MTD PRODUCTS INC. P.O. BOX 368022 CLEVELAND, OHIO 44136-9722
PRINTED IN U.S.A.
FORM NO. 770-10540A
7/10/01
TABLE OF CONTENTS
Content
Page
Important Safe Operation Practices .................................................................................. 3
Assembling Your Snow Thrower ....................................................................................... 5
Know Your Snow Thrower................................................................................................. 6
Operating Your Snow Thrower .......................................................................................... 7
Making Adjustments.......................................................................................................... 9
Maintaining Your Snow Thrower ....................................................................................... 10
Off-Season Storage .......................................................................................................... 11
Troubleshooting ................................................................................................................ 11
Parts List .......................................................................................................................... 12
FINDING MODEL NUMBER
This Operator’s Manual is an important part of your new snow thrower. It will help you to assemble, prepare and
maintain the unit for best performance. Please read and understand what it says.
Before you start assembling your new snow thrower, please locate the model plate on the
equipment and copy the information from it in the space provided below. The information on the
model plate is very important if you need help from our Customer Support Department or an
authorized dealer.
•
You can locate the model number by standing behind the unit in the operating position and looking down at
the dash panel . A sample model plate is explained below. For future reference, please copy the model
number and the serial number of the equipment in the space below.
(Model Number)
(Serial Number)
Copy the model number here:
Copy the serial number here:
MTD PRODUCTS INC
CLEVELAND, OHIO 44136
ENGINE INFORMATION
The engine manufacturer is responsible for all engine-related issues with regards to performance, power-rating,
specifications, warranty and service. Please refer to the engine manufacturer’s Owner’s/Operator’s Manual packed
separately with your unit for more information.
CALLING CUSTOMER SUPPORT
If you have difficulty assembling this product or have any questions regarding the controls, operation or
maintenance of this unit, please call the Customer Support Department.
Call 1- (330) 220-4MTD (4683) or 1- (800)-800-7310 to reach a Customer Support representative.
Please have your unit’s model number and serial number ready when you call. See previous section
to locate this information. You will be asked to enter the serial number in order to process your call .
For more details about your unit, visit our website at www.mtdproducts.com
2
SECTION 1: IMPORTANT SAFE OPERATION PRACTICES
WARNING: This symbol points out important safety instructions which, if not followed, could endanger
the personal safety and/or property of yourself and others. Read and follow all instructions in this manual
before attempting to operate this machine. Failure to comply with these instructions may result in personal
injury. When you see this symbol—heed its warning.
WARNING: Engine Exhaust, some of its constituents, and certain vehicle components contain or emit
chemicals known to State of California to cause cancer and birth defects or other reproductive harm.
DANGER: This machine was built to be operated according to the rules for safe operation in this manual. As with any type
of power equipment, carelessness or error on the part of the operator can result in serious injury. This machine is capable
of amputating hands and feet and throwing objects. Failure to observe the following safety instructions could result in
serious injury or death.
Training
1.
2.
3.
4.
5.
6.
7.
6.
7.
Read, understand, and follow all instructions on the
machine and in the manual(s) before attempting to
assemble and operate. Keep this manual in a safe place
for future and regular reference and for ordering
replacement parts.
Be familiar with all controls and their proper operation.
Know how to stop the machine and disengage them
quickly.
Never allow children under 14 years old to operate this
machine. Children 14 years old and over should read and
understand the operation instructions and safety rules in
this manual and should be trained and supervised by a
parent.
Never allow adults to operate this machine without
proper instruction.
Thrown objects can cause serious personal injury. Plan
your snow throwing pattern to avoid discharge of material
toward roads, bystanders and the like.
Keep bystanders, helpers, pets and children at least 75
feet from the machine while it is in operation. Stop
machine if anyone enters the area.
Exercise caution to avoid slipping or falling, especially
when operating in reverse.
8.
9.
Preparation
1.
2.
3.
4.
5.
Thoroughly inspect the area where the equipment is to
be used. Remove all door mats, newspapers, sleds,
boards, wires and other objects which could be tripped
over or thrown by the auger/impeller.
Always wear safety glasses or eye shields during
operation and while performing an adjustment or repair to
protect your eyes. Thrown objects which ricochet can
cause serious injury to the eyes.
Do not operate without wearing adequate winter outer
garments. Do not wear jewelry, long scarves or other
loose clothing which could become entangled in moving
parts. Wear footwear which will improve footing on
slippery surfaces.
Use a grounded three wire extension cord and receptacle
for all units with electric start engines.
Adjust collector housing height to clear gravel or crushed
rock surfaces.
Disengage all clutch levers before starting the engine.
Never attempt to make any adjustments while engine is
running, except where specifically recommended in the
operator’s manual.
Let engine and machine adjust to outdoor temperature
before starting to clear snow.
To avoid personal injury or property damage use extreme
care in handling gasoline. Gasoline is extremely
flammable and the vapors are explosive. Serious
personal injury can occur when gasoline is spilled on
yourself or your clothes which can ignite. Wash your skin
and change clothes immediately.
a. Use only an approved gasoline container.
b. Extinguish all cigarettes, cigars, pipes and other
sources of ignition.
c. Never fuel machine indoors.
d. Never remove gas cap or add fuel while the
engine is hot or running.
e. Allow engine to cool at least two minutes before
refueling.
f. Never over fill fuel tank. Fill tank to no more than
½ inch below bottom of filler neck to provide space
for fuel expansion.
g. Replace gasoline cap and tighten securely.
h. If gasoline is spilled, wipe it off the engine and
equipment. Move machine to another area. Wait 5
minutes before starting the engine.
i. Never store the machine or fuel container inside
where there is an open flame, spark or pilot light
(e.g. furnace, water heater, space heater, clothes
dryer etc.).
j. Allow machine to cool at least 5 minutes before
storing.
Operation
1.
2.
3.
3
Do not put hands or feet near rotating parts, in the auger/
impeller housing or discharge chute. Contact with
rotating parts can amputate hands and feet.
The auger/impeller clutch lever is a safety device. Never
bypass its operation. Doing so, makes the machine
unsafe and may cause personal injury.
The clutch levers must operate easily in both directions
and automatically return to the disengaged position when
released.
5.
6.
7.
8.
9.
10.
11.
12.
13.
14.
15.
16.
17.
18.
19.
20.
Maintenance And Storage
Never operate with a missing or damaged discharge
chute. Keep all safety devices in place and working.
Never run an engine indoors or in a poorly ventilated
area. Engine exhaust contains carbon monoxide, an
odorless and deadly gas.
Do not operate machine while under the influence of
alcohol or drugs.
Muffler and engine become hot and can cause a burn. Do
not touch.
Exercise extreme caution when operating on or crossing
gravel surfaces. Stay alert for hidden hazards or traffic.
Exercise caution when changing direction and while
operating on slopes.
Plan your snow throwing pattern to avoid discharge
towards windows, walls, cars etc. To avoid property
damage or personal injury caused by a ricochet.
Never direct discharge at children, bystanders and pets
or allow anyone in front of the machine.
Do not overload machine capacity by attempting to clear
snow at too fast of a rate.
Never operate this machine without good visibility or
light. Always be sure of your footing and keep a firm hold
on the handles. Walk, never run.
Disengage power to the auger/impeller when
transporting or not in use.
Never operate machine at high transport speeds on
slippery surfaces. Look down and behind and use care
when in reverse.
If the machine should start to vibrate abnormally, stop the
engine, disconnect the spark plug and ground it against
the engine. Inspect thoroughly for damage. Repair any
damage before starting and operating.
Disengage all clutch levers and stop engine before you
leave the operating position (behind the handles). Wait
until the auger/impeller comes to a complete stop before
unclogging the discharge chute, making any
adjustments, or inspections.
Never put your hand in the discharge or collector
openings. Always use a clearing tool to unclog the
discharge opening.
Use only attachments and accessories approved by the
manufacturer (e.g. wheel weights, tire chains, cabs etc.).
If situations occur which are not covered in this manual,
use care and good judgment. Contact your dealer or
telephone 1-800-800-7310 for assistance and the name
of your nearest servicing dealer.
1. Never tamper with safety devices. Check their proper
operation regularly.
Disengage all clutch levers and stop engine. Wait until
the auger/impeller come to a complete stop. Disconnect
the spark plug wire and ground against the engine to
prevent unintended starting before cleaning, repairing, or
inspecting.
3. Check bolts, and screws for proper tightness at frequent
intervals to keep the machine in safe working condition.
Also, visually inspect machine for any damage.
4. Do not change the engine governor setting or over-speed
the engine. The governor controls the maximum safe
operating speed of the engine.
5. Snow thrower shave plates and skid shoes are subject to
wear and damage. For your safety protection, frequently
check all components and replace with original
equipment manufacturer’s (O.E.M.) parts only. “Use of
parts which do not meet the original equipment
specifications may lead to improper performance and
compromise safety!”
6. Check clutch controls periodically to verify they engage
and disengage properly and adjust, if necessary. Refer to
the adjustment section in this operator’s manual for
instructions.
7. Maintain or replace safety and instruction labels, as
necessary.
8. Observe proper disposal laws and regulations for gas,
oil, etc. to protect the environment.
9. Prior to storing, run machine a few minutes to clear snow
from machine and prevent freeze up of auger/impeller.
10. Never store the machine or fuel container inside where
there is an open flame, spark or pilot light such as a water
heater, furnace ,clothes dryer etc.
11. Always refer to the operator’s manual for proper
instructions on off-season storage.
2.
Your Responsibility:
•
Restrict the use of this power machine to persons
who read, understand and follow the warnings and
instructions in this manual and on the machine.
AVOID INJURY FROM
ROTATING AUGER KEEP HANDS, FEET
AND CLOTHING AWAY.
4.
DANGER
1. KEEP AWAY FROM ROTATING AUGER
CONTACT WITH AUGER CAN AMPUTATE
HANDS AND FEET.
2. DISENGAGE CLUTCH LEVERS, STOP ENGINE,
AND REMAIN BEHIND HANDLES UNTIL ALL
MOVING PARTS HAVE STOPPED BEFORE
UNCLOGGING OR SERVICING MACHINE.
3. TO AVOID THROWN OBJECTS INJURIES,
NEVER DIRECT DISCHARGE AT BYSTANDERS.
USE EXTRA CAUTION WHEN OPERATING ON
GRAVEL SURFACES.
4. READ OPERATOR'S MANUAL.
NEVER PUT HAND IN CHUTE. CONTACT WITH
ROTATING PARTS CAN AMPUTATE FINGERS
AND HANDS.
DO NOT UNCLOG DISCHARGE CHUTE WHILE
ENGINE IS RUNNING.
SHUT OFF ENGINE AND REMAIN BEHIND
HANDLES UNTIL ALL MOVING PARTS HAVE
STOPPED BEFORE UNCLOGGING.
4
SECTION 2: ASSEMBLING YOUR SNOW THROWER
Unpacking From Carton
•
•
•
•
Cut along corners of the carton and lay it down flat.
Remove packing material.
Remove any loose parts included with unit (i.e.,
operator’s manual, etc.).
Roll unit out of carton. Check carton thoroughly for
any remaining loose part.
•
•
Remove the hairpin clip from the end of the lower
chute crank.
Insert the upper chute crank into the lower chute
crank and align the holes.
Re-insert the hairpin clip into the hole to secure the
two chute cranks. See Figure 2.
Items Required For Assembly
1. Pair of pliers
2. Engine oil
3. Fresh gasoline
NOTE: All references to left or right side of the snow
thrower is from the operating position only.
Hairpin Clip
Upper Chute
Crank
Before Assembly
Lower Chute
Crank
WARNING: Disconnect the spark plug wire
and ground it against the engine to prevent
unintended starting. See Figure 1.
NOTE: For clarity
of viewing, the
control handle is
removed from the
picture. Do not
remove it for the task..
Raising Upper Handle
•
Loosen the hand knob on each side of the handle.
Remove packing material, if any.
Figure 2
Attaching Control Cable
The control cable may already be attached to the
control handle. If not attached, complete the following
steps to attach it to the snow thrower housing.
•
Hand Knob
Route the control cable over the lower handle.
Insert the end of the cable into the hole in the
control housing as shown in Figure 3. Push the
plastic fitting until it locks into the control housing.
Hand Knob
Bottom
Hole In
Control
Handle
Spark Plug
Access
“Z” End
of Cable
Figure 1
•
•
Control
Housing
Raise the upper handle in the direction shown in
Figure 1 until it clicks into the operating position.
Make sure not to pinch or crimp the cable.
Tighten the hand knobs.
Plastic
Fitting
Figure 3
Attaching Chute Crank
•
The lower chute crank is already attached to your snow
thrower at the factory. For shipping purposes, the upper
chute crank is packaged as loose part. Attach it to the
lower chute crank following instructions:
5
Lift the control handle up, and hook the “Z” end of
the control cable into the bottom hole in the control
handle, from the outside to the inside . If necessary,
pull up on the end of the cable with a pair of pliers to
obtain slack in order to hook it into the control
handle. Hold the “Z” fitting with the pliers, not the
cable, to avoid damaging the cable.
Lower Chute
Nut
NOTE: The upper hole in the control handle provides
for adjustment in belt tension. Refer to page 9 of this
manual for instructions.
Carriage
Bolt
Flat
Washer
Flat
Washer
Assembling Discharge Chute
•
•
•
Hex Bolt
Turn the chute crank until the chute faces straight
to the front. See Figure 4 .
Remove the hand knob, flat washer and carriage
bolt from the upper chute. See Figure 4.
Pivot the upper chute up and over the lip of the
lower chute. This will eliminate any gap between
the upper and the lower chutes. Secure with
hardware just removed.
Upper
Chute
Hand
Knob
Figure 4
SECTION 3: KNOW YOUR SNOW THROWER
WARNING: Be familiar with all the controls on the snow thrower and their proper operation. Know how to
stop the machine and disengage them quickly.
Auger Control Handle
Recoil Starter
Chute Crank
Gasoline Cap
Primer
Key
Electric Starter (if equipped)
Spark Plug Access
Discharge Chute
Oil Fill Plug
Auger
Shave Plate
Choke
Lever
Figure 5
Auger Control Handle
Chute Crank
Located on the upper handle, the auger control handle
is used to engage and disengage the auger. The snow
thrower is designed to propell by the rotation of the
auger. Pull the control handle back against the upper
handle to engage the auger; release to disengage.
Located on right side of dash panel, the chute crank
determines the direction that snow will be discharged.
Turn clockwise to discharge snow to the left; turn
counterclockwise to discharge to the right.
6
Discharge Chute
Ignition Key
The angle of the discharge chute controls the distance
that the snow is thrown. Tilt the discharge chute up for
greater distance; tilt down for less distance. Loosen the
hand knob on the side of the discharge chute to adjust.
Tilt the chute to the desired position, and tighten the
knob.
Used to start engine. Put key in “ON” position to start
for both electric and recoil start engines. Follow starting
instructions given in the next section.
Recoil Starter
Used to manually start the engine.
Electric Starter (If equipped)
Choke Lever
Used to start engine with a 120V power source
The location of the choke lever is indicated in Figure 5
inset. You will have to use this lever to start the engine.
Push the lever all the way up to the FULL/ON position,
or all the way down to the OFF position as desired.
Plug for Electric Start (If equipped)
Requires use of a three-prong outdoor extension cord
and a 120V power source
Primer Button
Spark Plug Access
Used to inject fuel directly into the carburetor to insure
fast starts in cold weather. Follow engine manual to
prime engine.
Spark plug located under the access cover.
SECTION 4: OPERATING YOUR SNOW THROWER
Before Starting
Press auger
control handle
to engage
auger
WARNING: Read, understand, and follow all
instructions and warnings on the machine and
in this manual before operating.
•
Turn handle
to change
discharge
direction
The spark plug wire was disconnected for safety.
Attach spark plug wire to spark plug before starting.
Gas and Oil Fill-Up
•
Primer
Recoil
Starter
Key
Check oil and gasoline level and add if necessary.
Follow related instructions in the seperate engine
manual packed with your snow thrower.
Choke
Lever
WARNING: Use extreme care when
handling gasoline. Gasoline is extremely
flammable and the vapors are explosive. Never
fuel the machine indoors or while the engine is
hot or running. Extinguish cigarettes, cigars,
pipes and other sources of ignition.
Electric
Starter*
Spark Plug Access
* If equipped
Figure 6
To Start Engine
•
•
•
Insert ignition key into slot. Turn key to ON position.
Now follow the instructions below as it pertains to
your unit.
•
Electric Starter (If equipped)
WARNING: The electric starter must be
•
used with a properly grounded three-prong
receptacle at all times to avoid the possibility of
electric shock. Follow all instructions carefully
prior to operating the electric starter.
•
7
The electric starter is equipped with a grounded
three-wire power cord and plug, and is designed to
operate on 120 volt AC household current.
Determine that your house wiring is a three-wire
grounded system. Ask a licensed electrician if you
are not certain.
If your home wiring system is not a three-wire
grounded system, do not use this electric starter
under any conditions.
If your home electrical system is grounded, but
a three-hole receptacle is not available, one should
be installed by a licensed electrician before using
the electric starter.
•
•
•
•
•
•
If you have a grounded three-prong receptacle,
proceed as follows.
Rotate choke lever to FULL position.
Connect power cord to switch box on dash panel.
Plug the other end of power cord into a three-prong
120-volt, grounded, AC receptacle.
Push starter button to crank engine. As you crank
the engine, move choke lever to FULL choke
position.
When engine starts, release starter button, and
move choke gradually to OFF. If engine falters,
move choke immediately to FULL and then
gradually to OFF.
When disconnecting the power cord, always unplug
from the three-prong receptacle first, and then from
the snow thrower.
•
•
Operating the Snow Thrower
•
Recoil Starter
•
•
•
•
•
Move choke lever to FULL choke position (cold
engine start).
If engine is warm, place choke in OFF position
instead of FULL.
Push primer button two or three times for cold
engine start.
If engine is warm, push primer button only once.
•
•
NOTE: Always cover vent hole in primer button when
pushing. Additional priming may be necessary for first
start if temperature is below 15 degrees Fahrenheit.
•
•
ter
ea nce
r
G sta
Di
Grasp starter handle and pull rope out slowly, until
it pulls slightly harder. Let rope rewind slowly.
Pull starter handle rapidly. Do not allow handle to
snap back. Allow it to rewind slowly while keeping a
firm hold on the starter handle.
As engine warms up and begins to operate evenly,
rotate choke lever slowly to OFF position. If engine
falters, return to FULL choke, then slowly move to
OFF position.
To stop engine, turn ignition key counter-clockwise.
Disconnect the spark plug wire from the spark plug
to prevent accidental starting while equipment is
unattended.
To help prevent possible freeze-up of starter, proceed
as follows:
•
Hand
Knob
Operating Tips
•
•
Upper
Discharge
Chute
Figure 7
To Stop Engine
•
Adjust the upper discharge chute up or down as
shown in Figure 4. You will have to loosen the hand
knob to adjust the upper chute, and then retighten
after correct adjustment is reached.
Use the chute crank to position the discharge chute
in order to discharge snow with the wind.
After making sure no bystanders or obstacles are in
front of the unit, engage the auger control handle.
As the snow thrower starts to move, maintain a firm
hold on the handle, and guide the snow thrower
along the path to be cleared.
Release the auger control handle to stop the snow
throwing action and the forward motion.
Di Les
sta s
nc
e
•
or four times. Pulling the starter rope will produce a
loud clattering sound, which is not harmful to the
engine or starter.
Wipe all snow and moisture from the carburetor
cover in the area of the control levers. Also, move
control levers back and forth several times. Leave
throttle control lever in the STOP or OFF position.
Leave choke control in the FULL choke position.
Remove ignition key and disconnect spark plug
wire to prevent accidental starting.
•
•
Run engine for a few minutes before stopping to
help dry off any moisture on the engine.
Electric Starter: Connect power cord to switch box
on engine, then to 120 volt AC receptacle. With the
engine running, push starter button and spin the
starter for several seconds. The unusual sound
made by spinning the starter will not harm engine or
starter. Disconnect the power cord from receptacle
first, and then from switch box.
Recoil Starter: With engine running, pull starter
rope with a rapid, continuous full arm stroke three
Discharge snow downwind whenever possible.
Slightly overlap each previously cleared path.
Lifting up on the handle will allow the rubber on the
augers to propel the snow thrower forward. Pushing
downward on the handle will raise the augers off
the ground and stop forward motion.
NOTE: Excessive upward pressure on the handle will
result in premature wear on the rubber auger blades
which would not be covered by warranty.
•
•
Run the engine for a few minutes before stopping to
help dry any moisture on the engine.
Clean the snow thrower thoroughly after each use.
WARNING: Muffler, engine and surrounding
areas become hot and can cause a burn. Do
not touch.
8
SECTION 5: MAKING ADJUSTMENTS
Belt Tension
WARNING: NEVER attempt to make any
Periodic adjustment of the belt tension may be required
due to normal stretch and wear on the belt. Adjust the
belt tension, following instructions below, if the augers
seem to hesitate while turning although engine
maintains the same speed.
adjustments while the engine is running,
except where specified in the operator’s
manual.
Shave Plate
•
•
To check the adjustment of the shave plate, place
the unit on a level surface. See Figure 8. The
wheels, shave plate and augers should all contact
level surface. Note that if the shave plate is
adjusted too high, snow may blow under the
housing. If the shave plate wears out excessively,
or the unit does not self-propel, the shave plate
may be too low and needs to be adjusted.
The upper hole in the control handle provides
adjustment for belt tension. To adjust, disconnect
the “Z” end of control cable from the bottom hole in
the control handle. See Figure 10 . Hook the cable
into the upper hole in control handle as shown.
Upper
Hole
Clutch
Cable
NOTE: On new units or units with a new shave plate
installed, the augers may be slightly off the ground.
Control
Housing
Figure 10
If additional adjustment is required, follow steps below.
•
•
Augers
Shave Plate
Figure 8
•
Remove the belt cover by removing five hex screws
that hold it in place. See Figure 12.
There are three adjustment holes provided in the
idler bracket assembly. See Figure 11. To adjust,
move the extension spring on the end of the clutch
cable to the next higher adjustment position on the
idler bracket assembly. Reassemble belt cover.
High Position
To adjust, tip the snow thrower back so that it rests
on the handle. Loosen the four lock nuts and bolts
which secure the shave plate to the housing. See
Figure 9. Move the shave plate to desired position
and retighten the nuts and bolts securely.
Idler
Bracket
Middle Position
Low Position
Auger
Pulley
Spring on
End of Clutch
Cable
Figure 11
Carburetor
WARNING: If any adjustments need to be
made to the engine while the engine is running
(e.g. carburetor), keep clear of all moving parts.
Be careful of muffler, engine and other
surrounding heated surfaces.
•
Lock Nut & Carriage Bolt
Figure 9
9
Refer to the separate engine manual, packed with
your unit, for carburetor adjustment information.
SECTION 6: MAINTAINING YOUR SNOW THROWER
Replacing Shave Plate
WARNING: Before servicing, repairing, or
The shave plate is attached to the bottom of the auger
housing and is subject to wear. It should be checked
periodically. There are two wearing edges and the
shave plate can be reversed. See Figure 14.
inspecting, disengage all clutch levers and stop
engine. Wait until all moving parts have come
to a complete stop. Disconnect spark plug wire
and ground it against the engine to prevent
unintended starting.
•
Replacing Belt
•
•
•
Remove the belt cover by removing five hex
screws. See Figure 12.
Remove the four carriage bolts and hex lock nuts
which attach it to the snow thrower housing.
Install new shave plate, making sure the heads of
the carriage bolts are on the inside of the housing.
Adjust the shave plate according to instructions on
page 9. Tighten securely.
Hex
Screw
Shave
Plate
Hex Screw
Remove these hardware
Belt Cover
Figure 12
•
•
•
•
Figure 14
Pull up on the idler pulley and slip the belt off the
engine pulley.
Push down on the idler pulley and slip the belt off
the auger pulley.
Reassemble new belt. See Figure 13.
Reinstall the belt cover.
Engine
•
•
Refer to the separate engine manual for all engine
maintenance procedures.
Check engine and snow thrower frequently for
loose hardware, and tighten as needed.
Lubrication
•
Idler Pulley
•
Engine
Pulley
Auger
Pulley
Drive
Belt
Figure 13
10
Lubricate pivot points on the control handle and the
extension spring at the end of the clutch cable with
a light oil once every season and before storage of
the snow thrower at the end of the season.
Lubricate the flange keepers on the chute crank
once a season with a light oil making sure the crank
rod moves freely. Remove bolts holding the shroud
to the housing, and lift shroud to access the chute
crank bracket.
SECTION 7: OFF-SEASON STORAGE
•
•
WARNING: Never store engine with fuel in
tank indoors or in enclosed, poorly ventilated
areas where fuel fumes may reach an open
flame, spark or pilot light as on a furnace, water
heater, clothes dryer, or other gas appliance.
•
•
Follow “Storage” instructions in the Engine Manual.
Store in a clean, dry area. Block the snow thrower
up so it is not resting on the rubber auger blades.
NOTE: When storing any type of power equipment in a
poorly ventilated or metal storage shed, care should be
taken to rustproof the equipment, especially springs,
cables and all moving parts.
Clean snow thrower thoroughly.
Lubricate as instructed above with a light oil.
SECTION 8: TROUBLESHOOTING GUIDE
Problem
Cause
Remedy
Engine fails to start
1.
2.
3.
4.
5.
6.
7.
Fuel tank empty, or stale fuel
Blocked fuel line
Key not in ON position
Spark plug wire disconnected
Faulty spark plug
Engine not primed
Engine flooded with excessive priming
1.
2.
3.
4.
5.
6.
7.
Fill tank with clean fresh gasoline.
Clean fuel line
Insert key and turn to ON position
Connect wire to spark plug.
Clean spark plug, readjust gap, or replace.
Prime engine four times.
Wait at least ten minutes before starting.
Engine runs erratic
1.
2.
Unit running on choke
Fuel line blocked, or stale fuel
1.
2.
3.
4.
Water or dirt in fuel system
Carburetor out of adjustment
3.
4.
Move choke lever to OFF position.
Clean fuel line and fill tank with fresh,
clean gasoline.
Refer to engine manual for remedy.
Refer to engine manual for remedy.
Engine overheats
1.
Carburetor out of adjustment
1.
Refer to engine manual for instruction.
Loss of power
1.
2.
Spark plug wire loose
Vent in gas cap plugged
1.
2.
Connect and tighten spark plug wire.
Clear vent.
Excessive vibration
1.
Loose parts or damaged auger
1.
Stop engine immediately and disconnect
spark plug wire. Check for possible
damage. Tighten all bolts and nuts. Repair
as needed. If the problem persists, take
unit to an authorized service dealer.
Drive cable out of adjustment
1.
2.
Drive belt loose or damaged
2.
Adjust drive cable following instructions on
page 9 of this manual.
Replace drive cable.
1.
Discharge chute clogged
1.
2.
Foreign object lodged in auger
2.
3.
Drive cable not adjusted properly
3.
4.
Drive belt loose or damaged
4.
Unit fails to self-propel 1.
Unit fails to discharge
snow
Stop engine immediately and disconnect
spark plug wire. Clean discharge chute
and the auger housing.
Stop engine immediately and disconnect
spark plug wire. Remove object .
Adjust drive cable following instructions on
page 9 of this manual.
Replace drive belt.
NOTE: For repairs beyond the minor adjustments listed above, contact your nearest authorized service
representative or call 1-800-800-7310 for the Customer Support Center. Refer to the engine manual, packed with
your snow thrower, for more engine related information.
11
SECTION 9: PARTS LIST FOR MODELS 285, 295, E285 AND E295
15
9
6
21
6
17
14
6
21
24
21
23
3
1
8
22
10
13
4
2
20
25
16
7
33
32
35
47
11
57
42
12 19 48
45
18
31
44
26
58
11
35
53
41
49
60
36
5
5
42
28
52
33
27
37
29
59
5
54
49
56
40
50
51
35 43
53
38
34
46
55
39
30
12
Models 285, 295, E285 and E295
Ref. No.
1.
2.
3.
4.
5.
6.
7.
8.
9.
10.
11.
12.
13.
14.
15.
16.
17.
18.
19.
20.
21.
22.
23.
24.
25.
26.
27.
28.
29.
Part No.
Part Description
747-1311
Upper Chute Crank Assemby
684-0177
Lower Chute Crank Assembly
684-0178
Bracket Assembly: Mitten Grip
731-2570
Shroud: Yellow, 7 Hp. Electric
731-2571
731-2607
710-0895
Shroud: Yellow, 5 Hp. Electric
Shroud: Yellow, 5 Hp. Recoil
TT Screw 1/4-15 x 0.75”
710-1003
B Screw #10-16 x 0.625”
710-1882
Hex Flange Screw
710-3083
Hex Bolt 5/16-18 x 1.375”
712-0252
Jam Nut
712-0429
Lock Nut
712-3010
Hex Nut 5/16-18
714-0104
Cotter Pin
714-0507
Cotter Pin
720-0201A
Knob: Chute Crank
725-0201
Ignition Key
725-2018
Switch: Electric Start Key
726-0100
Push Cap
736-0119
Lock Washer
736-0185
Flat Washer
736-0225
Internal Lock Washer
736-0400
Flat Washer
736-0451
Saddle Washer
7519636
Mitten Grip Handle
684-0190
Spark Plug Access
749-0711A
Upper Handle: Gull Wing
749-0796B
Lower Handle
710-0167
Carriage Screw 1/4-20 x 0.50”
710-0191
Hex Bolt
710-0323
Machine Screw
Ref. No.
30.
31.
32.
33.
34.
35.
36.
37.
38.
39.
40.
41.
42.
43.
44.
45.
46.
47.
48.
49.
50.
51.
52.
53.
54.
55.
56.
57.
58.
59.
60.
13
Part No.
Part Description
710-0352
B Screw1/4-14 x 0.375”
710-0451
Carriage Bolt
710-0642
TT Screw 1/4-20 x 0.75”
710-0773
TT Screw 3/8-16 x 0.5”
710-0896
AB Screw 1/4-14 x 0.625”
710-1005
B Screw 1/4-14 x 0.5”
711-0848A
Axle Tube
712-0116
Jam Lock Nut
712-3010
Hex Nut 5/16-18
712-3027
Lock Nut
731-1033
Shave Plate
732-0357A
Extension Spring
736-0108
Flat Washer
736-0119
Lock Washer
736-0176
Flat Washer
736-0242
Beleville Washer
736-0326
Flat Washer
736-0329
Lock Washer
741-0475
Plastic Bushing
741-0600
Ball Bearing
746-0910A
Clutch Cable
748-0234
Shoulder Spacer
756-0313
Flat Idler
784-5174
Bearing Cup
784-5175B
Bracket: Brake Idler
784-5176
Belt Cover
784-5485
Auger Assembly
784-5720
Chute Crank Bracket
684-0196
Auger Housing Assembly
734-1799
Wheel Assembly
710-1090
Hex Flange Screw
Models 285, 295, E285 and E295
19
16
24
18
1
15
7
5
11
10
15
8
17
Engine is for reference only
and may not resemble the
engine on your snow thrower.
9
6
13
25
3
Part of electric
start engines
21
13
23
14
3
2
4
22
Ref. No.
1.
2.
3.
4.
5.
6.
7.
8.
9.
10.
11.
13.
Part No.
629-0236
Description
Extension Cord †
710-0157
Hex Bolt 5/16-24 x 0.75”
710-0409
Hex Bolt 5/16-24 x 1.75”
710-0502A
TT Sems Screw
710-0751
Hex Screw 1/4-20 x 0.620”
710-1003
B Screw #10-16 x 0.625” †
710-3013
Hex Screw 1/4-20 x 0.50”
712-3006
Hex Nut 1/4-20
719-0581
Spacer
726-0205
Hose Clamp
731-2005
Choke Knob
736-0119
Lock Washer
Ref. No.
14.
15.
16.
17.
18.
19.
20.
21.
22.
23.
24.
25.
† For Electric Start models only
‡ For Model E295 only
14
20
Part No.
736-0242
Description
Beleville Washer
736-0329
Lock Washer
741-0475
Plastic Bushing
751-0535
Fuel Line Hose
751-0540A
Gas Tank
751-0603
Fuel Cap
754-0101A
V-Belt
756-0416B
V-Pulley Half
756-0475
Pulley
784-0322
Engine Mount
784-0323
Support Bracket
784-0374
Support Plate: Engine Mount ‡
Models 285, 295, E285 and E295
5
Ref. No.
9
8
10
3
2
4
Part No.
Description
1.
710-0487
Carriage Screw 5/16-18 x 2.0”
2.
710-1270
Machine Screw
3.
712-0324
Hex Lock Nut 1/4-20
4.
720-0284
Hand Knob w/ Wing Nut
5.
720-0295
Foam Grip
6.
725-0157
Cable Tie
7.
736-0451
Saddle Washer
8.
746-0883
Control Housing
9.
747-0956
Auger Bail
749-0711A
Upper Handle: Gull Wing
10.
1
6
7
7
4
5
Ref. No.
9
10
6
10
8
4
1
2
4
7
3
15
Part No.
Description
1.
710-0276
2.
710-0451
Carr. Bolt 5/16-18 x 0.750”
3.
710-3015
Hex Screw 1/4-20 x 0.75”
4.
712-3027
Lock Nut
5.
712-3068
Hex Lock Nut
6.
720-0284
Hand Knob
7.
731-0851A
Flange Keeper: Chute
8.
731-0915B
Lower Chute
9.
731-0921
Upper Chute
10.
736-0159
Washer
Carriage Screw: Special
ÍNDICE
Contenido
Página
Medidas importantes de seguridad ......................................................................................... 17
Montaje de su máquina quitanieve .......................................................................................... 19
Conozca la máquina quitanieve .............................................................................................. 20
Operación de su máquina quitanieve ...................................................................................... 21
Realización de ajustes ............................................................................................................ 23
Mantenimiento de su máquina quitanieve ............................................................................... 24
Almacenamiento fuera de temporada ..................................................................................... 25
Guía para la solución de problemas ........................................................................................ 25
BÚSQUEDA DEL NÚMERO DE MODELO
Este manual de operador es una parte importante de su nueva máquina quitanieve. Le ayudará a montar, preparar y mantener
la unidad para obtener los mejores resultados. Por favor lea y comprenda el contenido del manual.
Antes de comenzar el montaje de la máquina quitanieve nueva, por favor encuentre la placa del modelo del
equipo y copie la información contenida en la misma en el espacio provisto a continuación. La información
contenida en la placa del modelo es muy importante en caso de necesitar ayuda de nuestro Departamento de
Asistencia al Cliente o de un distribuidor autorizado.
•
Puede ubicar el número de modelo parándose detrás de la unidad en posición operativa y mirando hacia abajo en el
tablero de instrumentos . A continuación se explica un ejemplo de placa de modelo. Para referencias futuras, por favor
copie el número de modelo y el número de serie del equipo en el espacio a continuación.
(Número de modelo)
(Número de serie)
Copie el número del modelo en este espacio:
Copie el número de serie en este espacio:
MTD PRODUCTS INC
CLEVELAND, OHIO 44136
INFORMACIÓN ACERCA DEL MOTOR
El fabricante del motor es el responsable de todas las cuestiones relacionadas con el rendimiento, potencia de
salida, especificaciones, garantía y mantenimiento del motor. Por favor, para mayor confirmación, consulte el
manual del dueño/ operador del fabricante del motor que es enviado, en un paquete por separado, junto con su
unidad.
SERVICIO TELEFÓNICO DE ASISTENCIA AL CLIENTE
En caso de tener problemas para ensamblar este producto o de tener dudas con respecto a los controles, funcionamiento o
mantenimiento del mismo, por favor comuníquese con el Departamento de asistencia al cliente.
Llame al 1- (330) 220-4MTD (4683) o 1- (800)-800-7310 para comunicarse con un representante de asistencia
al cliente. Por favor tenga a mano el número de modelo y el número de serie de su unidad cuando llame.
Consulte la sección anterior para obtener esta información. Se le solicitará que ingrese el número de serie para
poder procesar su llamada.
Para obtener más detalles acerca de su unidad, visite nuestro sitio web en
16
ADVERTENCIA: Este símbolo indica importantes instrucciones de seguridad las cuales, en caso de no ser
respetadas, podrían poner en peligro la seguridad del personal y/o sus bienes materiales y los de terceros. Lea y siga
todas las instrucciones contenidas en este manual antes de intentar poner esta máquina en funcionamiento. De no
hacerlo puede ocasionar lesiones. Cuando vea este símbolo—preste atención a la advertencia..
ADVERTENCIA: El escape del motor de este producto, algunos de sus componentes y algunos componentes
del vehículo contienen o emiten productos químicos que el estado de California considera que pueden producir cáncer,
defectos de nacimiento u otros problemas reproductivos.
PELIGRO: Esta máquina está diseñada para ser utilizada respetando las reglas de seguridad contenidas en este manual. Al
igual que con todos los equipos eléctricos si el operador es descuidado o comete errores puede ocasionar lesiones graves. Esta
máquina puede amputar manos y pies y arrojar objetos. De no respetar las instrucciones de seguridad siguientes se pueden
producir lesiones graves o la muerte.
Capacitación
1.
2.
3.
4.
5.
6.
7.
8.
Lea, comprenda y respete todas las instrucciones que figuran
en la máquina o en este(os) manual(es) antes de proceder al
montaje y operación del equipo. Guarde este manual en un
lugar seguro para referencias futuras y regulares y para solicitar
repuestos.
Familiarícese con todos los controles y con el uso adecuado de
los mismos. Sepa cómo detener la máquina y cómo
desengranar los controles rápidamente.
Nunca permita que niños menores de 14 años operen esta
máquina. Los niños de 14 años y más deben leer y comprender
las instrucciones de operación y las reglas de seguridad
contenidas en este manual y deben ser capacitados y
supervisados por uno de los padres.
Nunca permita que adultos sin conocimientos acerca de la
máquina operen la misma.
Los objetos arrojados por la máquina pueden producir lesiones
graves. Planifique el patrón en el que va a ir arrojando nieve
para evitar que la descarga de material se realice hacia los
caminos, los observadores, etc.
Mantenga a los observadores, ayudantes, mascotas y a los
niños por lo menos a 75 pies de la máquina mientras la misma
está en funcionamiento. Detenga la máquina si alguien entra en
la zona.
Sea precavido para evitar patinarse o caerse especialmente
cuando opera la máquina en reversa.
9.
Preparativos
1.
2.
3.
4.
5.
6.
7.
Revise minuciosamente la zona donde se utilizará el equipo.
Quite todos los felpudos, periódicos, trineos, tablas, alambres y
otros objetos que podrían engancharse o ser expulsados por la
barrena/ motor.
Para protegerse los ojos utilice siempre anteojos o antiparras
de seguridad mientras opera la máquina o mientras la ajusta o
repara. Los objetos arrojados que rebotan pueden lesionar
gravemente la vista.
No opere la máquina sin la vestimenta adecuada para estar al
aire libre en invierno. No utilice alhajas, bufandas largas u otras
prendas sueltas que podrían enredarse en las partes móviles.
Utilice un calzado antideslizante para las superficies
resbaladizas.
Use un cordón prolongador y un tomacorriente de tres cables
con conexión a tierra para todas las unidades con motores con
encendido eléctrico.
Ajuste la altura de la caja del tomacorriente para limpiar la grava
o las superficies con piedras trituradas.
Desengrane todas las palancas de embrague antes de arrancar
el motor.
Nunca intente realizar ajustes mientras el motor está en marcha
excepto en los casos específicamente recomendados en el
manual del operador.
Deje que el motor y la máquina se adapten a la temperatura
exterior antes de comenzar a sacar la nieve.
Sea sumamente cuidadoso al manipular la gasolina para evitar
lesiones o daños. La gasolina es altamente inflamable y los
vapores son explosivos. Se puede lesionar gravemente si
derrama gasolina sobre usted o sobre la ropa ya que se puede
encender. Lave la piel y cámbiese de ropa de inmediato.
a. Utilice sólo recipientes para gasolina aprobados.
b. Apague todos los cigarrillos, cigarros, pipas y otras
fuentes de combustión.
c. Nunca cargue combustible en la máquina en un espacio
cerrado.
d. Nunca saque la tapa del gas ni agregue combustible
mientras el motor está caliente o en marcha.
e. Deje que el motor se enfríe por lo menos dos minutos
antes de volver a cargar combustible.
f.
Nunca recargue el tanque de combustible. Llene el
tanque no más de 1/2 pulgada por debajo de la base del
cuello del filtro para dejar espacio para la dilatación del
combustible.
g. Vuelva a colocar la tapa de la gasolina y ajústela bien.
h. Limpie la gasolina derramada sobre el motor y el
equipo. Traslade la máquina a otra zona. Espere 5
minutos antes de encender el motor.
i.
Nunca almacene la máquina o el recipiente de
combustible en un espacio cerrado donde haya fuego,
chispas o luz piloto (por ejemplo, hornos, calentadores
de agua, calefactores, secadores de ropa, etc.).
j.
Deje que la máquina se enfríe 5 minutos por lo menos
antes de almacenarla.
Funcionamiento
1.
2.
3.
4.
5.
17
No ponga las manos o los pies cerca de las piezas rotatorias, en
la caja de la barrena / motor o en el canal de descarga. El
contacto con piezas rotatorias puede amputar manos y pies.
La palanca del embrague de la barrena / motor es un dispositivo
de seguridad. Nunca pase por alto su funcionamiento. De
hacerlo la operación de la máquina es riesgosa y puede
ocasionar lesiones.
Las palancas del embrague deben funcionar bien en ambas
direcciones y regresar automáticamente a la posición de
desengrane cuando se las suelta.
Nunca opere la máquina si falta un canal de descarga o el
mismo está dañado. Mantenga todos los dispositivos de
seguridad en su lugar y en funcionamiento.
Nunca encienda el motor en espacios cerrados o en una zona
poco ventilada. El escape del motor contiene monóxido de
carbono, un gas inodoro y letal.
Espanól
SECCIÓN 1: MEDIDAS IMPORTANTES DE SEGURIDAD
7.
8.
9.
10.
11.
12.
13.
14.
15.
16.
17.
18.
19.
20.
Mantenimiento y almacenamiento
No opere la máquina estando bajo los efectos del alcohol o de
drogas.
El silenciador y el motor se calientan y producen una
quemadura. No los toque.
Sea sumamente precavido cuando opere la máquina sobre una
superficie con grava o cuando la cruce. Manténgase alerta por
si se presentan peligros ocultos o tráfico.
Tenga cuidado cuando cambie de dirección o cuando opere la
máquina en pendientes.
Planifique el patrón en el que va a ir arrojando nieve para evitar
que la descarga de material se produzca hacia las ventanas, las
paredes, los autos, etc. para evitar daños materiales o lesiones
producidas por los rebotes.
Nunca dirija la descarga hacia los niños, los observadores y a
las mascotas ni deje que nadie se pare delante de la máquina.
No sobrecargue la capacidad de la máquina tratando de sacar
la nieve muy rápidamente.
Nunca opere esta máquina si no tiene buena visibilidad o
iluminación. Siempre debe estar seguro de que está bien
afirmado y sostenga bien las manijas. Camine, nunca corra.
Corte la corriente a la barrena / motor cuando transporte la
máquina o cuando la misma no está en uso.
Nunca opere la máquina a alta velocidad de desplazamiento
sobre superficies resbaladizas. Mire hacia abajo y hacia atrás y
tenga cuidado cuando la use en reversa.
Si la máquina comenzara a vibrar de manera anormal, detenga
el motor, desconecte la bujía y póngala de manera que haga
masa contra el motor. Inspeccione la máquina minuciosamente
para ver si está dañada. Repare todos los daños antes de
encender y operar la máquina.
Desengrane todas las palancas de embrague y detenga el
motor antes de dejar la posición de operación (detrás de las
manijas). Espere a que la barrena / motor se detenga por
completo antes de destapar el canal de descarga, de realizar
ajustes o inspecciones.
Nunca ponga las manos en las aberturas de descarga o de
recolección. Utilice siempre una herramienta de limpieza para
destapar la abertura de descarga.
Use sólo uniones y accesorios aprobados por el fabricante (por
ejemplo, pesas para las ruedas, cadenas para los neumáticos,
cabinas, etc.).
Si se presentan situaciones que no están previstas en este
manual sea cuidadoso y use el sentido común. Comuníquese
con su distribuidor o llame al teléfono 1-800-800-7310 por
ayuda y para obtener el nombre del distribuidor más cercano.
1.
Nunca manipule los dispositivos de seguridad de manera
imprudente. Verifique regularmente si funciona de manera
correcta.
2. Desengrane todas las palancas de embrague y detenga el
motor. Espere a que la barrena / motor se detenga por
completo. Desconecte el cable de la bujía y póngalo de manera
que haga masa contra el motor para evitar que se encienda de
manera accidental antes de limpiar, reparar o revisar la
máquina.
3. Controle frecuentemente que todos los pernos y tornillos estén
bien ajustados para comprobar que la máquina se encuentra en
condiciones seguras de operación. Además realice una
inspección visual de la máquina para controlar si la misma está
dañada.
4. No cambie la configuración del regulador del motor ni acelere
demasiado el mismo. El regulador controla la velocidad máxima
segura de operación del motor.
5. Las placas de raspado y los zapatos anti deslizantes de que se
usan con la máquina quitanieves se desgastan y se dañan. Para
proteger su seguridad, verifique frecuentemente todos los
componentes y reemplácelos sólo con partes de los fabricantes
de equipos originales (O.E.M.). “La utilización de partes que no
cumplan con las especificaciones de equipos originales podría
tener como resultado un rendimiento incorrecto y además la
seguridad podría estar comprometida”
6. Revise los controles del embrague periódicamente para
verificar que engranen y desengranen adecuadamente y
ajústelos si es necesario. Consulte la sección de ajustes en este
manual del operador para obtener instrucciones.
7. Mantenga o reemplace las etiquetas de seguridad e
instrucciones según sea necesario.
8.
Respete las leyes y reglamentaciones referentes a la
disposición correcta de gas, aceite, etc. para proteger el medio
ambiente.
9. Antes de almacenar la máquina enciéndala unos minutos para
sacar la nieve que haya quedado en la misma y para evitar así
que se congele la barrena / motor.
10. Nunca almacene la máquina o el recipiente de combustible en
un espacio cerrado donde haya fuego, chispas o luz piloto como
por ejemplo, calentadores de agua, hornos, secadores de ropa,
etc.
11. Siempre consulte el manual del operador para obtener
instrucciones correctas acerca del almacenamiento fuera de
temporada.
Su responsabilidad:
•
Sólo permita que usen esta máquina eléctrica las personas que
lean, comprendan y respeten las advertencias y las
instrucciones que aparecen en este manual y en la máquina.
AVOID INJURY FROM
ROTATING AUGER KEEP HANDS, FEET
AND CLOTHING AWAY.
6.
DANGER
1. KEEP AWAY FROM ROTATING AUGER
CONTACT WITH AUGER CAN AMPUTATE
HANDS AND FEET.
2. DISENGAGE CLUTCH LEVERS, STOP ENGINE,
AND REMAIN BEHIND HANDLES UNTIL ALL
MOVING PARTS HAVE STOPPED BEFORE
UNCLOGGING OR SERVICING MACHINE.
3. TO AVOID THROWN OBJECTS INJURIES,
NEVER DIRECT DISCHARGE AT BYSTANDERS.
USE EXTRA CAUTION WHEN OPERATING ON
GRAVEL SURFACES.
4. READ OPERATOR'S MANUAL.
NEVER PUT HAND IN CHUTE. CONTACT WITH
ROTATING PARTS CAN AMPUTATE FINGERS
AND HANDS.
DO NOT UNCLOG DISCHARGE CHUTE WHILE
ENGINE IS RUNNING.
SHUT OFF ENGINE AND REMAIN BEHIND
HANDLES UNTIL ALL MOVING PARTS HAVE
STOPPED BEFORE UNCLOGGING.
18
SECCIÓN 2: MONTAJE DE LA MÁQUINA QUITANIEVE
Desempaque de la caja de cartón
•
•
•
•
Corte las esquinas de la caja de cartón y extiéndala en el
piso. Quite el material de empaque.
Quite cualquier parte suelta que se incluya con su unidad
(por ejemplo, el manual del operador, etc.).
Deslice la unidad hasta sacarla de la caja de cartón.
Verifique cuidadosamente si en la caja queda alguna parte
suelta.
Reinserte la broche de horquilla en el agujero para asegurar
las dos manivelas del canal. Ver Figura 2.
Piezas necesarias para el montaje
1.
2.
3.
Par de pinzas
Aceite del motor
Gasolina fresca
Broche de horquilla
NOTA: Las referencias a los lados derecho o izquierdo de la
máquina quitanieve se hacen observando la misma desde la
posición de operación.
Canal inferior
Manivela
Antes del montaje
ADVERTENCIA: Desconecte el cable de la
bujía y póngalo de manera que haga masa contra el
motor para evitar que se encienda de manera
accidental. Ver Figura 1.
ACLARACIÓN:
Para una
de la imagen,
mejor claridad
la manija de control
no aparece
en el dibujo. No
la quite para operar
el equipo.
Figura 2
Elevación del mango superior
•
Canal superior
Manivela
Instalación del cable de control
Afloje la perilla manual de cada lado del mango. Quite el
material de empaque, en caso de existir.
Es posible que el cable de control ya esté unido a la manija de
control. Si no está unido, complete los siguientes pasos para
unirlo a la caja de la máquina quitanieve.
•
Pase el cable de control por encima de la manija inferior.
Inserte el extremo del cable en el agujero de la caja de
control tal como se exhibe Figura 3. Ubique el accesorio
plástico hasta que encaje en la caja de control.
Perilla manual
Fondo
Agujero
Control
Manija
Extremo “Z”
del cable
Perilla manual
Control
Caja
Bujía de encendid
Acceso
Plástico
Accesorio
Figura 1
•
•
Figura 3
Eleve el mango superior en la dirección que se exhibe
Figura 1 hasta que encaje en la posición operativa.
Asegúrese de no apretar o rebordear el cable.
Ajuste las perillas manuales.
•
Ajuste la manivela del canal
La manivela del canal inferior ya fue instalada en fábrica en su
máquina quitanieve. Por razones de envío, la manivela del canal
superior está empaquetada como una parte separada. Adósela a
la manivela del canal inferior siguiendo las siguientes
instrucciones:
•
Quite el broche de horquilla de la manivela del canal inferior.
•
Inserte la manivela del canal superior en la manivela del
canal inferior y alinee los agujeros.
Eleve la palanca de control y enganche el extremo “Z” del
cable de control en el agujero del fondo de la manija de
control, desde el exterior y el interior . En caso de ser
necesario, tire hacia arriba el extremo del cable con un par
de pinzas para aflojarlo y poder engancharlo en la manija de
control. Mantenga el accesorio “Z” con las pinzas, no el
cable, para evitar dañar al cable.
NOTA: El agujero superior en la manija de control permite
ajustar la tensión de la banda. Consulte la página 23 de este
manual por las instrucciones.
19
Montaje del canal de descarga
•
•
•
Canal inferior
Gire la manivela del canal hasta que el canal esté ubicado
hacia el frente. Vea Figura 4 .
Quite la perilla manual, la arandela plana y el perno del carro
del canal superior. Ver Figura 4.
Gire el canal superior por encima del borde del canal
inferior. Esto eliminará cualquier espacio entre los canales
superiores e inferiores. Asegúrelo con las piezas metálicas
que acaba de quitar.
Tuerca
Carro
Perno
Plana
Arandela
Plana
Arandela
Bulón hexagonal
Superior
Canal
Manual
Perilla
Figura 4
SECCIÓN 3: CONOZCA LA MÁQUINA QUITANIEVE
ADVERTENCIA: Familiarícese con el uso de todos los controles de la máquina quitanieve y con su correcto
funcionamiento. Sepa cómo detener la máquina y cómo desengranar los controles rápidamente.
Manija de control
de la barrena
Arrancador
de retroceso
Manivela del canal
Tapa de la gasolina
Cebador
Llave
Arrancador eléctrico
(si es parte del equipo)
Acceso a
la bujía
Canal de
descarga
Tapón para
llenado de
aceite
Barrena
Placa de raspado
Palanca
de
obturación
Figura 5
Manija de control de la barrena
Manivela del canal
Ubicada en la manija superior, la manija de control de la barrena
se utiliza para enganchar y desenganchar la barrena. La
máquina quitanieve está diseñada para avanzar por rotación de
la barrena. Empuje la manija de control contra la manija superior
para enganchar la barrena, suelte para desengancharla.
Ubicada en el lado derecho del tablero de instrumentos, la
manivela del canal determina la dirección en que se descargará
la nieve. Gire en sentido de las agujas del reloj para descargar la
nieve hacia la izquierda; gire en dirección contraria de las agujas
del reloj para descargarla hacia la derecha.
20
Canal de descarga
Llave de encendido
El ángulo del canal de descarga controla la distancia a la cual se
arroja la nieve. Incline el canal de descarga hacia arriba si quiere
que la nieve sea arrojada a una distancia mayor; incline hacia
abajo si quiere que la descarga se realice a menor distancia.
Afloje la perilla manual del lado del canal de descarga para
ajustarlo. Incline el canal hacia la posición deseada y ajuste a
perilla.
Se utiliza para encender el motor. Coloque la llave en posición
“ON” para iniciar tanto el motor eléctrico como los motores
arrancadores de retroceso. Siga las instrucciones de inicio que
se brindan en la siguiente sección.
Arrancador de retroceso
Se utiliza para encender manualmente el motor.
Arrancador eléctrico (si es parte del equipo)
Palanca de obturación
Utilizado para encender el motor con una fuente de potencia de
120V
La ubicación de la palanca de obturación está indicada en la
sección de inserción de la Figura 5. Deberá utilizar esta palanca
para arrancar el motor. Empuje la palanca completamente hacia
arriba a la posición FULL/ON, o completamente hacia abajo a la
posición OFF, según se desee.
Enchufe para inicio eléctrico(si es parte del equipo)
Exige el uso de un cable de extensión de tres terminales para
exteriores
y una fuente de alimentación de 120V
Botón del cebador
Acceso a la bujía
Se utiliza para inyectar combustible directamente en el
carburador para asegurar que el motor se inicie rápidamente en
climas fríos. Siga las instrucciones el manual del motor para
cebarlo.
La bujía está ubicada debajo de la cubierta de acceso.
SECCIÓN 4: FUNCIONAMIENTO DE LA MÁQUINA QUITANIEVE
Antes de encender
tierra y está diseñado para operar con corriente doméstica
de 120 voltios
ADVERTENCIA: Lea, comprenda y siga
todas las instrucciones y advertencias que aparecen
en la máquina y en este manual antes de operarla.
•
Manija de control
Barrena de presión
la barrena
para enganchar
El cable de la bujía fue desconectado por seguridad.
Enchufe el cable de la bujía a la bujía antes de encender la
máquina.
Gire la manija
para cambiar
descarga
dirección
Llenado de gasolina y aceite
•
Verifique el nivel de aceite y gasolina y agregue en caso de
ser necesario. Siga las instrucciones correspondientes que
se indican en el manual del motor que se incluye por
separado con su máquina quitanieve.
Eléctrico
Arrancador*
Obturación
Palanca
Acceso a la bujía
* Si es parte
Para encender el motor
Inserte la llave de encendido en la ranura. Gire la llave a la
•
posición ON (encendido).
Ahora siga las instrucciones que aparecen debajo según
corresponda a su unidad.
Figura 6
•
Arrancador eléctrico (si es parte del equipo)
•
ADVERTENCIA: El arrancador eléctrico debe
•
ser utilizado con un receptáculo de tres terminales
correctamente conectado a tierra en todo momento
para evitar la posibilidad de descargas eléctricas.
Siga todas las instrucciones cuidadosamente para
operar el arrancador eléctrico.
•
Retroceso
Arrancador
Llave
ADVERTENCIA: Tenga extremo cuidado
cuando manipule la gasolina. La gasolina es altamente
inflamable y los vapores son explosivos. Nunca le
agregue combustible a la máquina en interiores o
mientras el motor está caliente o en funcionamiento.
Apague todos los cigarrillos, cigarros, pipas y otras
fuentes de combustión.
•
Cebador
•
El arrancador eléctrico está equipado con un cable de
alimentación y un enchufe de tres terminales conectados a
•
21
Determine si el cableado de su hogar es un sistema de tres
cables conectado a tierra. Consulte con un electricista
matriculado si no está seguro.
Si su sistema de cableado doméstico no es un sistema
de tres terminales con conexión a tierra, no utilice este
motor eléctrico bajo ningún tipo de condiciones.
Si su sistema de cableado doméstico es un sistema con
conexión a tierra, pero no cuenta con un receptáculo de
tres terminales, debe indicarle a un electricista con
experiencia que lo instale antes de utilizar el arrancador
eléctrico.
Si cuenta con un receptáculo de tres terminales, siga los
siguientes pasos.
Rote la palanca de obturación a posición FULL (total).
•
•
•
•
Conecte el cable de alimentación a la caja del interruptor en
el tablero de instrumentos. Enchufe el otro extremo del cable
de alimentación en un receptáculo de CA con conexión a
tierra de tres terminales de 120 voltios.
Presione el botón del arrancador para arrancar el motor con
la manivela. A medida que intenta encender el motor con la
manivela, mueva la palanca de obturación hacia la posición
de obturación FULL.
Cuando se inicia el motor, suelte el botón del arrancador, y
mueva el obturador gradualmente a la posición OFF
(apagado). Si el motor falla, mueva el obturador
inmediatamente a posición FULL y luego gradualmente a
OFF.
Cuando desconecte el cable de alimentación, siempre
desenchúfelo en primer lugar del receptáculo de tres
terminales, y luego de la máquina quitanieve.
•
•
Funcionamiento de la máquina quitanieve
•
Arrancador de retroceso
•
•
•
•
Rote la palanca de obturación a posición de obturación
FULL (encendido con el motor en frío).
Si el motor está caliente, ubique el obturador en posición
OFF en lugar de FULL.
Presione el botón del cebador dos o tres veces para iniciar
el motor en frío.
Si el motor está caliente, presione el botón del cebador una
sola vez.
•
•
NOTA: Siempre cubra el agujero de ventilación en el botón
cebador cuando lo presiona. Tal vez sea necesario un cebado
adicional para iniciar el equipo por primera vez si la temperatura
es menor a 15 grados Fahrenheit.
•
•
•
Tome con firmeza la manija del arrancador y tire de la soga
lentamente hasta que quede un poco más tirante. Deje que
la soga se enrosque lentamente.
Tire de la manija del arrancador rápidamente. No permita
que la manija se desenganche. Permita que se enrosque
lentamente mientras mantiene firmemente la manija del
arrancador.
Mientras el motor se calienta y comienza a funcionar de
manera pareja, rote la palanca del obturador lentamente
hacia la posición OFF. Si el motor falla, gire hacia el
obturador FULL, luego mueva lentamente hacia posición
OFF.
Ajuste el canal de descarga superior hacia arriba o hacia
abajo tal como se muestra en Figura 4. Tendrá que soltar la
perilla manual para ajustar el canal superior y luego volver a
ajustarla una vez que se ha logrado el ajuste correcto.
Utilice la manivela del canal para ubicar el canal de
descarga de manera que descargue la nieve en dirección al
viento.
Después de asegurarse de que no haya ningún transeúnte
ni ningún objeto enfrente de la unidad, enganche la manija
de control de la barrena. A medida que la máquina
quitanieve comienza a moverse, sostenga firmemente la
manija y guíe la máquina a lo largo del camino que desea
limpiar.
Suelte la manija de control de la barrena para que la
máquina deje de arrojar nieve y de desplazarse hacia
adelante.
r
yo ncia
a
M s ta
Di
D i Me
st no
an r
ci a
•
de manera continua y seguida. Al tirar de la soga del
arrancador se oirá un fuerte sonido de traqueteo, el cual no
daña al motor ni al arrancador.
Limpie toda la nieve y la humedad de la tapa del carburador
en el área de las palancas de control. Además, mueva las
palancas de control hacia delante y hacia atrás varias veces.
Deje la palanca de control de la mariposa en posición STOP
(detención) o en posición OFF. Deje el control de obturación
en la posición de obturación FULL.
Quite la llave de encendido y desconecte el cable de la bujía
para evitar que la máquina pueda encenderse
accidentalmente.
Superior
Descarga
Canal
Manual
Perilla
Figura 7
Para detener el motor
•
Para detener el motor, gire la llave de encendido en
dirección de las agujas del reloj. Desconecte el cable de la
bujía de la bujía para evitar que se encienda
accidentalmente mientras no se está prestando atención al
equipo.
Para ayudar a prevenir un posible congelamiento del arrancador,
proceda de la siguiente manera:
•
Deje encendido el motor durante algunos minutos antes de
detenerlo para permitir que se seque la humedad en el
mismo.
•
Arrancador eléctrico: Conecte el cable de alimentación a
la caja del interruptor del motor y luego al receptáculo de CA
de 120 voltios. Con el motor funcionando, presione el botón
del arrancador y deje girar el arrancador por varios
segundos. El sonido inusual que realiza el arrancador al
girar no dañará al motor ni al arrancador. Desconecte el
cable de alimentación del receptáculo primero y de la caja
del interruptor luego.
•
Arrancador de retroceso: Con el motor en funcionamiento,
tire con fuerza de la soga del arrancador tres o cuatro veces
Consejos de operación
•
•
En lo posible, descargue la nieve en dirección al viento.
Recubra ligeramente cada trayecto previamente despejado.
Si eleva la manija, la goma de la barrena impulsará la
máquina quitanieve hacia adelante. Si presiona la manija
hacia abajo, elevará la barrena del piso y detendrá el avance
la máquina.
NOTA: Una excesiva presión ascendente sobre la manija
tendrá como resultado un desgaste prematuro de las cuchillas de
goma de la barrena y esto no estará cubierto por la garantía.
•
•
Deje el motor encendido durante algunos minutos antes de
detenerlo para ayudar a secar toda presencia de humedad
en el motor.
Limpie cuidadosamente la máquina quitanieve después de
cada uso.
ADVERTENCIA: El silenciador, el motor y las
areas circundantes se recalientan y pueden causar
quemaduras. No los toque.
22
SECCIÓN 5: REALIZACIÓN DE AJUSTES
Tensión de la banda
ADVERTENCIA: NUNCA intente realizar
Es posible que se requieran ajustes periódicos de la tensión de la
banda debido al estiramiento y al desgaste normal de la banda.
Ajuste la tensión de la banda, siguiendo las instrucciones que
aparecen debajo si las barrenas parecen temblar cuando giran a
pesar de que el motor mantiene la misma velocidad,.
algún tipo de ajuste mientras el motor está
encendido, excepto los ajustes especificados en el
manual del operador.
Placa de raspado
•
•
Para verificar el ajuste de la placa de raspado, ubique la
unidad sobre una superficie nivelada. Vea Figura 8. Tanto
las ruedas como la placa de raspado y las barrenas deben
hacer contacto con la superficie nivelada. Fíjese que si la
placa de raspado está demasiado alta la nieve puede volar
debajo de la caja. Si la placa de raspado se desgasta
excesivamente, o la unidad no se autopropulsa, es posible
que la placa de raspado esté demasiado baja y deba ser
ajustada.
El agujero superior en la manija de control permite ajustar la
tensión de la banda. Para ajustarla, desconecte el extremo
“Z” del cable de control desde el agujero ubicado en el fondo
de la manija de control. Vea Figura 10 . Enganche el cable
en el agujero superior de la manija de control tal como se
exhibe.
Superior
Agujero
NOTA: En las unidades nuevas o en las que tienen una placa
Embrague
Cable
de raspado nueva las barrenas pueden estar un poco separadas
del suelo.
Control
Caja
Figura 10
Barrenas
Si se requiere un ajuste adicional, siga los siguientes pasos:
•
Quite la cubierta de la banda extrayendo los cinco tornillos
hexagonales que la sostienen. Ver Figura 12.
•
Hay tres agujeros de ajuste en el montaje del soporte
intermedio. Vea Figura 11. Para ajustar, mueva el resorte de
extensión ubicado en el extremo del cable del embrague a la
siguiente posición de ajuste en el montaje del soporte
intermedio. Vuelva a montar la cubierta de la banda.
Placa de raspado
Posición alta
Figura 8
•
Intermedio
Soporte
Para ajustarlas incline la máquina quitanieve hacia atrás de
manera que quede apoyada sobre la manija. Afloje las
cuatro tuercas y pernos de seguridad que fijan la placa de
raspado a la caja. Ver Figura 9. Mueva la placa de raspado
hacia la posición deseada y vuelva a ajustar las tuercas y los
pernos de manera segura.
Posición media
Posición baja
Barrena
Accionamiento
Polea
Extremo del embrague
Cable
Figura 11
Carburador
ADVERTENCIA: Si es necesario realizar
algún ajuste al motor (por ejemplo al carburador),
quite todas las partes móviles. Tenga cuidado con el
silenciador, el motor y otras superficies
recalentadas alrededor del mismo.
•
Tuerca de seguridad & perno del carro
Figura 9
23
Remítase al manual del motor, que está empacado con su
unidad por separado para obtener información acerca del
carburador.
SECCIÓN 6: MANTENIMIENTO DE LA MÁQUINA QUITANIEVE
Reemplace la placa de raspado
ADVERTENCIA: Antes de realizar tareas de
La placa de raspado está adosada al fondo de la barrena y puede
desgastarse. Debe ser controlada de manera periódica. Hay dos
bordes de desgaste ya que la placa de raspado puede ser
invertida. Ver Figura 14.
•
Quite los cuatro pernos del carro y las tuercas de seguridad
hexagonales que se adosan a la caja de la máquina
quitanieve.
•
Instale una nueva placa de raspado, asegurándose de que
las tapas de los pernos del carro se encuentren en el lado
interior de la caja.
•
Ajuste la placa de raspado de acuerdo a las instrucciones
que aparecen en la página 23. Ajústelos bien.
mantenimiento, reparación o inspección,
desenganche todas las palancas del embrague y
detenga el motor. Espere a que se detengan todas
las piezas que se mueven. Desconecte la bujía y
póngala de manera que haga masa contra el motor.
Reemplace las bandas
•
Quite la cubierta de la banda extrayendo los cinco
tornilloshexagonales. Ver Figura 12.
Hexagonal
Tornillo
de raspa
Placa
Tornillo
hexagonal
Cubierta de la banda
Figura 12
•
•
•
•
Quite estas piezas metálicas
Figura 14
Tire hacia arriba la polea loca y deslice la banda hasta
sacarla de la polea del motor.
Tire hacia abajo la polea loca y deslice la banda hasta
sacarla de la polea de la barrena.
Vuelva a montar la banda nueva. Ver Figura 13.
Reinstale la cubierta de la banda.
Motor
•
•
Remítase al manual del motor para obtener información
acerca de todos los procedimientos de mantenimiento del
motor.
Verifique con frecuencia el motor y la máquina quitanieve
para controlar que no haya piezas metálicas sueltas; en
caso de haber alguna suelta ajústela.
Lubricación
•
Polea loca
•
Motor
Polea
Barrena
Polea
Transmisión
Banda
Figura 13
24
Lubrique los puntos de giro de la manija de control y del
resorte de extensión del extremo del cable del embrague
con un aceite liviano una vez por temporada y antes de
almacenar la máquina quitanieve al final de la temporada.
Lubrique los fijadores de la brida en la manivela del canal
una vez por temporada con un aceite liviano asegurándose
de que la varilla de la manivela se mueva libremente. Quite
los pernos que sujetan el refuerzo a la caja, y eleve el
refuerzo para acceder al soporte de la manivela del canal.
SECCIÓN 7: ALMACENAMIENTO FUERA DE TEMPORADA
•
ADVERTENCIA: Nunca almacene el motor
con combustible en el tanque en un espacio cerrado
y con poca ventilación donde los gases del
combustible puedan alcanzar el fuego, chispas o
una luz piloto como la que tienen algunos hornos,
calentadores de agua, calefactores, secadores de
ropa o algún otro dispositivo a gas.
•
•
•
Siga las instrucciones de la sección de “Storage”
(almacenamiento) del manual del motor.
Almacénela en un área despejada y seca. Trabe la máquina
quitanieve de manera que no se apoye sobre las cuchillas
de goma de la barrena.
NOTA: Cuando almacene cualquier tipo de equipo eléctrico en
un galpón de depósito metálico o con poca ventilación, tenga
especial cuidado de realizarle un tratamiento anti- oxidante al
equipo, especialmente a los resortes, los cables y todas las
partes móviles.
Limpie minuciosamente la máquina quitanieve.
Lubríquela tal como se indica en las instrucciones anteriores
con un aceite liviano.
SECCIÓN 8: GUÍA PARA LA SOLUCIÓN DE PROBLEMAS
Problema
El motor no arranca
Causa
1.
2.
3.
4.
5.
6.
7.
Solución
El tanque de combustible está vacío o el combustible es viejo
La línea del combustible está bloqueada
La llave no está en posición ON
Se ha desconectado el cable de la bujía
La bujía no funciona correctamente
El motor no se ceba
El motor está ahogado ya que ha sido cebado en exceso
1.
2.
3.
4.
5.
6.
7.
El motor funciona de
manera errática
1.
2.
La unidad está funcionando en la posición obturación
La línea del combustible está tapada o el mismo es viejo
3.
4.
Agua o suciedad en el sistema del combustible
Es necesario ajustar el carburador
1.
2.
3.
4.
Llene el tanque con gasolina limpia.
Limpie la línea del combustible
Inserte la llave y póngala en la posición ON
(encendido)
Conecte el cable a la bujía.
Limpie la bujía, ajuste la distancia disruptiva o cambie
la bujía.
Cebe el motor cuatro veces.
Aguarde al menos diez minutos antes de encender el
motor.
Cambie la palanca de obturación a la posición OFF
(apagado).
Limpie la línea del combustible y llene el tanque con
gasolina limpia y fresca.
Remítase al manual del motor para solucionar el
problema.
Remítase al manual del motor para solucionar el
problema.
El motor recalienta
1.
Es necesario ajustar el carburador
1.
Remítase al manual del motor para obtener
instrucciones.
Pérdida de potencia
1.
2.
El cable de la bujía está flojo
La ventilación de la tapa de gasolina está obstruida
1.
2.
Conecte y ajuste el cable de la bujía.
Destape la ventilación.
Demasiada vibración
1.
Hay piezas que están flojas o la barrena está dañada
1.
Detenga el motor de inmediato y desconecte el cable
de la bujía. Controle si la máquina está dañada. Ajuste
todos los bulones y las tuercas. Realice las
reparaciones necesarias. Si el problema continúa,
lleve la unidad a un distribuidor autorizado.
La unidad no se
autopropulsa
1.
El cable de transmisión está flojo
1.
2.
Banda de transmisión suelta o dañada
Ajuste el cable de transmisión siguiendo las
instrucciones que aparecen en la página 9 de este
manual.
Reemplace el cable de transmisión.
La unidad no descarga la 1.
nieve
2.
El canal de descarga está tapado
1.
2.
Hay un objeto extraño en la barrena
2.
3.
El cable de transmisión no está ajustado correctamente
3.
4.
La banda de transmisión está floja o dañada
4.
Detenga el motor de inmediato y desconecte el cable
de la bujía. Limpie el canal de descarga y la caja de la
barrena.
Detenga el motor de inmediato y desconecte el cable
de la bujía. Saque el objeto.
Ajuste el cable de transmisión siguiendo las
instrucciones en la página 9 de este manual.
Reemplace la banda de transmisión.
NOTA: Para realizar otras reparaciones que no sean los ajustes menores que se enumeran arriba, comuníquese con el representante
del servicio autorizado más cercano o llame al 1-800-800-7310 para comunicarse con el centro de asistencia al cliente. Remítase al
manual del motor, que se incluye con su máquina quitanieve, para obtener mayor información relacionada con el motor.
25
Your Notes/Vuestro Apuntes
26
Your Notes/Vuestro Apuntes
27
MANUFACTURER’S LIMITED WARRANTY FOR:
The limited warranty set forth below is given by MTD
PRODUCTS INC (“MTD”) with respect to new merchandise
purchased and used in the United States, its possessions
and territories.
MTD warrants this product against defects in material and
workmanship for a period of two (2) years commencing on
the date of original purchase and will, at its option, repair or
replace, free of charge, any part found to be defective in
material or workmanship. This limited warranty shall only
apply if this product has been operated and maintained in
accordance with the Operator’s Manual furnished with the
product, and has not been subject to misuse, abuse, commercial use, neglect, accident, improper maintenance,
alteration, vandalism, theft, fire, water or damage because
of other peril or natural disaster. Damage resulting from the
installation or use of any accessory or attachment not
approved by MTD Products Inc. for use with the product(s)
covered by this manual will void your warranty as to any
resulting damages.
Normal wear parts or components thereof are subject to
separate terms as follows: All normal wear part or component failures will be covered on the product for a period of
90 days regardless of cause. After 90 days, but within the
two year period, normal wear part failures will be covered
ONLY IF caused by defects in material or workmanship of
OTHER component parts. Normal wear parts and components include, but are not limited to, belts, blades, blade
adapters, grass bags, rider deck wheels, seats, snow
thrower skid shoes, shave plates and tires. Batteries are
covered by a 90-day limited replacement warranty.
HOW TO OBTAIN SERVICE: Warranty service is available,
WITH PROOF OF PURCHASE THROUGH YOUR LOCAL
AUTHORIZED SERVICE DEALER. To locate the dealer in
your area, please check for a listing in the Yellow Pages or
contact the Customer Service Department of MTD PRODUCTS INC by calling 1-800-800-7310 or writing to P.O. Box
368022, Cleveland, Ohio 44136-9722. No product returned
directly to the factory will be accepted unless prior written
permission has been extended by the Customer Service
Department of MTD PRODUCTS INC.
This limited warranty does not provide coverage in the
following cases:
a. The engine or component parts thereof. These items
carry a separate manufacturer’s warranty. Please
refer to the applicable manufacturer’s warranty on
these items.
b. Routine maintenance items such as lubricants, filters,
blade sharpening and tune-ups, or adjustments such
as brake adjustments, clutch adjustments or deck
adjustments; and normal deterioration of the exterior
finish due to use or exposure.
c. Log splitter pumps, valves and cylinders have a separate one year warranty.
d. MTD does not extend any warranty for products sold
or exported outside of the United States of America,
its possessions and territories, except those sold
through MTD authorized channels of export distribution.
No implied warranty, including any implied warranty of
merchantability or fitness for a particular purpose,
applies after the applicable period of express written
warranty above as to the parts as identified. No other
express warranty or guaranty, whether written or oral,
except as mentioned above, given by any person or
entity, including a dealer or retailer, with respect to any
product shall bind MTD. During the period of the Warranty, the exclusive remedy is repair or replacement of
the product as set forth above. (Some states do not
allow limitations on how long an implied warranty lasts, so
the above limitation may not apply to you.)
The provisions as set forth in this Warranty provide the
sole and exclusive remedy arising from the sales. MTD
shall not be liable for incidental or consequential loss
or damages including, without limitation, expenses
incurred for substitute or replacement lawn care services, for transportation or for related expenses, or for
rental expenses to temporarily replace a warranted
product. (Some states do not allow the exclusion or limitation of incidental or consequential damages, so the above
exclusion or limitation may not apply to you.)
In no event shall recovery of any kind be greater than the
amount of the purchase price of the product sold. Alteration
of the safety features of the product shall void this Warranty. You assume the risk and liability for loss, damage, or
injury to you and your property and/or to others and their
property arising out of the use or misuse or inability to use
the product.
This limited warranty shall not extend to anyone other than
the original purchaser, original lessee or the person for
whom it was purchased as a gift.
How State Law Relates to this Warranty: This limited
warranty gives you specific legal rights, and you may also
have other rights which vary from state to state.