1
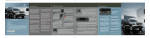
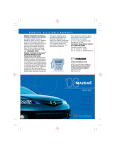
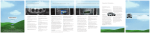
ADDITIONAL
Additional FEATURES
Features
SPECIFICATIONS
LOCATION OF THE SPARE TIRE
AND JACK
2006 MERCURY GRAND MARQUIS
QUICK REFERENCE GUIDE
Ford Motor Company
Customer Relationship Center
P.O. Box 6248
Dearborn, MI 48121
1-800-392-3673 (FORD)
(TDD for the hearing impaired:
1-800-232-5952)
All information contained in this
Mercury Quick Reference Guide was
accurate at the time of duplication. We
reserve the right to change features,
operation and/or functionality of any
vehicle specification at any time. Your
Mercury dealer is the best source for the
most current information.
For detailed operating and safety
information, please consult your
Owner’s Guide.
Your vehicle will be equipped with either
a full-size spare or a temporary spare.The
temporary spare is smaller than a regular
tire and designed for emergency use only.
Either spare will be located on a shelf in the
trunk, just under the rear window.The jack
may be located behind the mini spare tire or
behind the full size spare tire.
FUSES
If electrical components in your vehicle are not
working, a fuse may have blown. Blown fuses
are identified by a broken wire within the fuse.
To learn about changing fuses, please consult
your Owner’s Guide for details.
UNLEADED FUEL RECOMMENDATIONS
TRUNK RELEASE
HOOD RELEASE
Use “Regular” unleaded gasoline with an
(R+M)/2 octane rating of 87. Mercury does
not recommend using “Regular” gasoline
with an octane rating of 86 or lower in high
altitude areas.
Your trunk release is located on the trim panel of the driver’s door; press the
control to open the trunk.
The hood release handle is located below the instrument panel. Pull the
handle toward you to release. From the front of your vehicle, release the
auxiliary latch under the front center of the hood and lift until the lift
cylinders hold it open.
TIRE PRESSURE
Adjust the tire pressure to the recommended
specifications found on the Certification label.
When checking pressure, use an accurate tire
pressure gauge. Check tire pressure when the
tires are cold, after the vehicle has been parked
for at least one hour or has been driven less
than 1 mile (1.6 km).
Warning: Improperly
inflated tires can affect vehicle handling and can
fail suddenly, possibly resulting in loss of
vehicle control.
ROADSIDE ASSISTANCE
During your vehicle’s 3-year/36,000-mile limited warranty period, every new Mercury vehicle
includes the assurance and support of a 24-hour emergency Roadside Assistance program.
Roadside Assistance includes such services as fuel delivery, tire changes, jump starts, and help when
you are locked out of your vehicle.
Please complete your Roadside Assistance identification card and keep it in your wallet for quick
reference. This card can be found in your glove compartment, in your Mercury Owner's Guide
portfolio.
FUEL PUMP SHUT-OFF SWITCH
If you’re involved in a collision and attempt to restart your vehicle, your engine may crank but not
start. That may mean the fuel shut-off switch has been activated.You’ll find the switch on the left
side of the trunk, behind the left rear tail light and the trunk liner. For information on resetting,
please consult your Owner’s Guide.
*F6W3J19G217AA*
6W3J-19G217-AA
October 2005
Second Printing
M E R C U RY G R A N D M A R Q U I S
Quick Reference Guide
Litho in U.S.A.
All information contained in this Mercury Quick Reference Guide was accurate at the time of
duplication. We reserve the right to change features, operation and/or functionality of any vehicle
specification at any time. Your Mercury dealer is the best source for the most current information.
For detailed operating and safety information, please consult your Owner’s Guide.
ELECTRONIC COMPASS (If equipped)
Located in the overhead console, this compass may be affected when you
drive near large buildings, bridges, power lines and powerful broadcast
antennas.To make compass adjustments, please consult your Owner’s Guide.
POWER SEATS (If equipped)
The power seat controls are located inside each front door. Press the top
control to tilt the seat back forward or backward. Slide the lower control to
move the seat forward or backward. Press either end of the lower control to
move the seat cushion up or down.
POWER WINDOWS
Press the bottom portion of the switch to lower; the upper portion to raise.
To use the one touch down feature, press the double arrow and release
quickly; the window will open fully. Depress again to stop window
operation. The window lock feature allows only the driver to operate the
power windows. Press the left side of the window lock to prevent
passengers from controlling power windows; press the right side to restore
use of the controls.
EXTERIOR MIRRORS
Locking the doors
Power Side View Mirrors:To adjust these mirrors, select the left arrow to
adjust to the left mirror; the right arrow to adjust the right mirror. Move the
control in the direction you would like to adjust the mirror. Return to the
center position to lock the mirrors in place.
Heated Mirrors (If equipped):These mirrors warm up to remove ice, mist
and fog when the rear window defrost is activated; attempting to remove
ice with an ice scraper or to readjust the mirror glass if it is frozen in place,
could cause damage to the glass and mirrors.
Fold-Away Mirrors: Pull the side mirrors in carefully when driving through a
narrow space, like an automatic car wash.
Press this control to lock all doors. Press again to confirm that all
doors are locked.The horn will chirp and the parking lamps and tail
lamps will flash.
Message Center (If equipped)
REMOTE ENTRY SYSTEM
The remote entry system allows you to lock or unlock all vehicle
doors without a key.
Unlocking the doors
Press this control to unlock the driver’s door.The interior lamps will
illuminate with the ignition OFF. Press the control a second time
within five seconds to unlock all doors.
Opening the trunk
Press this control once to open the trunk.
Sounding the panic alarm
The panic feature operates with the key in the OFF position.
Press this control to activate the alarm.To deactivate the alarm, press the
control again, or turn the ignition to ACC or ON.
With the ignition in the ON position, the message center (located on your
instrument cluster) displays important vehicle information through a
constant monitor of vehicle systems.
You can select different features for the message center to display by using
the message center controls located in the center of the instrument panel.
Press the SETUP control to display SYSTEMS CHECK, DISPLAY
(odometer/speedometer), TEXT SIZE (normal/large), UNITS (english/metric), LANGUAGE, AND OIL
MINDER START VALUE.
Press the SELECT control to select functions in the SETUP menus.
Press the INFO control to display the trip odometer, distance to empty, average fuel economy and the
instantaneous fuel economy.
Press the RESET control to reset the functions shown in the INFO and SETUP menus.
Please refer to your Owner's Guide for complete details on the message center display features.
Audiophile AM/FM Satellite Compatible Stereo
In-Dash Six CD Sound System (If equipped*)
2
3
4
5
9
1
8
6
8
7
8
CAUTION: Do not use CD with adhesive label**
1| VOLUME/POWER CONTROL
Press the control to turn the audio system on or
off.Turn the control to raise or lower the volume.
2| AM/FM AND CD
In radio mode,press AM/FM to select AM,FM1
and FM2 frequency bands.In CD mode,press to
stop play and begin radio play.Press CD to enter
CD mode and to play a CD already in the system.
3| SAT AND SCAN/SHUF
SCAN/SHUF - Press to hear a brief sampling of all
listenable stations in radio mode, or to sample all
selections in CD mode. Press again to stop at the
desired selection. SHUF - Press and hold to play
CD tracks in random order, press again to stop.
SAT - SAT is only available when equipped with
Satellite radio.Your Audiophile radio comes
equipped with Satellite ready capability.The kit
to enable Satellite reception is available through
your Mercury dealer. Detailed Satellite
instructions are included with the dealer
installed kit.The dealer installed Satellite kit is
available only in the continental United States.
4| SEEK FUNCTION
The SEEK function control works in radio, tape
and CD modes. In radio mode, press the left
arrow to find the next listenable station down
the frequency band; press the right arrow to find
the next listenable station up the frequency
band. In tape or CD mode, press the left arrow
for the previous selection or track; press the right
arrow for the next selection or track.
5| TUNE-CAT
To move to the next frequency down the radio
band, press the left arrow. Press the right arrow
to move up the band to the next station;
hold the arrow to move quickly through the
other stations.
6| BASS + TREBLE CONTROL
Press the BASS or TREB control, then press the
left SEL-TEXT arrow to decrease the level of
BASS or TREB; press the right SEL-TEXT arrow
to increase the level.
7| BALANCE + FADE
Press BAL and use the left SEL-TEXT arrow to shift
the sound to the left speakers; press the right
SEL-TEXT arrow to shift sound to the right
speakers. Press FADE and the right SEL-TEXT
arrow to shift sound to the front speakers; press
the left SEL-TEXT arrow to shift sound to the rear.
8| RADIO STATION MEMORY PRESET
These controls can be used to select up to six
preset AM stations and twelve FM stations (six
in FM1 and six in FM2). Choose the frequency
band with the AM/FM select control. Select a
station, then press and hold the memory preset
control until the sound returns. Your selection
will be held in the memory.
9| EJECTING THE CD
Press this button to stop and eject a CD.
For more detailed information on the functions
of this audio system, please consult your
Owner's Guide.
* If your Grand Marquis is equipped with an AM/FM stereo with
cassette radio, please consult your Owner’s Guide for more
detailed information.
** CDs with adhesive labels and irregularly shaped CDs may get
stuck in the CD player. Homemade CDs should be identified with
permanent felt tip marker rather than adhesive labels.
MODEL YEAR
2006
GRAND MARQUIS
QUICK REFERENCE GUIDE
1
2
3 4
5
6
7
8
9
2006 GRAND MARQUIS
Thank you for choosing the Mercury Grand Marquis.
This luxurious sedan will give you and your
passengers room to stretch out, whether your trips
take you around the corner or across the country.
En route, you’re sure to appreciate responsive V8
power, rear-wheel drive performance and the added
confidence of advanced safety features.
Your new Grand Marquis also has many sophisticated
features designed for your comfort, convenience
and security. This guide will help you get acquainted
with them. (For a comprehensive review of all
vehicle features, please take time to review your
Owner’s Guide.)
We wish you and yours many pleasant miles.
10
11
INTERIOR FEATURES
1| HEADLAMP CONTROL
4| TRACTION CONTROL™ (If equipped)
9| OVERDRIVE
Headlamps:The first position clockwise will illuminate the parking lamps,
instrument panel, license plate and tail lamps.The second position clockwise
will illuminate the headlamps.
Autolamps:Turn the control counterclockwise to have the light-sensitive
system automatically control your headlamps.
High Beams: Your high beam controls are located in your turn signal stalk.
Push it forward to activate your high beams; pull it towards you to deactivate.
Daytime Running Lamps Feature (If equipped):This feature automatically
turns on the high beam headlamps with reduced output whenever the key
is in the ON position, the transmission is not in PARK, and the low beam
headlamps are not on.
Dimmer:To adjust the brightness of your instrument panel, rotate the
dimmer control to the left or right.
Fog Lamps (If equipped):To turn on the fog lamps when the headlamps or
autolamps are selected, pull out the headlamp switch.
The Traction Control™ system allows your vehicle to make better use of
available traction on slippery surfaces, especially snow and ice covered
roads. If you get stuck in snow or ice or on a very slippery road surface, try
switching the system off.This may allow excess wheel spin to “dig” the
vehicle out and enable a successful “rocking” maneuver.The traction control
indicator flashes during a Traction Control™ system event.
The normal driving position for the best fuel economy with your
automatic transmission is Overdrive. It will increase your fuel
economy when cruising at a constant speed for an extended
period of time.
5| ANTI-LOCK BRAKES
To deactivate Overdrive: If your vehicle is equipped with a columnshift transmission, press the transmission control switch located on
the end of the gearshift lever.
2| ADJUSTABLE PEDALS (If equipped)
PostScriptPicture
Grand Marquis 06_IP.eps
Your accelerator and brake pedals can be adjusted within approximately
2.5” of original placement to provide you with an extra measure of driving
comfort. Stop your vehicle, put the gearshift lever in P (Park) and
press the rocker control to adjust the pedals towards you or away from you;
adjust until you find the position that offers the greatest comfort
and control.
3| TURN SIGNAL AND WINDSHIELD WIPER/WASHER
Push the stalk down to activate your left turn signal; push up to activate the
right turn signal. Rotate the windshield wiper control forward or backward
to the desired interval – low- or high-speed position.When in the
intermittent mode, rotate the control forward for fast intervals; backward for
slow intervals. Push the end of the stalk to activate the washer. For a longer
wash cycle, push and hold.
ABS provides enhanced security by detecting wheel lockup in hard braking
situations.The light will illuminate when you start your engine; however, if it
stays on, continues to flash or fails to illuminate, see your dealership's
service department immediately. (Wheels sometimes accumulate brake
dust. Clean them with Detail Wash, available from your authorized Ford,
Lincoln or Mercury dealer.)
6| SPEED CONTROL
To engage your speed control, make sure you’re traveling at or above
30 mph (48 km/h) and press ON. To set a speed, press SET +. To set a higher
speed, press and hold SET +; release when you’ve reached the desired
speed. To return to a previously set speed, press RESUME (you must be
traveling above 30 mph [48 km/h]). To disengage, depress the brake pedal
or press OFF.
7| CHECK ENGINE
It's normal for warning and control lights to illuminate when you start your
engine. If the light remains on, have your vehicle serviced at your first
available opportunity. If the light is flashing, it indicates engine misfire,
which could damage your catalytic converter. Drive cautiously (avoiding
heavy acceleration and deceleration) and have your vehicle serviced as
soon as possible.
Overdrive: Overdrive on (off switch not depressed) is the normal
driving position for this automatic overdrive transaxle.
10| REAR WINDOW DEFROSTER
Push to clear the rear window of thin ice and fog. The defroster turns
off automatically after a predetermined amount of time, or when the
ignition is turned OFF.
11| CLOCK
Press MENU until SELECT HOUR or SELECT MINS is displayed. Use the left
arrow of the SEL control to decrease hours/minutes, or the right arrow of
the SEL control to increase hours/minutes.
Electronic Automatic Temperature
Control System (If equipped)
8| STEERING WHEEL, RADIO AND CLIMATE CONTROLS (If equipped)
Radio control features: Press VOL up or down to adjust the volume.
In radio mode, press NEXT to select a preset station from memory. In tape
or CD mode, press NEXT to listen to the next selection or track.
Climate Control features: Press TEMP up or down to adjust the temperature.
Press AUTOMATIC and use the temperature controls to select the temperature you prefer.
This system will then heat or cool to achieve that temperature, determining fan speed, airflow
location and choosing between use of outside or recirculated air.
If unusual conditions exist, the manual overrides allow you to select airflow locations and fan
speed.To return to automatic control, press AUTOMATIC.
Press OUTSIDE TEMP to display the outside temperature. Please consult your Owner’s Guide for details.