1
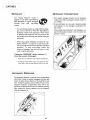
_ABLE
OF CONTENTS
Safety Instructions .....................................................I
Operating Instructions .........................................2-5
Features ....................................................................
6-7
Care and Cleaning ......................................................
8
Storing the Washer .....................................................
9
Replace Interior Light................................................
9
Reverse the Door .......................................................
9
Before You Call ....................................................
I0- I I
Operating Sounds .....................................................
12
Questions and Answers ..........................................13
Warranty ...................................................................
15
Guide de L'utilisateur .............................................16
Guia del Usuario .....................................................
32
Part No. 6 2717910
A/I 0/(30
MCS No. 22003304
...........................................................
IMPORTANT
!
SAFETY INSTRUCTIONS
WELCOME
Welcome and congratulations on your
chase of a Maytag Neptune _ washert
complete satisfaction is very important
For best results, we suggest reading this
rial to help acquaint you with proper
ating and maintenance procedures.
purYour
to us.
mateoper-
Should you need assistancein the future, it is
helpful to:
I) Have complete model and serial number
identification of your washer.This is located
on a data plate on the door.
_WARNING:
To reduce the risk of fire, electric shock or injury to persons when
usingthe appliance,follow basicprecautions,includingthe following:
1
Read all instructions before usingthe appliance.
2
3
As with any equipment using electricity and having moving parts, there are potential
hazards. To use this appliance safely,the operator should become familiar with the
instructions for operation of the appliance and always exercise care when using it.
Do not install or store this appliance where it will be exposed to the weather.
4
Install and level the clothes washer on a floor that can support the weight.
5
This appliance must be properly grounded. Never plug the appliance cord into a
receptacle which is not grounded adequately and in accordance with local and
national codes. See installation instructions for grounding this appliance.
To avoid the possibility of fire or explosion:
6
Date of Purchase
Model Number
Serial Number
2) IMPORTANT:
•
Keep
this
guide
and
Any material on which you have used a cleaning solvent, or which is saturated
with flammableliquids or solids, should not be placed in the clothes washer
until all traces of these liquids or solids and their fumes havebeen removed.
the sales receipt in a safe place for
future
reference.
Proof
of original
purchase date is needed for warranty
service.
These items include acetone, denatured alcohol, gasoline, kerosene, some
liquid household cleaners, some spot removers, turpentine, waxes and wax
removers.
If you have questions, write us (include your
model, serial number and phone number) or
call:
Do not add gasoline, dry-cleaning solvents, or other flammableor explosive
substances to the wash water. These substances give off vapors that could
ignite or explode.
Under certain conditions, hydrogen gas may be produced in a hot water
system that has not been used for 2 weeks or more. HYDROGEN GAS IS
EXPLOSIVE. If the hot water system has not been used for such a period,
before using a washing machine or combination washer-dryer, turn on all hot
water faucets and let the water flow from each for several minutes. This will
release any accumulated hydrogen gas. As the gasis flammable, do not smoke
or use an open flame during this time.
Unplug power supply cord before attempting to service your clothes washer.
MaytagAppliances Sales Company
Arm: CAIR ° Center
RO. Box 2370
Cleveland,TN 37320-2370
1-888-462-9824 USA and CANADA
1-800-688-2080 USA TTY
(for deaf, hearing impaired or speech
impaired)
(Mon.-FrL, 8am-8pm Eastern Time)
http://www.maytag.com
For service and warranty
tion, see page 15.
NOTE:
improve
may
the
informa-
In our
continuing
effort
to
the quality of our appliances, it
be necessary to make changes to
appliance
without
revising
this
Do not wash items that have been previously cleaned in, washed in, soaked in,
or spotted with gasoline, dry-cleaning solvents, or other flammableor explosive substancesasthey give offvapors that could ignite or explode. Hand wash
and line dry any items containing these substances.
Do not reach into the appliance if the tumbler is moving.
9
Do not allow children to play on or in the appliance. Close supervision of children
is necessary when the appliance is used near children.
110Do not tamper with controls.
!¸1¸!Do not repair or replace any part of the appliance or attempt any servicing unless
specifically recommended in published user-repair instructions that you understand
and have the skills to carry out.
12
13
guide.
14
Store laundry aids and other material in a cool, dry place where children cannot
reach them.
Do not wash or dry items that are soiled with vegetable or cookingoil.These items
may contain some oil after laundering. Due to the remaining oil, the fabric may
smoke or catch fire by itself.
Do not use chlorine bleach and ammonia or acids (such as vinegar or rust remover)
in the same wash. Hazardous fumes can form.
15
Do not machine wash fiberglassmaterials.Small particles can stick to fabricswashed
in following loadsand causeskin irritation.
16
Before the appliance is removedfrom serviceor discarded,removethe door to the
washingcompartment.
Do not sit on top of the clotheswasher.
1_
18
Inlet hoses are subject to damageand deterioration over time. Check the hoses
periodicallyfor bulges,kinks, cuts,wear or leaksand replace them every five years.
SAVE THESE INSTRUCTIONS
I
PERATING
INSTRUCTIONS
For detailed information on sorting, pretreating stains, etc., see the enclosed Laundering Tips booklet.
Step
i .........................................................................
LOAD
•
THE CLOTHES
WASHER
i
• The tub can be loaded completely
full with dry
unfolded clothes. However, do not pack the tub tightly.
• Overloading may reduce washing efficiency and possibly cause creasing or wrinkling of the load.
• When washing big bulky items or a couple of small
items that do not fill the tub completely, such as a rug
or two sweaters, a few towels should be added for
improved tumbling and spin performance.
• When washing heavily soiled loads, it is very important
to avoid overloading the washer to assure good
cleaning results.
• To load a forgotten item, press the start/pause pad,
add the item, close the door and press the
start/pause pad.After a 15 to 30 second pause,the
cycle will resume.
NOTE: To assure that your additional items get clean,
do not wait more than five minutes after the cycle has
started to add the item.
Step
! ....................................................................
SELECT
FABRICS
Press the appropriate
the cycle.
I
pad for the type of load.This will determine
cotton sturdy - Normal tumble pattern
jeans, sheets, linens, underwear, t-shirts.
the tumble/pause
pattern and spin speed for
and high speed spin. Use for towels,
wrinkle free - Reduced tumble pattern and spin speed to reduce wrinkling.
Use for dress shirts/pants, wrinkle free clothing, poly/cotton blend clothing.
delicates - Gentle tumble action and gentle spin speed. Use for
shirts/blouses, nylons, sheer or lacy garments.
dress
o
hand wash -Alternating periods of short and long soak and gentle spin speed.
Use for items labeled hand wash.
2
i,__'_ii_
PERATING
INSTRUCTIONS
CONT.
Step 3J
SELECT WASH/RINSE
WATER
TEMPERATURES
...................................................................................
I
'r
Press the appropriate "A" or down "v " pads to select the wash and
rinse water temperatures. Follow the garment care label and chart below
for best results.
Wash/Rinse
hot/cold - Whites & Heavily soiled color-fast items
warm/warrn
- Color-fast items. When warm rinse is selected, only the
third rinse will be warm.The first and second rinses will be cold to conserve
hol )ld
warn /arm
energy.
warmlcold -Wrinkle
Color-fast items
war_ _ld
Free items
,i
cola
!
coldlcold - Brightly colored items
Washable woolens
IMPORTANT:
The washer features an automatic temperature control to provide a warm wash of approximately 105 ° F and cold wash
of approximately 70 ° F.
While the washer is filling, you may notice hot and cold water going through the dispenser when cold or warm wash temperatures are
selected. This is a normal function of the automatic temperature control feature as the washer determines the temperature of the water.
Step
SELECT SOIL
LEVEL/WASH
OPTIONS
I
Pressthe appropriate pad to select the Soil Level/Wash Option.
heavy soil - Use for cleaningheavilysoiled loads.
normal soil - Use for cleaning moderately soiled loads.This
setting will be appropriate for most loads.
light soil - Use for cleaning lightly soiled loads.
quick -The Quick setting offers a quick cycle time. Suggested
uses include freshening newly purchased clothes, or clothing
that has been packed away.
rinse - Choose this setting to rinse only and then spin.
spin - Spins only.
3
Step
Press the appropriate
Options
pad(s) to select one or more options.
presoak - Adds 15 minutes of mostly soaking with minimal tumbling before
the regular cycle. Can be selected with any cycle.
pVk
o
stain cycle - Adds time to the wash and rinses for better
Automatically provides a fourth rinse.
stain removal.
staw_e
extra rinse - A fourth rinse at the end of the cycle to more completely
remove laundry additives and perfumes.
max extract - Use for jeans, towels, and bedding. Removes more water from
loads during spin.
NOTE:
To minimize wrinkling
of wrinkle
free fabrics, usingthe Max Extract
Q
rna_ct
option with these loads is not recommended.
delay wash - Allows the start of any cycle to be delayed for up to 9 hours.
Make the appropriate selection for your load, then press the delay wash pad
once for one hour or press the pad again to increase the delay wash time up
to 9 hours in one hour increments.
o
delVsh
Step 6j
o
SELECT THE SIGNAL
Press the "+" or "-" signal pad to increase or decrease the end of cycle signal volume.
Step 7j
START YOUR
MAYTAG
NEPTUNE
® WASHER
•
Close the door.
•
•
•
Add detergent and additives to the dispenser (See page 6).
Push the start/pause
pad.
When the washer is started after a pause, there may be up to a 30
second delay before continuing the cycle.
Q
Pressing off cancels the cycle and stops the washer,
NOTE: When the cycle is complete, the door locked light will go out.The door
will open easily. DO NOT attempt to open the washer door when the door
locked light is illuminated.To add a forgotten item, see pg. 2.
4
start/_se
PERATING INSTRUCTIONS
............
CONT.
es(_matedtime
i
ESTIMATED
TIME
DISPLAY
After pressing start/pause,
this display will show the estimated time remaining in the cycle.
iNO'cATO.
L' "TS
....
4
door locked - Lights whenever the door of the clothes washer is locked.The
can be unlocked by pressing the start/pause
pad to stop the washer.
Pad Indicator
Lights
pad is selected.
i .....................................
_ATER
-The
door
o
doorlocked
indicator lights above the pads will illuminate when the
,
USE
The amount of water used will vary with each load. The
Maytag Neptune ®clothes washer uses an adaptive fill valve to
provide the appropriate amount of water for efficient cleaning
performance and conservation of water and energy.
5
.................................................
!
EATURES
...................
i
DETERGENT
DETERGENT
Your Maytag Neptune _ washer is
designed to use either high efficiency , _1_1_1
(HE) detergents or regular detergents
normally
used with
top-loading
washers.
I. Pour laundry detergent
compartment
as it is filling.
with detergent
best results.
When using regular detergent formulated for toploading washers, it is important to pay close attention to the soil level of the load, load size,and water
hardness**. To avoid over-sudsing, reduce the
amount of detergent used with soft water or with
small or lightly soiled loads.
*
Brand names are trademarks
**
To determine
water
AUTOMATIC
water
measure
of the respective
I-Y2
manufacturers.
hardness in your area, contact your local
utility or State University
directly
into the detergent
before starting the clothes washer or
2. If color-safe bleach is to be used, it should be added
For best cleaning results, use a high efficiency detergent such as Tide HE or Wisk HE*. High efficiency
detergents contain suds suppressors which reduce
or eliminate suds.When less suds are produced, the
load tumbles more efficiently and cleaning results are
maximized.
If using the "PRESOAK"
option,
times the amount of detergent.
COMPARTMENT
Extension office in your area.
DISPENSER
The automatic dispenser consists of three compartments
which hold I) liquid or granular detergent and color safe
bleach, 2) liquid chlorine bleach and 3) liquid fabric softener. All laundry products can be added at once in their
respective dispenser compartments. They will be dispensedat the appropriate time for most effective cleaning.
After loading the laundry additives into the dispenser,
close the dispenser lid.
6
to the detergent
compartment
for
• When adding color-safe bleach with detergent, it is
best if both laundry products are in the same form;
granular or liquid.
EATURES CONT.
BLEACH
COMPARTMENT
(Liquid
Chlorine
!
Bleach Only)
I. Add liquid chlorine bleach to the bleach compartment.
DO NOT exceed the MAX FILL line.The liquid chlorine bleach compartment will hold 3/4 of a cup.
SOFTENER
I. Pour the recommended amount of liquid fabric softener into the softener compartment. For smaller
loads use less than one cap full.
Fabric softener may be diluted with warm water
until it reaches the MAX FILL line on the compartment. Do not dilute the liquid fabric softener
compartment
above the MAX
FILL line. If
the compartment
is filled above the MAX
FILL
line, fabric
softener
will enter
the
2,
Avoid splashing or over-filling the compartment. Overfilling the compartment
will release the liquid
chlorine
bleach into the clothes washer too
2,
early.
The washer automatically dispenses bleach into the
tub when there are approximately two minutes left in
the wash portion of the cycle. This maximizes the
effectiveness of the bleach.
3.
COMPARTMENT
clothes washer
This compartment
automatically
dilutes
releases liquid fabric softener at the proper
during the rinse cycle.
3.
4. The dispenser automatically dilutes liquid chlorine
bleach before it reaches the wash load.
too early.
and
time
NOTE:
NOTE:
•
Use the softener compartment only for liquid fabric
softeners.
•
•
Never pour undiluted liquid chlorine bleach directiy onto
the load or into the tub. It is a powerful chemical and
can cause fabric damage, such as weakening of the fibers
or color loss, if not used properly.
•
Using the Downy Ball* is not recommended with this
washer. It will not add fabric softener at the appropriate time. Use the dispenser on top of the washer.
If you prefer to use color-safe, non-chlorine bleach, add it
to the detergent compartment. Do not pour colorsafe bleach into the bleach compartment.
*
Brand
names
monufa_ut'er$.
7
are trademarks
of the
respective
ARE AND
CLEANING
Turn off the water faucets after finishing the day's
washing. This will shut off the water supply to the clothes
washer and prevent the unlikely possibility of damage from
escapingwater.
Use a soft cloth to wipe up all detergent, bleach or other spills
as they occur.
Clean the following as recommended:
Control Panel - clean with a soft, damp cloth. Do not use
abrasive powders or cleaning pads. Do not spray cleaners
directly on the panel.
Cabinet - clean with soap and water.
Interior - hard water deposits may be removed, if needed,
using a recommended cleaner labeled clothes washer safe.
! CLEANING
THE DISPENSER
The dispenser may need to be cleaned periodically due to
laundry additive build-up. For easy clean-up of the dis-
to remove the cap covering the siphon tube for the bleachand
softener. Run warm water and a soft brush or cloth over the
penser, grasp the removable two-compartment container
two parts to remove any excess laundry additives.
(for bleach and softener) as shown in illustration #1.As
you begin to lift the two-compartment
container, tilt
slightly inward, according to illustration #2 and remove
from the main dispenser.
Clean the main dispenser area using water and a soft cloth.
Once the main dispenser is clean, follow the illustrations in
reverse order to replace the two compartment container to
its original location.
Once the two-compartment container is removed from
the main dispenser,take it to a sink. Follow illustration #3
NOTE:
Do not use any cleaning substance but water in the main dispenser.It ispossible for cleaning substances
to drain into the tub. If this should happen, set the washer for a rinse and spin cycle to remove any cleaning substance from the washer before doing a load of laundry.
8
TORING
THE CLOTHES
WASHER
• Turn the water faucets off and disconnect the inlet hoses.
Washers can be damaged if water is not removed from hoses
and internal components before storage. Prepare the washer
for storage as follows:
• Disconnect the clothes washer from the electrical supply and
leavethe washer door open to let air circulate inside the tumbler.
• Select the cottonlsturdy
and quick setting and add one
cup of bleach to the detergent dispenser without clothes
in the tumbler. Run the clothes washer through a complete
cycle.
•
If the washer has been stored in below-freezing temperatures,
allow time for the washer to thaw out prior to use.
For information on long-term storage or storage of your washer during extreme cold temperatures,
call Maytag Customer Service toll-free at 1-888-462-9824.
U.S. customers usingTTY for deaf, hearing impaired or speech impaired, call 1-800-688-2080.
? EPLACE INTERIOR
Instructions
I) Unplug
LIGHT
for replacing
or disconnect
the bulb:
the clothes washer
from
the electrical
power
supply.
2) Open the door.
3) Unscrew the light bulb counter
clockwise from the socket.
4) Replace the bulb with a 10 watt
candelabra base light bulb and rotate clockwise.
5) Plug in or reconnect
clothes washer to the power supply.
Clothes
swing direction
washer
door
can be changed
using the following
procedure:
I) Swing door fully open and support it while removing four hinge screws (which hold hinges to door assembly).
2) Move the door to a work surface and transfer four door screws to the opposite side of the door assembly.
3) Remove one screw holding top hinge to cabinet and one screw holding top hinge cover to cabinet (opposite side).
4) Remove hinge and bracket from cabinet by moving them up and clown to a position where they are released.
5) Install hinge and bracket in swapped locations and drive screws to attach them securely to the cabinet.
6) Compare
top hinge and top bracket to bottom hinge and bottom bracket for correct hinge assembly position.
7) Repeat procedures
4 through 6 for bottom
hinge to cabinet and bottom bracket to cabinet.
8) Support door in fully open position on hinge side and drive four screws to securely attach hinges to door assembly.
9) Close door and check to see that clothes washer operates properly.
Counter Sunk Screw
r
,,
ll_.
•
,,.
,
,
_
..,
' ' _/
•
i
D
q
','
iJ
i_
!
,r
*
=
,, te
9
_
Door
_
Screws
EFORE
You
CALL
For
problem
laundry
solutions
i residue, tangling) and special
see the enclosed Launderin
Load isToo Wet
End of Cycle
•
•
Check fuse or reset circuit breaker.
•
•
Straighten drain hoses. Eliminate kinked hoses. If there is a drain restriction, call for service.
Close the door and push the start/pause pad. For your safety,washer will not tumble or
spin unless the door is closed.
•
After pressing the start/pause
•
begins to spin.The door must lock before spin can be achieved.
See"Tub is Completely Full of Suds" below.
•
•
Plug cord into live electrical outlet.
Check fuse or reset circuit breaker.
•
•
Close door and push the start/pause
pad to start the clothes washer. For your safety,
washer will not tumble or spin unless door is closed.
This may be a pause or soak period in the cycle. Wait briefly and it may start.
•
Check screens on inlet hoses at the faucets for obstructions. Clean screens periodically.
•
•
•
Run the clothes washer through another complete cycle using cold water.
Reduce detergent amount for that specific load size, soil level and water hardness.
Use high efficiency or low sudsing detergent specially formulated for front load washers.
Stops
Tub is Completely
Full of Suds
.................................................
damage,
Make sure door is firmly closed.
Make sure hose connections are tight.
Make sure end of drain hose is correctly inserted and secured to drain facility.
Avoid overloading.
Use high efficiency detergent to prevent over-sudsing.
Spin
or Drain
fabric
care procedures,
Use Max Extract option.
Try using a high efficiency detergent to reduce sudsing.
Load is too small.Very small loads (one or two items) may not spin out completely.
at
Leaks Water
Won't
(i.e.
laundry
pad, it will take a few moments
before the clothes washer
o....................................................................................................................................................................................................
•
•
•
Turn both faucets on fully.
Make sure temperature selection is correct.
Make sure hoses are connected to correct faucets and inlet connections. Flush water line
before filling washer.
Fills with the
Wrong
Temperature
Water
•
•
•
•
Check the water heater. It should be set to deliver a minimum 120°F (49°C) hot water at
the tap. Also check water heater capacity and recovery rate.
Disconnect hoses and clean screens. Hose filter screens may be plugged.
When warm rinse is selected, only the final rinse will be warm. The first two
rinses will be cold.
As the washer is filling, the water temperature may change as the automatic temperature
control feature checks incoming water temperature. This is normal.
CONT.
I0
EFORE
YOU
CALL
CONT.
Be sure the door is tightly dosed.
Plug cord into a live electrical outlet. (Tub light should illuminate).
Check fuse or reset circuit breaker.
Won't
Fill
Pressthe start/pause pad.
Turn both faucets on fully.
Straighten inlet hoses.
Disconnect hoses and clean screens. Hose filter screens may be plugged.
Open and close the door, then push the start/pause pad.
Check fuse or reset circuit breaker.
Won't Tumble
Close the door and press the start/pause pad. For your safety,the clothes washer will not
tumble or spin unless the door is closed.
Door Locked Shut;
Will Not Open
Press the start/pause pad to stop the machine.
It may take a few moments for the door lock mechanism to disengage.
Open the door and wash the lower portion of the gray door seal with a solution of I cup
chlorine bleach to 2 cups water.
Freshening
Your Washer
Is Noisy
For further
Select the following control panel setting: Cotton/Sturdy, Hot/Cold, Heavy soil setting.
Fill the bleach dispenser cup with liquid chlorine bleach and start the washer.
Pour an additional I/2 cup bleach into the detergent dispenser as the washer isfilling.
Allow the washer to complete the cycle.
At the end of the cycle, open the door and dry the gray door seal.
•
•
•
•
•
Clothes washer should be leveled properly as outlined in installation instructions.
Check the leveling leg lock nuts are tightened.
Be sure rubber feet are installed on leveling legs.
Weak floors can cause vibration and walking.
For information on normal operating sounds,see page 12.
assistance, call Maytag Customer Service toil-free at 1-888-4-MAYTAG
(I-888-462-9824).
U.S. customers usingTTY for deaf, hearing impaired or speech impaired, call 1-800-688-2080.
II
PERATING
High
pitched
SOUNDS
sound
during a spin cycle,
Flushing water
sound
the dispenser area.
coming from
Sloshing or gurgling water
sound
when washer is off and the tub is
rotated.
"Whirring"
followed
by
or
throughout
the wash cycle,
a
"Sloshing"
pause,
sound
repeated
The motor increases speed to spin the tub to remove moisture
the load.
from
Detergent is dispensed at the start of the cycle. Bleach is dispensed
during final minutes of wash. Fabric softener is dispensed during the
third rinse while the washer is filling.
The sealed balance ring around the tub contains
designed to make the washer spin smoothly.
a liquid and is
The tub rotates one direction followed by a pause.The tub reverses
direction
and pauses.This action continues throughout
the cycle.
Clothes washer maintains a slightly
reduced spin speed after achieving a
After reaching the maximum spin speed, the machine may reduce spin
higher spin speed,
speed slightly to create less noise and vibration.
The spin speed slows down dramatically when it sounds Eke an out-of-balance load.
The tumbler will begin to accelerate to speed, then slows back down
to redistribute the load more evenly when an unbalanced load occurs.
The Maytag Neptune ® clothes washer usesa true adaptive fill and adds
more water during the wash cycle as it is needed.
Water
is added
has been tumbling
after
the
washer
for a while.
......................................................................................................
Clicking/draining
is started
sounds
OR
Water flows through the dispenser to dilute and add bleach or fabric
softener at the appropriate time. This will occur even if bleach and
fabric softener are not used.
_ ...........................................................................................................................................................
when washer
Before the washer starts to fill, it will make a series of clicking noises
to check the door lock and do a quick drain.
12
UESTIONS
& ANSWERS
Q.
What's
the best cycle to use if I have stains on my laundry?
A.
Select the stain cycle option pad and heavy soil setting. Pretreat the stains with a laundry pre-treat
product. Refer to the
enclosed Laundering Tips booklet for more information on treating specific stains.
Q.
How
large
of a load can I wash in my Maytag
A.
The tub can be loaded completely full with dry, unfolded clothes. However, do not pack the tub tightly. If the load is heavily
soiled it is very important
Neptune
® washer?
not to overload the washer.
Q,
At the end of the cycle my load comes out wetter
than
A.
During tumble and spin the washer may have had difficulty
normal.What
causes this?
getting to a full spin speed because the load was not evenly dis-
tributed.This
can occur with small loads, heavy items or a load in which too much detergent
Q.
My laundry
items seem to be very wrinkled
A.
Wrinkling
at the end of the cycle. What
is caused by the combination of heat and pressure. Be sure wrinkle
on the wrinkle
can I do to correct
My whites
are not as white
as I'd like.What
A.
Wash white loads using the cotton/sturdy
DO NOT USE HAX-EXTRACT.
can I do?
fabric selection. Select the hot wash/cold
cup of chlorine bleach in the bleach dispenser.The
the problem?
free or permanent press fabrics are washed
free cycle,and a cold rinse is used. (See pg. 3 forWASH/RINSETemperature).
Q.
was used, causingover-sudsing.
rinse temperature setting and put 3/4
bleach will be dispensed in the final minutes of the wash providing for
optimal whitening. Maytag recommends a hot water wash temperature of 120-140 ° F (49 °- 60 ° C).
MAYI'AG
rlEP rUrlE.
13
MAYFAG
rlEPFUrlE,
14
WASHER
WARRANTY
Full One Year Warranty
For one (I) year from the date of original retail purchase, any part which fails in normal
replaced free of charge.
Limited
After
home use will be repaired or
Warranty
the first year from date of original retail purchase, through
the time periods listed below, the parts designated below
which fail in normal home use will be repaired or replaced free of charge for the part itself, with the owner paying all other
costs, including labor, mileage and transportation.
Second
Year - All parts.
Third
through
Fifth - Electronic control.
Third
through
Tenth
Third
through
Lifetime
Additional
Limited
Should an exterior
- Drive motor.
- Stainless steel inner wash basket.
WarrantyAgainst
Rust-Through
cabinet, including the top and baseframe, rust through during the one year period starting from the
date of retail purchase, repair or replacement
will be made free of charge. After
or replacement will be made free of charge for the part itself, with the owner
and transportation.
Please
Note:
Canada. Washers
two years.
This full warranty
located
and the limited
elsewhere
are covered
warranty
the first, and through
paying all other costs, including labor, mileage
apply when the washer
by the limited warranty
is located
in the United
only, including parts which
The specific warranties expressed above are the ONLY warranties provided by the manufacturer.This
specific legal rights, and you may also have other rights that vary from state to state.
To Receive
Warranty
the tenth year, repair
States or
fail during the first
warranty gives you
Service
To locate an authorized servicecompanyin your area contact the Maytagdealerfrom whom your appliancewas purchased;or caUMaytag
Appliances SalesCompany, MaytagCustomer Assistance at the number listed below. Should you not receive satisfactory warranty service, please call or write:
MaytagAppliances SalesCompany
Attn: CAIR ®Center
RO. Box 2370
Cleveland,TN 37320-2370
U.S. or Canada (toll-free) 1-888-462-9824
U.S. customers usingTTY for deaf, hearing impaired or speech impaired, call 1-800-688-2080.
When contactingMaytagAppliances SalesCompany, MaytagCustomer Assistance about a service problem, please includethe following:
(a) Your name, address and telephone number.
(b) Model number and serial number (found on the lower center of the door opening) of your appliance.
(c) Name and address of your dealer and the date the appliancewas purchased.
(d) A clear description of the problem you are having.
(e) Proof of purchase.
What
is not covered
by these warranties:
I. Conditions and damagesresulting from any of the following:
a. Improper installation, delivery, or maintenance.
b.Any repair, modification, alteration or adjustment not authorized by the manufacturer or an authorized servicer.
c. Misuse,abuse, accidents, or unreasonable use.
d. Incorrect electric current, voltage or supply.
e. Improper setting of any control.
2. Warranties are void if the original serial numbers have been
removed, altered, or cannot be readily determined.
3. Light bulb
4. Products purchased for commercial or industrialuse.
5. The cost of service or service call to:
a. Correct installation errors.
b. Instructthe user on proper use of the product.
c.Transport the appliance to the servicer.
6. Consequential or incidental damagessustained by any person
as a result of any breach of these warranties.
Some states do not allow the exclusion or limitation of consequential or incidental damages,so the above exclusion may not
apply.
User's Guides, service manuals and parts catalogs are available from
Maytag Appliances Sales Company, Maytag Customer Assistance.
Maytag
• 403 West
Fourth
Street
North
• P.O. Box 39
• Newton,
Iowa 50208