1
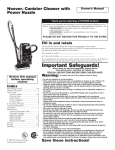
Owner’s Manual
English ➜ pp. 1-9
Español ➜ pág. 10-14
Français ➜ p. 15-19
Thank you for selecting a HOOVER product.
This cleaner was inspected and packaged carefully before being
shipped from the factory. If you should happen to need assistance
during assembly or operation,
Visit us online at www.hoover.com to find the service outlet
nearest you (click on the “Service” button) or
Call 1-800-944-9200 for automated referral of authorized
service outlet locations (U.S. only) or
Call 1-330-499-9499 to speak with a representative in our
Consumer Response Center.
PLEASE DO NOT RETURN THIS PRODUCT TO THE STORE
Review this manual before
operating steam cleaner.
www.hoover.com
®
Fill in and retain
The model and serial number are located on the bottom of the steam cleaner.
For your personal records, please enter the COMPLETE model and serial number
in the spaces provided and retain this information.
Your cleaner is model
and has serial number
It is suggested that you attach your sales receipt to this owner’s manual.
Verification of date of purchase may be required for warranty service of your
Hoover product.
Index
Carton Contents ..................................3
Cleaner Descriptions .........................3
How to Use ......................................4-7
If You Have a Problem .......................8
Important Safeguards ........................2
Maintenance
Storage ...........................................7
Nozzle cleaning pin .......................7
Calcium filter ...............................7-8
Warranty...............................................9
© 2003 The Hoover Company
www.hoover.com
2
Important Safeguards!
When using an electrical appliance, always follow
basic precautions, including the following:
READ ALL INSTRUCTIONS BEFORE USING THIS APPLIANCE
WARNING: CHOKING HAZARD - SMALL PARTS.
Warning:
To reduce the risk of fire, electric shock, or injury:
• Do not use outdoors.
• Close supervision is necessary when any appliance is used by or near
children. Do not allow cleaner to be used as a toy.
• Do not allow cleaner to run unattended at any time.
• Fill with cold water only.
• Do not use without tank and/or filter in place.
• Do not operate cleaner without water in the tank.
• Do not use with flammable or combustible materials or use in areas
where they may be present.
• Do not direct steam at people, animals or at electrical devices.
• Keep hair, loose clothing, fingers, feet and all parts of body away from
openings. Do not operate cleaner in bare feet or when wearing open toe
shoes or sandals.
• Use extra care when cleaning on stairs.
• Do not put any object into openings. Do not use with any opening
blocked; keep free of dust, lint, hair, or anything that may reduce flow.
• Do not pull or carry by cord, use cord as a handle, close door on cord
or pull cord around sharp edges or corners. Keep cord away from heated surfaces.
• Always disconnect cord from electrical outlet before servicing the
cleaner.
• Unplug cleaner when not in use. Turn off all controls before unplugging.
• Do not unplug by pulling on cord. To unplug, grasp the plug, not the
cord. Never handle plug or appliance with wet hands.
• The use of an extension cord is not recommended.
• Store in a dry place. Do not expose machine to freezing temperatures.
• Do not use with damaged cord or plug. If appliance is not working as it
should, has been dropped, damaged, left outdoors, or dropped into
water, take it to a Hoover Factory Service Center or Authorized Hoover
Warranty Service Dealer (Depot).
• Use cleaner only for its intended use as described in the instructions.
Use only attachments recommended by The Hoover Company; others
may cause hazards.
Save these instructions!
Questions or Concerns?
The Hoover Company wants to quickly resolve any concerns about your steam cleaner or questions regarding its use. Look on the
list provided with the product for your local Hoover Factory Service Center or in the Yellow Pages under “Vacuum Cleaners –
Household” for the nearest Authorized Hoover Warranty Service Dealer (depot) or:
Visit us online at www.hoover.com to find the service outlet nearest you (click on the “Service” button) or call:
1-800-944-9200 for an automated referral of authorized service outlet locations (U.S. only) or call:
1-330-499-9499 to speak with a representative in the Hoover Consumer Response Center.
1. Carton contents
1-1
Unpack the steam cleaner from the
carton and identify the parts shown.
Remove and dispose of cardboard
packing.
B
C
A. Main body
B. White round brush (1)
C. Purple round brushes (2)
D. Jet nozzle
D
A
E. Turbo nozzle
E
F. Triangular brush
G. Cloth cover for triangular brush
H
H. Mop pad
F
G
I. Sponge for mop pad (attached to
mop pad)
I
J. Shoulder strap
J
K. Nozzle cleaning pin
K
L. Plastic bag for accessory storage
L
M. Telescoping handle for mop use
M
This cleaner is intended for household use.
Operate cleaner only at voltage specified on data plate on bottom of cleaner.
2. Cleaner description
2-1
2
3
1. Indicator light
4
5
1
2. On/Off and steam adjustment knob
3. Opening for mop handle
4. Water tank lock
5. Water tank
6. Power cord
7. Resting foot/cord wrap
6
8. Safety valve
9. Cord hook
Polarized plug
9
8
7
To reduce the risk of electric shock, this appliance has a
polarized plug (one blade is wider than the other). This plug
will fit in a polarized outlet only one way. If the plug does
not fit fully in the outlet, reverse the plug. If it still does not
fit, contact a qualified electrician to install the proper outlet.
Do not change the plug in any way.
Continued
➜
3
3. How to Use
3-1
3-2
A
C
E
CAUTION:
THIS STEAM
CLEANER BLOWS OUT A HIGH
TEMPERATURE STEAM; DO NOT
DIRECT TOWARDS PEOPLE, PETS
OR ANY MATERIAL WHICH IS NOT
HEAT RESISTANT.
The temperature near the nozzle
reaches 212˚F (100˚C).
The effective use of the steam
cleaner is to apply steam at the
nearest point to the nozzle.
F
D
B
Removing tank
Fill tank
To remove the water tank, press the
water tank lock button (A). Pull tank (B)
off the cleaner body.
Turn tank upside down, unscrew cap (C)
and remove. Fill tank with cold water
until it reaches the line (D).
Line up tabs on cap (E) with slots in tank
(F). Twist cap tightly closed.
3-3
3-5
3-4
J
G
I
H
Replace tank
To replace tank, place tab on bottom of
tank (G) into slot in the cleaner body (H).
Press tank down until the water tank lock
button secures the front of the tank in
place.
Turn ON/OFF knob (I) to OFF position.
Plug cord into electrical outlet.
To turn steam cleaner ON, turn the knob
in a clockwise direction.
The red indicator light (J) will begin to
flash. The light will stop flashing and
stay on when the steam cleaner has
preheated and is ready for use.
(Approximately 30 seconds.)
Be sure the tank is securely in place.
3-6
Important reminders:
• Do not operate the steam cleaner with an empty water tank.
• Fill tank with cold water only. Do not fill with hot water.
• Do not mix cleaning detergents in the water tank. For stubborn dirt, the
surface can be pre-treated with a detergent before using the steam
cleaner.
• If steam is being used at the highest setting, do not continue at that
level for more than 10 minutes.
To increase the volume of steam for
tougher cleaning jobs, turn knob clockwise.
When less steam is desired, turn the
knob counter clockwise.
Wipe surface dry with a cloth or paper
towel.
4
• Do not run steam cleaner for a long successive time. (Not more than 1
hour at a time.)
• Do not store the steam cleaner with water in the water tank.
• This steam cleaner is designed for household use only.
To use as a handheld steamer
3-8
3-7
C
B
The steamer can be used as a handheld cleaner for various cleaning jobs
around the house. Use the following as a
guide for the various accessories and
recommended uses.
Turn cleaner OFF and unplug and
allow to cool before attaching or
removing any of the accessories.
NOTE: If using the steamer on waxed
surfaces, test in a hidden area to check
for effects on the wax.
CAUTION: Thermal shock can shatter
glass. Before cleaning cold glass surfaces, carefully warm the surface by
directing the steam jet on the glass
from a distance of no less then 4”-6”.
A
D
A
Using the jet nozzle
Using the brushes
The jet nozzle (A) is used to concentrate the steam spray to increase cleaning power. It can be used in small, hard
to reach spaces or where concentrated
steam is needed.
To attach the brushes, turn steam
cleaner OFF and allow to cool.
The jet nozzle can be used by itself or
with one of the brushes attached.
All brushes attach in the same manner.
Slide end of brush (D) over tip of nozzle
(A). Twist slightly to tighten.
To attach the jet nozzle, turn steam
cleaner OFF and allow to cool. Align
the tab (B) on the nozzle with the slot (C)
on the front of the steam cleaner. Twist
the nozzle in a clockwise direction to
tighten. The tip of the nozzle should be
facing downward.
NOTE: The two purple brushes can be
used in the kitchen, while the white
brush can be reserved for use in the
bathroom (toilet seat, tile grout, etc.).
Twist counter clockwise to remove.
To begin cleaning, follow Figs. 3-5 & 3-6.
3-9
3-10
3-11
H
F
G
E
The triangular brush (E) can be used
for larger areas (walls, floors, screens).
The cloth (F) can be placed over the triangular brush to aid drying, for more
even cleaning coverage and for cleaning
flat or painted surfaces.
I
Using the turbo
nozzle
The turbo nozzle (G) allows adjustment
for a narrower or wider spray, depending
on the area to be cleaned.
To attach the turbo nozzle, turn steam
cleaner OFF and allow to cool. Push
the nozzle straight into the hole (H) on
the front of the steam cleaner.
J
Pull the nozzle either out (I) for wider
steam flow or push in (J) for narrower
flow.
To begin cleaning, follow Figs. 3-5 & 3-6.
The turbo nozzle can be used on mirrors
or windows.
Continued
➜
5
3-12
3-13
3-14
Place the end of the strap with the clip
through the handle of the steam cleaner
and snap to close.
The shoulder strap may then be looped
around the shoulder. Adjust to desired
length.
To change accessories or to fill tank with
water, press the two sides of the clip to
unlock and pull through the handle of
the steam cleaner.
3-15
3-16
B
A
Using the shoulder strap
A shoulder strap (A) is included for your
convenience. Press the two sides of the
clip (B) to unlock the shoulder strap.
To use as a mop
B
A
Installing the telescoping handle allows
the steam cleaner to be used as a mop
for cleaning floors or walls.
NOTE: If using the steamer on waxed
surfaces, test in a hidden area to check
for effects on the wax.
C
Attach the handle
The handle can be extended to three
sections. Twist and pull to unlock the
end and middle sections. After extension, twist slightly to lock in place.
To shorten, reverse the procedure.
3-17
3-18
Place the end of the handle opposite
the grip (A) with flat side up, into the
opening (B) on the handle of the steam
cleaner body. Push down until it locks in
place and handle is firmly secured.
To remove the handle, press on the button (C) and pull the handle straight out.
3-19
A
D
B
To keep the cord out of the way, coil it
loosely around the handle. Insert the
cord through the slot (D) on the handle
grip to secure.
6
Using the mop pad
Align the tab (A) on the mop pad with
the slot (B) on the front of the cleaner.
Twist the pad in a clockwise direction to
tighten.
Place the mop pad on the floor or wall
surface to be cleaned. To begin cleaning, follow Figs. 3-5 & 3-6.
The sponge, located on the underneath
side of the mop pad, will aid in cleaning
and drying the surface.
3-20
C
4. Maintenance
4-1
Familiarize yourself with the home maintenance tasks presented in the following
sections. Keep this owner’s manual in a
convenient place where you can refer to
it when needed. Proper use and care of
cleaner will ensure continued cleaning
effectiveness.
A
B
Storing the steam
cleaner
The sponge on the mop pad may be
removed for cleaning or replacement. To
remove, turn the steam cleaner OFF,
unplug and allow to cool. Disconnect
mop pad from the steam cleaner by
twisting the pad in a counterclockwise
direction.
Turn steam cleaner OFF and disconnect
from electrical outlet.
Always empty the water tank before storing. Refer to Figs. 3-1 through 3-3.
Pull the metal cord hook (A) on the bottom of the steam cleaner out to allow the
cord to be wrapped around it and the
resting foot (B), located on the back of
the cleaner. Press the cord hook back in
place when cleaner is in use.
Grasp edges of sponge and pull up
slightly to release from tabs (C) on the
sides of the mop pad.
To replace sponge, press sides of
sponge under tabs, making sure all
edges are held in place.
Do not use the mop pad without the
sponge.
4-2
4-3
4-4
A
D
C
B
The nozzle cleaning pin
If a foreign substance clogs the hole (A)
located on the front of the body of the
steam cleaner, it will cause the safety
valve (B) to release steam.
Unplug cleaner and allow to cool. Use
the nozzle cleaning pin (C) to clean the
hole periodically to prevent clogging.
The hole in the jet nozzle (D) can also
be cleaned in the same manner.
The calcium filter
The steam cleaner is equipped with a
calcium filter which breaks down or dissolves calcium deposits in the water.
The calcium filter cartridge filter is located under the water tank.
The filter cartridge should be changed
once a year to maintain good cleaning
performance. New calcium filter cartridges can be purchased from a Hoover
Factory Service Center or purchased online at www.hoover.com. Ask for
HOOVER part no. 59173030.
Continued
➜
7
4-5
4-7
4-6
A
B
B
C
Turn steam cleaner OFF, unplug and
allow to cool.
To remove the cartridge (A), press outward on one of the two tabs (B) in the
body of the steam cleaner.
To replace the cartridge filter, place flat
end (C) toward back wall of steam
cleaner as shown, and snap in place.
Remove the water tank.
Lift up on cartridge and pull out.
Return water tank as described in Fig.
3-3.
Removing the filter
5. If you have a
problem
If a minor problem develops, it usually
can be solved quite easily when the
cause is found by using the checklist
below.
Problem: Indicator light not lit
Possible cause
Possible solution
• Not firmly plugged in.
• Plug in firmly.
• No voltage in wall plug.
• Check fuse or breaker.
• Blown fuse/tripped breaker.
• Replace fuse/reset breaker.
• Knob is turned OFF.
• Turn knob ON.
Problem: Steam coming from
safety valve
Possible cause
Possible solution
• Possible obstruction in nozzle.
• Turn steam cleaner OFF and
unplug from electrical outlet.
Clean the nozzle hole with nozzle
cleaning pin.
Problem: Nozzle comes off during
use
Possible cause
Possible solution
• Nozzle not attached properly.
• Turn steam cleaner OFF, allow to
cool and reattach nozzle (Fig. 3-7).
Problem: Not able to install mop
handle
Problem: Indicator light is on, but
steam is not coming out
Possible cause
Possible solution
Possible cause
Possible solution
• The handle is not fully extended.
• Fully extend handle (Fig. 3-15).
• Cleaner not warmed up and indicator light is still flashing.
• Wait until the light has stopped
flashing.
• Knob is turned to lowest setting.
• Turn knob to higher setting.
• Water tank is empty.
• Turn steam cleaner OFF and add
water.
8
Service
To obtain approved HOOVER service
and genuine HOOVER parts, locate the
nearest Hoover Factory Service Center
or Authorized Hoover Warranty
Service dealer (depot) by:
• checking the Yellow Pages under
“Vacuum Cleaners – Household”
OR–
• checking the list of Factory Service
Centers provided with this cleaner
OR–
• checking the Service section of
The Hoover Company on-line at
www.hoover.com
OR–
• calling 1-800-944-9200 for an automated referral of authorized service
outlet locations (U.S. only).
Do not send your cleaner to the Hoover
Company in North Canton for service,
this will only result in a delay.
If further assistance is needed, contact
The Hoover Company Consumer
Response Center, North Canton, Ohio
44720, Phone: 330-499-9499.
In Canada, contact Hoover Canada,
Burlington, Ontario L7R 4A8,
Phone: 1-800-263-6376.
Always identify your cleaner by the complete model number when requesting
information or ordering parts. (The
model number appears on the bottom of
the cleaner.)
Full One Year
Warranty
(Domestic Use)
Your HOOVER® appliance is warranted
in normal household use, in accordance
with the Owner’s Manual against original
defects in material and workmanship for
a period of one full year from date of
purchase. This warranty provides, at no
cost to you, all labor and parts to place
this appliance in correct operating
condition during the warranted period.
This warranty applies when the
appliance is purchased in the United
States including its territories and
possessions, or in Canada or from a
U.S. Military Exchange. Appliances
purchased elsewhere are covered by a
limited one year warranty which covers
the cost of parts only. This warranty
does not apply if the appliance is used
in a commercial or rental application.
Warranty service can only be obtained
by presenting the appliance to one of
the following Authorized Warranty
Service outlets. Proof of purchase will
be required before service is rendered.
1. Hoover Factory Service Centers
2. Hoover Authorized Warranty
Service Dealers (Depots)
For an automated referral of
authorized service outlets in the
U.S.A., phone 1-800-944-9200 OR
visit The Hoover Company on-line at
www.hoover.com
This warranty does not cover pick up,
delivery, or house calls; however, if you
mail your appliance to a Hoover Factory
Service Center for warranty service,
transportation will be paid one way.
While this warranty gives you specific
legal rights, you may also have other
rights which vary from state to state
(or province).
If further assistance is needed, or if
there are questions concerning this
warranty or the availability of warranty
service outlets, write or phone the
Consumer Response Center, The Hoover
Company, 101 East Maple St., North
Canton, Ohio 44720.
Phone 330-499-9499.
In Canada, contact Hoover Canada,
Burlington, Ontario, L7R 4A8.
Phone 1-800-263-6376.