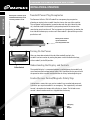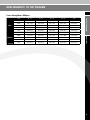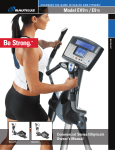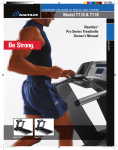
1
C H A N G I N G T H E G A M E I N H E A LT H A N D F I T N E S S ™
Model T9.14
Model T9.14
NAUTILUS ®
Be Strong.
Nautilus® Commercial Series
Treadmill Owner’s Manual
C H A N G I N G T H E G A M E I N H E A LT H A N D F I T N E S S ™
NAUTILUS ®
INTRODUCTION
INTRODUCTION
Thank you for purchasing the Nautilus ® Commercial Series T9.14 Treadmill. For more than 30 years
Nautilus has been producing the world’s finest fitness equipment used in health clubs and homes
around the globe. We hope this product exceeds your expectations and is a valuable tool for your
facility.
Please carefully read through this manual to familiarize yourself with the operation of your new
Nautilus ® treadmill. Doing so will help to insure that your users get the most out of your treadmill,
enjoying safe and effective workouts in the many miles ahead.
Nautilus, Inc.
World Headquarters
16400 SE Nautilus Drive
Vancouver, WA 98683
(800) NAUTILUS
nautilus.com
Model T9.14
b
TABLE OF CONTENTS
Installation & Operation> > > > > > > > > 4
Power Plug Receptacles> > > > > > > 4
Turning On the Power > > > > > > > > 4
Understanding the Display
and Controls > > > > > > > > > > > > > 4
Magnetic Safety Stop > > > > > > > > 5
Magnetic Safety Stop
Deactivation > > > > > > > > > > > > > 5
Exercise & Fitness Guidelines > > > > >35
Manual Program > > > > > > > > > > >13
Starting a Fitness Program > > > > > >36
Fat Burner Program> > > > > > > > > >14
Components of Fitness > > > > > > > >37
Calorie Burner Program > > > > > > >15
Nutrition > > > > > > > > > > > > > > > >39
Intervals Program> > > > > > > > > > 16
Determining Workout
Intensity Levels > > > > > > > > > > > >40
Heart Rate Zone Trainer Program > >17
More Workouts > > > > > > > > > > > >20
Nautilus Fit Test Program > > > > >20
Custom Intervals Program> > > > >26
Random Play Program> > > > > > >27
Getting Started > > > > > > > > > > > > > 6
Guidelines For Getting On
and Off the Treadmill > > > > > > > > > 6
HR Intervals Program > > > > > > >28
Workout Program Options > > > > > > >30
Treadmill Display Definitions > > > > > > 7
Heart Rate Monitoring > > > > > > > > >32
Treadmill Key Functions > > > > > > > > 9
Telemetry Heart Rate > > > > > > > > >32
Maintaining the Transmitter Belt> > >32
Workout Program Overview > > > > > >11
Console Codes > > > > > > > > > > > > >44
Default and Custom Codes > > > > > >44
Machine Status Codes > > > > > > > >45
Diagnostic Codes > > > > > > > > > > >46
NAUTILUS ®
Limited Access Control > > > > > > > 4
Quick Start Program > > > > > > > > >12
TABLE OF CONTENTS
Safety Requirements > > > > > > > > > > 2
Maintenance > > > > > > > > > > > > > >48
Cleaning and Inspecting > > > > > > >49
Tensioning and Tracking
Walking Belt > > > > > > > > > > > > >50
Moving and Storing> > > > > > > > > >51
Warranty Information > > > > > > > > > >52
Contact Heart Rate > > > > > > > > > >33
Contacting Nautilus > > > > > > > > > > >53
Workout Program Keypad > > > > > >11
Heart Rate Priority > > > > > > > > > > >34
1
C H A N G I N G T H E G A M E I N H E A LT H A N D F I T N E S S ™
NAUTILUS ®
SAFETY REQUIREMENTS
GENERAL GUIDELINES FOR SAFE OPERATION
1. Obtain a complete physical examination from your medical
qqqqq
WARNING
THESE GUIDELINES ARE DIRECTED TO
YOU, AS THE OWNER OF THE MACHINE
YOU SHOULD INSIST THAT ALL USERS FOLLOW THE
SAME GUIDELINES. YOU SHOULD MAKE THIS MANUAL
AVAILABLE TO ALL USERS.
qqqqq
WARNING
Do not begin an exercise program without
first consulting a physician.
qqqqq
WARNING
If at any time during your workout you feel
chest pain, experience severe muscular
discomfort, feel faint, or are short of breath, stop exercising
immediately. If the condition persists, you should consult
your medical doctor immediately.
qqqqq
WARNING
Secure long hair and loose clothing
before use.
doctor and enlist a health/fitness professional’s aid in
developing an exercise program suitable for your current
health status.
2. When working out for the first time, use the MANUAL
exercise program at the lower levels until you feel comfortable
and capable of higher workloads.
3. The intensity and duration of your exercise program should
always be subject to how you feel. Never permit peer pressure
to override your personal judgment while exercising.
4. Overweight or severely de-conditioned individuals should be
particularly cautious when using the machine for the first
time. Even though such individuals may not have histories of
serious physical problems, they may perceive the exercise to
be far less intense than it really is, resulting in the possibility
of overexertion or injury.
5. Although all equipment manufactured by Nautilus, Inc. has
been thoroughly inspected by the manufacturing facility prior
to shipment, proper installation and regular maintenance are
required to ensure safety. Maintenance is the sole responsibility
of the owner.
2
SAFETY REQUIREMENTS – SAVE THESE INSTRUCTIONS
IMPORTANT SAFETY INSTRUCTIONS
The following definitions apply to the words “Danger” and
“Warning” found throughout this manual:
qqqqq
DANGER
receptacle for signs of damage. Do not operate the
equipment if the integrity of this item is in question.
7. To avoid potential safety and electrical problems, replace
with manufacturers’ specified parts only.
8. This equipment is classified Class I, Type B, ordinary
equipment. Not protected against fluid ingress. Rated for
Used to call attention to immediate hazards
which, if not avoided, will result in immediate,
serious personal injury or loss of life.
Used to call attention to potential hazards that
could result in personal injury or loss of life.
continuous operation. Do not operate this equipment in the
presence of flammable anesthetic mixtures.
9. Do not let liquid enter the controller. If it does, the controller
must be inspected and tested for safety by an approved
technician before it can be used again.
READ ALL INSTRUCTIONS BEFORE
USING THE MACHINE.
qqqqq
DANGER To reduce the risk of electrical shock, always
unplug the external power supply from the electrical outlet
before cleaning, maintaining, or repairing.
qqqqq
WARNING To reduce the risk of burns, electric shock, or
injury to persons: Read this manual in full before operating
the treadmill. Failure to follow these guidelines can produce a
serious or possibly fatal electrical shock hazard or other serious
injury. Consult a qualified electrician as required.
NAUTILUS ®
qqqqq
WARNING
6. Before each use of this equipment, check the power
SAFETY REQUIREMENTS
When using electrical equipment, always follow these
basic precautions:
10. Increased risk due to leakage current can result if this
equipment is not grounded properly.
11. The treadmill must be on an appropriate, dedicated electrical
circuit. Nothing else should be connected to the circuit.
12. Do not stand on treadmill hood or front trim cover.
13. Close supervision is necessary whenever the machine is
used by or near children, invalids, or disabled persons.
Failure to follow the conditions set forth below shall limit, to the
extent allowed by law, Nautilus Inc. responsibility for the safety,
reliability, and performance of this equipment.
•
1. The controller Stop Key does not turn off the electrical
The operator manual must be read in full by each owner
and trainer before the product is first used. Each user
current to the treadmill. The treadmill continues to draw
must be instructed in the proper use of the treadmill and
power, even when the controller is off. To avoid electric
its accessories.
shock, do not remove treadmill hood or place hands
beneath the treadmill while the treadmill is plugged into
Do not remove the treadmill hood: dangerous voltages are
a power source.
present. Components are serviceable only by qualified
service personnel.
2. Do not start the treadmill when someone else is
standing on the belt.
•
The electrical wiring within the treadmill setting and the
electrical installation of the treadmill must comply with the
3. Keep speed and incline at the lowest settings when someone
applicable local or provincial requirements.
is getting on and off the treadmill.
•
4. Keep the area underneath and around the treadmill clear.
5.
qqqqq Never position the treadmill with the back
WARNING end (direction of belt travel) facing a wall or
any other objects such as furniture or other pieces of fitness
The equipment must be used in accordance with the
instructions for use.
•
For further information or instruction on use, maintenance
or specifications, please contact your Authorized Nautilus ®
Fitness Dealer or Service Technician.
equipment. Failure to do so can prevent safe exit of the
treadmill in an emergency situation such as falling. Allow
a minimum of four feet behind the treadmill and any objects.
3
C H A N G I N G T H E G A M E I N H E A LT H A N D F I T N E S S ™
Attach power cord here if your
treadmill will be facing a wall
or will be parallel to a wall.
Treadmill Power Plug Receptacles
The Commercial Series T19.14 Treadmill has two power plug receptacles
allowing you to plug in the treadmill from the front or the rear of the machine.
The rear power cord receptacle, located underneath the right side of the side
rail, should be used if the treadmill is going to be placed in the center of the
room facing away from the wall. The front power cord receptacle, located on the
front side of the motor pan, can be used if the treadmill is placed facing a wall or
parallel to a wall.
NAUTILUS ®
INSTALLATION
INSTALLATION & OPERATION
Attach power cord here
if your treadmill will
face away from the wall .
Turning On the Power
After you have determined which end of the treadmill to plug in, the
treadmill can be turned on by moving the power switch located at the front
of the treadmill, to the ON position.
Power Switch
Understanding the Display and Controls
The treadmill display is a computerized panel used to operate the treadmill and
see all workout data and operational status. You should familiarize yourself with
the operation of the treadmill and the location of all keys before beginning use.
Limited Access Control/Magnetic Safety Stop
Limited-access control lets you restrict treadmill use to authorized personnel.
It also lets you stop the treadmill in an emergency. The magnetically-activated
control is located on the bottom of the display as shown. The limited-access
control is deactivated on machines shipped from the factory.
Emergency
Stop
Magnet
4
INSTALLATION & OPERATION
Magnetic Safety Stop Activation
OPERATION
To activate the limited-access control and restrict access, place the magnetic
safety stop cord supplied with the treadmill in the designated area located
below the display.
The magnet will activate the control. If you remove the key, the treadmill belt
will stop and the controller will not respond to any key presses. Accumulated
values will remain on the display until you turn off the power, or press [Clear].
Attach magnetic safety cord onto
clothing as shown.
NAUTILUS ®
The console will display a message, REPLACE MAGNET when you remove the
magnetic key from its designated area. You must replace the key or deactivate
the control to start the walk belt.
Magnetic Safety Stop Deactivation
To deactivate the Safety Stop Cord and permit unrestricted access of the
treadmill follow the steps below.
1. With the magnet key in place and the display at the opening message,
SELECT WORKOUT, or, if the magnet key is removed and the display reads,
REPLACE MAGNET, press [Speed UP], [3], [ENTER]. The display will read
“CUSTOMIZE”. Use the [Speed UP] or [Speed DOWN] keys to scroll through
the options until the console displays ENABLE MAGKEY.
2. Press [ENTER], and the display will either read ON or OFF. Press [Speed:
+] or [Speed: -] to toggle between ON and OFF. With OFF displayed, press
[ENTER] to select OFF.
3. The display will show UPDATING for a few seconds, then display the
OFF setting.
4. Next, turn off the power to the treadmill from the circuit breaker switch. The
circuit breaker switch is located on the bottom front panel of the treadmill.
5. With the power to the treadmill off, remove the magnet key. Then, turn the
power to the treadmill back ON at the circuit breaker switch.
6. The display will show the SELECT WORKOUT screen. The limited access
control remains inactive, granting unrestricted access, until you turn the
magnetic key option back on, or place the magnet back in its designated area.
qqqqq
IMPORTANT If at any time the safety key is put back in place THE
SAFETY CORD FEATURE REACTIVATES AUTOMATICALLY and must be turned
off again using the above steps.
5
C H A N G I N G T H E G A M E I N H E A LT H A N D F I T N E S S ™
GETTING STARTED
NAUTILUS ®
GETTING STARTED
Guidelines For Getting On and Off the Treadmill
Instruct each user in the following guidelines for getting on and off the treadmill.
1. The walking belt should be moving at minimum speed before the user steps
onto the treadmill.
2. Stand next to the treadmill and place both hands on the front handrail.
3. Straddle the walking belt or step onto the side of the deck. Step onto the
moving belt and begin walking.
4. (Optional) To get the feel of the moving belt place the foot nearest the
treadmill on the walking belt and let it move backwards. Lift it and repeat
several times until comfortable with the treadmill speed.
5. When walking comfortably on the treadmill, let go of the handrail.
6. While walking on the treadmill:
•
Face forward. Avoid looking down at the walking belt.
•
Maintain speed by keeping a consistent distance from the handrail.
•
Adjust the speed and incline as desired. Hold the handrail as the speed
and incline change.
7. Before stepping off the treadmill, place one hand on the handrail, wait for the
belt to stop, then step off.
6
TREADMILL DISPLAY DEFINITIONS
The following describes the display functions and specifications for the
Commercial Series T9.14 Treadmill.
Incline — The treadmill incline is displayed in percentage of elevation. The T9.14
treadmill has an incline range of 0 to 15%.
Interval Time — The interval time is displayed in the lower display, upper left
area. The interval timer counts down the remaining time within each interval.
Speed — The treadmill speed is displayed in miles per hour (or kilometers per
hour). The Commercial Series T9.14 treadmill has a speed operation range of 0.5
mph to 12 mph (0.8 kph to 19.2 kph).
NAUTILUS ®
Time — The selected workout time is displayed in the upper left section of the
display window. In most of the workouts, the timer will count down, in minutes
and seconds, until the workout is finished or stopped. If (0) is entered in the
(MANUAL) or (HR ZONE TRAINER) workout, the timer will count up.
00:01
00:02
00:03
00:04
DISPLAY DEFINITIONS
Treadmill Display Functions
Heart Rate — Current heart rate is displayed next to the heart icon, in beats per
minute, in the lower display, upper right area.
Percentage of Maximum Heart Rate — An approximation of maximal heart
rate is calculated based on the latest American College of Sports Medicine
predictive equation as follows:
Max Heart Rate = 215 – (Age * .75)
Percentage of maximum heart rate will only be shown in HRC programs.
Example: For a person 40 years of age, max HR is estimated as
215 – 40 (age) * .75 = 185 . 185 beats per minute would be the approximate
maximum heart rate for a 40-year-old user.
If the user works out at 140 beats per minute, then 76% (140 / 185 = 76%) will
be displayed in the upper left corner of the lower display area. This means that
the 40 year old user working at 140 beats per minute is at 76% of their maximum
heart rate.
(See the Heart Training programs for more information.)
Distance — Provides a cumulative total of the equivalent distance, in miles (or
kilometers if your display is set to metric units), you have traveled.
7
C H A N G I N G T H E G A M E I N H E A LT H A N D F I T N E S S ™
NAUTILUS ®
DISPLAY DEFINITIONS
TREADMILL DISPLAY DEFINITIONS
Calories — Provides a current total of the number of calories burned during
a workout. Note: this number is only an approximation as a user’s caloric
expenditure will vary significantly based on a persons age, gender, weight
and metabolism.
Calories/Hour — Provides the rate at which calories are burned per hour at the
current speed and incline.
Pace — Displays the walking/running pace in minutes per mile (or minutes per
kilometer), or the time it will take you to complete one mile (or one kilometer)
at your current rate. Pace is shown in the top text line.
Watts — During a workout, this statistic displays the power output at the
current speed and incline, displayed in watts (746 watts = 1 hp).
METs — Gives you the relative energy cost of exercise. MET stands for
multiples of the resting metabolic rate. While you are sitting quietly, your body
consumes oxygen at the rate of about 3.5 milliliters per kilogram of body mass
per minute. When you exercise, your body needs more oxygen in order to
function. For example, exercising at 10 METs requires ten times the resting rate
of oxygen consumption, or about 35 milliliters per kilogram per minute. During a
workout, the display shows the current MET level. During the workout summary,
the average MET level is displayed.
Workout Profile — The dot-matrix area of the display shows the actual
course profile of the selected exercise program. The taller the column, the
higher the incline and/or speed for that interval. The flashing column shows
your current interval.
8
TREADMILL KEY FUNCTIONS
TM
NAUTILUS ®
Remote Operation Controls (ROC™ ) — The Remote Operation Controls
are located on the ergo bar in front of the console. The treadmill can be
controlled from these keypads. The ROC keypad includes a Quick Start key,
Speed UP and DOWN keys, Incline UP and DOWN keys, and a STOP key.
KEY FUNCTIONS
Remote
Operation
Controls
(ROC ™ )
Display LOCK / UNLOCK - Statistics Key — During the exercise program,
the Display LOCK / UNLOCK key is used to track workout statistics which
are shown in the text line of the display window. When a workout is started,
the display is in an unlocked mode and the various exercise statistics will
scroll in order. Press the [DISPLAY] key once to turn off the scan feature
and show the current statistic in the display window. Press the [DISPLAY]
key a second time and the scan feature will turn back on to scroll through the
different statistics.
When in the Display Unlock mode, the console will cycle through the
following statistics in order: Distance, Calories/Hour, Watts, METs, Target
Heart Rate.
At the completion of a workout, the statistic averages are calculated based
on the accumulation of data during the workout program.
Quick Start Key — The Quick Start Key provides an immediate start to a
workout session without having to provide any user information.
Stop Key — Press the STOP Key any time you want to pause the workout
program for up to one minute. Press the STOP Key a second time, or press (1),
and the workout statistics will be displayed, then the console will return to the
“SELECT WORKOUT” prompt.
Numeric Keypad (0-9) — The numeric keypad is located on the right side of
the console. During program setup, this keypad allows you to quickly enter
requested information such as time, age, intensity Speed or Incline , weight and
heart rate.
9
C H A N G I N G T H E G A M E I N H E A LT H A N D F I T N E S S ™
TREADMILL KEY FUNCTIONS
NAUTILUS ®
KEY FUNCTIONS
Enter – The ENTER Key confirms workout selections and stores the information
used by the console to calculate workout statistics.
Clear – During data entry, the CLEAR Key erases information from the console
memory and backs up to the previous data entry prompt.
Incline Up & Down Keys — The treadmill incline may be changed at any time
during a workout. Pressing the INCLINE UP key increases the incline and
pressing the INCLINE DOWN key decreases the incline. The treadmill incline
increases or decreases by increments of 0.5%.
Speed Faster & Slower Key — The treadmill belt speed may be changed at
any time during a workout. Pressing the SPEED DOWN Key decreases the belt
speed and pressing the SPEED UP key increases the belt speed. The belt speed
increases or decreases by increments of 0.1 MPH (0.15 KM/H).
qqqqq
IMPORTANT It is important to know that the speed change up or
down is not immediate. Speed will gradually increase or decrease so be sure
to allow the treadmill to adjust to a new speed before changing again to avoid
overshooting your desired speed.
10
WORKOUT PROGRAM OVERVIEW
Workout Program Keypad
When entering data, the user can select the standard default values by pressing
[ENTER] at the display prompt without first typing data. This will set up the
console with the following default data:
•
Weight – 175 lbs.
•
Speed – 2.0 mph in Fat Burner, Calorie Burner or HR Zone Trainer. 1.0
mph in Manual.
•
Age (HR Zone Trainer program only) – 40 years
•
Workout Time – The default time in the programmed workouts and Quick
Start is 20 minutes. The Manual and HR Zone Trainer programs do not
have a specified default time. In this program, the console timer will
count up to the maximum time of 99 minutes.
variety of programming
options with a great
amount of flexibility to
allow anyone of
any fitness level to use.
NAUTILUS ®
While the console is in the SELECT WORKOUT mode, press one of the exercise
program keys to preview the desired workout. After selecting the desired
workout, simply follow the prompts to enter the required user data for
that program.
The Commercial Series
T9.14 treadmill has a wide
PROGRAM OVERVIEW
The workout program keypad is located to the left of the display. There are six
workout program keys, including a More Workouts key with multiple advanced
program options.
Program Overview
Once you have selected a program, follow the console prompts.
•
ENTER BODY WEIGHT – type in your body weight in pounds (or kilograms
if your console is set to metric units).
•
ENTER SPEED – type in your desired speed. The T9.14 treadmill has a
speed range of 0.5 mph – 12 mph.
•
ENTER TIME 5 - 99 – select the workout duration in one minute
increments from five to 99.
11
C H A N G I N G T H E G A M E I N H E A LT H A N D F I T N E S S ™
NAUTILUS ®
QUICK START PROGRAM
QUICK START PROGRAM
The Quick Start Program
Provides an immediate start, without having to enter any user information. This
program uses the standard default settings to calculate calories burned during a
workout session.
To use the Quick Start program:
1. Press the [QUICK START] key. A message, ENJOY WORKOUT is displayed,
the workout begins with exercise statistics accumulating.
2. During the workout:
•
Speed may be changed at any time during the workout by pressing the
[Speed: UP] key to increase the speed, or the [Speed: DOWN] key to
decrease the speed. The new speed will continue through the rest of the
workout until changed using the Speed keys.
•
Incline may be changed at any time during the workout by pressing the
[Incline: UP] key to increase the incline, or the [Incline: DOWN] key to
decrease the incline. The new incline will continue through the rest of
the workout until changed using the Incline keys.
3. Press [STOP] to pause the workout. Press [STOP] again to end the
workout. The workout statistics will be displayed, and then the console
will revert back to the SELECT WORKOUT message.
12
MANUAL PROGRAM
The Manual Program
4. Next, the console will display ENTER TIME 5
– 99. Enter the desired time and press [ENTER].
Or, press [ENTER] to select the default time.
If you press [0], then the timer will count-up
from 0:00 to the maximum time of 99:00.
•
Speed may be changed at any time during the
workout by pressing the [Speed: UP] key to
increase the speed, or the [Speed: DOWN] key
to decrease the speed. Any changes to the
speed will be displayed in the current flashing
column. The new speed will continue through
the rest of the workout until changed using the
Speed keys.
•
Incline may be changed at any time during the
workout by pressing the [Incline: UP] key to
increase the incline, or the [Incline: DOWN]
key to decrease the incline. Any changes to
incline will be displayed in the current flashing
column. The new incline will continue through
the rest of the workout until changed using the
Incline keys.
To use the Manual program:
1. Press the [MANUAL] key. The message,
MANUAL WORKOUT will be displayed in the
text line and the workout profile displayed in
the lower display.
2. The console will display ENTER WEIGHT - LBS
(or ENTER WEIGHT – KG if in Metric mode).
Enter your weight using the numeric keypad and
press [ENTER]. Or, press [ENTER] to accept
the default value.
•
Your weight is used to calculate the number of
calories burned for each minute of exercise
and the total number of calories burned for the
exercise session.
3. The console will display ENTER SPEED - MPH
( or ENTER SPEED – KMH if in Metric mode).
Enter the desired speed using the numeric
keypad and press [ENTER]. Or, press [ENTER]
to accept the default value.
NAUTILUS ®
5. The console will display ENJOY WORKOUT and
the timer will begin.
MANUAL PROGRAM
The Manual Program allows you to control the speed
and incline of the treadmill during the workout, while
accurately calculating exercise statistics based on
your weight. The default speed is 1.0 mph unless
changed during the data entry mode. The incline is
0%. The workout profile in the display window is
divided into 30 equal intervals within the selected
workout time. The profile is based on the MET level,
with every 1 MET equating to one vertical bar. MET
level is based on a combination of incline and speed.
6. Press [STOP] to end the workout. The
workout statistics will be displayed, and then
the console will revert back to the SELECT
WORKOUT message.
13
C H A N G I N G T H E G A M E I N H E A LT H A N D F I T N E S S ™
NAUTILUS ®
FAT BURNER PROGRAM
FAT BURNER PROGRAM
The Fat Burner Program
The Fat Burner program is a 30 interval workout
designed with moderate changes in the incline
designed to stimulate fat store assimilation for users
on a weight control program. The profile in the center
display indicates the relative intensity. Any changes
to the intensity level will not change the look of the
remaining profile; however, the new intensity level
will continue through the rest of the workout.
4. Next, the console will display ENTER TIME 5 – 99.
Enter the desired time and press [ENTER]. Or,
press [ENTER] to select the default time.
5. The console will display ENJOY WORKOUT and the
timer will begin.
•
Speed may be changed at any time during the
workout by pressing the [Speed: UP] key to
increase the speed, or the [Speed: DOWN] key
to decrease the speed. Any changes to the
speed will be displayed in the current flashing
column. The new speed will continue through
the rest of the workout until changed using the
Speed keys.
•
Incline may be changed at any time during the
workout by pressing the [Incline: UP] key to
increase the incline, or the [Incline: DOWN]
key to decrease the incline. Any changes to
incline will be displayed in the current flashing
column. The new incline will continue through
the rest of the workout until changed using the
Incline keys.
To use the Fat Burner program:
1. Press the [FAT BURNER] key. The message, FAT
BURNER, will be displayed on the text line with the
workout profile displayed in the lower display.
2. The console will display ENTER WEIGHT - LBS (or
ENTER WEIGHT - KG if in Metric mode).
Enter your weight using the numeric keypad and
press [ENTER]. Or, press [ENTER] to accept the
default value.
•
Your weight is used to calculate the number of
calories burned for each minute of exercise
and the total number of calories burned for the
exercise session.
3. The console will display ENTER SPEED – MPH (or
ENTER SPEED – KMH if in Metric mode). Enter
the desired speed using the numeric keypad and
press [ENTER]. Or, press [ENTER] to accept the
default value.
14
6. Press [STOP] to end the workout. The
workout statistics will be displayed, and then
the console will revert back to the SELECT
WORKOUT message.
CALORIE BURNER PROGRAM
press [ENTER]. Or, press [ENTER] to accept the
default value.
4. Next, the console will display ENTER TIME 5 – 99.
Enter the desired time and press [ENTER]. Or,
press [ENTER] to select the default time.
5. The console will display ENJOY WORKOUT and the
timer will begin.
•
Speed may be changed at any time during the
workout by pressing the [Speed: UP] key to
increase the speed, or the [Speed: DOWN] key
to decrease the speed. Any changes to the
speed will be displayed in the current flashing
column. The new speed will continue through
the rest of the workout until changed using the
Speed keys.
•
Incline may be changed at any time during the
workout by pressing the [Incline: UP] key to
increase the incline, or the [Incline: DOWN]
key to decrease the incline. Any changes to
incline will be displayed in the current flashing
column. The new incline will continue through
the rest of the workout until changed using the
Incline keys.
To use the Calorie Burner program:
1. Press the [CALORIE BURNER] key. The message,
CALORIE BURNER, will be displayed on the text
line with the workout profile displayed in the lower
display.
2. The console will display ENTER WEIGHT - LBS (or
ENTER WEIGHT - KG if in Metric mode).
Enter your weight using the numeric keypad and
press [ENTER]. Or, press [ENTER] to accept the
default value.
•
Your weight is used to calculate the number of
calories burned for each minute of exercise
and the total number of calories burned for the
exercise session.
3. The console will display ENTER SPEED - MPH or
(ENTER SPEED – KMH if in Metric mode). Enter
the desired speed using the numeric keypad and
NAUTILUS ®
The Calorie Burner program is a 30 interval workout
designed for users wanting to increase their aerobic
capacity. The changes of intensity in the program
are greater than the changes in the Fat Burner
program, and are designed specifically to tax the
cardiorespiratory system. The profile in the center
display indicates relative intensity. Any changes
to the intensity level will not change the look of the
remaining profile; however, the new intensity level
will continue through the rest of the workout.
CALORIE BURNER PROGRAM
The Calorie Burner Program
6. Press [STOP] to end the workout. The workout
statistics will be displayed, and then the console
will revert back to the SELECT WORKOUT
message.
15
C H A N G I N G T H E G A M E I N H E A LT H A N D F I T N E S S ™
NAUTILUS ®
INTERVALS PROGRAM
INTERVALS PROGRAM
The Intervals Program
The Intervals program is an interval workout
containing 8 alternating rest intervals with 7 exercise
intervals. An interval cycle consists of a work phase
and a rest phase. You may scale the rest speed and
incline, and the work intensity speed and incline
independently - which will be saved for the remainder
of the workout.
•
Speed may be changed at any time during
the workout by pressing the [Speed: UP] key
to increase the resistance, or the [Speed:
DOWN] key to decrease the speed. Any
changes to the speed will only change the
speed in the current rest or work phase. To
change the speed of the work phase, you
must change the speed during a work phase.
To change the speed of the rest phase, you
must change the speed during a rest phase.
Changing the speed will not change the look of
the remaining profile; however, the new speed
will continue through the rest of the workout.
•
Incline may be changed at any time during the
workout by pressing the [Incline: UP] key to
increase the incline, or the [Incline: DOWN]
key to decrease the incline. Any changes to
the incline will only change the incline in the
current rest or work phase. To change the
incline of the work phase, you must change
the incline during a work phase. To change
the incline of the rest phase, you must change
the incline during a rest phase. Changing
the incline will not change the look of the
remaining profile; however, the new incline
will continue through the rest of the workout.
To use the Intervals program:
1. Press the [INTERVALS] key. The message,
INTERVALS, will be displayed on the text line with
the workout profile displayed in the lower display.
2. The console will display ENTER WEIGHT - LBS
(or ENTER WEIGHT - KG if in Metric mode).
Enter your weight using the numeric keypad and
press [ENTER]. Or, press [ENTER] to accept the
default value.
•
Your weight is used to calculate the number of
calories burned for each minute of exercise
and the total number of calories burned for the
exercise session.
3. The console will display ENTER WORK SPEED
- MPH or (ENTER WORK SPEED – KMH if in Metric
mode). Enter the desired work speed using the
numeric keypad and press [ENTER]. Or, press
[ENTER] to accept the default value.
4. The console will display ENTER REST SPEED
- MPH or (ENTER REST SPEED – KMH if in Metric
mode). Enter the desired rest speed using the
numeric keypad and press (ENTER). Or, press
(ENTER) to accept the default value.
5. Next, the console will display ENTER TIME 5 – 99.
Enter the desired time and press [ENTER]. Or,
press [ENTER] to select the default time.
16
6. The console will display ENJOY WORKOUT and the
timer will begin.
7. Press [STOP] to end the workout. The workout
statistics will be displayed, and then the
console will revert back to the SELECT
WORKOUT message.
HEART RATE (HR) ZONE TRAINER PROGRAM
an appropriate target heart rate in which to exercise in based on age,
weight and physical condition. While Nautilus provides some target
heart rate ranges, these are only approximations and should not be
viewed as a medical recommendation.
The Heart Rate Zone Trainer program allows you to exercise at a selected target
heart rate by automatically varying the intensity level (speed or incline) during
the workout. The default target heart rate is equal to 70% of your maximum
heart rate which is calculated by the following equation:
Max HR = 215 – (.75 * Age). Target HR = Max HR * .7. To choose a different
target heart rate (between 100 and 180 beats per minute) at any time during the
workout, use the numeric keypad to enter the new target heart rate, followed by
the [ENTER] key.
NAUTILUS ®
Heart Rate (HR) Zone Trainer Program
HRZT PROGRAM
qqqqq
WARNING! User should consult a physician to determine
To use the HR Zone Trainer program:
1. For best results, use a telemetry heart rate chest belt. However, you
can also use the contact HR grips located on the ergo bar in front of the
console. If you use contact HR, speed will be limited to a maximum of 4.5
mph. Further, HR Control will be limited to Incline changes only.
If you are using the telemetry HR method, put the chest strap on. Remember to
wet the electrodes underneath the chest strap. The console must detect a heart
rate signal to allow selection of the HR Zone Trainer program.
If you will be using contact HR, then place your hands on the contact HR grips
below the console.
2. Press the [HR ZONE TRAINER] key. The message, HR ZONE TRAINER, will
be displayed on the text line with the workout profile in the lower display.
3. The console will display ENTER WEIGHT - LBS (or ENTER WEIGHT KG if in Metric mode). Enter your weight using the numeric keypad and
press [ENTER].
Or, press [ENTER] to accept the default value.
•
Your weight is used to calculate the number of calories burned for
each minute of exercise and the total number of calories burned for the
exercise session.
17
C H A N G I N G T H E G A M E I N H E A LT H A N D F I T N E S S ™
NAUTILUS ®
HRZT PROGRAM
HEART RATE (HR) ZONE TRAINER PROGRAM
4. The console will display ENTER AGE 10 -99. Enter your age using the
numeric keypad and press [ENTER]. Or, press [ENTER] to accept the
default value of 40 years old.
5. The console will display TARGET HR. A suggested target heart rate will
be displayed, based on your age. Press [ENTER] to accept the calculated
target heart rate, or enter a different target heart rate using the numeric
keypad and then press [ENTER].
Or, press [ENTER] to accept the default value.
•
The target heart rate selected by the console is based on age, and is
equal to 70% of your maximum heart rate which is calculated by the
following equation: Max HR = 215 – (.75 * Age). Target HR = Max HR * .7.
If desired, change the target heart rate at this point by using the numeric
keypad to enter the new target heart rate, and then press [ENTER].
•
During a workout, change to a new target heart rate that is between 100
and 180 beats per minute at any time by using the numeric keypad to
enter the new target heart rate, and then pressing [ENTER].
7. The console will display ENTER SPEED – MPH or (ENTER SPEED – KMH
if in Metric mode). Enter the desired speed using the numeric keypad and
press (ENTER). Or, press ENTER to accept the default value.
8. The console will display HR CONTROL MODE, 1 – SPEED, 2 – INCLINE
(only when using telemetry HR – if using contact HR, skip to step 9).
Enter the desired form of HR Control by pressing 1 for SPEED or 2 for
INCLINE. Or, press (ENTER) to accept the default value. If contact
HR is being used, then this message is skipped and INCLINE control is
automatically selected.
9. The console will display ENTER TIME 5-99. Enter the desired time and
press [ENTER]. Or, press [ENTER] to accept the default value.
10. The console will display ENJOY WORKOUT and the timer will begin.
The following messages may be displayed during a workout:
18
•
CHECK HR BELT – Indicates that the telemetry heart rate signal has been
missing for the last 30 seconds.
•
HOLD HR SENSORS – Indicates that the contact heart rate signal has
been missing for the last 30 seconds.
HEART RATE (HR) ZONE TRAINER PROGRAM
HR BELT NEEDED – No telemetry belt signal has been sensed during the
initial setup time.
•
HR MODE DISABLED – No heart rate signal is allowed due to the set up
option that was chosen. Heart rate monitoring is not possible. To change
HR option, refer to the HR Priority section of this manual.
To change your target heart rate during the workout:
•
NAUTILUS ®
To change your target heart rate during the workout, use the numeric
keypad to enter the desired target heart rate and press ENTER to accept.
The new target heart rate will be used and the intensity level will change
automatically to achieve the new target heart rate.
HRZT PROGAM
•
11. Press [STOP] to end the workout. The workout statistics will be displayed,
and then the console will revert back to the SELECT WORKOUT message.
19
C H A N G I N G T H E G A M E I N H E A LT H A N D F I T N E S S ™
MORE WORKOUTS: FIT TEST PROGRAM
NAUTILUS ®
FIT TEST PROGRAM
MORE WORKOUTS
Press the More Workouts key for several advanced program options outlined
below. Press the Speed or Incline UP or DOWN keys to scroll through the MORE
WORKOUTS program options. Press ENTER when the desired program
is displayed.
The Nautilus Fit Test Program
Understanding Sub-maximal Exercise Testing
Before using the Nautilus T9.14 treadmill for sub-maximal exercise testing, it
should be noted that all sub-maximal tests make several assumptions:
•
That a steady-state heart rate is obtained for each exercise workload.
•
That a linear relationship exists between heart rate, oxygen uptake
and workload.
•
That the maximal heart rate for a given age is uniform.
•
That the mechanical efficiency of the physical activity performed
(i.e., oxygen uptake at a given workload) is the same for everyone.
It should be kept in mind that any one or all of the above mentioned assumptions
may not be met during a sub-maximal exercise test. If for any reason one of the
assumptions is not met, then errors in predicting VO 2 max will occur.
Unfortunately, it is often quite difficult to meet all of the requirements for the
four listed assumptions. For example, exercising at a given workload for only a
few minutes can involve an insufficient amount of time for many individuals to
achieve a true steady-state. To ensure that a steady-state has been achieved,
the heart rate should be measured after two minutes of exercise at a given
workload and again after the third minute of exercise at that workload. These
two heart rates should then be compared. If a difference of more than five beats
per minute between the two is found, the subject should continue to exercise
at one-minute intervals at the same workload until two successive heart rates
differ by less than five beats per minute.
It is also important that the sub-maximal heart rates obtained be between 115
and 150 beats per minute, because it is within this heart rate range that a linear
relationship tends to exist between heart rate and oxygen uptake or workload
for most adults. When the heart rate is less than 115, many external factors (e.g.,
talking, laughing, apprehension, etc.) can greatly influence heart rate. Once
20
MORE WORKOUTS: FIT TEST PROGRAM
The third assumption involves maximal heart rate. Maximal heart rate is the
greatest heart rate that can be measured when an individual is exercising to the
point of volitional fatigue (i.e., exhaustion) during a graded exercise test. The
T9.14 treadmill uses the most current published equation developed to estimate
the average maximal heart rate as follows:
Maximal heart rate = 215 minus (0.75 x age)
Maximal heart rate can, however, vary greatly among different individuals of
the same age. One standard deviation is ±12 bpm, which means that two-thirds
of the population varies an average of plus or minus 12 heart beats from the
average given by a prediction equation. If an individual’s age-predicted maximal
heart rate is higher than that person’s true maximal heart rate, then his/her
estimated VO2 max will be an overestimation of the correct or actual value.
NAUTILUS ®
•
FIT TEST PROGRAM
the heart rate reaches a level between 115 and 150, external factors no longer
influence heart rate, and a linear relationship exists. As the heart rate rises
above 150, the heart-rate/oxygen uptake relationship becomes curvilinear.
The final assumption addresses the issue of mechanical efficiency. Oxygen
uptake at any given work rate can vary by approximately 15% between
different individuals. Therefore, individuals vary in the amount of oxygen they
require to perform a certain exercise workload. Some individuals are more
efficient at performing a given task than others. As a result, the average
oxygen consumption associated with a given workload may vary significantly
from one person to another. Thus, VO 2 max predicted by sub-maximal exercise
tests tends to be overestimated for those who are mechanically efficient and
underestimated for those who are inefficient.
The point to remember is that sub-maximal exercise testing, though not as
precise as maximal exercise testing, is not without advantages. For example,
the results of such testing can provide a fairly accurate reflection of an
individual’s fitness status without the cost, risk, effort (on the part of the
subject) and time involved in max testing. If an individual is given repeated
sub-maximal exercise tests and that person’s heart rate response to a fixed
workload is found to decrease over time, it is reasonably safe to conclude that
the individual has made improvements in aerobic (cardiorespiratory) fitness,
irrespective of the accuracy of the VO 2 max prediction.
21
C H A N G I N G T H E G A M E I N H E A LT H A N D F I T N E S S ™
MORE WORKOUTS: FIT TEST PROGRAM
NAUTILUS ®
FIT TEST PROGRAM
Pretest Screening
Prior to any exercise test (maximal or sub-maximal), participants should
complete a brief health/medical questionnaire, have their resting blood pressure
and heart rate measured, and provide an informed consent form. The Physical
Activity Readiness Questionnaire (PAR-Q) is an example of a valid health/
medical questionnaire for screening individuals prior to sub-maximal exercise
testing. Canadian health and fitness practitioners have extensively (and quite
successfully) used the PAR-Q to determine whether individuals should be given
an exercise test. A “yes” answer to any of the following seven questions taken
from the PAR-Q would disqualify a participant from taking part in an exercise
test until appropriate medical clearance was obtained.
PHYSICAL ACTIVITY READINESS QUESTIONNAIRE (PAR-Q)
1. Has your doctor ever said you have a heart condition and recommended only
medically supervised physical activity?
2. Do you have chest pain brought on by physical activity?
3. Have you developed chest pain within the past month?
4. Do you tend to lose consciousness or fall over as a result of dizziness?
5. Do you have a bone or joint problem that could be aggravated by the
proposed physical activity?
6. Has a doctor ever recommended medication for your blood pressure or a
heart condition?
7. Are you aware, through your own experience or a doctor’s advice, of any
other physical reason against your exercising without medical supervision?
Nautilus Sub-maximal Fit Test
The Nautilus Fit Test is a program that estimates maximal aerobic capacity
based on heart-rate response to sub-maximal exercise.
The Nautilus branching protocol is a series of 3-minute stages of continuous
exercise at increasing intensity. The first stage is a warm-up at approximately 4
METs. The intensity of the remaining stages is based on the heart rate response
to the warm-up. The test is designed to raise the steady state heart rate of
the subject to at least 115 beats/minute. It is important to remember that two
consecutive heart rate measurements must be obtained above 115 beats/minute
to predict VO2 max . The test typically lasts from 6 to 15 minutes. The test will
22
MORE WORKOUTS: FIT TEST PROGRAM
terminate if the heart rate does not continue to rise from state to stage.
NAUTILUS ®
At the end of the 3rd minute of each stage, if the heart rates at the end of the
2nd and 3rd minute are not within 5 beats/min of each other, then that work rate
is maintained for an additional minute. At the end of the 4th minute, the heart
rate is compared to the heart rate at the end of the 3rd minute. If the heart
rates are within 5 beats/min, then the heart rate during the 4th minute is plotted
against the work rate. If the heart rate at the end of the 3rd and 4th minute are
not within 5 beats/min, then the work rate is maintained for one more additional
minute. If the heart rate at the end of the 4th and 5th minutes are within 5
beats/min, then the heart rate at the end of the 5th minute is plotted against the
work rate. If the heart rate at the end of the 4th and 5th minutes are not within 5
beats/min, then the test failed.
FIT TEST PROGRAM
In the Nautilus protocol, each work rate is performed for 3 minutes, with heart
rates recorded during the final 4 seconds of the second and third minutes of
each stage. If the heart rates are within 5 beats/min, then the heart rate during
the last minute is plotted against the work rate, and the program advances to
the next 3-minute stage. The program continues for two to four stages until two
steady state heart rates above 115 beats/min are obtained in two consecutive
stages. The line generated from the plotted points is then extended to the agepredicted maximal heart rate. A corresponding maximal work rate and VO2max
can then be calculated.
Once two consecutive heart rate measurements are obtained above 115
beats/min range, then the test ends successfully and the results are displayed.
Estimated maximum aerobic capacity is shown in ml/kg/min and METs. Next,
the results are compared to normative values for others of the same age range
and gender.
23
C H A N G I N G T H E G A M E I N H E A LT H A N D F I T N E S S ™
MORE WORKOUTS: FIT TEST PROGRAM
NAUTILUS ®
FIT TEST PROGRAM
To use the Fitness Test program:
1. Put the chest strap on. Remember to wet
underneath the chest strap, over the electrodes.
For test accuracy, use of a telemetry chest
strap is required.
LATER will be displayed if
•
The user stops exercising at any point during
the test.
2. Press the [MORE WORKOUTS] key. Then
use the Speed or Incline UP or DOWN keys to
scroll through the program options. When the
console displays NAUTILUS FIT TEST, press
[ENTER] to select.
•
The [STOP] key is pressed.
•
The heart rate response to each work level is
the same or less than the previous work level.
•
The heart rate never reaches 115 beats/minute.
3. The console will then display ENTER WEIGHT LBS (or ENTER WEIGHT - KG if in Metric mode).
Enter your weight using the numeric key keypad.
•
The heart rate continues to rise after the
fifth minute.
4. The console will display ENTER AGE 10 -99.
Enter your age using the numeric keypad.
5. The console will display ENTER GENDER / 1
- MALE / 2 - FEMALE. Enter your gender code
using the numeric keypad.
6. The console will display BEGIN FIT TEST.
Follow the onscreen prompts. The following
messages may be displayed during a
fitness test:
•
CHECK HR BELT - Indicates that the heart rate
signal has been missing for the last 30 seconds.
7. The test will be terminated early, and the
messages TEST TERMINATED / TRY AGAIN
24
8. The test is complete when two consecutive
steady-state heart rates are obtained above
115 beats/minute. The test can be as short as 6
minutes, or as long as 15 minutes.
•
No cool down is done at the end of the test.
9. The estimated maximal aerobic capacity is
displayed in METs, and VO 2 max . The results are
compared to normative values of the same age
and gender1 (see below), and given a fitness
rating of Low, Fair, Average, Good,
or High.
MORE WORKOUTS: FIT TEST PROGRAM
Fitness Rating Norms (VO2max)
Men
30 – 39
40 – 49
50 – 59
60 +
High
51.4 +
50.4 +
48.2 +
45.3 +
42.5 +
Good
51.3 – 46.8
50.3 – 44.6
48.1 – 41.8
45.2 – 38.5
42.4 – 35.3
Average
46.7 – 42.5
44.5 – 41.0
41.7 – 38.1
38.4 – 35.2
35.2 – 31.8
Fair
42.4 – 39.5
40.9 – 37.4
38.0 – 35.1
35.1 – 32.3
31.7 – 28.7
Low
39.4 or less
37.3 or less
35.0 or less
32.2 or less
28.6 or less
High
44.2 +
41.0 +
39.5 +
35.2 +
35.2 +
Good
44.1 – 38.1
40.9 – 36.7
39.4 – 33.8
35.1 – 30.9
35.1 – 29.4
Average
38.0 – 35.2
36.6 – 33.8
33.7 – 30.9
30.8 – 28.2
29.3 – 25.8
Fair
35.1 – 32.3
33.7 – 30.5
30.8 – 28.3
28.1 – 25.5
25.7 – 23.8
Low
32.2 or less
30.4 or less
28.2 or less
25.4 or less
23.7 or less
NAUTILUS ®
Women
20 – 29
FIT TEST PROGRAM
AGE
1 The American College of Sports Medicine, Guidelines for Exercise Testing and Prescription, 6th Edition, Lippincott WIlliams & WIlkins, Philidelphia, PA, 2000, p. 77.
25
C H A N G I N G T H E G A M E I N H E A LT H A N D F I T N E S S ™
MORE WORKOUTS: CUSTOM INTERVALS
NAUTILUS ®
CUSTOM INTERVALS
Custom Intervals Program
In the Custom Intervals workout, users can create a custom interval program by entering Rest Speed and Time,
Work Speed and Time, and total # of intervals.
To use the Custom Intervals Program:
1. Press the MORE WORKOUTS key. Then, use
the Speed or Incline UP or DOWN keys to
scroll through the program options. When the
console displays CUSTOM INTERVALS, press
[ENTER] to accept.
2. The console will then display ENTER WEIGHT
– LBS (or ENTER WEIGHT – KG if in Metric
mode). Enter your weight using the numeric
keypad and press (ENTER). Or, press [ENTER]
to accept the default value.
the desired number of intervals, up to 15, using
the numeric keypad and press (ENTER). Or,
press [ENTER] to accept the default value.
8. The console will display ENJOY WORKOUT and
the timer will begin.
•
Speed may be changed at any time during
the workout by pressing the [Speed: UP] key
to increase the resistance, or the [Speed:
DOWN] key to decrease the speed. Any
changes to the speed will only change the
speed in the current rest or work phase. To
change the speed of the work phase, you
must change the speed during a work phase.
To change the speed of the rest phase, you
must change the speed during a rest phase.
Changing the speed will not change the look of
the remaining profile; however, the new speed
will continue through the rest of the workout.
•
Incline may be changed at any time during the
workout by pressing the [Incline: UP] key to
increase the incline, or the [Incline: DOWN]
key to decrease the incline. Any changes to
the incline will only change the incline in the
current rest or work phase. To change the
incline of the work phase, you must change
the incline during a work phase. To change
the incline of the rest phase, you must change
the incline during a rest phase. Changing
the incline will not change the look of the
remaining profile; however, the new incline
will continue through the rest of the workout.
3.The console will display ENTER WORK SPEED
– MPH (or ENTER WORK SPEED – KMH if in
Metric mode). Enter the desired work speed
using the numeric keypad and press (ENTER).
Or, press [ENTER] to accept the default value.
4. The console will then display ENTER WORK
TIME. Enter the desired time up to 9:59 and
press (ENTER). Or, press [ENTER] to accept
the default value.
5. The console will display ENTER REST SPEED
- MPH (or ENTER REST SPEED – KMH if in
Metric mode). Enter the desired rest speed
using the numeric keypad and press (ENTER).
Or, press [ENTER] to accept the default value.
6. The console will then display ENTER REST
TIME. Enter the desired time up to 9:59 and
press (ENTER). Or, press [ENTER] to accept
the default value.
7. The console will display # OF INTERVALS. Enter
26
MORE WORKOUTS: RANDOM PLAY
Random Play Workout
1. Press the MORE WORKOUTS key. Then use the Speed or Incline UP or
DOWN keys to scroll through the program options. When the console
displays “RANDOM PLAY”, press [ENTER] to accept.
3. The console will display ENTER SPEED – MPH (or ENTER SPEED – KMH”if
in Metric mode). Enter the desired workout speed using the numeric
keypad and press (ENTER). Or, press [ENTER] to accept the default value.
NAUTILUS ®
2. The console will then display ENTER WEIGHT – LBS (or ENTER WEIGHT
– KG if in Metric mode). Enter your weight using the numeric keypad and
press (ENTER). Or, press [ENTER] to accept the default value.
RANDOM PLAY
The Random Play Workout is a program that randomly changes the intensity
throughout the workout time.
4. The console will then display ENTER TIME. Enter the desired time and
press (ENTER). Or, press [ENTER] to accept the default value.
5. The console will display ENJOY WORKOUT and the timer will begin.
27
C H A N G I N G T H E G A M E I N H E A LT H A N D F I T N E S S ™
NAUTILUS ®
HR INTERVAL PROGRAM
MORE WORKOUTS: HR INTERVAL PROGRAM
HR Interval Program
The HR Interval program allows the user to define an exercise Target HR, time at exercise Target HR, rest
Target HR, time at rest Target HR and total exercise time. This program will change the intensity level by
increasing or decreasing the speed or incline to keep the user in their defined Target HR zones.
To use the HR Interval Program:
2. The console will then display ENTER WEIGHT
– LBS (or ENTER WEIGHT – KG if in Metric
mode). Enter your weight using the numeric
keypad and press (ENTER). Or, press [ENTER]
to accept the default value.
3. The console will display ENTER AGE 10 -99.”
Enter your age using the numeric keypad. Or,
press [ENTER] to accept the default value of 40
years old.
4. The console will then display ENTER WORK
TARGET HR. Enter the desired Target HR using
the numeric keypad and press (ENTER). Or,
press [ENTER] to accept the default value.
5. The console will display WORK TARGET HR. A
suggested target heart rate will be displayed,
based on your age. Press [ENTER] to accept
the calculated target heart rate, or enter a
different target heart rate using the numeric
keypad and then press [ENTER].
Or, press [ENTER] to accept the default value.
•
28
Target HR = Max HR * .8. If desired, change
the target heart rate at this point by using the
numeric keypad to enter the new target heart
rate, and then press [ENTER].
1. Press the MORE WORKOUTS key. Then use
the Speed or Incline UP or DOWN keys to
scroll through the program options. When
the console displays HR INTERVALS, press
[ENTER] to accept.
The target heart rate selected by the console
is based on age, and is equal to 80% of your
maximum heart rate which is calculated by the
following equation: Max HR = 215 – (.75 * Age).
•
Change to a new target heart rate that is
between 100 and 180 beats per minute at any
time during a workout by using the numeric
keypad to enter the new target heart rate, and
then pressing [ENTER].
6. The console will display ENTER WORK TIME.
This is the amount of time you want to exercise
in the work target heart rate zone. Entire
desired work time using the numeric keypad
and press (ENTER). Or, press (ENTER) to
accept the default value.
7. The console will then display REST TARGET HR.
A suggested target heart rate will be displayed,
based on your age. Press (ENTER) to accept
the calculated target heart rate, or enter a
different target heart rate using the numeric
keypad and then press (ENTER). Or, press
(ENTER) to accept the default value.
•
The target heart rate selected by the console
is based on age, and is equal to 65% of your
maximum heart rate which is calculated by the
following equation: Max HR = 215 – (.75 * Age).
Target HR = Max HR * .65. If desired, change
the target heart rate at this point by using the
numeric keypad to enter the new target heart
rate, and then press [ENTER].
MORE WORKOUTS: HR INTERVAL PROGRAM
13. The console will display ENJOY WORKOUT and
the timer will begin.
NAUTILUS ®
10. The console will display ENTER SPEED – MPH
(or ENTER SPEED – KMH if in Metric mode).
Enter the desired speed using the numeric
keypad and press (ENTER). Or, press [ENTER]
to accept the default value.
12. The console will then display ENTER TIME.
Enter desired total workout time using the
numeric keypad and press ENTER. Or, press
(ENTER) to accept the default value.
HR INTERVAL PROGRAM
9. The console will display ENTER REST TIME.
This is the amount of time you want to exercise
in the rest target heart rate zone. Enter desired
rest time using the numeric keypad and press
(ENTER). Or press (ENTER) to accept the
default value.
11. The console will display HR CONTROL MODE,
1 – SPEED, 2 – INCLINE. Enter the desired form
of HR Control by pressing 1 for SPEED or 2
for INCLINE. Or, press (ENTER) to accept the
default value. If contact HR is used, then this
message is skipped and Incline control will be
automatically selected.
29
C H A N G I N G T H E G A M E I N H E A LT H A N D F I T N E S S ™
WORKOUT OPTIONS
WORKOUT OPTIONS
Options During a Workout
After the message, “Enjoy Workout”, is displayed, your workout statistics will
begin to accumulate. The exercise statistics include, in order:
Incline
Speed
Calories / Hour
NAUTILUS ®
Distance
Vertical Climbed
Power in watts
METs
Target Heart Rate (in Heart Rate Control programs only)
The 20 x 30 brickyard in the lower half of the display will show the exercise
profile of the workout program selected. Each column represents an equal
portion of the total workout and the flashing column will advance across the
brickyard as you progress through your workout.
Changing Speed, Incline or Target Heart Rate During a Workout
•
During the workout, the speed may be changed at any time during the
workout by pressing the [Speed: UP] key to increase the speed, or the
[Speed: DOWN] key to decrease the speed. The console will display
SPEED – MPH, or (SPEED – KMH if in Metric mode).
•
During the workout, the incline may be changed at any time during the
workout by pressing the [Incline: UP] key to increase the incline, or the
[Incline: Down] to decrease the incline. The console will display INCLINE.
•
In Heart Rate Control programs, you can use the numeric keys to change
the Target Heart Rate. If the user presses a numeric key in a Heart Rate
Control program, then the message line will display TARGET HR.
Once you enter your desired target heart rate, press [ENTER] to accept,
and the console will gradually change the resistance to move you to the
new target heart rate.
30
WORKOUT OPTIONS
Pausing Your Workout
When the program enters a PAUSE state, the interval timer begins to count
down from 1 minute to show you the time remaining in the pause condition.
•
At the end of the one minute count down, the current workout ends, the
accumulated exercise statistics are scrolled, and the program returns to
the opening message.
•
If the user presses STOP or CLEAR or [1], then the program ends, the
accumulated exercise statistics are scrolled, and the program returns to
the opening message.
•
If the user presses the [2] key, then the workout proceeds from where it
was suspended.
NAUTILUS ®
To leave the PAUSE state:
WORKOUT OPTIONS
The program automatically enters the PAUSE state from a workout when the
STOP key is pressed. The workout will be suspended, and the program will
display the following alternating messages every 3 seconds for up to 1 minute,
PRESS 1 TO RESET OR 2 TO CONTINUE.
End of Your Workout
The program is at the end of the workout when the workout time is completed,
or from the PAUSE state when the STOP key is pressed. At this point, each
workout statistic is scrolled with averages calculated and displayed for Incline,
Speed, Distance, Calories/Hour, Watts, METs, and Heart Rate.
After the statistics are scrolled, the program returns to the opening message. If
you want to replay the exercise statistics, press the Display LOCK/UNLOCK key,
and each exercise statistic will be scrolled once for 3 seconds.
31
C H A N G I N G T H E G A M E I N H E A LT H A N D F I T N E S S ™
HEART RATE MONITORING
NAUTILUS ®
HEART RATE MONITORING
Heart rate monitoring helps users monitor their levels of exertion by displaying
the heart rate during exercise. The are two methods of monitoring heart rate on
the Commercial Series T9.14 treadmill:
Telemetry Heart Rate
Telemetry (e.g. using a Polar®
or Polar-compatible transmitter
belt). A Polar-compatible heart
rate chest belt transmits the
heart beat signal to the receiver
in the display. The display shows
the heart rate in beats per minute
and uses the heart rate value in
heart rate control mode.
Contact heart rate (handgrip).
Sensors on the handgrip detect
heart rate and display it on
the controller.
qqqqq
WARNING!
Pacemaker users
should not use the
telemetry transmitter
without first consulting
with their doctor.
The telemetry heart rate monitoring system consists of the receiver, located
in the display, and a transmitter belt (purchased separately) worn across your
chest. The monitoring function is activated as soon as you strap on the chest
belt and step within range of the receiver in the machine. Two electrodes on the
underside of the chest belt sense the heart rate signal and send it to the receiver.
The far right decimal point in the Heart Rate Display pulses to indicate that the
display is receiving a valid signal. A microprocessor in the controller calculates
the heart rate and shows it, in beats per minute, on the display.
Before you put the transmitter belt on, wet the two electrode patches (the
grooved rectangles on the reverse side of the belt). Secure the transmitter belt
as high under the pectoral muscles (chest) as is comfortable. The transmitter
belt should fit snugly and comfortably, and allow normal breathing.
After the initial heart rate signal is detected, the display will enter a
validation phase in which four good heart beat signals lasting four seconds
are required before locking on telemetry heart rate signals for the duration
of the workout session.
If your heart rate is not being displayed, try the following:
•
•
•
•
•
Move closer to the display.
Tighten the elastic band on the chest belt.
Adjust the belt higher or lower on your chest.
Remoisten the electrodes.
Test your chest strap with a machine that you know is working, or with
a heart rate watch that you know is working.
Maintaining the Transmitter Belt
Clean the chest belt regularly with mild soap and water, then dry thoroughly –
residual sweat and moisture keeps the transmitter active and will drain the
battery in the transmitter. Do not use abrasives or chemicals such as steel
wool or alcohol for cleaning, as they can damage the electrodes permanently.
Replacement belts can be purchased from an Authorized Nautilus ® Fitness
Retailer or at www.nautilus.com.
32
HEART RATE MONITORING
Through the use of stainless steel sensors built into the handle bar and using
sophisticated software, heart rate can be checked at any time during a workout.
As with the wireless telemetry chest belt, the heart rate is shown on the display
in the same manner.
NAUTILUS ®
The contact heart rate system’s ability to detect a heart rate signal is influenced
by several factors. Movement of the muscles of the upper body produces an
electrical signal (muscle artifact) that will interfere with the detection of the
heart rate signal by the sensors. Movement of the hands while they are in
contact with the sensors also produces interference. Calluses and hand lotion
act as an insulating layer to reduce the signal strength. Also, the EKG signal
generated by some individuals is not strong enough to be detected by the
sensors. These individuals should opt for the telemetry method of heart
rate monitoring.
HEART RATE MONITORING
Contact Heart Rate
Contact heart rate input signals are acquired only during contact between your
hands and the stainless steel sensors on the handrails. To use the contact heart
rate feature, place your hands around the handles so that your hands touch both
the top and the bottom of the sensors. After the initial contact heart rate signal
is detected, the controller will enter a validation phase requiring a good heart
beat signal within 10 to 15 seconds, or until the system acquires a valid signal.
During the validation phase the controller will not recognize telemetry heart rate
signals. The controller will display a heart icon. If, during exercise, the heart
rate displayed is erratic, it may be helpful to remove your hands from the handles,
wipe them and place them back on the handles. In all programs, the heart rate is
shown automatically in the display window the first time the sensors
are touched.
33
C H A N G I N G T H E G A M E I N H E A LT H A N D F I T N E S S ™
NAUTILUS ®
HEART RATE PRIORITY
HEART RATE PRIORITY
Both contact heart rate and telemetry (e.g., Polar®) heart rate signal detection is available. The default
priority of heart rate input is LOCKED INPUT. If a telemetry signal is detected first, contact heart rate signals
are inhibited from being detected throughout the rest of the workout session and vice-versa.
Locked/Non-Locked Heart Rate Signal Options
When the EITHER INPUT option is selected the heart rate source signal is not fixed during the workout session
(if the signal is lost either input will be valid). If the LOCKED INPUTS option is selected then the heart rate
source signal is locked on the first detected signal during the workout. To set a heart rate signal input, or to
turn off the heart rate option all together, perform the following steps:
1. On the console keypad, press [Speed: UP], [3],
[2]. At this point the screen will display HR
INPUTS. Press [ENTER] to select this option.
2. There are five options to handle heart rate input
signals. Press the [Speed: UP] and [Speed:
DOWN] keys to scroll through the options until
you find the option that you want. Press the
[ENTER] key to select that option.
The options are as follows:
LOCKED INPUTS – allows either telemetry or
contact heart rate signals to be detected. Once
the console has detected a valid input signal it
will lock out the opposite type of signal for the
duration of the workout session. For example,
if you start out using contact heart rate then
you are limited to using only contact heart rate
during your workout session, even if the signal
is lost while performing the workout, and
vice-versa.
EITHER INPUT – allows either telemetry or
contact heart rate signals to be detected. Does
34
not lock out a particular input signal for the
entire workout. This option will detect either
input signal during a workout session, but only
one at a time, and only until the other signal
terminates.
TELEMETRY ONLY – locks out contact heart
rate signals and will only detect telemetry
signals.
HAND ONLY – locks out telemetry signals and
will only detect contact heart rate signals.
BOTH HR OFF – turns off the ability to detect
any heart rate signal. Used in rare situations
where there is excessive interference with the
heart rate signals.
•
During workouts where heart rate is
necessary, such as the HR Zone Trainer and
the Fitness Test, the console will pick up
telemetry heart rate signals so that the
programs are not disabled.
EXERCISE & FITNESS GUIDELINES
It is not a secret that lack of exercise is increasingly becoming a major health
issue. Obesity is on the rise, and being overweight can contribute to an
increased risk in heart attack, diabetes, high blood pressure and other life
threatening illnesses.
NAUTILUS ®
Exercise and Health
FITNESS GUIDELINES
No single fitness program is suitable for all. All fitness programs
should be designed by fitness professionals who are trained to
tailor the program to the individual goals and fitness levels of each
client. The following information on exercise intensity, duration,
and frequency is based on averages and is included here only as a
guideline for use by fitness professionals. Programs should be altered
for comfort and safety when necessary.
Most people do not get enough activity during the day to make up for the time
they spend at their desks, driving their cars or sitting in front of their televisions.
We have learned that exercising is not simply something we must do to look
good and have a great body. Exercise is a requirement for health, and overall
wellness, not to mention it can help you feel great!
The good news is that we are seeing more and more research that indicates we
don’t have to work out intensely to see the benefits. Sure, it is great if you can
workout for 30-40 minutes at a time, five days a week. But it is not essential.
Shorter bouts of exercise can have a great effect (especially if you are just
starting out), and a little bit of exercise at a time is much better than none at all.
And what is really exciting is that research indicates that whether you are young
or old, people who workout at light to moderate intensities may have an easier
time sticking to their exercise programs than those people who work out harder
and more often.
So, you do not need to be an athlete or a fitness “die-hard” to benefit from
exercise… you just need to get started, work out at levels that are comfortable
and enjoyable to you and stick with it!
35
C H A N G I N G T H E G A M E I N H E A LT H A N D F I T N E S S ™
EXERCISE & FITNESS GUIDELINES
NAUTILUS ®
FITNESS GUIDELINES
Steps to Getting Started
Once you have made the commitment to start an exercising program, here are
some suggestions that may help you stay motivated.
The first step is the most difficult. Any new habit is difficult to establish at first,
but it can be done. Be patient, and plan to start slow and easy. Less is more
when you are first starting out… don’t overdo it!
Get a physical exam. If you have been inactive for several years or new to an
exercise program, be sure to ask your doctor before beginning any exercise
program. Especially if you are over 30, have health problems or have a history of
heart disease in your family.
Find an exercise buddy. Research has shown that starting an exercise
program with someone can increase your chances of sticking to it. If you have
a buddy that is also starting a program, you can encourage, motivate and
challenge each other.
Make fitness a part of your schedule. Include it in your daily planner just as
you would any other appointment. Plan ahead for the week so that you can
be sure to fit it in. Even if you are pressed for time one day, a little exercise is
better than none at all. Do what you can to fit it in, even if you have less time
than you hoped for.
Use positive affirmations. Affirmations will help you program your
subconscious to accept new beliefs. Saying to yourself a couple of times a day,
“I am living a healthier lifestyle by exercising several times per week at home,”
can help you stay on track.
Set goals. Setting goals can be helpful in keeping you motivated, but remember
to keep them realistic. Short-term and long-term goals can make this easier.
How many days do you want to exercise this week? How many workouts would
you like to have done in 90 days or a year?
36
EXERCISE & FITNESS GUIDELINES
Components of Fitness
However, we have learned that two other components of fitness are just as
important. These other two components are muscle strength and flexibility.
So in addition to having a strong heart and lungs, we also need to be able to pick
up a full bag of groceries and tie our shoes without having to sit down.
NAUTILUS ®
When developing a fitness program, it is only appropriate that you develop all
three components in order to achieve balanced overall fitness. Let’s take a look
at all three components:
FITNESS GUIDELINES
Over the past 25 years, many people have focused on walking, running, cycling,
swimming and other types of aerobic activity as their only means of exercise.
Cardiovascular Fitness is training the heart and lungs to be stronger and deliver
more oxygen throughout your body with less effort. It can help reduce the risk of
heart disease, and help you manage your weight. It is the cornerstone of fitness,
and can be achieved in many ways such as walking or running on the treadmill or
outdoors, climbing stairs, cycling, using a StairMaster ® stepper or swimming in
the pool or ocean.
For many years, it was suggested that moderate level cardiovascular activity
(activities that make you sweat and breathe and a moderate pace) should be
done 3 – 4 days a week for 15 – 45 minutes at a time. It is now recommended that
you attempt to do some cardiovascular activity EVERY day, if possible.
The good news is that the cardiovascular activity does not need to be
moderately intensive everyday, nor does it need to be sustained for 15 – 45
minutes at a time.
So while it is ideal to challenge your heart and lungs by doing something like a
strong power walk every other day for 15 – 45 minutes, it is more important to
make sure you do at least a little bit of cardiovascular activity every day, even if
you don’t do it for very long or very intensely.
For example, you might try using a Nautilus ® treadmill for a scheduled, moderate
level workout for 20 – 30 minutes on Monday, Wednesday, Friday and Sunday
(see the intensity monitoring section for further details on how hard to workout).
On the other days, you might try going for a leisurely stroll 10 minutes in the
morning and in the evening (or whenever you can fit it in).
Whatever you do, just make sure you get your body moving, and your heart and
lungs pumping for some period of time every day.
37
C H A N G I N G T H E G A M E I N H E A LT H A N D F I T N E S S ™
NAUTILUS ®
FITNESS GUIDELINES
EXERCISE & FITNESS GUIDELINES
Muscular Strength is training your muscles to remain strong using
resistance such as Nautilus ® strength machines, dumbbells, elastic tubing
or your body weight. In the past decade, we have learned that building or
maintaining muscular strength is extremely important for a balanced fitness
program. And it is especially important as we get older.
We have learned through a variety of studies that those individuals who just
train aerobically (without strength training) do maintain their cardiovascular
endurance over the years, but they generally lose lean muscle mass as they
get older. However, those individuals who combine strength training and
cardiovascular training can maintain their lean body mass as they get older.
What this means is that if you just do cardiovascular activity, your body will
naturally lose muscle mass as you get older, and that means that you will
actually get “fatter” as you age, unless you incorporate strength training.
We have also learned that consistent strength training helps maintain bone
and muscle mass as we get older. For women, strength training (along with
cardiovascular training) may also protect against post-menopausal bone loss
and osteoporosis in their later years.
And strength training is not complicated. It is recommended that you do 8 –
12 repetitions of 8 – 10 major muscle groups at least 2 days a week. However,
you don’t have to do all these exercises at once. You can break them up into
shorter workouts throughout the day. For example, you can do just upper body
exercises in the morning, and your lower body exercises in the evening. Or, you
can alternate strength exercises with cardiovascular exercise (often known as
circuit training) by switching back and forth every couple of minutes.
Flexibility is being able to bend, reach, twist and turn with comfort and ease
as we perform daily tasks, play or exercise. It is perhaps the most ignored
component of fitness, but certainly the easiest one to incorporate into our daily
lives because it can be done anywhere and almost at any time.
To maintain your flexibility, you simply need to stretch. This could be as simple
as reaching for your toes, or reaching overhead when you wake up in the
morning. Or maybe you enjoy it so much that you would be interested in trying
the Nautilus ® yoga workout video. You can even incorporate stretching into your
strength training workouts by stretching the muscles you have used immediately
after you have completed your exercise set.
38
EXERCISE & FITNESS GUIDELINES
Nutrition
NAUTILUS ®
Do what feels good, but also remember to mix it up. Don’t just do traditional
“reach and hold” stretches. Also, try gently moving through a range of motion
that is comfortable to you. For example, you don’t have to stretch your neck
simply by pulling on your head with your hand. You can also just rotate the neck
slowly around and look side to side.
FITNESS GUIDELINES
Like cardiovascular training, it is recommended that you stretch every day.
However, you do not need to create a formalized program. You can simply make
sure that you stretch your major muscle groups throughout the day. Make sure
you include your thighs, calves, hamstrings, back, chest, neck and shoulders.
Of course, every good health and fitness program will also include a good
nutrition component. Good nutrition is likely the most important factor in
maintaining ideal body weight and managing weight loss.
There are a variety of schools of thought regarding which nutrition program,
diet or eating plan is best. While we do not promote or endorse any
particular one, here are some things to consider that will help you get on
the road to a healthy diet:
Understand caloric balance. How many Calories you intake, and how many
Calories you burn off will determine whether you will gain or lose weight day to
day. It is impossible to achieve weight loss without some sort of “Caloric deficit”
that can be obtained through cutting Calories, or burning off more than you take
in. The wisest approach is to do a little of both – cutting Calories and exercising.
It is the only proven long-term weight management program that is successful.
You should ensure that you are consuming at least 1,200 Calories per day total. A
total weight loss of no more than 2 pounds per week is recommended for longterm weight management.
Eat a variety of foods. Regardless of your eating plan, you should be sure to
include a variety of foods in your diet, maximizing your intake of fruits and
vegetables whenever possible. Colorful meals and snacks that are divided
amongst the 4 food groups will ensure that you obtain the nutrients needed for
your body to function at optimal levels. Any diet that focuses on just one food
group source or processed foods can be unhealthy in the long run, and should
be avoided. Don’t focus too much on any particular meal or snack, but rather on
your overall intake of a variety of different foods during any given day.
39
C H A N G I N G T H E G A M E I N H E A LT H A N D F I T N E S S ™
NAUTILUS ®
FITNESS GUIDELINES
EXERCISE & FITNESS GUIDELINES
Drink water. Our bodies are made up of over 70% water, and most of us don’t drink
enough. Carry water with you everywhere you go, and drink as often as you can.
This helps the body function at optimum levels, and can significantly help with
weight management.
Eat more often and be mindful of your portions. Research has shown that it can
be helpful to eat smaller meals more often versus 3 larger meals a day if you are
looking to promote healthy weight maintenance or weight loss. And we have
discovered that many portions we eat are much larger than necessary, and can
be laden with Calories. So, try snacking more and not eating so many large meals,
and share your snacks or food with others (or break your portions in half) to help
manage your Caloric intake.
Monitoring Your Intensity
When you are doing cardiovascular workouts, it is important that you work at the
appropriate intensities when you are first starting out. It is also important that you
workout at a variety of intensities after you have built a fitness base.
Research in recent years has indicated that one of the best ways to monitor your
cardiovascular intensity is to pay close attention to how you are feeling when
you workout. Most individuals can do a very good job of choosing the correct
intensities if they simply categorize how they feel into one of four intensity “zones.”
These zones could be described the following ways:
40
Zone 1
• Easy
• Warm-up
• Cool-down
Zone 2
• Challenging, but comfortable
• Steady endurance pace
Zone 3
• Challenging, and slightly uncomfortable
• Race pace
• Borderline out of breath
Zone 4
• Breathless
• Not maximum, but winded
• Can’t keep the pace for very long
EXERCISE & FITNESS GUIDELINES
FITNESS GUIDELINES
When you are first starting out, you should exclusively work in the Zone 1 and
Zone 2 intensities. After a few weeks, you can occasionally incorporate Zone 3
and Zone 4 intensities for short periods of time. Remember, when you begin to
incorporate Zone 3 and Zone 4 intensities, you will find that you will likely have to
drop down to Zone 1 intensities shortly thereafter as brief recovery periods.
For variety, you can spend a little bit of time in each of the four Zones during one
workout, and then spend your time in just one Zone during the next workout.
NAUTILUS ®
Prenatal woman should always remain at Zone 1 and Zone 2 intensities, and
anyone unaware of their current medical condition should also avoid Zone 3 and
Zone 4 without prior clearance from their doctor.
These Zones can be translated into target heart rate numbers if your fitness
product has a grip or telemetric heart rate counter. Research has shown the
best way to do this is not to establish heart rate numbers based upon age, but
rather based upon how you feel.
The following chart will allow you to log your heart rate numbers based upon
how you feel when working out. Simply log the heart rate numbers you find
when you feel you are working at each of the specific intensities.
Zone Description of Workout Intensity
Approximate
Percentage
of Maximum
Heart Rate
Log Your
Heart Rate
1
• Easy
• Warm-up
• Cool-down
50% – 65%
Enter the heart rate
you get when you are
working in Zone 1 u
2
• Challenging, but comfortable
• Steady endurance pace
65% – 75%
Enter the heart rate
you get when you are
working in Zone 2 u
3
• Challenging, and slightly uncomfortable
• Race pace
• Borderline out of breath
75% – 85%
Enter the heart rate
you get when you are
working in Zone 3 u
4
• Breathless
• Not maximum, but winded
• Can’t keep the pace for very long
85% – 90%
Enter the heart rate
you get when you are
working in Zone 4 u
Your
Heart Rate
41
C H A N G I N G T H E G A M E I N H E A LT H A N D F I T N E S S ™
NAUTILUS ®
FITNESS GUIDELINES
EXERCISE & FITNESS GUIDELINES
As you get in better shape, the heart rate number you obtain for each zone
will get higher and higher, which means your heart is able to handle higher
intensities. Or you may find that your numbers don’t change, but you are able to
stay in Zone 3 and Zone 4 longer than you used to.
Don’t get too attached to any specific number or target heart rate. If you train
properly, you will notice numbers that used to be difficult have now become
easier. You will also notice that if you are sick or over-tired, you may find that
numbers that usually feel fairly easy are one day much harder, and it is a good
sign to take a break. If you notice that numbers that are usually very challenging
are one day fairly easy, then it is a good time to push yourself.
Listening to your body, and using your heart rate numbers (when available) will
enable you to keep track of your intensity and see your progress as you train.
Beating The Dropout Odds
The Surgeon General’s Report on Physical Activity and Health summarizes a
few main points:
1. Regular physical activity offers substantial improvements in health and wellbeing for a majority of Americans.
2. If you exercise regularly, you’ll reduce your risk of heart attack, cancer,
diabetes, high blood pressure, osteoporosis and even the common cold.
3. Regular exercise, regardless of the intensity, can help you control stress,
sleep problems and depression.
The benefits of exercise and activity are AMAZING! And yet, only 22 percent of
Americans engage in exercise for 20 minutes a day. And even among individuals
who begin exercise programs, the dropout rate is about 50 percent.
So, how do you beat these odds? The answer appears to be in how your
start and maintain your exercise program as well as how you create a
habit of exercise.
Why are you starting an exercise program? For most individuals, it is to lose
weight and look better, which are great reasons. However, since changes in your
body shape and size can be gradual, and won’t happen overnight, it is important
to focus on other benefits so that you will remain motivated.
42
EXERCISE & FITNESS GUIDELINES
NAUTILUS ®
Additionally, try not to view exercise as punishment. Look at it as an investment
in your health. If you don’t feel motivated to workout one day, think of something
that is appealing to you that is active, and change your workout. Try not to let
your workout become routine or mundane, and always remember that some
exercise is better than none at all. So, if you feel you are not motivated to
continue, stop your workout early, or skip a day. It just might be the thing you
need to get you excited about your next workout.
FITNESS GUIDELINES
Thrive on the energy that exercise gives you. Watch your health risks scores go
down. Pay attention to how much easier everyday activity is. Notice how much
better you are sleeping. These kinds of additional benefits will continue to keep
you motivated if you make them just as important to you as weight loss.
Possibly the most important thing is to keep progressing your exercise program
slowly. Big increases in time or intensity can set you up for injury, and cause
you to drop out. Unless you are a world-class athlete, there is no reason to
workout at world-class levels. Remember to give yourself some days off and
get proper rest.
Finally, try to anticipate lapses. If you are traveling, or your schedule is becoming
busier, and you are fearful you may get off track, try planning ahead. For
example, book a hotel that has a workout facility or change up your workout so
that you keep your interest high and your boredom low. The bottom line is you
must be creative and innovative to keep up your fitness program. With some
imagination and planning, it is easy to do.
Suggested Reading:
The Complete Home Fitness Handbook by Edmund Burke, Human
Kinetics Publisher.
Full Body Flexibility by Jay Blahnik, Human Kinetics Publisher.
Building Strength and Stamina by Wayne Wescott, PhD, Human
Kinetics Publisher.
Cross-Training for Dummies by Tony Ryan and Martica Heaner,
For Dummies Publisher.
43
C H A N G I N G T H E G A M E I N H E A LT H A N D F I T N E S S ™
NAUTILUS ®
CONSOLE CODES
CONSOLE CODES
There are 4 groups of console codes as follows:
Customization (codes starting with 2 or 3), Machine
Status (codes starting with 4), Diagnostic (codes
starting with 6 or 7), and Configuration (codes
starting with 8). Each group of codes is defined
below. To access these console codes and the
options within each group, follow the instructions for
each section.
Customizing the T9.14 Treadmill
You can customize several parameters on the T9.14
to conform to your individual requirements, including
changing the workout default values and setting
custom parameters such as time limits, changing
screen contrast, changing language, and
changing units.
To change the workout default values:
1. Press [Speed: UP], [2], [ENTER]. The console
will display DEFAULTS.
2. Press [Speed: UP] or [Speed: DOWN] to scan
through the default choices. Select the option
you want to change by pressing [ENTER]. Then,
use the [Speed: UP] or [Speed: DOWN] keys to
view the choices for the selected option. Press
[ENTER] to accept the choice for that option.
The default options are as follows:
Change default weight
Use the numeric keypad or [Speed: UP] or
[Speed: DOWN] keys to change the desired
default weight for your facility. Press [ENTER]
to accept the new value.
Change default workout time
Use the numeric keypad or [Speed: UP] or
[Speed: DOWN] keys to change the desired
44
default workout time between 10 and 99
minutes. Press [ENTER] to accept the
new value.
Change default age
Use the numeric keypad or [Speed: UP] or
[Speed: DOWN] keys to change the desired
default age used to calculate target heart rate.
Valid age range is between 10 and 99 minutes.
Press [ENTER] to accept the new value.
Change default % Target HR
Use the numeric keypad or [Speed: UP] or
[Speed: DOWN] keys to change the desired
target HR value based on maximum HR. This
is used to calculate the target heart rate value
based on the % of maximum HR. Valid target HR
% is between 40 and 90%. Press [ENTER] to
accept the new value.
Change default Cool Down Time
Use the numeric keypad or [Speed: UP] or
[Speed: DOWN] keys to change the desired
default cool down time between 1 and 10
minutes. Press [ENTER] to accept the
new value.
To customize the console for your use:
1. Press [Speed: UP], [3], [ENTER]. The console
will display CUSTOMIZE.
2. Press [Speed: UP] or [Speed: DOWN] to scan
through the customize choices. Select the
option you want to change by pressing [ENTER].
Then, use the [Speed: UP] or [Speed: DOWN]
keys to view the choices for the selected option.
Press [ENTER] to accept the choice for
that option.
CONSOLE CODES
The customize options are as follows:
Use the numeric keypad to enter the desired
time limit between 5 and 99 minutes. Press
[ENTER] to accept the new time limit.
Change units
Choose the type of heart rate input.
1. Press [Speed: UP], [4], [ENTER]. The console
will display MACHINE STATUS
2. Press [Speed: UP] or [Speed: DOWN] to scan
through the choices. Select the option you
want to view by pressing [ENTER]. Press
[CLEAR] to exit the machine status codes.
The machine status options are as follows:
See Heart Rate Priority in the previous section
for details of the choices.
Machine run time in hours
Choose console language
Display the machine run time in hours. The
console will display RUN HOURS #####.
Use the [Speed: UP] and [Speed: DOWN] keys
to view the choices (English, German, French,
Spanish, Italian, Dutch, Swedish, Japanese).
Press [ENTER] to select your option.
Adjust upper LCD screen contrast
Use the [Speed: UP] and [Speed: DOWN] keys
to increase or decrease the contrast level of the
upper LCD. Press [ENTER] to select your option.
Adjust lower LCD screen contrast
NAUTILUS ®
Use the [Speed: UP] and [Speed: DOWN] keys
to toggle between USA units and Metric units.
Press [ENTER] to select your option.
To view maintenance information such as the run time
in hours, number of workouts and distance, as well a
machine type and software revision:
CONSOLE CODES
Max time limit
Machine Status Codes
Number of workouts
Display the number of times a workout key
has been pressed. The console will display
WORKOUTS ####.
Distance traveled
Display the total distance traveled in miles (or
kms if console is set to Metric units) . The
console will display DISTANCE #####.
Software revision
Use the [Speed: UP] and [Speed: DOWN] keys
to increase or decrease the contrast level of the
upper LCD. Press [ENTER] to select your option.
Display the console software revision number.
The console will display CONS 41375-###.
Reset Defaults
Machine type
This code will reset all exercise parameters to
the factory defaults. Press [ENTER], to accept
the default values.
Display the machine type the console is
currently configured to. The console will
display “ELLIPTICAL” or other machine type.
3. To exit CUSTOMIZE, press the [CLEAR] key.
45
C H A N G I N G T H E G A M E I N H E A LT H A N D F I T N E S S ™
CONSOLE CODES
NAUTILUS ®
CONSOLE CODES
Machine run time in hours since last cleared
(used for maintenance)
Display the machine run time since last cleared.
The console will display MAINT HOURS #####.
This will provide the number of hours between
service or maintenance calls. The machine run
time is reset to zero in the following Diagnostics
section.
3. To exit MACHINE STATUS, press the
[CLEAR] key.
Diagnostic Codes
Diagnostic codes are used to test various
components of the machine such as the display,
keyboard, serial port, alternator, and tachometer,
as well as viewing the error log information and
resetting the time between service or maintenance
calls. To run diagnostics and view diagnostic
information:
1. Press [Speed: UP], [6], [ENTER]. The console
will display DIAGNOSTICS
2. Press [Speed: UP] or [Speed: DOWN] to scan
through the choices. Select the option you
want to view by pressing [ENTER].
The diagnostic options are as follows:
Test display
To test the LCD display, press [ENTER] when
the message, DISPLAY TEST is displayed. The
console screen alternates turning on all LCD
segments and a representative program screen.
Verify that all LCD segments turn on.
Test keyboard
To test all the keys on the keyboard, press
[ENTER] when the message, KEY TEST is
46
displayed. Then, press any key on the
keyboard and that key’s name will be displayed
in the text line. Press [CLEAR] as the last key to
exit this test.
Test serial port
To test the serial port, press [ENTER] when the
message, SERIAL TESTS is displayed. This test
performs a serial loop back test. Select the
CSAFE RS-232 selection. You will need a loopback test cable (PN 040051-001) inserted into
the appropriate connector port to successfully
run this test. Console will display either PASS
or FAIL.
Test alternator
To test the machine’s alternator, press [ENTER]
when the message, ALT TEST is displayed.
This test verifies the alternator field routines
through the console. Position yourself on the
machine and press [SPEED: UP] for “field on”.
After exercising briefly you should build up
resistance. For “field off”, press
[SPEED: DWN].
Test tach response
To test the machine’s tachometer, press
[ENTER] when the message, TACH TEST is
displayed. Start exercising on the machine.
The console should regulate the alternator
resistance based on the tach signal to maintain
approximately 2,000 RPMs while you are
exercising. If not, there is a possible problem in
the AC tap or field circuit. Check the alternator,
the AC tap wire, the field wire, the diode, the
terminal posts, and the main cable.
3. To exit DIAGNOSTICS, press the [CLEAR] key.
4. To review the error log and reset the service
timer, press [Speed: UP], [7], [ENTER]. The
CONSOLE CODES
Error log
NAUTILUS ®
To display the machine’s error log, press
[ENTER] when the message, ERROR LOG, is
displayed. The console will report various
error messages in the display window. The
total amount of errors will be displayed in the
upper right window. Note that only the highest
priority reported error will be displayed. Errors
are handled in two ways. First, as a non-fatal
WARNING which will display the text message
but continue system operation until you press
the [CLEAR] key. The second way is a fatal
ERROR which will stop the exercise and return
the system to an idle intensity state. The
console will display the error text and not let
you restart the program unless power has been
turned off and then back on.
CONSOLE CODES
console will display DIAGNOSTICS2. Press
[Speed: UP] or [Speed: DOWN] to scan through
the choices. Select the option you want by
pressing [ENTER].
Reset service time
To reset the time between service or
maintenance calls, press [ENTER] when
the message, MAINT HOURS is displayed.
Selecting this code will reset the maintenance
timer to 0 hours.
5. To exit DIAGNOSTICS2, press the [CLEAR] key.
47
C H A N G I N G T H E G A M E I N H E A LT H A N D F I T N E S S ™
MAINTENANCE INSTRUCTIONS
MAINTENANCE
HELPFUL HINTS
If you keep your Nautilus treadmill properly maintained and serviced, it will
operate more efficiently and last longer. Read all maintenance instructions
thoroughly before beginning work. In some cases, an assistant is required to
perform the necessary tasks. All references to the right or left side and to the
front or back are made as if you were on the machine ready to exercise.
NAUTILUS ®
MAINTENANCE RECORDS
For ease of maintenance the T9.14 console will keep track of hours, number of
workouts, time between last servicing, etc. You can quickly access any of the
custom menus by pressing [SPEED: UP], [4], [ENTER]. The console will then
display MACHINE STATUS. Use the [Speed: UP] and [Speed: DOWN] keys to
scroll through the options. For details, refer to the Machine Status Console
Codes in the previous section.
RESETTING THE MAINTENANCE HOUR TIMER
After each maintenance period reset the counter. Press [SPEED: UP], [7],
[ENTER]. Then use the Speed keys to scroll through the options. When MAINT
HOURS is displayed, press [ENTER]. The console will display RESET SERVICE.
Press [ENTER]. The console wil display DONE. Press [CLEAR] to return to the
opening screen.
INITIAL SERVICE
Upon receiving your machine, use a soft, clean towel to wipe off the dust, which
may have accumulated during shipping. Your new machine will require minor
assembly. Refer to the “Installation Instructions” section for details.
48
PREVENTATIVE MAINTENANCE
Cleaning
3. Elevate the treadmill to maximum incline and
vacuum the floor under weekly it to prevent excess
dust and dirt from interfering with operation.
4. Depending upon the treadmill environment,
dust and or lint can accumulate under the hood.
Periodic internal cleaning should be done by a
qualified service personnel.
Inspection
1. Frame: Inspect the frame for any rust, bubbling, or
paint chips during the weekly cleaning. The salt in
perspiration can damage the unpainted surfaces.
Repair the damaged area with a touch-up paint kit
purchased from Nautilus (call Customer Service
for order information).
2. Inspect the power cord and walking belt for wear.
3. Check the position of the walking belt; be sure it is
not rubbing against the frame. The belt should be
evenly spaced on the deck within 0.25 inch; adjust
if necessary.
4. Remove potential hazards from the treadmill area.
DO NOT USE DETERGENTS OR CLEANING AGENTS
ON ANY PART OF THE DECK.
DO NOT LET LIQUID ENTER THE TREADMILL
OR DISPLAY.
qqqqq
WARNING DO NOT REMOVE THE
NAUTILUS ®
2. Clean the exterior of the machine daily using
soap and water or a diluted, non-mineral based
household cleaner such as Fantastic®.
THE BELT ONLY. DO NOT ADD ANY LUBRICANTS.
ADDING LUBRICANTS CAN RUIN THE PROPRIETARY
FRICTION-CONTROL SURFACE.
MAINTENANCE
1. DO NOT USE GLASS CLEANERS OR ANY OTHER
HOUSEHOLD CLEANERS ON THE CONSOLE.
Clean the console daily with a water-dampened
cloth and wipe dry after cleaning.
qqqqq
WARNING DRY MOP THE DECK UNDER
TREADMILL HOOD: DANGEROUS VOLTAGES ARE
PRESENT. COMPONENTS ARE SERVICEABLE ONLY
BY QUALIFIED SERVICE PERSONNEL.
Treadmill Belt Adjustments
qqqqq
WARNING SECURE LONG HAIR AND
LOOSE CLOTHING BEFORE WORKING NEAR THE
TREADMILL WALKING SURFACE OR PULLEYS.
As the treadmills walking belt stretches through
use it will become necessary to tension on the belt.
This often occurs within the first few months of use.
Adjust the belt tension whenever the belt slips or
moves unsteadily during operation. The belt tension
is adjusted by moving the rear roller of the treadmill
back to reduce slack. This is accomplished by turning
the adjustment bolts located on the back of
the treadmill.
49
C H A N G I N G T H E G A M E I N H E A LT H A N D F I T N E S S ™
NAUTILUS ®
MAINTENANCE
PREVENTATIVE MAINTENANCE
qqqqq
IMPORTANT Do not over tighten
walking belt! The belt need only be tight enough to
prevent it from slipping during use. Excessive belt
tension will decrease belt life and can damage the
treadmill rollers and drive system.
Adjustment
Bolts
1. Using a 1⁄ 2” socket, turn the left and right
adjusting bolts clockwise 1/2 turn. Use care to
make each adjustment equal to insure proper
belt alignment.
2. Test the belt by running on the belt at about 4
MPH. Hold the handrail lightly and resist the
belt movement with your feet. If walking belt
slips, repeat step 1.
of the bolts:
a. If the belt moves to the right, turn the right
tension bolt 1/4-turn clockwise.
b. If the belt moves to the left, turn the left
tension bolt 1/4-turn clockwise.
3. After making an initial adjustment, run the
treadmill for five minutes and observe how the belt
tracks. If the belt continues to move away from
the center, adjust the appropriate side as in Step 2
until properly centered.
qqqqq
IMPORTANT Do not over tighten
walking belt! The belt need only be tight enough to
prevent it from slipping during use. Excessive belt
tension will decrease belt life and can damage the
treadmill rollers and drive system.
Belt Replacement
If the walking belt becomes worn from heavy usage,
it may need to be replaced. Call an Authorized
Nautilus ® Fitness Dealer or a Service Technician
to obtain service.
Moving and Storage of Treadmill
qqqqq
IMPORTANT Treadmill is extremely
Belt Tracking
Perform this procedure whenever the belt moves to
one side or the other. Stay off the belt when adjusting
the tracking.
1. Start the treadmill at minimum speed and incline.
2. Increase speed to 5 mph and make the following
adjustment. The figure above shows the location
50
heavy and awkward and requires two people to
safely move!
1. Set the treadmill to maximum incline.
2. To avoid electrical shock, turn off the power
switch on the treadmill, then remove the treadmill
power cord from the power source before moving
the treadmill.
PREVENTATIVE MAINTENANCE
TREADMILL IS PLUGGED INTO A POWERED OUTLET
AND THE TREADMILL CIRCUIT BREAKER IS ON, THE
UNIT IS RECEIVING POWER, EVEN IF THE DISPLAY
IS TURNED OFF.
When storing for prolonged periods, cover the
treadmill with a dust cover. Do not store in damp
areas. Do not store the treadmill on its end as it could
fall on someone.
NAUTILUS ®
3. Together, lift the rear of the treadmill, then roll it
to the new site using the wheels on the front of
the treadmill.
MAINTENANCE
qqqqq
WARNING AS LONG AS THE
Using After Storage Period
Before using the treadmill again after moving or
storage, check the power cord and all attachments to
be sure they are undamaged and securely connected,
then test the system for proper operation.
51
C H A N G I N G T H E G A M E I N H E A LT H A N D F I T N E S S ™
NAUTILUS ®
WARRANTY
COMMERCIAL MARKET WARRANTY INFORMATION
All Nautilus exercise products are warranted to the
commercial market purchaser to be free from defects
in materials and workmanship. Warranty coverage
valid to the original purchaser only and proof of the
purchase will be required. Any product sold or placed
in an application not recommended by Nautilus will
void any warranty coverage set forth by Nautilus
warranty policies and procedures.
Time Period
15 -Years - Frame and AC-motor
3 - Years- Mechanical and electrical parts
1-Year- Labor
1 Year - Wear items
What this warranty does not cover
1. Any damage, failure or loss caused by accident,
misuse, neglect, abuse, improper assembly,
improper maintenance or failure follow
instructions or warnings in Owner’s Manual.
2. Use of product in a manner or environment for
which it was not designed.
Limitations
52
The foregoing warranties are in lieu of and exclude
all other warranties not expressly set forth herein,
whether expressed or implied by operation of law or
otherwise, including, but not limited to, warranties
of merchantability or fitness for a particular
purpose. Nautilus shall in no event be liable for
incidental or consequential losses, damages or
expenses in connection with its exercise products.
Nautilus’ liability hereunder is expressly limited to
the replacement of goods not complying with this
warranty or, at Nautilus’ election, to the replacement
amount of the purchase price of the exercise product
in question. Some states do not permit the exclusion
or limitation of implied warranties or incidental or
consequential damages, so the preceding limitations
and exclusions may not apply to you.
Procedures
Warranty service will in most cases be performed
by an authorized Nautilus Fitness Dealer or Service
Technician. The original purchaser must provide proof
of purchase, Service calls and/or transportation to
and from the Nautilus Dealer is the responsibility of
the purchaser.
1. Nautilus will have the option to repair or replace
any exercise product, which requires service.
2. Nautilus will replace any equipment frame that
is structurally defective with a new frame or
replace the unit with a unit of equal value.
3. Nautilus is not responsible for dealer labor
charges for the component changeovers
completed after the labor related warranty
period stated herein.
4. If you elect to repair an exercise product or part
yourself, using the services of someone other
than an authorized Nautilus Fitness Dealer or
Service Technician, or use a replacement part
not supplied by Nautilus, Nautilus shall not
be liable for any cost, damage, failure or loss
caused by the use of such unauthorized service
or parts.
CONTACTING NAUTILUS
If you need assistance, please have both the serial number of your machine and the date of purchase available
when you contact the appropriate Nautilus office listed below.
OFFICES IN THE UNITED STATES: E-mail: [email protected]
TECHNICAL SERVICE
The Nautilus Group, Inc.
10757 East Ute Street
Tulsa, OK 74116
Tel: 800-864-1270 or
800-331-3578
Fax: 800-764-7380
CORPORATE HEADQUARTERS
The Nautilus Group, Inc.
World Headquarters
16400 SE Nautilus Drive
Vancouver, WA 98683
Tel: 800-NAUTILUS
Fax: 360-694-7755
NAUTILUS ®
NAUTILUS INNOVATION CENTER/
CUSTOMER SERVICE
The Nautilus Group, Inc.
1886 Prairie Way
Louisville, CO 80027
Tel: 800-864-1270
Fax: 800-898-9410
CONTACT INFORMATION
Important Phone Numbers
INTERNATIONAL OFFICES:
For technical assistance and a list of distributors in your area,
please call or fax one of the following numbers.
INTERNATIONAL CUSTOMER SERVICE:
NORTH AMERICA OFFICE
Nautilus Health & Fitness Group
1886 Prairie Way
Louisville, CO 80027
Tel: 303-939-0100
Tel: 800-864-1270 x1603 or 1658
Fax: 303-402-4817
GERMANY OFFICE
Nautilus Health & Fitness Group
GmbH
Tel: 02204 61027
Fax: 02204 62890
ITALY OFFICE
Nautilus Health & Fitness Group
Italy s.r.l.
Tel: 031 51 10 86
Fax: 031 34 24 97
U.K. OFFICE
Nautilus Health & Fitness Group
UK Ltd
Tel: 01 908 267 345
Fax: 01 908 267 346
SWISS OFFICE
Nautilus Health & Fitness Group
International S.A.
Rue Jean ProuvÈ 6
1762 Givisiez / Switzerland
Tel: + 41 26 460 77 77
Fax: + 41 26 460 77 70
53
Model T9.14
©2005. Nautilus, Inc. All rights reserved. Nautilus, the Nautilus Logo, ROC, StairMaster and
Changing the Game in Health and Fitness are either registered trademarks of trademarks of
Nautilus, Inc. Polar is a registered trademark of its respective company.
The Nautilus Group, Inc. World Headquarters, 16400 SE Nautilus Drive, Vancouver, WA 98683
1 800-NAUTILUS www.nautilus.com