1
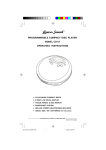
® PROGRAMMABLE COMPACT DISC PLAYER MODEL CD-52 OPERATING INSTRUCTIONS PLAYS ALL MUSIC COMPACT DISCS BASS BOOST SYSTEM 6 DIGIT LCD VISUAL DISPLAY TRACK REPEAT & DISC REPEAT AC ADAPTOR INCLUDED DELUXE STEREO HEADPHONES INCLUDED USES 2 SIZE AA BATTERIES (NOT INCLUDED) AUX OUT JACK - CONNECTS TO YOUR STEREO SYSTEM (PATCH CORD NOT INCLUDED) PLEASE READ CAREFULLY BEFORE USE CD52(22C-0E7)022100 NL v.1 E 1 INTRODUCTION Your new Lenoxx Sound model CD-52 portable compact disc player, uses the latest technology to give you crisp clean sound from all your compact discs. Please read these operating instructions completely to take advantage of all the features of this set. ACCESSORIES INCLUDED AC ADAPTOR STEREO HEADPHONES 2 LOCATION OF CONTROLS 5 6 4 7 8 3 9 2 10 11 12 1 13 14 1. CD DOOR OPEN BUTTON 2. CD DOOR 3. BACKWARD SKIP / SEARCH BUTTON ( ) ) 4. FORWARD SKIP / SEARCH BUTTON ( 5. STOP AND POWER OFF BUTTON 6. REPEAT/RANDOM BUTTON 7. LCD VISUAL DISPLAY 8. PROGRAM BUTTON 9. PLAY/PAUSE AND POWER ON BUTTON 10. AC ADAPTOR JACK 11. AUX OUT JACK (for home stereo connection) 12. VOLUME CONTROL 13. PHONES JACK (headphone jack) 14. BATTERY DOOR 15. BASS BOOST SWITCH 15 3 POWER SOURCES 1. Using with Batteries Insert two size AA alkaline batteries according to the + and - markings in the battery compartment. TIPS ON BATTERY USE Reversing polarities will damage the batteries and possibly your set. Be sure to follow polarity ( + and - ) as indicated. Do not mix different types together (Alkaline, Carbon-Zinc, Nickel-Cadmium etc.), or old batteries with new ones. When not in use for an extended period of time, or while internal batteries will not be used, remove them to prevent possible acid leakage or corrosion resulting in damage to your player. When the batteries have become discharged, they must be disposed of in a safe manner that complies with all applicable laws. Installation of batteries should only be done by an adult (for safety). ALKALINE BATTERY LIFE Bear in mind that battery life expectancy is based upon volume and bass listening levels. Maximum battery power consumption happens at maximum settings. Typical life for 2 size AA alkaline batteries is above 8 hours of continuous use. WHEN THIS SYMBOL FLASHES IN THE DISPLAY If the alkaline batteries are weak and discharged, this symbol flashes in the display, then the power automatically turns off. If this occurs, replace the alkaline batteries (also if display does not show anything, the batteries are dead). NOTE: You may use rechargeable batteries on this set. However, because rechargeable batteries generally have lower voltage (1.2 volts instead of 1.5 volts). Your playing time will be much less than normal fresh alkaline batteries. 4 2. Using AC Power Your player may be powered from any household 120V AC outlet, using the AC adaptor included. Insert the adaptors small connector plug into the DC 4.5V Jack marked on player (on the right side of the set), and plug the adaptor into an AC outlet. NOTE: If the AC Adaptor is connected, and regular batteries are installed, the player automatically switches to the AC Adaptor power and the batteries are not used. CAUTION: To prevent electric shock, do not use this AC Adaptor with an extension cord or outlet, unless it can be fully inserted without exposing any part of the blades. Do not use any other AC adaptor to power this set or you may damage your set. CONNECTING TO HOME STEREO SYSTEMS The AUX OUT jack is made to accept a stereo mini plug (3.5mm). Simply connect the cables mini plug to the AUX OUT jack on your player, and the other appropriate end usually RCA JACKS to the CD/AUX INPUTS of your home stereo. TO AUX OUT JACK YOUR CD PLAYER TO AUX IN JACKS OPTIONAL CABLE 3.5mm TO RCA JACKS YOUR STEREO SYSTEM 5 CD PLAYING 1 Load the Disc. Push here Disc 1234 1234 1234 1234 1234 Label side up 2 Slide right to open Connect the Headphones. Stereo headphones To PHONES jack 3 Press the PLAY/PAUSE button. TOTAL TRACKS TOTAL PLAYING TIME ON THE CD PLAY/PAUSE button 4 Adjust the Volume. TRACK NUMBER ELAPSED PLAYING CURRENTLY TIME OF THE PLAYING CURRENT TRACK MAXIMUM VOLUME CONTROL MINIMUM 6 Other Operations Operation Press To pause play PLAY/PAUSE button To release pause and resume play To stop Display window shows TRACK NUMBER CURRENTLY PLAYING PLAYING TIME FLASHES TRACK NUMBER CURRENTLY PLAYING PLAYING TIME ADVANCES PLAY/PAUSE button STOP button TOTAL TRACKS To turn off the power TOTAL PLAYING TIME STOP button once and wait 30 seconds, or press STOP button twice To skip to the next track(s) once (or repeatedly) To skip to the previous track(s) once (or repeatedly) To go ahead at high speed (search) Keep depressed and release when the desired music section of the disc is found. To go back at high speed (search) Keep depressed and release when the desired music section of the disc is found. BASS BOOST switch This switch enhances the low frequency (bass) sounds at low listening levels. Switch this ON or OFF to suit your taste. BASS BOOST switch REPEAT, INTRO AND RANDOM PLAY You may have repeat, intro or random play using the REPEAT/RANDOM button. Press the REPEAT/RANDOM button several times, and the display will show the followings in turn: REPEAT 1 --> REPEAT ALL --> INTRO --> SHUFF (RANDOM) --> NORMAL PLAY Single Track Repeat Plays one song over and over till you press STOP. During play, select the song you want to repeat with either of the SEARCH buttons ( or ), then press the REPEAT/RANDOM button once, the symbol REPEAT 1 appears in the display. X 1 REPEAT 1 The song currently playing will repeat over and over, until you press STOP. All Tracks Repeat Repeats all songs in order over and over, till you press STOP. X2 During play, press the REPEAT/RANDOM button twice, the symbol REPEAT ALL will show in the display. All songs will keep playing in sequence 1, 2, 3, etc. and when finished, will start all over again until you press the STOP button. REPEAT ALL Intro Play This plays the first 10 seconds of every song in sequential order. 1. During play, press the REPEAT/RANDOM button three times, the word INTRO will flash in the display. 2. Press the PLAY button, the word INTRO will stop flashing and the first 10 seconds of each song on the CD will play in sequential order. 3. When you find a song you like, press the PLAY button, normal play will be resumed, that song (and the following songs) will play NORMALLY. X3 INTRO Random Play This plays the songs on the disc in a random order. 1. During play, press REPEAT/RANDOM button four times, the word SHUFF will flash. 2. Press the PLAY button, this will play all of the songs in random order selected by the CD player. The word SHUFF will be steady on. 3. Press the SEARCH button to skip to the next random song. X4 SHUFF 7 8 PROGRAM PLAY The tracks (songs) on the disc can be programmed (arranged in advance) to play in any order you prefer (up to 20 tracks can be programmed). Programming Example: Program Number 1 2 3 4 5 6 7 8 etc. Track Number (song number) 3 5 8 1 2 4 1 1 etc. During programming, the word PROG flashes in the display. To program songs to play in your preferred order, follow steps below: 1.During play, press the PROGRAM button. 3.Press the PROGRAM button. Track 3 is now programmed. Program #2 will now show in the display, ready for your next selection of track. PRO G The word PROG will flash in the display. PRO G Program number 2.Press the SEARCH button ( or ) to select track number 3 (example). PROG and track number 03 will flash in the displa y. PRO G Track number 4.Repeat steps 2 and 3 to program other tracks till you finish (up to 20 selections). 5.After programming is finished, press PLAY to begin programmed play. PROG changes to be steady on in the display, and music begins to play in the order you programmed. NOTE: - The player will stop automatically after all programmed tracks have been played. - To quit programmed play, press STOP button once. Then you may press PLAY button to re-start normal play. Your programming will be lost: When the alkaline batteries are exhausted or removed, or the AC ADAPTOR is disconnected. When the power is shut off or the CD DOOR is opened. MAINTENANCE Cleaning the lens A dirty lens will cause sound skipping. If the lens is very dirty, the player may not work. We suggest using a special cleaning disk (not included) available in most music and Hi-Fi stores. However, if you do not have one, you may use a cotton swab very slightly dampened with alcohol to clean the lens. 9 Handling Compact Discs Dirty, scratched or warped discs Cleaning the cabinet may cause skipping or noise. Handle the disc only by the edges. To keep clean, do not touch its surface. Discs should be stored in their cases after use to avoid scratches. Do not expose discs to direct sunlight, high humidity, high temperatures, or dust, etc. Prolonged exposure to extreme temperatures can warp the disc (such as leaving the discs in your car during summertime). Do not stick or write anything on either side of disc. Sharp writing instruments, or the inks used in some felt-tip pens, may damage its surface. Wipe with a soft cloth. If the cabinet is very dirty, dampen (not dripping wet) the cloth with a weak solution of soapy water, and then wipe clean. Cleaning the Discs To remove the Disc Fingerprints should be carefully wiped from the surface of disc with a soft cloth. Unlike conventional records, compact discs have no grooves to collect dust and microscopic dirt, so gently wiping them with a soft cloth should remove most particles. Wipe in a straight motion from the center to the edge. Open the CD DOOR by sliding the DOOR OPEN button, hold the disc by the edge while slightly pressing on the center spindle as illustrated, then lift it from the edge to release and remove. NOTE Never use thinner, benzine, record cleaner or antistatic spray on a compact disc. Such chemicals can damage its plastic surface. Always press the STOP button and wait for the disc to stop rotating before sliding the DOOR OPEN button to remove the disc. 10 SAFETY PRECAUTIONS Do not take the set apart. The laser beam used in the set may harm your eyes. Refer servicing to qualified service personnel only. Do not insert pins or coins, clips, or any objects inside the set. This set is equipped with a safety device which automatically turns the laser beam off when the CD DOOR is opened. Do not drop the set or subject it to strong shocks. Doing so could result in damage. Do not place the set in locations where the temperature is high, or in humid or dusty locations, or locations with long heavy vibrations, or tilted surfaces. The sets cabinet may warp or the set may be damaged if it is placed in direct sunlight, near heaters (where the temperature is 140 0 F/60 0C or higher) or in cars with the windows closed. In the summer, the temperature may get as high as 212 0 F/1000C or more. Use the set within a temperature range of 410F/5 0C to 950F/35 0C. Use ONLY the AC Adaptor provided, others may damage your set. Disconnect the Adaptor from the wall outlet when the set is not to be used for an extended period of time (3 days or more). When cleaning your set, use a soft dry cloth. Do not use solvents or commercially available cleaners, as they may damage or discolor the finish. Do not wear headphones while operating a motor vehicle. This could create a traffic hazard and is illegal in many areas. Do not use this set when bicycling or running. The headphones supplied with your set provide superb stereo listening while allowing you to hear some outside sounds when listening at normally low volume levels. Listening at extremely high volume levels minimizes the intrusion of outside noise/sounds. In the interest of safety, it is strongly advised against the use while engaging in activities where the exclusion of external sounds (whistles, horns, sirens, traffic, etc.) could be hazardous. Also loud volume can hurt your ears. If you notice that the sound has become weak or distorted or if tracks do not change, this is an indication that your batteries are weak. Replace both batteries at the same time (see Using with Batteries). Your CD-52 is identified by a serial number located in the Battery Compartment. Record this number in the space provided below. Model CD-52 Serial No. Date Purchased: This manual contains detailed information on its safety and use. Please read it carefully so that you may take full advantage of its many features, and ensure a safe reliable operation. Keep this manual for future reference. CONDENSATION If cold water is poured into a glass, water droplets form on the outside of the glass. This is called condensation. Condensation may occur on internal operating parts of the lens. Condensation occurs: When the set is brought from the cold outdoors into a warm room, or if it is from a cold room to a room which is heated, or in the summer, if the set is moved from an airconditioned room or car to a hot or humid location. Should condensation occur, the set may not operate properly. Open the CD DOOR and wait for about 20 minutes (to allow the internal parts to adjust to the surrounding temperature) before using the set. IMPORTANT REQUIREMENT BY THE FCC 11 Since the CD circuitry may cause interference to other radios nearby, switch this set off when not in use or move it away from the affected radios. This device complies with Part 15 of the FCC Rules. Operation is subject to the following two conditions: (1) This device may not cause harmful interference, and (2) This device must accept any interference received, including interference that may cause undesirable operation. NOTE: This equipment has been tested and found to comply with the limits for a Class B digital device, pursuant to Part 15 of the FCC Rules. These limits are designed to provide reasonable protection against harmful interference in a residential installation. This equipment generates, uses and can radiate radio frequency energy and, if not installed and used in accordance with the instructions, may cause harmful interference to radio communications. However, there is no guarantee that interference will not occur in a particular installation. If this equipment does cause harmful interference to radio or television reception, which can be determined by turning the equipment off and on, the user is encouraged to try to correct the interference by one or more of the following measures: Reorient or relocate the receiving antenna. Increase the separation between the equipment and receiver. Connect the equipment into an outlet on a circuit different from that to which the receiver is connected. Consult the dealer or an experienced radio/TV technician for help. SAFETY CERTIFICATION This Compact Disc Player is made and tested to meet safety standards of the FCC requirements and comply with safety performance of the U.S. Department of Health and Human Services, and also with FDA Radiation Performance Standards 21 CFR Subchapter J. WARNING To prevent fire or shock hazard, do not expose this appliance to rain or moisture. LASER SAFETY THIS SET EMPLOYS AN OPTICAL LASER BEAM SYSTEM IN THE CD MECHANISM, DESIGNED WITH BUILT-IN SAFEGUARDS. DO NOT ATTEMPT TO DISASSEMBLE. EXPOSURE TO THIS INVISIBLE LASER LIGHT BEAM MAY BE HARMFUL TO HUMAN EYES. THIS IS A CLASS-1 LASER PRODUCT. USE OF ADJUSTMENTS OTHER THAN THOSE SPECIFIED HEREIN, MAY RESULT IN HAZARDOUS LASER LIGHT BEAM EXPOSURE. THIS COMPACT DISC PLAYER SHOULD NOT BE ADJUSTED OR REPAIRED BY ANYONE EXCEPT QUALIFIED SERVICE PERSONNEL. THE LASER MECHANISM IN THE SET CORRESPONDS TO THE STYLUS (NEEDLE) OF A RECORD PLAYER. ALTHOUGH THIS PRODUCT USES A LASER PICK-UP LENS, IT IS COMPLETELY SAFE WHEN OPERATED ACCORDING TO DIRECTIONS. TROUBLE SHOOTING GUIDE Symptoms Tracks do not change or set does not play normally. CD Player will not turn on. Disc will not play. Causes Solutions 12 Replace both batteries with fresh Batteries are weak (they alkaline batteries. Battery life with may test OK on tester but they are weak for CD fresh batteries is above 8 hours of playing time (rechargeable batteries operation). have 1/2 of that life). Dead or weak batteries. Replace both batteries with fresh ones. AC Adaptor not connected Check AC Adaptor connection at AC outlet and the right side of set. properly. Disc inserted incorrectly. Re-insert disc with label side facing up. Defective compact disc. Try another compact disc. CD DOOR not closed. Close the door securely. Moisture has formed inside Take out the CD and leave the CD DOOR open for about 20 minutes the CD deck. to dry the moisture condensation. No sound from headphones. Headphone plug not Re-insert headphone plug into PHONES jack (not AUX OUT). inserted properly. VOLUME control set to Increase the volume. minimum. Replace with fresh batteries or use Weak batteries. AC Adaptor. Defective compact disc. Try another compact disc. VOLUME control Headphones plugged into Plug headphones into PHONES jack. (NOT THE AUX OUT JACK) AUX OUT jack. has no function. The compact disc or lens Clean or replace the compact disc Sound is skipping is dirty or CD is scratched. or clean the lens. or sound stops. Place the CD player on a level Strong vibrations. surface that is stable. Music is too loud. Lower the VOLUME control. Sound is distorted. BASS BOOST switch is ON. Slide BASS BOOST switch to OFF. Buttons do not work. Weak batteries. Replace both batteries or use AC Adaptor. Electronic or static error caused circuitry to lock. Remove batteries and Adaptor. Wait 15 seconds and re-insert. Make sure batteries are fresh or Adaptor has power. 13 TECHNICAL SPECIFICATIONS CD Player Section Frequency response .............................. Wow and flutter ...................................... Sampling frequency ................................ D/A converter ......................................... Error correction method .......................... Pickup ................................................... Laser diode material GaAIAs Laser output less than 44.6mw 20Hz-20KHz Below measurable limits 44.1KHz 1-bit CIRC Optical 3-beam semiconductor laser (780 nm wavelength) General Maximum output (stereo headphones) ..... 20mW + 20mW Power Supply AC adaptor ........................................... 120V/60Hz DC ....................................................... 3V: Using 2 size AA batteries Set Dimensions (approximate) Width ............................................... Depth .............................................. Height .............................................. Weight (approximate) ........................... 5 1/4" 6" 1 1/8" 9.5oz. (270g) (set only) Because the products are subject to continuous improvement, Lenoxx reserves the right to modify product designs and specifications without notice and without incurring any obligation. For customer service Dial 1-800-315-5885(MONDAY - THURSDAY 09:00 AM - 5:00 PM, FRIDAY 09:00 AM - 1:00 PM EST) or Visit Our Website: http://www.lenoxx.com © 2000 LENOXX ELECTRONICS CORP. 2 GERMAK DRIVE CARTERET, N.J. 07008 MADE & PRINTED IN CHINA CD52(22C-0E7)022100 NL v.1 E