1
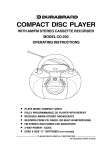
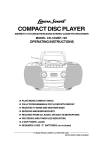
® COMPACT DISC PLAYER AM/FM STEREO CASSETTE RECORDER MODEL CD-210 OPERATING INSTRUCTIONS PLAYS ALL MUSIC COMPACT DISCS DIGITAL TUNING WITH 20 RADIO PRESETS FULLY PROGRAMMABLE CD PLAYER WITH REPEAT RECEIVES AM/FM STEREO BROADCASTS BASS BOOST SYSTEM RECORDS FROM CD, RADIO, OR BUILT-IN MICROPHONE 2 WAY POWER - AC/DC REQUIRES 8 SIZE C BATTERIES PLEASE READ CAREFULLY BEFORE USE CD-210SN021800 v.1 E SAFETY INSTRUCTIONS CAUTION RISK OF ELECTRIC SHOCK DO NOT OPEN The lightning flash and arrow head within the triangle is a warning sign alerting you of dangerous voltage inside the product. CAUTION: TO REDUCE THE RISK OF ELECTRIC SHOCK, DO NOT REMOVE COVER (OR BACK). NO USER SERVICEABLE PA RT S I N S I D E . REFER S E RV I C I N G TO Q U A L I F I E D SERVICE PERSONNEL. The exclamation point within the triangle is a warning sign alerting you of important instructions accompanying the product. SEE BOTTOM OF THE SET WARNING: TO REDUCE THE RISK OF FIRE OR ELECTRIC SHOCK, DO NOT EXPOSE THIS APPLIANCE TO RAIN OR MOISTURE. THESE IMPORTANT SAFETY INSTRUCTIONS ARE INCLUDED, AS APPLICABLE TO THE APPLIANCE, CONVEYING TO THE USER THE INFORMATION ITEMIZED BELOW: 1.Read Instructions - All the safety and operating instructions should be read before the appliance is operated. 2. Retain Instructions - The safety and operating instructions should be retained for future reference. 3. Heed Warnings - All warnings on the appliance and in the operating instructions should be adhered to. 4. Follow Instructions - All operating and use instructions should be followed. 5.Water and Moisture - The appliance should not be used near water - for example near a bathtub, washbowl, kitchen sink, laundry tub, in a wet basement, or near a swimming pool, and the like. 6.Wall or Ceiling Mounting - The appliance should not be mounted to a wall or ceiling. 7.Ventilation - The appliance should be situated so that its location or position does not interfere with its proper ventilation. For example, the appliance should not be situated on a bed, sofa, rug, or similar surface that may block the ventilation openings; or, placed in a built-in installation, such as a bookcase or cabinet that impede the flow of air through the ventilation openings. 8.Heat - The appliance should be situated away from heat sources such as radiators, heat registers, stoves, or other appliances (including amplifiers) that produce heat. 9. Power Sources - The appliance should be connected to a power supply only of the type described in the operating instructions or as marked on the appliance. 10. Grounding or Polarization - Precautions should be taken so that the grounding or polarization means of an appliance is not defeated. 11. Power Cord Protection - Power supply cords should be routed so that they are not likely to be walked on or pinched by items placed upon or against them, paying particular attention to cords at plugs, convenient receptacles, and the point where they exit from the appliance. 12. Cleaning - The appliance should be cleaned only as recommended by the manufacturer. 13. Nonuse periods - The power cord of the appliance should be unplugged from the outlet when left unused for a long period of time. 1 SAFETY INSTRUCTIONS 1 4 .Object and Liquid Entry - Care should be taken so that objects do not fall and liquids are not spilled into the enclosure through openings. 1 5 .Damage Requiring Service - The appliance should be serviced by qualified service personnel when: A. The power supply cord or the plug has been damaged; or B. Objects have fallen, or liquid has been spilled into the appliance; or C. The appliance has been exposed to rain; or D. The appliance does not appear to operate normally or exhibits a marked change in performance; or E. The appliance has been dropped, or the enclosure damaged. 1 6 .Servicing - The user should not attempt to service the appliance beyond that described in the operating instructions. All other servicing should be referred to qualified service personnel. 1 7 .Power lines - An outdoor antenna should be located away from power lines. 1 8 .Outdoor Antenna Grounding - If an outside antenna is connected to the receiver, be sure the antenna system is grounded so as to provide some protection against voltage surges and built up static charges. Section 810 of the National Electrical Code, ANSI/ NFPA 70 provides information with respect to proper grounding of the mast and supporting structure, grounding of the lead-in wire to an antenna discharge unit, size of grounding conductors, location of antenna-discharge unit, connection to grounding electrodes, and requirements for the grounding electrode. See Figure. EXAMPLE OF ANTENNA GROUNDING AS PER NEC - NATIONAL ELECTRICAL CODE ANTENNA LEAD IN WIRE GROUND CLAMP ANTENNA DISCHARGE UNIT (NEC SECTION 810-20) GROUNDING CONDUCTORS (NEC SECTION 810-21) ELECTRIC SERVICE EQUIPMENT GROUND CLAMPS POWER SERVICE GROUNDING ELECTRODE SYSTEM (NEC ART 250, PART H) It is the intent of Lenoxx that this product be used in full compliance with the copyright laws of the United States and that prior permission be obtained from copyright owners whenever copying tapes or CDs. Do not apply oil or petroleum products or solvents to any part of this set. CAUTION Use of controls or adjustments or performance of procedures other than those specified herein may result in hazardous radiation exposure. This compact disc player is classified as CLASS 1 LASER PRODUCT as stated on the bottom of the set. 2 BATTERY SAFETY INSTRUCTIONS CAUTION: TO REDUCE THE RISK OF FIRE OR PERSONAL INJURY OR DAMAGE TO YOUR SET, READ AND FOLLOW THESE INSTRUCTIONS. 1. Use only the type and size of batteries mentioned in the operating instructions booklet (batteries are not included with this set, please buy the proper batteries). 2. Do not dispose the batteries into a fire. The cells may explode. Check with local codes for possible special disposal instructions. 3. Do not open or mutilate the batteries. Released electrolyte is corrosive and may cause damage to the eyes or skin. It may be toxic if swallowed. 4. Be careful when handling batteries in order not to short the battery with conducting materials such as rings, bracelets and keys. The battery or conductor may over heat and cause burns. 5. Do not attempt to recharge non-rechargeable batteries. The batteries may leak corrosive electrolyte or explode. 6. Do not attempt to rejuvenate the batteries identified for use with this product by heating them. Sudden release of the battery electrolyte may cause burns or irritation to eyes or skin. 7. All batteries should be replaced at the same time. Mixing fresh and discharged batteries could increase internal cell pressure and rupture the batteries. 8. When inserting batteries into this product, the proper polarity ( and ) or direction must be observed. Reverse insertion of some or all of the batteries may result in battery eletrolyte leakage or explosion. 9. Remove the batteries from this product if the product will not be used for a long period of time (several months or more) since during the period the batteries could leak, damaging the product. 10. Discard weak or dead batteries as soon as possible since they are more likely to leak in the product. Batteries should be replaced (depending on the product) when the display gets dim or if the Low Battery Indicator shows or if the sound gets distorted. 11. Do not store this product in high temperature areas. Batteries that are stored in a freezer or refrigerator for the purpose of extending shelf life should be protected from condensation during storage and defrosting. Batteries should be stabilized at room temperature prior to use after cold storage. 12. If this product does not operate normally, see TROUBLE SHOOTING in this instruction manual. If you cant resolve the problem, or if the product is damaged, refer to the LENOXX WARRANTY INFORMATION. Opening or removing covers may expose you to dangerous voltages or other risks. Incorrect reassembly can cause electric shock when the appliance is subsequently used. 13. If liquid leaks from the batteries, carefully wipe this liquid. Do not allow it to touch your skin, and discard the leaking batteries. 14. Do not mix batteries (OLD and NEW or CARBON and ALKALINE, etc.). 15. The use of rechargeable batteries is not recommended for this set because their voltage and life is lower than standard batteries. 16. Installation of batteries should be done by an adult only. SAVE THESE INSTRUCTIONS 3 CHOOSING THE POWER SOURCES You can use the AC power or batteries as a power source. 1. To a wall outlet AC SOCKET 2. Battery compartment TIP If the plug of the AC power cord does not match your outlet, do not force it. Reverse it and try again. The plugs are polarized and only fits one way into the wall outlet and back of the set. 1. Connecting the AC power cord Insert one end of the supplied AC power cord to the socket located at the rear of the player, and the other end to the wall outlet. 2. Using the player on batteries TIP Replace the batteries when the POWER lamp dims or when the player stops operating. Replace all the batteries with new ones. Before you replace the batteries, be sure to take out the CD from the player and remember to check the Battery Safety Instructions on Page 3. Insert 8 size C batteries (not supplied) into the battery compartment. To use the player on batteries, disconnect the AC power cord from the player. c c 4 c c c c c c LO W E R U PP ER LISTENING TO THE RADIO 3 1 2 Connect the supplied AC power cord or batteries (see page 4). 1 Press the POWER switch, the POWER indicator will turn on. Press the RADIO switch, the RADIO indicator will turn on. 2 3 4 5 BAND Press the AM/FM BAND switch to select the desired wave band. Tune into the station you prefer using the TUNING UP or DOWN button. Each time the button is pressed, the frequency changes. Keep the button pressed, the station will change rapidly (automatic tuning), release the button and it will stop at the next strong station. (NOTE: For FM stations, stretch the FM antenna out.) If you tune into a FM stereo station, FM STEREO will show in the display. To hear more BASS sounds, press the BASS BOOST button. 5 PRESETTING STATIONS 4&6 5 Connect the supplied AC power cord or batteries (see page 4). 1-3 4 Follow Steps 1 to 3 (LISTENING TO THE RADIO on the previous page) to select a station. PGM 5 6 Press the STORE button, PRESET will show and PROGRAM will flash in the display for about 6 seconds. While the PROGRAM is flashing, press the PRESET button to choose a memory location (01-10). PGM Press the STORE button again to confirm, the station now broadcasting is stored into that preset memory location. PROGRAM disappears from the display. PRESET PROGRAM PRESET PROGRAM PRESET NOTE: Steps 4-6 should be done quickly. 7 Repeat the above steps to store other 9 stations into memory. TIP: UP TO 10 AM AND 10 FM STATIONS CAN BE STORED INTO THE PRESET MEMORY LOCATIONS. (THEY WILL REMAIN IN MEMORY AS LONG AS THE BATTERIES ARE INSTALLED, OR AC POWER CORD IS CONNECTED.) 6 LISTENING TO THE PRESET STATIONS (after you programmed them) 1 Make sure both POWER and RADIO indicator lamps are on. Connect the supplied AC power cord or batteries (see page 4). 1 2 3 BAND Press the AM/FM BAND switch to select the desired wave band. Press the PRESET button several times to choose a memory location (01-10). You will receive the station you stored into that preset memory location. 2 3 USE THESE BUTTONS FOR ADDITIONAL OPERATIONS To Press or Adjust Adjust the volume VOLUME control Turn off the Radio Press the POWER switch. 2 TO IMPROVE RADIO RECEPTION Change position of the antenna for FM or FM Stereo. Move the set itself for AM. 7 1 PLAYING A CD 2 1 3 4 Connect the supplied AC power cord or batteries (see page 4). 1 Press the POWER switch, the POWER indicator lamp will go on. 2 Press the CD switch, the CD indicator lamp will go on and the display will show 6 zeros. 3 OPEN CLOSE 4 5 6 OPEN CLOSE TRACK Open the CD DOOR by pushing it down at the position marked OPEN/CLOSE and place the CD in the CD compartment. The label side of the CD should face upward. Close the CD DOOR by pushing it down at the position marked OPEN/CLOSE again. The display will show 6 zeros and then the total number of tracks (songs) and the total playing time of the disc. Press the CD PLAY button. The player will play all the songs (tracks) once. TRACK TRACK TRACK To hear more BASS sounds, press the BASS BOOST button. TIP: WILL FLASH IN THE DISPLAY IF THERE IS NO DISC IN THE CD COMPARTMENT OR THE DISC IS UPSIDE DOWN. 8 USE THESE BUTTONS FOR ADDITIONAL OPERATIONS VOLUME CONTROL TRACK TIP When CD play is paused, the elapsed playing time will flash and no music will play. To r e s u m e p l a y, p r e s s t h e PA U S E button again, the elapsed play time will stop flashing and music will play. To Press or Adjust Adjust the volume VOLUME control Stop playback Pause playback The elapsed playing time will flash during pause. Press again to resume play after pause. Go to the next track TIP If you bump the set during CD play, the music wil l s top or skip for a few seconds. This is normal for this type of player. Go back to the previous track Locate a point in a song Remove the CD Turn off the power 9 or while playing, press and hold down until you find the point. Open the CD DOOR by pu s h i n g i t d o w n a t th e position marked OPEN/ CLOSE (press STOP first). Press the POWER switch, the POWER indicator lamp will be off. PLAYING CD SONGS OVER AND OVER (Repeat Play) You can play CD tracks repeatedly in normal or programmed play modes (see page 11). CD SWITCH POWER SWITCH 1.Press the POWER switch, the POWER indicator lamp will be ON. 2.Press the CD switch, the CD indicator lamp will be ON. 3.Press the CD REPEAT ( ) button. To repeat Press a single track (song) P r e s s t h e R E P E AT ( ) button twice, REPEAT will flash. all the tracks (all songs) programmed tracks The display shows P r e s s t h e R E P E AT ( ) button once, REPEAT will be steady on. Press the PROGRAM (PGM) button, and then the REPEAT button once 4.Select the track by pressing or , and then press To Cancel Repeat Play Press the REPEAT button until the REPEAT TRACK TRACK TRACK REPEAT REPEAT REPEAT . icon disappears in the display. 10 PROGRAM SELECTING YOUR OWN MUSIC PLAYING ORDER (Programmed Play) You can make a program of up to 20 tracks to play songs in the order you want them to be played. PROGRAM (PGM) 1 PGM 2 3 During STOP mode, press the PROGRAM ( PGM ) button. The , display will show PROGRAM and TRACK will flash in the display. Press the SEARCH buttons either or until the desired track shows in the display. PGM Press the PROGRAM button. The display will show . 4 Repeat steps 2&3 until all the desired tracks are programmed. ( NOTE: Steps 1-4 should be done quickly.) 5 Press the PLAY button to start program play. PROGRAM and the track number being played will show in the display. TRACK TRACK TRACK TRACK To check the order of tracks before play DISPLAY PROGRAM PROGRAM PROGRAM PROGRAM Press the PROGRAM button during STOP mode. Every time you press the button, the track number appears in the programmed order. To change the current program Just create a new program following the programing procedure. To cancel Program Play Press the STOP button. 11 PLAYING A CASSETTE TAPE 1 2 4 3 Connect the supplied AC power cord or batteries (see page 4). 1 Press the POWER switch, the POWER indicator lamp will go on. 2 Press the TAPE switch, the TAPE indicator lamp will go on. 3 STOP/EJ. 4 PLAY 5 6 AUTO STOP Press the STOP/EJECT button to open the cassette door and insert a recorded tape. Close the door. Press the PLAY button. The player turns on and starts playing. When the player finishes playing that side of the tape, the set will stop. To hear the other side, flip the tape over, then insert and press PLAY. To hear more BASS sounds, press the BASS BOOST button. 12 TAPE PLAY DIRECTION EMPTY FULL REEL REEL INSERT TAPE THIS WAY FULL REEL O N RIGHT USE THESE BUTTONS FOR ADDITIONAL OPERATIONS BASS BOOST FAST F.& PHONES VOLUME REWIND JACK CONTROL PLAY STOP/EJ PAUSE To Press or Adjust Adjust the volume VOLUME control Get different sound effect BASS BOOST switch for more BASS sounds Stop playback STOP/EJECT button Fast forward or rewind the tape FAST FORWARD button or REWIND button Pause playback PAUSE button Press again to resume play after pause. Eject the cassette STOP/EJECT button (once or twice) To enjoy the music without disturbing others Insert your headphone plug into the PHONES JACK on the top of the set. NOTE: Headphone is n ot included. L 13 RECORDING ON A TAPE 1 3 Connect the supplied AC power cord or batteries (see page 4). 1 Press the STOP/EJECT button to open the tape compartment and insert a blank tape. Select the program source (AM, FM, CD, or built-in microphone) you want to record. 2 To record from the CD player, insert a CD and follow the steps to play a CD (see page 8). To record from a radio, press the RADIO switch, and tune into the station you want (see page 5). To r e c o r d f r o m t h e b u i l t - i n m i c r o p h o n e , p r e s s t h e TA P E switch and speak in front of the set. 3 4 Press the RECORD button to start recording. (The PLAY button is depressed automatically.) To hear what you recorded, press TAPE switch, then REWIND and PLAY. 14 INSERT TAPE THIS WAY FULL REEL ON RIGHT USE THESE BUTTONS FOR ADDITIONAL OPERATIONS TIP • • • Adjusting the VOLUME or pressing the BASS BOOST will not affect the recording level. For best recording effect, use the AC power instead of batteries. To erase a recording, just start a new recording, and the old one is automatically replaced. POWER SWITCH PAUSE STOP/EJECT To Press or Adjust Stop recording STOP/EJECT button Pause recording PAUSE button Press the button again to resume recording. Turn off the power Press the STOP/EJECT button and the POWER switch. 15 PRECAUTIONS On Safety As the laser beam used in the CD player section is harmful to the eyes, do not attempt to disassemble the cabinet. Refer servicing to qualified personnel only. Should any solid object or liquid fall into the player, unplug the player, and have it checked by qualified personnel before operating it any further. C batteries. We recommend alkaline batteries for longer life. When the batteries are not to be used, remove them to avoid damage that can be caused by battery leakage or corrosion. On Operation If the player is brought directly from a On Placement Do not leave the player in a location near heat source, or in a place subject to direct sunlight, excessive dust or mechanical shock. Do not place the player on an inclined or unstable place. cold to a warm location, or is placed in a very damp room, moisture may condense on the lens inside the CD player section. Should this occur, the player will not operate properly. In this case, remove the CD and wait about an hour for the moisture to evaporate. If the player has not been used for a long time, set it in the playback mode to warm it up for a few minutes before inserting a cassette. Do not place anything within 1 inch of On Power Sources For battery operation, use 8 size the back of the cabinet. The ventilation holes must not be covered for the player to operate properly and prolong the life of its components. If the player is left in a car parked in the sun, be sure to choose a location in the car where the player will not be subjected to the direct rays of the sun. This CD player is designed to be played on a stable no vibration position. If you bump the set during CD play, the music will stop or skip for a few seconds. This is normal for this type of player. you have any questions or problems Since a strong magnet is used for the Ifconcerning your player, please contact speakers, keep personal credit cards using magnetic coding or spring-wound watches away from the player to prevent possible damage from the magnets. 16 our customer service department at 1-800-315-5885. (MONDAY - THURSDAY 09:00 AM - 05:00 PM, FRIDAY 09:00 AM - 01:00 PM EST) PRECAUTIONS (continued) Notes on Cassettes Break off the cassette tab from side A Notes on CDs Before playing, clean the CD with a cleaning cloth. Wipe the CD from the center out. or B to prevent accidental recording. If you want to reuse the tape for recording, cover the broken tab with adhesive tape. Side A Do not use solvents such as benzene, Tab for side B t h i n n e r, commercially available cleaners or anti-static spray intended for vinyl LPs. To record on a tape with its tab broken off, cover the respective tab hole for side A or B with adhesive tape. Do not expose the CD to direct sunlight or heat sources such as hot air ducts, nor leave it in a car parked in direct sunlight as there can be a considerable rise in temperature inside the car. The use of a cassette with more than 90 minutes of play time is not recommended except for long continuous recording or playback. To reduce the chances of tape jamming Do Tab for side A not stick paper or stickers on the CD, nor scratch the CD. o r t an glin g, y o u s h o u l d c h e c k th a t there are no loose layers of tape visible through the cassette center window. If any, tighten these loose layers of tape using a pencil before inserting the cassette into the set. After playing, store the CD in its case. If there is a scratch, dirt or fingerprints on the CD, it may cause a tracking error or skipping. 17 MAINTENANCE Cleaning the Lens Notes for Storing Cassette Tapes If the lens becomes dirty, it may cause a skipping of sound during CD operation. Clean with a commercially available lens cleaner and blower. 1. Do not put a tape near a magnetic field, such as a TV, or speaker. Magnetic fields may reduce the tape sensitivity or even erase the recording. 2. Do not store tape for any length of time in a hot, moist or dusty place. Cleaning the Tape Heads Wipe the heads, the pinch roller and the capstan with a cleaning swab slightly moistened with cleaning fluid or alcohol after every 10 hours of operation for optimum playback and recording quality. After cleaning, insert a tape when the areas RECORD/PLAY BACK HEAD PINCH ROLLER CAPSTAN ERASE HEAD COTTON SWAB cleaned are completely dry. NOTE: In order to see and clean the head, you may have to press PLAY first. 18 Cleaning the Cabinet Clean the cabinet, panel and controls with a soft cloth slightly moistened with a mild detergent solution. Do not use any type of abrasive pad, scouring powder, or solvent, such as alcohol or benzene. TROUBLESHOOTING General Problem The power is not on or the POWER indicator lamp is dim. There is no sound. Remedy Connect the AC power cord to a wall outlet securely. Make sure the batteries are inserted correctly and they are fresh. Make sure the appropriate indicator lamp is ON as you want. Adjust the volume. Unplug the headphones when listening through speakers. Radio CD player flashes in the display even when a CD is in place. CD does not play. open for about an hour to dry moisture condensation. Make sure the CD indicator lamp is ON. Clean the CD, or replace it if the CD is badly damaged. Place the player in a location free from vibration. Check if your batteries are fresh. Check if the CD itself is damaged by playing it in another set. The sound drops out. The sound is weak or has poor quality. Replace all the batteries with new ones if The RECORD button does not function/The tape does not play. Tape player Insert the CD with the label side up. Make sure that the CD compartment is closed. Place the CD with the label side up. Clean the CD. Take out the CD and leave the CD door The tape does not erase completely. The tape does not record. The sound is weak/The sound quality is poor. Cassette PLAY button pops up. they are weak, or bring the set near a window, or rotate the set. Make sure the safety tab on the cassette is in place. Make sure the TAPE indicator lamp is ON. Make sure the tape is not at the end. Press REWIND then RECORD. Clean the erasing head (see page 18). Replace all the batteries with new ones if they are weak. Make sure the tape is inserted properly. Make sure the safety tab of the cassette is in place. Clean the heads, pinch roller and capstan (see page 18). The tape has reached its end. Remove it, flip to the other side and re-insert. Or press REWIND and PLAY to hear that side. 19 SPECIFICATION General Description Power source: Speakers: AC 120V, 60Hz 15Watts DC 12V (8 size C batteries) (Alkaline batteries are recommended) 2-4 8 ohm Output power: 2.2W / channel Dimensions: Width: 16 1 / 4 Depth: 10 Height: 7 Weight: 7LBs (without batteries) CD Section Plays disc type: Any normal CD used in portable players Laser wavelength: 760 - 800 NM Tracking method: 3 - spot error detection Frequency response: 80Hz - 15 KHz 3.86 mm lens Tape Recorder Section Frequency response: Standard normal bias cassette tape, 70 - 10 KHz Radio Section Frequency range: FM: 87.5 - 108 MHz AM: 520 - 1710 KHz LENOXX reserves the right to make design and specification changes for product improvement. PROTECT YOUR FINE FURNITURE! WE RECOMMEND A CLOTH OR OTHER PROTECTIVE MATERIAL BE PLACED UNDER THE SET WHEN PLACING IT ON SURFACE WITH A NATURAL OR LACQUER FINISH. For Customer Service Dial 1-800-315-5885 (MONDAY - THURSDAY 09:00 AM - 5:00 PM, FRIDAY 09:00 AM - 1:00 PM EST) © 2000 LENOXX ELECTRONICS CORP. 2 GERMAK DRIVE CARTERET, N.J. 07008 http://www.lenoxx.com MADE & PRINTED IN CHINA 20 CD-210SN021800 v.1 E