1
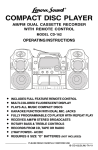
CD PLAYER DUAL ALARM DIGITAL CLOCK RADIO MODEL CDR-1902 OPERATING INSTRUCTIONS DUAL ALARMS - PERFECT FOR WEEKDAYS & WEEKENDS PLAYS MUSIC COMPACT DISCS FULLY PROGRAMMABLE CD PLAYER WITH REPEAT RECEIVES AM/FM BROADCASTS WAKE UP TO CD, RADIO OR BUZZER EASY TO SET CLOCK BATTERY BACK-UP (9V BATTERY NOT INCLUDED) PLEASE READ CAREFULLY BEFORE USE IB-CDR1902(TA)-WM-E-090902 WARNING TO PREVENT FIRE OR SHOCK HAZARD, DO NOT USE THE PLUG WITH AN EXTENSION CORD, RECEPTACLE OR OTHER OUTLET UNLESS THE BLADES CAN BE FULLY INSERTED TO PREVENT BLADE EXPOSURE. TO PREVENT FIRE OR SHOCK HAZARD, DO NOT EXPOSE THIS APPLIANCE TO RAIN OR MOISTURE. WARNING RISK OF ELECTRIC SHOCK DO NOT OPEN The lightning flash with arrowhead symbol, within an equilateral triangle, is intended to alert the user to the presence of uninsulated dangerous voltage within the products enclosure that may be of sufficient magnitude to constitute a risk of electric shock to persons. WARNING: TO REDUCE THE RISK OF ELECTRIC SHOCK, DO NOT REMOVE COVER (OR BACK). NO USER SERVICEABLE PARTS INSIDE. REFER SERVICING TO QUALIFIED SERVICE PERSONNEL. The exclamation point within an equilateral triangle is intended to alert the user to the presence of important operating and maintenance (servicing) instructions in the literature accompanying the appliance. IMPORTANT SAFETY INSTRUCTIONS 1. 2. 3. 4. 5. 6. 7. 8. 9. 10. 11. 12. Read these instructions. Keep these instructions. Heed all warnings. Follow all instructions. Do not use this apparatus near water. Clean only with dry cloth. Do not block any ventilation openings, install in accordance with the manufacturers instructions. Do not install near any heat sources such as radiators, heat registers, stoves, or other apparatus (including amplifiers) that produce heat. Do not defeat the safety purpose of the polarized or grounding-type plug. A polarized plug has two blades with one wider than the other. A grounding type plug has two blades and a third grounding prong. The wide blade or the third prong are provided for your safety. If the provided plug does not fit into your outlet, consult an electrician for replacement of the obsolete outlet. Protect the power cord from being walked on or pinched particularly at plugs, convenience receptacles, and the point where they exit from the apparatus. Only use attachments/accessories specified by the manufacturer. Use only with cart, stand, tripod, bracket, or table specified by the manufacturer, or sold with the apparatus. When a cart is used, use caution when moving the cart/apparatus combination to avoid injury from tip-over. 13. Unplug this apparatus during lightening storms or when unused for long periods of time. 14. Refer all servicing to qualified service personnel. Servicing is required when the apparatus has been damaged in any way, such as power-supply cord or plug is damaged, liquid has been spilled or objects have fallen into the apparatus, the apparatus has been exposed to rain or moisture, does not operate normally or has been dropped. 15. This appliance shall not be exposed to dripping or splashing water and that no object filled with liquid such as vases shall be placed on the apparatus. 1 IB-CDR1902(TA)-WM-E-090902 ADDITIONAL SAFETY INSTRUCTIONS 1. Power Sources - The appliance should be connected to a power supply only of the type described in the operating instructions or as marked on the appliance. 2. Wall or Ceiling Mounting - The appliance should not be mounted to a wall or ceiling. 3. Object and Liquid Entry - Care should be taken so that objects do not fall and liquids are not spilled into the enclosure through openings. 4. Servicing - The user should not attempt to service the appliance beyond that described in the operating instructions. All other servicing should be referred to qualified service personnel. 5. Do not connect FM antenna wire to any outdoor antenna. Do not apply oil or petroleum products or solvents to any part of this set. CAUTION Use of controls or adjustments or performance of procedures other than those specified herein may result in hazardous radiation exposure. This compact disc player is classified as CLASS 1 LASER PRODUCT as stated on the bottom of the set. 2 IB-CDR1902(TA)-WM-E-090902 1. Setting the Clock TIME BUTTON 1 CLOCK/CD DISPLAY MINUTE BUTTON HOUR BUTTON Connect the AC power cord into a live wall outlet. Clock display will show 12:00 . If the plug of the AC power cord does not match your outlet, do not force it. Reverse it and try again. This plug is polarized and only fits one way into the wall outlet. 2 Hold the TIME button down, and press the HOUR button, until the right hour time shows PM indication lights up in the display. for PM time. the TIME button down, 3 Hold and press the MINUTE button until the right minute time shows in the display. Example: 10:26 p.m. Refer to Page 10 Part 8. Setting the Alarm Times for setting alarm time. 3 IB-CDR1902(TA)-WM-E-090902 2. Playing a CD CD DOOR OPEN button POWER button CD DISPLAY button CLOCK/CD DISPLAY FUNCTION switch (on the left side) CD PLAY button Connect the AC power cord (see Setting the Clock). 1 Press the POWER button to turn on the power, make sure the POWER lamp is on. Slide the FUNCTION switch to CD position. 2 Press the CD D OOR OPEN button to open the CD Door and place the CD in the CD compartment. The label side of the CD should face upward. 3 Close the CD D OOR by pushing it down at the right corner. The display will show the total track number of the disc for 5 seconds, then go back to clock time display. 4 Press the CD PLAY button. The player plays all the tracks once. Press the CD DISPLAY button, the display will show the track number of current play. POWER lamp total track number of the disc CD Track number During CD play, the display still shows CLOCK time, press CD DISPLAY button if you want CD display. 4 IB-CDR1902(TA)-WM-E-090902 3. More about CD operation Use these buttons for additional operations CD DOOR OPEN button POWER button POWER lamp CD Track VOLUME CONTROL Tip When CD play is paused, the CD track number will flash and no music will play. To resume play, press the PAUSE button again, CD track number will stop flashing and music will play. To Press or Adjust Adjust the volume Volume Control Stop playback STOP Pause playback PLAY/PAUSE CD track number will flash during pause. Press again to resume play after pause. Go to the next track SKIP/SEARCH FORWARD Go back to the previous track SKIP/SEARCH BACKWARD Locate a point in a song or while playing, press and hold down until you find the point. Remove the CD CD DOOR OPEN button (press first). Turn off the CD player Press the POWER button to turn off the power, the POWER lamp will be off. 5 IB-CDR1902(TA)-WM-E-090902 4. Playing CD tracks repeatedly (Repeat Play) POWER button REPEAT lamp FUNCTION switch (on the left side) REPEAT button 1. Press the POWER button to turn on the power and slide the FUNCTION switch to CD position. 2. Press (PLAY button). 3. Press the CD REPEAT button. To repeat Press (during play) Repeat Lamp a single track (song) Press the REPEAT button once Flashing all the tracks (all songs) Press the REPEAT button twice Steady on 4. You may select the individual track to repeat by pressing or . To cancel Repeat Play Press the REPEAT button until the REPEAT lamp is off. 6 IB-CDR1902(TA)-WM-E-090902 5. Playing CD in programmed order You can make a program of up to 20 tracks in the order you want them to be played. PROGRAM lamp PROGRAM button 1. Press the POWER button to turn on the power and slide the FUNCTION switch to CD position. Make sure the CD is stopped. 2. Press the PROGRAM button. The letters P01 will show and the PROGRAM lamp will flash. 3. Press or to select the tracks you want to program in the order you want. 4. Press the PROGRAM button to confirm. The letters P02 will show. 5. Repeat steps 3 and 4. You can program up to 20 tracks. 6. Press to start programmed play. The PROGRAM lamp will show steadily on the display. To change the current program Just create a new program following the programming procedure. To cancel Programmed Play Press the STOP button to stop programmed play. Press the STOP button again after pressing the PROGRAM button or press the CD DOOR OPEN button to open the CD door, and the PROGRAM lamp goes off. 7 IB-CDR1902(TA)-WM-E-090902 6. Listening to the radio RIGHT SIDE VIEW LEFT SIDE VIEW FUNCTION SWITCH VOLUME CONTROL TUNING CONTROL BAND SWITCH Connect the supplied AC power cord (see Setting the Clock). 1 Press the POWER button to ON and slide the FUNCTION switch to RADIO position. 2 Slide the BAND switch to the proper band position that you want. 3 Tune into the station you prefer using the TUNING CONTROL. Adjust for the clearest sound. 4 Adjust the VOLUME CONTROL for desired loudness. 5 Press the POWER button to turn off the power and the Radio, the POWER lamp will go off. 8 IB-CDR1902(TA)-WM-E-090902 7. More about radio operation PHONES jack FM ANTENNA BATTERY COMPARTMENT (at the bottom of the set) To improve broadcast reception Fully stretch out the FM ANTENNA for better FM reception. Reorient the player itself for better AM reception. Or locate the set near a window. To listen without disturbing others Connect your headphones (optional - not included) into the PHONES jack at the back of the set. The speaker will automatically be silenced. Remember to unplug the headphones if you want the set to wake you up in the morning. To use battery backup Install a 9V battery for Clock backup, so that if your home power is momentarily off, you will not have to set up the time & alarm settings. Note: The display will not show the time but the time will be kept in memory and will reappear when power is restored. 9 IB-CDR1902(TA)-WM-E-090902 8. Setting the Alarm Time This set has dual alarms. You may set ALARM 1 to wake you at a certain time, or ALARM 2 to wake you at a different time, or ALARM 1+2 - both alarms will sound at the times you set. This feature is useful for a husband & wife waking up at different times or a single person who likes to wake up at different times during weekdays or holidays. To set ALARM 1, slide the ALARM SET switch to position 1, the ALARM 1 lamp will turn on. To set ALARM 2, slide the ALARM SET switch to position 2, the ALARM 2 lamp will turn on. RIGHT SIDE VIEW FRONT SIDE VIEW ALARM ALARM 1 lamp ALARM 2 lamp MINUTE HOUR ALARM SET switch 1 Hold the ALARM button. the HOUR button to select correct hour 2 Press time. Release the HOUR button but continue to press the ALARM button. 3 Press the MINUTE button for correct minute. the ALARM button, the clock display 4 Release will show the normal time of day. NOTE 1: The alarm times can not be set when the ALARM SET button is switched to OFF or ALARM 1+2 position. NOTE 2: If you want to be waked up in the morning, the PM lamp should be off on alarm time (when pressing ALARM button). To change PM to AM time, advance time 12 hours. NOTE 3: To wake to ALARM 1 time, slide ALARM SET switch to position 1. To wake to ALARM 2 time, slide ALARM SET switch to position 2. To wake to both times, slide ALARM SET switch to position 1+2. 10 IB-CDR1902(TA)-WM-E-090902 9. Waking up to alarm or music 1. Waking up to alarm 1.Set the alarm time as previously instructed and slide the ALARM SET switch to ALARM 1, ALARM 2 or ALARM 1+2, the proper ALARM lamp will be on. 2.Set the FUNCTION switch to BUZZER position. Alarm buzzer will sound at the set alarm time. 2. Waking up to CD 1. Set the alarm time as previously instructed and slide the ALARM SET switch to ALARM 1, ALARM 2 or ALARM 1+2, the proper ALARM lamp will be on. 2. Set the FUNCTION switch to CD position. 3. Make sure there is a CD disc loaded in the compartment and POWER lamp is off. The CD Disc will start playing from the first track at the set alarm time. 3. Waking up to radio 1. Refer to Listen to the radio for radio operation instructions. Select the desired AM or FM band using the BAND switch and TUNING knob. 2. Set the alarm time as previously instructed and slide the ALARM SET button to ALARM 1, ALARM 2 or ALARM 1+2, the proper ALARM lamp will be on. 3. Set the FUNCTION switch to RADIO position. 4. Press the POWER button to turn off the power, make sure the POWER lamp is off. The radio will start playing at the set alarm time. 11 IB-CDR1902(TA)-WM-E-090902 10. Snooze and Sleep functions When alarm or music comes on 1. To sleep extra 6 minutes Just press the SNOOZE button, the alarm or music will stop and come on after 6 minutes. 2. To stop the alarm or music Just press the ALARM OFF (POWER) button, the alarm or music will stop and come on next day. Going to Sleep with CD music 1. Follow steps 1-4 of Playing a CD on Page 4 to start the CD play. 2. Press the SLEEP button,the display will show two dashes --, and the SLEEP lamp flashes in the display. Press the SLEEP Button to select the desired playing time (90 minutes, 60 minutes or 30 minutes). 3. The music will play for the time you selected, and the SLEEP lamp will show on the display. 4. The CD will stop automatically after the selected playing time, and the SLEEP lamp will be off. 5. To shut off the music before the time is up, press the POWER button. Going to Sleep with RADIO 1. Follow steps 1-4 of Listening to the Radio on Page 8 to start the RADIO play. 2. Press the SLEEP button,the display will show two dashes --, and the SLEEP lamp flashes in the display. Press the SLEEP Button repeatedly to select the desired playing time (90 minutes, 60 minutes or 30 minutes). 3. The music will play for the time you selected, and the SLEEP lamp will show on the display. 4. The RADIO will stop automatically after the selected playing time, and the SLEEP lamp will be off. 5. To shut off the music before the time is up, press the POWER button. 12 IB-CDR1902(TA)-WM-E-090902 Precautions On safety On power sources As For battery backup, you may use a 9V the laser beam used in the CD player section is harmful to the eyes, do not attempt to disassemble the casing. Refer servicing to qualified personnel only. battery (optional), so that you will not have to re-set the clock every time you disconnect the power. The nameplate indicating operating voltage, power consumption, etc. is located at the bottom of the set. Should any solid object or liquid fall into the player, unplug the player, and have it checked by qualified personnel before operating it any further. On operation If the player is brought directly from a On placement cold to a warm location, or is placed in a very damp room, moisture may condense on the lens inside the CD player section. Should this occur, the player will not operate properly. In this case, remove the CD and wait about an hour for the moisture to evaporate. Do not leave the player in a location near heat source, or in a place subject to direct sunlight, excessive dust or mechanical shock or vibration. Do not place the player on an inclined or unstable place. CD player is designed to be played Do not place anything within 1 inch of This on a stable no vibration position. If you the back of the cabinet. The ventilation holes must be unobstructed for the player to operate properly and prolong the life of its components. bump the set during CD play, the music will stop or skip for a few seconds. This is normal for this type of player. you have any questions or problems Since a strong magnet is used for the Ifconcerning your player, please contact speakers, keep personal credit cards using magnetic coding or springwound watches away from the player to prevent possible damage from the magnet. our customer service department. 13 IB-CDR1902(TA)-WM-E-090902 Precautions (continued) Cleaning the lens Notes on CDs If the lens becomes dirty, it may cause a skipping of sound during CD operation. Clean with a commercially available lens cleaner blower or a cotton swab. Before playing, clean the CD with a cleaning cloth. Wipe the CD from the center out. Do not use solvents such as benzene, thinner, commercially available cleaners or anti-static spray intended for vinyl LPs. Do not expose the CD to direct sunlight or heat sources such as hot air ducts, nor leave it in a car parked in direct sunlight as there can be a considerable rise in temperature inside the car. Do not stick paper or sticker on the CD, nor scratch the surface of the CD. After playing, store the CD in its case. If there is a scratch, dirt or fingerprints on the CD, it may cause tracking error. Cleaning the cabinet Clean the cabinet, panel and controls with a soft cloth slightly moistened with a mild detergent solution. Do not use any type of abrasive pad, scouring powder, or solvent, such as alcohol or benzene. 14 IB-CDR1902(TA)-WM-E-090902 Trouble Shooting Remedy Problem Connect the AC power cord to a wall outlet securely. Make sure that outlet has power. The power is not on. General Make sure the FUNCTION switch is at the right position as you want. There is no sound. Adjust the volume. Unplug the headphones through speakers. when listening AM or PM not set correctly. Is alarm time set in AM range (PM lamp off)? Alarm does not come on in the morning. ALARM SET switch is in OFF position. Are appears in the display even when a CD is in place. the ALARM INDICATORS off? ALARM SET switch is not in the proper position. Insert the CD with the label side up. Make CD player sure that the CD compartment is closed. CD play is paused, press again. Take out the CD and leave the CD door CD does not play. open for about an hour to dry moisture condensation. Make sure the FUNCTION switch is at CD position. Clean the CD, or replace it if the CD is badly The sound drops out. Place the player in a location free from vibration. • It is normal since the radio uses less power CD does not play while radio may continue to play. Radio damaged. than the CD player. Fully stretch out the FM antenna to improve The sound is weak or has poor quality. FM reception. Bring the set near a window, or rotate the set for AM reception. 15 IB-CDR1902(TA)-WM-E-090902 Specification GENERAL DESCRIPTION Power source: AC 120V, 60Hz 10Watts DC 9V (optional - for clock backup) Speakers: 3 8 ohm Output power: 1.5W Dimensions: Width: 10 Depth: 7 Height: 4 1/2 Weight: 7 LBs (without battery) CD SECTION Plays disc type: Any compact discs bearing this logo Laser wavelength: 760 - 800 NM Tracking method: 3 - spot error detection 3.86 mm lens Frequency response: 50 Hz - 15 kHz (+1/-2dB) NOTE: This CD player will only play NORMAL music CDs (or CD-R CDs). This set will not play CDRW encoded discs. RADIO SECTION Frequency range: FM: 88 - 108 MHz AM: 530 - 1700 kHz LENOXX reserves the right to make design and specification changes for product improvement. PROTECT YOUR FINE FURNITURE! WE RECOMMEND A CLOTH OR OTHER PROTECTIVE MATERIAL BE PLACED UNDER THE SET WHEN PLACING IT ON SURFACE WITH A NATURAL OR LACQUER FINISH. For customer service Dial 1-800-315-5885 (MONDAY - THURSDAY 9:00 AM - 5:00 PM, FRIDAY 9:00 AM - 1:00 PM EST) or Visit Our Website: http://www.lenoxx.com © 2002 LENOXX ELECTRONICS CORP. 2 GERMAK DRIVE CARTERET, N.J. 07008 MADE & PRINTED IN CHINA 16 IB-CDR1902(TA)-WM-E-090902