1
Please read the instruction handbook before using the printer. Keep it close to the
printer for easy reference.
INSTRUCTION HANDBOOK
Laser Printer
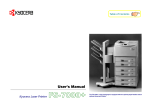
The DP-3600 in this photograph is equipped with two optional paper feeders (ST1000) and an optional document finisher (F-8118).
Introduction
Please read the instruction handbook before using the
printer. Keep it close to the printer for easy reference.
The sections of this handbook and parts of the printer marked with
symbols are safety warnings meant to protect the user, other individuals
and surrounding objects, and ensure correct and safe usage of the printer.
The symbols and their meanings are indicated below.
The symbol indicates that the related section includes information on
prohibited actions. Specifics of the prohibited action are indicated inside
the symbol.
...........[Warning of prohibited action]
DANGER: Indicates that serious injury or even death will very possibly
result from insufficient attention to or incorrect compliance with the related
points.
WARNING: Indicates that serious injury or even death may result from
insufficient attention to or incorrect compliance with the related points.
CAUTION: Indicates that personal injury or mechanical damage may
result from insufficient attention to or incorrect compliance with the related
points.
...........[Disassembly prohibited]
The ● symbol indicates that the related section includes information on
actions which must be performed. Specifics of the required action are
indicated inside the symbol.
...........[Alert of required action]
Symbols
The D symbol indicates that the related section includes safety warnings.
Specific points of attention are indicated inside the symbol.
...........[General warning]
...........[Remove the power plug from the outlet]
...........[Always connect the printer to an outlet with
a ground connection]
...........[Warning of danger of electrical shock]
...........[Warning of high temperature]
Please contact your service representative to order a replacement if the
safety warnings in the handbook are illegible or if the handbook itself is
missing. (fee required)
i
Introduction
Caution
NO LIABILITY IS ASSUMED FOR ANY DAMAGE CAUSED BY IMPROPER INSTALLATION.
Notice on Software_____________________________________________________________________________________
SOFTWARE USED WITH THIS PRINTER MUST SUPPORT THE PRINTER’S NATIVE MODE OR ONE OF ITS EMULATION MODES. The
printer is factory set to emulate the HP LJ 5M/5Si. The emulation mode can be changed by following the procedures described in Chapter 2.
Notice _______________________________________________________________________________________________
The information in this manual is subject to change without notification. Additional pages may be inserted in future editions. The user is asked to
excuse any technical inaccuracies or typographical errors in the present edition.
No responsibility is assumed if accidents occur while the user is following the instructions in this manual. No responsibility is assumed for defects in
the printer’s firmware (contents of its read-only memory).
This manual, any copyrightable subject matter sold or provided with or in connection with the sale of the page printer, are protected by copyright.
All rights are reserved. Copying or other reproduction of all or part of this manual, any copyrightable subject matter without the prior written consent
of our company is prohibited. Any copies made of all or part of this manual, any copyrightable subject must contain the same copyright notice as
the material from which the copying is done.
Regarding Tradenames _________________________________________________________________________________
PRESCRIBE is a registered trademark of Kyocera Corporation. PRESCRIBE 2, PRESCRIBE 2e, KPDL, and KIR are trademarks of Kyocera
Corporation.
Diablo 630 is a product of Xerox Corporation. IBM Proprinter X24E is a product of International Business Machines Corporation. EPSON LQ-850 is
a product of Seiko Epson Corporation. HP LaserJet 5Si and HP LaserJet 5M are products of Hewlett-Packard Company. Hewlett-Packard, PCL,
and PJL are registered trademarks of Hewlett-Packard Company. Centronics is a trade name of Centronics Data Computer Corp. PostScript is a
registered trademark of Adobe Systems Incorporated. Microsoft and Windows are registered trademarks of Microsoft Corporation. Adobe and
Acrobat are trademarks of Adobe Systems Incorporated which may be registered in certain jurisdictions.
This page printer uses PeerlessPrint5 and PeerlessPrintXL to provide the HP LaserJet compatible PCL5 language (PeerlessPrint5) and PCL6
language (PeerlessPrintXL) emulations. PeerlessPrint5 and PeerlessPrintXL are trademarks of The Peerless Group, Redondo Beach, CA 90278,
U.S.A.
This product was developed using the Tornado™ Real Time Operating System and Tools from Wind River Systems.
ii
Introduction
IBM PROGRAM LICENSE AGREEMENT ____________________________________________________________________
THE DEVICE YOU HAVE PURCHASED CONTAINS ONE OR MORE SOFTWARE PROGRAMS (“PROGRAMS”) WHICH BELONG TO
INTERNATIONAL BUSINESS MACHINES CORPORATION (“IBM”). THIS DOCUMENT DEFINES THE TERMS AND CONDITIONS UNDER
WHICH THE SOFTWARE IS BEING LICENSED TO YOU BY IBM. IF YOU DO NOT AGREE WITH THE TERMS AND CONDITIONS OF THIS
LICENSE, THEN WITHIN 14 DAYS AFTER YOUR ACQUISITION OF THE DEVICE YOU MAY RETURN THE DEVICE FOR A FULL REFUND.
IF YOU DO NOT SO RETURN THE DEVICE WITHIN THE 14 DAYS, THEN YOU WILL BE ASSUMED TO HAVE AGREED TO THESE TERMS
AND CONDITIONS.
The Programs are licensed not sold. IBM, or the applicable IBM country organization, grants you a license for the Programs only in the country
where you acquired the Programs. You obtain no rights other than those granted you under this license.
The term “Programs” means the original and all whole or partial copies of it, including modified copies or portions merged into other programs. IBM
retains title to the Programs. IBM owns, or has licensed from the owner, copyrights in the Programs.
1. License
Under this license, you may use the Programs only with the device on which they are installed and transfer possession of the Programs and the
device to another party.
If you transfer the Programs, you must transfer a copy of this license and any other documentation to the other party. Your license is then
terminated. The other party agrees to these terms and conditions by its first use of the Program.
You may not:
1) use, copy, modify, merge, or transfer copies of the Program except as provided in this license;
2) reverse assemble or reverse compile the Program; or
3) sublicense, rent, lease, or assign the Program.
2. Limited Warranty
The Programs are provided “AS IS”.
THERE ARE NO OTHER WARRANTIES COVERING THE PROGRAMS (OR CONDITIONS), EXPRESS OR IMPLIED, INCLUDING, BUT NOT
LIMITED TO, THE IMPLIED WARRANTIES OF MERCHANTABILITY AND FITNESS FOR A PARTICULAR PURPOSE.
Some jurisdictions do not allow the exclusion of implied warranties, so the above exclusion may not apply to you.
SUPPLEMENT TO AGREEMENT FOR SOFTWARE BUNDLING AND DISTRIBUTION FOR ALDC
iii
Introduction
3. Limitation of Remedies
IBM’s entire liability under this license is the following;
1)
For any claim (including fundamental breach), in any form, related in any way to this license, IBM’s liability will be for actual damages only and
will be limited to the greater of:
a)
the equivalent of U.S. $25,000 in your local currency; or
b)
IBM’s then generally available license fee for the Program
This limitation will not apply to claims for bodily injury or damages to real or tangible personal property for which IBM is legally liable.
IBM will not be liable for any lost profits, lost savings, or any incidental damages or other economic consequential damages, even if IBM, or its
authorized supplier, has been advised of the possibility of such damages. IBM will not be liable for any damages claimed by you based on any third
party claim. This limitation of remedies also applies to any developer of Programs supplied to IBM. IBM’s and the developer’s limitations of
remedies are not cumulative. Such developer is an intended beneficiary of this Section. Some jurisdictions do not allow these limitations or
exclusions, so they may not apply to you.
4. General
You may terminate your license at any time. IBM may terminate your license if you fail to comply with the terms and conditions of this license. In
either event, you must destroy all your copies of the Program. You are responsible for payment of any taxes, including personal property taxes,
resulting from this license. Neither party may bring an action, regardless of form, more than two years after the cause of action arose. If you
acquired the Program in the United States, this license is governed by the laws of the State of New York. If you acquired the Program in Canada,
this license is governed by the laws of the Province of Ontario. Otherwise, this license is governed by the laws of the country in which you acquired
the Program.
iv
Introduction
Typeface Trademark Acknowledgement____________________________________________________________________
All resident fonts in this printer are licensed from Bitstream Inc., Cambridge, Massachusetts, U.S.A.
Dutch801, Swiss742, Incised901, ZapfCalligraphic801, ZapfHumanist601, OriginalGaramond, and Chianti are trademarks of Bitstream Inc.
Century Schoolbook, Stymie, and Cooper-Black are trademarks of Kingsley-ATF Type Corporation.
ITC Avant Garde, ITC Benguiat, ITC Bookman, ITC Souvenir, ITC Zapf Chancery, and ITC ZapfDingbats are registered trademarks of International
Typeface Corporation.
Revue is a trademark of Esselte Pendaflex Corporation in the U.S., Letraset Canada Ltd. in Canada, and Esselte Letraset Ltd. elsewhere.
Bitstream Sublicense Agreement _________________________________________________________________________
FONTWARE/TrueDoc developed by BITSTREAM INC. is provided as part of this Printer by our company under license. We, as a Licensee of
BITSTREAM, grants you, the Sublicensee, non-exclusive right to use FONTWARE/TrueDoc installed in this Printer, if you agree to and at all times
comply with the following items:
1.
Ownership
As the Sublicensee, you own the Printer in which FONTWARE/TrueDoc is originally installed, but BITSTREAM retains title to and ownership in the
software program of FONTWARE/TrueDoc. The Sublicense is not a sale of the original software program of FONTWARE/TrueDoc or any portion
or copy of it.
2.
Copy Restrictions
FONTWARE/TrueDoc is copyrighted. Unauthorized copying of FONTWARE/TrueDoc even if modified, merged, or included with other software, is
expressly forbidden. You may be held legally responsible for any copyright in-fringement.
3.
Unauthorized Use
FONTWARE/TrueDoc may not be removed, disclosed and transferred to any third party for any length of time without the prior written consent of
our company or BITSTREAM. Also, you may not modify, adapt, translate, reverse engineer, decompile, or create derivative works based on
FONTWARE/TrueDoc.
4.
Term
This agreement should remain in full force and effect forever thereby allowing the Sublicensee to use the FONTWARE/TrueDoc forever unless the
Sublicensee violates the terms of paragraphs 2. or 3. above. In the event of such violation, this agreement will terminate automatically without
notice from us. Upon termination, you should destroy FONTWARE/TrueDoc and all copies of them, in part and in whole, including modified copies,
if any.
v
Introduction
FCC statement
This device complies with Part 15 of the FCC Rules. Operation is subject to the following two
conditions: (1) This device may not cause harmful interference, and (2) this device must accept any
interference received, including interference that may cause undesired operation.
This equipment has been tested and found to comply with the limits for a Class B digital device,
pursuant to Part 15 of the FCC Rules. These limits are designed to provide reasonable protection
against harmful interference in a residential installation. This equipment generates, uses, and can
radiate radio frequency energy and, if not installed and used in accordance with the instructions, may
cause harmful interference to radio communications. However, there is no guarantee that interference
will not occur in a particular installation. If this equipment does cause harmful interference to radio or
television reception, which can be determined by turning the equipment off and on, the user is
encouraged to try to correct the interference by one or more of the following measures:
·
·
·
·
Reorient or relocate the receiving antenna.
Increase the separation between the equipment and receiver.
Connect the equipment into an outlet on a circuit different from that to which the receiver is
connected.
Consult the dealer or an experienced radio/TV technician for help.
Changes or modifications not expressly approved by the manufacturer for compliance could void the
user’s authority to operate the equipment.
Shielded circular cable should be used for interfacing with the computer.
Caution to user
Any modification without prior permission may cause harmful interference.
If any modification/change is introduced to this equipment without prior permission, we as the
manufacturer cannot guarantee compliance with FCC rules.
To use equipment which does not comply with FCC rules is prohibited.
vi
Introduction
The printer may be optionally installed with the following options:
Conforming to the Class B limits
·
·
·
·
·
·
·
·
ST-1000 Paper Feeder (500 sheets)
EF-100 Envelope Feeder
AD-31 Duplexer
F-8130 Bulk Paper Stacker (3000 sheets)
AS-M8111 Mail Box/Sorter
F-8118 Document Finisher (1800 sheets)
HD-201 Hard Disk Units
Barcord Reader DP-2800/3600 Series
vii
Introduction
Interface connectors
Important note on the interface connectors
Be sure to turn off printer power before connecting or disconnecting an interface cable* to the printer.
For protection against static discharge which may be applied to the printer’s internal electronics
through the interface connector(s), keep any interface connector which is not in use capped using the
protective cap supplied.
* Use shielded interface cable.
Safety information
Laser safety
This printer is certified as a Class 1 laser product under the U.S. Department of Health and Human
Services (DHHS) Radiation Performance Standard according to Radiation Control for Health and
Safety Act of 1968. This means that the printer does not produce hazardous laser radiation. Since
radiation emitted inside the printer is completely confined within protective housings and external
covers, the laser beam cannot escape from the printer during any phase of user operation.
Laser notice
This printer is certified in the U.S. to conform to the requirements of DHHS 21 CFR Subchapter for
Class I (1) laser products, and elsewhere is certified as a Class I laser product conforming to the
requirements of IEC 825.
viii
Introduction
CAUTION
Laser radiation when open. DO NOT STARE INTO BEAM OR VIEW
DIRECTLY WITH OPTICAL INSTRUMENTS.
* Use of controls or adjustments or performance of procedures other than those specified
herein may result in hazardous radiation exposure.
ix
Introduction
CDRH regulations
The Center of Devices and Radiological Health (CDRH) of the U.S. Food and Drug Administration
implemented regulations for laser products on August 2, 1976. These regulations apply to laser
products manufactured after August 1, 1976. Compliance is mandatory for products marketed in the
United States. A label indicating compliance with the CDRH regulations must be attached to laser
products marketed in the United States.
Ozone concentration
The printer generates ozone gas (O3) which may concentrate in the place of installation and cause an
unpleasant smell. To minimize concentration of ozone gas to less than 0.1 ppm, we recommend you
not to install the printer in a confined area where ventilation is blocked.
x
Introduction
Declaration of Conformity (U.S.A.)
Model Number:
Trade Name:
Responsible Party Name:
Address:
Phone/Fax No.:
DP-3600
Mita
MITA COPYSTAR AMERICA,INC.
225 Sand Road, P.O. Box 40008
Fairfield New Jersey 07004-0008
(973)808-8444, (973)882-6000
This device complies with Part 15 of the FCC Rules, Operation is subject to the following two
conditions: (1) This device may not cause harmful interference, and (2) this device must accept any
interference received, including interference that may cause undesired operation.
xi
Introduction
Canadian Department of Communications compliance statement
This Class B digital apparatus complies with Canadian ICES-003.
Avis de conformité aux normes du ministère des Communications du Canada
Cet appareil numérique de la classe B est conforme à la norme NMB-003 du Canada.
Safety & EMI Requirements
IEC
Laser requirements (U.S.A.)
IEC950:1991 (+A1+A2+A3+A4) / (IEC825-1:1993)
FDA Title 21, CFR Chapter 1, Subchapter J
CSA C22.2-950/UL1950:1995 (3rd edition)
FCC
CDC
xii
Rules 47 CFR, Parts 2 and 15, subpart B, Class B
ICES-003 (3rd): 1997, Class B
Introduction
Disclaimer
We shall have no liability or responsibility to customers or any other person or entity with respect to
any liability, loss or damage caused or alleged to be caused directly or indirectly by equipment sold or
furnished by us, including but not limited to, any interruption of service, loss of business or anticipatory
profits, or consequential damages resulting from the use or operation of the equipment or software.
Moving the Printer
When you move the printer:
·
·
·
Move it gently.
Keep it as level as possible, to avoid spilling toner inside the printer.
If you ship the printer, remove the developer unit and ship it separately. Be sure to consult your
dealer before attempting long-distance transportation of the printer.
xiii
Introduction
As an ENERGY STAR Partner, Mita (Mita Copystar America, Inc.) has
Determined that this product meets the ENERGY STAR guidelines for energy
efficiency.
* ENERGY STAR is a U.S. registered mark.
xiv
Introduction
Introduction
The laser printer has many extremely desirable features. It was designed to make a contribution to a
cleaner environment as well as to represent the latest generation of page printer technology.
Superb print quality
With an amorphous silicon drum, microfine ceramic toner, and the latest technology from us such as
KIR 2 function*, this laser printer delivers superb print quality and clarity. (*See page 2-58.)
Ultra long life modules
The main modules in this laser printer such as the drum, developer unit and fuser unit, which are
disposable in conventional printers, are specifically designed for extraordinarily long life and need no
periodic replacement. The drum is made of amorphous silicon which is environmentally benign. The
only maintenance regularly needed therefore is to replenish the toner supply in the developer
approximately every 25,000 printed pages (A4 landscape at a printing rate of approximately 5%) and
to clean some parts inside the printer.
Amorphous silicon drum
Our own unique ceramics technology has led to the development of an extremely hard and durable
drum with extraordinarily long service life. Also, the drum has several excellent photoconductive
properties, such as stability and reliability in varying temperatures, resistance to heat and solvent, etc.,
thus providing superb high resolution printing.
High speed printing
A3-size pages typically print at a rate of 20 pages per minute, B4 at 22 pages per minute, and
A4/letter (landscape feed) at 36 pages per minute (when printing multiple copies of the same page).
(Actual printing time varies depending on what is being printed.)
xv
Introduction
Environmentally benign waste parts
The toner container is made out of a benign, flammable material. (Be sure to dispose of containers
according to local laws and regulations.)
Large paper capacity cassettes
Equipped at the bottom with a two-stage paper feeder, each paper cassette can hold approximately
2
500 sheets (80 g/m , 0.1 mm thickness). There is also a multi-purpose tray with a capacity of
approximately 100 sheets. Paper can be output on a face-down output tray or an optional face-up
output tray. Either output tray can stack approximately 500 sheets of paper.
Scalable printing
This printer allows reductions between various paper sizes using the page setup function.
Bitmapped and scalable typefaces
In addition to its 80 internal bitmap fonts, the printer provides 45 fully-scalable resident typefaces that
are equivalent to HPLJ fonts. The scalable typefaces can be used at any size desired up to
999.75 points, in 0.25-point increments.
KPDL
The printer is equipped with KPDL (our implementation of the PostScript page description language)
and Adobe PostScript Type 1 compatible 35 fonts.
xvi
Introduction
A new printer control language, PRESCRIBE 2e
PRESCRIBE 2e includes advanced graphics capabilities that allow you to print any conceivable outline
shape or solid form. Also provided are a variety of special effects, such as patterned fills, gray-scale
shading, a user-accessible print image model, and multiple page orientations and print directions
within the same page.
PDF417 two-dimensional bar code
The printer includes the capability that allows the user to implement the two-dimensional stacked bar
code symbology, PDF417, or Portable Data File 417. This expanded functionality is achieved by using
the PRESCRIBE 2e language commands.
Automatic rotation of fonts and graphics
Images and scalable fonts are automatically rotated to match the page orientation.
A wide variety of internal symbol sets
The printer supports most Hewlett-Packard LaserJet 5M compatible symbol sets for both bitmap and
scalable fonts.
Display of printer messages in any of four languages
English, French, German, or Italian. As an option it is also possible to download the messages in other
languages. Please contact your dealer.
xvii
Introduction
Memory card slot for option fonts, macros, forms, etc.
Data in the memory card can be selectively read from the printer’s control panel.
Simple Network Management Protocol (SNMP) compliance
Offers network managers complete open system network management.
Large memory capacity
This printer comes standard equipped with 16 MB of memory. This can be extended up to 64 MB of
memory through optional expansion of memory.
Expandable interface
Equipped with slots for installing optional interfaces, the interfaces of this printer can be expanded to
meet the specific operating environment.
xviii
Introduction
Contents
Chapter 1 Safeguards and Installing the Page Printer..................1-1
CAUTION LABELS ................................................................................................. 1- 2
INSTALLATION PRECAUTIONS ........................................................................... 1- 3
PRECAUTIONS FOR USE ..................................................................................... 1- 5
Unpacking and Inspection............................................................................................ 1- 7
Moving the Printer ........................................................................................................ 1-10
Names of Parts ............................................................................................................ 1-11
Setup and Connections................................................................................................ 1-13
The Multi-Purpose Tray ............................................................................................... 1-36
Expanding Memory ...................................................................................................... 1-41
Chapter 2 Operating the Page Printer ............................................2-1
Control panel................................................................................................................ 2- 2
Operating Procedures.................................................................................................. 2-11
Mode Selection Menu .................................................................................................. 2-24
Configuring Interfaces .................................................................................................. 2-27
Emulation Selection ..................................................................................................... 2-28
Reduction (Page Set)................................................................................................... 2-29
RAM DISK.................................................................................................................... 2-32
Virtual Mail Box (VMB) ................................................................................................. 2-34
Memory Card ............................................................................................................... 2-40
Setting the Paper Type ................................................................................................ 2-51
Sleep Timer Setting...................................................................................................... 2-56
Dumping Received Data .............................................................................................. 2-57
KIR 2 Level................................................................................................................... 2-58
Ecoprint Mode .............................................................................................................. 2-60
Resource Protection .................................................................................................... 2-61
Adjusting the Print Density ........................................................................................... 2-62
Setting the Audio Warning (Buzzer)............................................................................. 2-62
xix
Contents
Chapter 3 Fonts ............................................................................... 3-1
Bitmap and Scalable Fonts .......................................................................................... 3- 2
List of Fonts.................................................................................................................. 3- 3
Symbol Set................................................................................................................... 3- 8
Chapter 4 Maintenance ................................................................... 4-1
Toner Container Replacement ..................................................................................... 4- 2
Cleaning ....................................................................................................................... 4-10
Chapter 5 Troubleshooting............................................................. 5-1
General Guide.............................................................................................................. 5- 2
Print Quality Problems ................................................................................................. 5- 4
Indicators and Messages ............................................................................................. 5- 8
Correcting a Paper Jam ............................................................................................... 5-19
Chapter 6 Symbol Set Tables ......................................................... 6-1
Appendix A Printer Specifications.................................................A-1
Appendix B Paper Selection...........................................................B-1
Appendix C Host Computer Interface ............................................C-1
Index......................................................................................... INDEX-1
Mode Select Menu .................................................................Last page
xx
Chapter 1
Safeguards and
Installing the Page
Printer
This chapter uses illustrations to explain the names of parts of this
printer, how to use it, its environmental requirements, and how to
install it.
CAUTION LABELS ............................................................. 1- 2
INSTALLATION PRECAUTION.......................................... 1- 3
PRECAUTIONS FOR USE................................................. 1- 5
Unpacking and Inspection ....................................................... 1- 7
Moving the Printer.................................................................... 1-10
Names of Parts ........................................................................ 1-11
Setup and Connections ........................................................... 1-13
The Multi-Purpose Tray ........................................................... 1-36
Expanding Memory.................................................................. 1-41
1-1
Chapter 1 Safeguards and Installing the Page Printer
CAUTION LABELS
Caution labels have been attached to the printer at the following locations for safety
purposes. BE SUFFICIENTLY CAREFUL to avoid fire or electric shock when removing a
paper jam or when replacing toner.
Label 1
High temperature inside. Do not
touch parts in this area, because
there is a danger of getting
burned. ........................................
NOTE: DO NOT remove these labels.
1-2
INSTALLATION PRECAUTIONS
INSTALLATION PRECAUTIONS
■ Environment
CAUTION
• Avoid placing the printer on or in locations which are unstable or
not level. Such locations may cause the printer to fall down or fall
over. This type of situation presents a danger of personal injury
or damage to the printer. ................................................................
• Avoid locations with humidity or dust and dirt. If dust or dirt
become attached to the power plug, clean the plug to avoid the
danger of fire or electrical shock.....................................................
• Avoid locations near radiators, heaters, or other heat sources, or
locations near flammable items, to avoid the danger of fire. ..........
• To keep the printer cool and facilitate changing of parts and
maintenance, allow access space as shown below.
Leave adequate space, especially around the rear cover, to allow
air to be properly ventilated out of the printer. ................................
30 cm (11.8 inches)
20 cm (7.9 inches)
Other precautions
• Adverse environmental conditions may affect the safe operation
and performance of the printer. Install in an air-conditioned room
(recommended room temperature: around 20°C, humidity:
around 65%RH) and avoid the following locations when selecting
a site for the printer.
. Avoid locations near a window or with exposure to direct
sunlight.
. Avoid locations with vibrations.
. Avoid locations with drastic temperature fluctuations.
. Avoid locations with direct exposure to hot or cold air.
. Avoid poorly ventilated locations.
. Ammonia or other harmful fumes. (If you are planning to
fumigate the room, or make liberal use of insecticide, remove
the printer first!)
. Low air pressure, e.g., located more than 2000 meters (6500
feet) above sea level.
• The printer will work best if it is installed in a location that is:
. Near the computer
If the parallel interface is used to connect the printer to the
computer, the connecting cable should be shielded type and
not be longer than 3 meters (10 feet).
. Level and well supported
Place the printer on a steady table or desk. Do not place the
printer on an unstable cart, stand, or table. The printer may fall,
causing injury, or serious damage to the printer.
45 cm (17.7 inches)
45 cm (17.9 inches)
60 cm (23.6 inches)
1-3
Chapter 1 Safeguards and Installing the Page Printer
■ Power supply/Grounding the printer
WARNING
• DO NOT use a power supply with a voltage other than that
specified. Avoid multiple connections in the same outlet. These
types of situations present a danger of fire or electrical shock.......
• The printer should not be the same power circuit as an air
conditioner, fluorescent light, copier, or shredder, because these
devices generate electrical noise on the power line. If it must
share a power circuit with equipment like this, a light -frequency
noise filter or isolation transformer is advisable. (Filters and
transformers are available commercially.)
• Plug the power cord securely into the outlet. If metallic objects
come in contact with the prongs on the plug, it may cause a fire
or electric shock..............................................................................
• If the power from the outlet itself appears to be unstable, a line
stabilizer should be used. In places where the voltage tends to
fluctuate, it may be necessary to install a voltage regulator.
• Always connect the printer to an outlet with a ground connection
to avoid the danger of fire or electrical shock in case of an electric
short. If an earth connection is not possible, contact your service
representative. ................................................................................
• As the disconnect device is not incorporated in the printer’s AC
primary circuit, an easy accessible socket outlet must be
provided near the equipment.
Other precautions
• Connect the power plug to the closest outlet possible to the
printer.
• Near an AC wall outlet, preferably one that can be used for the
printer alone.
• Only use this printer under the voltage listed on the serial No.
label attached to the rear panel of the printer.
• If the printer is used with the optional bulk paper stacker (F-8130)
or document finisher (F-8118), in order to avoid short-circuiting, it
should be ensure that these devices are plugged securely into
their respective power outlets.
• Be sure to connect the ground wire for the printer’s power supply
to the ground terminal of the power outlet, to a copper pole buried
at least 65 cm (25 inches) in the ground, or to a water pipe
approved by the water department for use as a ground.
• Never use a gas pipe as a ground, as this may result in fire.
• The outlet should be earthed, or an adapter should be used.
• If an extension cord is used, the total length of the power cord
plus extension should be 5 meters (17 feet) or less.
1-4
■ Handling of plastic bags
WARNING
• Keep the plastic bags that are used with the printer away from
children. The plastic may cling to their nose and mouth causing
suffocation. .....................................................................................
PRECAUTIONS FOR USE
PRECAUTIONS FOR USE
■ Cautions when using the printer
WARNING
• DO NOT place metallic objects or containers with water (flower
vases, flower pots, cups, etc.) on or near the printer. This type of
situation presents a danger of fire or electrical shock should they
fall inside. .......................................................................................
• DO NOT remove any of the covers from the printer as there is a
danger of electrical shock from high voltage parts inside the
printer. ............................................................................................
• DO NOT damage, break or attempt to repair the power cord. DO
NOT place heavy objects on the cord, pull it, bend it
unnecessarily or cause any other type of damage.
These types of situations present a danger of fire or electrical
shock..............................................................................................
• When adding memory, ALWAYS remove the power plug from the
outlet. If this operation is performed with the power still attached,
there is a danger of electrical shock. .............................................
• DO NOT remove or connect the power plug with wet hands, as
there is a danger of electrical shock. ............................................
• For safety purposes, ALWAYS remove the power plug from the
outlet when cleaning the main charger. .........................................
• ALWAYS contact your service representative for maintenance or
repair of internal parts. ...................................................................
CAUTION
• DO NOT pull the power cord when removing it from the outlet. If
the power cord is pulled, the wires may become broken and there
is a danger of fire or electrical shock. (ALWAYS grasp the power
plug when removing the power cord from the outlet.) ....................
• NEVER attempt to repair or disassemble the printer or its parts as
there is a danger of fire, electrical shock or damage to the laser.
If the laser beam escapes, there is a danger of it causing
blindness. .......................................................................................
• ALWAYS remove the power plug from the outlet when moving
the printer. If the power cord is damaged, there is a danger of fire
or electrical shock. .........................................................................
• If the printer becomes excessively hot, smoke appears from the
printer, there is an odd smell, or any other abnormal situation
occurs, there is a danger of fire or electrical shock. Turn the
power switch OFF (O) immediately, remove the power plug from
the outlet and contact your service representative. ......................
• If the printer will not be used for a short period of time (overnight,
etc.), turn the power switch OFF (O).
If it will not be used for an extended period of time (vacations,
etc.), remove the power plug from the outlet for safety purposes
during the time the printer is not in use. .........................................
• If anything harmful (paper clips, water, other fluids, etc.) falls into
the printer, turn the power switch OFF (O) immediately. Next,
remove the power plug from the outlet to avoid the danger of fire
or electrical shock. Then contact your service representative. .....
• ALWAYS hold the designated parts only when lifting or moving
the printer. ......................................................................................
• For safety purposes, ALWAYS remove the power plug from the
outlet when performing cleaning operations. .................................
1-5
Chapter 1 Safeguards and Installing the Page Printer
• If dust accumulates within the printer, there is a danger of fire or
other trouble. It is therefore recommended that you consult with
your service representative in regard to cleaning of internal parts.
This is particularly effective if accomplished prior to seasons of
high humidity. Consult with your service representative in regard
to the cost of cleaning the internal parts of the printer. ..................
Other precautions
• DO NOT place heavy objects on the printer or cause other
damage to the printer.
• DO NOT open the front cover, turn off the power switch, or pull
out the power plug during Printing.
• During Printing, some ozone is released, but the amount does not
cause any ill effect to one's health. If, however, the printer is used
over a long period of time in a poorly ventilated room or when
making an extremely large number of prints, the smell may
become unpleasant. To maintain the appropriate environment for
copy work, it is suggested that the room be properly ventilated.
• When lifting or moving the printer, contact your service
representative.
• DO NOT touch electrical parts, such as connectors or printed
circuit boards. They could be damaged by static electricity.
■ Cautions when handling consumables
CAUTION
• Avoid inhalation, ingestion, skin or eye contact. If ingestion
occurs, dilute stomach contents thoroughly with water and seek
medical treatment. If skin contact occurs, wash with soap and
water. If contact with eyes occurs, flush thoroughly with water
and seek medical treatment. ..........................................................
• Prolonged inhalation of excessive dusts may cause lung damage.
Use of this product, as intended, does not result in inhalation of
excessive dusts..............................................................................
• Do not incinerate toner and toner containers. Dangerous sparks
may cause burn. ............................................................................
• Keep away from children................................................................
Other precautions
• Always read the safety instructions which are included in the box
or printed on the container when handling consumables.
• Dispose of the toner or toner containers in accordance with
Federal, State and Local rules and regulations.
• Store consumables in a cool, dark location.
• DO NOT attempt to perform any operations not explained in this
handbook.
• CAUTION: Use of controls or adjustments or performance of
procedures other than those specified herein may result in
hazardous radiation exposure.
1-6
• If the printer will not be used for an extended period of time,
remove the paper from the cassette, return it to its original
package and reseal it.
Unpacking and Inspection
Unpacking and Inspection
Remove the printer from the package according to the steps given below. (See figure on next page.)
After removing the printer, check that nothing is missing against the list of packaged contents.
CAUTION
Be sure that two or more people unpack and install the printer. Be very
careful as the printer is heavy and can hurt your back.
1.
Place the box containing the printer on a flat, stable surface.
2.
Remove the User’s Manual, Toner Kit and other items located on top of the spacer and remove
the spacer.
3.
Carefully remove the printer.
List of packaged contents
The printer and paper feeder are packaged in separate boxes.
1-7
Chapter 1 Safeguards and Installing the Page Printer
Contents of Printer Box and How to Remove Them
(1) Power Cord
(2) Drum Unit Cover*
(3) Toner Kit (toner container, cleaning cloth)
(4) User’s manual and CD-ROM including the printer drivers and manuals.
Remove the
tape used for
packaging as
shown in the
diagram rather
than cutting with
a cutter. This
tape can be
reused when
repackaging the
printer.
(1)
(2)
(3)
(4)
* This drum unit cover is necessary
during maintenance to remove
the drum unit.
1-8
Unpacking and Inspection
How to Remove the Paper Feeder
1-9
Chapter 1 Safeguards and Installing the Page Printer
Moving the Printer
Note the following items when moving the printer.
CAUTION
Be sure that two or more people lift the printer. Grasp the handholds
. indicated in the figure below and lift carefully so as not to hurt your back.
Be sure to lift the printer gently, keeping it horizontal, to prevent toner from soiling the inside of the
printer.
When transporting the printer a long distance, contact the your dealer from which you purchased the
printer.
1-10
Names of Parts
Names of Parts
Front View/Side View
Power Switch
Paper Full Sensor
Face-Down Output Tray
Vent
Paper Stopper
Control Panel
Connector for Optional
Feeder*
MP (Multi-Purpose) Tray
Side Cover
Front Cover
Paper Feeder
Side Cover
Handholds
Upper Paper
Feed Cassette
Lower Paper
Feed Cassette
Paper Feeder
Face-Up Output Tray
Handholds
*
To prevent static electricity, be sure to cover the optional
feeder connector not being used with the protective caps
supplied with the printer.
1-11
Chapter 1 Safeguards and Installing the Page Printer
Rear View
Memory Card Slot
Interior View
Option Interface/Hard Disk Unit Slot Cover (OPT2)
Toner Container Release Lever (Green)
Parallel Interface
Connector* (
)
Top Cover
Toner
Container
Power Cord
Connector
Drum Unit Release
Lever (Grey)
Option Unit (Service use only)
Lock Lever
Connector
(Green)
Drum Unit
Fuser Unit
Rear Panel
Serial Interface
(RS-232C/RS-422A)
Connector* (IOIOI)
Charger Unit
Option Interface Slot Cover (OPT1)
Cleaning Knob
(Green)
Handle for Pulling Out Paper Feed
Unit (Green)
Paper Feed Unit
*
1-12
To prevent static electricity, be sure to cover interface
connectors not being used with the protective caps
supplied with the printer.
Developer Unit
Developer Unit Release Lever (Grey)
(Service use only)
Setup and Connections
Setup and Connections
Set up the printer according to the following steps.
1.
2.
3.
4.
5.
6.
7.
8.
9.
10.
11.
12.
13.
Install the printer on the paper feeder. ............................................................................ Page 1-14
Open the top cover. ........................................................................................................ Page 1-15
Install the toner container. .............................................................................................. Page 1-16
Close the top cover. ........................................................................................................ Page 1-19
Adjust the paper guide on the paper feed cassette. ....................................................... Page 1-19
Add paper. ...................................................................................................................... Page 1-22
Open the paper stopper on the face-down tray (if required). .......................................... Page 1-24
Open the face-up output tray (when the tray is being used). .......................................... Page 1-24
Connect the printer to the computer. .............................................................................. Page 1-25
Attach the power cord. .................................................................................................... Page 1-27
Test the printer. ............................................................................................................... Page 1-28
Test the interface with the computer. .............................................................................. Page 1-29
Install the printer driver. .................................................................................................. Page 1-30
1-13
Chapter 1 Safeguards and Installing the Page Printer
1.
Install the printer on the paper feeder.
Align the installation holes on the bottom of the printer with the positioning pins on top of the paper
feeder and slowly lower the printer into place. Check that the connector on top of the paper feeder is
properly connected to the connector on the bottom of the printer. Casters (CA-28) capable of being
mounted on the paper feeder are available as an option.
Connector
Positioning Pins
1-14
Setup and Connections
2.
Open the top cover.
Remove the packing tape stuck to the printer and gently lift the top cover as far as it will go.
Top Cover
1-15
Chapter 1 Safeguards and Installing the Page Printer
3.
Install the toner container.
1.
Take the toner container from the toner kit. Shake the toner container with the protective seal
facing up as shown in the figure five times or more to thoroughly mix the toner inside.
Toner Container
Shake five or more
times.
Protective Seal
2.
Carefully peal off the protective seal.
Protective Seal
1-16
Setup and Connections
3.
Check that the two toner container release levers are positioned to the right (released) as shown
in the figure. If not positioned to the right, slide them to the right until they stop.
Toner Container Release Levers
(positioned to right)
4.
Align the ends of the toner container with the grooves to the left and right inside the printer as
shown in the figure and install.
Toner Container
Grooves
1-17
Chapter 1 Safeguards and Installing the Page Printer
5.
Check that the toner container is installed in the correct position, and push forcefully on the top of
the toner container.
6.
After the toner container is installed, set the two toner container release levers to the left position
(fixed).
Toner Container Release Levers
(Be sure to set to the left and fix the container in place.)
1-18
Setup and Connections
4.
Close the top cover.
Close the top cover.
Top Cover
5.
Adjust the paper guide on the paper feed cassette.
The paper feed cassette attached to the paper feeder located at the bottom of the printer can be used to
supply standard paper from A5 size up to ledger size by adjusting its paper guide and paper stopper
position. The paper feed cassette is shipped from the factory set to A4 or letter.
The positions for each paper size are indicated inside the paper feed cassette.
Note______________________________________________________________________
A4 and letter size can only be fed in the landscape direction.
1-19
Chapter 1 Safeguards and Installing the Page Printer
Paper feed cassette position
Paper Guide
: Paper Size Indicator Position
Note: Be sure to remove the size
indicator plates which are
temporarily attached before
using the printer.
Paper Stopper
Paper Guide
1-20
Front Side
1.
Pull out the paper feed cassette until it stops.
2.
Open the paper feed roller located on the right side of the cassette until it stops as shown in the
figure.
3.
Next, adjust the position of the paper stopper located on the left side of the cassette. While
holding down the lever (green) on the paper guide, slide the paper stopper to the desired paper
size.
4.
Adjust the position of the paper guides located at the front and rear of the paper feed cassette.
Align the paper guides to the desired paper size by pressing the knobs (green) on the paper
guides so they slide.
Setup and Connections
Paper Limit Indicator
Paper Stopper
3.
1.
Paper Feed Cassette
4.
2.
Paper Guide
Do not touch the rubber
part of the paper feed
unit.
1-21
Chapter 1 Safeguards and Installing the Page Printer
6.
Add paper.
Try as much as possible to use fresh paper which has just been opened. Paper which has been stored
long periods contains moisture and may result in sheets sticking together and/or paper jams. For
specifications on the paper which can be used with this printer, please refer to Appendix B Paper
Selection.
1.
1.
Square the edges of the paper and insert into the paper feed cassette as shown in the figure. Be
sure that the paper does not exceed the paper limit indicators located on the left and right of the
paper guide (see previous page). The paper feed cassette can hold up to about 500 sheets
(0.1 mm thickness per sheet). Printing is performed on the underside of the paper.
2.
Return the opened paper feed roller to its original position.
2.
Do not touch the rubber part
of the paper feed unit.
1-22
Setup and Connections
3.
Close the paper feed cassette.
Paper is added to the second paper feed cassette in the same way.
4.
Size indicator plates are also supplied. Place these on the front of the cassette according to the
paper size inside to make it easy to know the current paper size.
À
Size Indicator
Plate
Á
Â
1-23
Chapter 1 Safeguards and Installing the Page Printer
7.
Open the paper stopper on the face-down tray (if required).
Raise the paper stopper on the face-down tray.
Paper Stopper
8.
Open the face-up output tray (when the tray is being used).
Use the face-up output tray when you wish paper to be stacked with the printed side facing up
(reverse order). The face-up output tray is located on the left side of the printer. Use it by opening as
shown in the figure.
Face-up output tray
1-24
Setup and Connections
9.
Connect the printer to the computer.
CAUTION
Before performing this step, be sure to turn off the printer's power switch
and unplug the power plug from the power outlet. Failure to do so may
result in electric shock.
A standard Centronics parallel interface connector (
) and RS-232C/RS-422A serial interface
connector (IOIOI) are located on the rear side of the printer. For pin connections, please refer to
Appendix C.
Parallel Interface Connector (
)
Serial Interface (RS-232C/RS-422A)
Connector (IOIOI)
1-25
Chapter 1 Safeguards and Installing the Page Printer
Parallel Interface Connection
1.
Plug one end of the printer cable into the connector on the printer marked with a
symbol.
2.
Close the clips on both sides to fix the connector in place.
(parallel)
Clips
Printer Cable
3.
Plug the other end of the printer cable into the computer’s parallel (Centronics) interface
connector. This connector is usually marked PRINTER. For details, please refer to the hardware
manual for the computer.
Serial Interface Connection
The printer is shipped from the factory with its serial interface set to RS-232C mode, but it can also be set
to RS-422A mode in accordance with how it will be used. For details, please refer to Appendix C.
1-26
1.
Plug one end of the cable into the connector marked IOIOI on the printer.
2.
Tighten the screws on both sides securely.
3.
Plug the other end of the cable into the computer's serial interface connector. For details,
please refer to the hardware manual for the computer.
Setup and Connections
10. Attach the power cord.
CAUTION
Be sure the printer's power switch is turned off.
Note______________________________________________________________________
Only use the power cord supplied with the printer.
1.
Plug the power cord into the power cord connector on the rear side of the printer.
Power Cord Connector
Power Cord
2.
Connect the other end of the power cord into a power outlet.
WARNING
Be sure to connect the ground wire of the printer to ground.
1-27
Chapter 1 Safeguards and Installing the Page Printer
11. Test the printer.
Use the following procedure to test the printer and print out a status page indicating factory settings.
For details on the indicators and keys on the printer’s control panel, please refer to Chapter 2
Control Panel.
1.
Turn on the printer's power switch.
It does not matter whether the computer's power is on or off. Self test will be displayed in
the message display of the printer.
Notes_____________________________________________________________________
·
·
2.
When the printer’s power is turned on after a toner container has been installed for the first time,
the printer will display the message Please wait for about five minutes until it becomes ready
for printing (Ready). Note that the printer is not broken.
An error message of the form XXX Open will be displayed in the printer’s message display
unless all covers on the printer are properly closed. If this happens, check that the part indicated in
the error message is properly closed.
Wait until the ON LINE indicator lights and Ready appears in the message display.
If the ON LINE indicator is off, make it light by pressing the ON LINE key.
3.
Press the STATUS key. Information such as the memory allocation currently set for the printer
will be printed on a page in a list.
If the status page prints without problems, you can tell that the developer unit and paper feed cassette
are installed properly. For details on the contents of the status page, see Chapter 2.
1-28
Setup and Connections
12. Test the interface with the computer.
In order to check that the printer and the computer are properly connected you must print by sending
an actual command from the computer.
1.
Turn on the printer's power switch and turn on the computer’s power as well.
2.
Wait until the message display switches from Self test to Ready.
3.
Check that the ON LINE indicator is lit. If it is not lit, make it light by pressing the ON LINE key.
4.
Enter and execute the following command at the DOS prompt on the computer screen.
ECHO !R! STAT; EXIT;>PRN
If this causes the printer to print a status page (a page on which current printer settings are printed), then
the printer and computer are properly connected. If this does not print a status page, check that the
printer cable is properly connected. The cable or one of the connectors may also be broken.
Notes on Application Software
The computer and printer have been successfully connected by the procedures up to this point. In
order to print from software run on the computer, it is necessary to install a printer driver on the
computer to which the printer is connected. After the printer driver is installed, be sure to make proper
printer settings from within the software.
1-29
Chapter 1 Safeguards and Installing the Page Printer
13. Install the printer driver.
A CD-ROM containing a printer driver for Windows (Windows 3.1, Windows 95/98 and Windows NT
3.51/4.0) is supplied with this printer. Once this printer driver is installed on the computer, it is
possible to make various settings for this printer from within Windows applications. It is also possible
to control options and printing from within Windows.
For each of these operating systems, the printer driver is located in the folder on the CD-ROM. The
steps for installing this driver are given below. Read this in conjunction with the manual supplied with
Windows.
For details on how to install the printer driver under Windows NT, read the file README.TXT in the
CD-ROM's root directory.
Installing Under Windows 95/Windows 98
1.
Insert the supplied CD-ROM into the CD-ROM drive of the computer.
2.
Click on “Start” with the mouse on the Windows95/98 Task Bar, and align the cursor with
“Settings.” Click on “Printers” among the items displayed.
Start Button
Windows 95
1-30
Windows 98
Setup and Connections
3.
The printer folder will open. Double click on “Add printer.”
Windows 95
Windows 98
4.
The Printer Wizard screen will appear. Click on “Next >.”
5.
A screen for selecting the printer to be connected will appear. Select the most
printer and click on “Next.”
6.
Next, “Click the manufacturer and model of your printer....” screen will appear. At this point,
select “Have Disk…” located at the lower right. (See the figure for Step 7.)
7.
A screen for installing from floppy disk will appear. Enter “[CD-ROM Drive Name]:\” as the
source from which to copy the file and click on “OK.”
appropriate
1-31
Chapter 1 Safeguards and Installing the Page Printer
8. Select “DP-3600,” click on “Next >,” and follow the on-screen instructions to install.
Once the
driver has been properly installed, the printer icon will be added to the printers
folder.
Note______________________________________________________________________
When printing under Windows 95/98, be sure to set the emulation of this printer to HP LJ 5M/5Si
(default setting).
1-32
Setup and Connections
Installing Under Windows 3.1
1.
Insert the supplied CD-ROM into the CD-ROM drive of the computer.
2.
Double click on the “Control Panel”.
3.
Double click on “Printers.”
1-33
Chapter 1 Safeguards and Installing the Page Printer
4.
Click on “Add >>.”
5.
A screen for “List of Printers:” will appear. From the choices, click on “Install Unlisted or Updated
Printer.”
4.
5.
1-34
Setup and Connections
6.
Click on “Install….”
7.
The install printer menu will appear. Enter “[CD-ROM Drive Name]: \” and click on “OK.”
6.
8.
Select “DP-3600” from the printers displayed and click on “OK.” Once the driver has
been installed, close the Control Panel by clicking on “Close.”
1-35
Chapter 1 Safeguards and Installing the Page Printer
The Multi-Purpose Tray
The multi-purpose tray is incorporated on the right side of the printer. It can be used in one of two
modes: first mode or cassette mode. The multi-purpose tray can hold about 100 sheets of paper
(0.1 mm thickness).
First Mode (Automatic Manual Feeding)
The printer automatically feeds any paper placed on the multi-purpose tray even if another paper
source is selected. After all paper in the multi-purpose tray is printed, paper will be fed from the paper
source originally set. (This is the factory set default.)
Cassette Mode
Approximately 100 sheets of paper can be continuously fed.
For details on paper which can be used with this printer, please refer to Appendix B.
If first mode is set with the multi-purpose tray as the current cassette, printing is carried out using
custom size paper feed timing regardless of the size setting for the multi-purpose tray.
Duplex printing from the Multi-Purpose Tray
In first mode, be sure to set the MP tray to the same paper size, paper type and feed direction as set
for the current cassette. If the paper size, type or feed direction differs, a paper jam may result. Also
note that it is not possible to select the multi-purpose tray as the current cassette and perform duplex
printing. We therefore recommend that duplex printing be performed from the paper cassette. An
optional duplex unit is required to perform duplex printing.
1-36
The Multi-Purpose Tray
Feeding from the Multi-Purpose Tray
1.
Open the multi-purpose tray as shown in the figure.
Multi-purpose tray
2.
Open the sub tray and adjust the paper guides according to the width of the paper to be fed.
Paper guides
Sub tray
Note:
The paper guides must be set to the widest
position when closing the multi-purpose tray.
1-37
Chapter 1 Safeguards and Installing the Page Printer
3.
Check that the message Ready is displayed in the printer's message display, and that the ON
LINE indicator is lit.
4.
Set the paper source to the multi-purpose tray by pressing the FEED key until the message
display indicates MP tray. The multi-purpose tray indicator on the control panel will flash, and
Add paper will be displayed.
5.
Press the MODE key. Then use + or – keys to display Paper handling
6.
Press the 4 (Form Feed) key to display >MP tray size or > MP tray type, then
press the ENTER key so you can set the paper size or type to be fed from the multi-purpose
tray. See Mode Select Menu at the end of this manual.
>.
The manner in which paper is fed in each of these modes is explained below.
First mode
1.
Press the MODE key. Then use + or – keys to display Paper handling
2.
Press the 4 (Form Feed) key to display >MP tray mode.
3.
After pressing the ENTER key, the mode display is changed by pressing the +
Display First and then press the ENTER key.
>MP tray mode
>.
and – keys.
First
4.
Press the EXIT key.
Note______________________________________________________________________
In this mode, the paper source indicator on the control panel does not change while paper is being fed
from the multi-purpose tray.
1-38
The Multi-Purpose Tray
Cassette Mode
1.
Press the MODE key to display Paper handling
2.
Press the 4 (Form Feed) key to display >MP tray mode.
3.
After pressing the ENTER key, the mode display is changed by pressing the + and – keys.
Display Cassette and then press the ENTER key.
>.
>MP tray mode
Cassette
4.
Press the EXIT key.
5.
Insert the paper so that it is aligned straight in the tray as far as it will go. About 100 sheets
2
(0.1 mm thickness, 80 g/m ) can be inserted at one time. Do not load paper above the paper
limit mark.
Paper limit mark
6.
Ready will appear on the message display.
1-39
Chapter 1 Safeguards and Installing the Page Printer
Feeding Envelopes
Envelopes should be fed face up. Be sure to set the print direction from the Mode Select Menu. Insert
the envelopes in the tray as far as they will go. Do not load envelopes above the paper limit mark.
Paper limit mark
Envelopes
For details on suitable envelope paper quality and shape, see Appendix B. Be sure to use suitable
envelopes as print quality may be reduced.
For the envelope sizes which can be used with this printer, see the table on page 2-5.
1-40
Expanding Memory
Expanding Memory
The printer comes standard equipped with 16 MB of main memory. However, more complex pages
can be printed and processing speed increased by expanding the printer’s memory. There are two
slots available in the printer for expanding memory. (One 16 MB SIMM is installed in one of the slots
when the printer is shipped from the factory.) Printer memory can be expanded to up to 64 MB by
installing optional extended memory chips (SIMMs) in these slots.
Notes_____________________________________________________________________
·
·
The expansion memory should be installed only by an authorized dealer or a certified technician.
We shall not be liable for damage due to improper installation of the expansion memory.
This printer possesses two SIMM sockets. One 16 MB SIMM is installed in one of the sockets
when the printer is shipped from the factory. When expanding the printer’s memory to its maximum
of 64 MB, it is necessary to remove this SIMM which was installed at the factory.
1-41
Chapter 1 Safeguards and Installing the Page Printer
The description given below is intended for service personnel.
Precautions on the Handling of Extended SIMMs
Static electricity which may accumulate in the human body through walking on carpets or other such
surfaces is the enemy of SIMMs loaded with many semiconductor chips. Pay attention to the following
things before installation to protect memory chips against damage from static electricity.
·
·
·
Do not remove the SIMMs from their anti-static bag until immediately prior to installation.
Eliminate any static electricity from your body through grounding before touching the SIMMs.
Be absolutely sure when handling the SIMMs to hold them by the substrate without touching the
printed connector section.
Yes
No
1-42
Expanding Memory
Installing SIMMs
Insert the SIMM or SIMMs into the dedicated sockets on the printer's main board.
WARNING
Take precautions that no foreign substances such as metal chips or liquid
get inside the printer during the installation process. Operation of the
printer during the presence of a foreign substance may lead to fire or
electric shock.
CAUTION
Be sure to turn off the printer's power and disconnect all cables when
installing SIMMs in the printer. Failure to do so may lead to electric shock.
1-43
Chapter 1 Safeguards and Installing the Page Printer
1.
Turn off the printer's power and disconnect the power cord and all cables connected to the
printer.
2.
Remove the six screws on the printer's rear cover, and remove the rear panel. There are two
sockets for installing SIMMs located on the main board.
Screws
Sockets for Installing
SIMMs
Main Board
Rear Panel
1-44
Expanding Memory
3.
Remove the SIMM or SIMMs from the package.
À
Insert the connector end of the SIMM into the socket.
Á
Carefully push the board upright until it snaps into place. Make sure that the catches at
the ends of the socket fit into the holes at the ends of the SIMM board.
À
Á
SIMM
Catch
Socket
Note______________________________________________________________________
SIMMs may be installed in either slot regardless of their memory capacity.
1-45
Chapter 1 Safeguards and Installing the Page Printer
To remove a SIMM, carefully pull the end catches slightly outwards and tilt the SIMM as shown,
then pull the SIMM out of the socket.
4.
After the SIMMs have been installed, reattach the rear cover on the printer and tighten all six
screws securely.
After SIMMs have been installed in the printer, use the following procedure to check that installation
has been performed properly.
1-46
Expanding Memory
Testing Extended Memory
1.
Check that the power switch is off, plug the power cord into the printer, and turn the power on.
2.
Wait for the printer's ON LINE indicator to light and the message display to read Ready, and
press the STATUS key.
3.
If installation has been performed properly, a status page will be printed. Check the Memory in
the upper right. Information on the SIMMs installed in slot 1 and slot 2 is shown here. There is
no problem if total memory has increased. (The printer is shipped from the factory with 16384
KB [16 MB] of memory.)
1-47
Chapter 2
Operating the Page
Printer
This chapter explains the printer's control panel and operating
procedures. It also covers operations which use the memory
card.
Control panel ...................................................................... 2- 2
Operating Procedures......................................................... 2- 11
Mode Selection Menu ......................................................... 2- 24
Configuring Interfaces......................................................... 2- 27
Emulation Selection ............................................................ 2- 28
Reduction (Page Set) ......................................................... 2- 29
RAM DISK .......................................................................... 2- 32
Virtual Mail Box (VMB)........................................................ 2- 34
Memory Card ...................................................................... 2- 40
Setting the Paper Type ....................................................... 2- 51
Sleep Timer Setting ............................................................ 2- 56
Dumping Received Data..................................................... 2- 57
KIR 2 Level ......................................................................... 2- 58
Ecoprint Mode..................................................................... 2- 60
Resource Protection ........................................................... 2- 61
Adjusting the Print Density.................................................. 2- 62
Setting the Audio Warning (Buzzer) ................................... 2- 62
2-1
Chapter 2 Operating the Page Printer
Control Panel
The printer control panel consists of indicators, a message display, and various keys.
Symbolic Indicators
FORM FEED/4Key
ON LINE Key
DATA
ON LINE
STACK
CANCEL
CANCEL Key
CONTINUE/3Key
ATTENTION
FEED
CONTINUE
INTERFACE
RESOLUTION
Message Display
STACK Key
FEED Key
+ key
SIZE
COPIES
FORM FEED
3
4
EXIT
ENTER
MODE
STATUS
MODE/
EXIT Key
– key
ENTER/STATUS key
Nearly all of the printer modes set using keys on the control panel are automatically recorded within
the printer, and are not lost even if power is turned off. The previous operational mode is therefore
restored when the printer's power is turned on again.
2-2
Control Panel
Message Display
The message display displays the printer's operational mode. Messages which are displayed and
their meaning are given in the table below.
Message
Meaning
Self test
The printer is self-testing and warming up after power-up and is not ready to
print.
Please wait
The printer is warming up and is not ready to print.
Ready
The printer is ready to print
Processing
The printer is processing print data or in the middle of printing.
Waiting
The last page remains unprinted. The printer waits awhile and eventually
generates a form feed allowing the last page to be printed. (The length of
time depends on the form feed timeout setting.)
The printing will begin immediately when the Form Feed key is pressed.
If a memory card is being used this can indicate the printer is waiting for data
to be written.
Sleeping
The printer is in Sleep mode. The printer wakes from Sleep mode whenever
a key on the control panel is pressed, the cover is opened or closed, or data
is received. The printer then warms up and goes online. (The time that it
takes the printer to enter Sleep mode depends on the Sleep Timer setting.)
Cancelling data
Data inside the printer is being canceled.
FormFeed TimeOut
An automatic form feed has been generated.
Paper loading
After the paper feed cassette has been loaded into the paper feeder, the
paper feed position within the cassette is being readied.
2-3
Chapter 2 Operating the Page Printer
Interface Indicator
The interface indicator indicates the interface over which data is currently being received or was last
received. When an optional interface such as a network interface is installed in the printer, this
indicator displays the information in the table below depending on the interface used.
Display
PAR
SER
OPT1
OPT2
Description
Parallel interface
Serial interface (RS-232C/RS-422A)
Optional interface 1
Optional interface 2
These indicators will flash while the printer is receiving data and continue flashing until the interface is
released even if data transmission is finished. The printer gives priority to data coming in over the
interface corresponding to the blinking indicator.
Resolution Indicator
This shows the current printing resolution. Resolution is set to 600 dpi (dot-per-inch), HP LJ 5M/5Si
emulation, when shipped from the factory. The printer's resolution can be selected using the mode
select menu (See the menu hierarchy given at the end of this manual.).
2-4
Control Panel
Paper Size Indicator
The paper size indicator indicates the paper size of the cassette currently installed in the printer
(factory setting is A3) or the paper size currently set for the multi-purpose tray. During printing the
paper size specified by the computer in data being sent to the printer will be displayed. (For example,
if the paper size in the cassette is B5 and reduced printing from A4 to B5 has been specified, B5 will
be displayed before and after printing but A4 will be displayed during printing.)
The following abbreviations are used to indicate the paper sizes.
Indicator
A3
A4
A5
A6
B4
B5
B6
LT
LD
LG
MO
BU
DL
*
Paper Size
ISO A3 (29.7 ´ 42 cm)
ISO A4 (21 ´ 29.7 cm)
ISO A5 (14.8 ´ 21 cm)
ISO A6 (10.5 ´ 14.8 cm)*
JIS B4 (25.7 ´ 36.4 cm)
JIS B5 (18.2 ´ 25.7 cm)
JIS B6 (12.8 ´ 18.2 cm)*
Letter (8-1/2 ´ 11 inches)
Ledger (11 ´ 17 inches)
Legal (8-1/2 ´ 14 inches)
Monarch (3-7/8 ´ 7-1/2 inches)*
Business (4-1/8 ´ 9-1/2 inches)*
ISO DL (11 ´ 22 cm)*
Indicator
C4
C5
b5
EX
#6
#9
CU
HA
OH
Paper Size
ISO C4 (22.9 ´ 32.4 cm)*
ISO C5 (16.2 ´ 22.9 cm)*
ISO B5 (17.6 ´ 25 cm)*
Executive (7-1/4 ´ 10-1/2 inches)*
[only the multi-purpose tray feeding]
Commercial 6-3/4
(3-5/8 ´ 6-1/2 inches)*
Commercial 9
(3-7/8 ´ 8-7/8 inches)*
CUSTOM (11.7 x 17.7 inches)
Japanese Postcard (10 x 14.8 cm)*
Return Postcard (20 x 14.8 cm)*
Only when the multi-purpose tray or EF-100 is installed.
Note______________________________________________________________________
Settings made by application software have priority over settings made from the control panel.
2-5
Chapter 2 Operating the Page Printer
Copy Indicator
Indicates the number of copies set in the current interface (001 – 999), and the number is reduced as
printing proceeds.
Indicator
Refer to the table below for the names and meanings of indicators on the control panel.
Indicators on the Control Panel
Indicator
2-6
Name
Description
Face-down tray
indicator
Flashing: Indicates that paper is jammed near the facedown output tray.
Lit: indicates when printed pages are delivered to the facedown output tray.
Face-up tray
indicator
Flashing: Indicates that paper is jammed near the face-up
output tray.
Lit: indicates when printed pages are delivered to the faceup output tray.
Toner indicator
Flashing: Indicates there is insufficient toner
Lit: Indicates that the printer is out of toner. Replace with
a new toner container.
Cassette feed
indicator
Flashing: Indicates that the cassette is not installed
properly or there is no paper in the cassette or that paper
is jammed in the paper feed cassette.
Lit: Indicates paper is being fed from the paper feeder
(ST-1000).
Control Panel
Indicator
Name
Description
Multi-purpose feed
indicator
Flashing: Indicates that there is no paper in the tray or that
paper is jammed near the multi-purpose tray.
Lit: Indicates when paper is fed from the multi-purpose
feed tray.
Optional paper feeder
indicator
Duplex printing
indicator
ON LINE
DATA
ATTENTION
Flashing: Indicates that there is no paper in the optional
envelope feeder (EF-100); or that paper is jammed near
the paper feed opening.
Lit: Indicates that paper is being fed from the optional
envelope feeder (EF-100) .
Flashing: Indicates that paper is jammed in the optional
duplex printing unit (AD-31).
Lit: Indicates that the printer is printing in duplex mode
when the optional duplex printing unit (AD-31) is installed.
On-line indicator
Lit: indicates that the printer is on-line. The printer prints
received data.
Off: The printer is offline. The printer stores but does not
print received data.
Data indicator
Flashing: Indicates data transfer is taking place.
Lit: Indicates either that data is being processed, or that
data is being written to the memory card.
Attention indicator
This indicator indicates a problem that may be resolved by
the user.
Off: Indicates operations are normal.
Flashing: Indicates that the printer needs maintenance.
Check the message display for details and take
appropriate action.
Lit: This indicates that the printer cannot print due to no
paper in the cassette or similar reason. Check the
message display for details and take appropriate action.
2-7
Chapter 2 Operating the Page Printer
About the LED Indicator for the Paper Feed Cassettes
The size indicator plate on the front of the paper feed cassettes is illuminated by LED. This LED
indicates the status of the cassettes as follows depending on whether it is on, off or flashing.
LED Status
Flashing quickly
Flashing slowly
Lit
Out
Paper size indicators
2-8
Meaning
Paper feed from this cassette is jammed.
This cassette is out of paper.
This cassette is currently selected.
· The cassette is not inserted properly.
· The cassette is not currently selected.
Control Panel
Control Keys
ON LINE
DATA
ATTENTION
CONTINUE
FORM FEED
3
CANCEL
STACK
FEED
INTERFACE
RESOLUTION
SIZE
COPIES
EXIT
ENTER
MODE
STATUS
The functions of each key are given in the table below.
Key
Function
ON LINE key
Pauses and restarts printing. Data can be sent even while printing is paused.
(See page 2-16.)
CANCEL key
(1) This key can be used to cancel mode selection during mode selection or cancel printing
during printing. (See page 2-17.)
(2) It also cancels the alarm buzzer when it goes off. (See page 2-62.)
STACK key
This key selects whether to output paper face-down (printed side down) or face-up (printed
side up). It can also select optional output locations when corresponding options are
installed. (See page 2-14.)
FEED key
(1) This key selects the paper feed cassette or multi-purpose tray as the paper source. It
can also select an optional if one is installed. (See page 2-15.)
(2) Select the alternative paper source when Use alternative ? is displayed.
2-9
Chapter 2 Operating the Page Printer
Key
Function
CONTINUE/
3key
(1) This key forcibly cancels errors and resume printing when printing is halted due to errors
such as memory overflow.
(2) This key functions as the 3key during mode selection. It moves upward in the mode
select menu and moves the cursor left.
EXIT/MODE key
(1) This key interrupts settings when pressed during mode selection. (See page 2-23)
(2) This key is used to start and end the next mode selection and make settings.
This key is used in relation to the interface, emulation, fonts, character code set, memory
card operations and optional hardware, etc. (For details, see the menu hierarchy given at
the end of this manual.)
+ key
– key
These keys are used to select menus and change setting values while making settings with
the MODE key. Holding either key down activates an auto-repeat function causing menus
to continuously change.
FORM FEED
and 4key
(1) This key is used to forcibly print a form feed on the last page when a print timeout
occurs.
(2) This key functions as the 4key during mode selection. It moves downward in the menu
hierarchy and moves the cursor right (See page 2-23).
ENTER/
STATUS key
(1) This key confirms settings selected during mode selection.
(2) This key prints a status page (online). (See page 2-19.)
(3) This key determines the paper source while Use alternative? is being
displayed. (See page 5-10.)
Notes_____________________________________________________________________
·
·
2-10
Menus set using these keys are enabled for the interface currently indicated on the message
display.
Settings made from the control panel may be automatically switched to different settings by
application software being used.
Operating Procedures
Operating Procedures
This section explains basic operations of the printer and procedures leading up to and including
printing.
Operating Precautions
·
·
Do not turn off power during printing. This may result in a paper jam or damage to the printer.
·
·
Do not move the printer during printing.
·
·
·
·
Do not open covers on the printer or covers of optional equipment or open the paper feed cassette
during printing.
Refrain from frequently plugging and unplugging the power plug from the power outlet even when
power is turned off.
Do not plug or unplug the power cord or printer cables while the printer's power is turned on.
Be sure that the printer's power is off when inserting or removing a memory card. Inserting or
removing a memory card while the printer's power is on may result in damage to the memory card
and/or the printer.
Be sure to carefully attach and detach paper feed cassettes and carefully open and close the top
cover.
Be sure to unplug the power cord from the power outlet and take precautions against dust
gathering on the printer by draping a cover over it when it is not in use.
2-11
Chapter 2 Operating the Page Printer
Switching Power On
Check that the power cord is securely plugged in at both ends. Check that the printer is connected to
the computer (See page 1-28).
1. Push the power switch to the ON ( | ) position.
Power Switch
2.
Wait for the printer to warm up. During warm-up the message display indicates Self test.
3.
At the end of the warm-up period, the ON LINE indicator lights, and the message display
indicates Ready.
The printer is now ready to print.
Note______________________________________________________________________
If an error is detected while the printer is warming up, the ATTENTION indicator will light. A message
concerning the error will be displayed in the message display. (See Chapter 4.)
CAUTION
If the printer will not be used for a short period of time (overnight, etc.), turn
the power switch OFF (O). If it will not be used for an extended period of
time (vacations, etc.), remove the power plug from the outlet for safety
purposes during the time the printer is not in use.
2-12
Operating Procedures
Basic Printing Operations
The flow of basic operations to print is given below. Keys on the control panel are explained after that.
For details on using the MODE key, be sure to read the section “Mode Select Menu” at the end of this
manual in conjunction with this section.
1. Use the MODE key to set an emulation for the printer which conforms to the software being used.
This printer is shipped from the factory with emulation set to HP LJ 5M/5Si.
2. Use the MODE key to select the font to use and paper direction.
3. Use the FEED key to select paper feeding from the cassette or the multi-purpose tray.
4. Use the STACK key to select the destination output tray.
5. Use the MODE key to set the number of printed copies.
6. Check that the message Ready appears in the message display and that the ON LINE indicator
lights, then make preparations to print from the computer.
Press the FORM FEED key if, after printing, the message Waiting appears in the message
display.
2-13
Chapter 2 Operating the Page Printer
Selecting the Output Tray
Printed paper can be output on either the face-up output tray or the face-down output tray. Selecting the
face-up output tray will cause paper to be stacked with the printed surface facing up. Selecting the facedown output tray will cause paper to be stacked with the printed surface facing down. Normally it Is
more convenient to use the face-down output tray.
When the message Ready or Add paper appears in the message display, the output tray will be
switched every time the STACK key is pressed and the selected destination will appear in the
message display as follows.
Face-up tray
Face-down tray
The output tray currently selected will also flash on the indicator on the front panel.
Face-Down Tray Indicator
Face-Up Tray Indicator
2-14
Operating Procedures
Feed Selection
Use the FEED key to select whether to feed paper from one of the paper feed cassettes or from the
multi-purpose tray. If optional paper feeders (ST-1000 or EF-100) are installed, any of these can also
be selected.
The FEED key can be used whenever the message display indicates Ready or Add paper.
Press the FEED key. The selection cycles and is momentarily displayed in the message display as:
Cassette 1
Cassette 2
Cassette 3
Cassette 4
Cassette 5
Cassette 6
EF
MP tray
(Paper feeder's top cassette)
(Paper feeder's bottom cassette)
(Displayed when an optional feeder is installed [upper
cassette])
(Displayed when an optional feeder is installed [lower cassette])
(Displayed when a second optional feeder is installed [upper
cassette])
(Displayed when a second optional feeder is installed [lower
cassette])
(Displayed when an EF-100 is installed)
(Printer's multi-purpose tray)
The paper size and media type set for the paper source are also displayed in addition to the above
displays.
The cassette indicator corresponding to the selected cassette on the control panel will flash. Selecting
the paper feeder (ST-1000) cassette will also light the ready indicator on the front of that cassette.
Paper feed selections can also be made using the PRESCRIBE 2e PSRC command.
2-15
Chapter 2 Operating the Page Printer
MP (multi-purpose) tray indicator
Cassette indicator
Switching Online/Offline
After printing starts, it is possible to interrupt printing to check whether the print job is coming out as
anticipated.
Pressing the ON LINE key during data processing will cause the ON LINE indicator to go out and
pressing it during printing will cause the printer to stop after the page currently being printed is
finished. During processing means anytime the messages Processing, Waiting or
FormFeed TimeOut are being displayed in the message display.
The printer continues to receive data even while the printer is offline while the message
Processing is displayed.
Press the ON LINE key to bring the printer online again. The printer will come online and the
ON LINE indicator will light.
Read the section below on how to cancel printing.
2-16
Operating Procedures
Canceling Printing
Perform the following procedure when you wish to cancel printing after it has begun.
1.
Check if the message Processing is displayed in the message display.
2.
Press the ON LINE key to take the printer offline.
3.
Perform the necessary procedure on the computer to halt printing.
4.
Press the CANCEL key.
5.
The message Print Cancel? will appear in the message display and the interface to be
canceled will be displayed.
The following interfaces may be displayed.
Parallel
Serial
Option 1 (only when an optional interface is installed)
Option 2 (only when an optional interface is installed)
6.
Selecting the interface to cancel using the + or – key and then press the ENTER key. Printing
from the interface selected will be stopped.
A few pages may be printed even after the CANCEL key is pressed as remaining data received
before the CANCEL key was pressed is printed.
The message Print Cancel? Current job will also be displayed when the CANCEL
key is pressed for the purpose of stopping the printing of status pages or font lists from the
control panel. When the ENTER key is pressed, the message Cancelling data appears
in the message display and printing stops after the printer finishes printing the current page.
2-17
Chapter 2 Operating the Page Printer
Press the CANCEL key again if you wish to stop the cancellation of printing.
Press the ON LINE key to put the printer back online to continue with other print jobs.
Notes_____________________________________________________________________
·
·
2-18
Canceling data from the computer using the CANCEL key will restore temporary settings to their
default values. (The same status resulting from executing the PRESCRIBE 2e RES command.)
It is impossible to cancel printing of just one side when printing in duplex mode using an optional
duplex printing unit (AD-31).
Operating Procedures
Status Printout
It is possible to print out and check the printer's current status including unit emulation, font, printing
range, and memory usage.
1. Check that the ON LINE indicator lit and that the message Ready is displayed in the message
display.
2. Press the STATUS key. The message display will read Processing, and a status page will
be printed. After it is finished printing, the message display will return to Ready.
An example of a printed status page is shown on the next page. Note that information on an actual
status page may differ slightly from this example.
2-19
Chapter 2 Operating the Page Printer
Sample Status Page
1
2
4
5
3
6
7
8
9
2-20
Operating Procedures
1 — Software version
This information shows the software version and date of issue of the printer.
2 — Hardware information
This information shows the currently selected paper feed source (indicated by an asterisk), paper size,
paper type, and main settings of the printer.
3 — Page information
This information shows the currently selected resolution and number of copies.
4 — Memory usage
This information shows the amount of total memory installed in the printer and the amount of currently
available memory.
5 — Installation Options
This shows the options currently installed in the printer.
6 — Emulation
This shows all available emulations and the currently selected emulation (marked with an asterisk).
The printer is shipped from the factory set to HP LJ 5M/5Si emulation.
7 — Interface information
This information shows all interfaces installed in the printer and the currently selected interface.
2-21
Chapter 2 Operating the Page Printer
8 — Fonts at startup (for each interface)
This shows the font automatically selected when the printer starts up (default font). It is possible to set
different fonts for the parallel interface and the serial interface. The figure on page 2-20 shows default
settings. The font is set to "1" (Courier bitmap font).
This also shows font information similar to the column below if an optional interface is installed.
9 — KIR test pattern
This is used when setting the printer's KIR 2 mode. For details, see page 2-58.
10 — User font list
Following the status page, font listings are output which show the fonts which have been downloaded
to the printer from the computer.
10
2-22
Operating Procedures
Form Feed
Depending on the software, the message Waiting may be displayed in the message display when
you get to the end of a print job. This occurs when the software does not issue a final form feed to the
printer indicating the end of the print data. If you wait awhile, FormFeed TimeOut will be
displayed and the last page will be printed automatically. Pressing the FORM FEED key allows you to
finish printing immediately.
1.
Check if the message display reads Waiting.
2.
Press the FORM FEED key. The message display will now read Processing and the last
page will print.
Note______________________________________________________________________
The Waiting display may also appear due to interruptions in printed data while the computer is
processing data. Pressing the FORM FEED key unnecessarily when the message display reads
Waiting will result in a form feed.
Mode Selection
The MODE key is used when making various mode settings and selections. For details, see the
section Mode Selection Menu beginning on the next page.
2-23
Chapter 2 Operating the Page Printer
Mode Selection Menu
This section explains the menu hierarchy used for all menus which can be set and selected using the
MODE key. The MODE key can be used to display all of the menus in the table below. This mode
selection menu conforms to the menu hierarchy given at the end of this manual.
Pressing the MODE key initially displays menus at the top of the hierarchy.
Use the + and – keys to move between menus in the same level. The + key shows the next menu,
while the – key shows the previous one. Change levels by using the 3and 4keys. The 4key moves to
lower levels (sub-menus), while the 3key moves to higher levels.
Mode Selection Menu List
Menu
Interface
Description
>
Default Setting
Selects the interface for which settings are to be made.
Settings from the mode select menu are applied to the
interface selected here.
Parallel
•
Depending on the computer connected, you can select
from any of Nibble (high), Auto, Normal,
High Speed.
Nibble (high)
•
The following settings can be made for the serial
interface.
Baud rate
Data bit
Stop bit
Parity
Protocol
Barcode mode
9600
8
1
None
DTR (pos.) & XON
Off
(Continued on next page)
2-24
Mode Selection Menu
Menu
Description
Default Setting
Number of copies
Set the number of copies to be printed. This can be set up to 999.
001
Emulation
>
HP LJ 5M/5Si
Font
>
Switches the printer emulation.
The mode can be further set if KC-GL emulation is set.
Selects the print font.
Page set
Size reduction settings [See page 29]
[CS] ® [CS]
Page orientation
Print direction settings [See page 29]
Portrait
Opt. ROM
>*
HARD DISK
>*
Reads information from the option ROM installed in the
printer’s main board.
The following settings can be made from sub-menus
when an optional hard disk unit is installed.
(For details, please read the hard disk unit instruction manual.)
The following settings can be made from sub-menus when no
optional hard disk is installed and this mode is set to On.
RAM DISK mode >*
MEMORY CARD
>*
Paper handling >
Bitmap
—
Off
The following operations can be performed from sub-menus
on memory card installed in the printer.
The following operations can be performed from sub-menus
on paper type.
—
Multi-purpose tray mode
Paper size for multi-purpose tray
Paper type for multi-purpose tray
Paper size for optional envelope feeder (EF-100) *
Paper type for optional envelope feeder (EF-100) *
Paper type for Cassette 1– 6
Duplex printing mode*
Optional stacker mode*
Override A4/Letter
Set up the custom paper type
Reset the custom paper type
First
A4 or Letter
Rough
DL or Business
Envelope
Plain
None
Sorter
Off
—
—
(Continued on next page)
2-25
Chapter 2 Operating the Page Printer
Menu
Others
Description
>
Default Setting
The following sub-menus can be displayed by pressing the
4 key and then the + or – key.
Message language setting
Automatic form feed timeout setting
Sleep timer setting [See page 2-56.]
Receive data damping [See page 2-57.]
Print a list of resident fonts
Printer reset
Line feed setting [See page 2-29.]
Carriage return setting
Display total number of printed pages
KIR 2 mode setting
Ecoprint Mode setting
Page protection mode
Resolution setting
Resource setting
Print density setting
Alarm (buzzer) setting
Service (for service personnel)
English
30 sec.
30 min.
—
—
—
LF only
CR only
—
On
Off
Auto
600
Off
03
On
—
*: These items are available only when the printer is installed with the applicable option unit/kit.
Main items within these menus are explained beginning on the next page. For details on other menus,
see the Mode Select Menu diagram at the end of this manual.
2-26
Configuring Interfaces
Configuring Interfaces
The printer is equipped with both a parallel and serial interface. Independent settings can be made for
each interface. Optional interfaces can also be installed.
To configure each interface, press the MODE key and use the + or – key to select the interface you
wish to make settings for.
Note______________________________________________________________________
This interface selection does not select which interface data will be received from. The printer
automatically selects that interface.
Parallel Interface
The parallel interface mode of this printer supports a bi-directional/high-speed mode. Normally, this
interface is used under the default setting Nibble (high), see Appendix C. After setting the
interface, be sure to reset the printer or turn the power off at least once. The new setting will be
enabled thereafter.
2-27
Chapter 2 Operating the Page Printer
Emulation Selection
The following emulations can be selected for this printer. The emulation selected is stored even while
the printer's power is off.
Line printer
IBM Proprinter
Diablo 630
EPSON LQ-850
HP LJ 5M/5Si (Default setting)
KPDL
KC-GL
KC-GL Emulation
The following settings can be made from the sub-menu when KC-GL emulation is selected.
2-28
Display
Description
> KC-GL Pen width
The width of pens (1) through (8) can be set in 1-dot increments from 01 to 99.
After selecting the pen on this sub-menu, you can also display and select the
width set for that pen on a lower menu.
> KC GL Page set
Any of the following page sizes can be set: A2, A1, A0, B3, B2, B1, B0,
SPSZ (custom size specified using the SPSZ command). The selected page
size will be automatically reduced to the actual paper size being used.
Reduction (Page Set)
Reduction (Page Set)
Make settings on the page set menu to print at a reduced size. This menu is used to set the source
paper size and the paper size to use after reduction. These settings can be made from within
programs or files using the PRESCRIBE 2e SPSZ command.
Notes_____________________________________________________________________
·
·
Printed results when making reductions differ from equivalent size printing. Sometimes the line
width of characters may not be consistent or lines may appear in figures or image patterns.
Landscape feeding while making reductions is possible from the multi-purpose tray in first mode.
Bring up the page set menu. The following display will appear.
Page set
[CS] ® [CS]
Target size indicator
Source size indicator
Source size indicator···This is the paper size before reduction.
This must be the same as the paper size set for print data from the computer.
Target size indicator···This is the paper size after reduction.
This must be the same as the paper size set for the feed cassette.
2-29
Chapter 2 Operating the Page Printer
It is possible to set the following paper sizes (envelope) when using the PRESCRIBE 2e SPSZ
command. The message display will show the messages given in the following table.
Source Size-Target Size Combinations
Source Size Indicator
Target Size Indicator
Reduction/Enlargement Ratio
CS
CS
CS 98%
100%
98%
LG
Legal size
(8.5 ´ 14 inches)
LG
LG 98%
100%
98%
LT
Letter size
(8.5 ´ 11 inches)
LT
A4
LT 98%
100%
94%
98%
LD
Ledger size
(12 ´ 15.5 inches)
LD
LD 98%
100%
98%
A5
(14.8 ´ 21 cm)
A5
A5 98%
100%
98%
B5
(18.2 x 25.7 cm)
B5
A5
B5 98%
100%
81%
98%
(Continued on next page)
2-30
Reduction (Page Set)
Source Size Indicator
Target Size Indicator
Reduction/Enlargement Ratio
A4
(21 ´ 29.7 cm)
A4
LT
B5
A5
A4 98%
100%
94%
86%
70%
98%
B4
(25.7 ´ 36.4 cm)
B4
B5
A4
B4 98%
100%
70%
81%
98%
A3
(29.7 ´ 42 cm)
A3
A4
B4
A3 98%
100%
70%
86%
98%
2-31
Chapter 2 Operating the Page Printer
RAM DISK
A RAM DISK can be set up as a virtual media device by setting a given amount of the total printer
memory as the RAM DISK. This can then be used for reading and writing data just as with a memory
card or as a virtual mail box function (see page 2-34). Note however that data written to the RAM
DISK is lost if the printer is reset or its power turned off. RAM DISK settings can be made from the
printer's control panel.
Notes_____________________________________________________________________
·
·
The RAM DISK is set from the printer's user memory. The printer's printing speed may therefore
drop or insufficient memory errors result depending on the value of the RAM DISK setting.
RAM DISK functions cannot be used if an optional hard disk unit is installed.
Setting the RAM DISK Size
1. Press the MODE key.
2. Press the + or – key and select RAM DISK mode >.
3. The default setting is Off. Pressing the ENTER key will cause a ? to flash. Press the + or – keys
to display On and then press the ENTER key.
4. Press the 4 key to display >RAM DISK size.
2-32
RAM DISK
5. Press the ENTER key again, and change the RAM DISK size using the + or – key. It is not possible
to make a setting that exceeds total printer memory. The default value for the RAM DISK is the
total printer memory minus 9 MB. This parameter may be set anywhere from 01 to 55 depending
on the available printer memory. Press the EXIT key if you want to cancel the setting.
6. Once the desired RAM DISK size is displayed, press the ENTER key.
7. Press the EXIT key. Then turn the printer's power off and on again. The setting will be activated
after restart.
RAM DISK Operations
The following operations are available with the RAM DISK.
·
·
·
·
·
·
Read Data
Write Data
Delete Data
Print a List of Data Names
Print Accumulated VMB Data
Print VMB List
Except for printing accumulated VMB data and printing a VMB list, procedures for all operations are
the same as for a memory card. Please see the memory card item for the given procedure.
2-33
Chapter 2 Operating the Page Printer
Virtual Mail Box (VMB)
The Virtual Mail Box (VMB) function is a mail box function for the printer which does not require a
physical mail box to be attached to the printer. The virtual mail box function can be used when RAM
DISK mode is On or when an optional hard disk unit is installed on the printer. This manual describes
how to use the virtual mail box with a RAM DISK.
With a virtual mail box, unlike a physical mailbox, data sent from the computer is stored in the RAM
DISK as rasterized data. This stored data accumulates in a numbered virtual output tray. When it is
time to actually print the data, it is printed by specifying the virtual output tray number where the data is
stored using the printer's control panel or an optional barcode reader.
Note______________________________________________________________________
If all the data in a virtual output tray is printed, all data in that tray will be deleted. If printing is halted by
pressing the CANCEL key during printing, data in that tray will not be deleted. Data is not deleted unless
all data in the virtual output tray is printed.
2-34
·
Locked mailbox
Allowing a password to be set for the virtual output tray, this feature makes the printout of
confidential documents easy.
·
Multilevel mailbox
Supporting up to 255 virtual output trays, mail boxes can be allocated at the individual level rather
than by the user's job title or group.
·
Large capacity mailbox
There is no limit on the size per virtual output tray. Since the only limit is on the total size of all
trays, all of the RAM DISK can be used.
Virtual Mail Box (VMB)
Outputting to a VMB
When sending data to a virtual output tray set within the RAM DISK, make this setting from the printer
driver. With this setting, data can be sent by specifying the desired virtual output tray number. It is also
possible to assign a name to a virtual output tray and send data by specifying that name. (For details on
this setting, please refer to the help documentation for the printer driver.)
When data is sent by specifying a virtual output tray, printing to paper is not performed at the time data is
sent. Sent data accumulates in the virtual output trays of the RAM DISK. For details on printing
accumulated data, please see the next item.
Print Accumulated VMB Data
This function prints VMB data accumulated in a virtual output tray.
1. Select RAM DISK mode on the printer's Mode Select Menu and display >Print VMB
data Tray. The VMB tray number will appear in the location marked by #'s below, while the
VMB tray name will appear in the location marked by %'s.
>Print VMB data
Tray###:%%%%%%%
2. Pressing the ENTER key will cause a ? to flash.
>Print VMB data
Tray###?%%%%%%%
3. Each time the + or – keys are pressed, the VMB data display will change. Press the CANCEL key if
you want to halt printing. The ? display will disappear.
2-35
Chapter 2 Operating the Page Printer
4. Display the VMB data you want to print. Pressing the ENTER key will cause Processing to be
displayed and the data will be printed.
Print Accumulated VMB Data with a Password
This function prints VMB data protected by a password which has accumulated in a virtual output tray.
1. Display >Print VMB data Tray. The VMB tray number will appear in the location marked
by #'s below, while the VMB tray name will appear in the location marked by %'s.
>Print VMB data
Tray###:%%%%%%%
2. Pressing the ENTER key will cause a ? to flash.
>Print VMB data
Tray###?%%%%%%%
3. Each time the + or – keys are pressed, the VMB data display will change.
Press the CANCEL key if you want to halt printing. The ? display will disappear.
4. If a password is set for the VMB data you want to print, the message display will change to
>User ID? 00001 and the printer will standby to accept a password. The cursor will blink in
the one's place of the displayed number. Enter the correct password. Use the 3 and 4 keys to
change places and the + or – keys to change the displayed number. Passwords from 00001 to
65535 can be entered.
2-36
Virtual Mail Box (VMB)
5. Press the ENTER key once the correct password is entered. Processing will be displayed
and the data will be printed. If the password was incorrect, an error message will be displayed.
(See page 5-11.) Pressing the CONTINUE key will return the printer to Ready status.
Note that the password entered here is reset (returns to 00001) when this mode is exited.
Print VMB Accumulated Data List
This feature prints a list of VMB data accumulated in the RAM DISK.
1. Display >List of VMB.
>List of VMB
2. Pressing the ENTER key will cause a ? to flash.
>List of VMB ?
Press the CANCEL key if you want to halt printing. The ? display will disappear.
3. Pressing the ENTER key will cause Processing to be displayed and the VMB data list to be
printed.
2-37
Chapter 2 Operating the Page Printer
An actual VMB list printout will differ slightly from sample given above.
Information regarding virtual output trays which are set will be displayed in the virtual mail box list. A mark is shown with the bin number for virtual output trays which contain data. If a password is set for a
virtual output tray, there is no barcode shown for that virtual output tray. Also, "FULL!!" will be shown
for virtual output trays for which there was an error when data was sent to them. A VMB ERROR LOG
will be printed when data from such a virtual output tray is printed.
2-38
Virtual Mail Box (VMB)
Operations for Using a Barcode Reader
If an optional barcode reader (Barcord Reader DP-28/3600 Series) is connected to the printer, it is
possible to print data within a virtual output tray using the barcode in the list. Select the barcode for
"Output (1)" in the upper right using the barcode reader and then select the barcode for the virtual
output tray you want to print. If you want to delete the data in a tray, select "Delete (2)" also in the
upper right and then select the barcode for the virtual output tray you want to delete. Note that all data
in the tray will be deleted.
For detailed operating procedures for the barcode reader, please read the instructions included with
the barcode reader.
2-39
Chapter 2 Operating the Page Printer
Memory Card
This printer is equipped with a memory card slot. This allows, for example, the use of fonts other than
internal fonts by using an optional font card. If a JEIDA Ver. 4.2/PCMCIA Ver. 2.1 memory card is used,
it is possible to read, write and delete data and format the memory card.
Note______________________________________________________________________
Only 32 MB or less flash or S-RAM type memory card conforming to JEIDA Ver. 4.2/PCMCIA Ver. 2.1
can be written or formatted by this printer.
It is possible to set the partitions on the memory card which you wish to execute for the printer at
power-on by using the PRESCRIBE 2e FRPO I0 command. For details on the FRPO command,
please read the Programming Manual on the supplied CD-ROM.
A font card can be read from the control panel or read automatically upon power-on or printer reset
when a font card is inserted in the printer.
Inserting Memory Card
Carefully insert the memory card as far as it will go with the top side facing right (back side of the
printer).
Memory Card Slot
Memory Card
2-40
Memory Card
Notes_____________________________________________________________________
Follow the precautions below when handling a memory card.
·
·
·
·
·
·
·
·
·
·
A memory card is sensitive to static electricity. Before handling a memory card, be sure to
eliminate any static electricity which may have built up on your body or clothing by touching a
metallic object.
Use a flash memory card or S-RAM memory card conforming to JEIDA Ver. 4.2/PCMCIA Ver. 2.1
which are approved by us.
Be sure that its power is off when inserting or removing a memory card.
Do not insert a memory card into the slot with undue force.
Do not bend a memory card.
Do not drop a memory card or subject them to shock.
Do not splash water or other liquids on a memory card.
Do not place a memory card near fires or heat sources.
Do not subject a memory card to direct sunlight.
Store a memory card in their protective case when not using them.
Operating a Memory Card
The following operations on a memory card inserted into the printer's memory card slot are possible.
·
·
·
·
·
·
·
Reading Fonts
Reading Macros
Reading Data
Writing Data
Deleting Data
Formatting Memory Card
Printing a List of Data Names (Partitions)
2-41
Chapter 2 Operating the Page Printer
Note that only reading fonts and printing a list of partitions are possible when a font card is inserted.
The following sections explain each of these operations.
Each operation is described below.
Reading Fonts from a Memory Card
Fonts can be read into the printer's internal memory from an optional font card. The font read can
then be selected from the printer's control panel. A font card is automatically read into the printer
when the printer's power is turned on. The operation described here is performed while the message
display reads Ready.
1.
Check that the font card is inserted into the memory card slot. Bring up the menu >Read
fonts on the message display. This display only appears if a font card is inserted.
2.
Press the ENTER key. ? will appear.
Press the CANCEL key to stop reading fonts.
2-42
3.
Pressing the ENTER key again will cause Processing to appear in the lower part of the
message display and font data to be read from the font card.
4.
After fonts have been read, the message display will return to >Read fonts.
5.
Pressing the EXIT key will cause the message display to return to Ready.
Memory Card
Reading Macros from a Memory Card
Macro data on a memory card can be registered on the printer. Registered macro data can be used
just like macro data located in printer memory. If a memory card already containing macro data is
inserted in the printer, that macro data will be read into the printer automatically when the printer's
power is turned on.
The operation described here is performed when a memory card is inserted while the message display
reads Ready.
Note______________________________________________________________________
Macro data on a memory card has no effect on printer memory.
1.
Check that the memory card containing macro data is inserted. Bring up the menu >Read
macro on the message display. This display only appears if a memory card containing macro
data is inserted.
2.
Press the ENTER key. ? will appear.
Press the CANCEL key to stop reading macro data.
3.
Pressing the ENTER key again will cause Processing to appear in the lower part of the
message display and macro data to be read from the memory card.
4.
After macro data has been read, the message display will return to >Read macro.
5.
Pressing the EXIT key will cause the message display to return to Ready.
2-43
Chapter 2 Operating the Page Printer
Notes_____________________________________________________________________
·
·
If the name of a macro on the memory card is the same as that in printer memory, the macro data
on the memory card with the conflicting name will not be registered.
Registered macro data will be lost if the memory card is pulled out. Re-execute >Read macro if
this happens.
Reading Data (Partitions) from a Memory Card
Specified data (partitions) on a memory card can be read into printer memory.
1.
Bring up the menu >Read data on the message display.
This display only appears if there is data on the memory card.
2.
Press the ENTER key. ? will flash.
3.
You can scroll through data names on the memory card one by one by pressing the + key.
Press the CANCEL key to stop reading data.
4.
Press the ENTER key while the desired data name is being displayed. Processing will
appear in the message display and the selected data will be read into the printer.
After data has been read, the message display will return to Ready.
2-44
Memory Card
Writing Data (Partitions) to a Memory Card
Data sent from the computer can be written on a memory card. Data written on the card can be read
into printer memory by key operations from the control panel of the printer.
Assuming the card has enough memory capacity, up to 127 partitions can be written on a single card.
Partitions written on the card are automatically assigned names, which can be checked by printing out
a partition list.
Check that the memory card can be written (that write-protection is released).
1.
Bring up the menu >Write data on the message display.
2.
Press the ENTER key. ? will appear.
3.
Pressing the ENTER key again will cause Processing to appear in the message display
followed by Waiting.
Processing
Waiting
Press the CANCEL key to cancel writing data.
4.
With the printer now set, send data from the computer to the printer.
[Example]
Sending the file TEST.TXT to the printer from the computer (DOS mode).
COPY TEST.TXT PRN
The message display will change to Processing when data is received and will change back
to Waiting when reception is finished.
2-45
Chapter 2 Operating the Page Printer
5.
Check that the message display has changed to Waiting and press the FORM FEED key.
The printer will automatically print the data just written (example below). This printout can be
used to check the name (partition name) under which data was written and confirm that it was
written properly.
S
l
o
t
n
u
m
b
e
r
:
Slot name for the memory card (only A is supported)
Data type: Data type (only 2 is supported)
Partition name: Name of the partition (data) written
Write data length: Size of the partition data written (in units of bytes)
After printing is finished, the message display will return to Ready.
2-46
Memory Card
Deleting Data from a Memory Card
It is possible to delete data names on a memory card one at a time. Check that the memory card can be
written (that write-protection is released).
1.
Bring up the menu >Delete data on the message display. This display only appears if the
memory card contains data.
2.
Press the ENTER key. ? will flash and a data name will appear after it.
The ? will flash, and a data name will appear.
>Delete data
? (data name)
3.
You can scroll through data names on the memory card one by one by pressing the + key.
Press the CANCEL key to cancel this operation.
4.
Press ENTER key while the data name you wish to delete is shown. The message display will
change to Processing, and the printer will automatically print a partition list. Use this to
check that the specified partition has been deleted properly.
After the partition list is printed, the message display will return to Ready.
Formatting Memory Card
It is necessary to first format a new memory card before it can be used by the printer. A formatted
memory card can then be written with data.
Note______________________________________________________________________
·
·
Note that if you format a memory card which already has data written on it, that data will be lost
entirely.
Check that the memory card can be written (that write-protection is released).
2-47
Chapter 2 Operating the Page Printer
1.
Bring up the menu >Format on the message display.
2.
Press the ENTER key. ? will appear.
3.
Pressing the ENTER key again will cause Processing to appear in the message display
and the memory card will be formatted.
The printer will print memory card formatting information (example below) after initialization is
finished. Use this to check that the memory card has been formatted properly.
Slot number: Slot name for the memory card (only A is supported)
Card size: The overall memory capacity of the card (in units of bytes)
Data size: The amount of data available to the system
Remaining Size: The remaining amount of available memory on the memory card
After this information is printed, the message display will return to Ready.
2-48
Memory Card
Printing a List of Data Names (Partitions)
This operation prints the contents (data names, data size, etc.) of the memory card inserted in the
memory card slot.
1.
Bring up the menu >List of Partitions on the message display.
2.
Press the ENTER key. ? will appear.
Press the CANCEL key to cancel printing.
3.
Pressing the ENTER key again will cause printing to start.
After this information is printed, the message display will return to Ready.
2-49
Chapter 2 Operating the Page Printer
Note______________________________________________________________________
"Remaining Size" in the partition list indicates the amount of remaining memory on the memory card.
Since the system uses about 70 bytes to write a piece of data on the memory card, the actual
available memory on the card is a little less than that displayed.
2-50
Setting the Paper Type
Setting the Paper Type
This printer is capable of printing under the optimum setting for the type of paper being used.
Setting the paper type for the paper source from the printer's control panel will cause the printer to
automatically print in the mode best suited to that type of paper. This allows you to easily achieve highquality printing results. A different paper type setting can be made for each paper source including the
multipurpose tray. Not only can preset paper types be selected, but it is also possible for the user to
define and select customized paper types.
The following types of paper can be set. For details on paper, please see Appendix B.
Cassette, Media Type and Custom Settings
Media Type
Duplex path
EF
(MP tray available only in
(Envelope feeder)
Cassette mode)
MP tray
Cassette
Plain
1
1
1
1
Transparency
1
2
2
2
Preprinted
1
1
1
1
Labels
1
2
1
2
Bond
1
1
1
1
Recycled
1
1
1
1
Vellum
1
2
2
2
Rough
1
1
1
1
Letterhead
1
1
1
1
Color
1
1
1
1
Prepunched
1
1
1
1
Envelope
1
2
1
2
Paper Type
Cardstock
1
2
1
2
Custom #*
1
1
1
1
*: This is a paper type defined and registered by the user. Up to eight types of user
settings may be defined. A number from 1 to 8 is used in place of the #. For
details on setting user types, please see page 2-52.
1: Can be stored
2: Cannot be stored
2-51
Chapter 2 Operating the Page Printer
Making Settings
The following describes the procedure for setting the paper type using the Recycled type and Cassette
1 as examples.
1. Display Paper handling > on the printer's Mode Select Menu and press the 4 key. Then
use the + and - keys to display the Cassette 1 type.
Paper handling >
>Cassette 1 type
Plain
2. Pressing the ENTER key will cause a ? to flash. Press the + or - keys to display Recycled.
>Cassette 1 type
? Recycled
Press the CANCEL key if you want to cancel the setting. The ? display will disappear.
3. Pressing the ENTER key will cause the ? to disappear. Pressing the EXIT key will exit the setting.
The same procedure can be used to set the paper type for other paper sources.
2-52
Setting the Paper Type
Paper type user setting
The following describes the procedure used to set a user-defined paper type for the printer. Eight
custom user settings may be registered. After having been set, any of these may be called up when
setting the paper type for a paper source.
1. Display Paper handling > on the printer's Mode Select Menu and press the 4 key. Then
use the + and - keys to display >Custom setup.
Paper handling >
>Custom setup
>
Custom #
2. Pressing the ENTER key will cause a ? to be displayed. Press the + or - keys to select the paper
type (see page 2-51) that you want to customize and then press the ENTER key.
>Custom setup
? Custom #
Note______________________________________________________________________
Note that if you change the setting for a paper type other than Custom 1 through 8 the paper type
setting for each paper source set to that paper type will be changed.
2-53
Chapter 2 Operating the Page Printer
3. Press the 4 key after selecting the paper type you want to customize. Pressing the + or - keys will
cycle through a display of the submenus given in the table below.
Submenus displayed
Selection parameters
Description
>>Paper weight
Light(Thin)
Normal (default)
Heavy (Thick)
Sets the paper thickness
>>Fuser mode
Vellum
Low
Middle (default)
High
Sets the temperature for the fusing
unit.
>>Duplex path
(only when the paper type is
Custom #)
Enable (default)
Disable
Selects duplex printing on/off when
a AD-31 is installed (setting active
only for the selected paper type)
Display the submenu to be set and press the ENTER key. A ? will flash. Press the + or - keys to
select the desired parameter.
>>Paper weight
? Normal
(Example: Setup menu for Paper weight)
Press the CANCEL key if you want to cancel the setting. The ? will disappear.
2-54
Setting the Paper Type
4. Pressing the ENTER key will cause the ? to disappear. Pressing the EXIT key will exit the setting.
The same procedure can be used to set the parameters on other submenus.
Note that the setting status for paper weight and fuser mode used for each paper type is as given in
the table below. In addition, all paper type settings made using Custom setup can be reset to
the default values shown in the table below using the >Reset custom setup menu.
Paper Type
Plain
Fuser
mode
TransPreparency* printed
Bond
Recycled Vellum*
Low
1
1
1
1
Color
Prepunched
Envelope Card
stock
Custom
1
1
1
1
1
1
1
1
Light
(Thin)
Heavy
(Thick)
Letter
head
1
1
High
Normal
Rough
1
Vellum
Middle
Paper
weight
Labels
1
1
1
1
1
1
1
1
1
1
1
1
1
*: These cannot be selected when the paper source is EF-100.
2-55
Chapter 2 Operating the Page Printer
Sleep Timer Setting
This printer is equipped with a sleep timer function for conserving energy in cases where there has
been no operation from the control panel or data has not been received for a predetermined period of
time.
The sleep timer can be set anywhere from 0 to 120 minutes in 5-minute increments. Setting the sleep
timer to 0 turns it off. The sleep timer is set at the factory to 30 minutes.
Once the set time arrives, the printer will display Sleeping and all indicators will go out. This
minimizes the amount of energy used.
Pressing a key on the control panel, opening and closing a cover, or sending data to the printer while it is
displaying Sleeping will cause the printer to display Please wait and it will begin warming up.
After it warms up, the printer's ON LINE indicator will light and it will enter ready status.
Note______________________________________________________________________
The printer environment last set is still maintained even though all indicators are out while the printer is in
Sleeping mode.
2-56
Dumping Received Data
Dumping Received Data
It is possible to print data received by the printer as hexadecimal code for the purposes of debugging
programs and files.
1.
Pressing the ENTER key once while >Print HEX-DUMP is shown on the
will cause a ? to flash.
2.
Send data to be dumped to the printer while the ? is flashing.
3.
Pressing the ENTER key again will print the corresponding pages of dumped data. Once the
dumped data you require has been output, it is possible to cancel the printing of any further
dumped data by taking the printer offline by pressing the ON LINE key and then pressing the
CANCEL key.
4.
Once all data has been received, the message Waiting will appear. Press the FORM FEED
key to finish printing.
message display
2-57
Chapter 2 Operating the Page Printer
KIR 2 Level
This printer incorporates the KIR 2 smoothing function. KIR 2 provides high quality printing by
providing a software-type improvement to the resolution. Print a status page to find out the current
mode.
The KIR 2 setting is Off.
The KIR 2 setting is On
(Default setting).
Note______________________________________________________________________________
·
·
2-58
Set the print density to “ 03 ” when setting the KIR 2 mode. For details on print density, see
page 2-62.
You can look at the check line, the last line on a status page, to make the optimum KIR 2 mode
setting. Please refer to the table on the next page.
KIR 2 Level
Status page
KIR 2 Checking Lines
KIR 2 Setting
Description
Optimized stripes
The current KIR 2 setting is optimal.
Dark vertical stripes
The KIR 2 mode currently set is too strong. Set the KIR 2 mode to Off.
(See the Mode Select Menu at the end of this manual.)
White vertical stripes
The KIR 2 mode currently set is too weak. Set the KIR 2 mode to On.
(See the Mode Select Menu at the end of this manual.)
2-59
Chapter 2 Operating the Page Printer
Ecoprint Mode
The Ecoprint enables you to reduce the amount of toner consumed on the page so as to save your
printing costs. The factory-setting is off.
Ecoprint is Off (default)
Ecoprint is On
Notes_____________________________________________________________________
·
·
2-60
Ecoprint status varies depending on the feed direction of the paper and the print direction.
The Ecoprint setting has no effect on the print speed.
Resource Protection
Resource Protection
When you switch from the HP LJ 5M/5Si emulation to another, all downloaded fonts and macros are
lost. Resource protection preserves these PCL resources in memory so that they are intact when you
change the emulation back to HP LJ 5M/5Si.
By using the printer's >Resource prot., you can select from two resource protection modes as
follows:
>Resource prot.
Permanent
In this mode, the printer stores fonts, macros, symbol sets, etc. in memory that were downloaded as
permanent PCL resources. All temporary resources are lost when the emulation mode is changed
from HP LJ 5M/5Si to another or vice versa.
>Resource prot.
Perm / Temp
In this mode, the printer stores both permanent and temporary resources when the emulation mode is
changed from HP LJ 5M/5Si to another or vice versa.
2-61
Chapter 2 Operating the Page Printer
Adjusting the Print Density
If necessary, the print density can be adjusted from the Mode Select Menu. The required print density
can be selected from five different steps (01 – 05). The factory setting is 03, and there is normally no
need to alter this setting.
When using the KIR 2 function, please use the “ 03” setting. For details on adjusting the KIR 2 mode,
see page 2-58.
Setting the Audio Warning (Buzzer)
In addition to the message displayed when the paper supply is exhausted, or when paper jamming
occurs, an audio warning is made to sound. This is useful, for example, when the printer is in a
location some distance from the user.
The audio alarm is set to On when leaving the factory. The buzzer will sound according to the type of
printer error as given in the following table.
The buzzer does not sound if the buzzer setting is set to Off.
2-62
Setting the Audio Warning (Buzzer)
Type of Error and Corresponding Audio Alarm (Buzzer)
Priority
Error Message
Alarm Frequency
Remarks
High
Paper jam
short beeps
–
Replace Toner
Clean printer
short beeps
–
Clean printer
Press CONTINUE
short beeps
–
Option stacker
path error
short beeps
*
Option Stacker
paper full
short beeps
*
Face-down tray
paper full
short beeps
–
Option tray
paper full
##
short beeps
*
Remove paper
Option tray
##
short beeps
*
Remove Opt.
Stacker paper
short beeps
*
Load (paper source)
short beeps
–
Load Cassette #
short beeps
–
Memory overflow
Press CONTINUE
short beeps
–
(Continued on next page)
2-63
Chapter 2 Operating the Page Printer
Priority
Error Message
Alarm Frequency
Remarks
Print overrun
Press CONTINUE
short beeps
–
KPDL Error
##
Press CONTINUE
short beeps
–
MEMORYCARD err##
Press CONTINUE
short beeps
*
HARDDISK error##
Press CONTINUE
short beeps
*
RAM DISK error
Press CONTINUE
short beeps
*
Opt. ROM error
Press CONTINUE
short beeps
*
Add Staples
Press CONTINUE
short beeps
*
Set paper
Press CONTINUE
short beeps
–
Add paper
long beeps
–
Low
*: These error messages are displayed if the relevant option is fitted.
##: The number displayed will vary depending on the error. Please refer to Chapter 5.
2-64
Setting the Audio Warning (Buzzer)
The alarm will continue to sound while the error condition continues (if the printer is in the sleep mode,
the alarm will be silent for that period alone). The alarm will cease to sound, however, when the
CANCEL key is pressed.
To rectify the various error conditions listed above, please refer to Chapter 5 of this manual, or to the
operating manuals accompanying the various optional equipment.
Notes_____________________________________________________________________
·
·
If you wish to cancel the data being processed while the audio alarm is sounding, press the
CANCEL key twice. Firstly, the audio alarm will be turned off, and then the data processing will be
canceled.
After the audio alarm has been set to Off, even if the PRESCRIBE 2e FRPO INIT command is
executed, the printer will not return to the initial (On) alarm setting. To set the audio alarm to On,
reset using the mode select menu from the control panel.
2-65
Chapter 3
Fonts
This chapter describes the types of fonts you can use with the
printer, including the printer’s resident and KPDL fonts, and
symbol sets.
Bitmap and Scalable Fonts........................................................ 3-2
List of Fonts ............................................................................... 3-3
Symbol Set ................................................................................ 3-8
3-1
Chapter 3 Fonts
Bitmap and Scalable Fonts
A font is a set of characters of a particular design. The design is referred to as a typeface. Several
characteristics identify a font. These include the font type (bit map or scalable), symbol set, spacing,
pitch, height, style, stroke weight, and typeface family.
The printer provides two types of resident fonts: bitmap fonts and scalable (outline) fonts. Also, fonts
may be downloaded to the printer’s memory or optional harddisk from a memory card or disk. These
fonts are referred to as downloadable or soft fonts. The printer accepts as many downloadable fonts
as its user available memory permits.
Bitmap fonts
A bitmap font is made of a fixed bit pattern. This pattern is stored in a special format for use in the
printer. Bitmap fonts have a fixed height (size) for each character. Therefore, different font sets are
required for different font sizes. For example, Dutch801BM10-Roman is a 10-point font and
Dutch801BM8-Roman is an 8-point font.
Scalable fonts
Scalable fonts provide the outline of the characters. This outline is scaled according to the scaling
information from the computer and filled in for printing. Depending on the capabilities of the software
you use, the scalable fonts can be scaled from 0.25 point to 999.75 points in quarter point increments.
3-2
List of Fonts
List of Fonts
This section contains a full list of the printer’s resident fonts. You can print the same font list from the
printer by using the printer’s control panel key. To print a list of fonts, refer to Mode Select Menu, List of
Resident fonts.
Bitmap Fonts
The printer has 80 resident bitmap fonts. Note that all resident bitmap fonts include the letters BM in
the typeface name.
Scalable Fonts
The printer has 45 resident scalable fonts. These fonts include the letters SWC or SWM in the
typeface name and are equivalent to HP LaserJet fonts.
KPDL Fonts
The printer has 35 KPDL fonts. The KPDL fonts are Adobe PostScript Type 1-compatible and have
the suffix SWA at the end of the font name.
3-3
Chapter 3 Fonts
Resident Scalable Fonts (1)
3-4
List of Fonts
Resident Scalable Fonts (2)
3-5
Chapter 3 Fonts
KPDL Fonts (1)
3-6
List of Fonts
KPDL Fonts (2)
3-7
Chapter 3 Fonts
Symbol Set
A symbol set is the set of alphabetical and numerical characters and symbols the printer prints. Each
character is assigned to a particular character code.
The page printer offers not only a large selection of bitmap and scalable fonts but also a large
selection of symbol sets (also referred to as character sets). This is because the printers the page
printer emulates have a number of their own symbol sets for printing in different languages and other
purposes. Most of those symbol sets are the same regarding the letters of the alphabet, digits, and
basic punctuation marks, but they differ considerably in their special symbols which lie in the upper
half of the character code table, consisting of character codes 128 through 254 (hex 80 through FE).
The symbol set selection can also be made from the printer’s control panel. See Mode Select Menu
on the last page in this manual.
3-8
Symbol Set
Table 3.1. Bitmap Fonts Symbol sets
SSET value
SSET ID
Symbol set
4
0D
ISO 60: Norway
9
0I
ISO 15: Italian
14
0N
ECMA-94 Latin 1
19
0S
ISO 11: Swedish
21
0U
ISO 6: ASCII
37
1E
ISO 4: U.K.
38
1F
ISO 69: France
39
1G
ISO 21: Germany
53
1U
US Legal
83
2S
ISO 17: Spain
277
8U
HP Roman-8
341
10U
PC-8
373
11U
PC-8 (D/N)
405
12U
PC-850
3-9
Chapter 3 Fonts
Table 3.2. Scalable Fonts Symbol sets
SSET value
SSET ID
Symbol set
4
0D
ISO-60 Norway
9
0I
ISO-15 Italian
14
0N
ECMA-94 Latin 1
19
0S
ISO-11 Sweden
21
0U
ISO-6 ASCII
37
1E
ISO-4 U.K.
38
1F
ISO-69 France
39
1G
ISO-21 Germany
53
1U
US Legal
78
2N
ISO Latin 2
83
2S
ISO-17 Spain
173
5M
PS math
174
5N
ISO Latin 5
180
5T
Windows Latin 5
202
6J
MS publishing
206
6N
ISO Latin 6
234
7J
Desktop
269
8M
Math 8
277
8U
HP Roman-8
293
9E
Windows Latin 2
298
9J
PC-1004
308
9T
PC-Turkish
(Continued on next page)
3-10
Symbol Set
SSET value
SSET ID
Symbol set
309
9U
Windows
330
10J
PS text
341
10U
IBM PC-8
373
11U
IBM PC-8 (D/N)
394
12J
Macintosh
405
12U
IBM PC-850
501
15U
Pi font
565
17U
PC-852 Latin 2
620
19L
Winbalt
629
19U
Windows Latin 1
853
26U
PC-775
3-11
Chapter 4
Maintenance
This chapter explains how to maintenance the printer. This only
covers replacing the toner container and cleaning parts such as
the main charger unit and paper feed unit.
Toner Container Replacement..........................................4- 2
Cleaning............................................................................4-10
4-1
Chapter 4 Maintenance
Toner Container Replacement
When there is not enough toner, the printer displays the message “ Toner low” in the message
display. Be sure to prepare a new toner container when this message appears. If printing is continued
in this condition, the printer will display the message “ Replace Toner Clean printer”
and stop when there is no more toner.
In this case, printing can be continued by replacing with a new toner kit.
Toner Container Replacement Interval
Assuming an average toner coverage of 5% (A4 or letter size, landscape feed and with Ecoprint mode
turned off), the toner container will need replacing approximately once every 33,000* printed pages.
* In the case of a new printer in which a toner container has been installed for the first time, the number of
pages that can be printed will be approximately 28,000 pages.
Toner Kit to be Used
Name:
Description:
Toner for DP-28/3600 Series (The toner kit is included with the printer.)
Toner Container
Cleaning Cloth
Cap for Old Toner Container
Grid Cleaner
Plastic Waste Bag (The toner kit supplied with the printer does not contain a plastic
waste bag.)
Instruction Manual
CAUTION
Do not incinerate toner and toner containers. Dangerous sparks may cause
burn.
4-2
Toner Container Replacement
Notes_____________________________________________________________________
·
·
·
·
Do not use the toner inside the old toner container.
Be sure to distance items such as floppy disks during toner container replacement.
Be sure to clean the inside of the printer along with replacing the toner container. For details, see
Cleaning on page 4-10.
Use of the original toner kits is highly recommended to prevent printer trouble and ensure the long
life of the printer.
Replenishing Toner
1.
Open the top cover.
Top Cover
4-3
Chapter 4 Maintenance
2.
Slide the toner container release levers to the right until they stop and remove the old toner
container. After removing it, take care not to tilt the toner container.
Toner Container Release Levers
3.
Old Toner Container
Cap the old toner container with the cap supplied in the new toner kit.
Old Toner Container
Push the cap securely in place.
(Be careful not to cap the new toner
container by accident.)
4-4
Toner Container Replacement
4.
Dispose of the old toner container in the plastic waste bag supplied in the new toner kit so that
toner does not scatter.
Plastic Waste Bag
Old Toner Container
CAUTION
Do not incinerate toner and toner containers. Dangerous sparks may cause
burn.
Note______________________________________________________________________
Although the toner container is made from non-harmful, flammable material, be sure to dispose of this
waste according to local laws and regulations.
4-5
Chapter 4 Maintenance
5.
Take the new toner container from the toner kit. Shake the toner container five times or more
with the protective seal facing up as shown in the figure in order to thoroughly mix the toner
inside.
Shake five or more times
Protective Seal
6.
Carefully remove the protective seal.
Protective Seal
4-6
Toner Container Replacement
7.
Check that the two toner container release levers are positioned to the right (released) as shown
in the figure. If not positioned to the right, slide them to the right until they stop.
Toner Container Release Levers (Positioned to the right)
8.
Align the ends of the toner container with the grooves to the left and right inside the printer as
shown in the figure and install.
New Toner Container
Grooves
4-7
Chapter 4 Maintenance
9.
Check that the toner container is installed in the correct position, and push forcefully on the top
of the toner container as shown in the figure.
10. After the toner container is installed, slide the two toner container release levers to the left
position (fixed) as shown in the figure.
4-8
Toner container release levers (Positioned to the left)
Toner Container Replacement
11. Close the top cover.
4-9
Chapter 4 Maintenance
Cleaning
Be sure to clean the main charger unit and paper feed unit along with replacing the toner kit. Also be
sure to clean the inside of the printer periodically (about once per month) to ensure optimum print
quality even if you are not replacing the toner kit.
Note______________________________________________________________________
If the toner container has been replaced when the message Replace Toner Clean
printer was displayed, the message Clean printer Press CONTINUE will be
displayed after replacement. After cleaning the inside of the printer following the procedure shown
below, press the CONTINUE key; the message will disappear and the printer will be ready for printing.
WARNING
For safety purposes, ALWAYS remove the power plug from the outlet
when cleaning the main charger.
CAUTION
For safety purposes, ALWAYS remove the power plug from the outlet
when performing cleaning operations.
4-10
Cleaning
Main Charger Unit
Cleaning the Charger Wire
Clean according to the following procedure.
1.
Open the printer's front cover.
Front Cover
2.
Pull the cleaning knob (green) located on the main charger unit slowly in and out a few times as
shown in the figure. This cleans the charger wire inside the unit.
Cleaning Knob (green)
4-11
Chapter 4 Maintenance
Cleaning the Grid
The main charger unit grid should be cleaned when the toner kit is changed.
1.
Take the grid cleaner from protective bag in the new toner kit, and remove the cap.
Note______________________________________________________________________
The grid cleaner pad is impregnated with water. Clean this part quickly to prevent the pad from drying
out.
Cap
Pad
Protective Bag
Grid cleaner
4-12
Cleaning
2.
Attach the grid cleaner to the printer with the pad facing up as shown in the figure.
Grid Cleaner
3.
After attaching the grid cleaner, slightly lift the main charger unit and repeat the action of slowly
pulling the cleaning knob in and out at least five times. This will clean the grid inside the main
charger unit.
(1) Lift slightly
(3) Pull in and out
at least five times
(2) Pull as far as
possible
Main Charger Unit
4-13
Chapter 4 Maintenance
4-14
4.
When the grid is clean, remove the grid cleaner from the printer and dispose of it. The grid
cleaner is not re-usable.
5.
Close the front cover. This ends the charger unit cleaning procedure.
Cleaning
Paper Feed Unit
CAUTION
Wait a while after turning the printer’s power to allow the fuser unit to cool
(about 20 minutes). Do not touch the fuser unit as this may result in a burn
injury.
Fuser Unit
Print problems such as soiling of the reverse side of printed pages may occur if the paper feed unit
becomes dirty. Clean the paper feed unit according to the following procedure.
1.
Open the printer's front cover.
Front Cover
2.
Turn the lock lever counterclockwise as shown in the figure to release the feed unit.
4-15
Chapter 4 Maintenance
Lock Lever
3.
Grasp the handle on the paper feed unit and slowly pull it out.
Paper Feed Unit
Handle
4-16
Cleaning
4.
Clean the saw-toothed seperator next to the transfer roller two or three times as shown in the
diagram using the cleaning brush housed in the front panel of the paper feed unit. Return the
cleaning brush after you have finished using it.
Transfer Roller
Cleaning
Brush
Seperator
(saw-toothed)
Paper Feed Unit
Transfer Roller
Cleaning Brush
4-17
Chapter 4 Maintenance
5. Wipe the paper dust on the registration roller and any dirt on the paper ramp using the cleaning
cloth included in the toner kit.
Cleaning Cloth
Paper Ramp
Registration
Roller [Metal]
Transfer Roller [Black]
Paper Feed Unit
Note______________________________________________________________________
Be careful not to touch the transfer roller during cleaning as this may adversely affect print quality.
4-18
Cleaning
6.
When you have finished cleaning the paper feed unit, push it back in until you feel it catch in
place.
7.
Turn the lock lever clockwise as shown in the figure to securely lock the feed unit.
Lock Lever
4-19
Chapter 4 Maintenance
8.
4-20
Close the printer's front cover.
Chapter 5
Troubleshooting
This chapter explains how to handle printer problems which may
occur. If a problem cannot be corrected, please contact your
dealer.
General Guide .........................................................................5- 2
Print Quality Problems .............................................................5- 4
Indicators and Messages.........................................................5- 8
Correcting a Paper Jam...........................................................5-19
5-1
Chapter 5 Troubleshooting
General Guide
There are quite a few printer problems which may be corrected by the user. This section explains how
to correct these problems.
If some kind of printer problem should occur, check the following before concluding the printer is
broken.
Symptom
The printer will not
print.
Check Items
Check the ON LINE
indicator.
Check the print
quality of a status
page if one can be
printed.
Corrective Action
Off
Press the ON LINE key.
If the indicator remains off and the printer still
will not print even after pressing the ON LINE
key, the problem may be power-related.
Look through the items below and check
anything that seems appropriate.
Lit
See the appropriate item below.
No problem
There may be a problem in the connection
with the computer. Look through the items
below and check anything that seems
appropriate.
There is a
problem
See the section on “Print Quality Problems”
(See page 5-4).
The ATTENTION indicator is lit.
See the section on “Indicators and
Messages” (See page 5-8).
A maintenance message appears in the message
display.
See the section on “Indicators and
Messages” (See page 5-8).
Paper is jammed.
See the section on “Correcting a Paper Jam.”
(Continued on next page)
5-2
General Guide
Symptom
Nothing lights on the
control panel even
when power is turned
on and the fan makes
no noise.
Check Items
Check that the power cord is
properly plugged into the power
outlet.
Corrective Action
Turn off the printer's power, plug in the
power cord securely, and try turning on the
printer's power again.
Check that the power switch is really in the on position.
The printer prints a
status page, but data
from the computer is
not being printed
normally.
Check the interface cable.
Connect both ends of the interface cable
securely. Try replacing the printer cable.
For details on the parallel interface of this
printer, see Appendix C.
Check program files and application
software.
Try printing another file or using another
print command. If the problem occurs only
with a specific file or application, check the
printer settings for that application.
If you still cannot correct a printer problem even after checking the above, please contact your dealer.
5-3
Chapter 5 Troubleshooting
Print Quality Problems
There are many possible causes of the print quality problems, such as blank output, shown in the
table below. The troubleshooting procedure for each type of problem is given below. If the checks
explained in this section do not solve the problem, please contact your dealer.
Printed Results
All-black printout
Corrective Action
Please contact your dealer.
(Continued on next page)
5-4
Print Quality Problems
Printed Results
Dropouts, horizontal streaks, stray dots
Corrective Action
Clean the charger wire.
Open the printer's front cover and clean the charger wire
using the green cleaning knob.
(See Chapter 4.)
Black or white vertical streaks
Check the message in the message display.
If the Toner low message is displayed and the toner
indicator is flashing. (See Chapter 4.)
Clean the charger wire
Open the printer's front cover and clean the charger wire
using the green cleaning knob. (See Chapter 4.)
(Continued on next page)
5-5
Chapter 5 Troubleshooting
Printed Results
The image is smeared.
Corrective Action
Clean the charger wire
Open the printer's front cover and clean the charger wire
using the green cleaning knob. (See Chapter 4.)
Faint or blurred printing
Check the Ecoprint setting. (See Chapter 2.)
Try setting toner control to high density.
(See Chapter 2.)
If the Toner low message is displayed and the toner
indicator is flashing, install a new toner kit.
(See Chapter 4.)
Clean the charger wire
Open the printer's front cover and clean the charger wire
using the green cleaning knob. (See Chapter 4.)
Grey background.
Check the control panel.
If the Toner low message is displayed and the
indicator is flashing, install a new toner kit. (See Chapter 4.)
(Continued on next page)
5-6
Print Quality Problems
Printed Results
Corrective Action
Clean the main charger wire.
Open the printer’s side cover. Pull the green main charger
wire cleaning knob slowly in and out a few times. (See
Chapter 4.)
Check the main charger unit installation.
Open the printer’s side cover. Remove the main charger unit
half way out, then reinstall it properly. (See Chapter 4.)
Dirt on the top edge or back of the paper
Check the transfer roller.
Pull out the paper feed unit and check whether the transfer
roller is dirty. If so, print several pages to eliminate the dirt.
Check the paper feed unit.
Pull out the paper feed unit and check whether the inside of
the printer is soiled with toner. If so, wipe it clean using the
supplied cleaning cloth.
Characters out of position.
Check the file or program.
See if the problem is caused by an error with PRESCRIBE 2e
commands. If the problem occurs only with a specific file or
program, the most likely cause is an error in a parameter to a
command or command syntax.
5-7
Chapter 5 Troubleshooting
Indicators and Messages
This section explains the indicators on the control panel and the messages which appear in the
message display and the appropriate corrective action to take in each case.
Indicators
Indicator
Condition
Corrective Action
Flashing
The printer has run low on toner. The toner should be replaced
as soon as possible. Clean the printer after replacement. (See
Chapter 4.)
Lit
Fast Flashing
Paper is jammed in the location flashing.
Slow Flashing
The paper has run out in the paper cassette or multi-purpose
tray. Add paper to the paper feed source. (See Chapter 1.)
Lit
ATTENTION
5-8
Toner is low or has run out. Replace with a new toner
container. (See Chapter 4.)
This indicates either the current paper feeder or the paper
output point.
Flashing
A paper jam has occurred in the optional duplex printing unit
(AD-31). Remove the paper jam referring to the instruction
manual for the AD-31.
Lit
An optional duplex printing unit (AD-31) has been attached,
and the printer is printing in duplex printing mode.
Flashing
The printer is warming up (Please wait) or the printer has
insufficient memory available. Confirm the message indicated
on the message display.
Lit
A message will be displayed in the message display. Take
corrective action according to the message displayed. The
table on the following page lists the corrective action to take in
response to each message.
Indicators and Messages
Maintenance Messages
Message
Corrective Action
Top cover
Open
The top cover is open.
Front cover
Open
The front cover is open.
Side cover
Open
The printer’s side cover is open.
Paper feeder 1
side cover Open
The paper feeder's side cover is open.
Face-down tray
paper full
The face-down tray has become full.
Add paper (paper source)
(paper size) (media type)
The paper source is out of paper.
Set paper
Press CONTINUE
Add a sheet of paper to the multi-purpose tray, and press the CONTINUE key.
Printing will start.
Close it tightly.
Close it tightly.
Close it tightly.
Close it tightly.
If an optional paper feeder (ST-1000) is installed, the paper feeder having the
problem will be indicated number in the message. If the maximum of three
feeders are installed, the upper feeder is 1, the middle feeder is 2, and the
bottom feeder is 3.
You must remove all printed pages from the face-down tray. The face-down
tray can hold approximately 500 sheets.
Add paper to the paper cassette or multi-purpose tray. Not only the paper
source, but also the paper size and media type set for the paper source in
question are displayed.
(Continued on next page)
5-9
Chapter 5 Troubleshooting
Message
Load (paper source)
(paper size) (media type)
Corrective Action
The paper size or type does not match the printing data.
One of MP tray, Cassette 1 to 6, or EF (Envelope feeder) will be
displayed In place of "paper source". Load the paper displayed on the
message display and press the CONTINUE key to print.
Or, pressing the FEED key without pressing the CONTINUE key, will cause
Use alternative? to be displayed, and a different paper source can
be selected to supply paper. The paper source changes each time the FEED
key is pressed. And press the MODE key to display Paper
handling >. Press the 4 key and you can change the paper source
setting using the + or – key to select. Load paper appropriate for the paper
source and press the EXIT key to print.
Load Cassette #
(paper size) (media type)
The paper size does not match.
The size of the paper in the cassette is different to the size specified by the
application software or by PRESCRIBE 2e command. Put paper of the
specified size into the cassette. (# represents the cassette number.)
If the CONTINUE key is pressed, printing will be resumed. However, if more
than one sheet is to be printed, the same message will again be displayed
from the second sheet onward.
You can abandon printing by pressing the CANCEL key.
5-10
Cassette #
not loaded
The cassette is not closed securely,
Paper jam
Open front cover
Paper has become jammed.
Paper jam
##############
This message appears when the front cover is open during a paper jam.
Close it tightly. (# represents the cassette number.)
Open the front cover. The location of the paper jam is displayed in the
message display.
Letters A through I and numbers 1 through 6 will appear in place of the #'s.
For details on the meaning of the text displayed, see page 5-19. A label
displaying these number indications is also attached to the back of the front
panel.
The indicator on the front panel also flashes the location of the paper jam.
(Continued on next page)
Indicators and Messages
Message
Corrective Action
Warning
Low memory
The printer’s internal memory is running low.
Toner low
There is not enough toner inside the toner container.
Remove any unnecessary download fonts and/or macros. You can check the
amount of user memory currently available by printing a status page.
There is not enough toner. Prepare a new toner container. (See Chapter 4.)
Replace Toner
Clean printer
There is no more toner in the toner container.
Option interface
Error
A failure has occurred with the option interface.
HARDDISK error20
Install the harddisk unit into the OPT2 slot.
The printer has stopped because there is no more toner. Replace with a new
toner kit. After replacing, be sure to clean the printer. (See Chapter 4.)
Check the option interface installed on the printer.
This message is displayed when the optional harddisk unit is accidentally
installed into the OPT1 slot. Be sure to install the harddisk unit in the OPT2
slot. Be sure to turn off the printer’s power before removing the incorrectly
installed harddisk.
RAM DISK error ##
Press CONTINUE
Check the error code displayed in the place of ## and refer to the
appropriate description below.
01: Abnormal format. Try turning the power off and on again.
02: RAM DISK mode is Off. Turn RAM DISK mode On.
03: Cannot write to the disk system because it is write protected. Remove
the write protection.
04: No disk space. Clean up files.
05: Specified file not on disk.
06: No memory for use by disk system. Expand printer memory.
10: Cannot format disk because host data is spooled there.
Format the disk after Ready is displayed.
(Continued on next page)
5-11
Chapter 5 Troubleshooting
Message
Corrective Action
RAM DISK error ##
Press CONTINUE
85: VMB: Alias error (Alias setting failure or no virtual bin corresponds to the
alias.)
Make the setting again.
86: VMB: Password error (No password specification, mistaken password, or
password setting failure)
Check the password.
87: VMB: Although an attempt was made to use a virtual bin job stack, the
stack size reached the maximum limit.
Output the job or raise the maximum limit.
88: VMB: There was a job or page which could not be read out during virtual
bin job output (the job is destroyed).
89: VMB: No job in the virtual bin specified for output or that virtual bin is not
being used.
Check the bin.
97: MPS: A non-volatile job has reached the maximum limit and no more
data can be saved. Clean up the job or raise the maximum limit.
98: MPS: There was a page which could not be read out within a job (the job
is destroyed).
99: MPS: No job in the virtual bin specified for output or that page is missing.
Virtual Mail Box
full
The virtual mail box area is full.
Clean printer
Press CONTINUE
Please clean the inside of the printer. See Chapter 4.
Missing
Toner kit
Print out accumulated VMB data. If the VMB function is being implemented by
RAM DISK, increase the RAM DISK size.
After cleaning the inside of the printer, press the CONTINUE key and the
printer will be ready for printing. This message will be displayed when
replacing the toner container after the message Replace Toner
Clean printer has been displayed.
No toner container is installed.
Install the toner container. (See Chapter 1.)
The printer does not operate when this message is displayed.
(Continued on next page)
5-12
Indicators and Messages
Message
Corrective Action
Missing
Drum unit
The drum unit is not installed.
Missing
Developing unit
The developing unit is not installed.
Missing
Fuser unit
The fuser unit is not installed.
Install M-Kit
The maintenance kit (LY-30) needs to be replaced.
Securely install the drum unit in the printer.
(For details, see the maintenance kit description manual.)
Securely install the developing unit in the printer.
(For details, see the maintenance kit description manual.)
Securely install the fuser unit in the printer.
(For details, see the maintenance kit description manual.)
Replace the maintenance kit since the total number of printed pages has
reached 350,000. Contact the licensed dealer from which you purchased the
printer or service outlet. The maintenance kit includes a drum unit, developer
unit and so on.
Unsupported
External Device
An unsupported option hardware has been installed.
Call service
person##:#######
A failure requiring the attention of service personnel has occurred.
Be sure to install proper option hardware compatible with the DP-3600.
(Please refer to the list of options on page vi.)
A failure requiring the attention of service personnel has occurred and the
printer has stopped. The corresponding error code and total printed pages are
displayed in the message display (part indicated by #’s).
5-13
Chapter 5 Troubleshooting
Error Messages
Message
Memory overflow
Press CONTINUE
Print overrun
Press CONTINUE
Corrective Action
Current print processing cannot continue due to insufficient memory.
Check available user memory by printing a status page, and either remove
unnecessary download fonts and/or macros or expand the printer’s memory.
Press the CONTINUE key to print data as far as it was stored. You can
abandon printing by the CANCEL key.
Current print processing cannot continue due to insufficient memory.
The data transferred to the printer was too complex to print on a page.
Check available user memory by printing a status page, and either remove
unnecessary download fonts and/or macros or expand the printer’s memory.
Note: After this message has been displayed, Page protect mode will be on.
To maintain optimum use of memory during printing, display >Page
protect from the mode select menu, and re-select Auto.
Press the CONTINUE key to print data as far as it was stored. You can
abandon printing by the CANCEL key.
KPDL Error
Press CONTINUE
MEMORY CARD err
Insert again
Current print processing cannot continue.
To print out a error report, display >Print KPDL errs from the mode
select menu, and select On.
Press the CONTINUE key to resume printing. You can abandon printing by the
CANCEL key.
The memory card is missing.
This message appears when the memory card has been removed from the
memory card slot during memory card operations. Re-insert the same
memory card in the same slot. the printer will continue with memory card
processing.
(Continued on next page)
5-14
Indicators and Messages
Message
Corrective Action
Insert the same
MEMORY CARD
Insert the same memory card.
Warning battery
MEMORY CARD
The memory card's battery is low.
Battery error
MEMORY CARD
Insert a new battery in the memory card.
Format error
MEMORY CARD
The memory card requires formatting.
This message appears when the memory card has been removed from the
memory card slot during memory card operations and replaced with a different
memory card. Re-insert the same memory card in the same slot. The printer
will continue with memory card processing.
This message appears when the printer is in the ready state and the battery of
the memory card installed in the printer is low. You can still enter the memory
card mode, but the battery should be changed as soon as possible.
This message appears when the printer is in the ready state and the battery in
the memory card is missing or completely dead. Memory card operations are
not possible. Insert a new battery in the memory card.
This message appears when the printer is in the ready state and the memory
card is not formatted.
Be sure to format the memory card. (See Chapter 2.)
(Continued on next page)
5-15
Chapter 5 Troubleshooting
Message
MEMORYCARD err ##
Press CONTINUE
Corrective Action
This message appears when an error occurs during access to the memory
card using the PRESCRIBE 2e RWER (ICCD) command or from the printer’s
control panel. Look at the error code given in place of ## and refer to the
corresponding description given below. Note that only error codes 09 and 11
are displayed due to memory card operations made from the control panel.
01:Data or memory card capacity is too large.
· This error code appears if an attempt is made to write more than
32 MB of data to a memory card or if the capacity of the memory card
installed in the printer is more than 32 MB. Decrease the data being
written to the memory card to less than 32 MB. Note that only memory
card of 32 MB and less can be used by this printer.
· This error code appears when a data name not existing on the memory
card is specified.
Check the data names on the memory card.
02: The memory card does not meet specifications. This memory card
cannot be used by this printer. Insert a memory card which can be used by
this printer. (See “Memory Card” of Chapter 2.)
03: The memory card is not supported by this printer.
Only JEIDA Ver. 4.2/PCMCIA Ver. 2.1 memory card can be used by this
printer.
04: The card is an S-RAM or flash card which cannot be used by this printer.
05: There is no battery in the memory card. Replace the battery in the
memory card with a new one.
06: The memory card is write-protected. Cancel the write-protection of the
memory card.
07: The memory card requires formatting. Format the memory card from the
control panel.
09: The capacity of the memory card is insufficient. This error code appears
when an attempt is made to write more data on the memory card than
available memory. To halt the writing of data, first stop data transmissions
from the computer, and then the printer's CANCEL key. Press the FORM
FEED key if the message Waiting will appear in the message display. The
message display will return to reading Ready.
(Continued on next page)
5-16
Indicators and Messages
Message
Corrective Action
MEMORYCARD err ##
Press CONTINUE
11: The memory card is full of data items. The number of data items which
can be written on the memory card is limited to 127. Pressing the CANCEL
key will restore the message Ready in the message display.
13: This is a logical error. Try substituting another flash memory card.
15: The flash memory card in question is not supported by this printer.
17: The flash memory card cannot be written due to insufficient printer
memory. Either delete unnecessary macros and/or fonts stored in the printer,
or expand the printer's available memory.
18: This is a write error. Try substituting another flash memory card.
(Error codes 13 through 18 apply only to a flash memory card.)
>Read fonts ?
Failed
The font cannot be read due to insufficient memory.
I/F occupied
The interface selected is currently being used.
A download font could not be loaded into printer memory due to insufficient
available printer memory. Either remove unnecessary download fonts and/or
macros or expand the printer's memory.
The interface is secured while the interface name displayed in the message
display is flashing even if the printer is in the ready state. How long this takes
depends on the interface release timeout (FRPO J2) setting.
This message appears, and then the ATTENTION indicator lights, when an
attempt is made to select a secured interface from the control panel or when
an attempt is made to perform memory card operations while the interface
indicator is flashing.
Repeat operations after releasing the interface.
(Continued on next page)
5-17
Chapter 5 Troubleshooting
Message
Processing
PAR FIT A4
Corrective Action
Compressed data is printed due to insufficient memory.
Compressed data is printed due to insufficient memory when FIT flashes in
the resolution indicator. The quality of printed data is reduced when this
occurs. FIT will continue flashing even after printing is finished. The
resolution indicator will automatically return to reading 600 dpi when any key is
pressed, when a timeout occurs, or when subsequent data is received.
Expand printer memory to avoid this error.
5-18
Processing
PAR 600 A4
600 dpi processing cannot be performed due to insufficient memory.
Processing
PAR 300 A4
Expand printer memory to avoid this error.
When 300 flashes in the resolution indicator even though the printer was set to
600 dpi, the printer automatically set resolution to 300 dpi due to insufficient
memory and continued printing. The resolution indicator will automatically
return to reading 600 dpi when any key is pressed, when a timeout occurs, or
when subsequent data is received.
Correcting a Paper Jam
Correcting a Paper Jam
This section describes how to remove paper when it jams in the printer. The printer will stop whenever
paper jams in the printer or paper is not fed from a cassette. The printer will go offline and the message
Paper jam Open front cover will appear in the message display.
Paper jam
Open front cover
Opening the printer's front cover will cause the message display to change. It will now indicate the
coded location (A through I and 1 through 6) of the paper jam.
Example
Paper jam
C, H, 1
In this example, paper is jammed in the paper feeder (C), paper feed unit (H), and in the upper cassette
(1). The corrective action to take in cases like this is explained using actual examples beginning from
page 5-23.
The meanings of symbols appearing on the message display and the corresponding locations of paper
jams are given in the table on the next page. Be sure to correct paper jams according to the procedure
given on the following pages.
WARNING
High voltage is present in the charger section. Take sufficient care when
working in this area, as there is a danger of electrical shock.
CAUTION
The printer’s fuser unit is extremely hot. Take sufficient care when working
in this area, as there is a danger of getting burned.
5-19
Chapter 5 Troubleshooting
Locating and Correcting Paper Jams
Message Display Indicator and Paper Jam Location
Indicator
A
B
C
D
E
F
G
H
I
1
2
3
4
5
6
Meaning of Indicator
Optional paper feeder
(EF-100)
Multi-purpose tray
Paper feeder included with
printer
Optional paper feeder
(ST-1000)
Optional paper feeder
(ST-1000)
Optional paper stacker
(F-8118, F-8130, or AS-M8111)
Face-up output tray/
Face-down output tray
Paper feed unit
Optional duplex printing unit
(AD-31)
Cassette 1
Cassette 2
Cassette 3
Cassette 4
Cassette 5
Cassette 6
Corresponding Printer Location
A
G
B
I
1
2
F
C
3
4
D
5
6
E
A label titled “Locating and Correcting Paper Jams” is
also attached to the back of the front cover.
The indicator on the printer's front panel also flashes the location of paper jams.
5-20
H
Correcting a Paper Jam
Correcting Paper Jams
CAUTION
Pull out the paper feed unit and wait a while to allow the fuser unit to cool.
Do not touch the fuser unit as this may result in a burn injury.
Fuser unit
WARNING
Take care not to leave any small pieces of paper in the printer when
removing paper jams as this may result in fire.
Note that data remaining in the printer will be lost if power is turned off while correcting a paper jam.
After checking the location of the paper jam using the table on the previous page, take corrective action
according to the table on the next page. After removing all jammed paper, the printer will automatically
resume printing.
5-21
Chapter 5 Troubleshooting
Indicator
A
B
C, D, E
F
G
Meaning of Indicator
Check the optional paper feeder
(EF-100).
(Only when installed)
Check the multi-purpose tray.
Check the optional paper feeder
(ST-1000).
(D and E are only displayed when
an optional ST-1000 is installed.)
Check the optional unit (F-8118,
AS-M8111, or F-8130).
(Only when installed)
Check the face-up output tray.
Check the face-down output tray.
Check the paper feed unit.
H
Check the fuser unit.
I
1—6
5-22
Check the optional duplex printing
unit (AD-31).
(Only when installed)
Check the cassette indicated.
Corresponding Printer Location
When a paper jam occurs in the optional feeder, pull it out
carefully. (For details, read the optional envelope feeder
instruction manual.)
When a paper jam occurs in the multi-purpose tray, first
completely remove all jammed paper and then open and close
the front cover.
Open the side cover of the paper feeder indicated and remove
the jammed paper. (See Figure 5.1.)
Remove the paper jammed in the paper stacker.
(For details, read the paper stacker instruction manual.)
If printing stops before a page is completely output, carefully
remove that sheet of paper. (See Figure 5.2.)
If printing stops before a page is completely output, carefully
remove that sheet of paper.
Open the front cover and carefully pull out the paper feed unit as
far as it will go. If paper is jammed in the registration rollers,
remove it by the easiest means possible. (See Figure 5.3.) Pull
jammed paper out of the fuser unit in the same manner. (See
Figure 5.4.)
After all paper has been completely removed, return the paper
feed unit.
Open the front cover and carefully pull out the paper feed unit as
far as it will go. Open the fuser unit cover (grasp the tab
[green]) and check inside the fuser unit. Jammed paper may
sometimes be left inside the fuser unit. (See Figure 5.5.)
Open the front cover, pull out the duplex printing unit and
remove the jammed paper. (For details, read the duplex printing
unit instruction manual.)
Pull out the cassette indicated and remove the jammed paper.
After all paper has been completely removed, open and close
the front cover.
Correcting a Paper Jam
Example
In the example given on page 5-19, paper is jammed in the paper feeder (C), the upper cassette (1),
and the paper feed unit (H).
Paper jam
C, H, 1
1.
When paper jams in multiple locations such as in this example, begin taking corrective action
from the location displayed at left. After the paper jam in the paper feeder (C) is corrected, the
display will change as follows.
Paper jam
H, 1
2.
Next, pull out the paper feed unit and remove the jammed paper. After removing the paper the
display will change as follows.
Front cover
Open
3.
Close the front cover. This completes taking care of this paper jam.
Notes ____________________________________________________________________
·
·
Sometimes the page on which the paper jam occurred will not be re-printed depending on the
location of the paper jam.
Note that your hands may become dirty from unfused toner when removing paper jams.
Frequent occurrence of paper jams may indicate you are using a paper specification which does not suit
the printer. If this appears to be the case, please switch to a different type of paper. Also be sure to check
that the paper type setting is correct. Suitable paper specifications are described in detail in Appendix B.
If you have tried changing paper types and paper jams still occur frequently, there may be some
problem with the printer. In this case, please contact your dealer.
5-23
Chapter 5 Troubleshooting
Paper Feeder’s Side Cover
Figure 5.1 Paper jam in paper feeder unit
Printer’s Side Cover (Left)
Face-Up Tray
Figure 5.2 Paper jam in face-up tray
5-24
Correcting a Paper Jam
Registration Roller
Open this cover first.
Paper Feed Unit
Figure 5.3. Paper jammed in paper feed unit
5-25
Chapter 5 Troubleshooting
Fuser Unit Cover
Grasp the tab
(green) to open.
Press down
these two
levers (green)
when paper is
hard to pull out.
Tab (green)
Figure 5.4. Paper jammed at the fuser unit
Figure 5.5. Paper jammed inside the fuser unit
Note______________________________________________________________________
When removing jammed paper, be careful not to touch the separator located on the back side of the
fuser unit cover with your hands.
Fuser Unit Cover
Separator
5-26
Chapter 6
Symbol Set Tables
The following tables show all the characters included in the most
common symbol sets available with the five emulations.
6-1
Chapter 6 Symbol Set Tables
HP LaserJet 5M Symbol Sets
LaserJet 5M HP Roman-8 (8U)
6-2
LaserJet 5M ECMA-94 Latin 1 (0N)
HP LaserJet 5M Symbol Sets
LaserJet 5M US Legal (1U)
LaserJet 5M IBM PC-8 (10U)
To have the printer print the characters of decimal numbers of 7
through 15, and 27, set the printer to the HP PCL transparent mode
(ESC&p#X).
6-3
Chapter 6 Symbol Set Tables
6-4
LaserJet 5M IBM PC-8 (D/N) (11U)
LaserJet 5M IBM PC-850 (12U)
To have the printer print the characters of decimal
numbers of 7 through 15, and 27, set the printer
to the HP PCL transparent mode (ESC&p#X).
To have the printer print the characters of decimal
numbers of 7 through 15, and 27, set the printer to the
HP PCL transparent mode (ESC&p#X).
HP LaserJet 5M Symbol Sets
LaserJet 5M ISO Latin 6 (6N)
LaserJet 5M PS Math (5M)
6-5
Chapter 6 Symbol Set Tables
LaserJet 5M PS Text (10J)
6-6
LaserJet 5M Math8 (8M)
HP LaserJet 5M Symbol Sets
LaserJet 5M Pi font (15U)
LaserJet 5M MS publishing (6J)
6-7
Chapter 6 Symbol Set Tables
LaserJet 5M Windows (9U)
6-8
LaserJet 5M Desktop (7J)
HP LaserJet 5M Symbol Sets
LaserJet 5M ISO Latin 2 (2N)
LaserJet 5M ISO Latin 5 (5N)
6-9
Chapter 6 Symbol Set Tables
LaserJet 5M WinBalt (19L)
6-10
LaserJet 5M PC775 (26U)
HP LaserJet 5M Symbol Sets
LaserJet 5M PC-1004 (9J)
LaserJet 5M Windows Latin 1 (19U)
6-11
Chapter 6 Symbol Set Tables
LaserJet 5M Windows Latin 2 (9E)
6-12
LaserJet 5M Windows Latin 5 (5T)
HP LaserJet 5M Symbol Sets
LaserJet 5M PC-852 Latin 2 (17U)
LaserJet 5M PC-Turkish (9T)
6-13
Chapter 6 Symbol Set Tables
Macintosh (12J)
6-14
HP LaserJet 5M Symbol Sets
LaserJet 5M International Characters
6-15
Appendix A
Printer Specifications
A-1
Appendix A Printer Specifications
Printer Specifications
Item
Printing method
Printing speed
(when printing multiple copies of
the same page/feed from paper
cassette)
Resolution
First print (A4, 23°C)
Warmup time (23°C)
Controller
Main memory
Supported operating systems
Supported protocols
Interfaces
Memory card slot
Self test
Maximum duty cycle
Drum
Developer
Main charger
Transferring
Separation
Drum cleaning
Drum discharging
A-2
Description
Electrophotography, Semiconductor laser + polygon mirror system
A4/Letter: 36 pages/minute (landscape feed)
B4:
22 pages/minute
A3:
20 pages/minute
600 dots/inch (vertical and horizontal), includes KIR 2 smoothing function
(2400 dots/inch horizontal)
Sleep mode off - Approx. 10 seconds
Sleep mode on - Approx. 100 seconds
90 seconds or less
PowerPC 740™ (233 MHz)
16 MB, expandable up to 64 MB, with two SIMM slots
Windows 3.1, Windows 95/98, Windows NT
IPX/SPX, TCP/IP, DLC
High-speed bidirectional parallel interface ´ 1
Serial interface (RS-232C/RS-422A) ´ 1
Optional interface slot ´ 1
Optional interface/hard disk slot ´ 1
Type I slot (JEIDA ver. 4.2/PCMCIA Ver. 2.1) ´ 1
Performed at power-up
150,000 pages/month (dry A4 PPC standard paper)
Amorphous silicon drum
Mono-component dry developer
Positive scorotron charger
Negative charger roller
Positive charger electrode
Blade cleaner
Illumination by eraser LED array
Printer Specifications
Item
Fuser
Toner saving
Paper
Paper sizes
Paper capacity
Capacity of output trays
Ambient conditions
Power supply
Power consumption
Operating noise
(in accordance with ISO 7779
[Bystander Position, sound
pressure level at the front])
External dimensions
Description
Heat roller and pressure roller
Ecoprint mode
Plain paper (See Appendix B.)
Cassettes:
Ledger size, A3 to A5 universal cassette
Multi-purpose tray:
80 mm x 148 mm to 297 mm x 450 mm
2
Cassettes:
500 sheets each (80 g/m , [0.1-mm thickness])
2
Multipurpose tray:
100 sheets (80 g/m , [0.1-mm thickness])
2
Face-down tray—500 sheets (80 g/m , [0.1-mm thickness])
2
Face-up tray—500 sheets (80 g/m , [0.1-mm thickness])
Temperature:
10°C to 32.5°C (50°F to 90.5°F)
Humidity:
20% to 80% RH
Optimum conditions:
20°C (68°F), 65% RH
Altitude:
Max. 2000m (6500 feet)
120 V, 60 Hz, max. 10 A (U.S.A./Canada)
220-240 V, 50/60 Hz, max. 5 A (European countries)
Max. allowable voltage fluctuation: ±10%
Max. allowable frequency fluctuation: ±2%
Max.:
1200 W
During normal operations: 825 W
During standby:
220 W
During sleep mode:
31 W
During printing:
LpA = 54 dB (A)
During standby:
LpA = 39 dB (A)
During sleep mode:
Immeasurably low
Printer:
Paper feeder:
Weight
Printer:
Paper feeder:
560 mm (22 1/8") wide ´ 345 mm (13 5/8") high ´
566 mm (22 3/8") deep
560 mm (22 1/8") wide ´ 247 mm (9 3/4") high ´
560 mm (22 1/8") deep
38.2 kg (84.2 lbs.)
19.5 kg (43 lbs.)
A-3
Appendix B
Paper Selection
B-1
Appendix B Paper Selection
General Guidelines
Although the page printer is designed for printing on standard dry PPC photocopier copy paper (standard
paper), it can print on various types of paper that conforms to the specifications given in this chapter.
Select paper carefully as use of paper inappropriate for the printer may result in paper jams or
wrinkling of output paper. Low-quality paper may reduce printing quality, not only wasting paper but
possibly leading to damage to the printer. It is possible to achieve efficient printing with few problems
and minimize the risk of printer damage or wear by following the precautions listed below.
Usable Paper
Be sure to use copy paper (standard paper) used in standard dry PPC photocopiers.
Note______________________________________________________________________
Some recycled paper does not meet the necessary specifications for use in this printer due to
conditions such as stored water and pulp content. Before purchasing recycled paper, test a sample
on the printer and check that printing quality is satisfactory. Be sure to select a brand of recycled
paper which offers good printing quality and does not contain excessive levels of paper dust.
There are differences in grade between each paper manufacturer, and these differences can affect
printer operations. Satisfactory printing results cannot be obtained through the use of poor-quality paper.
Even inexpensive paper may turn out to be uneconomical from a results standpoint if its quality is
inappropriate for the printer.
B-2
General Guidelines
Paper Specifications
The following table summarizes the basic paper specifications. Details are given on the following
pages.
Paper Specifications
Weight
Thickness
Dimensional accuracy
Squareness of corners
Moisture content
Pulp content
2
60 to 90 g/m (16 to 24 lbs./ream)
0.086 to 0.110 mm (3.4 to 4.3 mils)
±0.7 mm (±0.0276 inches)
90° ±0.2°
4% to 6%
80% or more
Note______________________________________________________________________
Consult with your dealer before purchasing any specially treated paper or special application paper.
We bear absolutely no responsibility for accidents resulting from the use of inappropriate paper which
does not meet the specifications listed above. For paper, contact the licensed dealer from which you
purchased the printer.
B-3
Appendix B Paper Selection
Selecting the Right Paper
The following sections explain the basic things to look for when selecting paper. Keep these things in
mind when selecting paper.
Condition of the Paper
Avoid using paper that is folded at the corners, curled, dirty, stained, has a rough cut, fuzzy fibers,
rough surface or is easily torn.
Use of paper in these conditions can lead to illegible printing, misfeeding, and paper jams, and can
shorten the life of the printer. Select paper which has as smooth and even a surface as possible.
Note that use of paper with a surface coating or other surface treatment may damage the drum or
fuser unit.
Composition
Do not use paper that has been coated or surface-treated and contains plastic or carbon. The heat of
fusing can cause such paper to give off harmful fumes, and may damage the drum.
Bond paper should contain at least 80% pulp. Not more than 20% of the total paper content should
consist of cotton or other fibers.
B-4
Selecting the Right Paper
Paper Size
Cassettes and the multi-purpose tray can handle the paper sizes listed in the following table. The
printer automatically detects the paper size loaded in a cassette.
Paper Sizes for Paper Feeding
Paper
Size
ISO A3
ISO A4
ISO A5
JIS B4
JIS B5
Ledger
Letter
Legal
297 ´ 420 mm
210 ´ 297 mm
148 ´ 210 mm
257 ´ 364 mm
182 ´ 257 mm
11 ´ 17 inches
8.5 ´ 11 inches
8.5 ´ 14 inches
Other sizes of paper can be fed from multi-purpose tray. The minimum size of fed paper is
80 ´ 148 mm (3.1 ´ 5.8 inches). The maximum size is 297 ´ 450 mm (11.7 ´ 17.7 inches). (Printing
position adjustment is required.)
Smoothness
Although it is important to use paper with a smooth and even surface, do not use paper which has
been coated. Paper that is too smooth, can cause multiple feeding and paper jams.
B-5
Appendix B Paper Selection
Basis Weight
Basis weight is the weight of one square meter sheet of paper. Paper that is too light or too heavy can
cause misfeeding, jams, and premature wear of the printer. Uneven paper weight can cause multiple
feeds, print defects, poor toner fusing, blurring, and other print quality problems. The proper weight is 60
2
2
to 90 g/m for regular paper and 90 to 200 g/m for thick paper.
Thickness
The paper used with the printer should be neither extremely thick nor extremely thin. If you are having
problems with multiple feeds and paper jams, the paper may be too thin. The paper may also be too
thick if you are having problems with paper jams. The proper thickness is 0.086 to 0.110 mm (3.4 to 4.3
mils).
Moisture Content
Moisture content is defined as the percent ratio of moisture to the dry mass of the paper. Moisture can
affect feedability, electrostatic properties, and toner fusing characteristics.
The moisture content of the paper varies with the relative humidity in the room. When the relative
humidity is high and the paper absorbs moisture, the paper edges expand, becoming wavy in
appearance. When the relative humidity is low and the paper loses moisture, the edges shrink and
tighten, and print contrast may suffer.
Wavy or tight edges can cause misfeeding and alignment anomalies. The moisture content of the
paper should be 4% to 6%.
To ensure the proper moisture content it is important to store the paper in a controlled environment.
Some tips on moisture control are:
B-6
Selecting the Right Paper
·
·
·
Store paper in a dry, well-ventilated location.
·
Avoid leaving paper where it is exposed to heat, sunlight, or damp.
Keep the paper flat and in its wrapping as long as possible. Rewrap paper that is not in use.
Store paper in its original carton. Place a pallet etc. under the carton to separate it from the
floor. Keep paper away from boarding or concrete floors during the rainy season.
Other Paper Properties
Stiffness
Paper that is too limp or too stiff may fold or bend inside the printer, resulting in a paper jam.
Curl
Most paper has a natural tendency to curl in one direction or the other if it is stored unwrapped. Paper
will curl slightly upward when it passes through the fuser unit. Load the paper with its natural curl
downward so that it will come out flat. Some paper also has a front and back surface. If this is
indicated on the paper's packaging, be sure to load the paper into the cassette face down.
Electrostatic properties
During the printing process the paper is electrostatically charged to attract the toner. The paper must
be able to release this charge so that printed sheets do not cling together in the output tray.
Quality control
Uneven sheet size, corners that are not square, ragged edges, welded (uncut) sheets, and crushed
edges and corners can cause the printer to malfunction in various ways. Pay particular attention to
these considerations if you are choosing paper yourself.
B-7
Appendix B Paper Selection
Packaging
Select paper that is wrapped by the ream and then placed in a box. The best wrapping is one whose
inner surface is coated to protect again humidity.
Specially treated paper
We recommend that you avoid using paper listed below which has been specially treated, even if it
meets basic specifications. If you wish to use such paper, test a sample on the printer and check that
printing quality is satisfactory before purchasing.
·
·
·
B-8
Paper with a glossy finish
Paper with sections cut out
Paper which is embossed
Special Paper
Special Paper
This section explains printing on special paper. The page printer can use the following types of
special paper. In this case, set the media type according to the table below.
Paper type
Colored paper
Preprinted paper
Overhead projector transparencies
Postcards
Envelopes
Label
Media type
Color
Preprinted
Transparency
Cardstock
Envelope
Labels
When using the above types of paper, be sure to use products that are specified for use with
photocopiers and/or page printers. Feed paper other than colored paper or pre-printed paper from the
MP (multi-purpose) tray or optional envelope feeder (EF-100).
Since the composition and quality of special paper vary considerably, special paper is more likely than
white bond paper to give trouble during printing. Special paper may be used with this printer if it meets
the following conditions. Note that these types of paper differ greatly in their construction and quality,
resulting in an increased chance of problems occurring during printing. No liability will be assumed if
moisture etc. given off in printing on special paper causes harm to the machine or operator.
Note______________________________________________________________________
Before purchasing any type of special paper, test a sample on the printer and check that printing
quality is satisfactory.
B-9
Appendix B Paper Selection
Specifications for each type of special paper are given below.
Colored Paper
Colored paper should meet the same specifications as listed for white bond paper in page B-3. In
addition, the pigments used in the paper must be able to withstand the temperature of the printer’s
fusing process (approximately 200°C [392°F]).
Preprinted Paper
The paper base of preprinted paper should meet basic specifications. The preprinted ink must be able
to withstand the temperature of the printer’s fusing process (approximately 200°C [392°F]), and do not
use paper with any kind of surface treatment, such as the type of paper commonly used for calendars.
Overhead Projection (OHP) Film
OHP film must be able to withstand the heat of fusing during the printing process. Specifications are
as follows.
OHP Film Specifications
Item
Tolerance of heat
Thickness
Material
Squareness of corners
Specification
Must be able to withstand the temperature of the
printer’s fusing process (approximately 200°C [392°F]).
0.100 to 0.110 mm (3.9 to 4.3 mils)
Polyester
90° ±0.2°
Note______________________________________________________________________
Do not use film made from anything other than polyester.
B-10
Special Paper
Thick Paper/Postcards
2
Use postcards weighing 90 to 200 g/m . Any postcards of size 100 mm by 148 mm or larger may be
used. Avoid using homemade postcards, picture postcards or postcards whose printing surface has
been coated. Do not use paper which has a rough cut.
When using paper which is slightly curled or paper which is printed on one side be sure to slightly curl
the paper upward as shown in the figure.
Feed direction
Feed direction
Envelopes
2
Envelopes made from paper weighing 60 to 79 g/m may be printed using this printer.
Envelopes are not of even thickness due to their folded construction. It therefore may not be possible to
print evenly on an envelope surface in some cases. Envelopes which are particularly thick may wrinkle
as they come out of the printer. Test a sample envelope on the printer and check that printing quality is
satisfactory before purchasing.
Envelopes with exposed adhesive cannot be used regardless of their type. Envelopes which use
peel-off strips to cover adhesive also cannot be used as this little strip coming off inside the printer can
result in major damage.
Envelopes which have been specially treated also cannot be used. For example, envelopes with
string attached for sealing , envelopes with open windows, and envelopes with film covered windows
cannot be used with this printer.
B-11
Appendix B Paper Selection
Label
The basic rule for printing on adhesive label is that the adhesive must never come into contact with
any part of the printer. Adhesive paper sticking to the drum or rollers will damage the printer.
Label paper must be manually fed.
Label paper has a structure comprising three layers, as shown below. The top sheet is printed on. The
adhesive layer consists of pressure-sensitive adhesives. The carrier sheet (also called the linear or
backing sheet) holds the label until use. Due to the complexity of its composition, adhesive-backed
label paper is particularly likely to give trouble in printing.
Top sheet (white bond paper)
Adhesive
Carrier sheet
Adhesive-back label
Adhesive label paper must be entirely covered by its top sheet, with no spaces between the individual
labels. Labels with spaces in between are apt to peel off, causing serious jam problems.
Some label paper is manufactured with an extra margin of top sheet around the edge. Do not remove
the extra top sheet from the carrier sheet until after printing is finished.
Acceptable
Unacceptable
Top sheet
Carrier sheet
B-12
Label arrangement
Special Paper
Table below lists the specifications for adhesive label paper.
Adhesive Label Specifications
Item
Specification
2
Weight of top sheet
44 to 74 g/m (12 to 20 lbs/ream)
Composite weight
104 to 151 g/m (28 to 40 lbs/ream)
Thickness of top sheet
0.086 to 0.107 mm (3.9 to 4.2 mils)
2
Composite thickness
0.115 to 0.145 mm (4.5 to 5.7 mils)
Moisture content
4% to 6% (composite)
Note______________________________________________________________________
Printing quality and possible trouble when printing label are entirely the responsibility of the user.
B-13
Appendix C
Host Computer
Interface
This appendix describes the signals used in the laser printer’s
parallel, RS-232C/RS-422A interfaces. It also lists pin
assignments, signal functions, timings, connector specifications,
and voltage levels. The RS-232C/RS-422A protocols are also
covered. Finally, it explains the use of the printer in a multicomputer environment.
C-1
Appendix C Host Computer Interface
Parallel Interface
Parallel interface communication modes
The printer features the fast data transmission on the parallel interface. The parallel interface mode
can be activated from the printer’s control panel (see Chapter 2) as follows:
Note______________________________________________________________________
Use a parallel printer cable that complies with the IEEE1284 standards.
Nibble (high) [default]
High speed data communication is used in compliance with the IEEE 1284 standard. Ordinarily, you
should leave this setting unchanged.
Auto
The printer automatically changes its communication mode to the one the host computer is currently
using.
Normal
The printer uses the communication method described by to the normal definitions of the Centronics
interface.
High-speed
This mode enables faster data transmission between the printer and the host computer.
C-2
Parallel Interface
Interface Signals
The pins of the parallel interface connector carry the signals listed in Table C. 1. Asterisks in the table
indicate signals that are active low. The table also indicates whether each signal is incoming or
outgoing with respect to the printer.
Table C. 1. Parallel Connector Pin Assignments
Pin
In/out
1
2
3
4
5
6
7
8
9
10
11
12
13
14
15
16
17
18
19
20
21
22
23
24
25
In
In
In
In
In
In
In
In
In
Out
Out
Out
Out
In
—
—
—
—
—
—
—
—
—
—
—
Description
Strobe* [nStrobe]
Data 0 [Data 1]
Data 1 [Data 2]
Data 2 [Data 3]
Data 3 [Data 4]
Data 4 [Data 5]
Data 5 [Data 6]
Data 6 [Data 7]
Data 7 [Data 8]
Acknowledge* [nAck]
Busy [Busy]
Paper Empty [PError]
On-Line (Select) [Select]
Auto-feed [nAutoFd]
Not connected
0V DC
Chassis GND
+5 V DC
Ground return
Ground return
Ground return
Ground return
Ground return
Ground return
Ground return
(Continued on next page)
C-3
Appendix C Host Computer Interface
Pin
In/out
26
27
28
29
30
31
32
33
34
35
36
—
—
—
—
—
In
Out
—
—
Out
In
Description
Ground return
Ground return
Ground return
Ground return
Ground return
Ignored [nInit]
Error*, returns error status if FRPO O2=2 [nFault]
—
Not connected
Power Ready
Select In [NSelectIn]
[ ]: Signal names in the Auto mode (IEEE 1284). In the Auto mode, these signals are bi-directional.
Detailed descriptions of the signals follow.
Strobe* [nStrobe] (Pin 1)
A negative-going Strobe* pulse causes the printer to read and latch the data on the Data 0 [1] to
Data 7 [8] signal lines.
Data 0 [1] to Data 7 [8] (Pins 2 to 9)
These eight signals form the data byte sent from the host computer to the printer. Data 7 [8] is the
most significant bit.
Acknowledge* [nAck] (Pin 10)
This negative-going pulse acknowledges the previous character received by the printer. Acknowledge*
pulses are sent only when Busy is low.
Busy [Busy] (Pin 11)
This signal is high when the printer is busy and low when it is able to accept more data. Every high-tolow transition is followed by an Acknowledge* pulse.
C-4
Parallel Interface
Paper Empty [PError] (Pin 12)
This signal goes high when the printer runs out of paper.
On-Line [Select] (Pin 13)
This signal is high when the printer is on-line and low when the printer is off-line. It goes low when the
upper unit is raised, or when the ON LINE key is pressed to set the printer off-line.
Note______________________________________________________________________
The Paper Empty and On-Line signals are not used unless enabled by the FRPO command (O2
parameter).
Auto-Feed [nAutoFd] (Pin 14)
This signal is used in the Epson version of the Centronics interface to receive a carriage return. In
high-speed mode, it is used as an interrupt.
+5 V DC (Pin 18)
This line is connected to the printer’s +5 V DC line (+5 V ±0.5 V, 250 mA [Serial and Parallel total]
maximum, fused).
Prime [nInit] (Pin 31)
This signal is used in the standard Centronics interface to enable the computer to reset the printer. It is
ignored by the printer.
Error* [nFault] (Pin 32)
When the high-speed parallel line control is on (FRPO O2=2), this line returns error status.
C-5
Appendix C Host Computer Interface
Auxiliary output 1 (Pin 33)
This signal line is not used.
Power Ready (Pin 35)
This signal is high when the printer’s power is on.
Select In [NSelectIn] (Pin 36)
This signal is used in some versions of the Centronics interface to enable the computer to force the
printer on-line. In high-speed mode, it is used as an interrupt.
C-6
Serial (RS-232C/RS-422A) Interface
Serial (RS-232C/RS-422A) Interface
RS-232C interface
Interface Signals
The pins of the printer’s RS-232C interface connector carry the signals listed in Table C. 2. The table
also indicates whether each signal is incoming or outgoing with respect to the printer.
Table C. 2. RS-232C Signal Pin Assignments
Pin
In/out
Signal
1
2
3
4
5
6
7
11
20
—
Out
In
Out
In
In
—
—
Out
FG
TXD
RXD
RTS
CTS
DSR
SG
+5 V DC
DTR
Description
Frame ground
Transmit Data
Receive Data
Request To Send
Clear To Send
Data Set Ready
Signal Ground
Reserved
Data Terminal Ready
Brief descriptions of the signals follow.
FG – Frame Ground – (Pin 1)
This pin is connected directly to the printer frame.
TXD – Transmit Data – (Pin 2)
This output carries asynchronous data sent by the printer to the computer. It is used mainly in
handshaking protocols.
C-7
Appendix C Host Computer Interface
RXD – Receive Data – (Pin 3)
This input carries serial asynchronous data sent by the computer to the printer.
RTS – Request To Send – (Pin 4)
This output is always held high (above 3 volts).
CTS – Clear To Send – (Pin 5)
DSR – Data Set Ready – (Pin 6)
Unused.
SG – Signal Ground – (Pin 7)
All signals can transmit between the printer and the host computer to send each signals with a signal
ground.
+5 V DC – (Pin 11)
This line is connected to the printer’s +5 V DC line (+5 V ±0.5 V, 250 mA [Parallel and Serial total]
maximum, fused).
DTR – Data Terminal Ready – (Pin 20)
This output is used as a buffer nearly-full handshake line. It is held high (above 3 volts) when the
buffer can accept more data.
RS-232C Interface Voltage Levels
The voltage levels of the interface signals conform to EIA RS-232C specifications. SPACE is from 3
volts to 15 volts. MARK is from –3 volts to –15 volts. Voltages between –3 volts and 3 volts are
undefined.
C-8
Serial (RS-232C/RS-422A) Interface
RS-422A interface
The serial interface of this printer was set to RS-232C mode before leaving the factory. However, by
changing the jumper connector on the main circuit board, the interface can be changed to RS-422A
mode.
In RS-232C mode, the printer can be connected to a personal computer
(or similar device) equipped with an RS-232C serial interface. (The serial interface is set to
RS-232C before leaving the factory.)
In RS-422A mode, the printer can be connected to a personal computer
(or similar device) equipped with an RS-422A serial interface.
Note______________________________________________________________________
The changing of the main circuit board jumper connector should be carried out only by an authorized
dealer or a certified technician. We shall not be liable for damage due to improper changing of this
main circuit board jumper connector.
Note______________________________________________________________________
The following instructions are intended for the technician only.
Note on Handling the Main Circuit Board
Before touching the main circuit board, touch a water pipe or other large metal object to discharge
yourself of static electricity. While doing the work, it is recommended that you wear an antistatic wrist
strap.
C-9
Appendix C Host Computer Interface
Removing the rear panel from the Printer
1.
Turn the printer’s power off. Unplug the printer’s power cable and disconnect the printer’s
interface cable from the computer.
2.
Remove the six screws from the printer’s rear panel and remove the panel.
Rear Panel
C-10
Serial (RS-232C/RS-422A) Interface
Changing the Jumper Setting
1.
There is a jumper located on the main board in the location shown in the diagram. Referring to
the diagram, set this jumper in the position which matches the serial interface mode to be used.
In this example, the jumper setting is changed from RS-232C to RS-422A.
Jumper Connector
RS-232C Setting Position
(factory setting)
RS-422A Setting Position
1.
After completion of the above, replace the rear panel and secure it with the screws.
C-11
Appendix C Host Computer Interface
Verifying the Setting
The procedure described below should be followed to verify that the RS-422A mode had been
correctly set. Print the service status page to verify that the RS-422A mode has been correctly set.
1.
Make sure the power switch is off. Plug the power cord into the printer and turn power on.
2.
If the printer is on-line, select >>Print Status page in the Mode Select menu (refer to
Mode Select Menu at the end of this document), and print the service status page.
3.
Verify whether the setting is corrected by checking the status printed at the bottom of the page. The
following sample indicates that “RS-422A” is set “RS4”. If “RS-232C” is set, “RS2” appears.
[Printer Status Page]
Indicates the current serial interface mode.
Interface Signals
The pins in the printer’s RS-422A interface connector carry the signals listed in Table C. 3.
Table C. 3. RS-422A Signal Pin Assignments
C-12
Pin
In/out
Signal
Description
1
3
7
9
10
11
18
—
In
—
Out
Out
—
In
FG
RDA
SG
SDA
SDB
—
RDB
Frame ground
Receive data Inverted
Signal ground
Send data Inverted
Send data
+5 V DC
Receive data
Serial (RS-232C/RS-422A) Interface
Overview of Signals (RS-422A)
FG – Frame Ground – (Pin 1)
This pin is connected directly to the printer frame.
RDA – Receive Data Inverted – (Pin 3)
RDB – Receive Data – (Pin 18)
These pins carry asynchronous data sent from the computer to the printer. (differential input)
SG – Signal Ground – (Pin 7)
All signals can transmit between the printer and the host computer to send each signals with a signal
ground.
SDA – Send Data Inverted – (Pin 9)
SDB – Send Data – (Pin 10)
These pins carry asynchronous data sent from the printer to the computer. (differential output)
+5 V DC (Pin 11)
This line is connected to the printer’s +5 V DC line (+5 V ±0.5 V, 250 mA [Serial and Parallel total]
maximum, fused).
RS-422A interface voltage levels
The interface signal voltage levels conform with the EIA RS-422A standard. The differential voltage
varies from 200 mV to 6 V.
SERIAL Connector
The connector marked "IOIOI " (RS-232C/RS-422A) on the rear panel is a DB-25S connector. Use a
DB-25P connector (or equivalent) for the connector on the cable.
C-13
Appendix C Host Computer Interface
RS-232C/RS-422A Protocol
A protocol is a set of rules the computer follows in sending data to the printer. The RS-232C/RS-422A
parameters are stored in battery backed-up memory. They are indicated on the status printout. They can
be changed by the FRPO (firmware reprogram) command described in the Programming Manual. The
parameters and their identification codes are given below.
H1: Baud rate
Parameter value
12
24
48
96
19
38
57
11
The factory setting is 9600 baud.
H2: Data bits
7 or 8, factory-set to 8.
H3: Stop bits
1 or 2, factory-set to 1.
C-14
Baud rate
1200
2400
4800
9600
19200
38400
57600
115200
RS-232C/RS-422A Protocol
H4: Parity
Parameter value
Meaning
0
1
2
3
None
Odd
Even
Ignore
The factory setting is “None” (0 on the status printout).
H5: Protocol logic
Parameter value
0
1
2
3
4
5
Meaning
Combination of 1 and 3 below
DTR/DSR, positive logic
DTR/DSR, negative logic
XON/XOFF
ETX/ACK
XON/XOFF recognized only as protocol
The factory setting is 0.
Note______________________________________________________________________
Since DTR/DSR protocol is not used with the RS-422A standard, select a parameter value other than
0, 1, or 2 for the H5 setting when using the RS-422A interface.
H6: Buffer nearly-full threshold
This is a percentage from 0 to 99. The factory setting is 90.
C-15
Appendix C Host Computer Interface
H7: Buffer nearly-empty threshold
This is a percentage from 0 to 99. The factory setting is 70.
The factory settings of the buffer nearly-full and nearly-empty thresholds (H6 and H7) are subject to
change without notification.
The gap between the nearly-full and nearly-empty thresholds allows the computer to send a fairly large
amount of data in a continuous stream.
H8: Received-data buffer size
This is the size of the input buffer, specified in units of 10K bytes. The factory-set value is 6 meaning
60K bytes.
PRESCRIBE 2e FRPO D0 command
The PRESCRIBE 2e FRPO D0 command is provided to allow manipulating XON/XOFF when an error
has occurred on the serial interface. The following table summarizes the error status corresponding to
different D0 values.
Timing of XON transfer to
host while Ready or
Waiting
C-16
XON sent every 3-5
seconds
XON not sent
Serial interface error
error not handled
error handled
D0 = 0 (default)
D0 = 1
D0 = 10
D0 = 11
RS-232C Cable Connection
RS-232C Cable Connection
Preparing an RS-232C Cable
After obtaining an RS-232C cable, check that it is wired correctly, referring to the pin assignment table in
Appendix C. If you have an IBM communication adapter cable type 1502067, you will have to resolder
the wiring at the printer end of the cable. The procedure is as follows.
1.
Unscrew the plastic cover from the printer end of the cable.
2.
Next to each of the wires inside the cable is a bare shield wire. Solder all these shield wires
together into a single bundle.
3.
Using a section of flat wire about 3 mm wide and 15 mm long, connect the bundle of shield wires
to the metal facing of the connector. Check that the solder connections are secure.
4.
Desolder wires 2 and 3, then resolder them in crossed configuration. Solder wire 2 to pin 3 and
wire 3 to pin 2. Cover the solder joints with thermofit tube.
5.
Cut wires 4, 5, 6, and 20.
6.
Solder wires 5 and 6 together and connect them to pin 20. Cover the solder joints with thermofit
tube. Leave wire 4 unconnected.
7.
Tape all remaining loose ends, or seal them with thermofit tube.
8.
Screw the plastic cover back on.
C-17
Appendix C Host Computer Interface
Connecting the Printer to the Computer
1.
Check that the power of both the printer and computer is switched off.
2.
Discharge yourself by touching a metal object such as a doorknob.
3.
Remove the plastic cap from the printer’s RS-232C interface connector.
4.
Plug the printer end of the RS-232C interface cable into the printer’s RS-232C connector and
screw it in place.
5.
Plug the other end of the cable into the computer’s RS-232C interface connector.
6.
Switch on the printer’s power.
7.
The printer’s RS-232C parameters are factory-set to the following values:
Baud rate=9600 bps, Data bits (character length)=8 bits,
Stop bits=1, Parity=None
The three RS-232C protocols are XON/XOFF and DTR. The printer performs all three of them
simultaneously, using positive logic for DTR.
If you are uncertain as to the printer’s current parameter settings, you can reset them to the
values listed above by following the manner described in the last page in this manual.
C-18
RS-232C Cable Connection
8.
Set the computer to the same parameters as the printer. On many computers
this can be done
by setting DIP switches before power is turned on. Another method is as follows:
In DOS, enter the following commands:
C>MODE COM1:96,N,8,1,P
C>MODE LPT1:=COM1
To test the interface, then enter:
CTRL P
C>DIR
CTRL P
The software settings made by the procedures above are temporary. On most computers,
permanent settings must be made with DIP switches.
If you want to use a different baud rate or change any of the other RS-232C parameters, you can
use the printer’s FRPO (firmware reprogram) command. See the Programming Manual for
details.
C-19
Index
Index
A
D
ATTENTION indicator............................. 2-7
DATA indicator ....................................... 2-7
Dispose of the old toner container.......... 4-5
Dumping received data ........................ 2-57
B
Barcode reader ............................2-34, 2-39
Bitmap fonts............................................ 3-2
Buzzer................................................... 2-62
C
CANCEL key........................................... 2-9
Cap ......................................................... 4-4
Cassette mode...................................... 1-36
CAUTION LABELS ................................. 1-2
CD-ROM ........................................1-8, 1-30
Charger wire ..................................4-11, 5-5
Cleaning................................................ 4-10
Cleaning brush...................................... 4-17
Cleaning cloth ......................................... 4-2
Cleaning knob....................................... 4-11
CONTINUE key .................................... 2-10
Control keys ............................................ 2-9
Control panel........................................... 2-2
Copy indicator ......................................... 2-6
Custom setup........................................ 2-53
E
Ecoprint ......................................... 2-60, 5-6
Emulation ........................... 2-21, 2-25, 2-28
Envelope...................................... 1-40, 2-30
Error messages .................................... 5-14
EXIT key............................................... 2-10
Expanding memory .............................. 1-41
F
Face-up output tray .............................. 1-24
FEED key ............................................... 2-9
Feed selection ...................................... 2-15
First mode ............................................ 1-38
Flash memory card............................... 2-40
Fonts .................................... 2-19, 2-22, 3-1
FORM FEED key.................................. 2-10
Form feed ............................................. 2-23
Fuser mode ................................. 2-54, 2-55
Index-1
Index
G
List of fonts ............................................. 3-3
Lock lever.............................................. 4-16
P
General guide..........................................5-2
Grid........................................................4-12
Grid cleaner................................... 4-2, 4-12
M
Paper ...................................................... B-1
Paper feed cassette ............................. 1-19
Paper feed unit ..................................... 4-15
Paper jam ............................................. 5-19
Paper ramp........................................... 4-18
Paper size indicator ................................ 2-5
Paper specifications ............................... B-3
Paper stopper .............................. 1-20, 1-24
Paper type ................................... 2-51, 2-55
Paper weight................................ 2-54, 2-55
Parallel interface connector .................. 1-25
Parallel interface.................... 2-4, 2-24, C-2
Partitions............................................... 2-44
Plastic waste bag.................................... 4-5
Power cord .................................... 1-8, 1-27
Power switch ........................................ 2-12
PRECAUTIONS FOR USE .................... 1-5
Print density................................. 2-58, 2-62
Print quality problem ............................... 5-4
Printer driver ......................................... 1-30
Printer specifications .............................. A-1
Protective seal ........................................ 4-6
Protocol ................................................C-14
H
Hex-dump..............................................2-57
I
Indicator........................................... 2-6, 5-8
Install .....................................................1-30
INSTALLATION PRECAUTIONS............1-3
Interface ........................................2-24, C-1
Interface indicator....................................2-4
Interface signals ..................................... C-3
J
Jumper connector ................................ C-11
K
KCGL.....................................................2-28
KIR 2 .....................................................2-58
KIR 2 test pattern .................................2-22
L
Index-2
Macros .................................................. 2-43
Main charger unit .................................. 4-11
Maintenance ........................................... 4-1
Maintenance messages.......................... 5-9
Memory card ......................................... 2-40
Message display ..................................... 2-3
MODE key............................................. 2-10
Mode selection...................................... 2-23
Mode selection menu list ...................... 2-24
MP (Multi-purpose) tray ........................ 1-36
O
OHP film ...............................................B-10
ON LINE indicator ................................... 2-7
ON LINE key ........................................... 2-9
Online/offline ......................................... 2-16
Optional interface.................................... 2-4
Options......................................................vii
Output tray ............................................ 2-14
Index
R
T
RAM DISK .............................................2-32
Reduction ..............................................2-29
Registration roller ..................................4-18
Resolution indicator.................................2-4
Resource protection ..............................2-61
Right paper............................................. B-4
RS-232C interface.................................. C-7
RS-422A interface.................................. C-9
Target size ............................................ 2-30
Toner container................................1-8, 4-2
Toner container release levers ............... 4-4
Toner container replacement interval ..... 4-2
Toner kit...........................................1-8, 4-2
Transfer roller ................................4-17, 5-7
Troubleshooting ...................................... 5-1
S
Scalable fonts..........................................3-2
Separator ..............................................4-17
Serial interface ................................2-4, C-7
Serial interface connector ...........1-25, C-13
Setup and connections..........................1-13
SIMM .....................................................1-41
Size reduction.............................. 2-25, 2-29
Sleep timer ............................................2-56
Source size............................................2-30
Special paper ......................................... B-9
S-RAM card...........................................2-40
STACK key..............................................2-9
STATUS key .........................................2-10
Status page ...........................................2-20
Sub tray .................................................1-37
Symbol set...............................................3-8
U
Unpacking............................................... 1-7
V
Virtual mail box (VMB) .......................... 2-34
W
Windows ............................................... 1-30
Index-3
Mode Select Menu
Ready
PAR
These items willl not show unless the
printer is installed with the applicable
option unit/kit.
600 A4 001
Interface
Parallel
>
Serial
Option1
Option2
>Parallel I/F
Nibble (high)
Basic Operations During Mode Selection
Auto
This diagram gives quick reference to all
menu options and their sequence of
selection. Use this description in
combination with Chapter 2 Mode
Selection Menu.
High Speed
Normal
>Baud rate
9600
1. Press the MODE key to enter Mode
Selction mode.
>Data bits
8
2. Press the + or – key repeatedly until the
message display indicates the desired
item.
>Stop bits
1
3. Press the 8 key to move to a submenu.
Press the w key to return.
>Parity
None
4. Press the ENTER key once the desired
menu appears. ? will flash, and the
current setting can be changed.
>Protocol
DTR (pos.)&XON
5. Press the + and – key to select the
desired setting.
>Barcode mode
Off
6. Press the ENTER key.
If you want to re-enter a setting, press
the CANCEL key before pressing the
ENTER key.
7. Press the EXIT key. This will enable
currently selected settings.
>NetWare
Off
>
>>NetWare Frame
Auto
>
>>DHCP
OFF
On
>TCP/IP
Off
On
>Ether
Talk
>TCP/IP
Off
Off
Number of copies
001
>OPT.
StatusPage
>TCP/IP
Off
Off
>>IP Address
>>Gateway
>>Subnet Mask
Continued on next page
(Continued from previous page)
Emulation
HP LJ 5M/5Si
>
>Code set
ISO-6 ASCII
Emulation
KC-GL
>
>KC-GL
Pen width
(*1)
>>Pen (1) width
01
01 dot
dot (s)
(s)
>
>KC-GL Page set
Emulation
KPDL
>
>Print KPDL errs
Off
(*2)
On
Emulation
KPDL (AUTO)
>
>Alt. Emulation
HPLJ 5M/5Si
>Print KPDL errs
Off
(*2)
On
Emulation
IBM Proprinter
>
>Code set
IBM US
Emulation
DIABLO 630
>
>Code set
DIABLO US
Emulation
EPSON LQ-850
>
>Code set
LQ US
Font
Bitmap
>
Line Printer
>
Scalable
>Bitmap font
00001
>Courier
Dark
(*3)
Light
>AudreyTwo-Regu
lar SWC
>Courier
Dark
Page set
>Size
012.00 point (s)
>Pitch
Landscape
Opt. ROM
>
>
Continued on next page
*2:
The printer can be set to print error data during
KPDL emulation. If this is set to On, error data
will be printed if trouble occurs during printing.
This is set to Off before leaving the factory.
*3:
You can select either of two Courier fonts,
Dark (bold) or Light (thin), as the default
font. The original selection is Dark. The
selection made applies to both bit map fonts
and scalable fonts; the two cannot be set
independently.
*4:
The >Size menu is not available for the
Courier and Letter-Gothic fonts. The >Pitch
menu is displayed instead for these fixed width
fonts.
(*4)
10.00 cpi
>Read data
>List of
partitions
HARD DISK
Depending on the emulation selected, the
following set >code sets are available.
(*3)
Light
Page orientation
Portrait
*1:
>Read data
(Continued from previous page)
RAM DISK mode
Off
>
On
(*5)
MEMORY CARD
>
>RAM DISK size
>Read data
>Read fonts
>Format
>Read data
>Write data
>Delete data
>List of
Partitions
Paper handling
>
MP tray mode
First
>
>MP tray size
A4 or Letter
>MP tray type
PLAIN
Rough
>EF size
DL or Business
>EF type
Envelope
>Cassette 1 type
PLAIN
*5:
The RAM DISK mode menu is not
displayed when an optional hard disk unit is
installed.
*6:
This sets whether to enable or disable the
difference between A4 size and letter size.
Under the default setting of Off, the paper
size of the paper source is matched to the
paper size given for the data, and if these differ
a corresponding error message is displayed.
When this is set to On, printing is performed
even if the actual paper size differs from the
paper size given for the data.
*7:
This menu is displayed only when Custom
is selected
>Duplex mode
None
>Opt. StackerMode
Off StackerMode
>Opt.
On
>Override A4/LT
Off StackerMode
>Opt.
On
>Custom setup
Custom 1
>Reset custom
setup
>
(*6)
>>Fuser mode
Middle
>>Paper weight
Normal
>>Duplex path
Disable
>Opt.
StackerMode
Enable
Continued on next page
(*7)
(Continued from previous page)
Others
>
>MSG language
English
>Form Feed
Time Out 030 sec.
>Print HEX-DUMP
>Printer Reset
>LF action
LF only
Ignore LF
>CR action
CR only
CR and LF
Ignore CR
(*9)
>KIR mode
On
Off
>Ecoprint mode
Off
On
(*10)
On
300 dpi
Continued on next page
This is the total number of pages printed by the
printer up to the present time.
*11: This sets the print resolution.
CR and LF
>Resolution
600 dpi
*9:
*10: Although Auto is the default setting and this
menu does not usually appear, page protection
mode will be forcibly set to on if a Print
overrun Press CONTINUE error
occurs due to insufficient printer memory. Be
sure to return this setting to Auto in order to
maintain high printer memory efficiency.
>List of
resident Fonts
>Page protect
Auto
After the printer accepts all data and there is no
more data from the computer, the printer will
wait a set amount of time without printing the
final page. Once this preset amount of time has
elapsed, the printer will automatically issue a
form feed. This timeout setting can be set in 5second increments up to 495 seconds.
(*8)
>Sleep timer
030 min.
>Number of pages
printed
0123456
*8:
(*11)
(Continued from previous page)
>Resource prot.
Off
*12: These menus are for service personnel.
They should not be operated by the user.
Permanent
Perm / Temp
>Print density
03
>Buzzer
On
Off
>Service
>
>>Print
Status Page
>>Developer
>>Drum
(*12)
This machine has passed
all quality controls and
final inspection.
MITA COPYSTAR AMERICA, INC.
Headquarters:
225 Sand Road, P.O.Box 40008
Fairfield, New Jersey 07004-0008
TEL : (973)808-8444
FAX : (973)882-6000
New York Show Room:
149 West 51st street,
New York, NY 10019
TEL : (212)554-2679
FAX : (212)554-2625
Northeastern Region:
225 Sand Road, P.O.Box 40008
Fairfield, New Jersey 07004-0008
TEL : (973)808-8444
FAX : (973)882-4401
Midwestern Region:
225 Spring Lake Drive,
Itasca, Illinois 60143
TEL : (630)250-7447
FAX : (630)250-8787
Western Region:
14101 Alton Parkway
P.O.Box 57006, Irvine,
California 92618-7006
TEL : (714)457-9000
FAX : (714)457-9119
Southeastern Region:
1500 Oakbrook Drive,
Norcross, Georgia 30093
TEL : (770)729-9786
FAX : (770)729-9873
Southwestern Region:
2825 West Story Road,
Irving, Texas 75038-5299
TEL : (972)550-8987
FAX : (972)570-4704
Dallas Parts Distribution Center
& National Training Center:
2825 West Story Road,
Irving, Texas 75038-5299
TEL : (972)659-0055
FAX : (972)570-5816
MITA COPYSTAR CANADA, LTD.
MITA COPYSTAR MEXICO, S.A. DE C.V.
6120 Kestrel Road,
Mississauga, Ontario L5T 1S8
TEL : (905)670-4425
FAX : (905)670-8116
Av. 16 de Septimbre #407
Col. Santa Inés,
Delegacion Azcapotzalco
México, D.F.C.P. 02130
TEL : 3-83-27-41
FAX : 3-83-78-04
MITA COPYSTAR SOUTH AMERICA S.A.
Av. Mitre 1345 Florida (1602)
Pcia, Buenos Aires, Argentina.
TEL : (54)1-730-1070
FAX : (54)1-760-2071
1998. 11
5BT80010A