1
Kodak Digital Science™
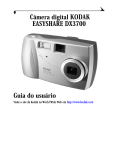
DVC323 Digital Video camera
Camera User’s Guide
All rights are reserved. No section of this manual may be photocopied, reproduced, translated
to another language, stored in a retrieval system, or transmitted in any form without the prior
written consent of Eastman Kodak Company.
The information contained in this manual is subject to change without notice. Eastman Kodak
Company makes no warranty of any kind with regard to this written material. Eastman Kodak
Company assumes no responsibility for any errors that may appear in this document.
Kodak, Digital Science, and the ds monogram are trademarks of Eastman Kodak Company.
Table of Contents
Getting Started . . . . . . . . . . . . . . . . . . . . . . . . . . . . . . . . . . . . . . . . . . . . . . . 1-1
Package Contents . . . . . . . . . . . . . . . . . . . . . . . . . . . . . . . . . . . . . . . . . . .1-2
Your DVC323 Camera . . . . . . . . . . . . . . . . . . . . . . . . . . . . . . . . . . . . . . .1-3
Camera Specifications . . . . . . . . . . . . . . . . . . . . . . . . . . . . . . . . . . . . . . .1-4
System Requirements . . . . . . . . . . . . . . . . . . . . . . . . . . . . . . . . . . . . . . . .1-6
Minimum System Requirements . . . . . . . . . . . . . . . . . . . . . . . . . . . .1-6
Additional Requirements for Recording Audio . . . . . . . . . . . . . . . . .1-7
Additional Requirements for Videoconferencing . . . . . . . . . . . . . . . .1-8
Installing Your DVC323 Camera . . . . . . . . . . . . . . . . . . . . . . . . . . . . . . .1-8
Installing the Software . . . . . . . . . . . . . . . . . . . . . . . . . . . . . . . . . . . . . . . . . 2-1
Connecting Your DVC323 Camera . . . . . . . . . . . . . . . . . . . . . . . . . . . . . . . 3-1
Universal Serial Bus (USB) Connection . . . . . . . . . . . . . . . . . . . . . . . . .3-1
Monitor Adjustment . . . . . . . . . . . . . . . . . . . . . . . . . . . . . . . . . . . . . . . . .3-2
Capturing Pictures and Videos . . . . . . . . . . . . . . . . . . . . . . . . . . . . . . . . . . 4-1
Composition . . . . . . . . . . . . . . . . . . . . . . . . . . . . . . . . . . . . . . . . . . . . . . .4-1
Lighting . . . . . . . . . . . . . . . . . . . . . . . . . . . . . . . . . . . . . . . . . . . . . . . . . .4-2
Adjusting Your Camera Settings . . . . . . . . . . . . . . . . . . . . . . . . . . . . . . .4-3
Viewing the “Video Settings” window . . . . . . . . . . . . . . . . . . . . . . . .4-3
Color Balance . . . . . . . . . . . . . . . . . . . . . . . . . . . . . . . . . . . . . . . . . . .4-5
Auto White Balance . . . . . . . . . . . . . . . . . . . . . . . . . . . . . . . . . . . . . .4-5
Exposure . . . . . . . . . . . . . . . . . . . . . . . . . . . . . . . . . . . . . . . . . . . . . . .4-6
Shutter Speed . . . . . . . . . . . . . . . . . . . . . . . . . . . . . . . . . . . . . . . . . . .4-6
Adjusting Your Camera for Videoconferencing . . . . . . . . . . . . . . . . . . .4-7
Printing Your Pictures . . . . . . . . . . . . . . . . . . . . . . . . . . . . . . . . . . . . . . .4-8
i
Table of Contents
Chapter-Page
Troubleshooting Problems . . . . . . . . . . . . . . . . . . . . . . . . . . . . . . . . . . . . . . 5-1
General Maintenance and Safety . . . . . . . . . . . . . . . . . . . . . . . . . . . . . . .5-1
Cleaning the Lens . . . . . . . . . . . . . . . . . . . . . . . . . . . . . . . . . . . . . . . . . . .5-1
Running Diagnostics . . . . . . . . . . . . . . . . . . . . . . . . . . . . . . . . . . . . . . . .5-2
Solving Camera Problems . . . . . . . . . . . . . . . . . . . . . . . . . . . . . . . . . . . .5-4
Getting Help . . . . . . . . . . . . . . . . . . . . . . . . . . . . . . . . . . . . . . . . . . . . . . . . . . 6-1
Online Services . . . . . . . . . . . . . . . . . . . . . . . . . . . . . . . . . . . . . . . . . . . . .6-1
Faxed Information . . . . . . . . . . . . . . . . . . . . . . . . . . . . . . . . . . . . . . . . . .6-1
Kodak Customer Support . . . . . . . . . . . . . . . . . . . . . . . . . . . . . . . . . . . . .6-2
Warranty & Regulatory Information . . . . . . . . . . . . . . . . . . . . . . . . . . . . W-1
Warranty Time Period . . . . . . . . . . . . . . . . . . . . . . . . . . . . . . . . . . . . . .W-1
Warranty Repair Coverage . . . . . . . . . . . . . . . . . . . . . . . . . . . . . . . . . . .W-1
Limitations . . . . . . . . . . . . . . . . . . . . . . . . . . . . . . . . . . . . . . . . . . . . . . .W-2
Application Support . . . . . . . . . . . . . . . . . . . . . . . . . . . . . . . . . . . . . . . .W-3
How to Obtain Service . . . . . . . . . . . . . . . . . . . . . . . . . . . . . . . . . . . . . .W-3
Regulatory Information . . . . . . . . . . . . . . . . . . . . . . . . . . . . . . . . . . . . .W-4
FCC Compliance and Advisory . . . . . . . . . . . . . . . . . . . . . . . . . . . .W-4
Canadian DOC Statement . . . . . . . . . . . . . . . . . . . . . . . . . . . . . . . . .W-4
Important Safety Instructions . . . . . . . . . . . . . . . . . . . . . . . . . . . . . .W-5
ii
Getting Started
Congratulations on purchasing your new Kodak Digital Science™ DVC323
Digital Video camera (DVC323 camera). Using your new DVC323 camera and
the right software, you can easily:
✔ Capture still pictures or record video clips with sound using PictureWorks
Live software
Science Picture Easy or PictureWorks Live software
✔ Hold a videoconference using Microsoft NetMeeting by Microsoft
Corporation or CU-SeeMe by White Pine Software, Inc. You can
communicate with one or more people and send video, audio, text, or
graphics as you participate in a class, a business meeting, or a chat with
friends or family.
✔ Capture, catalog, and share still images over the Kodak Picture Network
using Kodak Digital Science Picture Easy software
✔ Add annotations and diagrams to an image using Imaging for Windows
by Eastman Software
✔ Capture time-based still pictures for Web pages or area security
✔ Distort images using Kai’s Power GOO SE by MetaTools
✔ Import still images into photo imaging software using the TWAIN
Acquire Module
✔ Edit videos using your favorite video editing software and the device
driver for Microsoft Video For Windows software
1-1
Getting Started
✔ Send multimedia greeting cards to friends and family using Kodak Digital
1
Package Contents
The DVC323 package contains the following items:
✔ DVC323 camera with integrated Universal Serial Bus (USB) cable and
detachable base
✔ This Camera User’s Guide
✔ Quick setup card
✔ Registration/warranty card
If you purchased the DVC323 camera by itself—and not as part of a computer
system—the DVC323 package should also include the following items:
✔ DVC323 Software CD
✔ Software User’s Guide
1-2
Your DVC323 Camera
Shutter Button
LED
1
Focus
Wheel
Getting Started
Lens
Detachable Base
Tripod Mount
Camera Part
Description
Shutter Button
Use your mouse and the software application, or the shutter button,
to take pictures and record videos.
LED
(Red indicator
light)
When you plug the camera into your computer, the LED blinks until
the computer turns the camera on. When you take a picture, the LED
blinks. When you record a video, the LED stays on until you stop
recording.
If the LED blinks continuously, the computer is not communicating
with the camera. See the troubleshooting section of this manual for
help.
Focus Wheel
Use the focus wheel to adjust the lens and sharpen the image you are
capturing from 5” (12.7cm) to infinity.
Move the wheel toward
to focus on a close image, or toward
to focus on an image at a distance.
Detachable Base
Remove the base for hand-held or tripod camera operation.
Tripod Mount
Attach the camera to a tripod for added stability.
1-3
Camera Specifications
Specification
Imaging
Electronics
Description
Image Sensor
Kodak manufactured 640(H) x 480 (V) pixels,
interline transfer, progressive scan color CCD
with square pixels
Photo Resolution
640(H) x 480(V) 24-bit color, 16.7 million
colors
Picture Resolution
Stills: 320 x 240, 640 x 480 pixels (24-bit
color)
Video: 160 x 120, 320 x 240, 352 x 288 (CIF),
176 x 144 (QCIF)
Video Frame Rate*
Telephoto: 10 to 30 frames per second
Normal: 10 to 30 frames per second
Wide Angle: 12 to 28 frames per second
Signal-to-Noise Ratio 53 db before A/D conversion
Video Output Gamma 0.45
Video Color Format
Optics
Interface
Dimensions
Weight
1-4
YUV, 9 bits or 12 bits per pixel
Still Color Format
RGB, 24 bits per pixel
White Balance and
Exposure
Automatic, with a software option to adjust
manually
Lens
Kodak manufactured 3 element, 6.2mm focal
length lens with f/2.5 aperture
Digital Zoom and
Field of View
Telephoto: 20o
Normal: 30o
Wide Angle: 42o
Focus (Manual)
5” (12.7cm) to infinity
Electronic Shutter
Variable speed between 1/500 and 1/10 second
with stop action and normal settings
Computer Interface
and Cable
Universal Serial Bus (USB) interface (Version
1.0) with 9.8’ (3m) cable
Power
USB interface supplies power (<500mA @ 5V
supplied through USB cable)
Height
2.5” (6.35cm)
Width
2.0” (5.1cm)
Depth
5” (12.7cm)
Without the base
7 oz. (227 g)
With the base
10 oz. (284 g)
Specification
Operating
Environment
Description
Temperature
40 to 104o F (4.4o C to 40o C)
Humidity
Cold: 40o F @ 15% +/- 5% RH
Hot: 104o F @ 76% +/- 5% RH
Altitude
Low Temperature: 8,000 ft. at 49o F
@ 15 +/- 5% RH
High Temperature: 8,000 ft. at 86o F
@ 20 +/- 5% RH
* The frame rates apply when 6Mbit/second USB bandwidth is available. Frame rates
may be lower if other Isochronous USB devices are operating through the bus.
1
Getting Started
1-5
System Requirements
Minimum System Requirements
Your computer must be equipped with the following components in order to use
the DVC323 camera:
✔ Personal computer with a Universal Serial Bus (USB) and a Pentium (or
equivalent) Processor.
✔ Windows 95 system software, Version 4.00.950B or later. (Most Pentium
MMX Computers are shipped with Version 4.00.950B or later.) If you
have a non-MMX Pentium Computer, check the system properties to
determine which version of Windows 95 you are running:
1 Right-click on the My Computer icon.
2 Click on Properties.
3 View the System
field to determine
the version of
Windows 95.
✔ CD-ROM drive
✔ Minimum of 16 MB of available RAM
1-6
✔ 13 MB of available hard disk space for the required software:
—10 MB for PictureWorks Live
—3 MB for drivers (DVC323 Device Driver, OCX, and the TWAIN
Acquire Module)
To determine the amount of free space on your hard disk:
1 Right-click on the My Computer icon.
2 Click on Explore.
3 View the Free Space for your hard disk.
1
Getting Started
✔ Additional hard disk space for the software applications you choose to
install:
—6 MB for Kai’s Power GOO SE
—18 MB for Picture Easy
—5 MB for Microsoft NetMeeting
✔ 256 color VGA display (800 x 600 resolution, 16-bit color (or better) is
recommended)
Additional Requirements for Recording Audio
If you are going to use the DVC323 camera for recording video clips with sound,
your computer system must also contain the following components:
✔ Microphone
✔ 16-bit sound system
✔ Speakers or headphones
1-7
Additional Requirements for Videoconferencing
If you are going to use the DVC323 camera for videoconferencing, your
computer system must also contain the following components:
✔ Microphone
✔ 16-bit sound system
✔ Speakers or headphones
✔ Network connection (for H.323 network-type conferencing)
—TCP/IP (winsock-compliant), network connection
—28.8 Kbps (or better) modem, Ethernet, or ISDN connection
✔ Telephone connection (for H.324 dialup-type conferencing)
—H.324-compliant software and recommended modem
Installing Your DVC323 Camera
If you purchased your DVC323 camera by itself—not bundled with a computer
system—you must install the software from the DVC323 Software CD before
connecting the camera to your personal computer. Follow the instructions for
“Installing the Software” in the next chapter before connecting the camera to
your personal computer.
If you purchased your DVC323 camera as part of a computer system, software
for using the camera should already be installed on your new personal computer.
Follow the instructions in Chapter 3 for “Connecting Your DVC 323 Camera” to
your personal computer.
1-8
Installing the
Software
If you purchased your Kodak Digital Science DVC323 Digital Video camera
(DVC323 camera) by itself—not bundled with a computer system—you must
install the software that is on the DVC323 Software CD onto your personal
computer before you connect the camera.
1 Close all applications that may be running on your personal computer.
2 Place the DVC323 Software CD
into your CD-ROM drive.
☞ If Auto Run is turned on in
2
Installation
Windows 95, the first install
window automatically
appears within a few
seconds. Go to step 6.
3 Click on the Start button on your computer taskbar.
4 Click on Run to display the “Run” window.
5 In the Open field, type the letter of
the drive that contains the CD and
then type :\setup
For example: d:\setup
2-1
6 Click OK to display the “DVC323 Digital Video camera” screen.
7 Click on Install to display the
“Software Install Options” screen.
☞ Click on Show Me Goodies
to view information about the
demo software (such as
CU-SeeMe) included in the
“Goodies” folder on the
Software CD.
8 Click on Install DVC323
Software and follow the
instructions that are displayed on
the screen.
9 Remove the DVC323 Software CD from your CD-ROM drive.
The following software applications are installed with the DVC323 Software:
✔ Kai’s Power GOO SE
✔ PictureWorks Live
✔ TWAIN
You must repeat the installation procedure and select a different installation
option in Step 8, to install Microsoft NetMeeting or Picture Easy.
Once you have installed the DVC323 Software, follow the instructions in the
next chapter for “Connecting Your DVC323 Camera” to your personal computer.
For instructions on using the software with your DVC323 camera (or uninstalling the software), refer to the DVC323 Software User’s Guide.
2-2
Connecting Your
DVC323 Camera
Once software for using the Kodak Digital Science DVC323 Digital Video
camera (DVC323 camera) is installed on your personal computer, you are ready
to connect your DVC323 camera to your computer.
Universal Serial Bus (USB) Connection
Follow these steps to connect your DVC323 camera to your computer:
1 Connect the camera cable from the camera to the USB connection on your
computer.
USB Connection
Camera Cable
3
Connect Camera
2 View the message “Unknown device.... Searching for file.” (Windows 95
automatically displays this message when it detects the camera.)
3 Wait until Windows 95 loads the necessary drivers and the “Unknown
device...” message disappears.
After you connect the camera to your computer, the camera will be in video
mode.
3-1
Monitor Adjustment
You may need to adjust the display settings for your monitor to view pictures
from the DVC323 camera.
1 Double-click on the My Computer icon.
2 Double-click on the Control Panel icon.
3 Double-click on the Display icon to view the “Display Properties” window.
4 Click on the Settings tab.
3-2
5 In the Color Palette field,
select 16-bit (65536 Colors)
or 24-bit (True Color or
16777216 Colors).
6 In the Desktop Area field,
select 800 by 600 pixels (or
greater).
7 Click on the OK button.
3
Connect Camera
3-3
Capturing
Pictures and
Videos
4
Pictures & Videos
Your Kodak Digital Science DVC323 Digital Video camera (DVC323 camera)
will take good pictures in your home or office just by connecting it to your
computer. You can take even better pictures by following some simple hints for:
✔ Composition
✔ Lighting
✔ Color balance
✔ Auto white balance
✔ Exposure
✔ Shutter speed
✔ Videoconference camera adjustment
Composition
✔ Hold the camera steady in your hand, place it on a stable surface, or use a
tripod.
✔ Position the subject in the center of the image area.
4-1
Lighting
Follow these lighting hints to capture quality pictures and videos:
✔ Use plenty of light
Since lighting conditions vary depending on wall color, the use of lamp
shades, and many other factors, refer to the following table for some
guidelines.
Light Type
Good
(100 lux)
Very Good Excellent
(200 lux) (400 lux)
100W incandescent
7 ft.*
4 ft.*
3 ft.*
40W incandescent
3 ft.*
2 ft.*
--
34W Cool White Deluxe Fluorescent
8 ft.*
5 ft.*
3 ft.*
*This is the recommended distance when pointing a desk lamp (with a
reflector and no shade) at the subject. If you use another type of lamp,
move it closer to the subject.
✔ Place the lights behind and near the camera so they shine toward the
subject
✔ Do not mix light types (for example, fluorescent and incandescent, or
incandescent and daylight)
✔ Avoid aiming the camera at bright lights or windows
4-2
Adjusting Your Camera Settings
✔ Color Balance
✔ Auto White Balance
✔ Exposure
✔ Shutter Speed
Viewing the “Video Settings” Window
Follow these steps to view the “Video Settings” window. Then follow the
recommendations for adjusting the color balance, auto white balance, exposure,
and shutter speed in the following sections. (You can also adjust the settings
when using some software applications, like PictureWorks Live.)
☞ There is no preview window to show the effect of your changes to the
current settings. You must restart your software application to verify the
adjustments.
1
2
3
4
Click on the Start button on your computer taskbar.
Select Programs.
Select KODAK DVC323.
Select DVC323 Video Setup to view the “Video Settings” window.
4-3
4
Pictures & Videos
You can adjust the following image quality settings for your camera to achieve
the most pleasing video image:
5 Click on the Settings tab to
adjust the Color Balance
attributes.
6 Click on the Camera
Controls tab to:
✔ Turn Auto White
Balance on or off
✔ Turn Auto Exposure on
or off
✔ Select the Shutter
Speed
7 Adjust the settings according to the recommendations in the following
sections.
8 Click on the OK button to save all your adjustments on the “Video Settings”
window.
9 Restart your software application to activate the camera adjustments you just
made.
4-4
Color Balance
✔ If the light source is consistent, move the hue slider on the “Video
Settings” window until the image looks correct.
✔ If the light source is changing, select one of the preset color balance
settings for the common light sources (incandescent, fluorescent, or
daylight). Then adjust the hue slider until the image looks correct. (Refer
to Chapter 2 in the DVC323 Software User’s Guide for information about
adjusting the camera settings while using PictureWorks Live.)
If your light source is unusual, the hue slider and preset values may not be
correct. Follow the procedure for adjusting the Auto White Balance in the next
section.
Auto White Balance
If the Auto White Balance control has trouble selecting the correct balance for a
scene, complete the following procedure:
1 Place a plain white sheet of paper in front of the camera so that the paper is
the only object in the scene. Make sure the light on the paper is the same as
the light on the scene.
2 Turn off Auto White Balance on the “Video Settings” window and select one
of the predefined lighting situations.
3 Turn Auto White Balance on again.
This procedure re-initializes Auto White Balance with a neutral scene. The white
balance should remain the same when the white paper is removed.
4-5
4
Pictures & Videos
The software has automatic and manual color balance options. When Auto White
Balance is selected on the “Video Settings” window, the software automatically
adjusts the colors for the current lighting conditions. If the resulting color is not
satisfactory, you can manually adjust the color balance in two ways.
Exposure
The software has automatic and manual exposure control options. When Auto
Exposure is selected on the “Video Settings” window, the software adjusts the
brightness. You can use the manual mode to adjust the brightness. If you adjust
the brightness manually, you will have to adjust the brightness each time the
lighting conditions change.
Shutter Speed
The shutter speed is determined by your software’s video setting. Use the
information in the following table to select the best frame rate for your particular
need. For example, for low light conditions, select a slower shutter speed range
(set Zoom at Wide and Quality at High) on the “Video Settings” window.
Zoom
Setting
Wide
42o
Normal
30o
Max. Frame
Rate*
(Frames Per Sec.)
Shutter Speed
Range
High (Best)
12
1/120 - 1/12 sec.
Medium (Better)
20
1/120 - 1/20 sec.
Low (Good)
28
1/120 - 1/28 sec.
High (Best)
10
1/120 - 1/10 sec.
Quality
Setting
Medium (Better)
20
1/120 - 1/20 sec.
Low (Good)
30
1/120 - 1/30 sec.
10
1/120 - 1/10 sec.
20
1/120 - 1/20 sec.
30
1/120 - 1/30 sec.
Telephoto High (Best)
20o
Medium (Better)
Low (Good)
* The maximum frame rates apply when 6Mbit/second USB
bandwidth is available. Frame rates may be lower if other USB
devices are attached to the bus.
When taking pictures of moving objects, select Stop Action to limit the shutter
speed to 1/40 second (maximum) and reduce motion blur.
4-6
Adjusting Your Camera for Videoconferencing
If you experience video display problems with your videoconferencing software
application, your software may only support one image size or format. You can
select the image format that is supported by your videoconferencing application
by following these steps:
1
2
3
4
Click on the Start button on your computer taskbar.
Select Programs.
Select KODAK DVC323.
Select DVC323 Video Setup to view the “Video Settings” window.
5 Click on the Image
Format tab.
6 If your videoconferencing
software only supports one
image size or format, select
the Format from the list of
available formats.
7 Click on OK to save your adjustments on the “Video Settings” window.
8 Restart the videoconferencing software application to activate your video
camera adjustments.
4-7
4
Pictures & Videos
Several videoconferencing software applications do not allow you to enhance the
video image settings directly. As shown in the previous section, you can adjust
the image quality attributes (brightness, zoom, hue, etc.) for your camera on
Kodak’s “Video Settings” window.
Printing Your Pictures
When printing your captured pictures, we recommend using Kodak Inkjet
Snapshot paper. Snapshot Paper is designed to work with most inkjet printers to
produce clearer, crisper, and more detailed images.
☞ The 4 x 6 in. Snapshot Paper is only available for inkjet printers. Do not use
Snapshot Paper with laser printers.
Before you print with Snapshot Paper, you may need to:
✔ Rotate the picture so it is in portrait layout.
✔ Resize the picture so the image is smaller than the Snapshot paper. For
example, when the image is in portrait layout, try setting the image to 4.5
inches tall and 3.4 inches wide.
✔ Adjust your printer as directed on the Kodak Inkjet Snapshot Paper
Getting Started sheet. This will produce the best quality prints.
4-8
Troubleshooting
Problems
General Maintenance and Safety
5
✔ To keep from damaging your Kodak Digital Science DVC323 Digital
✔ Never touch the lens with your finger.
✔ Clean the outside of the DVC323 camera by wiping it with a clean, dry
cloth.
☞ Never use harsh or abrasive cleaners or organic solvents on the
camera or any of its parts.
✔ Never disassemble or touch the inside of the DVC323 camera. This will
void your warranty and could result in electrical shock.
Cleaning the Lens
1 Blow gently on the lens to remove dust and dirt.
2 Moisten the lens by breathing lightly on it.
3 Wipe the lens gently with a soft, lint-free cloth or an untreated lens-cleaning
tissue.
☞ Do not use cleaning solutions unless they are designed specifically for
camera lenses. Do not wipe the camera lens with chemically treated
eyeglass lens tissue because it may scratch the lens.
5-1
Troubleshooting
Video camera (DVC323 camera), avoid exposing it to moisture and
extreme temperatures.
Running Diagnostics
If you are having problems with your DVC323 camera, run the diagnostic
software to determine if there is a Kodak driver problem.
1 Close all applications that may be running on your computer.
2 Click on the Start button on your computer taskbar.
3 Click on Programs.
4 Click on KODAK DVC323.
5 Click on DVC323 Diagnostic.
6 Wait until the diagnostic software finishes and displays one of the following
two symbols:
✔ Green smiling face—the diagnostics ran successfully and did not find any
errors.
✔ Frowning face and an error code—refer to the following table for a
possible solution to the problem:
Error Description
Code of Error
-1
Camera Open
Failure
Cause
Solution
The camera is not
connected.
Check the camera connection to
the USB port on your computer.
The camera driver is not Unplug the camera and re-install
installed.
the DVC323 software.
5-2
The USB driver is not
installed.
Unplug the camera and re-install
the DVC323 software.
A USB hardware
malfunction occurred.
Contact your computer vendor for
help.
Error Description
Code of Error
-2
-3
Unknown Error
OCX not
Registered or
Missing
Cause
Solution
The computer doesn’t
meet the minimum
RAM requirements.
Add RAM to your computer.
There are too many
applications running.
Close some software applications
or application windows.
Other
Restart your computer and check
for viruses. Run SCANDISK to
check for corrupted files.
The operating system
and drivers are not
properly configured.
If the camera was previously
operating properly, unplug the
camera and re-install the
DVC323 software.
There is a hardware
problem with the USB.
Contact your computer vendor for
help.
The OCX is not
registered or cannot be
found.
Unplug the camera and re-install
the DVC323 software.
5
5-3
Troubleshooting
-4
Out of Memory
Solving Camera Problems
If you are having problems with your camera, or are having trouble viewing
images from your camera, refer to the information in the following table for
possible solutions.
Problem
Cause
Solution
LED blinks slowly
Computer does not
detect the camera
✔
Unplug the camera and plug it
in again.
✔
Reboot the computer with the
camera plugged in.
Wrong USB driver
software is installed on
your computer
Run the DVC 323 installer, which
will tell you if you need a different
version of the USB driver software
on your computer.
USB port is not enabled
Refer to the manual for your
specific computer. Enter the CMOS
Setup for your computer
immediately after a restart and
make sure the USB port is enabled.
USB port may be
1
conflicting with other
interfaces. For example,
an interrupt level conflict 2
with a sound, network, or
graphics card.
Double-click on the System
icon in the control panel.
Click on the Device Manager
tab and make sure “Universal
Serial Bus Controller” is listed.
3 If the controller is not listed,
the USB port is not enabled in
the CMOS Setup. Refer to the
manual for your specific
computer.
4 If the controller is listed with a
!, there is a problem with the
USB port. Select Properties to
see what the problem is and
then contact your computer
vendor.
LED never lights
5-4
No power to USB port
Refer to the manual for your
specific computer. Enter the CMOS
Setup for your computer
immediately after a restart and
make sure the USB port is enabled.
Cause
Solution
LED stays lit
Camera is not working
properly
✔
Unplug the camera and then
plug it in again.
✔
Reboot your computer with the
camera plugged in.
✔
Unplug the camera and then
plug it in again.
✔
Reboot your computer with the
camera connected.
✔
Un-install the DVC323
software and then re-install it.
✔
Rotate the focus wheel on the
camera until the image is sharp.
To see more detail, select High
in the Quality field on the
“Video Settings” window (see
Chapter 4).
✔
If in low light, place the camera
in its base and on a stable
surface. Start recording the
video by using the mouse and
the software application instead
of pressing the shutter button
on the camera. Make sure the
subject is not moving rapidly.
✔
If in normal or bright light,
select Fast shutter speed on the
“Video Settings” window. This
will limit the shutter speed to a
stop action setting to allow you
to capture moving subjects
with less motion blur, and
allow hand-held use of the
camera and use of the shutter
button with much less camera
shake.
“Unable to connect
camera” message
appears
Camera driver file is
missing or corrupted
Still pictures are blurry The subject is moving
too fast for the shutter
speed, the camera is
being moved while
taking the picture, or the
manual focus is set
incorrectly.
5-5
5
Troubleshooting
Problem
Problem
Cause
Solution
Pictures/Videos are
dark
There is not enough light
or the auto exposure is
keying on a bright area
of the scene
✔
Increase the light on the
subject.
✔
Remove any bright light
sources from the scene.
✔
Select a High sharpness (low
frame rate) video mode on the
“Video Settings” window.
Select Wide in the Zoom field
for the slowest shutter speed.
✔
If using the “Center Weighted”
exposure setting, make sure the
subject is in the center of the
display window. If a bright
object is in the center of the
window, the rest of the scene
will be darkened when the
camera attempts to expose the
bright object properly.
✔
Decrease the amount of light in
the scene.
✔
Select Fast shutter speed on the
“Video Settings” window to
take pictures and videos in
bright outdoor light.
✔
If using the “Center Weighted”
exposure setting, make sure the
subject is in the center of the
display window. If a dark
object is in the center of the
window, the rest of the scene
will be lightened when the
camera attempts to expose the
dark object properly.
Pictures/Videos are too Camera is set improperly
light
for use in bright light or
auto exposure is keying
on a dark area of the
scene
5-6
Problem
Cause
Solution
Pictures/Videos are
noisy or grainy
Not enough light
✔
Increase the light on the
subject.
✔
Select a High sharpness (low
frame rate) on the “Video
Settings” window.
✔
On the PictureWorks Live
“Camera Setup” window, set
the Shutter Speed to Normal to
allow for slower shutter speeds
for taking pictures and videos
indoors.
Viewfinder image is too When moving the
light or too dark
camera between extreme
low light and extreme
bright light, the Auto
Exposure may fail to
provide the best results.
Select a Finished Size for the
pictures or videos which is
smaller than the maximum
available.
✔
If the Auto White Balance does
not correct itself within 30
seconds, adjust the Hue slider
on the “Video Settings”
window to correct the colors.
✔
Click on Restore Defaults on
the PictureWorks Live
“Camera Setup” window
(Exposure and Color tab). This
will reset the color balance
settings.
✔
Select one of the preset color
balance settings (incandescent,
fluorescent, or daylight).
✔
Adjust the Hue slider to
provide the best color.
If the Auto Exposure does not
correct itself within 30 seconds,
adjust the exposure manually by
adjusting the brightness slider on
the “Video Settings” window. (To
return to Auto Exposure mode,
click on the Auto Exposure check
box.)
5-7
Troubleshooting
Viewfinder image has a In extreme low light or
strange coloring
bright light, or changing
lighting conditions, the
Auto White Balance can
fail to provide the best
results.
✔
5
Problem
Cause
Solution
When using a thirdparty video application,
the video frame rate
appears slower than
with the Kodak TWAIN
driver or PictureWorks
Live
Your DVC323 Camera is
compatible with software
that uses the Video for
Windows (VFW)
interface for video
devices.
The Kodak TWAIN and
PictureWorks Live software have
been optimized to work best with
your DVC323 Camera. The
available frame rates using the
camera as a standard VFW device
with other software will be reduced
due to an effect of the VFW
interface.
When using a thirdparty video application,
Auto Exposure or Auto
White Balance appear
slower than with the
Kodak TWAIN driver
or PictureWorks Live.
Your DVC323 Camera is
compatible with software
that uses the Video for
Windows (VFW)
interface for video
devices.
The Kodak TWAIN and
PictureWorks Live software have
been optimized to work best with
your DVC323 Camera. Since
frame rates drop when operating in
VFW mode, Auto Exposure and
Auto White Balance operate more
slowly.
Video viewfinder has
no image or the image
is just a mix of colors
Not enough band-width 1
available for USB bus to
transfer video data
2
without errors.
Double-click on the System
icon on the Control Panel.
Click on the Performance tab.
3 Click on the Graphics button.
4 Move the Hardware
Acceleration slider to the left
to reduce the amount of
acceleration.
5 Reboot your computer and try
your camera again.
You may also want to contact your
PCI card manufacturer to make
sure you have the latest driver for
the card and that the card is fully
Windows 95 compliant.
5-8
Cause
Solution
Video display appears
to be dropping frames
The CPU in your
computer is not powerful
enough for the selected
camera mode
✔
Change to a lower frame rate
(High sharpness) on the “Video
Settings” window.
✔
On the PictureWorks Live
“Camera” menu, change the
window size to Small.
✔
Close some software
applications to free up memory
and/or CPU power.
✔
Change to a lower frame rate
(High sharpness) on the “Video
Settings” window.
✔
On the PictureWorks Live
“Camera” menu, change the
window size to Small.
✔
On the “Camera Setup”
window, set the Finished Size
for videos to 160 x 120.
✔
Exit PictureWorks Live so that
you are not trying to play back
a video while previewing live
video from your camera. When
you play back the recorded
video without the camera
running, the video should play
back smoother.
Captured videos appear
slower than expected or
are dropping frames
✔
✔
When switching
between Video and Still
mode in PictureWorks
Live, the display image
looks different
The CPU in your
computer is not
powerful enough for
the selected camera
mode
The camera is set to
a low frame rate
When using
Manually change the quality
PictureWorks Live, the
setting on the “Camera Setup”
camera will always
window.
change to High Quality
mode when switched
from Video to Still mode
5-9
5
Troubleshooting
Problem
Getting Help
Help with your Kodak Digital Science DVC323 Digital Video camera (DVC323
camera) is available from a number of resources.
✔ in Troubleshooting Problems, Chapter 5
✔ your place of purchase
✔ World Wide Web
✔ product information by fax from Kodak
✔ technical support
Online Services
6
Contact Kodak via:
World Wide Web
http://www.kodak.com/go/dvc
America Online
(keyword) KODAK
CompuServe
GO KODAK
Help
Faxed Information
Kodak offers automated support for digital imaging products and services.
Product information can be faxed to you by calling:
U.S.
1-800-508-1531
Canada
1-800-295-5531
Europe
44-131-458-6962
U.K.
44-0-131-458-6962
6-1
Kodak Customer Support
If you have questions concerning the operation of the DVC323 camera, you may
speak to a Kodak customer support representative. Have the DVC323 camera
connected to your computer, its serial number ready, and be at your computer
when you call.
U.S. and Canada—call toll free, 1-888-375-6325, between the hours of
9:00 a.m. and 8:00 p.m. (Eastern Standard Time) Monday through Friday.
Outside the U.S. and Canada—call the Kodak Digital Imaging Support
Centre toll free number on the following pages that is associated with your
location. In Europe, you can also call the U.K. toll line, 44-131-458-6714,
between the hours of 09.00 and 17.00 (GMT/CET) Monday through Friday.
Country
6-2
Help number
Fax
Argentina
54-1-808-300
54-1-808-3328
Australia
1-800-674-831
61-3-9353-2488
Austria
0-660-7348
44-131-458-6962
Belgium
0800-72247
44-131-458-6962
Brazil
0-800-15-0000
55-12-331-8571
Caribbean
78-7-757-5500
78-7-757-8760
Chile
56-2-697-2000
56-2-697-0310
China–Shanghai
8621-64720888
8621-64726582
China–Beijing
8610-63471155
8610-63475641
Colombia
57-1-629-0266
57-1-629-0673
Denmark
80-01-09-24
44-131-458-6962
Dominican Republic
809-563-1252
809-563-1264
Egypt
20-2-394-2205
20-2-393-1119
France
0800-90-6281
44-131-458-6962
Finland
0800-117056
44-131-458-6962
Germany
0130-82-54-02
44-131-458-6962
Greece
00800-44125605
44-131-458-6962
Hong Kong
852-2564-9777
852-2564-9753
Hungary
36-1-269-71-17
36-1-269-71-13
India
91-22-617-5823
91-22-617-6004
Ireland
1-800-409391
44-131-458-6962
Italy
1678-72-996
44-131-458-6962
Country
Help number
Fax
Japan
81-3-5488-2390
81-3-5488-4512
Korea
82-2-708-5400
82-2-708-5500
Latin America
1-305-267-4700
1-305-267-4780
Lebanon
961-1-883822
961-1-881726
Malaysia
60-3-757-2722
60-3-755-5919
Mexico
52-5-449-4300
52-5-449-4400
Middle East
971-4-444-910
971-4-447-059
Netherlands
06-0224428
44-131-458-6962
New Zealand
0800-500-135
64-9-302-8637
Norway
800-1-1848
44-131-458-6962
Panama
52-3-678-6200
52-3-678-6210
Peru
51-1-224-8610
51-1-224-8605
Philippines
63-2-810-0331
63-2-816-6718
Portugal
351-1-4149-500
351-14194-321
7-095-929-9166
7-095-929-9170
Singapore
65-470-9875
65-479-8397
South Africa
27-11-804-2852
27-11-804-5013
Spain
900-98-4485
44-131-458-6962
Sweden
020-793169
44-131-458-6962
Switzerland
0800-551034
44-131-458-6962
Taiwan
886-2-893-8210
886-2-895-1069
Thailand
66-2-271-3040
66-2-279-5073
Turkey
90-216-342-3332
90-216-343-6743
U.K.
0800-281487
44-131-458-6962
Uruguay
59-2-92-0473
59-2-92-1796
Venezuela
58-2-903-1111
58-2-943-2081
6
Help
Russia
6-3
Warranty &
Regulatory
Information
Warranty Time Period
Kodak warrants the Kodak Digital Science DVC323 Digital Video camera
(DVC323 camera) to be free from malfunctions and defects in both materials and
workmanship for one year from the date of purchase.
Warranty Repair Coverage
This warranty will be honored within the geographical location that the product
was purchased.
If the equipment does not function properly during the warranty period due to
defects in either materials or workmanship, Kodak will, at its option, either repair
or replace the equipment without charge, subject to the conditions and limitations
stated herein. Such repair service will include all labor as well as any necessary
adjustments and/or replacement parts.
Kodak will also provide telephone assistance during the warranty period.
Warranty-1
Warranty
If replacement parts are used in making repairs, these parts may be
remanufactured, or may contain remanufactured materials. If it is necessary to
replace the entire system, it may be replaced with a remanufactured system.
Limitations
WARRANTY SERVICE WILL NOT BE PROVIDED WITHOUT DATED
PROOF OF PURCHASE. PLEASE RETURN THE WARRANTY
REGISTRATION CARD WITHIN 30 DAYS OF PURCHASE.
THIS WARRANTY BECOMES NULL AND VOID IF YOU FAIL TO PACK
YOUR DVC323 CAMERA IN A MANNER CONSISTENT WITH THE
ORIGINAL PRODUCT PACKAGING AND DAMAGE OCCURS DURING
PRODUCT SHIPMENT.
THIS WARRANTY DOES NOT COVER: CIRCUMSTANCES BEYOND
KODAK’S CONTROL; SERVICE OR PARTS TO CORRECT PROBLEMS
RESULTING FROM THE USE OF ATTACHMENTS, ACCESSORIES OR
ALTERATIONS NOT MARKETED BY KODAK; SERVICE REQUIRED AS
THE RESULT OF UNAUTHORIZED MODIFICATIONS OR SERVICE;
MISUSE, ABUSE; FAILURE TO FOLLOW KODAK’S OPERATING,
MAINTENANCE OR REPACKAGING INSTRUCTIONS; OR FAILURE TO
USE ITEMS SUPPLIED BY KODAK (SUCH AS ADAPTERS AND
CABLES).
KODAK MAKES NO OTHER WARRANTIES, EXPRESS, IMPLIED, OR OF
MERCHANTABILITY OR FITNESS FOR A PARTICULAR PURPOSE FOR
THIS EQUIPMENT OR SOFTWARE.
REPAIR OR REPLACEMENT WITHOUT CHARGE ARE KODAK’S ONLY
OBLIGATION UNDER THIS WARRANTY. KODAK WILL NOT BE
RESPONSIBLE FOR ANY SPECIAL, CONSEQUENTIAL OR INCIDENTAL
DAMAGES RESULTING FROM THE PURCHASE, USE, OR IMPROPER
FUNCTIONING OF THIS EQUIPMENT REGARDLESS OF THE CAUSE.
SUCH DAMAGES FOR WHICH KODAK WILL NOT BE RESPONSIBLE
INCLUDE, BUT ARE NOT LIMITED TO, LOSS OF REVENUE OR PROFIT,
DOWNTIME COSTS, LOSS OF USE OF THE EQUIPMENT, COST OF ANY
SUBSTITUTE EQUIPMENT, FACILITIES OR SERVICES, OR CLAIMS OF
YOUR CUSTOMERS FOR SUCH DAMAGES.
Depending on your geographical location, some limitations and exclusions may
not apply.
Warranty-2
Application Support
For application-specific support, contact your reseller, systems integrator,
software manufacturer, or dealer.
How to Obtain Service
Visit us on the Internet at http://www.kodak.com
Please refer to the Kodak Customer Support section in Chapter 6 of this user’s
guide for the support hotline designated to your location.
When returning a DVC323 camera for repair, the unit shall be packed in its
original packing materials. A problem report should also be enclosed with the
equipment. If the original packaging has been discarded or is not available,
packing will be at the owner's expense.
The repaired or replaced unit will be shipped from Kodak within five business
days from the date of the DVC323 camera receipt at the service center.
Unless a specific Kodak warranty is communicated to the purchaser in writing by
a Kodak company, no other warranty or liability exists beyond the information
contained above, even though defect, damage or loss may be caused by
negligence or other act.
To obtain warranty repair service, contact your local Kodak representative at the
phone numbers listed on pages 6-2 and 6-3 of this manual.
Warranty
Warranty-3
Regulatory Information
FCC Compliance and Advisory
This device complies with Part 15 of the FCC Rules. Operation is subject to the
following two conditions:1) this device may not cause harmful interference, and
2) this device must accept any interference received, including interference that
may cause undesired operation.
This equipment has been tested and found to comply with the limits for a Class B
digital device, pursuant to Part 15 of the FCC Rules. These limits are designed to
provide reasonable protection against harmful interference in a residential
installation.
This equipment generates, uses, and can radiate radio frequency energy and, if
not installed or used in accordance with the instructions, may cause harmful
interference to radio communications. However, there is no guarantee that
interference will not occur in a particular installation.
If this equipment does cause harmful interference to radio or television reception,
which can be determined by turning the equipment off and on, the user is
encouraged to try to correct the interference by one or more of the following
measures: 1) reorient or relocate the receiving antenna; 2) increase the separation
between the equipment and the receiver; 3) connect the equipment to an outlet on
a circuit different from that to which the receiver is connected; 4) consult the
dealer or an experienced radio/TV technician for additional suggestions.
Any changes or modifications not expressly approved by the party responsible
for compliance could void the user’s authority to operate the equipment. Where
shielded interface cables have been provided with the product or specified
additional components or accessories elsewhere defined to be used with the
installation of the product, they must be used in order to ensure compliance with
FCC regulation.
Canadian DOC Statement
DOC Class B Compliance—This digital apparatus does not exceed the Class B
limits for radio noise emissions from digital apparatus set out in the radio
interference regulations of the Canadian Department of Communications.
Obervation des normes-Class B—Le présent appareil numérique n’émet pas de
bruits radioélectriques dépassant les limites applicables aux appareils numériques
de la Classe B prescrites dans les règlements sur le brouillage redioélectrique
édictés par le Ministère des Communications du Canada.
Warranty-4
Important Safety Instructions
When using your DVC323 camera, always follow these basic safety precautions:
✔ Read and understand all instructions before using your camera.
✔ To reduce the risk of electric shock:
—Do not immerse the digital video camera in water or any other liquid.
—Do not disassemble the digital video camera. Take it to a qualified
service person when service or repair work is required. Incorrect
reassembly of the camera can cause electric shock when the camera is
used later.
✔ If you notice smoke or a strange smell coming from the digital video
camera, immediately disconnect the USB cable from your computer.
☞ Use of controls, adjustments, or procedures other than those specified
herein may result in exposure to shock or electrical/mechanical hazards.
Warranty
Warranty-5