1
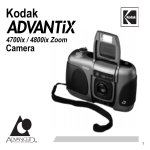
Kodak
4700ix / 4800ix Zoom
Camera
1
Camera Identification
(3)
(4)
(2)
(1)
(5)
(6)
(11)
(7)
(8)
(10)
(9)
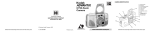
Unfold the front and back flaps of this manual for easy reference to the camera’s parts.
2
Camera Identification
(12)
ME
(13)
(14)
SELE
TEX CT
T
NU
SE
LE
CT
EN
TE
R
EX
P
LE
FT
(15)
(22)
(21)
(20)
(19)
(18)
(17)
(16)
3
LCD Panel
(23)
(25)
(24)
SELECT
TEXT
OFF
(31) (30) (29) (28)
4
EXP
LEFT
FILL
(27)
(26)
This device complies with part 15 of the FCC Rules. Operation is subject to
the following two conditions: (1) this device may not cause harmful
interference, and (2) this device must accept any interference received,
including interference that may cause undesired operation.
NOTE: Your model camera has been tested and found to comply with the limits
for a Class B digital device, pursuant to Part 15 of the FCC Rules. These limits
provide reasonable protection against interference in residential use. The
camera generates, uses and can radiate radio frequency energy and, if not used
in accordance with the instructions, may cause interference to radio
communications. There is no guarantee that interference will not occur. If this
camera does cause interference to radio or television reception, which can be
determined by turning the camera off and on, you may reduce the interference
by the following:
— Reorient or relocate the receiving antenna.
— Increase the separation between the camera and the receiver.
— Consult the dealer or an experienced radio/television technician for help.
Changes or modifications not approved by the party responsible for compliance
could void the user’s authority to operate the equipment.
This Class B digital apparatus meets all requirements of the Canadian
Interference-Causing Equipment Regulations
5
Welcome to the innovative world of the Advanced Photo System!
And thank you for buying this KODAK ADVANTIX Camera.
Need Help with Your Camera?
Call:
Kodak (USA only) toll free from 9:00 a.m. to 7:00 p.m. (Eastern time)
Monday through Friday at 1 (800) 242-2424.
Kodak (Canada only) from 8:30 a.m. to 5:00 p.m. (Eastern time) Monday
through Friday at 1 (800) 465-6325, ext. 36100; for the Toronto area, call
(416) 766-8233, ext. 36100.
Visit our web site at http://www.kodak.com
For warranty purposes, please keep your sales receipt as proof of
the date of purchase.
© Eastman Kodak Company, 1997
6
ENGLISH
KODAK ADVANTIX
4700ix/4800ix Zoom Camera
Look for this logo to be certain that the film you buy is
made for this camera.
Look for this logo to select a certified photofinisher for
developing your film and to assure that you get all the
features of the Advanced Photo System.
Film Status Indicator (FSI)
Unexposed
A highlighted indicator advances from
one symbol to another to identify the
status of the film inside the cassette.
1
2
Partially
exposed
4
3
Fully
exposed
Processed Negatives
7
Contents
Camera Identification ............................ 9
Using the “SELFTIMER” ..................... 18
Attaching the Strap ............................. 10
Loading the Battery ............................. 10
Low-Battery Indicator ...................... 11
Battery Tips ..................................... 11
Power Shut-Off ............................... 11
Date and Time Imprinting .................... 18
Setting the Date and Time .............. 18
Date and Time Formats .................. 19
Changing the Date and Time
Formats ..................................... 19
Loading the Film ................................. 12
Using the “SET DISPLAY” ................... 20
Taking Pictures .................................... 13
Typical Print Sizes (Formats) .......... 13
Using the Zoom Lens ...................... 14
Setting the Language .......................... 20
Taking Flash Pictures .......................... 15
Flash-Lamp Signals ........................ 15
Flash-to-Subject Distance ............... 16
Selecting Flash Modes and
Infinity-Focus Mode ......................... 16
“FILL FLASH” .................................. 17
“INFINITY ” ...................................... 17
“FLASH OFF” .................................. 17
8
Print Title Imprinting ............................ 21
Roll Title Imprinting ............................. 21
Title-Select List ............................... 22
Unloading the Film .............................. 23
Automatic Rewind ........................... 23
Using the Manual Rewind Button .... 24
Caring For Your Camera ..................... 24
Troubleshooting .................................. 25
Specifications ...................................... 27
Camera Identification
(Unfold the front and back cover flaps of manual for camera diagrams.)
1 Zoom-Dial Lever
18 Enter Button
2 Shutter Button
19 Select Button
3 Lens Cover/Flash
20 Film-Rewind Button
4 Format-Selector Button
21 Menu Button
5 Viewfinder
22 Tripod Socket
6 Light Sensor
7 Lens
8 Self-Timer Lamp
9 Auto-focus Windows
10 Strap Post
11 Battery Door
12 Viewfinder Eyepiece
13 Flash/Camera-Ready Lamp
14 LCD Panel
15 Film Door
16 Film Chamber
17 Film-Door Latch
LCD Panel
23 Infinity-Focus Indicator
24 Battery Symbol
25 Text-Messaging Panel
26 Frame Counter
27 Film-Presence Indicator
28 Self-Timer Indicator
29 Fill-Flash Indicator
30 Flash Indicator
31 Off-Flash Indicator
9
Attaching the Strap
Loading the Battery
1. Insert the shorter
looped end of the
strap behind the
Strap Post (10).
This camera uses one
3-volt lithium KODAK
K123LA (or equivalent)
Battery that supplies
power for all camera
operations.
2. Thread the longer end
of the strap through
the shorter loop.
3. Pull the strap tight.
1. Open the Battery
Door (11) by using
your finger tip.
• Before you remove
the old battery, close
the lens cover/flash.
2. Insert the battery
into the
chamber as
shown.
3. Snap the
battery door
closed.
• After you
load a new
battery into the camera, you will
need to reset the date and time.
10
Low-Battery Indicator
Power Shut-Off
It’s time to replace the battery when—
To save battery power, the camera will
automatically go into a sleep mode if it is
not operated for more than 60 seconds.
You can press the shutter button, zoom
control, film-rewind, mode buttons or
rewind button to awake the camera.
• the Battery Symbol (24) “blinks” and the
“BATTERY LOW” message appears on
the LCD panel or
• none of the indicators, except for steady
battery symbol, appears on the LCD
panel and the shutter button cannot
be released.
Battery Tips
• Remember to keep a spare battery with
you at all times.
• Read and follow all warnings and
instructions supplied by the battery
manufacturer.
• Keep batteries away from children.
• Do not try to take apart, recharge or
short circuit the battery, or subject it to
high temperature or fire.
• Store batteries in their original
packaging prior to use.
11
Loading the Film
You can load film into the camera with the
lens cover/flash opened or closed.
1. Turn the camera upside down and
slide the Film-Door Latch (17) to
automatically open the Film Door (15).
• The film door will open only when the
film chamber is empty or the film in
the camera is completely rewound
into the film cassette.
2. Insert the film cassette completely into
the Film Chamber (16). Make sure the
Film Status Indicator (FSI) on the film
cassette is at ●.
• Do not force the film cassette into
the film chamber.
3. Close the film door to start the autofilm advance. The Frame Counter (26)
on the LCD Panel (14) will show the
number of frames remaining on the film
cassette.
• After you close the safety-interlock
film door, you cannot open the door
until the film is completely rewound
into the film cassette.
12
Taking Pictures
You can take Classic (C), HDTV (H), and
Panoramic (P) pictures on the same film
cassette (see the following table for
Typical Print Sizes). Your photoprocessing cost will be based on the
format size(s) that you use
to expose the film.
1. Lift the Lens Cover/
Flash (3) up to
uncover the
Lens (7) and to
activate the
flash.
I
LTA
MU
2. Press the
Format-Selector Button (4)
to the desired format (C,
H, or P). The
viewfinder will
change to show the
selected field of
view.
C
C
H
C
H
4. Partially depress the
Shutter Button (2)
until the Flash/
Camera-Ready
Lamp (13) turns
green. Fully depress
the shutter button to
take the picture.
• Follow the instructions
on the text-messaging
panel when the flash/
camera-ready lamp
is red.
C
H
P
P
P
P
H
F
3. Frame your subject within the
Viewfinder Eyepiece (12). For a sharp
picture, stand at least 2.5 ft (0.8 m)
from your subject.
Typical Print Sizes (Formats)
C
H
P
Classic
Group (HDTV) Panoramic
31/2 x 5" or 4 x 6" 31/2 x 6" or 4 x 7" 31/2 x 81/2" to 4 x 111/2"
(88.9 x 127 mm or (88.9 x 152 mm or (88.9 x 216 mm to
102 x 152 mm)
102 x 178 mm)
102 x 292.7 mm)
13
Using the Zoom Lens
This camera has a motorized-zoom lens
that lets you select the ideal lens-focal
length for taking pictures. When you turn
the camera on, it is initially set to the
wide-mode position.
1. Lift the Lens Cover/Flash (3) up to
uncover the Lens (7) and to activate
the flash.
2. Slide the Zoom-Dial Lever (1) to the left
to the wide-mode position to
zoom away from the subject. Slide the
lever to the right to the tele-mode
position to zoom closer to the subject.
14
3. Frame your subject within the
Viewfinder Eyepiece (12).
4. Partially depress the Shutter Button (2)
until the Flash/Camera-Ready
Lamp (13) turns green. Fully depress
the shutter button to take the picture.
• The lens barrel will automatically
return to the wide-mode position after
approximately 60 seconds.
Taking Flash Pictures
In dim light, such as indoors or outdoors
in heavy shade, or on dark overcast days,
you need flash. Your camera features an
automatic flash that fires when you need
it. It also provides automatic daylight fill
flash under certain bright-light conditions
where shadows may exist. When you
partially depress the shutter button and
the flash-ready lamp glows green, the
flash is fully charged and ready for
picture-taking (see the following tables for
Flash-Lamp Signals and Flash-toSubject Distance).
1. Lift the Lens Cover/Flash (3) up to
uncover the Lens (7) and to activate
the flash.
3. Keep the subject within the distance
range for the speed of film in your
camera. Don’t take pictures beyond the
maximum distance or your pictures will
be dark.
Flash-Lamp Signals
Lamp Indicator
Glows green
“Blinks” red *
Glows red
Situation
Flash fully charged
Flash not fully charged
Subject closer than
2.5 ft (0.8 m)
* A text message will appear on the LCD panel
to inform the user the reason of warning.
2. Take the picture when the Flash-Ready
Lamp (13 ) glows green.
• The LCD panel will display “FLASH
NOT READY” message when the
flash is not fully charged.
15
Flash-to-Subject Distance
ISO
Film
Wide
Speed (30 mm)
50
2.5 to 9 ft
(0.8 to 2.7 m)
100
2.5 to 13 ft
(0.8 to 4 m)
200
2.5 to 18 ft
(0.8 to 5.5 m)
400
2.5 to 26 ft
(0.8 to 7.9 m)
800
2.5 to 36 ft
(0.8 to 11 m)
1600
2.5 to 52 ft
(0.8 to 15.8 m)
16
Tele
(60 mm)
2.5 to 8 ft
(0.8 to 2.4 m)
2.5 to 11 ft
(0.8 to 3.4 m)
2.5 to 15 ft
(0.8 to 4.6 m)
2.5 to 22 ft
(0.8 to 6.7 m)
2.5 to 31 ft
(0.8 to 9.4 m)
2.5 to 44 ft
(0.8 to 13.4 m)
Selecting Flash Modes and
Infinity-Focus Mode
Besides the “AUTO FLASH” mode, you
can select “FILL FLASH,” “INFINITY,” and
“FLASH OFF.”
Press the SELECT Button (19) until the
desired indicator and corresponding text
message appear on the LCD Panel (14).
Flash modes and the infinity mode
remain selected after you take the
picture. To cancel the selection, close the
lens cover/ flash or press the SELECT
button to return to the standard point-andshoot “AUTO FLASH “ mode.
“FILL FLASH”
FILL
Bright light indoors or outdoors from
backlit subjects can create dark shadows
(especially on faces) in high-contrast
scenes. Use fill flash to lighten these
shadows.
1. Press the SELECT Button (19) until the
“FILL FLASH” message and indicator
appear on the LCD Panel (14).
2. Frame your subject within the
Viewfinder Eyepiece (12).
3. Press the Shutter Button (2) to take
the picture.
“INFINITY ”
For maximum sharpness of distant
scenery at any zoom position, use the
infinity feature (for outdoor use only).
1. Press the SELECT Button (19) until the
“INFINITY” message and indicator
appear on the LCD Panel (14).
“FLASH OFF” OFF
When you do not want to use the flash,
especially indoors where flash is
prohibited, such as in theaters and
museums, or when you want to take
twilight scenes or distant subjects that are
beyond the flash range, or capture the
ambiance of existing light, use the flashoff feature.
1. Press the SELECT Button (19) until the
“FLASH OFF” message and indicator
appear on the LCD Panel (14).
2. Frame your subject within the
Viewfinder Eyepiece (12)
3. Press the Shutter Button (2) to take
the picture.
• Use a tripod and high-speed film
because the shutter speed at night
will most likely be slow.
2. Frame your subject within the
Viewfinder Eyepiece (12).
3. Press the Shutter Button (2) to take
the picture.
17
Using the
“SELFTIMER”
You can include yourself in pictures
by using the self-timer feature. The
electronic self-timer will delay the
release of the shutter button for
approximately 10 seconds after you
press the shutter button.
1. Place the camera on a tripod (Tripod
Socket [22]) and press the ENTER
Button (18). The “SELFTIMER READY”
message and indicator will appear on
the LCD Panel (14).
2. Frame your picture in the Viewfinder
Eyepiece (12).
3. Press the Shutter Button (2). The SelfTimer Lamp (8) on the front of the
camera will blink during the self-timer
countdown.
• To cancel the self-timer selection
before the shutter releases, press the
ENTER button or close the lenscover flash.
• The self-timer is automatically
canceled after the shutter releases.
18
Date and Time Imprinting
This camera has a quartz clock and
automatic calendar through the
year 2099.
Traditional cameras print date and/or time
information directly onto the film. Your
camera uses the film’s magnetic data
strip to record date and time information
which your photofinisher imprints on the
back of your photographs.
Setting the Date and Time
1. Repeatedly press the MENU
Button (21) until the LCD Panel (14)
displays “SET DATE.”
2. Press the SELECT Button (19) to
select the date function. The first two
digits of the date will “blink.” Press the
Zoom-Dial Lever (1) to the right or left
to increase or decrease the number.
3. Press the ENTER Button (18) to store
the selected month and to activate the
next “blinking” date option (follow steps
2 and 3 to complete your selection).
• After you set the “date” or “time,” the
LCD panel will display “DATE IS” or
“TIME IS” followed by the selected
date or time.
4. Repeat steps 1–3 to choose and
“SET TIME.”
Date and Time Formats
The date and time formats are automatically set for you according to the
designated language listed below. If you
want to change the automatic settings for
date and time formats, see Changing the
Date and Time Formats.
Time
Format
English
12 hour
German
24 hour
French
24 hour
Spanish
24 hour
Japanese 24 hour
Changing the Date and Time Formats
(mm, dd, yy/ dd, mm, yy/ yy, mm, dd and 12/24
hour)
1. Repeatedly press the MENU
Button (21) until the LCD Panel (14)
displays “SET DATE FORMAT.”
2. Press the SELECT Button (19) to make
the selection. Press the Zoom-Dial
Lever (1) to the right or left to increase
or decrease the number.
3. Press the ENTER Button (18) to store
the selected format.
• After you set the “date” or “time,” the
LCD panel will display “DATE
FORMAT IS” followed by the selected
format.
4. Repeat steps 1–3 to choose and “SET
Date Format
month, day, year
day, month, year
day, month, year
day, month, year
year, month, day
19
Using the “SET DISPLAY”
Setting the Language
This feature will allow you to view one of
three display formats:
U.S. “ENGLISH” is initially set into the
memory of this camera or you can
change the language to “DEUTSCH” for
German, “FRANCAIS” for French,
“ESPANOL” for Spanish or [Katakana] for
Japanese.
Example
“SHOW DATE TIME:”
“SHOW DATE/ISO:”
“SHOW TIME/ISO:”
03/21/97 12:00
03/21/97 ISO 200
ISO 200 12:00
1. Repeatedly press the MENU
Button (21) until “SET DISPLAY”
appears on the LCD Panel (14).
2. Press the SELECT Button (19) to make
the selection. To change the data
option, use the Zoom-Dial Lever (1) to
cycle to your selection.
3. Press the ENTER Button (18) to set
the selected data option.
20
1. Press and hold the MENU Button (21)
for 4 seconds until the “blinking”
language appears on the LCD
Panel (14).
2. Press the Zoom-Dial Lever (1) to cycle
to your selection.
3. Press the ENTER Button (18) to set
the language.
• After you set the language, the LCD
panel will display “LANGUAGE IS”
followed by the selected language.
Print Title Imprinting
Roll Title Imprinting
You can choose a print title from the TitleSelect List and choose a language (see
Setting the Language) before you take the
picture. The title you select will be recorded
on the film’s magnetic
data strip. At certified
Advanced Photo System
labs, the selected title will
be printed on the back of
the print.
You can choose an additional roll title
from the Title-Select List for the entire
roll of film. Both the roll and print title will
be imprinted on the back of the print.
1. Repeatedly press the
MENU Button (21) until the LCD
Panel (14) displays “SET PRINT TITLE.”
2. Press the SELECT Button (19) to select
“SET PRINT TITLE.” Use the Zoom-Dial
Lever (1) to cycle from one title to
another.
1. Repeatedly press the MENU
Button (21) until the LCD Panel (14)
displays “SET ROLL TITLE.”
2. Press the SELECT Button (19) to
select “SET ROLL TITLE.” Use the
Zoom-Dial Lever (1) to cycle to another
title selection.
3. Press the ENTER Button (18) to store
the selected title.
• After you set the title, the LCD panel
will display “SET ROLL TITLE IS”
followed by the selected title.
3. Press the ENTER Button (18) to store
the selected title.
• After you set the title, the LCD panel
will display “SET PRINT TITLE IS”
followed by the selected title.
NOTE: Print title selections will
automatically cancel after 24 hours
of camera inactivity.
21
Title-Select List
22
Title
Title
ANNIVERSARY
HOLIDAY
BAPTISM
HONEYMOON
BIRTHDAY
I LOVE YOU
CANADA DAY
INDEPENDENCE DAY
CHRISTMAS
MOTHER’S DAY
CONGRATULATIONS
PARTY
EASTER
REUNION
FAMILY
SCHOOL EVENT
FATHER’S DAY
SEASONS GREETING
FESTIVAL
THANK YOU
FRIENDS
THANKSGIVING
GRADUATION
TRIP
HALLOWEEN
VACATION
HANUKKAH
VALENTINE’S DAY
HAPPY NEW YEAR
WEDDING
Unloading the Film
Automatic Rewind
2. Turn the camera upside down and
slide the Film-Door Latch (17) to
automatically open the Film Door (15).
The camera automatically rewinds the
film into the cassette after the last
exposure.
1. Wait for the film to completely rewind
into the film cassette.
• The “FILM REWINDING” message
will appear on the LCD Panel (14)
and the Frame Counter (26) will
count down to “0.”
• The empty Film-Presence
Indicator (27) and “REMOVE FILM”
message will appear on the LCD
panel when the film is rewound. (The
message will only appear when the
lens cover/flash is up.)
3. Remove the film cassette from the
camera.
• The FSI on the film cassette will be
at ✖.
23
Using the Manual Rewind Button
If you don’t want to take pictures on the
entire roll of film, you can manually
activate the automatic rewind.
1. Gently press the Film-Rewind
Button (20) by using a pointed object to
start the auto-film rewind.
2. Follow steps 1–3 from Automatic
Rewind.
NOTE: You cannot reload partially
exposed film into this camera for
continuous picture-taking.
Caring For Your Camera
1. Protect the camera from dust,
moisture, sudden impact, and
excessive heat.
CAUTION: Do not use solvents or harsh
or abrasive cleaners on the camera body.
2. If the lens appears dirty, breathe on it
to form a mist and wipe the surface
gently with a soft, lintless cloth or lenscleaning tissue. Never wipe a dry lens.
CAUTION: Do not use solvents or
solutions not designed for cleaning
camera lenses. Do not use chemically
treated tissues intended for cleaning
eye glasses.
3. Remove the battery when you store
the camera for an extended time.
CAUTION: To prevent possible damage
and electrical shock, do not attempt to
disassemble or repair the camera or flash
unit by yourself.
24
Troubleshooting
What happened
Probable cause
Solution
Camera will
not operate
There are no more
pictures remaining
Remove the film
Battery weak, dead,
missing, or improperly
loaded
Replace or reload the
battery
Film does not
advance or rewind
Battery weak, dead,
missing, or
improperly loaded
Replace or reload
the battery
LCD panel is blank
Battery weak, dead,
missing, or
improperly loaded
Replace or reload
the battery
Battery weak
Battery weak, dead,
missing, or improperly
loaded
Flash not fully charged
Replace the battery
Replace or reload
the battery
LCD panel displays:
“BATTERY LOW”
“REPLACE BATTERY”
“FLASH NOT READY”
Wait until the “FLASH
NOT READY” message
disappears or until the
flash-ready lamp
glows green
25
What happened
Probable cause
Solution
Flash/camera ready
lamp “blinks” red
Flash not fully
charged
Wait for lamp to glow
green
Flash/camera ready
lamp glows red
Subject closer
than 2.5 ft (0.8 m)
See Flash-to-Subject
Distance on page 11
Film cassette does
not fit completely
into the film chamber;
film door does not close
Loaded exposed,
or processed film into
the camera
Load only unexposed
film into the camera
26
Specifications
Film Type:
KODAK ADVANTIX Film for color pictures
Lens:
Autofocusing 30–60 mm motorized zoom lens, 5-elements/2-group
construction, glass aspheric
Focus System:
Passive multi-spot AF
Focus Range:
C, H, & P: Wide/Tele: 2.5 ft – ∞ (0.8 m – ∞)
Viewfinder:
Real image with C, H, & P format display
LCD:
Text display with camera-status information and warnings
Film-Speed:
DXIX (ISO) 50–1600 for color films
Flash Unit:
Built-in, KODAK SENSALITE™ Flash
Flash Range:
(ISO 200)
Wide: 2.5–18 ft (0.8–5.5 m)
Tele: 2.5–15 ft (0.8–4.6 m)
Apertures:
f/5.9–f/6.9
Shutter:
Programmed auto-exposure electronic
Power Source:
Main power: one 3 V lithium KODAK K123LA (or equivalent) Battery
Dimensions:
121 mm X 67 mm X 43.5 mm
Weight:
8.1 oz (230 g) without film or battery
Kodak, Sensalite, Advantix, and the Advanced Photo System symbol and logotype are trademarks.
27
Consumer Imaging
EASTMAN KODAK COMPANY
Rochester, NY 14650
© Eastman Kodak Company, 1997
11-97
Pt. No. 917 4459
28
Printed in U.S.A.