1
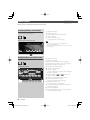
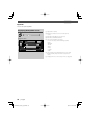
7-Inch WIDE SCREEN MONITOR-RECEIVER
KVT-M707
INSTRUCTION MANUAL
© B64-3134-00/00 (EV)
KVT-M707_Instruct_E_r6.indd 1
05.5.9 2:25:24 PM
Contents
Before Use .................................................... 4
Opening/Closing the Monitor and Power
Switch ....................................................... 6
Removing/Attaching the Protection Panel 7
KVT-M707 Basic operations ........................ 8
Basic Operations of Remote Controller ... 10
Switch Screen Mode .................................. 12
Muting Audio Volume upon Reception of
Phone call ............................................... 13
Tuner Control ............................................. 14
Displaying the Easy Control Panel
Displaying the Tuner Control screen
Displaying the Tuner Menu screen
Seek Mode
Auto Memory
Manual Memory
Preset Select
Direct Search
Traffic Information
Search for Program Type
Radio Text
DAB Tuner control ..................................... 28
Displaying the Easy Control Panel
Displaying the DAB Tuner Control screen
Displaying the DAB Tuner Menu screen
Seek Mode
Auto Ensemble Memory
Service Preset Memory
Service Select
Language Filter
Search for Program Type
DAB Information
DAB Announcement
Character Entry .......................................... 34
How To Use the Character Entry screen
Source Select.............................................. 35
Displaying the Control screen
Displaying the Source Select screen
Adjusting the Monitor Display Position and
Quality .................................................... 36
Displaying the Screen Control screen
Displaying the Angle Control screen
Disc Changer/CD player Control ............... 20
Displaying the Easy Control Panel
Displaying the Disc Changer/ CD player Control
screen
Displaying the Disc Changer/ CD player Menu
screen
Set Disc Name
Disc Select (during play by disc changer)
Direct Search
TV Control .................................................. 24
Displaying the TV Picture screen
Displaying the Easy Control Panel
Displaying the TV Control screen
Displaying the TV Menu screen
Seek Mode
Auto Memory
Manual Memory
Preset Select
Set Station Name
2 |
English
KVT-M707_Instruct_E_r6.indd 2
05.5.10 6:08:56 PM
Setup Menu
Setup Menu ............................................................37
Displaying the Control screen
Displaying the Setup Menu screen
Audio Set Up ..........................................................38
Displaying the Audio Set Up screen
Crossover Network Setup
System Setup .........................................................40
Displaying the System Set Up 1 screen
Displaying the System Set Up 2 screen
AV Interface ............................................................42
Displaying the AV I/F 1 screen
Displaying the AV I/F 2 screen
Displaying the AV I/F 3 screen
User Interface ........................................................44
Displaying the User I/F 1 screen
Displaying the User I/F 2 screen
Touch Panel Adjust
Clock
Security Code Setup
Set Up Memory
TV Setup .................................................................49
Displaying the TV1 Area Set screen
Displaying the TV2 Area Set screen
DAB Set Up .............................................................50
Displaying the DAB Set Up screen
Announcement Selection
RDS Setup ...............................................................52
Displaying the RDS Set Up 1 screen
Displaying the RDS Set Up 2 screen
AMP Control ...........................................................53
Displaying the AMP Control screen
Troubleshooting Guide ............................. 60
Specifications............................................. 62
Sound Effects Menu
Sound Effects Menu..............................................54
Displaying the Control screen
Displaying the Sound Effects Menu screen
Audio Control ........................................................55
Displaying the Audio Control 1 screen
Displaying the Audio Control 2 screen
Equalizer .................................................................56
Displaying the Equalizer screen
Tone curve setup
Zone Control ..........................................................58
Displaying the Zone Control screen
English |
KVT-M707_Instruct_E_r6.indd 3
3
05.5.9 2:25:25 PM
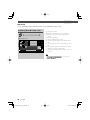
Before Use
2WARNING
NOTE
To prevent injury or fire, take the following
precautions:
• If you experience problems during installation,
consult your Kenwood dealer.
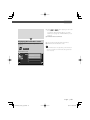
• If the unit fails to operate properly, press the Reset
button to restore factory settings.
• To prevent a short circuit, never put or leave any
metallic objects (such as coins or metal tools) inside
the unit.
2CAUTION
To prevent damage to the machine, take
the following precautions:
• Make sure to ground the unit to a negative 12V DC
power supply.
• Do not install the unit in a spot exposed to direct
sunlight or excessive heat or humidity. Also avoid
places with too much dust or the possibility of
water splashing.
• Do not place the faceplate or the faceplate case in
areas exposed to direct sunlight, excessive heat or
humidity. Also avoid places with too much dust or
the possibility of water splashing.
• To prevent deterioration, do not touch the terminals
of the unit or faceplate with your fingers.
• Do not subject the faceplate to excessive shock, as it
is a piece of precision equipment.
• When replacing a fuse, only use a new fuse with
the prescribed rating. Using a fuse with the wrong
rating may cause your unit to malfunction.
• Do not use your own screws. Use only the screws
provided. If you use the wrong screws, you could
damage the unit.
Reset button
• Characters in the LCD may become difficult to read
in temperatures below 5 ˚C (41 ˚F).
• The characters conforming to ISO 8859-1 character
set can be displayed.
• The illustrations of the display and the panel
appearing in this manual are examples used to
explain more clearly how the controls are used.
Therefore, what appears on the display in the
illustrations may differ from what appears on the
display on the actual equipment, and some of the
illustrations on the display may be inapplicable.
• Time is displayed on each control screen in the 12
hour clock display type (with AM/PM displayed) or
in the 24 hour clock display type (without AM/PM
displayed) depending on the sales area. The display
type cannot be changed. In this instruction manual,
screens of the 24 hour display type are used as
examples.
Audio units you can control from the
KVT-M707 Receiver (As of April, 2005):
KTC-V500E, KTC-9090DAB, KHD-C710, KDC-CPS89,
KDC-CPS87, KDC-CPS85, KDC-CPS82, KDC-C719,
KDC-C717, KDC-C715, KDC-C712, KDC-C669,
KDC-C667, KDC-C665, KDC-C662, KDC-C469,
KDC-C467, KDC-C465, KDC-C462, KDV-C820,
KDC-C719MP, KDC-D301, KDC-D300, KDC-D401,
KMD-D400
(Set the "O-N" switch to "N" position if provided.)
Navigation units you can control from the
KVT-M707 Receiver (As of April, 2005):
KNA-DV3200, KNA-DV2200
4 |
English
KVT-M707_Instruct_E_r6.indd 4
05.5.9 2:25:26 PM
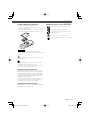
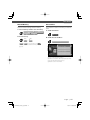
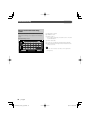
Loading and Replacing the battery
1. Use two "R03"/ "AAA"-size batteries.
Slide the cover while pressing downwards to
remove it as illustrated.
2. Insert the batteries with the + and – poles aligned
properly, following the illustration inside the case.
Explanation of icons used on this manual
Indicates the key operation on the receiver.
Indicates the button you must touch.
Indicates the key or joystick operation on the
remote controller.
The initial value of each setup is shown.
Gives an additional information or an operation
advice.
2WARNING
• Store unused batteries out of the reach of children.
Contact a doctor immediately if the battery is accidentally
swallowed.
• Do not set the remote control on hot places such as above
the dashboard.
• The provided batteries are intended for use in operation
checking, and their service life may be short.
• When the remote controllable distance becomes short,
replace both of the batteries with new ones.
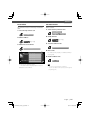
Cleaning the panel and monitor
When the operator panel and monitor panels are
dirty, wipe and clean them using a soft cloth (such as
a commercially available silicon coated cloth). When
contaminated excessively, clean them using a cloth
dipped in a neutral detergent first, then remove the
detergent using a dry cloth.
Do not use a hard cloth and a volatile chemical (such
as an alcohol). If used, the panel surface may be
scratched or printed letters may be erased.
Cleaning the Faceplate Terminals
If the terminals on the unit or faceplate get dirty, wipe
them with a clean soft dry cloth.
English |
KVT-M707_Instruct_E_r6.indd 5
5
05.5.9 2:25:27 PM
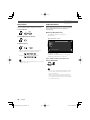
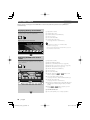
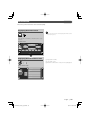
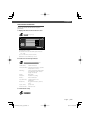
Opening/Closing the Monitor and Power Switch
Open the monitor
[OPEN/CLOSE] key
Close the monitor
Turn the power on
Hold down the [SRC] key more than
one second to turn it off.
[SRC] key
• Do not touch the moving components when you are opening or closing the monitor. If you touch the moving components,
you may be hurt or the equipment may be damaged.
• Do not try to open or close the monitor by hand.
• You can automatically open or close the monitor when you turn on or off the ignition key (see page 36).
• If the monitor movement is stopped by the shift lever or another obstacle when the monitor is opened, this movement is
canceled by the safety function. If an obstacle is pinched by the monitor when closed, the monitor movement is also canceled
by the safety function. If it has occurred, remove the obstacle and press the [OPEN/CLOSE] key again.
6 |
English
KVT-M707_Instruct_E_r6.indd 6
05.5.9 2:25:28 PM
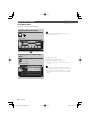
Removing/Attaching the Protection Panel
Remove the protection panel
Attach the protection panel
Place the right end of the protection panel onto
hooks and push it until clicked and locked.
Then, push the left end of the panel to lock it.
Two hooks
• Close the monitor first, then remove or attach the protection panel.
• After you have removed the protection panel, you cannot operate the receiver.
• After you have removed the protection panel, you can flash the burglar alarm lamp (see page 46).
English |
KVT-M707_Instruct_E_r6.indd 7
7
05.5.9 2:25:29 PM
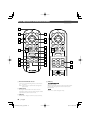
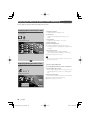
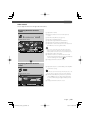
KVT-M707 Basic operations
■ When the monitor is open
TI
■ When the monitor is closed
TI
8 |
English
KVT-M707_Instruct_E_r6.indd 8
05.5.9 2:25:29 PM
1 Play/Pause
[38] key
Pauses and replays a disc.
5 Track/Station Selectors
[4]/[¢] key
Selects a music, chapter, track, or frequency.
2 Video Source Selection
[V.SEL] key
Video source selection changes in the following order
each time you press the key.
6 Band/Folder Selectors
[FM]/[AM] key
[FM] key switches to the FM1/2/3 band or next folder/
disc.
[AM] key switches to the AM band or previous folder/
disc.
Video/ TV*
Rear view camera*
Navigation*
*Optional accessory
You can also turn off the video display by pressing the
key longer than 1 second.
When you press the key again, the previous video
display comes back on.
3 Audio Source Selection/Power Supply
[SRC] key
Audio source selection changes in the following order
each time you press the key.
7 Attenuator/ Traffic Information
[ATT]/ [TI] key
Attenuates the volume.
Press it again to cancel muting.
Press it for more than one second to turn the Traffic
Information function on or off. (see page 18)
8 Select Seek Mode
[AUTO] key
Selects the Seek mode. (see pages 16/26/30 for the
<Seek Mode>)
9 Screen Setup
[SCRN] key
Displays the Screen Control or Angle Control screen.
(see page 36)
p Function
[FNC] key
The video source function changes in the following
order each time you press the key.
Switches the source that is output at the AV OUTPUT
terminal when it is pressed more than 1 second.
*Optional accessory
q Switch Screen Mode
[MODE] key
Switches the screen mode. (see page 12)
You can also turn off the power by pressing the key
longer than 1 second.
When you press the key again, the power turns on.
Push it again to turn the power on.
4 Volume Controls
[VOLUME] key
• Aside from the navigation system, the display turns on
when you apply the parking brake.
• It is necessary to set "Navigation Source" of <AV Interface>
to "On" to add Navigation as an audio source that can be
selected the with [SRC] key. (see page 43)
• It is necessary to engage the shift knob of car to "Reverse"
to switch to rear view camera video display.
English |
KVT-M707_Instruct_E_r6.indd 9
9
05.5.10 8:12:53 PM
Basic Operations of Remote Controller
2
NAV
14
18
ENTER
AUD
CANCEL
MENU
ZOOM
OUT
–
TV
15
38
BAND+
u ATT 4
¢
VOL
7
ZOOM
IN
POSITION
–
ZOOM
OUT
¢
d
CANCEL
MENU
6
VOL
ENTER
AUD
BAND+
u ATT 4
4
SR
C
SR
C
TV
5
L
SE
V.
1
L
SE
V.
3
NAV
d
ZOOM
IN
POSITION
8
38
17
MODE
9
12
ROUTEM
VIEW
SC1
16
1 .? &
2 ABC
3 DEF
VOICE
2-ZONE
MAPDIR
AV OUT
SC2
OPEN
11
4 GHI
5 JKL
6 MNO
10
7 PQRS
8 TUV
9 WXYZ
u
13
0
d
CLEAR
REAR
VOL
# BS
19
20
DIRECT
MODE
ROUTEM
1 Remote Control Mode selector
Selects one of the following remote control modes.
TV: TV source
AUD: Tuner source or attached disc changer/disc
player source
2 [NAV] switch
Pressing the switch until it locks enters into the
navigation system control mode. Pressing the switch
again returns to the AV control mode.
VIEW
SC1
4 [VOL] key
TUNER
TV
DISC
Adjusts the volume.
When you press the key, the volume attenuates. When
you press the key again, the volume returns to the
previous level.
NAV
Zooms in or out the navigation map.
3 [SRC] key
Audio source changes each time you press the key.
10 |
English
KVT-M707_Instruct_E_r6.indd 10
05.5.9 2:25:31 PM
5 [V.SEL] key
Video source selection changes in the following order
each time you press the key.
q [OPEN] key
TUNER
TV
DISC
Opens or closes the monitor each time you press the
key.
NAV
Jumps to the function registered in Shortcut 2.
Video/ TV*
w [2-ZONE] key
Rear view camera*
TUNER
Navigation*
Turns Zone function on or off each time you press
the key.
(see page 58 for the <Zone Control>)
*Optional accessory
Plays Voice guidance.
TUNER
+: Switches to the FM1, FM2, or FM3 band.
–: Switches to the AM band.
TV
BAND: Switches to TV1, TV2, or VIDEO.
e [REAR VOL] key
TUNER
TV
DISC
You can adjust the rear channel volume when Zone
function is on.
r [MENU] key
DISC
+: Selects next disc.
–: Selects previous disc.
NAV
NAV
Displays Main menu.
t [CANCEL] key
Selects a icon.
NAV
7 [4]/ [¢] key
Displays previous screen (same as the [Return] button
on the navigation screen).
TUNER
Selects a station.
y [SC1] key
TV
Selects a channel.
NAV
Jumps to the function registered in Shortcut 1.
DISC
Selects a track.
u [VIEW] key
NAV
Selects an icon or scrolls horizontally.
8 [38] key
NAV
Switches between 2D and 3D map displays.
i Joystick
DISC
NAV
Plays or pauses.
TV
Selects the Seek mode.
(see page 16/26/30 for the <Seek Mode>)
NAV
Displays the current position.
9 [MODE] key
Switches the Screen mode. (see page 12)
Also performs the selected function when you press
the button down.
o [0] – [9] key
TUNER
1 .? &
—
TV
6 MNO
: Recall the stations on memory.
NAV
You can enter a character/number.
; [DIRECT] key
NAV
Displays Route Option menu.
p [AV OUT] key
TUNER
DISC
NAV
6 [BAND] key
TUNER
TV
TV
Selects the Direct Search mode.
(see pages 18/23 for <Direct Search>)
DISC
Selects an AV source to be output at the AV OUTPUT
port.
NAV
Changes the map direction.
Switches between the heading up navigation and
north up navigation map displays.
TUNER
TV
DISC
NAV
• It is necessary to engage the shift knob of car to "Reverse"
to switch to rear iew camera video display.
: An operation during FM/AM broadcasting source
: An operation during TV source (optional accessory)
: An operation during disc source (optional accessory) playback
: An operation during Navigation system (KNA-DV2200, KNA-DV3200: optional accessory) control mode
English |
KVT-M707_Instruct_E_r6.indd 11
11
05.5.10 8:12:54 PM
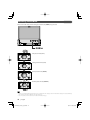
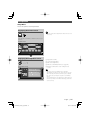
Switching Screen Mode
The Screen mode of the monitor changes each time the [MODE] key is pressed.
Full picture mode (FULL)
Justify picture mode (JUST)
Zoom picture mode (ZOOM)
Normal picture mode (NORMAL)
• When you select the Menu, Easy Control screen, or Navigation, the display is shown in the full-size display mode automatically.
The screen mode of these displays cannot be changed.
• You can set the screen mode for each of the TV and video images.
12 |
English
KVT-M707_Instruct_E_r6.indd 12
05.5.9 2:25:33 PM
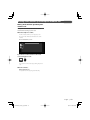
Muting Audio Volume upon Reception of Phone call
Muting Audio Volume upon Reception
of Phone call
The system automatically attenuates the audio
volume when receiving a phone call.
When the telephone is called...
The Phone Call ("CALL") screen appears, and
the system automatically attenuates the audio
volume.
Phone Call ("CALL") screen
CALL
13:50
If you want to continue to listen to the audio
source during phone call...
The system resumes audio play during the phone
call.
When the call ends...
Hang up the phone.
The system resumes playing automatically.
English |
KVT-M707_Instruct_E_r6.indd 13
13
05.5.9 2:25:34 PM
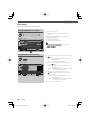
Tuner Control
Various control screens appear in the Tuner Source mode.
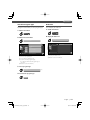
Displaying the Easy Control Panel
1
2
3
4
5
The Tuner Control Panel is displayed in a floating
position of the selected picture.
Adjusts the volume.
Switches the source.
Switches the band (to AM or FM1/2/3).
Tunes in a station.
Switches the Seek mode.
(see page 16 for the <Seek Mode>)
Displaying the Easy Control Panel
1
MODE:FULL AV-OUT:AV-IN1
2
SRC
TUNER
FM1
3
3
4
A M
F M
Preset 1
4
1
5
SEEK
98.1 MHz
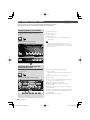
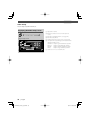
Displaying the Tuner Control screen
You can tune in a station using various functions.
Tuner Control screen
6
6
TUNER
7
6
7
8
9
p
q
w
e
13
12
9
14
13:50
13
10
Next
11
FM
8
• For receiver key operations, see <KVT-M707 Basic
Operations> (see page 8).
• The Easy Control Panel is hidden when you touch a central
part of monitor.
15
LO.S
FM 1
AM
16
17
18
19
20
SCRL MONO
AME SEEK
DISP
Preset 1
98.1 MHz
6
AUTO1
1
2
3
r
6
22
4
5
6
t
y
21
u
i
o
;
14 |
Adjusts the volume.
Calls the Tuner Menu.
Calls the Sound Effects Menu. (see page 54)
Displays the Source Select screen. (see page 35)
Calls the Setup Menu. (see page 37)
Switches to the FM1/2/3 band.
Switches to the AM band.
Tunes in a station.
Use the <Seek Mode> (see page 16) to change the
frequency switching.
Switches between 1 to 6 buttons and
Function buttons to use.
Turns the Local Seek function On or Off.
Selects the Auto Memory mode.
(See page 16 for the <Auto Memory>)
Switches the Seek mode.
(see page 16 for the <Seek Mode>)
Selects the Program Service Name, or Radio Text
mode for text display.
Scrolls the display text.
Select the Monaural reception mode. (Only when
receiving the FM broadcast)
English
KVT-M707_Instruct_E_r6.indd 14
05.5.9 2:25:35 PM
a When 1 to 6 buttons appear, you can recall
the stations on memory.
For memory of broadcasting stations, see <Auto
Memory> (see page 16) or <Manual Memory> (see
page 17).
s Indicates current Seek mode.
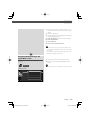
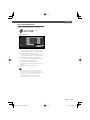
Displaying the Tuner Menu screen
You can select menu options using various
functions.
d Selects option from various function menus.
f Returns to the Tuner Control screen.
• The available functions vary depending on the model used
(the tuner specifications and the broadcasting system that
can be received).
Me n u
Tuner Menu screen
TUNER
Preset Select
23
PTY Search
24
Radio Text
English |
KVT-M707_Instruct_E_r6.indd 15
15
05.5.9 2:25:40 PM
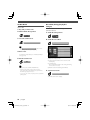
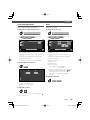
Seek Mode
Auto Memory
Sets a station selection.
Stores stations with good reception in memory
automatically.
SEEK
If SEEK is not shown, touch N e x t .
The mode is switched in following order each time
you touch the button.
AUTO1
Tunes in a station with good
reception automatically.
AUTO2
Tunes in stations in memory one
after another.
MANU
Switches to the next channel
manually.
1
Select a band you wish to store in memory
AM
2
Select the Auto Memory mode
AME
If
3
AME
is not shown, touch
Next
.
Start Auto Memory
Touch
or
.
Auto Memory terminates when 6 stations are
stored or when all stations are tuned in.
• The operation ends automatically if you do not operate
within 10 seconds.
16 |
English
KVT-M707_Instruct_E_r6.indd 16
05.5.9 2:25:41 PM
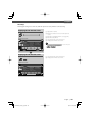
Tuner Control
Manual Memory
Preset Select
Stores the current receiving station in memory.
Lists and tunes in stations in memory one after the
other.
1
Select a station you wish to store in memory
1
Call the Tuner Menu
AM
Me n u
2
Store in memory
2
2sec.
1
Call the Preset Select Menu
2sec.
—
6
Preset Select
If
to
are not shown, touch
.
Continue to touch until the memory number
appears.
1
6
Next
1
TUNER
4
FM1 1) 87.5 MHz
FM1 2) 90.1 MHz
2
FM1 3) 98.1 MHz
FM1 4) 106.1 MHz
2
3
FM 98.1
FM1 5) 108.0 MHz
FM1 6) 87.5 MHz
1 Tunes in the displayed station.
2 Switches the band of the displayed station list.
3 Shows the band and frequency.
4 Returns to the Tuner Menu.
English |
KVT-M707_Instruct_E_r6.indd 17
17
05.5.10 6:08:58 PM
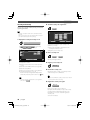
Direct Search
Traffic Information
Tunes in a station when its frequency is entered.
When a traffic bulletin starts, any source is switched
to the traffic information and it is displayed
automatically.
1
Select a band
–
2
BAND+
When the traffic bulletin starts...
Select the Direct Search mode
The Traffic Information screen appears
automatically.
Traffic Information screen
# BS
1
1
TUNER
DIRECT
13:50
2
3
Enter frequency
0
—
3
9 WXYZ
Traffic Information
When you enter them, signal reception starts.
Example: When you receive FM 92.1 MHz
0
9 WXYZ
2 ABC
1 .? &
Example: When you receive AM 810 kHz
0
8 TUV
1 .? &
0
1
1
1 Adjusts the volume.
2 Calls the Sound Effects Menu. (see page 54)
3 Calls the Setup Menu. (see page 37)
If you continue to listen to the audio source
during traffic bulletin...
• The operation ends automatically if you do not operate
within 10 seconds.
• It is necessary to have Traffic Information function set
to On in order to have the Traffic Information screen
appear automatically.
• During reception of traffic information the adjusted
volume is automatically remembered, and the next
time it switches to traffic information it's automatically
the remembered volume.
18 |
English
KVT-M707_Instruct_E_r6.indd 18
05.5.9 2:25:46 PM
Tuner Control
Search for Program Type
Radio Text
A program is tuned when you set its program type.
You can display the radio text.
1
1
Call the Tuner Menu
Me n u
Me n u
2
2
Call the PTY Search Menu
Display the Radio Text
Radio Text
PTY Search
1
TUNER
4
Call the Tuner Menu
All Speech
T U N2E R
1
R a d i o Te x t
All Music
2
News
2
Current Affairs
3 SRCH
FM 98.1
Information
Not Found
1 Displays the Radio Text.
2 Returns to the Tuner Menu.
1 Selects a program type.
2 Scrolls the program type list.
3 Searches for the program type.
It is displayed when the Program Type is
selected.
4 Returns to the Tuner Menu.
3
Select a program type
News
4
etc.
Search for the program type
SRCH
English |
KVT-M707_Instruct_E_r6.indd 19
19
05.5.9 2:25:48 PM
Disc Changer/CD player Control
You can recall various control screens during Disc Changer/CD player playback.
(with the optional accessory Disc Changer or CD player connected only)
Displaying the Easy Control Panel
1
2
3
4
5
The Disc Changer/CD player Control Panel is
displayed in a floating position of the selected
picture.
Displaying the Easy Control Panel
During playback on disc change
1
TV1
MODE:FULL AV-OUT:AV-IN1
2
5
SRC
CD CH
D1
5
D –
D +
T3
3
3
Adjusts the volume.
Switches the source.
Selects a track.
Plays or pauses.
Selects a disc when a disc is played back on the
disc changer.
• For Disc Changer/CD player playback and receiver key
operations, see <KVT-M707 Basic Operations> (see page 8).
• The Easy Control Panel is hidden when you touch a central
part of the monitor.
4
1
P 5:32
During playback on CD player
3
SRC
CD
3
T3
4
P 5:32
Displaying the Disc Changer/ CD
player Control screen
You can play the Disc Changer/CD player using
various functions.
Disc changer/CD player Control screen
CD CH
6
7
Next
10
11
12
RDM
REP
T 7 20
SCN
19 D 3
REP
–
20 |
13:50
9
Disc –
15
8
Disc +
13
14
DREP MRDM
16
DISP
7
8
18
17
SCRL TIME
P 3 : 2 5 21
22
–
–
–
6 Calls the Disc Changer/ CD player Menu.
7 Selects a track.
Starts Fast Forward or Fast Rewind when it is held
down.
8 Selects a disc. (Function of Disc Changer)
9 Plays or pauses.
p Starts or stops Scan Play (that plays the beginning
of each track one after the other).
q Repeats to play (the current track).
w Starts or stops Random Play (to play track in
random order).
e Repeats to play disc (the current disc). (Function of
Disc Changer)
r Starts or stops Magazine Random Play (to play track
of the disc changer in random order). (Function of
Disc Changer)
t Switches the button display.
English
KVT-M707_Instruct_E_r6.indd 20
05.5.9 2:25:51 PM
y Selects the Disc Name (see page 22 for the <Set
Disc Name>), Disc Text, or Track Text mode for text
display.
u Scrolls the display text.
i Switches the play time display between Track, Disc,
and Disc Remaining Time.
o Shows Disc Number. (Function of Disc Changer)
; Shows Track Number.
a Shows Play Time.
s Shows current playback function.
• The functions that can be used and the information that
can be displayed will differ depending on the models being
connected.
• The information shown will be different depending on the
CD Changer or CD player being used.
Displaying the Disc Changer/ CD
player Menu screen
You can select menu options using various
functions.
d Selects options from various function menus.
f Returns to the Disc Changer/CD player Control
screen.
Me n u
• The available functions vary depending on the source used.
CD Menu screen
CD
23 Name Set
24
English |
KVT-M707_Instruct_E_r6.indd 21
21
05.5.9 2:25:54 PM
Set Disc Name
Names a CD.
1
2
Play a CD you wish to name
Call the CD/Disc Changer Menu
Disc Select (during play by disc
changer)
The discs loaded on the disc changer are listed for
quick disc selection.
1
Me n u
3
Select the Set Name mode
Call the Disc Changer Menu
Me n u
2
Name Set
Call the Disc Select Menu
Disc Select
CD-CH
• The Name Set
position varies
depending on the disc you are playing.
2
Enter a name
3. Disc Name
4. Disc Name
For character entry details, see <Character Entry>
(see page 34).
P 2:35
Exit the Set Name mode
5. Disc Name
6. Disc Name
1 Plays the displayed disc.
2 Selects the Disc Name or Disc Text mode for
text display.
3 Scrolls the list.
(It is not displayed when a disc changer having
6 or less discs is used.)
4 Returns to the Disc Changer/ CD Menu.
Ok
• You cannot name an MD or MP3/WMA disc.
• Number of discs that can be stored in memory:
Varies depending on the CD changer/ player. Refer to
the CD changer/ player manual.
• You can set a disc name only after you have applied the
parking brake.
1
2. Disc Name
3
5
1. Disc Name
DISP
3
4
4
3
Select the desired disc
1. Disc Name
Touch the desired disc display.
22 |
English
KVT-M707_Instruct_E_r6.indd 22
05.5.9 2:25:56 PM
Disc Changer/CD player Control
Direct Search
Searches for a disc or a track when its number is
entered.
1
Enter a disc or track number
—
0
2
9 WXYZ
Search
When searching for a track:
4
¢
When searching for a disc:
–
BAND+
• The operation ends automatically if you do not operate
within 10 seconds.
English |
KVT-M707_Instruct_E_r6.indd 23
23
05.5.9 2:25:58 PM
TV Control
Various control screens appear in the TV Source mode. (You can only operate TV with the optional accessory
TV Tuner connected.)
Displaying the TV Picture screen
1
2
3
4
5
Various control screens appear in the TV Source
mode.
Select the TV
Pictures.
TV Picture screen
TV1 1
Group1 2
Preset 1 3
2ch 4
MODE:FULL AV-OUT:AV-IN1
6
5
7
8
TV
TV1
Group1
Preset 1
• For TV picture selection and receiver key operations, see
<KVT-M707 Basic Operations> (see page 8).
• The information display is cleared automatically after
approximately 5 seconds. Also, the information can be
displayed automatically when it is updated (see page 44).
2ch
Displaying the Easy Control Panel
The Control Panel is displayed in a floating position
of the TV picture.
Displaying the Easy Control Panel
TV1
Preset 1
2ch
MODE:FULL AV-OUT:AV-IN1
TV Band Number Display
TV Area Group Display (see page 49)
Memory Number Display
Channel Number Display
Channel Up Area
Increase the channel.
6 Channel Down Area
Decrease the channel.
7 Band/Video Switch Area
Switches to TV1, TV2, VIDEO1, or VIDEO2.
8 Information Display Button Area
9
p
q
w
e
r
Adjusts the volume.
Switches the source.
Switches to Video (to VIDEO1 or VIDEO2).
Switches the TV band (to TV1 or TV2).
Calls up a channel.
Switches the Seek mode.
(see page 26 for the <Seek Mode>)
9
• The Easy Control Panel display is hidden when you touch a
central area of the monitor.
10
SRC
TV T V 1
24 |
11
VID
Group1
12
13
13
T V
Preset 1
14
SEEK
2ch
9
English
KVT-M707_Instruct_E_r6.indd 24
05.5.9 2:25:59 PM
Displaying the TV Control screen
You can tune in a TV station using various
functions.
TV Control screen
15
15
T V 16
VIDEO
17
22
19
22
18
Next
21
TV
24
25
–
SEEK
AME
T V 128 G r o u p 1
P r e s e t 1 29
23
13:50
20
–
15
AUTO1
1
t
y
u
i
o
;
a
s
2
3
d
–
–
f
2ch
15
27
4
5
6
26
g
h
j
k
l
Displaying the TV Menu screen
Adjusts the volume.
Calls the TV Menu.
Calls the Sound Effects Menu. (see page 54)
Displays the Source Select screen. (see page 35)
Calls the Setup Menu. (see page 37)
Switches to VIDEO1 or VIDEO2.
Switches to TV1 or TV2.
Select a channel.
Use the <Seek Mode> (see page 26) to change the
channel tuning sequence.
Switches between 1 to 6 buttons and
Function buttons to use.
Selects the Auto Memory mode.
(see page 26 for the <Auto Memory>)
Switches the Seek mode.
(see page 26 for the <Seek Mode>)
When 1 to 6 buttons appear, you can
recall channels on memory.
For memory of broadcasting stations, see <Auto
Memory> (see page 26) or <Manual Memory> (see
page 26).
Seek Mode Indicator
TV Area Group Display (see page 49)
Memory Number Display
/ Selects options from various function menus.
z Returns to the TV Control screen.
You can select menu options using various
functions.
• The available functions vary depending on the model used
(the tuner specifications and the broadcasting system that
can be received).
Me n u
TV Menu screen
TV
Preset Select
Name Set
30
31
English |
KVT-M707_Instruct_E_r6.indd 25
25
05.5.9 2:26:01 PM
Seek Mode
Auto Memory
Sets a station selection.
Stores stations with good reception in memory
automatically.
1
SEEK
If SEEK is not shown, touch N e x t .
The mode is switched each time you touch the
button.
AUTO1
Tunes in a station with good
reception automatically.
AUTO2
Tunes in stations in memory one
after another.
MANU
Switches to the next channel
manually.
Select a band you wish to store in memory
TV
2
Select the Auto Memory mode
AME
If
3
AME
is not shown, touch
Next
.
Start Auto Memory
Touch
or
.
Auto Memory terminates when 6 stations are
stored or when all stations are tuned in.
• The operation ends automatically if you do not operate
within 10 seconds.
Manual Memory
Stores the current receiving channel in memory.
1
Select a channel you wish to store in memory
TV
2
Store in memory
2sec.
1
2sec.
—
6
If 1 to 6 are not shown, touch N e x t .
Continue to touch until the memory number
appears.
26 |
English
KVT-M707_Instruct_E_r6.indd 26
05.5.10 6:09:00 PM
TV Control
Preset Select
Set Station Name
Lists and tunes in stations in memory one after the
other.
Names a station.
1
1
Select a station you wish to name
Select a band you wish to call
TV
TV
2
2
Call the TV Menu
Call the TV Menu
Me n u
Me n u
3
(Page 25 y)
(Page 25 y)
3
Select the Set Name mode
Call the Preset Select Menu
Name Set
Preset Select
1
TV
TV
2
3ch
TV1
1) 1ch
TV1
2) 2ch
TV1
3) 3ch
TV1
4) 4ch
TV1
5) 5ch
TV1
6) 6ch
1 Tunes in the displayed station.
The station name is displayed if previously set.
2 Returns to the TV Menu.
4
Enter a name
For character entry details, see <Character Entry>
(see page 34).
5
Exit the Set Name mode
Ok
• You can store up to 20 stations in memory.
• You can set a station name only after you have applied
the parking brake.
English |
KVT-M707_Instruct_E_r6.indd 27
27
05.5.9 2:26:08 PM
DAB Tuner control
Various control screens appear in the DAB Tuner source mode. (with the optional accessory DAB tuner
connected only)
Displaying the Easy Control Panel
1
2
3
4
5
6
The DAB Tuner Control Panel is displayed in a
floating position of the selected picture.
Displaying the Easy Control Panel
Adjusts the volume.
Switches the source.
Switches the band (to DAB1/2/3).
Selects a service.
Selects the Ensemble.
Switches the Seek mode.
(see page 30 for the <Seek Mode>)
1
MODE:FULL AV-OUT:AV-IN1
• For system key operations, see <KVT-M707 Basic
Operations> (see page 8).
• The Easy Control Panel display is hidden when you touch
the central area of the monitor.
2
3
SRC
DAB
4
Band S –
DAB1
4
S +
5
5
6
SEEK
1
220.094MHz
Displaying the DAB Tuner Control
screen
You can select the Ensemble and services using
various functions.
DAB Tuner Control screen
7
7
DAB
8
Service +
9
14
11
10
Next
15
Band
21
DA B 1
14
13
y
16
17
18
–
–
SEEK
AME
DISP
Preset 2
Service Label
7
AUTO1
1
13:50
12
Service –
P/S
13
2
3
7
8
9
p
q
w
e
r
t
u
20
7
4
5
6
19
i
o
;
a
28 |
Adjusts the volume.
Calls the DAB Tuner Menu.
Calls the Sound Effects Menu. (see page 54)
Displays the Source Select screen. (see page 35)
Calls the Setup Menu. (see page 37)
Switches the band (to DAB1/2/3).
Selects a service.
Selects the Ensemble.
Switches between 1 to 6 buttons and
Function button to use.
Selects the Auto memory mode.
(see page 30 for the <Auto Ensemble memory>)
Switches the Seek mode.
(see page 30 for the <Seek Mode>)
Changes the display between Ensemble label, PTY
label, Component label, Region label, and Audio
quality.
When 1 to 6 buttons appear, you can
recall a service from memory.
Seek Mode Indicator
Selects the primary or secondary operation.
English
KVT-M707_Instruct_E_r6.indd 28
05.5.9 2:26:11 PM
Displaying the DAB Tuner Menu
screen
s Selects options from various function menus.
d Returns to the DAB Tuner Control screen.
You can select menu options using various
functions.
Me n u
• For DAB Tuner function details, see the Instruction Manual of
DAB Tuner (optional accessory).
DAB Tuner Menu screen
DAB
Ser vice Select
Languag e Filter
23
19
PTY Search
DAB Information
22
English |
KVT-M707_Instruct_E_r6.indd 29
29
05.5.9 2:26:14 PM
Seek Mode
Service Preset Memory
Sets a station selection.
The current receiving service is stored in memory.
1
Select a service you wish to store in memory
SEEK
Band
If SEEK is not shown, touch N e x t .
The mode is switched each time you touch the
button.
Service +
2
Store in memory
2sec.
AUTO1
Tunes in a station with good
reception automatically.
AUTO2
Tunes in stations in memory one
after another.
MANU
Switches to the next channel
manually.
Service –
1
2sec.
—
6
If 1 to 6 are not shown, touch N e x t .
Continue to touch until the memory number
appears.
Auto Ensemble Memory
An ensemble with good reception is stored in
memory automatically.
1
Select a band you wish to store in memory
Band
2
Select the Auto Memory mode
AME
If
3
AME
is not shown, touch
Next
.
Start Auto Memory
Touch
or
.
Auto Memory terminates when 6 stations are
stored or when all stations are tuned in.
30 |
English
KVT-M707_Instruct_E_r6.indd 30
05.5.10 8:12:55 PM
DAB Tuner control
Service Select
Language Filter
The service list of the currently receiving ensemble
is displayed for your selection.
The languages are list for your selection.
1
1
Call the DAB Tuner Menu
Call the DAB Tuner Menu
Me n u
Me n u
2
2
Call the Language Filter Menu
Call the Service Select Menu
Languag e Filter
Ser vice Select
DAB
3
DAB
3
Ser vice Name
1
Language
Ser vice Name
1
English
1
2
Ser vice Name
2 SRCH
Ser vice Name
2
220.094
Ser vice Name
1 Selects a service.
2 Scrolls the service list.
3 Returns to the DAB Tuner Menu.
3
220.094
Ser vice Name
1 Selects a language.
2 Searches for the selected language.
3 Returns to the DAB Tuner Menu.
3
Select a language you wish to use
4
Search for the language
Select a service
Ser vice Name
SRCH
English |
KVT-M707_Instruct_E_r6.indd 31
31
05.5.9 2:26:18 PM
Search for Program Type
3
Select a program type
The services are received when you set its program
type.
1
Call the DAB Tuner Menu
Select a Language
1. Display the Language select screen
Me n u
2
LANG
Call the PTY Search Menu
PTY Search
DAB
PTY
News
DAB
1 Language
4
1
1
English
PTY
News
1
2 SRCH
220.094
2
SRCH
LANG
3
Re t u r n
3
1 Selects a Language.
2 Searches for the program type.
3 Returns to the PTY Search Menu.
220.094
1 Selects a program type.
2 Searches for the program type.
3 Displays the Language select screen.
4 Returns to the DAB Tuner Menu.
2. Select a Language
4
Search for the program type
SRCH
32 |
English
KVT-M707_Instruct_E_r6.indd 32
05.5.9 2:26:21 PM
DAB Tuner control
DAB Information
DAB Announcement
The DAB information is displayed.
When the Announcement you have turned on
starts, any source is switched to the Announcement
automatically.
1
Call the DAB Tuner Menu
When the announcement starts...
Me n u
The Announcement screen appears automatically.
2
Display the DAB Information screen
Announcement screen
1
DAB
3
1
DAB
DAB Information
13:50
1
Service Label:
2
Ensemble Label:
Traffic News
1
2
1
Component Lable:
220.094
1 Adjusts the volume.
1 Displays the DAB information (such as Service
label, Ensemble label, Component label, Audio
quality, Region label, and Dynamic label).
2 Scrolls the information display.
3 Returns to the DAB Tuner Menu.
English |
KVT-M707_Instruct_E_r6.indd 33
33
05.5.9 2:26:24 PM
Character Entry
How To Use the Character Entry
screen
When you select the Set Disc Name mode or
others, the following screen appears for character
entry.
Character Entry screen
1
2
a
b
c
d
e
f
g
h
i
j
k
l
m
n
5
o
p
q
r
s
t
u
5
v
w
x
y
z
Space
3
1
1
1
34 |
2
KENWOOD
4
6
Ok
1 Adjusts the volume.
2 Shifts the cursor.
3 Enters a space.
If you erase a character, locate the cursor on it and
touch this button.
4 Enters characters.
5 Scrolls up or down the character button display.
6 Exits the Character Entry mode and returns to the
previous screen.
• You can enter characters only after you have applied the
parking brake.
English
KVT-M707_Instruct_E_r6.indd 34
05.5.9 2:26:26 PM
Source Select
The source you wish to listen to can be selected quickly.
Displaying the Control screen
• The Source Select screen can be displayed from the control
screen of any source.
Press this key several times unit the Control screen
appears.
Control screen
TUNER
13:50
FM
AM
Next
LO.S
FM 1
SEEK
AME
Preset 1
DISP
MONO
98.1 MHz
SCRL
AUTO1
Displaying the Source Select screen
1 Adjusts the volume.
2 Select the source.
3 Returns to the Control screen previously displayed.
Source Select screen
1
1
2
STANDBY
TUNER
3
CD
TV
CD-CH
AUX EXT
1
1
English |
KVT-M707_Instruct_E_r6.indd 35
35
05.5.9 2:26:27 PM
Adjusting the Monitor Display Position and Quality
You can adjust the position and picture quality of the monitor.
Displaying the Screen Control screen
You can adjust the picture quality using the
following keys.
Screen Control screen
1
1
2
2
3
3
4
4
5
5
Au t o D I M
7
7
6
8
1 Brightness Control
Disabled if the Auto Dimmer is On.
2 Tint Control
Displayed for an NTSC system image on TV or
Video.
3 Color Control
Displayed on the TV/Video screen only.
4 Contrast Control
5 Black Level Adjustment
6 Displays the Adjust Monitor Position screen.
(see page 36 for the <Displaying the Angle Control
screen>)
7 Auto Dimmer Setup
When turned "On", the display is dimmed
automatically when the ambient becomes dark.
8 Returns to the previous screen.
• The Screen Control screen is displayed only when you have
applied the parking brake.
Displaying the Angle Control screen
You can set the monitor position and open/close
speed.
Angle Control screen
9
9
10
10
11
AU TO O P - C L
12 M O N I AC T
36 |
13
Screen
9 Monitor Angle Adjustment
p Forward/Backward Monitor Position Adjustment
q Monitor Open/Close Setup
When turned "On", the monitor is opened or closed
automatically when you turn on or off the ignition
key.
w Monitor Action Setup
When set to "Quick", the monitor is opened quickly.
e Returns to the Screen Control screen.
r Returns to the previous screen.
Of f
Normal
14
OK
English
KVT-M707_Instruct_E_r6.indd 36
05.5.9 2:26:29 PM
Setup Menu
Setup Menu
You can set up various receiver parameters.
Displaying the Control screen
• You can call the same Setup Menu for the Control screen of
each source.
Press this key several times until the Control screen
appears.
Control screen
TUNER
13:50
FM
AM
Next
LO.S
FM 1
SEEK
AME
Preset 1
DISP
MONO
98.1 MHz
SCRL
AUTO1
Displaying the Setup Menu screen
1
2
3
4
5
Setup Menu screen
1
1
3
Adjusts the volume.
Scrolls the Setup Menu.
Calls each Setup Menu.
Calls the Sound Effects Menu. (see page 54)
Returns to the Control screen of the previous
source.
4
5
2
2
1
Touch
1
• Your setup on the Sound Effects menu is adjusted
automatically according to your <Audio Set Up> (see page
38) on the Setup menu. We recommend you to complete
the <Audio Set Up> first, then set up the <Sound Effects
menu>.
• The available functions vary depending on the model used
(the tuner specifications and the broadcasting system that
can be received).
English |
KVT-M707_Instruct_E_r6.indd 37
37
05.5.9 2:26:32 PM
Audio Set Up
You can setup a speaker network, etc.
Displaying the Audio Set Up screen
Speaker setup screen
1
1
4
3
7
2
5
6
1
38 |
6
1
1 Adjusts the volume.
2 Returns to the Control screen of the previous
source.
3 Calls the Sound Effects Menu. (see page 54)
4 Calls the Setup Menu.
5 Displays the X'Over setup screen. (see page 39)
6 Sets up the front speaker type to fine-tune for the
optimal equalizer curves.
"Standard": Setup for general diameter speakers
"Narrow": Setup for small diameter speakers
"Middle": Setup for middle diameter speakers
"Wide":
Setup for large diameter speakersr
7 Set the use or no use of Subwoofer.
English
KVT-M707_Instruct_E_r6.indd 38
05.5.9 2:26:36 PM
Setup Menu
Crossover Network Setup
You can set a crossover frequency of speakers.
(Page 38 5)
X'Over setup screen
X'Over
HPF Front FREQ
220Hz
HPF Rear FREQ
2
180Hz
LPF SUB FREQ
3
120Hz
1
4
SUB Phase
Normal
5 Re t u r n
1 Sets a Front High Pass Filter frequency.
You can select any of the following frequency.
Through, 40, 60, 80, 100, 120, 150, 180, 220 Hz
2 Sets a Rear High Pass Filter frequency.
You can select any of the following frequency.
Through, 40, 60, 80, 100, 120, 150, 180, 220 Hz
3 Sets a Subwoofer Low Pass Filter frequency.
You can select any of the following frequency.
50, 60, 80, 100, 120, Through Hz
4 Sets the phase of subwoofer output.
The phase is reversed 180 degrees when set to
"Reverse".
5 Returns to the Speaker setup screen.
• Set in both the front channel and rear channel
simultaneously when using high pass filter function.
You cannot set a correct crossover network if the high
pass filter function is only used for one channel.
• The SUB Phase button is not displayed when the
Subwoofer Low Pass Filter is set to "Through".
English |
KVT-M707_Instruct_E_r6.indd 39
39
05.5.9 2:26:37 PM
System Setup
You can set up the system parameters.
Displaying the System Set Up 1
screen
System Set Up 1 screen
1
1
4
3
Beep
5
On
5
Of f
S c ro l l
2
Auto
Remote Sensor
7
On
System Set Up 1
1
6
7
Of f
8
1
1 Adjusts the volume.
2 Returns to the Control screen of the previous
source.
3 Calls the Sound Effects Menu. (see page 54)
4 Calls the Setup Menu.
5 Turns the key touch tone On or Off. ( On)
6 Allows scrolling of text display on the Source
Control screen. ( Manual)
"Auto":
Scrolls the screen automatically.
"Manual": Allows you to scroll the screen manually.
7 Selects a remote control signal. ( On)
When turned "Off", the remote control of TV
reception is rejected.
8 Displays the System Set Up 2 screen.
• If
is not shown, touch
or
40 |
to display it.
English
KVT-M707_Instruct_E_r6.indd 40
05.5.9 2:26:38 PM
Setup Menu
Displaying the System Set Up 2
screen
9 Selects an illumination color of receiver keys.
( Red)
"Green": Green
"Red":
Red
p Displays the System Set Up 1 screen.
System Set Up 2 screen
Key ILLUMI
Green
10
9
System Set Up 2
English |
KVT-M707_Instruct_E_r6.indd 41
41
05.5.9 2:26:41 PM
Control during DVD Video or Video CD Playback
AV Interface
You can set audio and visual (AV) interface parameters.
Displaying the AV I/F 1 screen
1
2
3
4
AV I/F 1 screen
1
1
3
2
4
4
5
5
6
Off
7
7
8
1
1
Adjusts the volume.
Calls the Sound Effects Menu. (see page 54)
Calls the Setup Menu.
Selects a navigation system connection. ( RGB)
"RGB": Allows the Kenwood’s Navigation System
to connect via its interface cable.
"AV-IN1": Allows a third-party navigation system to
connect via the AV INPUT1 port.
"Off":
Must be used if no navigation system
is connected. (The navigation display
is cancelled when the AV source is
switched.)
5 Sets a name to be displayed when you select a
system that is connected via the AV INPUT1 port.
( VIDEO1)
• If you have set the navigation system connection to "AV IN1",
the display is fixed to "NAV".
6 Sets an image display of the system that is
connected via the AV INPUT2 port. ( Off)
"Off": When the image source is switched, an
image entered via the AV INPUT2 port is
displayed.
"On": When an image signal is entered via the AV
INPUT2 port, this image is displayed.
7 Sets a name to be displayed when you select an
image of the system that is connected via the AV
INPUT2 port. ( VIDEO2)
8 Displays the AV I/F 2 screen.
• If
is not shown, touch
or
42 |
to display it.
English
KVT-M707_Instruct_E_r6.indd 42
05.5.9 2:26:41 PM
Before Use
Setup Menu
Displaying the AV I/F 2 screen
AV I/F 2 screen
9
On
10
11
11
AV- I N 1
13
12
Displaying the AV I/F 3 screen
AV I/F 3 screen
F-Left
15
16
Navigation Sou r c e
14
15
16
17
18
9 Sets a method to switch to the rear view camera
video display. ( Off)
"On": Switches to the the rear view camera video
display when engaging the shift knob of car
to "Reverse".
"Off": Switches to the the rear view camera video
display when engaging the shift knob of car
to "Reverse" and then pressing the [V.SEL]
switch several times.
p You can flip the left and right of the rear view
camera video display. Set to "Reverse" and the the
rear view will be displayed left and right in mirror
image on the screen. ( Normal)
q Selects an AV source to be output at the AV
OUTPUT port. ( AV-IN1)
w Displays the AV I/F 1 screen.
e Displays the AV I/F 3 screen.
r Selects speakers used for voice guidance of the
navigation system. ( F-Left)
"F-Left": Uses the front left side speaker for voice
guidance.
"F-Right": Uses the front right side speaker for
voice guidance.
"Front-All": Uses both front speakers for voice
guidance.
t Adjusts the volume for voice guidance of the
navigation system. ( 19)
y Mutes the volume during voice guidance of the
navigation system. ( On)
When turned "On", the volume level drops for voice
guidance.
u Sets a selecting method of audio source from the
Navigation system. ( Off)
"On": Allows you to select the audio source input
from the Navigation system interface by
pressing [SRC] or selecting it on Source
Select screen.
"Off": The audio source cannot be selected using
[SRC] or on Source Select screen.
i Displays the AV I/F 2 screen.
English |
KVT-M707_Instruct_E_r6.indd 43
43
05.5.9 2:26:45 PM
Control during DVD Video or Video CD Playback
User Interface
You can set up user interface (IF) parameters.
Displaying the User I/F 1 screen
User I/F 1 screen
1
1
4
1 Adjusts the volume.
2 Returns to the Control screen of the previous
source.
3 Calls the Sound Effects Menu. (see page 54)
4 Calls the Setup Menu.
5 Switches the wall paper.
6 Displays the User I/F 2 screen.
3
2
Wa l l
5
5
• If
is not shown, touch
or
to display it.
6
1
1
Displaying the User I/F 2 screen
User I/F 2 screen
7
8
9
10
44 |
7 Sets an on-screen display of the navigation screen.
( Auto)
"Auto": Information is displayed for 5 seconds
when updated.
"Off":
Information is not displayed.
8 Sets an on-screen display of the video playback
screen. ( Auto)
"Auto": Information is displayed for 5 seconds
when updated.
"MANU": Information is displayed when you touch
on the screen. (see page 24)
9 Sets an on-screen display of the TV screen.
( Auto) (with the optional accessory TV tuner
connected only)
"Auto": Information is displayed for 5 seconds
when updated.
"MANU": Information is displayed when you touch
on the screen. (see page 24)
p Displays the User I/F 1 screen.
English
KVT-M707_Instruct_E_r6.indd 44
05.5.9 2:26:48 PM
Before Use
Setup Menu
Touch Panel Adjustment
Clock
You can adjust the touch panel operations.
Adjusts the clock time.
1
1
Display the Touch Panel Adjust screen
Display the Clock screen
Touch
If Touch
touch
Clock
is not shown,
to display it.
or
1
If Clock
touch
1
4
3
Me n u
Touch Adjust
1
1
4
5
is not shown,
to display it.
or
6
7
3
Set
5
11:25
6
7
8
2
2
RDS SYNC
To u c h
1
Of f
9
1
1 Adjusts the volume.
2 Returns to the Control screen of the previous
source.
3 Calls the Sound Effects Menu. (see page 54)
4 Calls the Setup Menu.
5 Allows you to start touch panel adjustment.
1
1 Adjusts the volume.
2 Returns to the Control screen of the previous
source.
3 Calls the Sound Effects Menu. (see page 54)
4 Calls the Setup Menu.
5 Clock time display.
6 Adjusts hours.
7 Adjusts minutes.
8 Sets "00" minute.
Setup examples: 3:00~3:29 ➔ 3:00
3:30~3:59 ➔ 4:00
9 Sets the clock time in synchronization with the
time data sent from the RDS station. ( On)
When turned "On", the synchronized mode
starts and the clock cannot be adjusted
manually.
Start to adjust the touch panel
Set
Touch Adjust
1
On
Clock
1
2
9
2
2
Adjust the clock time
1 Cancels the adjustment and returns to the
Touch Panel Adjust screen.
2 Resets to the initial status.
3
Adjust the positions
Touch the center of left lower and right upper
when requested.
English |
KVT-M707_Instruct_E_r6.indd 45
45
05.5.9 2:26:52 PM
Before Use
Security Code Setup
2
You can set a security code to protect your receiver
system against theft.
Start the security code registration
Set
Pa s s Wo r d
• When the Security Code function is activated it can't be
released.
Note, your Security Code is the 4 digit number entered in
your "Car Audio Passport" in this package.
1
1st
1
1
2
3
4
5
6
7
8
9
0
Display the Security Code Setup screen
3
2 Clear
Cancel
4 Enter
Security
If Security
touch
or
1 Enters the numbers to your security code.
2 Clears your entry.
3 Cancels the registration and returns to the
Security Code Setup screen.
4 Registers your security code.
is not shown,
to display it.
1
1
4
3
Security Code
DSI
6
On
Set
Of f
5
3
6
Enter a security code
2
0
Security
1
• If you have already completed the code registration,
cannot touch S e t .
9
Input by four-digit number.
1
1 Adjusts the volume.
2 Returns to the Control screen of the previous
source.
3 Calls the Sound Effects Menu. (see page 54)
4 Calls the Setup Menu.
5 Allows you to start security code registration.
6 Turns the DSI function on or off.
If turned "On", the burglar alarm lamp flashes
when the protection panel is removed. ( On)
—
4
Register your security code
Enter
5
Reenter the security code
Reenter the same security code as that you have
entered in Step 3 for confirmation.
• If you enter a different security code, the screen returns
to Step 3 (for the first code entry).
6
Register the security code again
Enter
Now, your security code is registered.
If you press the Reset button or if you disconnect
your Receiver from the battery after the code
registration, you need to enter the registered
security code.
See below for details.
46 |
English
KVT-M707_Instruct_E_r6.indd 46
05.5.10 6:09:05 PM
Before Use
Setup Menu
If you have pressed the Reset button or if you have
disconnected the Receiver from battery...
1
Enter the correct security code
0
—
9
You must enter the same security code as that you
have entered in Step 3 above.
2
Enter the security code
Enter
Now, you can use your Receiver.
• If you enter a wrong security code, you cannot use your
Receiver for a while.
Incorrect entry count
1
2
3
4 or more
Receiver inoperable time
–
5 minutes
1 hour
24 hours
English |
KVT-M707_Instruct_E_r6.indd 47
47
05.5.9 2:26:59 PM
Before Use
Set Up Memory
Memory
Audio Set Up and AV Interface settings can be
memorized. The memorized settings can be recalled
at any time. For example, even when the settings
are cleared due to replacement of the battery, the
settings can be restored.
1
4
Please Select the
D e s i r e d F u n c t i o n f ro m
t h e C h o i c e s B e l ow.
1
3
Display the Set Up Memory screen
1 Recalls the memorized settings.
2 Memorizes the current Audio Set Up and AV
Interface settings.
3 Clears the currently memorized.
4 Returns to Set Up Memory screen.
Set Up Memor y
If Set
touch
Up Memor y
or
is not shown,
to display it.
1
1
3
4
5
2
3
5
Wo u l d Yo u L i k e t o
Memorize or Recall the
Au d i o & AV s e t u p ?
1
Touching the screen displays a confirmation
message. Touch
.
To cancel recalling, touch
.
When clearing the currently memorized
settings:
Touching the screen displays a confirmation
message. Touch
.
To cancel clearing, touch
.
. The
4
48 |
.
When recalling the memorized settings:
Display the Memory screen
To cancel memorization, touch
Setup Menu screen appears again.
Memorize or recall the settings
When memorizing the Audio Set Up and AV
Interface settings:
If settings have already been memorized, a
confirmation message appears. Touch
To cancel memorization, touch
.
1
1 Adjusts the volume.
2 Returns to the Control screen of the previous
source.
3 Calls the Sound Effects Menu. (see page 54)
4 Calls the Setup Menu.
5 Locks the Audio Set Up and AV Interface
settings.
When
is shown in red, you cannot
set the Audio Set Up and AV Interface settings.
2
2
Quit memorization/recalling of settings
English
KVT-M707_Instruct_E_r6.indd 48
05.5.9 2:26:59 PM
Before Use
Setup Menu
TV Setup
The TV signal receiving areas can be set. (with the optional accessory TV Tuner connected only)
Displaying the TV1 Area Set screen
TV Set Up
TV1 Area Set screen
1
1
4
Me n u
3
Denmark
Belgium
G e r m a ny
Iceland
Po r t u g a l
N o r w ay
Sweden
Yo u g o s l a v i a
Au s t r i a
Finland
2 Netherland
Spain
Switzerland
1 Adjusts the volume.
2 Returns to the Control screen of the previous
source.
3 Calls the Sound Effects Menu. (see page 54)
4 Calls the Setup Menu.
5 Sets the present TV1 receiving area.
6 Displays the TV2 Area Set screen.
• If
is not shown, touch
TV Set Up
or
to display it.
5
1
2
3
4
5
6
6
TV1 Area Set
1
1
Displaying the TV2 Area Set screen
7 Sets the present TV2 receiving area.
8 Displays the TV1 Area Set screen.
TV2 Area Set screen
Me n u
Au s t r i a
Finland
Netherland
Spain
Switzerland
Belgium
Denmark
G e r m a ny
Iceland
Po r t u g a l
N o r w ay
Sweden
Yo u g o s l a v i a
7
1
8
2
3
4
5
6
TV2 Area Set
English |
KVT-M707_Instruct_E_r6.indd 49
49
05.5.9 2:27:03 PM
Control during DVD Video or Video CD Playback
DAB Set Up
You can set the DAB reception. (with the optional accessory DAB Tuner connected only)
Displaying the DAB Set Up screen
DAB Set Up
DAB Set Up screen
1
5
4
1
DAB Priority
Off
Me n u
2
6 DRC
7
3
Regional INT
Off
Off
PTY Watch
8
PTY Watch Off
Announcement Select
8
Set
9
DAB Set Up
1
1
1 Adjusts the volume.
2 Calls the Sound Effects Menu. (see page 54)
3 Returns to the Control screen of the previous
source.
4 Calls the Setup Menu.
5 Turns the DAB Priority On or Off.
6 Turns the Dynamic Range Control function On or
Off.
7 Turns the Regional Announcement function On or
Off.
8 Sets a program type to be selected automatically
when the receiving ensemble starts.
9 Displays the Announcement Selection screen. (see
page 51)
• If
or
50 |
is not shown, touch
DAB Set Up
to display it.
English
KVT-M707_Instruct_E_r6.indd 50
05.5.9 2:27:06 PM
Setup Menu
Announcement Selection
You can set various announcement reception
parameters.
1
Displays the Announcement Selection screen
Set
(page 50 9)
1
1
Announcement
Tr a f f i c N e w s
Off
Tr a n s p o r t N e w s
Off
3
Wa r n i n g
Off
3
News
Off
2
4 Re t u r n
1
1
1 Adjusts the volume.
2 Turns the Announcement Reception function
On or Off.
3 Scrolls the Announcement items.
4 Returns to the DAB Set Up screen.
2
Set the announcement parameters
Tr a f f i c N e w s
etc.
"Traffic News":
Traffic information
"Transport News": Time table information of public
transportation services
"Warning":
Lower priority items than alarms
(power failure, cutoff of water
supply and others)
"News":
News flash
"Weather":
Weather forecasting
"Events":
Event information
"Special Events": Undetermined event
information
"Radio Info":
Program information, advance
notice
"Sports news":
Sports news
"Financial news": Financial news
3
Terminate the setup
English |
KVT-M707_Instruct_E_r6.indd 51
51
05.5.9 2:27:08 PM
RDS Setup
The related RDS parameters can be set.
Displaying the RDS Set Up 1 screen
RDS Set Up
RDS Set Up 1 screen
1
1
4
3
Me n u
2
News
5
AF
5
Off
6
On
Of f
7
On
Of f
7
Of f
8
6
Regional
Au t o T P S e e k
8 On
RDS Set Up 1
9
1
1 Adjusts the volume.
2 Returns to the Control screen of the previous
source.
3 Calls the Sound Effects Menu. (see page 54)
4 Calls the Setup Menu.
5 Sets a news bulletin interrupt time.
6 Turns the Alternative Frequency function On or Off.
( On)
7 Turns the Region Restriction function On or Off.
( On)
8 Turns the Auto TP Seek function On or Off. ( On)
9 Displays the RDS Set Up 2 screen.
1
• If
or
Displaying the RDS Set Up 2 screen
is not shown, touch
RDS Set Up
to display it.
p Selects a display language for the PTY function.
q Displays the RDS Set Up 1 screen.
RDS Set Up 2 screen
Me n u
11
52 |
Language Select
10
German
10
RDS Set Up 2
English
KVT-M707_Instruct_E_r6.indd 52
05.5.9 2:27:09 PM
Setup Menu
AMP Control
Sets the power amp connected via the LX bus. (with the optional accessory LX Power Amp connected only)
Displaying the AMP Control screen
1
2
3
4
AMP Control
AMP Control screen
1
1
2
3
6
Me n u
7
7
4
6
5 A M P 1 V O LT 1 4 . 4 V
Set
8
• If
AMP Control
1
5
6
7
8
Adjusts the volume.
Calls the Setup Menu.
Calls the Sound Effects Menu. (see page 54)
Returns to the Control screen of the previous
source.
Is showing connected option and value.
Select a setup option.
Selects a set value.
Enters the set value.
1
is not shown, touch
or
to display it.
• For the model name of amp you can control from the
system, see the amp’s catalog.
• For the options and values you can change and for the
amp’s operation when changed, see the amp’s instruction
manual.
AMP Control
English |
KVT-M707_Instruct_E_r6.indd 53
53
05.5.9 2:27:13 PM
Before Effects
Sound
Use
Menu
Sound Effects Menu
You can set up the receiver sound effects.
Displaying the Control screen
• You can display the same Sound Effects Menu on the
Control screen of any source.
Control screen
TUNER
13:50
FM
AM
Next
LO.S
FM 1
SEEK
AME
Preset 1
DISP
MONO
98.1 MHz
SCRL
AUTO1
Displaying the Sound Effects Menu
screen
1
2
3
4
Sound Effects screen
1
2
1
• Your setup on the <Sound Effects Menu> is adjusted
automatically according to your <Audio Set Up> (see page
38) on the Setup menu. We recommend you to complete
the <Audio Set Up> first, then set up the <Sound Effects
Menu>.
3
4
1
54 |
Adjusts the volume.
Calls the Sound Effects Menu.
Calls the Setup Menu. (see page 37)
Returns to the Control screen of the previous
source.
1
English
KVT-M707_Instruct_E_r6.indd 54
05.5.9 2:27:14 PM
Before Use
Audio Control
You can adjust the front/ rear and right/ left audio balance.
Displaying the Audio Control 1
screen
Audio Control 1 screen
1
1
6
4
5
3
5
2
1 Adjusts the volume.
2 Returns to the Control screen of the previous
source.
3 Calls the Setup Menu. (see page 37)
4 Calls the Sound Effects Menu.
5 Adjusts the right and left volume balance.
6 Adjusts the front and rear volume balance.
7 Adjusts the volume of the present source based on
the difference level of original volume.
6
8
7
-1
7
8
9
10
1
1
• If you have increased the volume first, then reduced the
volume using the "Vol. Offset", the sound generated if you
suddenly switch to another source may be extremely loud.
8 Adjusts the subwoofer volume.
9 Turns the Loudness control function On or Off.
If turned "On", high and low tones are automatically
enhanced during low volume. ( On)
p Displays the Audio Control 2 screen.
Displaying the Audio Control 2
screen
q Adjusts the bass boost of the B.M.S power amplifier
(optional accessory).
• You may not set some models of power amp boost to "+18".
See the catalog or instruction manual of power amplifier.
Audio Control 2 screen
Me n u
BMS AMP Bass
11
Flat
BMS AMP FREQ
12
Normal
13
11
Low
12
w Sets the center frequency of bass boost you have
set for "AMP Bass". If you set the center frequency
to "Low", it will be dropped approximately 20% to
30%.
e Displays the Audio Control 1 screen.
Audio Control 2
English |
KVT-M707_Instruct_E_r6.indd 55
55
05.5.10 6:09:07 PM
Control during DVD Video or Video CD Playback
Equalizer
You can set up the equalizer.
Displaying the Equalizer screen
Equalizer screen
1
1
4
3
2
7
Me n u
To n e
System Q
5
5
Natural
6
System Q-EX
On
Equalizer
1
56 |
1
1 Adjusts the volume.
2 Returns to the Control screen of the previous
source.
3 Calls the Setup Menu. (see page 37)
4 Calls the Sound Effects Menu.
5 Selects an equalizer curve type.
You can select any of the following equalizer
curves.
• "Natural"
• "Rock"
• "Pops"
• "Easy"
• "Top40"
• "Jazz"
6 Selects items to be adjusted for tone curve setup.
If turned "Off", only Level can be setup for tone
curves.
7 Displays the Tone curve setup screen. (see page 57)
English
KVT-M707_Instruct_E_r6.indd 56
05.5.9 2:27:21 PM
Before Use
Sound Effects Menu
Tone curve setup
4
You can set a Tone curve.
1
Set a level
Level
Display the Tone setup screen
5
Set a Q factor
To n e
Q Factor
Tone setup screen
1
1
You can set it up only when Bass or Middle is
adjusted.
2
3
6
Close the Tone setup screen
4
6
5
Ba s s DC E X T
7
1
1
1 Adjusts the volume.
2 Bass adjustment items are displayed.
3 Middle adjustment items are displayed.
4 Treble adjustment items are displayed.
5 Bass DC Extend settings
If turned "On", it extends the bass center
frequency to the low register by approximately
20%.
6 Tone curve becomes flat.
7 Returns to the Equalizer screen.
• Tone curve can be set for each source.
2
Select a frequency band you wish to adjust
You can adjust the following frequency bands.
"Bass": 40, 50, 60, 70, 80, 100, 120, 150 Hz
"Middle": 500, 1k, 1.5k, 2k Hz
"Treble": 10k, 12.5k, 15k, 17.5k Hz
3
Set a center frequency
FREQ
English |
KVT-M707_Instruct_E_r6.indd 57
57
05.5.9 2:27:22 PM
Sound Effects Menu
Zone Control
You can set the front and rear audio source.
Displaying the Zone Control screen
Zone Control screen
1
1
4
5
7
3
2
Normal
8
6
1 Adjusts the volume.
2 Returns to the Control screen of the previous
source.
3 Calls the Setup Menu. (see page 37)
4 Calls the Sound Effects Menu.
5 Turns the Zone Function (that sets different source
sounds for front and rear speakers) On or Off.
6 Sets the front and rear audio source separately.
(This button appears when the Zone function is
On.)
6
AV-IN1
1
1
• When the rear speaker sound is switched, the audio source
that is output at the AV OUTPUT terminal is also switched to
the same source.
However, if you have set the "Area" to "Reverse", the audio
source that is output at the AV OUTPUT terminal is switched
depending on the front sound source.
7 Switches the front and rear audio sources.
(This button appears when the Zone function is
On.)
Use "Reverse" to change over the front and rear
audio sources.
8 Adjusts the volume of the rear channel.
(This button appears when the Zone function is
On.)
• There are following limitations when zone function is set to
"On".
- There is no output from the subwoofer.
- Equalizer (see page 56) and Loudness (see page 55) are not
effective for the rear channel (or front channel when "Area"
is set to "Reverse").
- Audio Setup function (see page 38) and Equalizer setting
function (see page 56) are not available.
58 |
English
KVT-M707_Instruct_E_r6.indd 58
05.5.9 2:27:24 PM
English |
KVT-M707_Instruct_E_r6.indd 59
59
05.5.9 2:27:25 PM
Troubleshooting Guide
What might appear to be a malfunction in your unit may just be the result of slight misoperation or miswiring. Before calling service, first check the following table for possible problems.
General
? The power does not turn on.
✔ The fuse has blown.
After checking for short circuits in the wires,
replace the fuse with one having the same
rating.
✔ The speaker wire has a short-circuit or touches
the chassis of the vehicle, and then the
protection function is activated.
Wire or insulate the speaker cable properly and
press the reset button.
? The message "Disconnected cable found.
Please confirm a connection line." is displayed
and the unit cannot be used.
✔ Receiver unit is disconnected.
Connect the wire correctly, referring to the
section on <INSTALLATION MANUAL>.
? A non-connected source cannot be selected.
✔ An optional unit required to listen to each
source is not connected yet.
A non-connected source is not selected. See
<INSTALLATION MANUAL> and connect the
unit correctly.
✔ The RESET button is not pressed yet although
the optional unit has been connected to the
system.
Press the reset button (see page 4).
✔ The "O-N" switch of the optional unit is at the
"O" position.
Set the "O-N" switch to the "N" position.
✔ A disc changer not supported by the system is
used.
Use a disc changer supported by the system
(see page 4).
? Nothing happens when the buttons are
pressed.
✔ The computer chip in the unit is not
functioning normally.
Press the reset button on the unit (see page 4).
60 |
? No television/video image appears.
✔ The unit is not connected to the parking brake
detection switch.
Make proper connections according to
<INSTALLATION MANUAL>.
✔ The parking brake is not engaged.
For safety reasons no television/video images
are displayed while the vehicle is moving.
Engaging the parking brake will cause images
to be displayed.
? The screen is dark.
✔ The unit is in a location where temperature is
low.
If the temperature of the monitor unit drops,
the screen may appear darker when power is
first turned on due to the characteristics of a
liquid crystal panel. Wait a while after turning
power on for the temperature to rise. Normal
brightness will return.
? The screen does not darken when the vehicle’s
lights are turned on.
✔ The unit is set to auto dimmer.
When the unit is set to auto dimmer, it is not
linked to the vehicle's light switch.
✔ The illumination wire has not been connected.
(If manual dimmer is set)
Make proper connections according to
<INSTALLATION MANUAL>.
? AM/FM radio reception is poor and/or there is
noise.
✔ The TV antenna and vehicle‘s radio antenna are
too close.
Separate the two antennas as far as possible.
Turn off the main unit.
? The remote controller does not operate.
✔ The remote control mode selector is not set
correctly.
Switch the remote control mode selector
according to the source you select (see page
10).
English
KVT-M707_Instruct_E_r6.indd 60
05.5.9 2:27:25 PM
? No sound can be heard, or the volume is low.
✔ Attenuator is turned on.
Turn off Attenuator.
✔ The fader or balance settings are set all the
way to one side.
Reset the fader and/or balance settings.
? Does not switch to the rear view camera video
display when pressing the [V.SEL] button.
✔ The reverse sensor wire is disconnected.
Connect the wire correctly, referring to the
section on <INSTALLATION MANUAL>.
✔ The input/output wires or wiring harness are
connected incorrectly.
Reconnect the input/output wires or the
wiring harness correctly. See the section on
<INSTALLATION MANUAL>.
? The sound quality is poor or distorted.
✔ One of the speaker wires is being pinched by a
screw in the car.
Check the speaker wiring.
✔ The speakers are not wired correctly.
Reconnect the speaker wires so that each
output terminal is connected to a different
speaker.
? Radio reception is poor.
✔ The car antenna is not extended.
Pull the antenna out all the way.
✔ The antenna control wire is not connected.
Connect the wire correctly, referring to the
section on <INSTALLATION MANUAL>.
? The memory is erased when the ignition is
turned off.
✔ The battery wire has not been connected to
the proper terminal.
Connect the wire correctly, referring to the
section on <INSTALLATION MANUAL>.
✔ The ignition and battery wire are incorrectly
connected.
Connect the wire correctly, referring to the
section on <INSTALLATION MANUAL>.
? The TEL mute function does not work.
✔ The TEL mute wire is not connected properly.
Connect the wire correctly, referring to the
section on <INSTALLATION MANUAL>.
? The TEL mute function turns on even though
the TEL mute wire is not connected.
✔ The TEL mute wire is touching a metal part of
the car.
Pull the TEL mute wire away from the metal
part of the car.
English |
KVT-M707_Instruct_E_r6.indd 61
61
05.5.10 6:09:10 PM
Specifications
Specifications subject to change without notice.
Monitor section
Picture size
: 6.95 inches wide
154.1(W)×87.1(H)mm
Display system
: Transparent TN LCD panel
Drive system
: TFT active matrix system
Number of pixels
: 336,960 (480H×234V×RGB)
Effective pixels
: 99.99%
Pixel arrangement
: RGB striped arrangement
Back lighting
: Cold Cathode Fluorescent Tube
FM Tuner section
Frequency range (50kHz)
: 87.5~108.0MHz
Usable sensitivity (S/N=30dB)
: 0.7μV/75Ω
Quieting sensitivity (S/N=46dB)
: 1.6μV/75Ω
Frequency response (±3.0dB)
: 30Hz~15kHz
S/N (dB) (MONO)
: 65dB
Selectivity (±400kHz)
: ≥ 80dB
Stereo separation
: 37dB (1kHz)
LW Tuner section
Frequency range (9kHz)
: 153kHz~281kHz
Usable sensitivity
: 45dBμ
MW Tuner section
Video section
Color system of external video input
: NTSC/PAL
External video input level (RCA jacks)
: 1Vp-p/75Ω
External audio max input level (RCA jacks)
: 1V/22kΩ
Analog RGB input
: 0.7Vp-p/75Ω
Audio section
Maximum Power (Front&Rear)
: 50W×4
Output power (Front&Rear) (DIN 45324, +B=14.4V)
: 30W×4
Preout level (V)
: 5V/10kΩ
Preout impedance
: 80Ω
Tone action
Bass: 100 Hz ±10 dB
Middle: 1 kHz ±10 dB
Treble: 10 kHz ±10 dB
General
Operating voltage
: 14.4V (11V~16V)
Current consumption
: 15A
Dimensions (W×H×D)
Main unit: 182mm×53mm×161mm
Hideaway unit: 225mm×40mm×168mm
Operational temperature range
: -10°C – 60°C
Storage temperature range
: -20°C – 85°C
Weight
Main unit: 1.7kg
Hideaway unit: 1.1kg
Frequency range (9kHz)
: 531kHz~1611kHz
Usable sensitivity
: 25dBμ
Although the effective pixels for the liquid crystal panel is given as 99.99% or more, 0.01% of pixels may not light or may light
incorrectly.
62 |
English
KVT-M707_Instruct_E_r6.indd 62
05.5.9 2:27:28 PM
English |
KVT-M707_Instruct_E_r6.indd 63
63
05.5.9 2:27:28 PM
KVT-M707_Instruct_E_r6.indd 64
05.5.9 2:27:28 PM