1
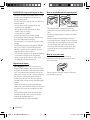
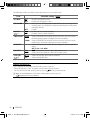
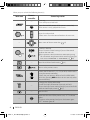
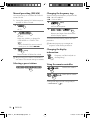
Declaration of Conformity with regard to the EMC Directive 2004/108/EC Manufacturer: Kenwood Corporation 2967-3 Ishikawa-machi, Hachioji-shi, Tokyo, 192-8525 Japan EU Representative’s: Kenwood Electronics Europe BV Amsterdamseweg 37, 1422 AC UITHOORN, The Netherlands For Turkey Bu ürün 26891sayılı Resmi Gazete’de yayımlanan Elektrikli ve Elektronik Eşyalarda Bazı Zararlı Maddelerin Kullanımının Sınırlandırılmasına Dair Yönetmeliğe uygun olarak üretilmiştir. This product complies with Directive, Number 26891 regarding “REGULATION ON THE RESTRICTION OF THE USE OF CERTAIN HAZARDOUS SUBSTANCES IN ELECTRICAL AND ELECTRONIC EQUIPMENT”. DVD-RECEIVER KDV-MP3346 KDV-MP3346M INSTRUCTION MANUAL The marking of products using lasers The label is attached to the chassis/case and says that the component uses laser beams that have been classified as Class 1. It means that the unit is utilizing laser beams that are of a weaker class. There is no danger of hazardous radiation outside the unit. • Manufactured under license from Dolby Laboratories. Dolby and the double-D symbol are trademarks of Dolby Laboratories. • “DVD Logo” is a trademark of DVD Format/Logo Licensing Corporation registered in the US, Japan and other countries. • DivX® is a registered trademark of DivX, Inc., and is used under license. • ABOUT DIVX VIDEO: DivX® is a digital video format created by DivX, Inc. This is an official DivX Certified device that plays DivX video. Visit www.divx.com for more information and software tools to convert your files into DivX video. • ABOUT DIVX VIDEO-ON-DEMAND: This DivX Certified® device must be registered in order to play DivX Videoon-Demand (VOD) content. To generate the registration code, locate the DivX VOD section in the device setup menu. Go to vod.divx.com with this code to complete the registration process and learn more about DivX VOD. • Microsoft and Windows Media are either registered trademarks or trademarks of Microsoft Corporation in the United States and/or other countries. • This product incorporates copyright protection technology that is protected by U.S. patents and other intellectual property rights. Use of this copyright protection technology must be authorized by Macrovision, and is intended for home and other limited viewing uses only unless otherwise authorized by Macrovision. Reverse engineering or disassembly is prohibited. This symbol mark indicates that Kenwood manufactured this product so as to decrease harmful influence on the environment. © GET0637-001B [U/UU] (B64-4732-18) CoverRear_KDV-MP3346M_001B_f.indd 1-2 12/16/09 4:39:14 PM WARNINGS (to prevent injury or fire): • Never put or leave any metallic objects (such as coins or metal tools) inside the unit to prevent short circuit. • DO NOT install any unit or wire any cable in a location where; – it may obstruct the steering wheel and gearshift lever operations. – it may obstruct the operation of safety devices such as air bags. – it may obstruct visibility. • DO NOT operate the unit while driving. • If you need to operate the unit while driving, be sure to look around carefully. • The driver must not watch the monitor while driving. If the parking brake is not engaged, “DRIVER MUST NOT WATCH THE MONITOR WHILE DRIVING.” appears on the monitor, and no playback picture will be shown. – This warning appears only when the parking brake lead is connected to the parking brake system built in the car (refer to the Installation/Connection Manual). How to attach/detach the control panel • The control panel is a precision piece of equipment and can be damaged by shocks or jolts. • Keep the control panel in its hard case while detached. • Do not expose the control panel (and the hard case) to direct sunlight or excessive heat or humidity. Also avoid places with too much dust or the possibility of water splashing. • To prevent deterioration, do not touch the terminals of the unit or control panel with your fingers. How to reset your unit If this unit (or the connected external components) fails to operate properly, press the reset button. Important to know... • Lens fogging: When you turn on the car heater in cold weather, dew or condensation may form on the lens in the DVD player of the unit. This condensation on the lens may not allow discs to play. In such a situation, remove the disc and wait for the condensation to evaporate. If the unit still does not operate normally after a while, consult your Kenwood dealer. • When you purchase external components, check with your Kenwood dealer to make sure that they work with your model and in your area. • Detailed information and notes about the playable audio files are stated in an online manual on the following site: www.kenwood.com/cs/ce/audiofile/ 2 The unit returns to factory settings when the reset button is pressed. ENGLISH EN02-11_KDV-MP3346M[U]f.indd 2 11/19/09 4:44:16 PM How to read this manual The illustrations of the display and the panel appearing in this manual are examples used to explain more clearly how the controls are used. Therefore, what appears on the display in the illustrations may differ from what appears on the display on the actual equipment, and some of the illustrations on the display may be inapplicable. The following icons/symbols are used to indicate: [Hold] Press and hold the button(s) until the desired operation begins. Turn the control knob. XX) ( <XXXX> Turn the control knob to make a selection, then press to confirm. Reference page number Function Control setting item Continued on the next page CONTENTS 4 Preparation 4 Canceling the display demonstration 4 Setting the clock 5 Prepare the remote controller (RC-DV350) 5 Other settings before operations 7 Basic operations 7 Control panel 7 Remote controller (RC-DV350) 9 11 12 Listening to the radio Playable disc type Listening to a disc 13 Operation using the control panel 14 Operation using the remote controller 21 Listening to the other external components 22 24 26 27 28 Other adjustments Troubleshooting Maintenance Language codes Specifications ENGLISH EN02-11_KDV-MP3346M[U]f.indd 3 3 11/23/09 2:13:23 PM Preparation The display demonstration is always turned on unless you cancel it. When you turn on the power (or after you reset the unit), the display shows: “CANCEL” = “DEMO” = “PRESS” = “VOL KNOB” • If no operation is done for about 15 seconds, “DEMO START” appears and the display demonstration starts. To cancel the display demonstration: 1 Press the control knob. “NO/<YES>” is shown on the display. 2 Press the control knob again to select “YES”. “DEMO OFF” appears on the display. • If “NO” is selected, “DEMO START” appears and the display demonstration starts. 4 Finish the procedure. [Hold] Setting the clock 1 Turn on the power. 2 Enter Function Control settings. 3 Turn the control knob to make a selection, then press to confirm. You can also cancel the display demonstration from the Function Control settings, see the following: Canceling the display demonstration 1 Turn on the power. 2 Enter Function Control settings. 1 : 00 4 3 4 Adjust the hour. Turn the control knob to make a selection, then press to confirm. ENGLISH EN02-11_KDV-MP3346M[U]f.indd 4 11/19/09 4:44:16 PM 5 Adjust the minute. Other settings before operations 1 : 00 Press 4 to return to the hour adjustment. 6 Before using this unit for the first time, make the following settings for optimum performance. 1 Turn the unit to standby state. 2 Enter Function Control settings. 3 Select “INIT SETUP.” 4 Turn the control knob to make a selection, then press to confirm. Finish the procedure. [Hold] While in clock display screen, press and hold SCRL DISP will enter <CLOCK ADJ> setting directly. Perform steps 4 and 5 to adjust the hour and minute. Prepare the remote controller (RC-DV350) Insert the batteries into the remote controller by matching the polarity (+ and –) correctly. See table on page 6 for selection. AAA/R03 5 Finish the procedure. [Hold] If the range or effectiveness of the remote control decreases, replace both batteries. Caution: • Danger of explosion if battery is incorrectly replaced. Replace only with the same or equivalent type. • Battery shall not be exposed to excessive heat such as sunshine, fire, or the like. ENGLISH EN02-11_KDV-MP3346M[U]f.indd 5 5 11/19/09 4:44:17 PM The following settings can only be done when the unit is on standby state. Item KEY BEEP TDF ALARM AUX SET 21) ( SWITCH PRE SP SELECT PAL/NTSC FILE TYPE 20) ( Selectable setting, [ Initial ] • ON • OFF • ON : Activates the keypress tone. : Deactivates the keypress tone. : When you turn off the ignition switch of the car, the unit beeps if the control panel is not detached. Detach the control panel to reduce the possibility of theft. • OFF : Cancels. • ON : Enables “AUX” in source selection. • OFF : Disables “AUX” in source selection. • REAR : Selects if the REAR/SW terminals on the rear of this unit are used for connecting the speakers (through an external amplifier). • SUBW : Selects if the REAR/SW terminals on the rear of this unit are used for connecting a subwoofer (through an external amplifier). : Selects the connected speaker size for strong bass and to improved — clarity. OFF, 5/4, 6 × 9/6, OEM • PAL : Selects this if your monitor is of the PAL color system. • NTSC : Selects this if your monitor is of the NTSC color system. • A + V : Selects to play only audio and/or video files. • PIC : Selects to play JPEG files. When a call comes in... “CALL” appears on the display and the audio system is paused. • When the call ends, “CALL” disappears and the audio system resumes. You can also resume the audio system by pressing SRC during a conversation. Make sure the MUTE lead is connected to a mobile phone system in your car. ( 6 Installation/Connection Manual). ENGLISH EN02-11_KDV-MP3346M[U]f.indd 6 11/30/09 4:27:10 PM Basic operations Control panel Detaches the control panel Loading slot Remote sensor • DO NOT expose to bright sunlight. Control knob Display window Auxiliary input jack Remote controller (RC-DV350) When using the remote controller, point the top of the remote control towards the remote sensor as directly as possible. The operations from the remote controller differ depending on the position of the mode switch. AUD (audio) mode: For controlling a selected source or tuner source, etc. DVD mode: For controlling playback of a DVD with the player integrated in this unit. You cannot operate the remote controller if the mode switch is in the middle. 2 ZONE / R. VOL (∧/∨) / for this unit. are not applicable ENGLISH EN02-11_KDV-MP3346M[U]f.indd 7 7 11/19/09 4:44:17 PM When you press or hold the following button(s)... Main unit Remote controller — General operation • Turns on. • Turns off if pressed and held. Selects the available sources (if the power is turned on). • If the source is ready, playback also starts. Adjusts the volume level. • Selects items if turn the control knob on the main unit. — Selects items of the on-screen bar. ( or 18) • Confirms selection. • Enters Function Control settings if pressed the control knob on the main unit. If no operation is done for about one minute after pressing the control knob, the operation will be canceled (except if you 22) have selected “AUD CTRL” or “AUD SETUP”). ( — Enters Music/Video Search mode. ( 13) Returns to the previous menu. • Selects the FM bands (F1 / F2 / F3) or AM (in AUD mode if using the remote controller). • Selects the next/previous folder of an DivX/MP3/WMA/ WAV disc. (Pressing BAND on the main unit can only select the next folders.) — 8 — • Changes the display information. • Scrolls the display information if pressed and held. • Enters clock adjustment mode directly if pressed and held while in clock display screen. ( 4, 5) — Ejects the disc. Attenuates the sound (if the power is on). “ATT” indicator flashes. • To return to the previous level, press the button again. “ATT” indicator goes off. ENGLISH EN02-11_KDV-MP3346M[U]f.indd 8 11/19/09 5:09:43 PM Listening to the radio ! ~ Ÿ ] “TUNER” “ST” lights up when receiving an FM stereo broadcast with sufficient signal strength. ] “F1,” “F2,” “F3,” or “AM” You can select or set the <TUNER CTRL> settings while listening to the radio. 1 3 Enter Function Control settings. Turn the control knob to make a selection, then press to confirm. See table below for selection. 2 Select “TUNER CTRL.” 4 Finish the procedure. [Hold] Item SEEK MODE Tuning mode A-MEMORY Automatic presetting CRSC SET *2 Clear Reception Stereo Control setting Selectable setting, [ Initial ] Selects the tuning mode for 4 / ¢ buttons. • AUTO1 : Automatically search for a station. • AUTO2 : Search in order of the stations in the preset memory. • MANU : Manually search for station. You can preset up to 6 stations for each FM and AM band. • START *1 : Automatically search for stations and stored in to the memory. “A-MEMORY” flashes on the display during search. • CANCEL : Returns to item selection menu. • ON *3 : Improve the FM reception, (but the stereo effect may be lost). • OFF : Cancels. The stereo effect may be restored automatically (depending on the reception condition). *1 All previously stored stations are erased and stations are stored anew. The station stored in the lowest preset number will be automatically tuned in. *2 Displayed only when the source is “TUNER (F1 / F2 / F3).” *3 Strong electrical fields (such as from power lines) may cause unstable sound quality when <CRSC SET> is set to <ON>. In such situation, set to <OFF>. ENGLISH EN02-11_KDV-MP3346M[U]f.indd 9 9 11/26/09 4:02:27 PM Manual presetting (FM/AM) Changing the frequency step You can preset up to 18 stations for FM and 6 stations for AM. You can change the frequency step of FM/AM: • FM : 50 kHz to 200 kHz • AM : 9 kHz to 10 kHz Ex.: Storing FM station of 92.5 MHz into preset number “4” of the F1 band. 1 1 [Hold] ] Turn off the power. 2 ] “F1” 2 ] “92.5” Make sure <MANU> is selected for <SEEK MODE> in <TUNER CTRL>. ( 9) • To fast-forward/fast-reverse manual search, press and hold 4 / ¢ . 3 [Hold] Preset number “4” flashes for a while. The previously preset station is erased when a Release your fingers from the buttons after the display appears. To restore the initial setting, repeat the same procedure. When the frequency step is changed, the frequencies in the memory are deleted. Changing the display information Frequency = Clock = (back to the beginning) new station is stored in the same preset number. Selecting a preset station Using the remote controller Searches for stations* Selects preset stations * Tuning mode depends on the setting made for <SEEK MODE>. ( 10 9) ENGLISH EN02-11_KDV-MP3346M[U]f.indd 10 11/26/09 4:04:31 PM Playable disc type Disc type DVD Recording format, file type, etc Playable DVD-Video *1 Region Code: 2 (for KDV-MP3346M) or 3 (for KDV-MP3346) Ex.: DVD-Audio / DVD-ROM DVD Recordable/Rewritable (DVD-R/-RW *2, +R/+RW *3) • DVD Video: UDF bridge • DVD-VR • DivX/MPEG-1/MPEG-2/MP3/ WMA/WAV: ISO 9660 level 1, level 2, Romeo, Joliet DVD-Video / DVD-VR / DivX / MPEG1 / MPEG2 / JPEG / MP3 / WMA / WAV Dual Disc DVD side AAC / MPEG4 / DVD+VR / DVD-RAM Non-DVD side CD/VCD Audio CD / CD Text (CD-DA) / VCD (Video CD) DTS-CD / SVCD (Super Video CD) / CD-ROM / CD-I (CD-I Ready) CD Recordable/Rewritable (CD-R/-RW) • ISO 9660 level 1, level 2, Romeo, Joliet CD-DA / VCD (Video CD) / DivX / MPEG1 / MPEG2 / JPEG / MP3 / WMA / WAV AAC / MPEG4 *1 If you insert a DVD Video disc of an incorrect Region Code, “REGION CODE ERROR” appears on the monitor. *2 DVD-R recorded in multi-border format is also playable (except for dual layer discs). DVD-RW dual layer discs are not playable. *3 It is possible to play back finalized +R/+RW (Video format only) discs. +RW double layer discs are not playable. When buying DRM enabled contents, check the Registration Code in the <DivX(R) VOD> ( 20). Registration Code changes each time a file with the displayed Registration Code is played to protect against copying. Use of “DualDisc” When playing a “DualDisc” on this unit, the surface of the disc that is not played may be scratched while the disc is inserted or ejected. Since the music CD surface does not conform to the CD standard, playback may be impossible. (A “DualDisc” is a disc with one surface containing DVD standard signals and the other surface containing music CD signals.) ENGLISH EN02-11_KDV-MP3346M[U]f.indd 11 11 11/23/09 2:13:39 PM Listening to a disc Before performing any operations... Turn on the monitor to watch the playback picture. If you turn on the monitor, you can also control playback of other discs by referring to the monitor screen. ( 16 – 20) • Selects an appropriate color system (PAL/NTSC) for your monitor. ( 5, 6) The disc type is automatically detected, and playback starts automatically (for DVD: automatic start depends on its internal program). ] Turn on the power. ~ Ÿ ! If the current disc does not have any disc menu, all tracks will be played repeatedly until you change the source or eject the disc. • When a disc is inserted, “IN” indicator lights up. ] Starts playback if necessary. If “ ” appears on the monitor when pressing a button, the unit cannot accept the operation you have tried to do. • In some cases, without showing “ ,” operations will not be accepted. • Do not attempt to insert a disc into the loading slot if another disc is already there. • The unit can only play 12 cm discs. If you insert an 8 cm disc, it will get stuck inside and can cause the unit to malfunction. • Discs with period of use: DO NOT leave discs with a limited period of use in this unit. If you load an already expired disc, you may not be able to remove it from this unit. • If you turn off the power while listening to a disc, disc play will start automatically the next time you turn on the power. • If you change the source, playback also stops (without ejecting the disc). Next time you select the disc source as the playback source, disc play starts from where it has been stopped previously. • When removing a disc from the unit, pull it out horizontally. Caution on volume setting: Discs produce very little noise compared with other sources. Lower the volume before playing a disc to avoid damaging the speakers by the sudden increase of the output level. To check the Macrovision version While listening to a DVD... 1 Press the control knob to enter Function Control settings. 2 Turn the control knob to select <SYS CTRL>, then press the control knob to confirm. 3 Turn the control knob to select <M/V FW VER>, then press the control knob. The display shows the Macrovision version. 12 ENGLISH EN12-21_KDV-MP3346M[U]f.indd 12 11/23/09 2:15:25 PM Operation using the control panel Ejects the disc * “NO DISC” appears and “IN” indicator goes off. Press SRC to listen to another playback source. Selecting the playback modes Random Play Pauses or resumes playback “DISC RDM” (Disc Random), “RANDOM OFF” • For Video CD: While PBC is not in use Stops playback Selects title/program/ playlist/folder Selects chapter/ track/file [Hold] “FOLDER RDM” (Folder Random), “RANDOM OFF” • Press and hold RDM to select “ALL RDM.” Repeat Play Fast-forwards/ fast-reverses * If the ejected disc is not removed within 15 seconds, the disc is automatically inserted again into the loading slot to protect it from dust. Playback starts automatically. Selecting a folder or track/file “CHAP REP” (Chapter Repeat), “TITLE REP” (Title Repeat), “REPEAT OFF” “CHAP REP” (Chapter Repeat), “PRGM REP” (Program Repeat), “REPEAT OFF” “TRACK REP” (Track Repeat), “REPEAT OFF” • For Video CD: While PBC is not in use 1 ] Enter Music/Video Search mode. “SEARCH” appears. 2 “FILE REP” (File Repeat), “FOLDER REP” (Folder Repeat), “REPEAT OFF” “FOLDER REP” (Folder Repeat), “REPEAT OFF” ] Select a folder or track/file. • To return to the folder list, press . • To return to the root folder, press BAND. For audio CD, pressing BAND will change to the first track. • To cancel the Music/Video Search mode, press and hold . ENGLISH EN12-21_KDV-MP3346M[U]f.indd 13 13 11/19/09 4:52:18 PM Changing the display information Title number & Chapter number / Program/Playlist number & Chapter number = Play time = Clock = (back to the beginning) Track number *1 & Play time = Clock = (back to the beginning) Disc title = Track title = Track number & Play time = Clock = (back to the beginning) Title & Artist name *2 = Album name & Artist name *2 = Folder name = File name = File number & Play time *2 = Clock = (back to the beginning) *1 While PBC is not in use. *2 For JPEG: “JPEG” appears. Operation using the remote controller Before performing any operations... Pauses or resumes playback Stops playback Searches for a chapter/track/file Selects a title/program/playlist/folder 14 ENGLISH EN12-21_KDV-MP3346M[U]f.indd 14 11/30/09 4:27:42 PM Reverses/fast-forwards “×2, ×5, ×10, ×20, ×60” “1, 2, 3” During pause: Reverse slow motion*1/forward slow motion “1/32, 1/16, 1/8, 1/4, 1/2” *1 Not possible for DVD-VR or Video CD. During pause: Forward frame-by-frame playback Skip back or forward the scenes by about five minutes*2 *2 The operation is enable when the Operation bar is not displayed. During playback or pause: Enlarge the video image*3 “1 – 6, OFF” *3 You can move through the zoomed image by pressing 5 / ∞ / 2 / 3. During pause: Enlarge the image*3 “1, 2, OFF” During playback: Selects a desired camera angle During playback: Selects different subtitle languages During playback: Changes the audio stream During playback: Changes the audio channel “ST (stereo), L (left), R (right)” • Pressing number button 2 on the main unit can also change the audio channel of the VCD. ENGLISH EN12-21_KDV-MP3346M[U]f.indd 15 15 11/23/09 2:15:33 PM Direct Search Using the Disc Menu 1 1 ] Select the search mode. Disc menu is displayed. “CHAP” (chapter search), “TITLE” (title search), search mode off 2 “CHAP” (chapter search), “PRGM” / “PLST” (program/playlist search), search mode off “NUMBER” or “TRACK” (if PBC is not in use), search mode off “TRACK,” search mode off ] Select an item. • To return to the previous menu, press MENU. • To return to the first menu feature, press TOP MENU. 1 ] To show Program list menu. or “TRACK,” “FOLDER,” search mode off 2 ] Enter your desired number. ] To show Playlist menu. 3 2 ] Starts playback from the entered time. • The search mode is cleared automatically after approximately 5 seconds. • “0” is not displayed in the first digit by pressing the 0 button. Ex.: “– –” = Press 0, 2 = “– 2”. 16 ] Select an item. • To remove the Program list/Playlist menu, press MENU or TOP MENU again. ENGLISH EN12-21_KDV-MP3346M[U]f.indd 16 11/30/09 4:28:06 PM PBC (playback control) Menu D Playback information Current title/chapter Current program/chapter Current playlist/chapter ] Return to the menu screen. Menu settings and operating procedures may differ. Follow the instructions on each menu screen. To cancel the PBC playback 1 Press 7 to stop. 2 Press DIRECT. 3 Press the number buttons. 4 Press ENTER. • To resume PBC, press TOP MENU or MENU. On-screen bar operations Information bar Operation bar A Disc type B • DVD-Video: Audio signal format type and channel • VCD: PBC C Playback mode ( also 19) DVD-Video: C. RPT: Chapter repeat T. RPT: Title repeat DVD-VR: C. RPT: Chapter repeat PG. RPT:Program repeat MPEG Video: T. RPT: Track repeat F. RPT: Folder repeat A. RND: All random F. RND: Folder random VCD *: T. RPT: Track repeat A. RND: All random JPEG: F. RPT: Folder repeat Current track Current folder/track Current folder/file E Time indication Elapsed playing time of the disc (For DVD-Video/DVD-VR: Elapsed playing time of the current title/program/playlist.) DVD-Video/DVD-VR: Remaining title/program/playlist time VCD: Remaining disc time Elapsed playing time of the current chapter/track (except DVD-VR) Remaining time of the current chapter/track (except DVD-VR) F Playback status 3 Play ¡/1 Forward/reverse search / Forward/reverse slow-motion 8 Pause 7 Stop G Operation icons Change time indication (see E) Time Search (Enter the elapsed playing time of the current title/ program/playlist or of the disc.) Title Search (by its number) Chapter Search (by its number) Track Search (by its number) Change the audio language or audio channel Change or turn off the subtitle language Change the view angle Repeat play Random play * While PBC is not in use. ENGLISH EN12-21_KDV-MP3346M[U]f.indd 17 17 11/26/09 4:06:14 PM During playback... Control screen operations 1 Information bar appears. ] Press again to show the operation bar. 2 ] Select an item. 3 ] Make a selection. For entering time/numbers, see the following. • To cancel pop-up menu, press RETURN. • To remove the on-screen bar, press OSD again. To enter time/numbers 1 Press 5 / ∞ to change the number. 2 Press 2 / 3 to move to the next entry. 3 Press ENTER to confirm. • Each time you press 5 / ∞ the number increases/decreases by one value. • It is not required to enter the zero and tailing zeros. A Current folder number/total folder number B Folder list with the current folder selected • An image is displayed when an album art is attached to the tag of a playing audio file. C Selected playback mode D Elapsed playing time of the current track E Operation mode icon ( 3, 7, 8, ¡, 1 ) F Current track number/total number of tracks in the current folder (total number of tracks on the disc) G Track information H Track list with the current track selected 1 ] Stops playback to show the control screen. Control screen appears automatically. 2 ] Selects “Folder” column (except for Audio CD) or “Track” column. 18 ENGLISH EN12-21_KDV-MP3346M[U]f.indd 18 11/23/09 2:51:21 PM 3 ] Selects a folder or track. 2 Press 5 / ∞ / 2 / 3 to select a folder, then press ENTER. 3 Press 5 / ∞ / 2 / 3 to select a track, then press ENTER to start playback. • To return to the folder list, press RETURN. • To remove List Screen, press MENU or TOP MENU again. 4 ] Starts playback. Disc setup menu operations While playing a DVD disc... Playback starts automatically. 1 To select a playback mode While the control screen is displayed.... 1 Press OSD to show the playback mode selection screen. ] Enters disc setup menu. 2 ] Selects a menu. ( 2 Press 2 / 3 to select a playback mode (“REPEAT” / “RANDOM”). 3 Press 5 / ∞ to select an item. “REPEAT” : “TRACK” (track/file repeat) *1, “FOLDER” (folder repeat) *2, “OFF” (repeat off) “RANDOM” *1 : “FOLDER” (folder random) *2, “ALL” (all random), “OFF” (random off) 4 Press ENTER. *1 Not selectable for JPEG. *2 Not selectable for audio CD. 20) 3 ] Selects an item you want to set up. ( 20) 4 ] Selects an option. • To cancel the pop-up menu, press RETURN. • To cancel disc setup menu, press SETUP. To select a file from List Screen 1 While stop, press MENU or TOP MENU to show the list screen. ENGLISH EN12-21_KDV-MP3346M[U]f.indd 19 19 11/26/09 4:06:47 PM LANGUAGE Menu Item MENU LANGUAGE AUDIO LANGUAGE SUBTITLE Setting Select the initial disc menu language. ( Select the initial audio language. ( 27) 27) Select the initial subtitle language or remove the subtitle (OFF). 27) ( Select the language for the on screen display. PICTURE ON SCREEN LANGUAGE MONITOR TYPE Select the monitor type to watch a wide screen picture on your monitor. OTHER AUDIO OSD POSITION 20 Select the on-screen bar position on the monitor. •1 : Higher position •2 : Lower position (Guidance below the disc setup menu will disappear.) DOWN MIX When playing back a multi-channel disc, this setting affects the signals reproduced through the rear output terminals. • SURROUND : Select to enjoy multi-channel surround audio by COMPATIBLE connecting an amplifier compatible with Dolby Surround. • STEREO : Normally select this. D. RANGE You can enjoy a powerful sound at low or middle volume levels COMPRESSION while playing a Dolby Digital software. • AUTO : Select to apply the effect to multi-channel encoded software (excluding 1-channel and 2-channel software). • ON : Select to always use this function. DivX (R) VOD This unit has its own Registration Code. Once you have played back a disc in which the Registration Code recorded, this unit’s Registration Code is overwritten for copyright protection. FILE TYPE Select playback file type when a disc contains different types of files. • AUDIO : Play MP3/WMA/WAV files. • STILL PICTURE : Play JPEG files. • VIDEO : Play DivX/MPEG Video files. • AUDIO + : Play MP3/WMA/WAV/DivX/MPEG Video files. VIDEO ENGLISH EN12-21_KDV-MP3346M[U]f.indd 20 11/23/09 2:51:22 PM • When the language you have selected is not recorded on a disc, the original language is automatically used as the initial language. In addition, for some discs, the initial languages settings will not work as you set due to their internal disc programming. • When you select “16:9” for a picture whose aspect ratio is 4:3, the picture slightly changes due to the process for converting the picture width. • Even if “4:3 PAN SCAN” is selected, the screen size may become “4:3 LETTERBOX” for some discs. Listening to the other external components You can connect an external component to the AUX (auxiliary) input jack on the control panel. Preparation: Make sure <ON> is selected for <AUX SET>. ( 5, 6) • For details, refer also to the instructions supplied with the adapter or external components. ~ ] “AUX” Ÿ Turn on the connected component and start playing the source. ! ] Adjust the volume. ⁄ Adjust the sound as you want. ( 22, 23) Connecting an external component to the AUX input jack Portable audio player, etc. 3.5 mm stereo mini plug (not supplied) ENGLISH EN12-21_KDV-MP3346M[U]f.indd 21 21 11/30/09 4:28:32 PM Other adjustments 1 3 Enter Function Control settings. Turn the control knob to make a selection, then press to confirm. See table below for selection. 2 Select “AUD CTRL,” “DISP CTRL,” or “AUD SETUP.” 4 Finish the procedure. [Hold] The following settings can be made while: AUD CTRL : Listening to any source except in STANDBY state or when listening to a phone call. DISP CTRL : Listening to any source. AUD SETUP : Listening to any source except in STANDBY state or when listening to a phone call. AUD CTRL (audio control) Item Selectable setting, [Initial] SW LEVEL *1 –15 — +15, [0] : Adjusts the subwoofer output level. SW SET *1 • ON • OFF : Selects to turn on the subwoofer output. : Selects to turn off the subwoofer output. BASS BOOST • OFF • LVL1 • LVL2 : Cancels. : Selects your preferred bass boost level. SYSTEM Q • NATURAL • ROCK • POPS • EASY • TOP40 • JAZZ • GAME : Selects a preset sound mode suitable to the music genre. “EQ” indicator lights up (except when <NATURAL> is selected). <USER> appears automatically if you adjust <BASS LEVEL>, <MID LEVEL>, or <TRE LEVEL>. *1 Displayed only when <SUBW> is selected for <SWITCH PRE>. ( 22 5, 6) ENGLISH EN22-29_KDV-MP3346M[U]f.indd 22 11/19/09 4:56:43 PM AUD SETUP (audio setup) DISP CTRL (display control) AUD CTRL (audio control) Item Selectable setting, [Initial] BASS LEVEL *2 –8 — +8, [0] : Adjusts the bass level of the selected sound mode. MID LEVEL *2 –8 — +8, [0] : Adjusts the middle level of the selected sound mode. TRE LEVEL *2 –8 — +8, [0] : Adjusts the treble level of the selected sound mode. BALANCE L15 — R15, [0] : Adjusts the left and right speaker output balance. FADER F15 — R15, [0] : Adjusts the front and rear speaker output balance. DIMMER SET • ON • OFF : Dims the display illumination. : Cancels. TEXT SCRL • AUTO : Repeats scrolling automatically (at 5-second intervals). : Scrolls the display information once. • MANU Press and hold DISP to scroll the display information regardless of the setting. VOL OFFSET –8 — +8, [0] : Preset the volume adjustment level of each source. (for AUX) The volume level will automatically increase or decrease when you change the source. –8 — 0, [0] • Before making an adjustment, select the source (for other you want to adjust. sources) LPF SW *3 • 85HZ • 120HZ • 160HZ • THRU : : : : Frequencies higher than 85 Hz are cut off. Frequencies higher than 120 Hz are cut off. Frequencies higher than 160 Hz are cut off. All signals are sent to the subwoofer. *2 The adjustment made will be stored automatically as <USER> in <SYSTEM Q>. *3 Displayed only when <SW SET> is set to <ON> and <SUBW> is selected for <SWITCH PRE> ( 5, 6). ENGLISH EN22-29_KDV-MP3346M[U]f.indd 23 23 11/26/09 4:07:32 PM Troubleshooting Disc in general FM/AM General Symptom 24 Remedy/Cause Sound cannot be heard from the speakers. • Adjust the volume to the optimum level. • Check the cords and connections. “PROTECT” appears on the display and no operations can be done. Check to be sure the terminals of the speaker leads are covered with insulating tape properly, then reset the unit. ( 2) If “PROTECT” does not disappear, consult your nearest service center. The unit does not work at all. Reset the unit. ( Automatic presetting (“A-MEMORY”) does not work. Store stations manually. ( • Radio reception is poor. • Static noise while listening to the radio. • Connect the antenna firmly. • Pull the antenna out all the way. Disc cannot be played back. • Insert the disc correctly. • Clean the disc. • The disc is severely scratched. Try another disc instead. “IN” flashes on the display. The CD player is not operating properly. Reinsert the disc. If the disc cannot be ejected or the display continue to flash even when the disc has been properly reinserted, switch off the power and consult your nearest service center. • CD-R/CD-RW cannot be played back. • Tracks on the CD-R/CD-RW cannot be skipped. • Insert a finalized CD-R/CD-RW. • Finalize the CD-R/CD-RW with the component which you used for recording. Disc sound is sometimes interrupted. • Stop playback while driving on rough roads. • Change the disc. • Check the cords and connections. “NA FILE” appears on the display. The unit is playing an unsupported audio file. 2) 10) ENGLISH EN22-29_KDV-MP3346M[U]f.indd 24 11/19/09 4:56:44 PM DivX/MPEG Video/MP3/WMA/WAV Disc in general Symptom Remedy/Cause “NO DISC” appears on the display. Insert a playable disc into the loading slot. “PLEASE” and “EJECT“ appear alternately on the display. The disc is quite dirty, inserted upside down, severely scratched, or unreadable. Press 0, then insert a disc correctly. “REGION ERR” appears on the display. The disc you wanted to play has a region code that cannot be played with this unit. Disc cannot be played back. • Change the disc. • Record the tracks using a compliant application in the appropriate discs. ( 11) • Add the extension code <.divx>, <.div>, <.avi>, <.mpg>, <.mpeg>, <.mp3>, <.wma>, or <.wav> to the file names. Noise is generated. Skip to another track or change the disc. Tracks cannot play back as you have intended them to play. Playback order is determined when files are recorded. Longer readout time is required. (“READING” keeps flashing on the display.) Readout time varies due to the complexity of the folder/ file configuration. Do not use too many hierarchies and folders. No sound can be heard when • Record the audio track using MP3 or Dolby Digital as picture is displayed while the audio stream of DivX files. playing a DivX/MPEG Video file. • Record the audio track using MPEG1 Audio Layer 2 as the audio stream for MPEG Video files. Elapsed playing time is not correct. This sometimes occurs during playback. This is caused by how the tracks are recorded. “PLEASE” and “EJECT” appear alternately on the display. Insert a disc that contains tracks of appropriate formats. Correct characters are not displayed (e.g. album name). This unit can only display letters (upper case), numbers, and a limited number of symbols. ENGLISH EN22-29_KDV-MP3346M[U]f.indd 25 25 11/19/09 4:56:44 PM Maintenance How to clean the unit To keep discs clean If the control panel is stained, wipe it with a dry soft cloth such as a silicon cloth. If it is badly stained, wipe the stain off with a cloth moistened with neutral cleaner, then wipe it again with a clean soft dry cloth. • Applying spray cleaner directly to the unit may affect its mechanical parts. Wiping the control panel with a hard cloth or using a volatile liquid such as thinner or alcohol may scratch the surface or erases characters. A dirty disc may not play correctly. If a disc does become dirty, wipe it with a soft cloth in a straight line from center to edge. • Do not use any solvents (for example, conventional record cleaner, spray, thinner, benzine, etc.) to clean discs. How to clean the connectors Frequent detachment will deteriorate the connectors. To minimize this possibility, periodically wipe the connectors with a cotton swab or cloth moistened with alcohol, being careful not to damage the connectors. Connectors How to handle discs When removing a disc from Center holder its case, press down the center holder of the case and lift the disc out, holding it by the edges. • Always hold the disc by the edges. Do not touch its recording surface. When storing a disc in its case, gently insert the disc around the center holder (with the printed surface facing up). • Make sure to store discs in cases after use. 26 To play new discs New discs may have some rough spots around the inner and outer edges. If such a disc is used, this unit may reject the disc. To remove these rough spots, rub the edges with a pencil or ball-point pen, etc. Do not use the following discs: Single CD (8 cm disc) Warped disc Sticker and sticker residue Stick-on label Unusual shape C-thru Disc (semitransparent disc) Transparent or semitransparent parts on its recording area ENGLISH EN22-29_KDV-MP3346M[U]f.indd 26 11/19/09 4:56:44 PM Language codes Code Language Code Language Code Language Code Language ENGLISH SPANISH FRENCH GERMAN English Spanish French German ET EU FA FI Estonian Basque Persian Finnish LN LO LT LV SM SN SO SQ Samoan Shona Somali Albanian ITALIAN DUTCH SWEDISH DANISH RUSSIAN CHINESE PORTUGUESE JAPANESE AA AB AF AM AR AS AY AZ BA BE BG BH BI Italian Dutch Swedish Danish Russian Chinese Portuguese Japanese Afar Abkhazian Afrikaans Ameharic Arabic Assamese Aymara Azerbaijani Bashkir Byelorussian Bulgarian Bihari Bislama FJ FO FY GA GD GL GN GU HA HI HR HU HY IA IE IK IN IS IW JI JW Fiji Faroese Frisian Irish Scots Gaelic Galician Guarani Gujarati Hausa Hindi Croatian Hungarian Armenian Interlingua Interlingue Inupiak Indonesian Icelandic Hebrew Yiddish Javanese MG MI MK ML MN MO MR MS MT MY NA NE NO OC OM OR PA PL PS QU RM SR SS ST SU SW TA TE TG TH TI TK TL TN TO TR TS TT TW UK UR UZ Serbian Siswati Sesotho Sundanese Swahili Tamil Telugu Tajik Thai Tigrinya Turkmen Tagalog Setswana Tonga Turkish Tsonga Tatar Twi Ukrainian Urdu Uzbek BN BO BR CA CO CS CY Bengali, Bangla Tibetan Breton Catalan Corsican Czech Welsh KA KK KL KM KN KO KS Georgian Kazakh Greenlandic Cambodian Kannada Korean (KOR) Kashmiri RN RO RW SA SD SG SH VI VO WO XH YO ZU Vietnamese Volapuk Wolof Xhosa Yoruba Zulu DZ EL EO Bhutani Greek Esperanto KU KY LA Kurdish Kirghiz Latin SI SK SL Lingala Laothian Lithuanian Latvian, Lettish Malagasy Maori Macedonian Malayalam Mongolian Moldavian Marathi Malay (MAY) Maltese Burmese Nauru Nepali Norwegian Occitan (Afan) Oromo Oriya Panjabi Polish Pashto, Pushto Quechua RhaetoRomance Kirundi Rumanian Kinyarwanda Sanskrit Sindhi Sangho SerboCroatian Singhalese Slovak Slovenian ENGLISH EN22-29_KDV-MP3346M[U]f.indd 27 27 11/19/09 4:56:44 PM TUNER SECTION AUDIO/VIDEO SECTION Specifications Maximum Power Output: Front/Rear: 50 W per channel Full Bandwidth Power (at less than 1% THD): 22 W per channel Speaker Impedance: 4 Ω to 8 Ω Tone Action: Bass: 100 Hz Middle: 1 kHz Treble: 10 kHz Level: ±8 dB Frequency Response: 40 Hz to 20 000 Hz Line-Out Level/Impedance: 2.5 V/20 kΩ load (full scale) Subwoofer-Out Level/Impedance: 2.5 V/20 kΩ load (full scale) Color System: NTSC/PAL Video Output Level: 1 Vp-p (75 Ω) Other Terminal: AUX (auxiliary) input jack, Antenna input Frequency Range: FM: 200 kHz space: 50 kHz space: 87.9 MHz to 107.9 MHz 87.5 MHz to 108.0 MHz AM: 10 kHz space: 9 kHz space: 530 kHz to 1 700 kHz 531 kHz to 1 611 kHz FM Tuner: AM Tuner: 28 Frequency: Usable Sensitivity (S/N = 30 dB): 9.3 dBf (0.8 μV/75 Ω) Quieting Sensitivity (S/N = 50 dB): 15.2 dBf (1.6 μV/75 Ω) Frequency Response (±3 dB): 30 Hz to 15 000 Hz Stereo Separation: 40 dB Usable Sensitivity (S/N = 20 dB): 28 dBμ (25 μV) ENGLISH EN22-29_KDV-MP3346M[U]f.indd 28 11/26/09 4:08:22 PM Signal Detection System: Non-contact optical pickup (semiconductor laser) Number of Channels: 2 channels (stereo) Frequency Response: DVD, fs=48 kHz/96 kHz: 16 Hz to 22 000 Hz DVD/CD PLAYER SECTION CD, fs=44.1 kHz: 90 dB Signal-to-Noise Ratio (1 kHz): 90 dB Wow and Flutter: Less than measurable limit DivX/MPEG Video: Video: Max. Resolution: 720 × 480 pixels (30 fps) 720 × 576 pixels (25 fps) Audio: Bit Rate: 32 kbps – 320 kbps Sampling Frequency (DivX): MPEG-1: 32 kHz, 44.1 kHz, 48 kHz MPEG-2: 16 kHz, 22.05 kHz, 24 kHz Sampling Frequency (MPEG Video): 32 kHz, 44.1 kHz, 48 kHz Bit Rate: 32 kbps – 320 kbps Sampling Frequency: MPEG-1: 32 kHz, 44.1 kHz, 48 kHz MPEG-2: 16 kHz, 22.05 kHz, 24 kHz Bit Rate: 32 kbps – 320 kbps Sampling Frequency: 22.05 kHz, 32 kHz, 44.1 kHz, 48 kHz MP3: WMA: WAV (Linear PCM): Power Requirement: GENERAL 16 Hz to 20 000 Hz Dynamic Range: Quantization Bit Rate: 16 bit Sampling Frequency: 44.1 kHz Operating Voltage: DC 14.4 V (11 V to 16 V allowance) Maximum Current Consumption: 15 A Grounding System: Negative ground Allowable Operating Temperature: 0°C to +40°C Dimensions (W × H × D): (approx.) Installation Size: 182 mm × 52 mm × 159 mm Panel Size: 188 mm × 58 mm × 6 mm Mass: 1.3 kg (excluding accessories) Design and specifications are subject to change without notice. ENGLISH EN22-29_KDV-MP3346M[U]f.indd 29 29 11/26/09 4:08:22 PM