1
Use_ f
_ears ROebuck and Co., Heffrnan &'st=,....
Table of Contents / |ndice
PRODUCT RECORD ...............................................
2
REGISTRO DEL PRODUCTO ..................................
DRYER SAFETY ......................................................
2
SEGURIDAD
DRYER USE .............................................................
4
USO DE LA SECADORA ........................................
DRYER CARE ..........................................................
6
CUIDADO DE LA SECADORA .............................. 13
TROUBLESHOOTING
7
SOLUCION
8
CONTRATOS
8
GARANTIA ..............................................................
PROTECTION
.............................................
AGREEMENTS
...............................
WARRANTY .............................................................
SERVICE NUMBERS ........................ BACK COVER
DE PROBLEMAS
NUMEROS
9
DE LA SEOADORA ............................ 9
11
............................... 14
DE PROTECCION
.......................... 15
15
DE SERVIClO ........ CONTRAPORTADA
Product Record
For service or warranty assistance, you will need the following
information. Have this information available when you contact
Sears concerning your appliance.
To contact Sears, please refer to the Warranty and the back page
of this manual.
In the space following, record your complete model number,
serial number, and purchase date. You can find this information
on the model and serial number label, located at the top inside
dryer door well.
Model number 110,
Serial number
Purchase
date
Save these
reference.
instructions
and your
sales
receipt
for future
DRYER SAFETY
Your safety and the safety of others are very important.
We have provided many important safety messages in this manual and on your appliance. Always read and obey all safety
messages.
This is the safety alert symbol.
This symbol alerts you to potential hazards that can kill or hurt you and others.
All safety messages will follow the safety alert symbol and either the word "DANGER" or "WARNING."
These words mean:
You can be killed or seriously injured if you don't immediatel.=y
follow instructions,
You can be killed or seriously injured if you don't follow
instructions,
All safety messages will tell you what the potential hazard is, tell you how to reduce the chance of injury, and tell you what can
happen if the instructions are not followed.
2
IMPORTANT
SAFETYINSTRUCTIONS
WARNING:Toreduce
theriskoffire,electric shock, or injury to persons when using the dryer, follow
basic precautions,
including the following:
•
Read all instructions
•
Do not place items exposed to cooking oils in your dryer.
Items contaminated with cooking oils may contribute to
a chemical reaction that could cause a load to catch fire.
•
Do not dry articles that have been previously cleaned in,
washed in, soaked in, or spotted with gasoline, drycleaning solvents, other flammable, or explosive
substances as they give off vapors that could ignite or
explode.
•
Do not use fabric softeners or products to eliminate static
unless recommended by the manufacturer of the fabric
softener or product.
•
Do not allow children to play on or in the dryer. Close
supervision of children is necessary when the dryer is
used near children.
•
Do not use heat to dry articles containing foam rubber or
similarly textured rubber-like materials.
Clean lint screen before or after each load.
•
before using the dryer.
•
Before the dryer is removed from service or discarded,
remove the door to the drying compartment.
•
Do not reach into the dryer if the drum is moving.
•
Do not install or store the dryer where it will be exposed
to the weather.
•
Do not tamper with controls.
Do not repair or replace any part of the dryer or
any servicing unless specifically recommended
Use and Care Guide or in published user-repair
tions that you understand and have the skills to
attempt
in this
instruccarry out.
•
Keep area around the exhaust opening and adjacent surrounding areas free from the accumulation of lint, dust,
and dirt.
•
The interior of the dryer and exhaust vent should be
cleaned periodically by qualified service personnel.
•
See installation instructions
for grounding requirements.
SAVE THESE INSTRUCTIONS
WARNING:
For your
safety,
the risk of fire or explosion,
the information
or to prevent
in this manual
property
- Do not store or use gasoline
or any other appliance.
or other flammable
- WHAT TO DO IF YOU SMELL
GAS:
must
damage,
vapors
be followed
personal
and liquids
injury,
to minimize
or death.
in the vicinity
of this
• Do not try to light any appliance.
• Do not touch any electrical switch; do not use any phone in your building.
• Clear the room, building, or area of all occupants.
• Immediately
call your gas supplier from a neighbor's phone. Follow the gas supplier's
instructions.
• If you cannot reach your gas supplier,
- Installation and service
the gas supplier.
call the fire department.
must be performed
by a qualified
installer,
service agency,
or
Your dryer must be properly installed and vented to achieve
maximum drying efficiency and shorten drying times. Use the
minimum recommended installation clearances (found in your
Installation Instructions) to avoid blocking the flow of combustion
and ventilation air. See the Installation Instructions for more
information.
NOTE: Service calls caused by improper venting will be paid for
by the customer, whether it was a paid installation or selfinstalled.
1.
Do not use plastic vent or metal foil vent. Use 4 in. (10.2 cm)
metal or flexible metal vent. Do not kink or crush flexible
metal vent. It must be completely extended to allow adequate
exhaust air to flow. Check vent after installation. Refer to your
Installation Instructions for proper length requirements of
vent.
2.
Use a 4 in. (10.2 cm) exhaust hood.
3.
Use the straightest
4.
Use clamps to seal all joints. Do not use duct tape, screws or
other fastening devices that extend into the interior of the
vent to secure vent.
5.
Clean exhaust vent periodically, depending on use, but at
least every 2 years, or when installing your dryer in a new
location. When cleaning is complete, be sure to follow the
Installation Instructions supplied with your dryer for final
product check.
path possible when routing the vent.
Fire Hazard
Use a heavy metal vent.
Do not use a plastic vent,
Do not use a metal foil vent.
Failure to follow these instructions can result in death
or fire.
If the dryer is not properly installed and vented, it will not be
covered under the warranty.
DRYER USE
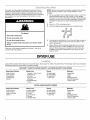
Load clothes loosely into the dryer. Do not pack the dryer. Allow space for clothes to tumble freely. The following charts show examples
of balanced loads that would allow for proper tumbling.
KING SIZE TM CAPACITY, SUPER CAPACITY and SUPER CAPACITY PLUS DRYERS
Heavy Work Clothes
Mixed Load
Towels
Delicates
4
4
2
2
4
3 sheets (1 king, 2 twin)
4 pillowcases
9 T-shirts
9 pair of shorts
3 blouses
10 handkerchiefs
3 shirts
10
10
14
1
3
1
4
8
2
1
pair of pants
pair of jeans
sweatshirts
sweatpants
shirts
bath towels
hand towels
washcloths
bath mat
EXTRA LARGE CAPACITY
Heavy Work Clothes
3 pair of pants
4 pair of jeans
2 pair of overalls
3 shirts
4
Mixed Load
3 double sheets
4 pillowcases
8 T-shirts
6 pair of shorts
2 blouses
8 handkerchiefs
camisoles
robe
slips
undergarments
sets of sleepwear
child's outfit
DRYERS
Towels
10 bath towels
10 hand towels
14 washcloths
1 bath mat
Delicates
3 camisoles
1 robe
4 slips
6 undergarments
2 sets of sleepwear
1 child's outfit
6.
7.
If desired, add a fabric softener sheet. Use only ones labeled
as dryer safe. Follow package instructions.
Press the PUSH TO START button.
Stopping and Restarting
You can stop your dryer anytime during a cycle.
To stop your dryer
Explosion Hazard
Keep flammable materials and vapors, such as
gasoline, away from dryer.
Open the dryer door or turn the Cycle Selector Control to OFF.
NOTE: The Cycle Selector Control should point to an Off area
when the dryer is not in use.
To restart your dryer
1. Close the door.
2.
3.
Select a new cycle and temperature (if desired).
Press PUSH TO START.
Do not dry anything that has ever had anything
flammable on it (even after washing).
Failure to follow these instructions
explosion, or fire.
can result in death,
Use the dryer rack to dry items such as sweaters and pillows
without tumbling. The drum turns, but the rack does not move.
If your model does not have a dryer rack, you may be able to
purchase one. To find out whether your model allows dryer rack
usage and to obtain ordering information, please refer to the back
page of this manual or contact the dealer from whom you
purchased your dryer.
NOTE: You must remove dryer rack for normal tumbling. Do not
use automatic cycles with the dryer rack.
TUMBLE FREE TM Non-Heated
Dryer Rack
Use with 29 in. (73.7 cm) wide dryers. Air circulates in a
concentrated pattern over and around clothes to allow efficient
and uniform drying.
Fire Hazard
No washer can completely remove oil.
Do not dry anything that has ever had any type of oil on
it (including cooking oils).
Items containing foam, rubber, or plastic must be dried
on a clothesline or by using an Air Cycle.
Failure to follow these instructions
or fire.
can result in death
This booklet covers several different models. Your dryer may not
have all of the cycles and features described.
Before using your dryer, wipe the dryer drum with a damp cloth to
remove dust from storing and shipping.
TUMBLE FREE TM Heated Dryer Rack
Use with 27 in. (69 cm) wide dryers. Air circulates in a concentrated
pattern over, under and through clothes, significantly reducing
drying time.
To use the dryer rack:
1. 29 in. (73.7 cm) Wide Dryer
Slide rear pegs into the dimples on the back wall of the dryer.
Lower the front legs to rest on the dryer opening.
27 in. (69 cm) Wide Dryer
Do not remove lint screen. Slide dryer rack over the bottom of
the dryer door opening. Push down to secure it on the frame.
2.
1.
Load clothes loosely into the dryer and close the door. Do not
pack the dryer. Allow space for clothes to tumble freely.
2.
Turn the Cycle Selector Control to the recommended cycle
for the type of load being dried. Use the Normal Dry cycle,
called out by an asterisk (*) to dry most heavy to medium
weight fabrics.
3.
3.
Set the Temperature control, to the recommended setting for
the type of fabric being dried. See "Dryer Cycle Descriptions"
(separate sheet) for temperature suggestions.
4.
4.
(OPTIONAL) Your dryer may have a WRINKLE GUARD c,_
feature selector. When you are unable to remove a load from
the dryer as soon as it stops, wrinkles can form. This feature
periodically tumbles, rearranges and fluffs the load without
heat to help avoid wrinkling.
5o (OPTIONAL) If you want the dryer to sound a signal when the
cycle is finished, set the END OF CYCLE SIGNAL control to
ON, or to the volume level you prefer (on some models). The
signal is helpful when you are drying permanent press,
synthetics and other items that should be removed from the
dryer as soon as it stops.
Put wet items on the rack. Leave space between items so air
can reach all surfaces. Do not allow items to hang over the
edge of the rack. Close the door.
Select cycle, temperature and time to match the fabrics in
your load. Items containing foam, rubber, or plastic must be
dried on a clothesline or by using an air cycle. Refer to the
following table.
Star[ the dryer. Reset time to complete drying, if needed.
Rack Dry
Cycle
Temp
Time
Washable wool items (block
to shape and lay flat on rack)
Timed
Dry
Low
20 min.
Stuffed toys or pillows (cotton
or polyester fiber filled)
Timed
Dry
Low
20 min.
Stuffed toys/pillows
rubber filled)
Air
(no heat)
None
20 - 50
min.
(foam
DRYER CARE
As Needed
Keep dryer area clear and free from items that would obstruct the
flow of combustion and ventilation air.
1. Roll lint oft the screen with your fingers.
2. Wet both sides of lint screen with hot water.
3.
4.
Thoroughly dry lint screen with a clean towel. Replace screen
in dryer.
1.
Apply a non-flammable
household cleaner to the stained area
of the drum and rub with a soft cloth until stain is removed.
Keep flammable materials and vapors, such as
gasoline, away from dryer.
2.
3.
Wipe drum thoroughly with a damp cloth.
Tumble a load of clean cloths or towels to dry the drum.
Place dryer at least 18 inches (46 cm) above the floor
for a garage installation.
NOTE: Garments which contain unstable dyes, such as
blue jeans or brightly colored cotton items, may discolor
dryer interior. These stains are not harmful to your dryer
not stain future loads of clothes. Dry unstable dye items
out to prevent dye transfer.
Failure to do so can result in death, explosion, or fire.
Clean the lint screen before each load. A screen blocked by lint
can increase drying time,
IMPORTANT:
•
Wet a nylon brush with hot water and liquid detergent. Scrub
lint screen with the brush to remove residue buildup.
Rinse screen with hot water.
5.
Explosion Hazard
•
Cleaning
Do not run the dryer with the lint screen loose, damaged,
blocked, or missing. Doing so can cause overheating and
damage to both the dryer and fabrics.
If lint falls oft the screen into the dryer during removal, check
the exhaust hood and remove the lint.
denim
the
and will
inside-
From Inside the Dryer Cabinet
Lint should be removed every 2 years, or more often, depending
on dryer usage. Cleaning should be done by a qualified person.
From Inside the Exhaust Vent
Lint should be removed every 2 years, or more often, depending
on dryer usage.
Every Load Cleaning
Style 1:
1o The lint screen is located on top of the dryer. Pull the lint
screen toward you. Roll lint oft the screen with your fingers.
Do not rinse or wash screen to remove lint. Wet lint is hard to
remove.
2.
Push the lint screen firmly back into place.
1.
Unplug dryer or disconnect
2.
Open the dryer door. Locate the light bulb cover on the back
wall of the dryer. Remove the screw located in the lower right
corner of the cover. Remove the cover.
3.
Turn bulb counterclockwise.
Replace the bulb with a 1g-watt
appliance bulb only, Replace the cover and secure with the
screw.
4.
Plug in dryer or reconnect power.
Style 2:
1o The lint screen is located in the door of the dryer. Pull the lint
screen straight up. Roll lint oft the screen with your fingers.
Do not rinse or wash screen to remove lint. Wet lint is hard to
remove.
2.
6
Push the lint screen firmly back into place.
power,
TROUBLESHOOTING
First try the solutions suggested hers and possibly avoid the cost of a service call...
Lint on load
•
Is the lint screen clogged? Clean lint screen. Check for air
movement.
•
Is the load properly sorted? Sort lint givers (towels, chenille)
from lint takers (corduroy, synthetics). Also sort by color.
•
Is the load too big or too heavy? Dry smaller loads so lint
can be carried to the lint screen.
•
Was the load overdried? Use correct dryer settings for load
type. Overdrying can cause lint-attracting static electricity.
See "Dryer Cycle Descriptions" (separate sheet).
•
Was paper or tissue left in pockets?
•
Is pilling being mistaken for lint? Pilling (surface fuzz) is
caused by normal wear and laundering.
Dryer will not run
•
Check the following:
Is the power cord plugged in?
Has a fuse blown, or has a circuit breaker tripped? There
may be 2 fuses or circuit breakers for the dryer. Check to
make sure both fuses are intact and tight, or that both circuit
breakers have not tripped.
Was a regular fuse used? Use a time-delay fuse.
Is the dryer door firmly closed?
Was the START button firmly pressed?
Is a cycle selected?
Stains on load or color change
No heat
•
Was dryer fabric softener properly used? Add dryer fabric
softener sheets at the beginning of the cycle. Fabric softener
sheets added to a partially-dried load can stain your
garments.
Has an air dry cycle been selected? Select the right cycle
for the types of garments being dried.
•
Were items soiled when placed in the dryer? Items should
be clean before being dried.
For gas dryers, is the valve open on the supply line?
•
Were items properly sorted? Sort light colors from dark
colors. Sort colorfast items from noncolorfast items.
•
Has a fuse blown, or a circuit breaker tripped? Electric
dryers use 2 household fuses or breakers. The drum may be
turning, but you may not have heat.
•
•
Unusual sounds
Items shrinking
•
•
Has the dryer had a period of non-use? If the dryer hasn't
been used for a while, there may be a thumping sound during
the first few minutes of operation.
Is it a gas dryer?. The gas valve clicking is a normal operating
sound.
•
Was the dryer overloaded?
tumble freely.
Dry smaller loads that will
•
Did the load overdry? Check the manufacturer's
Match dryer setting to load type.
care label.
Loads are wrinkled
•
•
Was the load removed from dryer at the end of the cycle?
Clothes are not drying satisfactorily
•
Check the following:
Is the lint screen clogged with lint?
Was the dryer overloaded?
tumble freely.
•
Did the load overdry? Check the manufacturer's
Match dryer setting to load type.
Is the exhaust vent or outside exhaust hood clogged with lint,
restricting air movement? Run the dryer for 5-10 minutes.
Hold your hand under the outside exhaust hood to check air
movement. If you do not feel air movement, clean exhaust
system of lint or replace exhaust vent with heavy metal or
flexible metal vent. See your Installation Instructions.
•
•
Have you recently been painting, staining or varnishing in
the area where your dryer is located? If so, ventilate the
area. When the odors or fumes are gone from the area, rewash and dry the clothing.
•
If the dryer is electric, is it being used for the first time?
The new electric heating element may have an odor. The odor
will be gone after the first cycle.
Is the dryer located in a room with temperature below
45°F (7°0)? Proper operation of dryer cycles requires
temperatures above 45°F (7°C).
•
Was a cold rinse water used? Was the load very wet?
Expect longer drying times with items rinsed in cold water
and with items that hold moisture (cottons).
•
Is the load too large and heavy to dry quickly?
the load to tumble freely.
Separate
care label.
Odors
Is the exhaust vent crushed or kinked? Replace with heavy
metal or flexible metal vent. See your Installation Instructions.
Are fabric softener sheets blocking the grille? Use only one
fabric softener sheet, and use it only once.
Dry smaller loads that can
Garment
•
damage
Checkthe
following:
Were zippers, snaps, and hooks left open?
Were strings and sashes tied to prevent tangling?
Were care label instructions
followed?
Were items damaged before drying?
7
PROTECTION
Master Protection Agreements
Congratulations on making a smart purchase. Your new
Kenmore _"_appliance is designed and manufactured for years of
dependable operation. But like all products, it may require
preventive maintenance or repair from time to time. That's when
having a Master Protection Agreement can save you money and
aggravation.
Purchase a Master Protection Agreement now and protect
yourself from unexpected hassle and expense.
The Master Protection Agreement also helps extend the life of
your new appliance. Here's what's included in the Agreement:
if Expert service
by our 12,000 professional
repair specialists
V Unlimited service and no charge for parts and labor on all
covered repairs
if "No-lemon"
guarantee - replacement of your covered
product if more than three product failures occur within twelve
months
if Product replacement
if Annual Preventive
extra charge
if your covered product can't be fixed
Maintenance
Check at your request - no
AGREEMENTS
if Fast help by phone - non-technical and instructional
assistance on products repaired in your home, plus convenient
repair scheduling
if Power surge protection against electrical damage due to
power fluctuations
if Rental reimbursement
longer than promised
if repair of your covered product takes
Once you purchase the Agreement, a simple phone call is all that
it takes for you to schedule service. You can call anytime day or
night, or schedule a service appointment online.
Sears has over 12,000 professional repair specialists, who have
access to over 4.5 million quality parts and accessories. That's
the kind of professionalism you can count on to help prolong the
life of your new purchase for years to come. Purchase your
Master Protection Agreement today!
Some limitations and exclusions apply. For prices and
information call 1-800-827-6655.
Sears Installation
Service
For Sears guaranteed professional installation of home
appliances and items like garage door openers and water
heaters, in the U.S.A. call 1-800-4-MY-HOME ®,
WARRANTY
Full One-Year Warranty on Mechanical and Electrical Parts
For one year from the date of purchase, when this dryer is
installed and operated according to the instructions provided in
these User Instructions, Sears will repair this dryer, free of charge,
if defective in materials or workmanship.
Service must be provided by a Sears Service Depar[ment in the
United States or an authorized agent.
NOTE: Exhausting this dryer with a plastic vent can void this
warranty. See your Installation Instructions for the complete
exhaust requirements for this dryer.
Warranty Restriction
If the dryer is subject to other than private family use, the above
warranty coverage is effective for only 90 days.
Warranty Service
Warranty service is available by contacting Sears at
1-800-4-MY-HOME
(1-800-469-4663). This warranty applies
only while the product is in use in the United States.
This warranty gives you specific legal rights and you may also
have other rights which vary from state to state.
Please reference the service numbers located on the back page
of this manual.
Sears, Roebuck and Co.
D/817WA, Hoffman Estates, IL 60179
8
INSTRUCCIONES PARA EL USUARIO DE LA SECADORA
Registro del producto
Para obtener asistencia acerca del servicio o la garantia, usted
necesitara tener la siguiente informaci6n. Tenga esta informaci6n
disponible cuando se ponga en contacto con Sears acerca de su
electrodomestico.
Para ponerse en contacto con Sears, sirvase tomar como
referencia la garantia y la contraportada de este manual.
En el espacio siguiente, anote su nOmero completo de modelo y
serie asi como la fecha de compra. Podr_. encontrar esta
informaci6n en la etiqueta con el nt]mero del modelo y de la
serie, en la cavidad interna superior de la puerta de la secadora.
Nt_merode modelo 110.
Nt_merode serie
Fecha de compra
Guarde estas instrucciones
para referencia futura.
y su comprobante
de compra
SEGURIDAD DE LA SECADORA
Su seguridad
y la seguridad
de los demds es muy importante.
Hemos incluido muchos mensajes importantes de seguridad en este manual y en su electrodomestico.
todos los mensajes de seguridad.
Lea y obedezca siempre
Este simbolo le llama la atencion sobre peligros potenciales que pueden ocasionar la muerte o una lesi6n a
usted y a los dem_.s.
Este eslos
el mensajes
simbolo dedeadvertencia
de seguridad.
Todos
seguridad irAn
a continuaci6n del simbolo de advertencia de seguridad y de la palabra
"PELIGRO" o "ADVERTENClA". Estas palabras significan:
Si no sigue las instrucciones de inmediato, usted puede
morir o sufrir una lesi6n grave.
Si no sigue las instrucciones,
una lesi6n grave.
Todos los mensajes de seguridad le dir_.n el peligro potencial, le diran como reducir las posibilidades
puede suceder si no se siguen las instrucciones.
INSTRUCCIONES
IMPORTANTES
usted puede morir o sufrir
de sufrir una lesi6n y Io que
DE SEGURIDAD
ADVERTENCIA:
A fin de reducir el riesgo de incendio, descarga electrica o de dafio alas personas que usen
la secadora, deben seguirse las precauciones basicas, incluidas las siguientes:
•
Lea todas las instrucciones
•
No coloque los objetos expuestos a aceite para cocinar
en su secadora. Los objetos expuestos a aceites para
cocinar pueden contribuir a una reacci6n quimica que
podria causar que una carga se inflame.
No seque articulos que ya se hayan limpiado, lavado,
remojado o manchado con gasolina, disolventes de
limpieza en seco, u otras sustancias inflamables o
explosivas ya que despiden vapores que pueden
encenderse o causar una explosi6n.
•
•
antes de usar la secadora.
No permita que jueguen los nidos sobre o dentro de la
secadora. Es necesaria la cuidadosa vigilancia de los
niSos toda vez que se use la secadora cerca de ellos.
•
•
•
•
Quite la puerta de la secadora al compartimiento de secado
antes de ponerla fuera de funcionamiento o de descartarla.
No introduzca las manos en la secadora cuando el tambor
esta en movimiento.
No instale o almacene esta secadora donde estar_.
expuesta a agua o a la intemperie.
No trate de forzar los controles.
No repare o reemplace ninguna pieza de la secadora ni
trate de repararla a menos que esto se recomiende
especificamente en el Manual del propietario o en
instrucciones de reparaci6n publicadas para el usuario
que usted comprenda y s61o si cuenta con la experiencia
necesaria para Ilevar a cabo dicha reparaci6n.
GUARDE ESTAS INSTRUCCIONES
9
INSTRUCCIONES
•
•
•
IMPORTANTES
DE SEGURIDAD
No utilice suavizadores de tejidos o productos para eliminar
el estatico de prendas a menos que Io recomiende el
fabricante del suavizador de tejidoso las instrucciones del
producto en uso.
No utilice calor para secar prendas que contengan espuma
de caucho o materiaies de caucho con textura similar.
•
Mantenga el area alrededor de la apertura de ventilaci6n
y las areas adyacentes a esta apertura sin pelusa, polvo
o tierra.
•
Limpie el filtro de pelusa antes o depues de cada carga
de ropa.
•
La parte interior de la maquina y el conducto de
ventilaci6n se deben limpiar peri6dicamente. Esta limpieza
la debe Ilevar a cabo un reparador c alificado.
Vea la instrucciones de instalaci6n para los requisitos de
conexi6n a tierra.
GUARDE ESTAS INSTRUCClONES
ADVERTENClA:
Para su seguridad,
la informaci6n
para minimizar
el riesgo de incendio o explosi6n,
heridas o la muerte.
- No almacene o use gasolina
aparato electrodomdstico.
- PASOS QUE USTED
u otros liquidos y vapores
DEBE SEGUIR
• No trate de encender
inflamables
cerca de dste u otro
SI HUELE A GAS:
ningdn aparato
• No toque ningdn interruptor
en este manual debe ser observada
o para prevenir da6os a propiedades,
eldctrico;
electrodomdstico.
no use ningdn teldfono
en su edificio.
• Desaloje a todos los ocupantes del cuarto, edificio o drea.
• Llame inmediatamente
a su proveedor de gas desde el teldfono de un vecino.
Siga las instrucciones
de su proveedor de gas.
• Si usted no puede comunicarse
con su proveedor de gas, Ilame al departamento
de bomberos.
- La instalacibn y el servicio deben ser efectuados
agencia de servicio o por el proveedor de gas.
10
por un instalador
calificado,
una
Su secadora debe de estar instalada y ventilada adecuadamente
para obtener una eficiencia maxima de secado y acortar el
tiempo de secado. Para evitar bloquear el flujo de combusti6n y
aire de ventilaci6n, deje que los espacios de instalaci6n tengan
las medidas minimas recomendadas (se encuentran en sus
Instrucciones de instalaci6n). Vea las Instrucciones de instalaci6n
_ara mas informaci6n.
1.
No utilice un ducto de escape de plastico o de aluminio.
Utilice un ducto de escape de metal pesado o de metal
flexible de 4 pulg. (10,2 cm). No tuerza o prense el ducto de
escape de metal flexible. El ducto de escape debe de estar
completamente extendido para permitir el flujo del aire de
ventilaci6n. Revise el ducto de escape despues de la
instalaci6n. Vea sus Instrucciones de instalaci6n para los
requerimientos necesarios para la Iongitud del ducto.
2.
3.
Utilice una capota de ventilaci6n de 4 pulg. (10,2 cm).
Utilice el camino m_.s directo posible al instalar el ducto.
4.
Utilice abrazaderas para sellar todas las juntas. No use cinta
adhesiva para conductos, tornillos ni otros dispositivos de
fijaci6n que se extiendan dentro del ducto de escape, para
fijar el ducto.
Limpie el ducto de escape por Io menos cada 2 a_os o
peri6dicamente segt]n el uso que le de a la secadora o
cuando instale la secadora en un nuevo lugar. Cuando
termine la limpieza revise por Qltima vez el producto,
asegurandose de seguir las Instrucciones de instalaci6n que
acompafian a su secadora.
Peligro de Incendio
Use un ducto de escape de metal pesado.
No use un ducto de escape de pldstico.
No use un ducto de escape de aluminio.
No seguir estas instrucciones
la muerte o incendio.
puede ocasionar
5.
La secadora no estara bajo garantia si no esta instalada y
ventilada adecuadamente.
NOTA: Las visitas de servicio que resulten necesarias debido a
una ventilaci6n inadecuada iran per cuenta del cliente, ya sea
que se trate de una instalaci6n pagada o una hecha per el cliente
mismo.
USO DE LA SECADORA
Coloque la ropa en la secadora holgadamente. No Ilene en exceso la secadora. Deje suficiente espacio para que la ropa rote con
libertad. El cuadro a continuaci6n ilustra ejemplos de cargas balanceadas que permitiran el movimiento de tambor adecuado.
SECADORAS DE CAPACIDAD
Ropa pesada de trabajo
4 pantalones
4 pantalones de mezclilla
2 sudaderas
2 pantalones de deporte
4 camisas
EXTRAGRANDE
Carga mixta
3 sAbanas (1 de cama doble,
2 de camas gemelas)
4 fundas
9 camisetas
9 pantalones cortos
3 blusas
10 pafiuelos
3 camisas
SECADORAS
Ropa pesada de trabajo
3 pantalones
4 pantalones de mezclilla
2 overoles
3 camisas
KING SIZE TM, CAPACIDAD SUPER y CAPACIDAD SUPER PLUS
Toallas
10
10
14
1
toallas
toallas
toallas
tapete
DE CAPACIDAD
Carga mixta
3 sabanas tamaSo doble
4 fundas para almohadas
8 camisetas
6 pantalones coCcos
2 blusas
8 pafiuelos
para bafio
para manos
facia]es
de ba_o
EXTRAGRANDE
Toallas
10
10
14
1
Articulos delicados
3 camisolas
1 bata de casa
4 fondos
8 prendas de ropa interior
2 juegos de ropa de dormir
1 juego de ropa para nifios
toallas
toallas
toallas
tapete
para bafio
para manos
facia]es
de baSo
Articulos delicados
3 camisolas
1 bata
4 fondos
6 piezas de ropa interior
2 juegos de pijamas
1 juego de ropa para nifios
11
5.
(OPCIONAL) Si usted desea que suene una seSal cuando se
termine el ciclo, fije la SENAL DE FIN DE CICLO (End of Cycle
Signal) en Encendido (ON), o en el nivel de volumen que
usted prefiera (en algunos modelos). Esta seSal es t]til
cuando usted esta secando artfculos de planchado
permanente, tela sintetica u otros artfculos que se deben
retirar de la secadora tan pronto como esta se detenga.
6.
Agregue una hoja de suavizante de telas, si Io desea. Use
s61o aquellas cuya etiqueta indique que se pueden usar en
secadoras. Siga las instrucciones del paquete.
7.
Empuje el bot6n de empuje para poner en marcha (PUSH TO
START).
Peligro de Explosi6n
Mantenga los materiales y vapores inflamables,
como la gasolina, alejados de la secadora.
tales
No seque ningdn artfculo que haya tenido alguna vez
cualquier substancia inflamable (adn despu_s de
lavarlo).
No seguir estas instrucciones puede ocasionar
la muerte, explosi6n o incendio.
Para detener y volver a porter en marcha
Usted puede detener su secadora en cualquier momento durante
un ciclo.
Para detener su secadora
Abra la puerta de la secadora o gire el control del selector de
ciclos a Apagado (OFF).
NOTA: El control del selector de ciclos debe apuntar hacia el
Area de apagado cuando la secadora no este en uso.
Para volver a poner en marcha su secadora
1. Cierre la puer[a.
2.
3.
Seleccione un nuevo ciclo y temperatura (si Io desea).
Presione Empuje para poner en marcha (PUSH TO START).
Use el estante de la secadora para secar sin rotaci6n artfculos
tales como sueters y almohadas. El tambor gira, pero el estante
no se mueve.
Peligro de Incendio
Ninguna lavadora puede eliminar completamente
el aceite.
No seque ningdn art[culo que haya tenido alguna vez
cualquier tipo de aceite (incluyendo los aceites de
cocina).
Los articulos que contengan espuma, hule o pldstico
deben secarse en un tendedero o usando un
Ciclo de Aire.
No seguir estas instrucciones
la muerte o incendio.
puede ocasionar
Este folleto cubre varios modelos diferentes. Es posible que su
secadora no tenga todos los ciclos y las caracterfsticas
descritos.
Antes de usar su secadora, limpie el interior del tambor con un
patio ht]medo para quitar residuos de polvo que se acumularon
durante el almacenaje y transpor[e.
1. Coloque la ropa en la secadora de modo suelto y cierre la
puerta. No Ilene en exceso la secadora. Deje suficiente
espacio para que la ropa rote con Iibertad.
2. Gire el control del selector de ciclos al ciclo recomendado
para el tipo de carga que se esta secando. Use un ciclo
normal, indicado por un asterisco (*) para secar la mayorfa de
las telas de peso pesado a mediano.
3.
Fije el control de temperatura al ajuste recomendado para el
tipo de tela que se esta secando. Vea "Descripciones de los
ciclos de la secadora" (en una hoja separada) para ver las
sugerencias de temperatura.
4.
(QPCIONAL) Es posible que su secadora tenga un selector
de la caracterfstica del protector antiarrugas WRINKLE
GUARD_L Cuando no pueda quitar una carga de la secadora
tan pronto termine el ciclo, la ropa podra arrugarse. Esta
caracterfstica rota peri6dicamente, acomoda y sacude la
ropa sin calor para evitar que se arrugue.
12
Si su modelo no cuenta con un estante de la secadora, tal vez
usted pueda adquirir uno. Refi@ase a la contraportada de este
manual o p6ngase en contacto con el distribuidor donde compr6
su secadora para saber si puede usar un estante de secado con
su modelo, y para recibir informaci6n sobre c6mo ordenarlo.
NOTA: Usted debe quitar el estante de la secadora para un
secado normal. No use ciclos automaticos con el estante de la
secadora.
Estante no t_rmico
de la secadora
TUMBLE
FREE
TM
Use con secadoras que tengan 29 pulg. (73,7 cm) de ancho. El
aire circula en un movimiento concentrado sobre las prendas y
alrededor de estas, para permitir que el secado sea eficaz y
uniforme.
Estante t_rmico
de la secadora
TUMBLE
FREE
TM
Use con secadoras que tengan 27 pulg. (69 cm) de ancho. El aire
circula en un movimiento concentrado sobre las prendas, asi
come tambien debajo y a traves de las mismas, reduciendo de
esta manera significativamente el tiempo de secado.
Para usar el eetante de la eecadora:
1. Secadora de 29 pulg. (73,7 cm) de ancho
Deslice las paras traseras dentro de las hendiduras que estan
en la pared posterior de la secadora. Baje las paras frontales
para que descansen en la abertura de la secadora.
Secadora de 27 pulg. (69 cm) de ancho
No quite el filtro de pelusa. Deslice el estante termico encima
de la parle inferior de la aber_ura de la puer[a de la secadora.
Empuje hacia abajo para asegurarlo en el marco.
2.
3.
4.
Coloque los articulos ht]medos en el estante. Deje espacio
entre los articulos para que el aire pueda Ilegar a todas la
superficies. No permita que los articulos se cuelguen del
borde del estante. Cierre la puerta.
Seleccione el ciclo, la temperatura y el tiempo que esten de
acuerdo con las telas de su carga. Los articulos que
contengan espuma, plastico o hule deben secarse en un
tendedero o usando un ciclo de aire. Consulte el cuadro a
continuaci6n.
Ponga la secadora en marcha. Vuelva a fijar el tiempo para
terminar el secado, si es necesario.
CUlDADO
Secado en el estante
Ciclo
Temp
Tiempo
Articulos lavables de lana
(deles forma y extiendalos en
sentido piano en el estante)
Secado
programado
Baja
20 min.
Juguetes de peluche o
almohadas (rellenos de fibras
de algod6n o poliester)
Secado
programado
Baja
20 min.
Juguetes de peluche/
almohadas (con relleno de
goma espuma)
De aire
(sin
calor)
Ninguna
20 - 50
min.
DE LA SECADORA
Estilo 2:
Mantenga el Area donde esta la secadora despejada y libre de
articulos que pudieran obstruir el flujo de aire para la combusti6n
y la ventilaci6n.
1.
El filtro de pelusa esta Iocalizado en la puerta de la secadora.
Jale el filtro de pelusa directamente hacia arriba. Quite la
pelusa enrollandola con los dedos. No enjuague o lave el filtro
para quitar la pelusa. La pelusa mojada es dificil de sacar.
2.
Empuje el filtro firmemente hasta que quede en su lugar.
Limpieza
peri6dica
1. Quite la pelusa del filtro enrollandola con sus dedos.
2. Moje ambos lados del filtro de pelusa con agua caliente.
3. Moje un cepillo de nylon con agua caliente y detergente
liquido. Talle el filtro de pelusa con el cepillo para quitar la
acumulaci6n de residuos.
Peligro de Explosi6n
4.
5.
Enjuague el filtro con agua caliente.
Seque minuciosamente el filtro de pelusa con una toalla
limpia. Vuelva a colocar el filtro en la secadora.
Mantenga los materiales y vapores inflamables, como
gasolina, lejos de la secadora.
Coloque la secadora a un minimo de 46 cm sobre
el piso para la instalaci6n en un garaje.
No seguir estas instrucciones puede ocasionar
la muerte, explosi6n o incendio.
1. Aplique un limpiador domistico no inflammable al b.rea
manchada del tambor y frote con un patio suave hasta que
desaparezca la mancha.
2. Limpie el tambor minuciosamente con un patio hL3medo.
3.
Limpie el filtro de pelusa antes de cada carga. Un filtro obstruido
con pelusa puede aumentar el tiempo de secado.
IMPORTANTE:
•
•
No ponga a funcionar la secadora con el filtro de pelusa flojo,
datiado, obstruido o sin 51. El hacerlo puede causar un sobrecalentamiento y datiar tanto la secadora como las prendas.
Sial quitar la pelusa del filtro esta cae dentro de la secadora,
revise la capota de ventilaci6n y quite la pelusa.
Seque una carga de ropa limpia o toallas para secar el tambor.
NOTA: Las prendas de colores que destitien tales como
mezclillas o arlculos de algod6n de colores vivos, pueden tetiir el
interior de la secadora. Estas manchas no datian su secadora ni
mancharan las cargas futuras de ropa. Seque los articulos de
colores que destitien al reves para evitar la transferencia del tinte.
Ifii I13"$II I
Del interior
CIO[I
{@
del gabinete
_...............
,_.........
de la secadora
SegL_n el use de la secadora, se debe quitar la pelusa cada 2
atios, o con mas frecuencia. La limpieza deber_, efectuarla una
persona calificada.
Limpieza de cada carga
Estilo 1:
1.
El filtro de pelusa esta ubicado en la parte superior de la
secadora. Jale el filtro de pelusa hacia usted. Quite la pelusa
enroll_.ndola con los dedos. No enjuague o lave el filtro para
quitar la pelusa. La pelusa mojada es dificil de sacar.
2.
Empuje el filtro firmemente hasta que quede en su lugar.
Del interior
del ducto de escape
SegL_n el use de la secadora, se debe quitar la pelusa cada 2
atios, o con mas frecuencia.
13
3.
1.
Desenchufe la secadora o desconecte
2.
Abra la puerta de la secadora. Localice la cubierta del foco
de luz en la pared posterior de la secadora. Quite el tornillo
ubicado en la esquina inferior derecha de la cubierta. Quite la
cubierta.
la energia.
4.
Gire el foco en sentido contrario alas manecillas del reloj.
Reemplacelo t)nicamente con un foco para
electrodomesticos de 10 vatios. Vuelva a colocar la cubierta y
asegl3rela con el tornillo.
Enchufe la secadora o vuelva a conectar la energia.
SOLUCION DE PROBLEMAS
En primer lugar, pruebe las soluciones sugeridas aquiy posiblemente se evite el gasto de una Ilamada de servicio t_cnico...
&Esta el ducto de escape aplastado o retorcido?
Reemplacelo con un ducto de metal pesado o flexible.
Consulte las Instrucciones de instalaci6n.
La secadora
•
&Estan las hojas del suavizante de telas bloqueando la rejilla?
Use t)nicamente una hoja del suavizante de telas y Qsela una
sola vez.
no funciona
Verifique Io siguiente:
&Est& la secadora ubicada en una habitacibn cuya
temperatura est& debajo de 45°F (7°C)? El funcionamiento
apropiado de los ciclos de la secadora requiere temperaturas
superiores a 45°F (7°C).
6Se ha enchufado el cable electrico?
6Se ha quemado un fusible o se ha disparado
cortacircuitos? Puede set que haya 2 fusibles
para la secadora. Verifique que ambos fusibles
y ajustados, o que no se hayan disparado los
el
o disyuntores
esten intactos
cortacircuitos.
•
&Se us6 un enjuague frio? &Estaba la carga muy mojada?
Espere tiempos de secado m&s prolongados para articulos
enjuagados en agua fria y para aquellos que retienen
humedad (fibras de algod6n).
•
&Est& la carga demasiado voluminosa y pesada para
secarse con rapidez? Separe la carga de modo que pueda
rotar libremente.
&Se us6 un fusible regular? Use un fusible retardador.
&Est,. cerrada con firmeza la puerta de la secadora?
&Se oprimi6 con firmeza el bot6n de Inicio (START)?
&Se ha seleccionado
un ciclo?
No hay calor
Pelusa en la carga
•
&Se ha quemado un fusible o se ha disparado el
cortacircuitos? Las secadoras electricas utilizan 2 fusibles o
disyuntores domesticos. El tambor quizas rote pero sin calor.
•
&Se ha seleccionado un ciclo de secado al aire?
Seleccione el ciclo correcto para el tipo de prendas que se
esten secando.
•
En el caso de secadoras a gas, &estb la v_lvula abierta en
la via de abastecimiento?
Sonidos
•
&Eet& obstruido el filtro de pelusa? Limpie el filtro de
pelusa. Verifique si hay movimiento de aire.
&Se ha separado la carga de modo apropiado? Separe las
prendas que sueltan pelusa (toallas, felpilla) de las que atraen
pelusa (pana, articulos sinteticos). Tambien separe por color.
&Est& la carga demasiado voluminosa o demasiado
pesada? Seque cargas menos voluminosas para que la
pelusa pueda ser trasladada al filtro de pelusa.
&Se sec6 la carga en exceso? Fije el ajuste de la secadora
segL3nel tipo de carga. Secar en exceso puede dar lugar a la
electricidad estatica que atrae pelusa. Vea "Descripci6n de
los ciclos de la secadora" (hoja aparte).
raros
&Ha estado la secadora en desuso durante un periodo?
Si la secadora ha estado en desuso por una temporada,
podrb, oirse un ruido pesado durante los primeros minutos de
funcionamiento.
•
•
•
•
&Ee una secadera a gas? El chasquido de la valvula de gas
es un sonido de funcionamiento normal.
&Se dej6 papel o pahuelo de papel en los bolsillos?
&Se eet&n confundiendo las motitas con la pelusa? Las
motitas (en la superficie de la ropa) son causadas por el
desgaste normal y el lavado.
Manchas
La ropa no estb secbndose
•
con pelusa?
&Est,. obstruido con pelusa el ducto de escape o la capota
de ventilaci6n, restringiendo el flujo del aire? Ponga a
funcionar la secadora unos 5 a 10 minutos. Ponga su mano
debajo de la capota de ventilaci6n para verificar el
movimiento del aire. Si no Io siente, limpie la pelusa del
sistema de ventilaci6n o reemplace el ducto de escape con
uno de metal pesado o de metal flexible. Consulte las
Instrucciones de instalaci6n.
14
&Se us6 de modo apropiado el suavizante de telas para
secadoras? Agregue las hojas del suavizante de telas para
secadora al comienzo del ciclo. Las hojas del suavizante de
telas que se agregan a una carga parcialmente seca pueden
manchar las prendas.
de modo satisfactorio
Verifique Io siguiente:
&Est,. el filtro de pelusa obstruido
en la carga o cambio de color
•
&Estaban sucios los articulos en el momento de ponerlos
en la secadora? Los articulos deberian estar limpios antes
de ponerlos a secar.
•
&Se separaron los articulos de mode apropiado? Separe
los colores claros de los colores oscuros. Separe los articulos
que no destiSen de los que destifien.
Las prendas se encogen
Olores
•
&Se sobrecargb la secadora? Seque cargas menos
voluminosas que puedan rotar con libertad.
•
&Se sec6 la carga en exceso? Verifique la etiqueta de
cuidado del fabricante. Fije el ajuste de la secadora segt]n el
tipo de carga.
•
&Pintb, tiSb o barnizb recientemente en el &rea donde se
encuentra su secadora? Si es asi, ventile el Area. Cuando
los olores y el humo se hayan ido del Area, vuelva a lavar la
ropa y luego sequela.
•
Si la secadora es el_ctrica, &se estA usando por primers
vez? El nuevo elemento calentador electrico puede emitir un
olor. El olor desaparecera despues del primer ciclo.
Las cargas est&n arrugadas
•
&Se quitb la carga de la secadora al terminar
el ciclo?
Prendas deterioradas
&Se sobrecargb la secadora? Seque cargas menos
voluminosas que puedan rotar con libertad.
•
&Se sec6 la carga en exceso? Verifique la etiqueta de
cuidado del fabricante. Fije el ajuste de la secadora segt]n el
tipo de carga.
Verifique Io siguiente: &Se dejaron abiertos los zipers,
broches de presi6n y ganchos?
_,Seataron los cordones y fajas para evitar que se enreden?
&Se siguieron las instrucciones
la prenda?
&Se han deteriorado
CONTRATOS
Contratos
Maestros
de Proteccibn
en
V Servicio ilimitado y gratuito para repuestos y mano de obra
en todas las reparaciones protegidas por el contrato
_/Garantia
"sin disgustos"
- reemplazo de su producto
protegido si ocurren mas de tres fallas del producto en el
transcurso de doce meses
V' Ayuda rApida por tel_fono - asistencia no tecnica e
instructiva para productos reparados en su hogar, ademas de
un horario de reparaci6n conveniente
V' Protecci6n de sobrevoltaje contra da_os electricos debido a
fluctuaciones de electricidad
V' Reembolso de la renta si la reparaci6n de su producto
protegido tarda mas de Io prometido
Una vez adquirido el Contrato, tan s61o tiene que Ilamar para fijar
la visita de servicio tecnico. Usted puede Ilamar a cualquier hora,
de dia o de noche, o fijar una visita tecnica en Internet.
Sears cuenta con un equipo de mas de 12.000 especialistas en
reparaci6n competentes, quienes tienen a disposici.6n mas de
4,5 millones de repuestos y accesorios de calidad. Ese es el tipo
de profesionalismo con el que usted puede contar para ayudarle
a prolongar la vida de su nuevo artefacto por muchos afios mas.
iAdquiera hoy su Contrato Maestro de Protecci6n!
Se aplican algunas limitaciones y exclusiones. Para obtener
precios e informaci6n adicional, Ilame al 1-888-784-6427.
Servicio de Instalacibn
V' Reemplazo del produoto
ser reparado
si su producto protegido no puede
V Revisi6n Anual de Mantenimiento
suya - sin costo adicional
los articulos antes del secado?
DE PROTECCION
iFelicitaciones por su inteligente adquisici6n! Su nuevo
electrodomestico
Kenmore < ha sido dise_ado y fabricado para
brindarle a_os de funcionamiento confiable. Pero al igual que
todos los productos, puede necesitar mantenimiento preventivo
o reparaci6n de vez en cuando. Es alli donde el Contrato Maestro
de Protecci6n puede ahorrarle dinero e inconvenientes.
Adquiera un Contrato Maestro de Protecci6n hoy y prot_jase
contra molestias y gastos inesperados.
El Contrato Maestro de Protecci6n tambien ayuda a prolongar la
vida de su nuevo artefacto. He aqui Io que se incluye en el
Contrato:
V Servioio Experto por nuestros 12.000 especialistas
reparaci6n competentes
de la etiqueta de cuidado de
Preventivo a solicitud
de Sears
Para la instalaci6n profesional garantizada de artefactos
electrodomesticos
y articulos como son abridores de puertas de
garaje y calentadores de agua, en los EE.UU. Ilame al
1-800-4-MY-HOME
®.
GARANT|A
Garantia completa de un a_o para las piezas mecdnicas y
componentes
eldctricos
Durante un a_o a partir de la fecha de compra, si se instala y
pone en funcionamiento la secadora en conformidad con las
instrucciones proporcionadas en estas Instrucciones para el
usuario, Sears repararA esta secadora, gratuitamente, si tuviese
defectos en el material o la mano de obra.
El servicio debera ser proporcionado por un departamento
servicio Sears en los Estados Unidos, o por un agente
autorizado.
de
NOTA: El empleo de un ducto de escape de plastico para esta
secadora puede anular esta garantia. Consulte las Instrucciones
de instalaci6n para obtener informaci6n completa sobre los
requisitos de ventilaci6n para esta secadora.
Restriccibn de la garantia
Si se somete a esta secadora a un uso ajeno al domestico
privado, la cober[ura de las garantias arriba citadas quedan
restringidas a s61o 90 dias.
Servicio de reparaci6n de la garantia
El servicio de reparaci6n de la garantia esta disponible poniendose en contacto con Sears, Ilamando al 1-800-4-MY-ROME
(1-800-469-4663}.
Esta garantia corresponde s61o mientras se
use el producto en los Estados Unidos.
Esta garantia le otorga derechos legales especificos yes posible
que usted tenga tambien otros derechos que pueden variar de un
estado a otro.
Sirvase tomar como referencia los nt]meros de servicio tecnico
ubicados en la contraportada de este manual.
Sears, Roebuck and Co.
D/817WA, Hoffman Estates, IL 60179
15
Your Home
For repair-in your home-of
all major brand appliances,
lawn and garden equipment, .or heating and cooling systems,
no matter who made zt, no matter who sold ztt
For,the replacement parts, accessories and
owner s manuals that you need to do-it-yourself.
For Sears professional installation of home appliances
and items like garage door openers and water heaters.
1-800-4-MY-HOME ® (1-800-469-4663)
Call anytime, day or night (U.S.A. and Canada)
www.sears.com
www.sears.ca
Our Home
For repair of carry-in items like vacuums, lawn equipment,
and electronics, call or go on-line for the locationof your nearest
18004881222
Sears Parts.,& R:pazr Center.
Callanytime, day ornight(U.S.A. only)
www.sears.com
To purchase a protection agreement (U.S.A.)
or :aint_an_e
1 800
827
agreement (Canada)on a. product serviced by Sears:
6655
(U.S.A.)
Pare pedir servicio de reparaci6n
a domicilio, y pare ordenar piezas:
1-888-SU-HOGAR _
(1-888-784-6427)
3979964
© Sears, Roebuck and Co.
1 800
361
6665
(Canada)
Au Canada pour service en frangais:
1-800-LE-FOYER
Mc
(1-800-533-6937)
www,sears,ca
TM
SM
.
® Registered Trademark /
Trademark /
Service Mark of Sears, Roebuck and Co.
® Marca Reglst rada / TM Marca de Comerclo. / SMMarca de Servlc_o de Sears, Roebuck and Co.
t0/02
Printed in U.S.A.
Impreso en EE. UU.