1
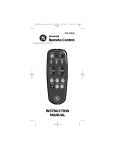
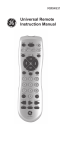
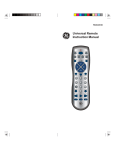
WIRELESS OFFICE KEYBOARD
AND OPTICAL MOUSE
HO98058
USER’S MANUAL
www.jascoproducts.com
TABLE OF CONTENTS
1. INTRODUCTION-------------------------------------------------------------------------------------------------- 3
2. FEATURE DESCRIPTION ------------------------------------------------------------------------------------- 3
3. PACKAGE CONTENTS ---------------------------------------------------------------------------------------- 4
4. SYSTEM REQUIREMENTS ----------------------------------------------------------------------------------- 4
5. INSTALLATION INSTRUCTIONS---------------------------------------------------------------------------- 5
6. SPECIAL FUNCTION HOT KEYS --------------------------------------------------------------------------- 7
6-1. OFFICE KEY ZONE -------------------------------------------------------------------------------------------- 7
6-2. MULTIMEDIA KEY ZONE -------------------------------------------------------------------------------------- 8
6-3. INTERNET KEY ZONE ------------------------------------------------------------------------------------------ 9
6-4. WINDOWS KEY ZONE ---------------------------------------------------------------------------------------- 10
7. SPECIAL MOUSE FUNCTIONS----------------------------------------------------------------------------- 11
8. TROUBLESHOOTING ----------------------------------------------------------------------------------------- 12
9. 3 YEAR LIMITED WARRANTY ------------------------------------------------------------------------------ 14
10. FCC STATEMENT--------------------------------------------------------------------------------------------- 15
Page - 2 -
Thank you for purchasing the GE branded Wireless Office Keyboard and Optical
Mouse. This User’s Manual contains all of the information needed to operate your
keyboard. Please keep the enclosed CD in a safe place for future maintenance after
installation.
1. Introduction
Do away with cables and take control of your applications. The Wireless Office Keyboard and Optical
Mouse are specially designed to optimize your efficiency and provide a complete wireless office
solution. With 32 special one-touch keys, you can execute your favorite commands instantly from your
desktop! The 5-button mouse allows easy scrolling in your applications, plus front and back Internet
buttons that can be programmed to perform other common tasks. The detachable wrist rest ensures
comfort and the key feel is quiet and crisp. This wireless solution is designed to maximize your total
productivity!
The Wireless Office Keyboard and Optical Mouse are compatible with Windows® 95, NT, 98, 2000,
ME, and XP. For Windows® ME, 2000, and XP or later operation systems, NO driver is required, except
to use the special function and short cut keys. You can just plug and play the Wireless Office Keyboard
and Optical Mouse, or install the driver to empower the keyboard with more functions.
2. Feature Description
•
•
•
•
•
Wireless Keyboard and Mouse eliminates the clutter of tangled cords.
Optical mouse provides pinpoint precision on almost any surface and won’t wear out.
14 hot keys for “Office Zone”.
7 hot keys for “Internet Zone”.
7 hot keys for “Multimedia Zone”.
•
•
•
•
4 hot keys for “Windows® Zone”.
100% compatible with Windows® 95, NT, 98, ME, 2000, and XP.
No driver required for Windows® ME, 2000, XP or later except for special application keys.
Wrist Rest for added comfort.
Page - 3 -
3. Package Contents
•
•
•
•
•
•
•
Wireless Office Keyboard
Wrist Rest
Wireless Optical Mouse
Receiver (with two PS/2 connectors)
Four AA Batteries
CD with Drivers
User’s Manual
4. System Requirements
•
Pentium 133 MHz or higher processor
•
Windows® 95 or later
•
Microsoft® Office 95 or later; enhanced Office features may also be compatible with other leading
applications
•
Microsoft® Internet Explorer 4.0 or later; Netscape Navigator 4.73 or later; MSN Explorer and AOL.
•
For Windows® 95, 98: 32 MB of RAM recommended
•
For Windows® NT, 2000, ME, XP: 64 MB of RAM recommended
•
4MB of available hard disk space
•
CD-ROM or DVD drive
•
PS/2 port
Note:
• “Sleep” hot key function is available if your system supports power management (ACPI) and has it
enabled and all the peripherals (e.g. VGA, Sound card…) are compatible with power management.
Page - 4 -
5. Installation Instructions
Please keep this user’s manual in a safe place. Every time the
batteries in the keyboard and mouse are changed, you will need
to re-link them. To do so, you will need to follow steps 5 – 11.
1. Uninstall any existing keyboard or mouse software from
your computer by going to “Add/Remove Programs” in the
“Control Panel”.
2. Shut down and turn off your computer before connecting or disconnecting any PS/2 device (failure to
do so could damage your computer).
3. Disconnect existing keyboard and mouse from your computer.
4. Plug the two PS/2 plugs on your new receiver into the correct ports on your PC. (Make sure the green
mouse plug is plugged into the mouse port, and the purple keyboard plug is plugged into the keyboard
port)
5. Install the included batteries into the battery compartments located on the bottom of your keyboard and
mouse. Make sure the polarity corresponds to the symbols in the battery compartment.
6. Place the receiver 8” (20cm) from any other electronic device such as computer, monitor, to ensure no
interference.
7. Place the keyboard and mouse within 3ft. (approximately 1 meter) of the receiver for optimal
communication.
8. Turn on your computer and start your Operating System.
9. Press the Link button on your receiver. The light should
begin to blink.
Page - 5 -
Link Button
2 AA Batteries
10. Use a pen to press the Link button on the bottom of your mouse and then move the mouse to ensure
connection. The light on the receiver should continue to blink.
11. Press the Link button on the bottom of your keyboard. The light on the receiver should now stop
blinking – the connection is complete. Press any standard letter or number on your keyboard to ensure
connection.
12. Insert the included CD in your CD-ROM drive and follow the on-screen instructions to install the
drivers and software for your keyboard and mouse.
2 AA Batteries
13. Once the drivers and software have been loaded and the computer has
rebooted, all keyboard and mouse functions should work properly. Hot
keys and mouse buttons can be customized by double clicking on the
keyboard ( ) or mouse (
the menu screens.
) icon in the system tray and selecting from
PLEASE NOTE THE FOLLOWING SPECIAL FEATURES OF YOUR KEYBOARD:
1. The Battery Low LED on you keyboard will illuminate when the
keyboard batteries need replaced. You will need to re-link your
keyboard and mouse each time you change batteries by following
steps 5 – 11 in the instructions above.
2. The silver OFFICE LOCK key on your keyboard switches the F keys
between special “Office Functions” and their regular functions. You
can tell if the “Office lock” is on because the LED on your receiver turns and stays orange when this
function is activated (otherwise it is green).
3. After the drivers and software have been installed, there are icons in the system tray for Scroll Lock
,
Number Lock , and Caps Lock to indicate when these items are active (green box with white
characters) or inactive (gray box with gray characters). These icons can be turned on or off in the
Keyboard Settings menu. To switch number lock on or off, your office lock needs to be OFF (the LED
light on the receiver should be green).
4. Note: The “Replace” office function does not work in Excel or Outlook. The “Redo” office function
does not work in Outlook.
Page - 6 -
6. Special Function Hot Keys
Hot keys give you quick and direct access to programs, files or commands. Using hot keys can increase
your productivity, as you do not have to take your hand off the keyboard so frequently (e.g. to use the
mouse). The available hot keys depend on the operating system and application being used. The
following list shows the icon on each hot key and the standard assignment of the hot keys. Most hot keys
can be reconfigured with the Wireless Office Keyboard and Optical Mouse Software (see section 5).
6-1. Office Key Zone
F
Lock
Office Lock
Switch the function from the normal function keys (green LED) to the
enhanced office function keys (orange LED). Office Lock must be on to
activate all other Office Hot Keys.
F1
Help
Open the Help file for the active window.
F2
New
Create a new document.
F3
Open
Open a document.
F4
Save
Save the file in the active window.
F5
Replace
Search for and replace the specified text and formatting.
F6
Spell
Start spell-check in the active document.
F7
Undo
Cancel the previous action.
F8
Redo
Cancel the previous undo.
F9
Reply
Reply to the sender of the active e-mail message.
F10
Reply All
Reply to all who received the active email message.
F11
Forward
Forward the active e-mail message.
F12
Send
Send the active e-mail message.
Print
Print
Print the document in the active window.
Screen
Page - 7 -
6-2. Multimedia Key Zone
Volume down
Decrease the volume. Hold down to decrease the volume more
quickly.
Volume up
Increase the volume. Hold down to increase the volume more
quickly.
Mute
Turn all sound off or on.
Play/Pause
Play or pause media. Once paused, press this key again to resume
playing.
Stop
Stop playing media.
Previous Track
Skip to the previous media track. Press once to return to the
beginning of the current track and press again for each preceding
track.
Next Track
Skip to the next media track.
Page - 8 -
6-3. Internet Key Zone
Back
Go back to the previously viewed item in programs that support the
“Back” command, such as a Web browser.
Forward
Go to the next item – if it was previously viewed in the same session – in
programs that support the “Forward” command, such as a Web browser.
Stop
Stop loading or refreshing a Web page or the contents of a particular
window.
Refresh
Update the information on an active Web page or the contents of a
particular window.
Search
Open the Internet Explorer Search pane
My favorites
Open the Internet Explorer Favorites pane. This is where you can store
shortcuts to frequently used files, websites or other items for easy access.
Home
Start the default Web browser or go to the Home Web page. If the Web
browser is already activated it opens the Home Web page. You can
reassign the Home key to start another Web browser, another Home Web
page or another application.
Page - 9 -
6-4. Windows Key Zone
Email
My Computer
Starts the default e-mail program. If you are not sure what the default
e-mail program is, press this key to find out. You can reassign the Email
key to start another e-mail program or another application.
Opens My Computer. My computer shows the contents of your floppy
drive, hard drive(s), CD-ROM drive, DVD drive and network drives.
You can also search for and open files and folders.
Calculator
Opens the calculator.
Sleep
Puts the system into sleep mode if the PC supports power management
and has it enabled. The user can put the computer to sleep at the press of
any button, protecting data and saving energy. If power management is
not enabled, this key will not work. Press sleep again to bring your
system back to operational mode.
Page - 10 -
7. Special Mouse Functions
1. Standard Left Mouse Button – In any Windows® application, click once to select files or
programs or double click to open selected applications. This button cannot be programmed.
2. Standard Right Mouse Button – In any Windows® application, right click to select item and
display a pop-up menu of common commands. This button cannot be programmed.
3. Scroll Wheel and Button – Roll the scroll wheel to scroll in any Windows® application that
supports scrolling. The scroll wheel also doubles as a third button. By default, this button
activates the scroll lock so that any movement of the mouse scrolls through your document in
applications that support scrolling. This button can also be programmed to any one of 47
common functions using the included mouse software (see Section 5 for instructions on using this
software).
4. Back Web Navigation Button – Click to back up to the previous screen in internet browsers,
Windows® Explorer, or any other supporting application. This button can also be programmed to
any one of 47 common functions using the included mouse software (see Section 5 for
instructions on using this software).
5. Forward Web Navigation Button - Click to skip to the next screen in Internet browsers,
Windows® Explorer, or any other supporting application. Note: this function typically works
only if you have already been to the next screen and used the “back” function to return to the
previous screen already. This button can also be programmed to any one of 47 common functions
using the included mouse software (see Section 5 for instructions on using this software).
Note: After periods of inactivity, the mouse goes into sleep mode to save batteries. To awake the
mouse, you must press a button on the mouse.
Page - 11 -
8. Troubleshooting
•
Keyboard and/or mouse does not work after replacing batteries
When batteries are removed, the wireless link is lost. You will need to re-link your mouse or keyboard.
To do so, repeat steps 5 - 11 in Section 5.
•
Mouse Does Not Respond
After periods of inactivity, the mouse goes into sleep mode to save batteries. To awake the mouse, you
must press a button on the mouse. If this does not work, change the batteries and re-link the mouse using
steps 5 - 11 in Section 5.
•
The Wireless Office Keyboard and Mouse Software does not work properly
Make sure all other keyboard and mouse software has been removed from your PC. To remove the other
software, use “Add/Remove Programs” in the Control Panel. The Control Panel is located under
“Settings” in the Start Menu. Then restart your computer and re-install the Wireless Office Keyboard
and Mouse Software.
•
Add, Remove or Re-install the Wireless Office Keyboard and Mouse Software
Once you have installed the Wireless Office Keyboard and Mouse Software, the icons will appear on the
right of the taskbar. If you want to re-install the software for any reason, you must un-install the software
from your operating system first. Right-click on both icons and select “Exit”. Then, open the “Start”
menu. Under “Settings” select Control Panel. Use “Add/Remove Software” to un-install the Wireless
Office Keyboard and Mouse Software. It will remove the software completely. To re-install the
software, follow steps 12 – 13 in Section 5.
•
Other application software will not install properly
This may be due to the Wireless Office Keyboard and Mouse Software. Remove the software as
described in “Add, Remove or Re-install the Wireless Office Keyboard and Mouse Software”. Install
the required application, and then reinstall the Wireless Office Keyboard and Mouse Software using
steps 12 – 13 in Section 5.
•
“Pre-track” and “Next track” do not stop
When these hot keys are held down the CD player normally continues searching for the next of previous
track. If this does not work it is due to the speed of your CD-ROM drive. The use of a high performance
CD-ROM drive is recommended.
Page - 12 -
•
VCD tracks or MPEG files cannot be played
Make sure you have installed Windows® Media Player 6 or later. You can download the current Media
Player from the Microsoft® Web site.
•
The default Microsoft Windows shortcut keys by cannot be assigned
The Wireless Office Keyboard and Mouse Software has taken over some system resources for the
shortcut keys the following 5 combination keys cannot be used again.
“Ctrl + Alt + E”, “Ctrl + Alt + P”, “Ctrl + Alt + O”, “Ctrl + Alt + D”, “Ctrl + Alt + C”
•
The embed office keys do not work
These keys use the standard definition of Microsoft shortcut combination keys. Make sure that your
software application supports these kinds of functions and that you are using Office 97 and Internet
Explorer 4.0, and Netscape Navigator 4.73 or later.
•
Scrolling function left & right does not move smoothly
Your operating system may not support this function.
•
The Num lock key does not work
Turn off the Office Lock Key. The Num Lock key will return to its normal function.
•
The keyboard does not work properly
Turn off your computer. Disconnect the PS2 plug from the PC. Wait a few seconds and then
reconnect it and follow the procedure for setting up hardware in section 5.
If you still cannot solve the problem, please contact your dealer.
Page - 13 -
9. 3 Year Limited Warranty
THREE YEAR LIMITED WARRANTY: Jasco Products Company warrants this product to be
free from manufacturing defects for a period of 3 years from the original date of consumer purchase.
This warranty is limited to the repair or replacement of this product only and does not extend to
consequential or incidental damage to other products that may be used with this unit. This warranty is
in lieu of all other warranties express or implied. Some states do not allow limitations on how long an
implied warranty lasts or permit the exclusion or limitation of incidental or consequential damages, so
the above limitations may not apply to you. This warranty gives you specific rights, and you may also
have other rights which vary from state to state. If unit should prove defective within the warranty
period, return prepaid with dated proof of purchase to:
Jasco Products Company
311 N.W. 122nd
Oklahoma City, OK. 73114
Page - 14 -
10. FCC Statement
Notice: Federal Communications Commission (FCC) requirements, Part 15
This equipment has been tested and found to comply with the limits for a class B digital device,
pursuant to part 15 of the FCC Rules.These limits are designed to provide reasonable protection
against harmful interference in a residential installation.This equipment generates, uses and can
radiate radio frequency energy and, if not installed and used in accordance with the instructions, may
cause harmful interference to radio communications. However, there is no guarantee that interference
will not occur in a particular installation. If this equipment does cause harmful interference to radio or
television reception, which can be determined by turning the equipment off and on, the user is
encouraged to try to correct the interference by one or more of the following measures:
•
Reorient or relocate the receiving antenna.
•
•
Increase the separation between the equipment and receiver.
Connect the equipment into an outlet on a circuit different from that to which the receiver is
connected.
• Consult the dealer or an experienced radio/TV technician for help.
CAUTION: Any changes of modifications not expressly approved by the grantee of this device could
void the users authority to operate the equipment.This device complies with Part 15 of the FCC Rules.
Operation is subject to the following two conditions: (1) this device may not cause harmful
interference, and (2) this device must accept any interference received, including interference that
may cause undesired operation.
Distributed for THOMSON INC
by Jasco Products Company
311 N.W. 122nd Street, Oklahoma City, OK 73114
www.jascoproducts.com
Page - 15 -